Acer Predator X34 34-inch WQHD Curved G-Sync Monitor Review
Today, we're looking at Acer's flagship curved gaming monitor, the Predator X34. It offers WQHD resolution, G-Sync, a 100Hz refresh rate and DTS audio in an impressive ultra-wide package.
Why you can trust Tom's Hardware
OSD Setup And Calibration
OSD Tour
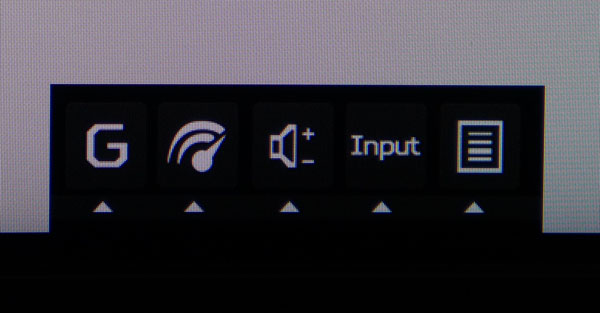
Pressing any of the control keys brings up a small set of icons that hover over the buttons' positions. G stands for game mode and will call up one of three presets. The needle icon represents overdrive. Next is volume, then input and finally the main OSD.
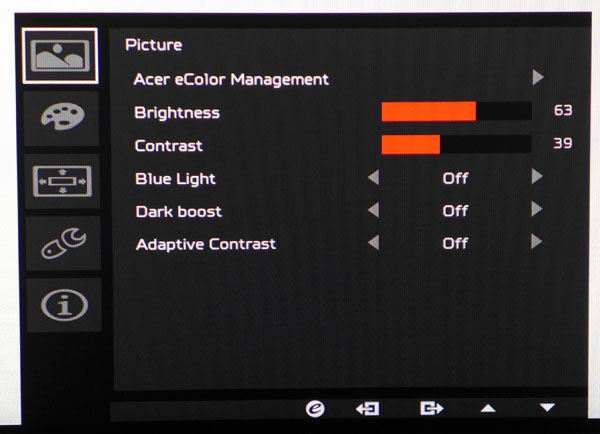
Acer users will be familiar with the X34's menu configuration. eColor Management refers to the X34's five picture modes; all are fixed except User. If you attempt to make any adjustments in the other presets, the mode automatically changes to User. That's where we did all our tests both before and after calibration.
You'll notice that we turned the Contrast control down from its default setting of 50. At that level, the X34 clips a fair amount of highlight detail and completely skews the gamma tracking. There's more on that below and on page five.
Blue Light is a five-step option that reduces the blue primary in an effort to mitigate eye fatigue. It's becoming common on all the monitors we test lately. A proper calibration can provide equal relief.
Dark Boost will manipulate low-end gamma to make shadow detail more visible. It's useful in games that have a lot of deep black areas. The option has three levels.
Adaptive Contrast will vary screen brightness and gamma according to content. It can make the image look more contrasty but it can also clip detail and you'll see the image dim and brighten as the scene changes. It's a phenomenon we call image pumping.
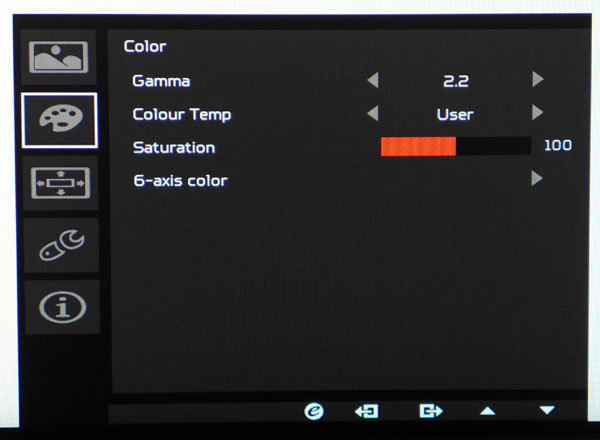
There are four gamma presets: Gaming, 1.9, 2.2 and 2.5. 2.2 is the default and best option for all content. Color temp settings include fixed Normal, Warm (closest to D65) and Cool plus an adjustable User mode. The Saturation slider will change all six colors at once. You can use it to make color more vivid at the expense of accuracy.
Get Tom's Hardware's best news and in-depth reviews, straight to your inbox.
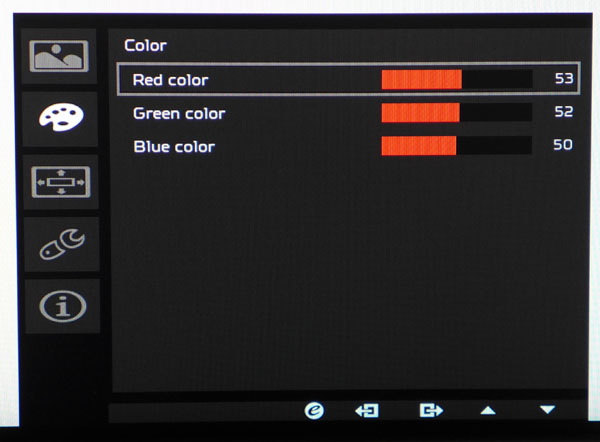
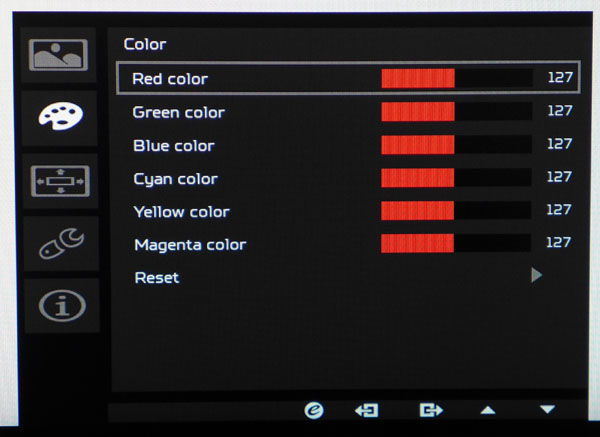
The RGB sliders start at mid-range, which means you can preserve contrast during calibration.
The 6-axis color option has sliders for every color and seems to affect only their luminance. We found no need for either adjustment as the X34 has a pretty accurate gamut out of the box.
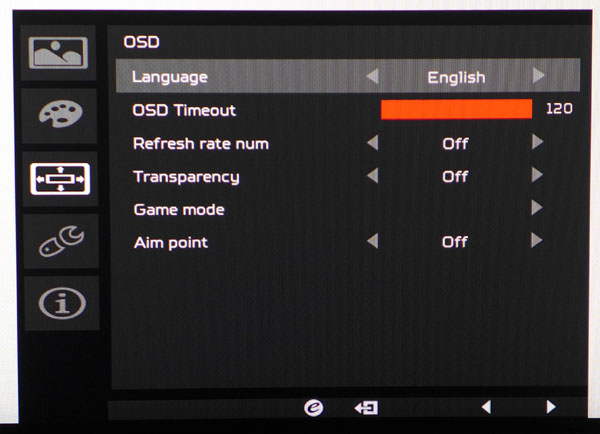
The OSD comes in 15 languages and can have a timeout of up to two minutes.
Refresh rate num puts an fps counter in the upper-right corner of the screen. It's not too intrusive and comes in a yellow font that is easily visible in any game.
Game mode provides three settings memories. After you've set up the X34 to your liking, you can toggle between them with one of the bezel keys.
Aim point places one of three white reticules at the center of the screen. You can't have it active at the same time as the frame counter.
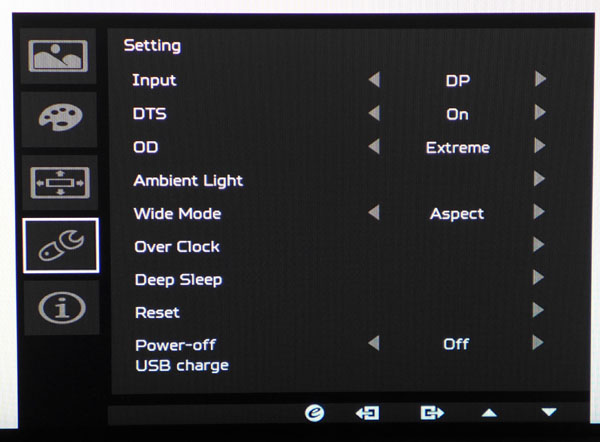
The Setting menu starts with an input selector. It's easier to use the bezel hotkey for this. DTS should be let on for the best possible sound from the seven-watt speakers. OD has Normal and Extreme settings. Extreme reduces motion blur but introduces a little ghosting. It's distracting in some content but not universally so.
Ambient Light refers to an LED along the panel's bottom edge that can light up your desktop in a variety of colors. You can also control the intensity, have the light breathe, flash or ripple (Acer's terms, not ours); or turn it off entirely.
Deep Sleep can be set for each input and regulates how the X34 wakes up when receiving an input. On means you'll have to press a bezel key to activate the monitor. When it's off, the screen comes on by itself.
Power-off shuts down the monitor when no signal is present. Reset returns all settings to their factory defaults. Power-off USB charge leaves the ports active so you can charge devices when the display is powered down.
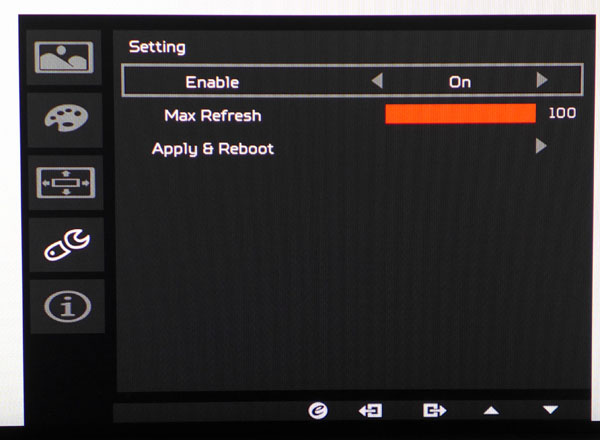
DisplayPort signals can be overclocked from the X34's native 75Hz up to a 100Hz refresh rate. There is no impact on Acer's warranty by doing this but there is no guarantee it will work with all video cards. Our system operated happily at 100Hz all day long. Once you set the rate here, you'll have to change the setting in Nvidia Control Panel too.
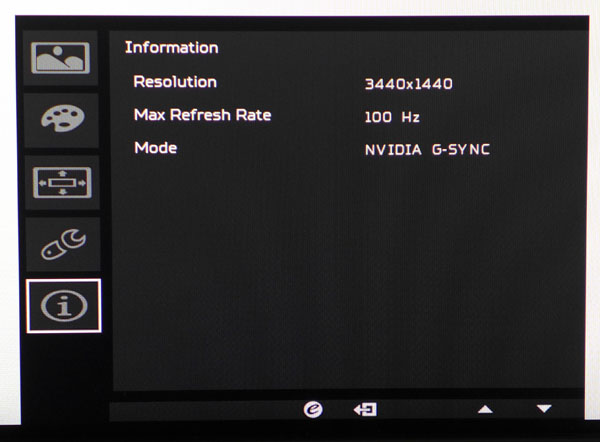
Signal information is minimal but you get the all-important refresh rate and G-Sync status.
Calibration
Making any change, including brightness, kicks the X34 into User mode. From there you have access to gamma presets, a white balance adjustment and a color management system. By default, accuracy is quite good—good enough to not require calibration. If you make only one adjustment however, it should be the contrast control. By default, it's set too high and clipped highlight detail is the result. Full detail is rendered at level 44 (50 is the factory setting). We went down further, to 39, to ensure the best white balance result. Since the RGB sliders begin at mid-range, we could get almost all of the lost contrast back by increasing red and green levels. Check out our recommended settings below.
| Acer Predator X34 Calibration Settings | |
|---|---|
| Brightness 200cd/m2 | 63 |
| Brightness 120cd/m2 | 33 |
| Brightness 100cd/m2 | 26 |
| Brightness 80cd/m2 | 20 |
| Brightness 50cd/m2 | 11 |
| Contrast | 39 |
| Gamma | 2.2 |
| Color Temp User | Red 53, Green 52, Blue 50 |
Current page: OSD Setup And Calibration
Prev Page Packaging, Physical Layout And Accessories Next Page Brightness And Contrast
Christian Eberle is a Contributing Editor for Tom's Hardware US. He's a veteran reviewer of A/V equipment, specializing in monitors. Christian began his obsession with tech when he built his first PC in 1991, a 286 running DOS 3.0 at a blazing 12MHz. In 2006, he undertook training from the Imaging Science Foundation in video calibration and testing and thus started a passion for precise imaging that persists to this day. He is also a professional musician with a degree from the New England Conservatory as a classical bassoonist which he used to good effect as a performer with the West Point Army Band from 1987 to 2013. He enjoys watching movies and listening to high-end audio in his custom-built home theater and can be seen riding trails near his home on a race-ready ICE VTX recumbent trike. Christian enjoys the endless summer in Florida where he lives with his wife and Chihuahua and plays with orchestras around the state.
-
Realist9 Finally a large monitor that checks all the boxes, resolution included.Reply
Now I just have to decide between this and a 4k. :( -
WyomingKnott Serious question, and maybe I'll learn something. Didn't freesync / Gsync eliminate the need for 100hz rates?Reply -
Au_equus Which batch did this monitor come from?Reply
The predator x34 was produced in two main batches. The 2nd batch (Feburary 2016) was done to correct problems in the first batch. -
av30 There is no blb etc.. because you received a cherry picked press sample. I can't take this review at face value due to that fact. The fact is that these panels have huge quality control issues that a visit to the forums will provide evidence of. I've gone through enough panel lotteries tyvm. Buy one of these at retail and see what a difference it makes.Reply -
natedawg72 ReplySerious question, and maybe I'll learn something. Didn't freesync / Gsync eliminate the need for 100hz rates?
Not at all. The purpose of Freesync/Gsync was to increase the apparent smoothness of gameplay by syncing refresh and frame output, which also happens to reduce possible input lag somewhat.
High refreshrates (90+) still have the advantage of less pixel blur (from pixels transitioning colors faster) which makes images clearer in fast paced games, and can still appear smoother than 60 hz gsync. Additionally, with a game running at 120 fps+ input should feel a tad snappier, especially with a higher refreshrate monitor.
How much you will notice it depends on several things I suppose. Some people don't care about it, but I've really enjoyed my 144hz monitor, even when I disable free-sync. -
natedawg72 ReplyNot at all. The purpose of Freesync/Gsync was to increase the apparent smoothness of gameplay by syncing refresh and frame output, which also happens to reduce possible input lag somewhat..
Forgot to mention one the most important points, elimination of screen tearing (within the dynamic refresh range). I apologize that I don't know how to edit comments here.. -
scott91575 ReplyThere is no blb etc.. because you received a cherry picked press sample. I can't take this review at face value due to that fact. The fact is that these panels have huge quality control issues that a visit to the forums will provide evidence of. I've gone through enough panel lotteries tyvm. Buy one of these at retail and see what a difference it makes.
I own one. The only issue I have is some backlight bleed that has actually improved with time. It is noticeable in a completely dark room and a black screen but I never notice it during normal usage. No other issues at all and I do get 100Hz.
That is of course a sample size of one, and for $1300 (although I paid $1150) expecting perfect is not unreasonable. Yet it is a fantastic monitor. -
Sam Hain Conclusion... By looking at the test comparisons, the BenQ X3501 bests the X34 OVERALL and is cheaper by a landslide.Reply
$1300 plus say $600 (average) for a GPU to push the X34's pixels, not to mention S&H and potential sales-tax... and your looking at $2K for your video-display option. SLI/X-Fire, ramp it up even more. Going Titan with this monitor as a dual-purchase and that's a loan, LOL! No thanks!
DSR upscale to 1440p with the X3501 makes more sense, i.e. bang-for-buck performance.
Who cares if the desktop is 1080p? If you are a strictly a gamer, it matters not to most, only those who vid/photo render/edit, or are just plain elitist's.
The X34 is a grand monitor, yes. But for the price, strictly for gaming... There are better/smarter options. Just my opinion.
