BenQ XR3501 35-Inch Curved Monitor Review
BenQ's XR3051 high-contrast AMVA panel offers an impressive 2000R curvature and a 144Hz refresh rate along with some very unique attributes.
Why you can trust Tom's Hardware
OSD Setup And Calibration
BenQ has some of the most thorough and well-designed OSDs in the business. If you're familiar with the company's monitors, you'll have no trouble figuring out the XR3501. The only thing we missed was the S-Switch controller. This screen resorts to traditional buttons that protrude from the bottom of the bezel and click with a solid response.
OSD Tour
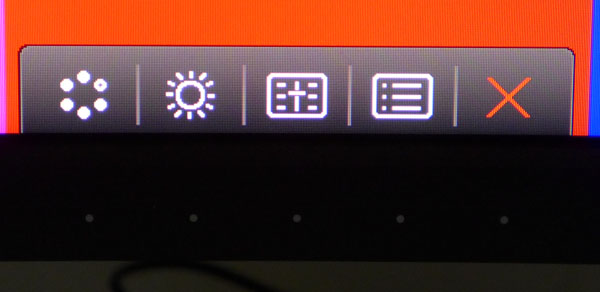
Pressing any key brings up a quick menu. The first three positions are programmable for quick access to a variety of functions. Here we have picture mode, brightness, Black eQualizer and main OSD.
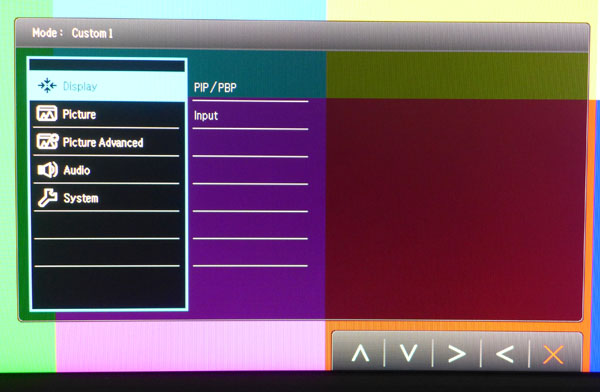
Regardless of where you leave off, the OSD always starts from the top. The first sub-menu is Display and contains PIP/PBP functions and the input selector. PBP lets you display any two inputs side-by-side. Aspect ratios are fixed so most images will have large bars at the top and bottom. PIP is more flexible with three window sizes and positioning in any corner of the screen.
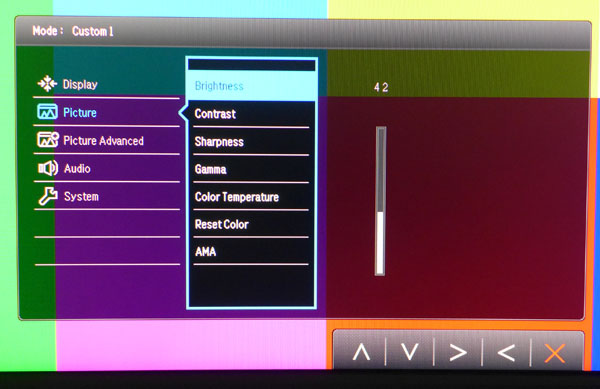
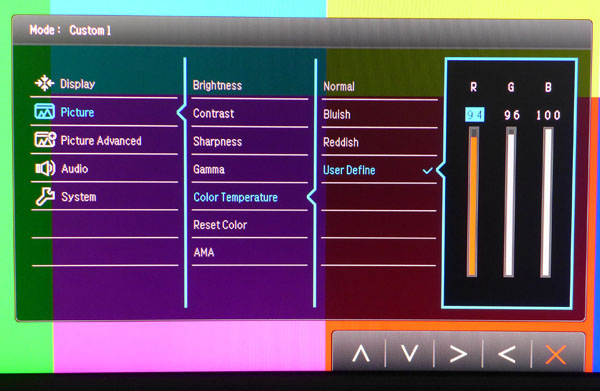
Next is the Picture menu, which has all calibration adjustments except the picture modes. Brightness, Contrast and Sharpness work as expected. See our settings table below for the values equivalent to various output levels.
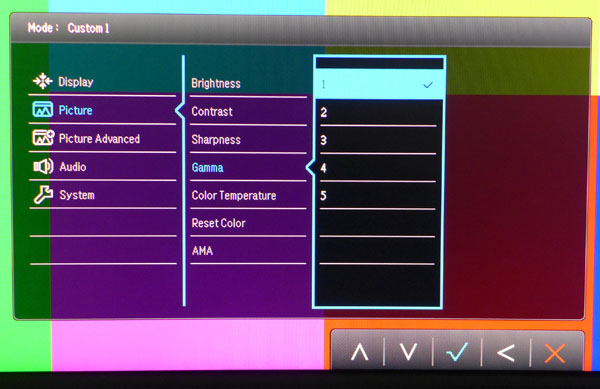
There are five gamma presets. Three is the default but that proved too dark in our tests. Number one is the best and tracks 2.2 perfectly.
You can choose between three preset color temps or select one of the custom picture modes for access to the User Define setting. The RGB sliders start at 100 percent so you will lose a bit of contrast when calibrating.
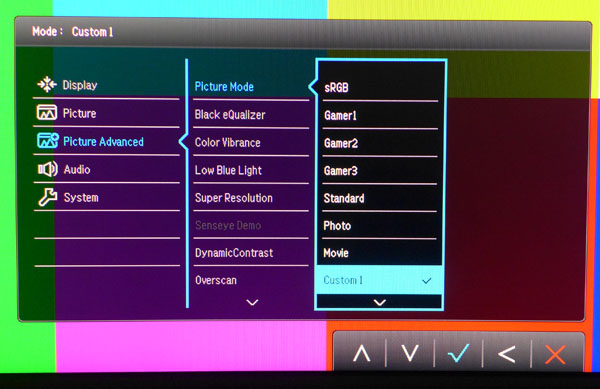
Moving to the Picture Advanced menu you'll find nine picture modes. Standard is the default and measures OK out-of-the-box, but the best fire-and-forget mode is sRGB. To unlock all the options, choose one of the Custom modes. The three Gamer modes take an interpretive approach to color reproduction and may be preferred by some users.
Get Tom's Hardware's best news and in-depth reviews, straight to your inbox.
Black eQualizer is a low-level gamma control that can help you see shadow detail a little better. Use it sparingly because it also reduces contrast.
Color Vibrance is an interesting option. At its default setting of 10, it results in a slightly over-saturated gamut. Dropping it to 9 brings things to a more accurate level. Going any lower de-saturates color until the monitor becomes black and white at the zero setting. Raising the slider above 10 results in very bright, almost cartoonish color as luminance is increased.
Low Blue Light is another way to adjust the white point by reducing the intensity of blue. If accuracy is your goal, a grayscale calibration will yield better results.
We've seen Super Resolution on other BenQ monitors and it usually adds edge enhancement to artificially sharpen the image. On our XR3501 sample however, it appears to be non-functional. We couldn't see any effect in either test patterns or actual content.
Dynamic contrast will deepen blacks and brighten whites at the expense of detail at those levels. And overscan removes about three percent from the edges of the image.
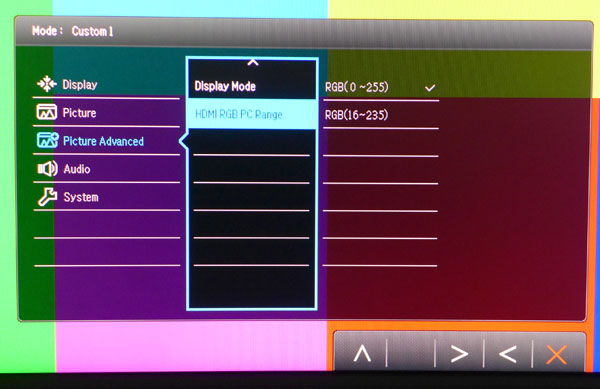
At the bottom of the Picture Advanced menu is Display Mode, which is BenQ's term for aspect ratio options. With a native 2560x1080 signal the only option is Full. If you use a lower-res format, you can choose 1:1 and see the image windowed or select Aspect to stretch it full-screen.
When you use an HDMI connection, be sure and select RGB 0-255 to see all the signal information.
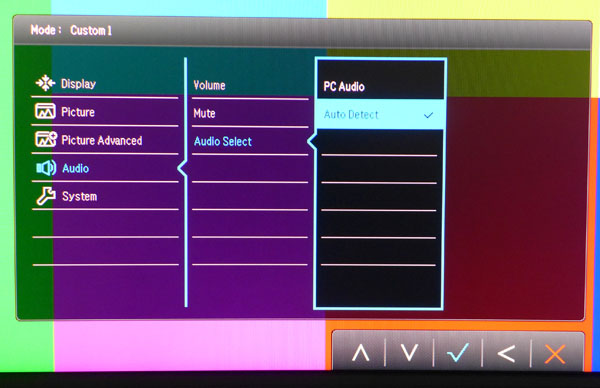
There are no speakers built into the XR3501, but here you can control the volume on the headphones and set your audio source. Auto Detect allowed us to hear sound coming over the DisplayPort and HDMI inputs.
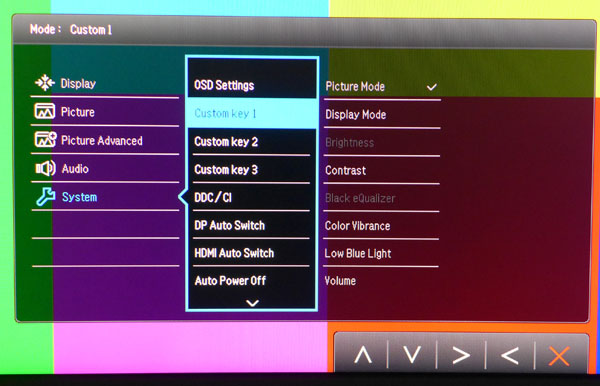
Here you can program the functions of the first three bezel control keys. This gives you quick access to a variety of options like brightness, picture mode and others.
The DP and HDMI Auto Switch options allow the XR3501 to detect signals and change inputs automatically.
Auto Power Off will shut down the monitor after a preset time.
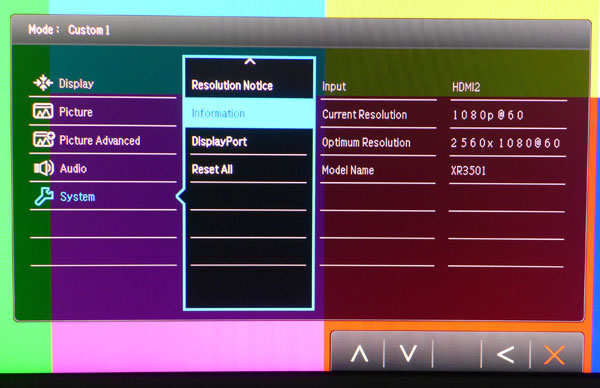
Signal info is limited to input resolution, suggested resolution and refresh rate. If you have an older video card that only supports DP1.1, select that here. Finally, you can reset the entire OSD with the Reset All command.
Calibration
The XR3501 ships in its Standard picture mode, which is reasonably accurate though some color and white balance errors are visible. Switching to the sRGB mode improves gamma to near-perfection but leaves color a tad over-saturated and whites a little too warm. To calibrate, select one of the Custom modes. That allows you to change the gamma preset and adjust the white point to a high level of accuracy. It's also important to drop the Color Vibrance control one click from 10 to 9. This has a subtle effect on color saturation that can be both measured and seen with the naked eye. Other options like Black eQualizer and Low Blue Light should be left alone for the most accurate color reproduction. Please try our settings below to dial in your XR3501.
| BenQ XR3501 Calibration Settings | |
|---|---|
| Picture Mode | Custom 1 |
| Brightness 200cd/m2 | 42 |
| Brightness 120cd/m2 | 17 |
| Brightness 100cd/m2 | 10 |
| Brightness 80cd/m2 | 4 |
| Contrast | 50 |
| Sharpness | 5 |
| Gamma | 1 |
| Color Temp User | Red 94, Green 96, Blue 100 |
| Color Vibrance | 9 |
...
Current page: OSD Setup And Calibration
Prev Page Packaging, Physical Layout And Accessories Next Page Brightness And Contrast
Christian Eberle is a Contributing Editor for Tom's Hardware US. He's a veteran reviewer of A/V equipment, specializing in monitors. Christian began his obsession with tech when he built his first PC in 1991, a 286 running DOS 3.0 at a blazing 12MHz. In 2006, he undertook training from the Imaging Science Foundation in video calibration and testing and thus started a passion for precise imaging that persists to this day. He is also a professional musician with a degree from the New England Conservatory as a classical bassoonist which he used to good effect as a performer with the West Point Army Band from 1987 to 2013. He enjoys watching movies and listening to high-end audio in his custom-built home theater and can be seen riding trails near his home on a race-ready ICE VTX recumbent trike. Christian enjoys the endless summer in Florida where he lives with his wife and Chihuahua and plays with orchestras around the state.
-
Soul_keeper Everytime I see these display news/reviews I look for the power usage numbers and end up having to google for them.Reply
Can you start adding the power usage to the specs tables ?
thanks -
iam2thecrowe ReplyEverytime I see these display news/reviews I look for the power usage numbers and end up having to google for them.
I don't know, I have never looked at power usage specs when deciding which monitor to buy. Ever. It is expensive for only 1080 vertical pixels though. Would rather settle for a 60hz model with 1440 for a similar price.
Can you start adding the power usage to the specs tables ?
thanks -
rajeshgoblet 'The other curved displays we've seen sport a 3800R curvature, which means a radius of 3000 millimeters.' i think its a little bit typo. 3000 should be 3800 milimeters.Reply -
Shankovich Seems pretty good. Don't mean to sound like a whiner but for $1000 I would expect 10 bit colour on it. Then again loving that 144 Hz, can't complain about anything else really.Reply -
Realist9 1080p at 35 inches. No. 5 years ago? Maybe. Today? No.Reply
And someone dropping $1000 on their monitor is very unlikely to have a sub $300 video card.
No excuses. This should have been at least 1440p. I was excited until I saw that. -
eklipz330 this is clearly an attempt at milking the market. next year they will have a 1440p variant, and the year after they will finally incorporate freesync/gsync.Reply
they could have at least made it 1200p
