System Builder Marathon, March 2012: $2600 Performance PC
Overclocking A Truly Overclockable Platform
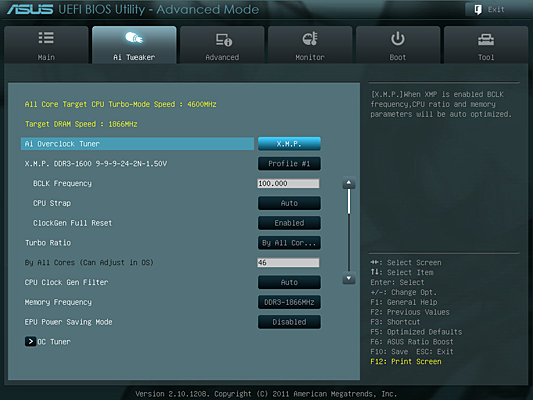
Most motherboards take one of two paths whenever memory is overclocked, either maintaining SPD values or loosening them extremely. Our modules support DDR3-1600 CAS 9 settings via XMP, so we started our CPU overclock using Asus’ XMP overclocking mode.
Rated at 1.50 V, we were able to use DDR3-1866 at 1.60 V with minimal timing changes.
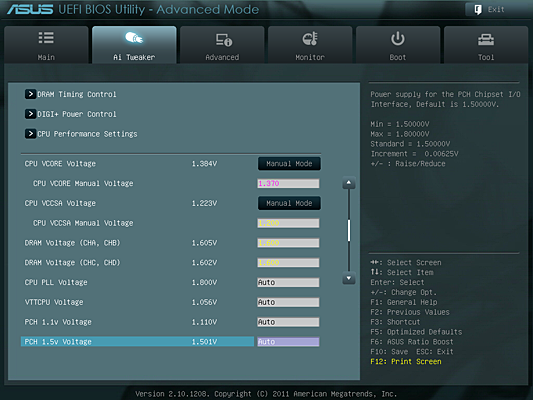
We keep our 32 nm-based Intel processors below 1.40 V for most reviews for added longevity. Our target this time was 1.38 V, and an actual 1.384 V was achieved using Asus’ 1.370 V setting.
Beware that even though Asus recommends motherboard-default voltage settings for most users, the P9X79 Pro responded to a multiplier of 46x by automatically increasing our CPU core to around 1.48 V! Manual voltage selection prevents this.
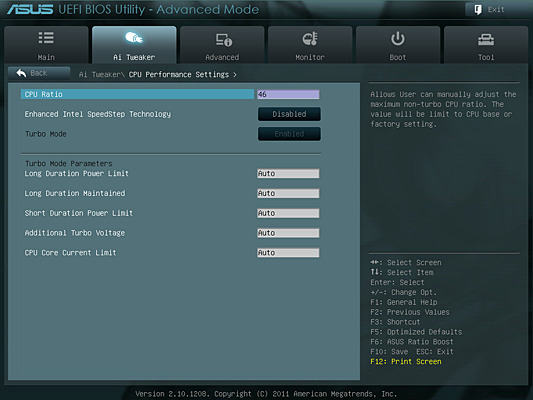
The CPU Performance Settings submenu is where CPU multiplier and Turbo Boost amperage limits are set. Although exceeding a certain power level could force the multiplier ratio to drop, Asus again claims that its Auto mode is aggressive enough to satisfy most overclocking demands. Extra current creates extra heat, but we choose to control CPU current by limiting voltage (V=IR). Thus, Asus’ advice here is good enough.
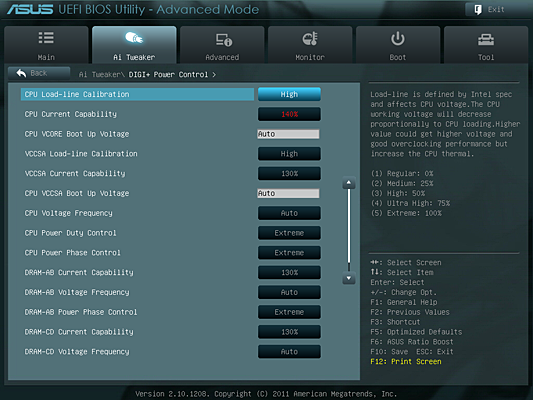
Intel processors call for reduced voltage at extreme loads to stay within a given power envelope, though such a behavior often causes overclocked systems to crash when they could actually benefit from more voltage. Dubbed Vdroop within the enthusiast community, Asus’ Load Line Calibration helps overcome this hurdle. Although the feature helps stabilize more aggressive overclocks, too much compensation can result in a voltage spike at high loads. We found that the P9X79 Pro’s High calibration setting kept our CPU voltage very close to its desired value.
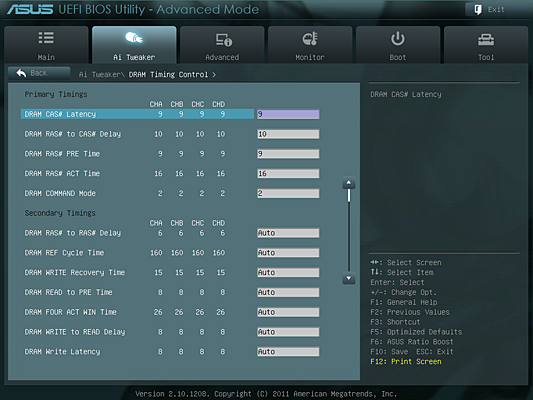
We were forced to use a tRCD value of 10 to reach DDR3-1866. We could have attempted tighter timings at the memory’s rated DDR3-1600, as 8-9-8 appeared stable for a brief test at the lower data rate.
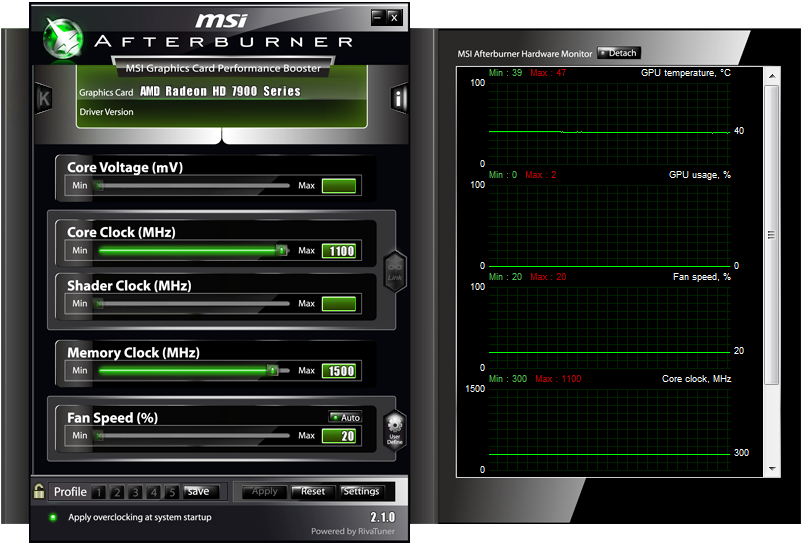
Graphics components are typically far closer to their safe voltage limits compared to CPUs, which is why we don’t increase GPU voltage on cards that we want to last. Overclocking at stock voltage is usually safe however, and MSI Afterburner supported the same settings as AMD's Overdrive utility, stretching up to 1125 MHz GPU and 1575 MHz memory clocks. Unfortunately, this card crashed in 3DMark at the highest memory speed and in DiRT 3 using the GPU clock ceiling. So, we pulled each back in in 25 MHz increments until stability was achieved.
Our final overclocking results were 4.60 GHz on the CPU, DDR3-1866 CAS 9, a 1100 MHz GPU clock, and GDDR5-6000.
Current page: Overclocking A Truly Overclockable Platform
Prev Page Hardware Installation Next Page Test Settings And BenchmarksGet Tom's Hardware's best news and in-depth reviews, straight to your inbox.
-
llguitargr8 Just curious, did you guys purchase all these parts and right these articles before the GTX 680 was released? I really thought you guys would have gone with that, and if it wasn't because they weren't available at the time, then what makes the 7970 better in your opinion?Reply -
g-unit1111 Not sure if I agree with that choice of cooler but I definitely like the rest of the setup!Reply -
bystander llguitargr8Just curious, did you guys purchase all these parts and right these articles before the GTX 680 was released? I really thought you guys would have gone with that, and if it wasn't because they weren't available at the time, then what makes the 7970 better in your opinion?Almost all these build articles are based on purchases that took place 2 months ago. Even if they were to have bought these parts today, it would be hard to purchase a 680, as stock is a major issue.Reply -
esrever I like the build except the x79 adds like $500 extra that I see very little benefit from.Reply -
e56imfg Dang I need to win this one!! I'm so happy they balanced the CPU with the GPU this time around.Reply -
hmp_goose Good job: Working through the details of the CPU cooler like that is half the fun of this hobby. Great build.Reply -
theuniquegamer Good build . But there could be more improvement by replacing a $600 cpu and $320 mother board with a i7 2600k and a $200 z68 mother board . And also replacing the 7970($590) with 2x680 at 2x$500(from the money saved from cpu and motherboard and 7970). It may give better gaming result than this build.Reply

