Acer XB280HK 28-inch G-Sync Ultra HD Gaming Monitor Review
Acer breaks new ground with its XB280HK. Offering an Ultra HD resolution and G-Sync in a reasonably-priced 28-inch package, this monitor is unique.
Why you can trust Tom's Hardware
OSD Setup
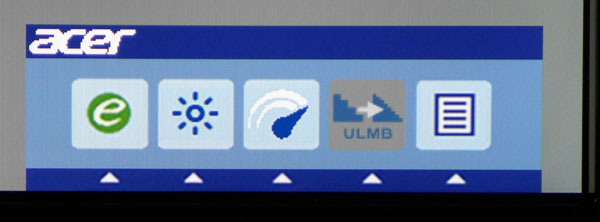
Pressing any key brings up a quick menu.
The “e” symbol represents Acer’s picture modes, explained below. The second icon indicates brightness control. The third is Overdrive. The fourth grayed-out symbol says ULMB. Unfortunately, that feature does not exist on this product. The fifth button brings up the main OSD.
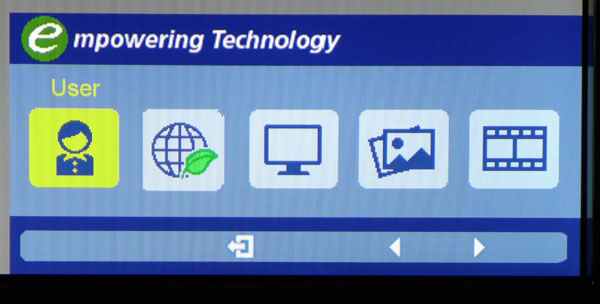
Here are the five picture modes: User, Eco, Standard (the default), Game and Movie. The only adjustable one is User. When you make any changes in the other modes, you’re automatically switched to User.
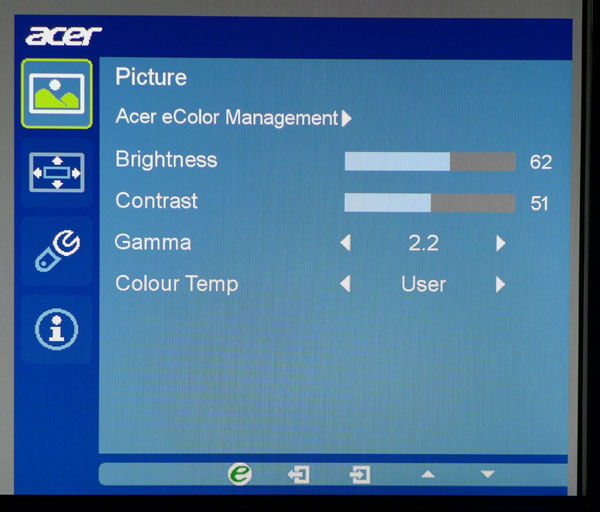
Acer eColor Management is another name for the picture modes. Brightness and Contrast work as expected, although it’s unusual that we’re able to increase the Contrast setting from the default. That usually induces clipping, though here we were able to improve the grayscale accuracy at 100 percent brightness by upping it a click.
There are multiple gamma presets, but they are too far apart to be useful. Fortunately, the 2.2 setting is reasonably close to the mark. The next lowest level is 1.9, which noticeably washes out the picture. Going the other way results in a dark, flat image. It’s best left on 2.2.
There are three color temp presets, plus User. Warm is pretty close to D65, as you’ll see in our benchmark results.
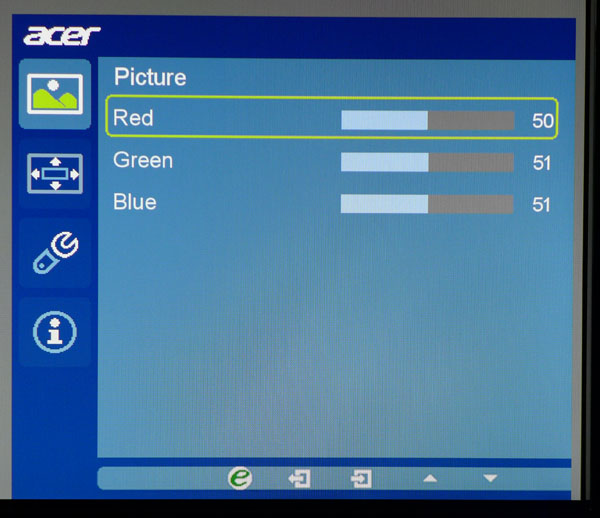
Selecting the User color temp takes you to RGB sliders that start in the center of their ranges. We really like this because it allows adjustments that don’t reduce contrast. In fact, we were able to increase it a little during calibration.
Get Tom's Hardware's best news and in-depth reviews, straight to your inbox.
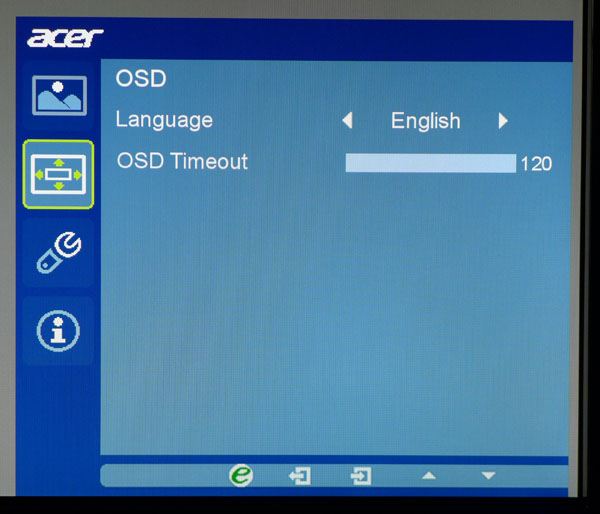
The OSD can be read in multiple languages, and the menu timeout has a maximum of 120 seconds.
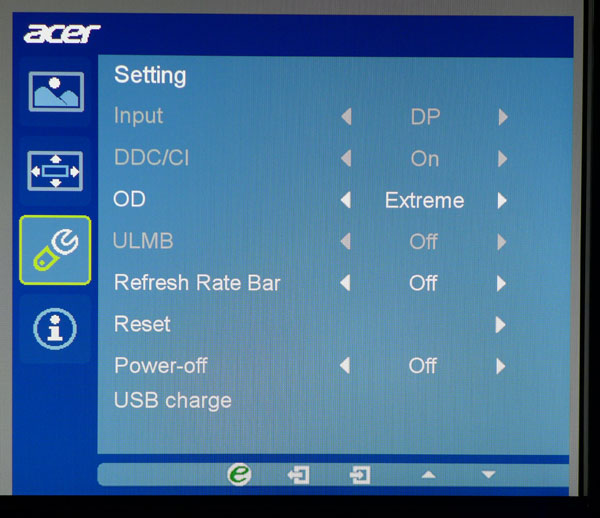
Obviously the XB280HK shares its menu firmware with other products, so some of these options are grayed out. There is only one input and DDC/CI is locked to On, as it should be. Overdrive control works well on the Extreme setting, where it results in very little motion blur, even though the panel tops out at 60Hz.
The refresh rate bar is a feature we haven’t seen before. You can make it either four or eight pixels wide, and it appears in the lower-left corner of the screen. The bar moves up and down to let you know the frame rate in real time. There is no numerical indicator, but can approximate where you are. Of course, it only works in G-Sync mode.
Reset returns all settings to their factory defaults. Turning the Power-off USB charge to On means the ports will continue to function when the monitor is in standby. This is handy for charging mobile devices.
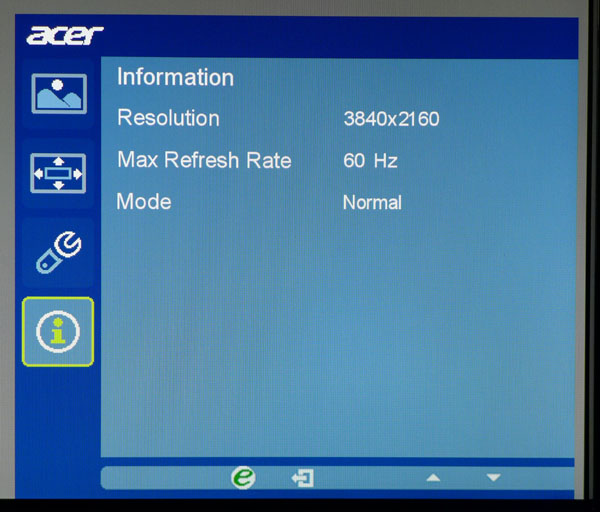
Here is the signal information. Unfortunately, all you get is resolution and refresh rate, which will always be 60Hz. The Mode field will say G-Sync when a compatible video card is present or Normal if your board is non-compliant.

Christian Eberle is a Contributing Editor for Tom's Hardware US. He's a veteran reviewer of A/V equipment, specializing in monitors. Christian began his obsession with tech when he built his first PC in 1991, a 286 running DOS 3.0 at a blazing 12MHz. In 2006, he undertook training from the Imaging Science Foundation in video calibration and testing and thus started a passion for precise imaging that persists to this day. He is also a professional musician with a degree from the New England Conservatory as a classical bassoonist which he used to good effect as a performer with the West Point Army Band from 1987 to 2013. He enjoys watching movies and listening to high-end audio in his custom-built home theater and can be seen riding trails near his home on a race-ready ICE VTX recumbent trike. Christian enjoys the endless summer in Florida where he lives with his wife and Chihuahua and plays with orchestras around the state.
-
Frozen Fractal On first glance I thought I wouldn't have to see "we will be reviewing XB270HU soon" quote again. But then I realized it's XB280HK. Oh well, guess have to endure that quote for few more time :rolleyes:Reply
Contrast ratio, brightness, chromacity & gamma tracing is where XB280HK looses the ground, but to be fair, most of the gamers won't be noticing much difference at all. But it is kind of disappointing to see Planar do better in these fields than Acer utilizing the same panel. I don't know, maybe the overdrive somehow worsen the results?
But ofcourse, it does well on uniformity and response time. Makes me wonder why XB280HK doesn't have ULMB if it's supposed to be a bundled feature with G-Sync. That should've helped in 60Hz panels more, rather than 144Hz ones.
But anyway, XB280HK looks promising, although I don't think 4K is what I prefer for gaming+life (although I do for gaming only). -
Frozen Fractal Reply16328127 said:Sorry if i missed it but what version display port is it?
It's 1.2a I presume. Since that's what is capable of 4K@60Hz other than HDMI 2.0 -
boju Should be at least version 1.2 for 4k @ 60Hz since this version has been doing this since year 2009. v1.2a is the same Res/Hz deal but brings added support for Freesync.Reply
-
picture_perfect Why do they keep pushing 4K for gaming. True gamers have always regarded fps as king and 4K is one-quarter the frame rate of 1080. Gamers don't need expensive 4K monitors driven by expensive cards at ever-lower frame rates (via G-sync). This is chasing the proverbial tail and counterproductive. Regular 1080p, v-synced at a constant 144 fps would be better than all that stuff.Reply -
spagalicious ReplyWhy do they keep pushing 4K for gaming. True gamers have always regarded fps as king and 4K is one-quarter the frame rate of 1080. Gamers don't need expensive 4K monitors driven by expensive cards at ever-lower frame rates (via G-sync). This is chasing the proverbial tail and counterproductive. Regular 1080p, v-synced at a constant 144 fps would be better than all that stuff.
*Competitive Gamers
People that like to play games also like to play games in ultra HD resolutions.
-
picture_perfect 4K is cool but GPUs cant handle it well enough yet. I'd rather have 1080p at high fps and gain an extra 1-2 frames of lag, but to each their own.Reply -
bystander Reply16328109 said:But ofcourse, it does well on uniformity and response time. Makes me wonder why XB280HK doesn't have ULMB if it's supposed to be a bundled feature with G-Sync. That should've helped in 60Hz panels more, rather than 144Hz ones.
ULMB uses flickering to lower persistence, which reduces the motion blur. If you've ever used 60hz CRT monitors, you'll know that flickering is painful on the eyes. This is why ULMB mode is not offered on 60hz monitors, and likely won't be offered on anything less than 75-85hz.
-
bystander Reply16329841 said:4K is cool but GPUs cant handle it well enough yet. I'd rather have 1080p at high fps and gain an extra 1-2 frames of lag, but to each their own.
Top end GPU's can handle 4K just fine. You just don't play it at max settings. What is better, medium to high settings and 4K, or maxed at 1080p? That is a subjective question, and will vary from person to person.
That said, I prefer higher refresh rates than 60hz, so I'll be going 1440p before 4K.
