Why you can trust Tom's Hardware
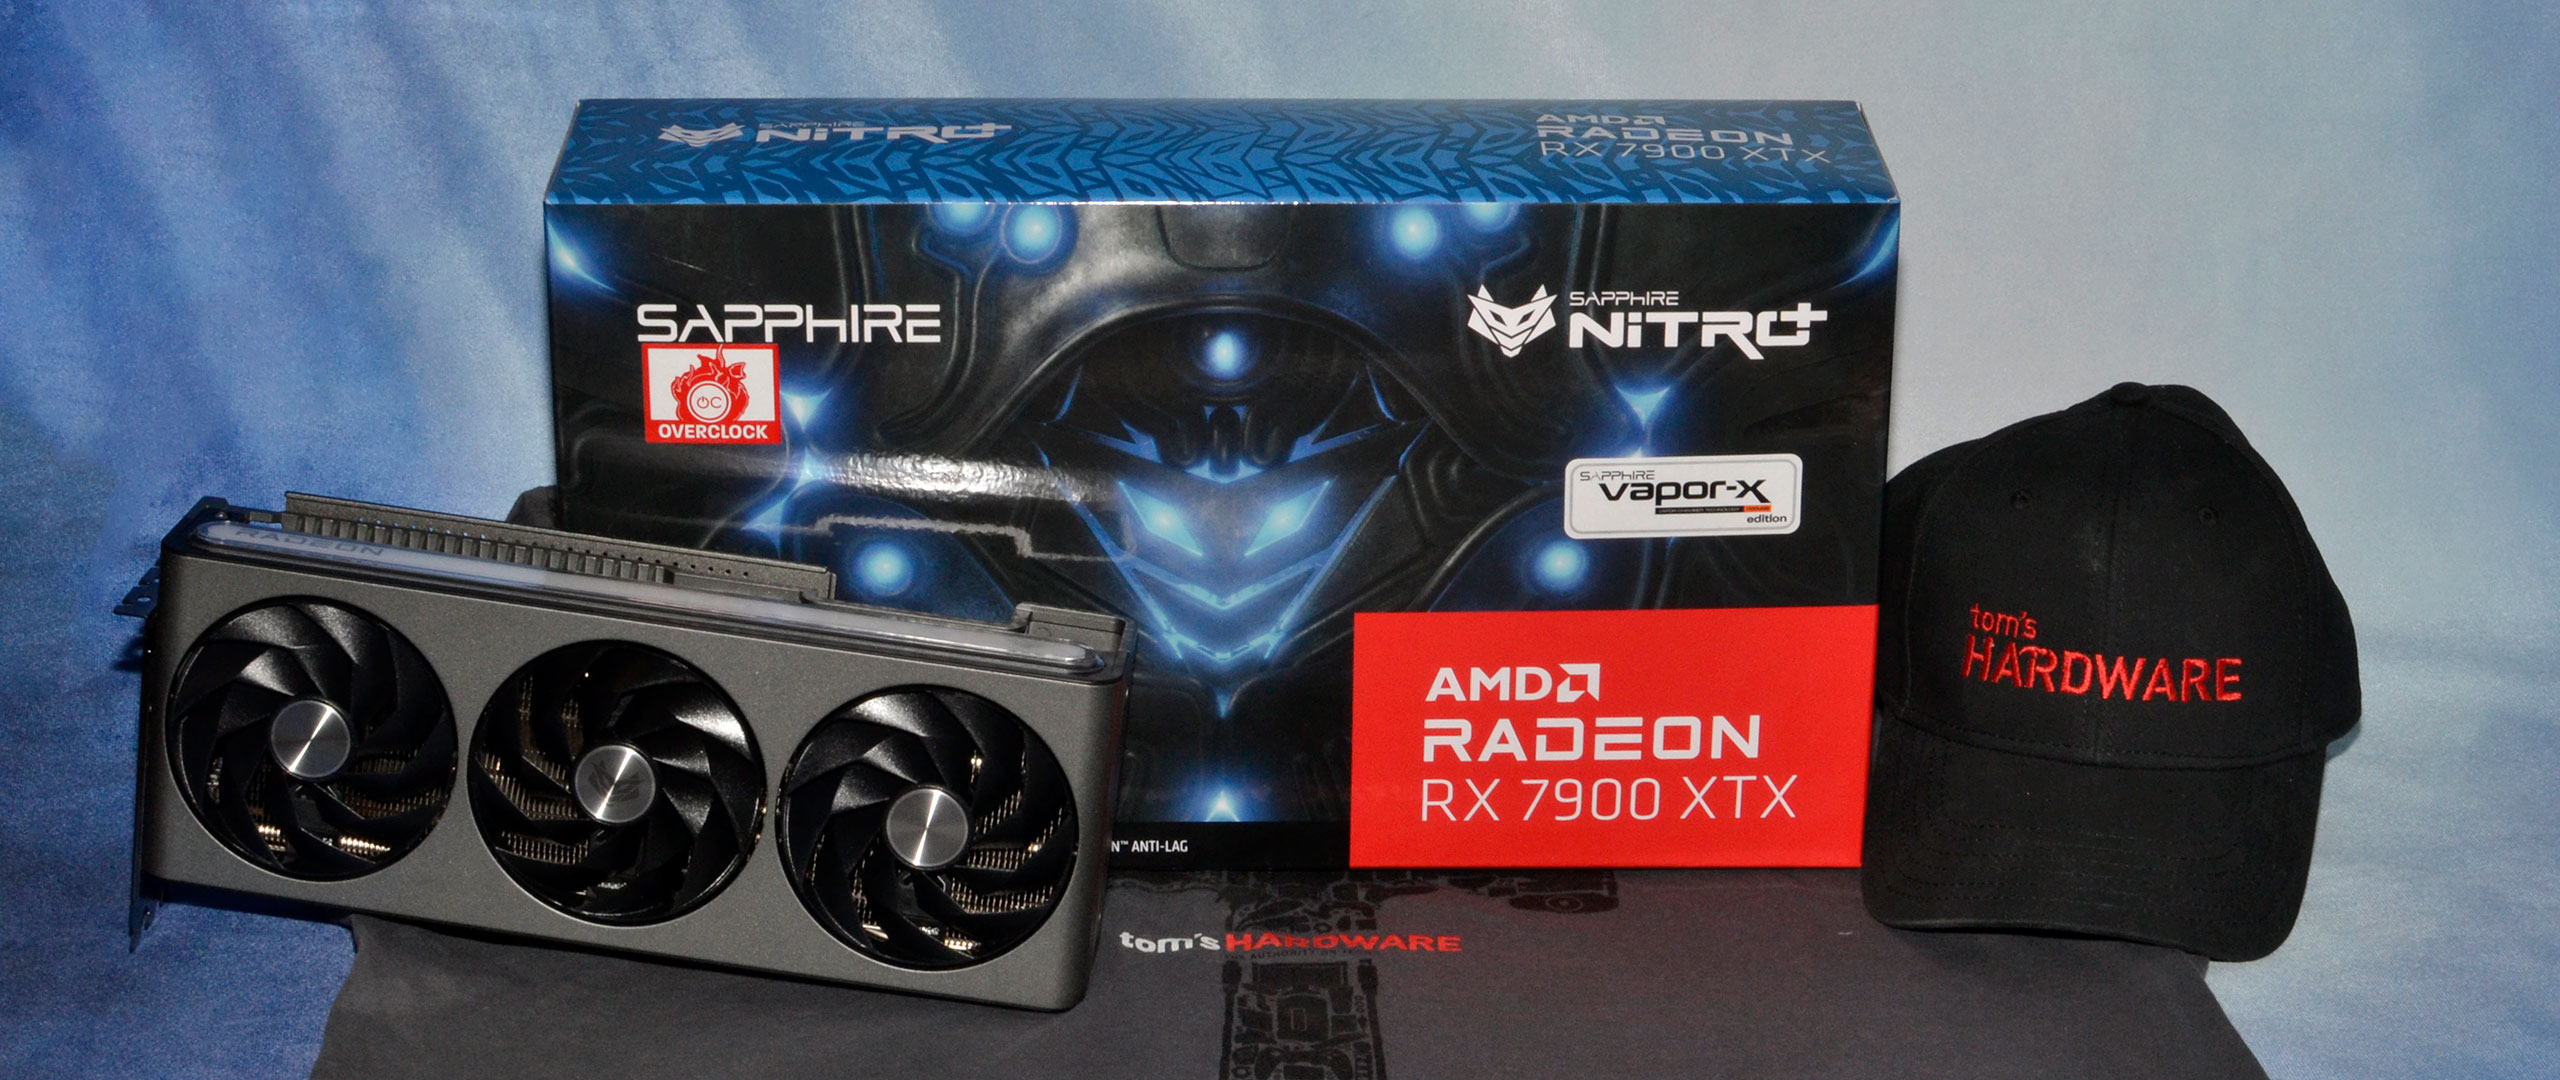
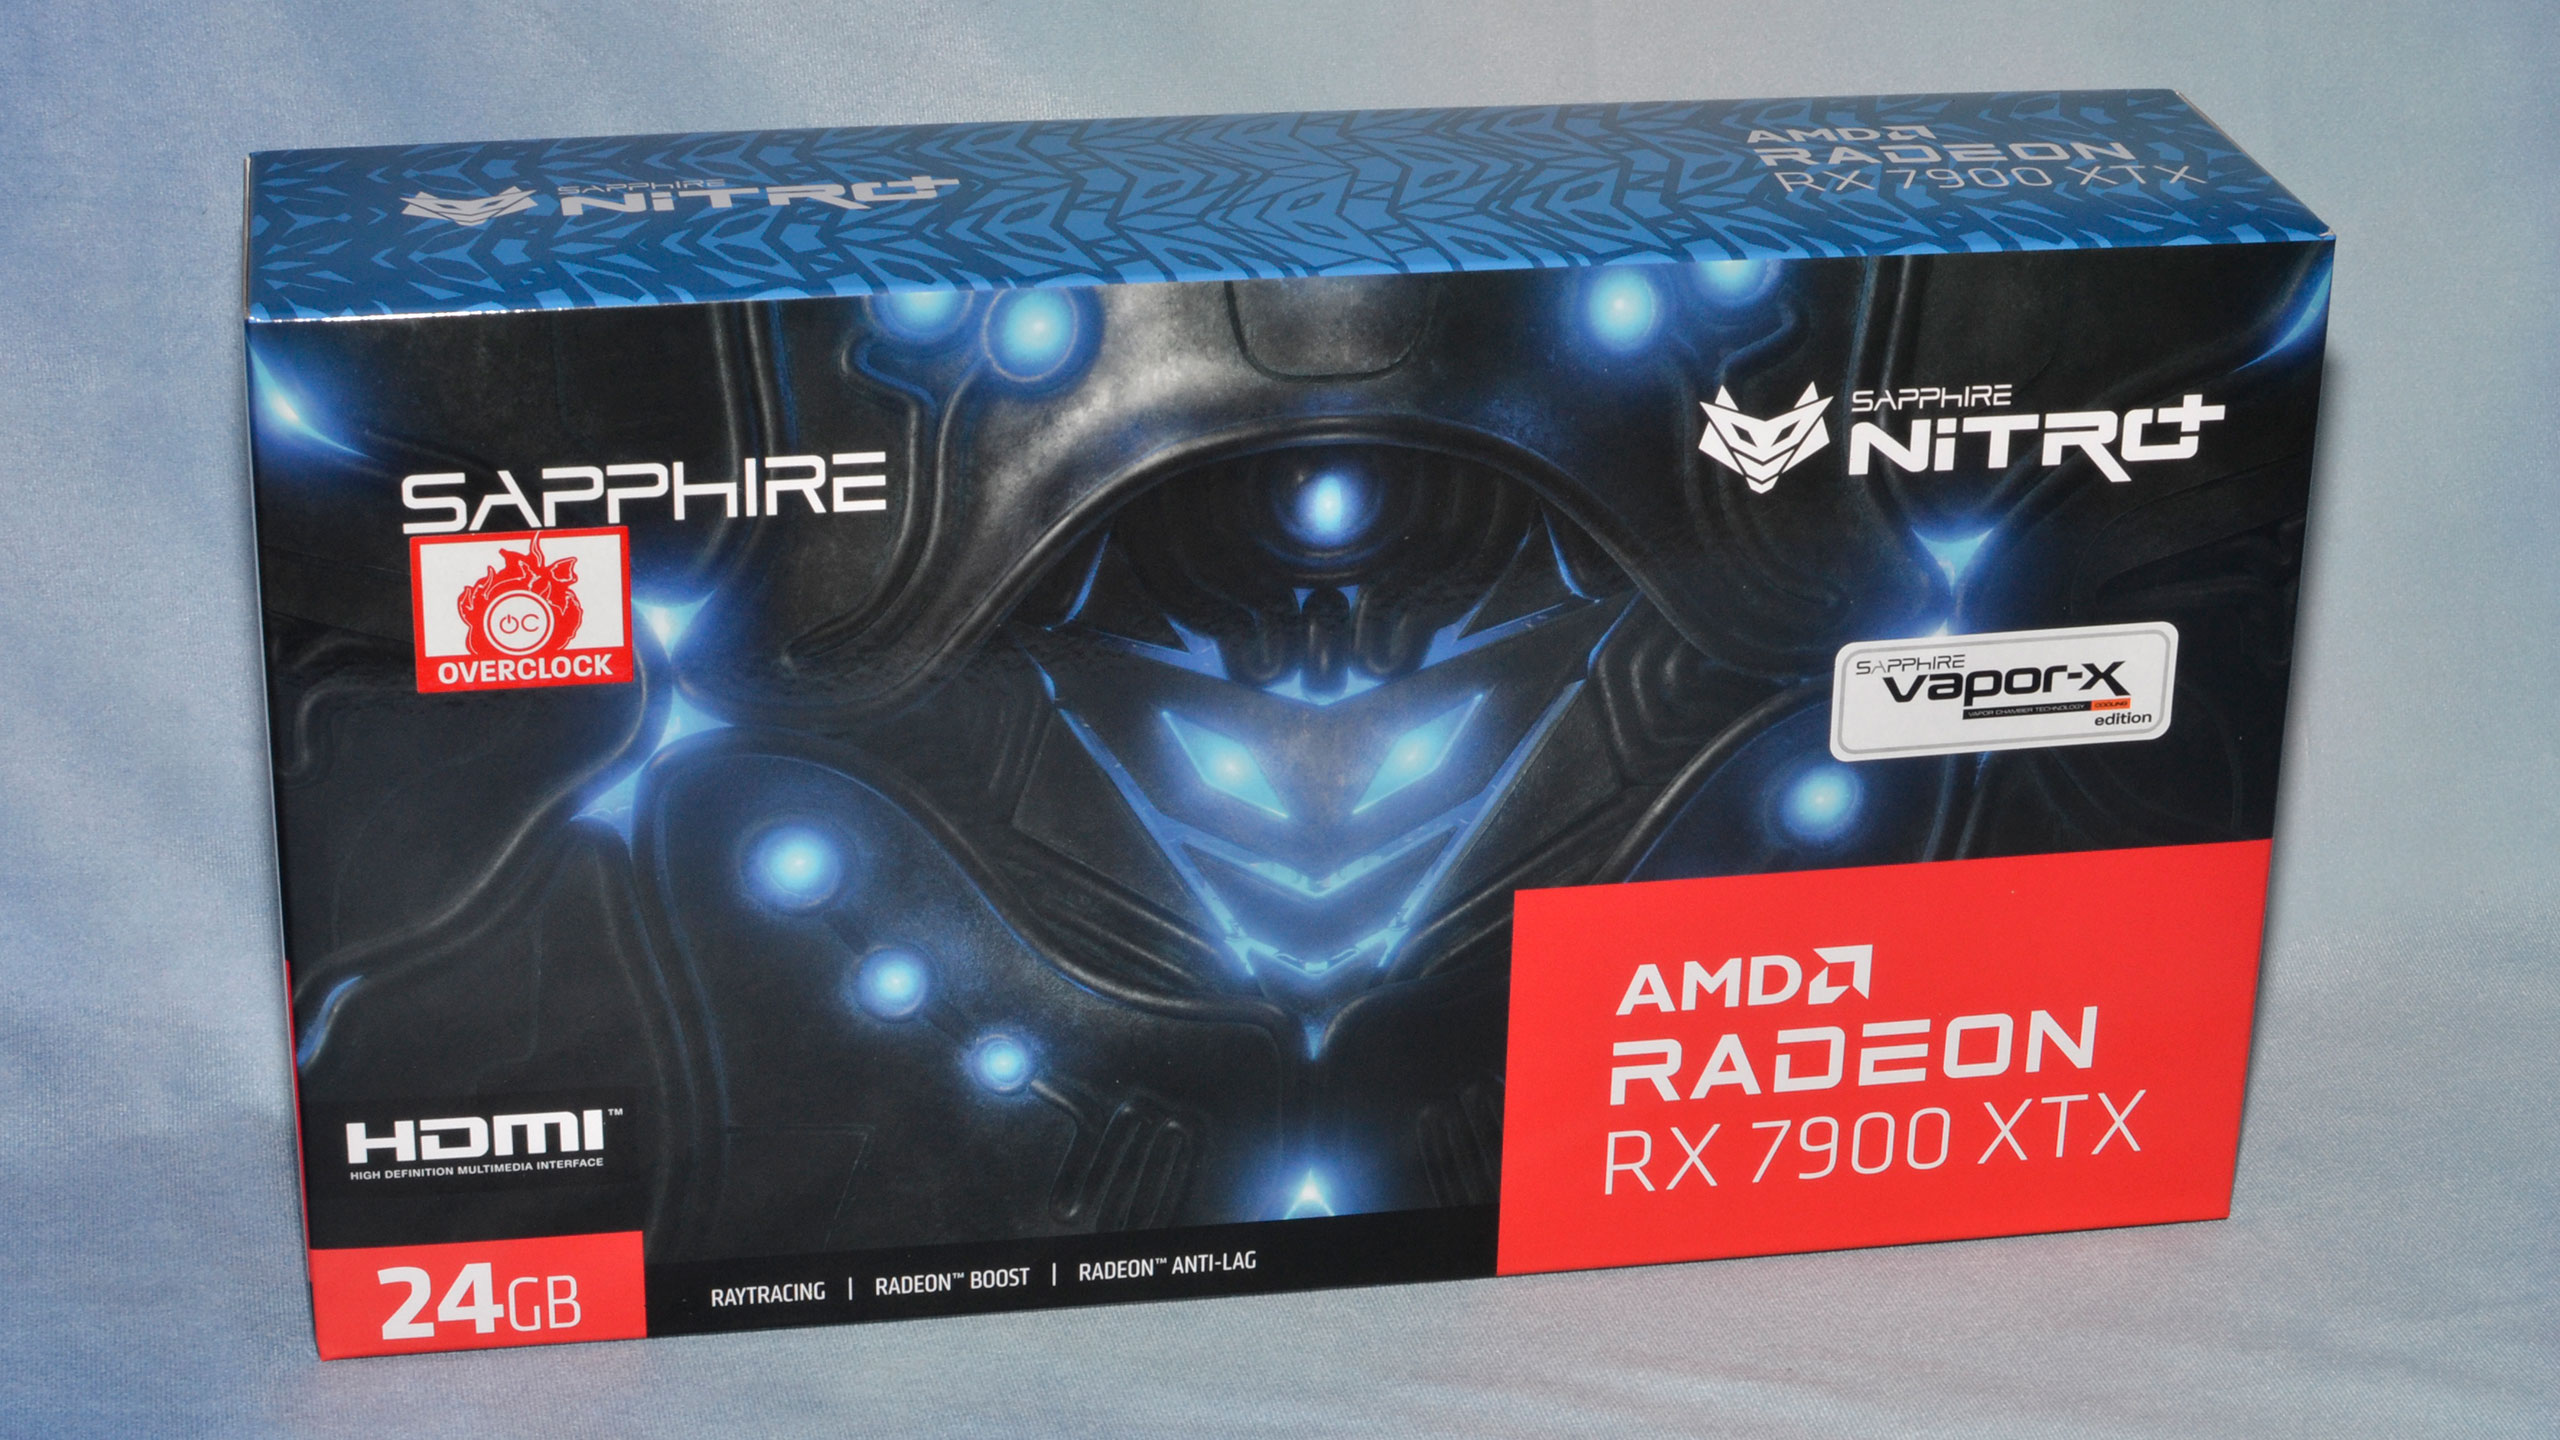
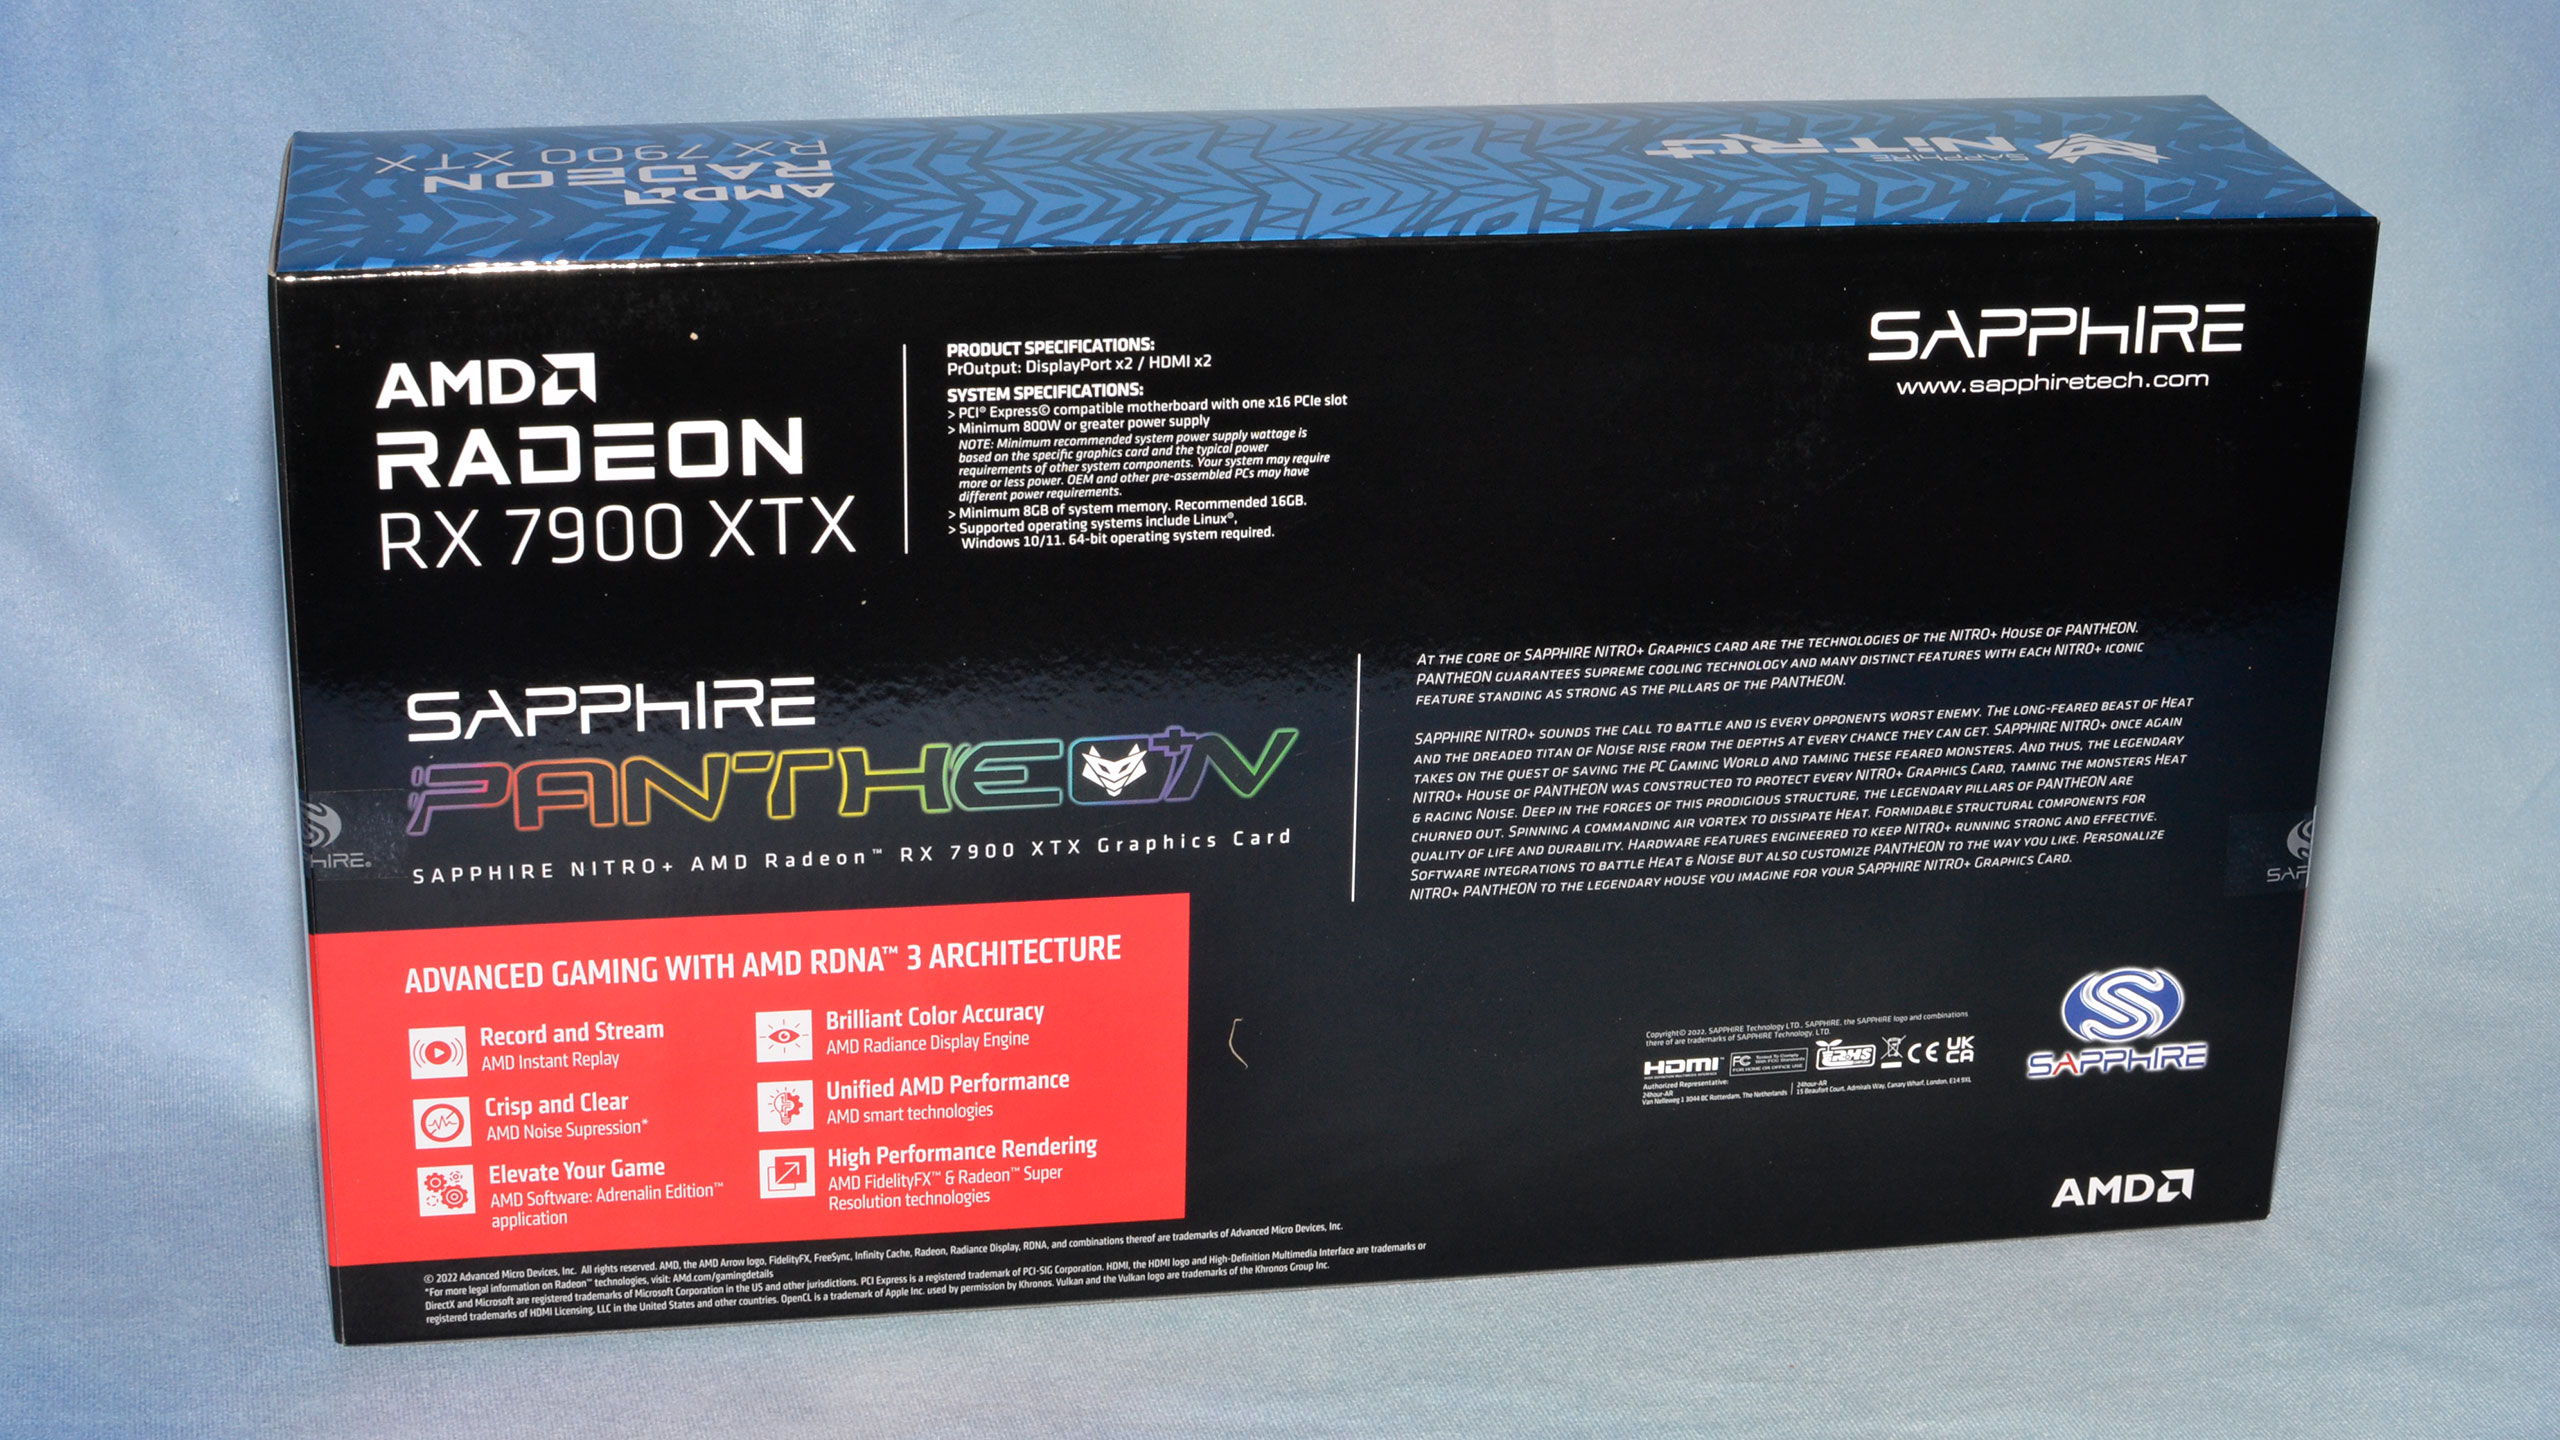
I made fun of the box art on Sapphire's RX 6950 XT Nitro+ Pure, and I'm happy to say the blue and black artwork on the 7900 XTX is less ugly. Not that it really matters once you unpack the card.
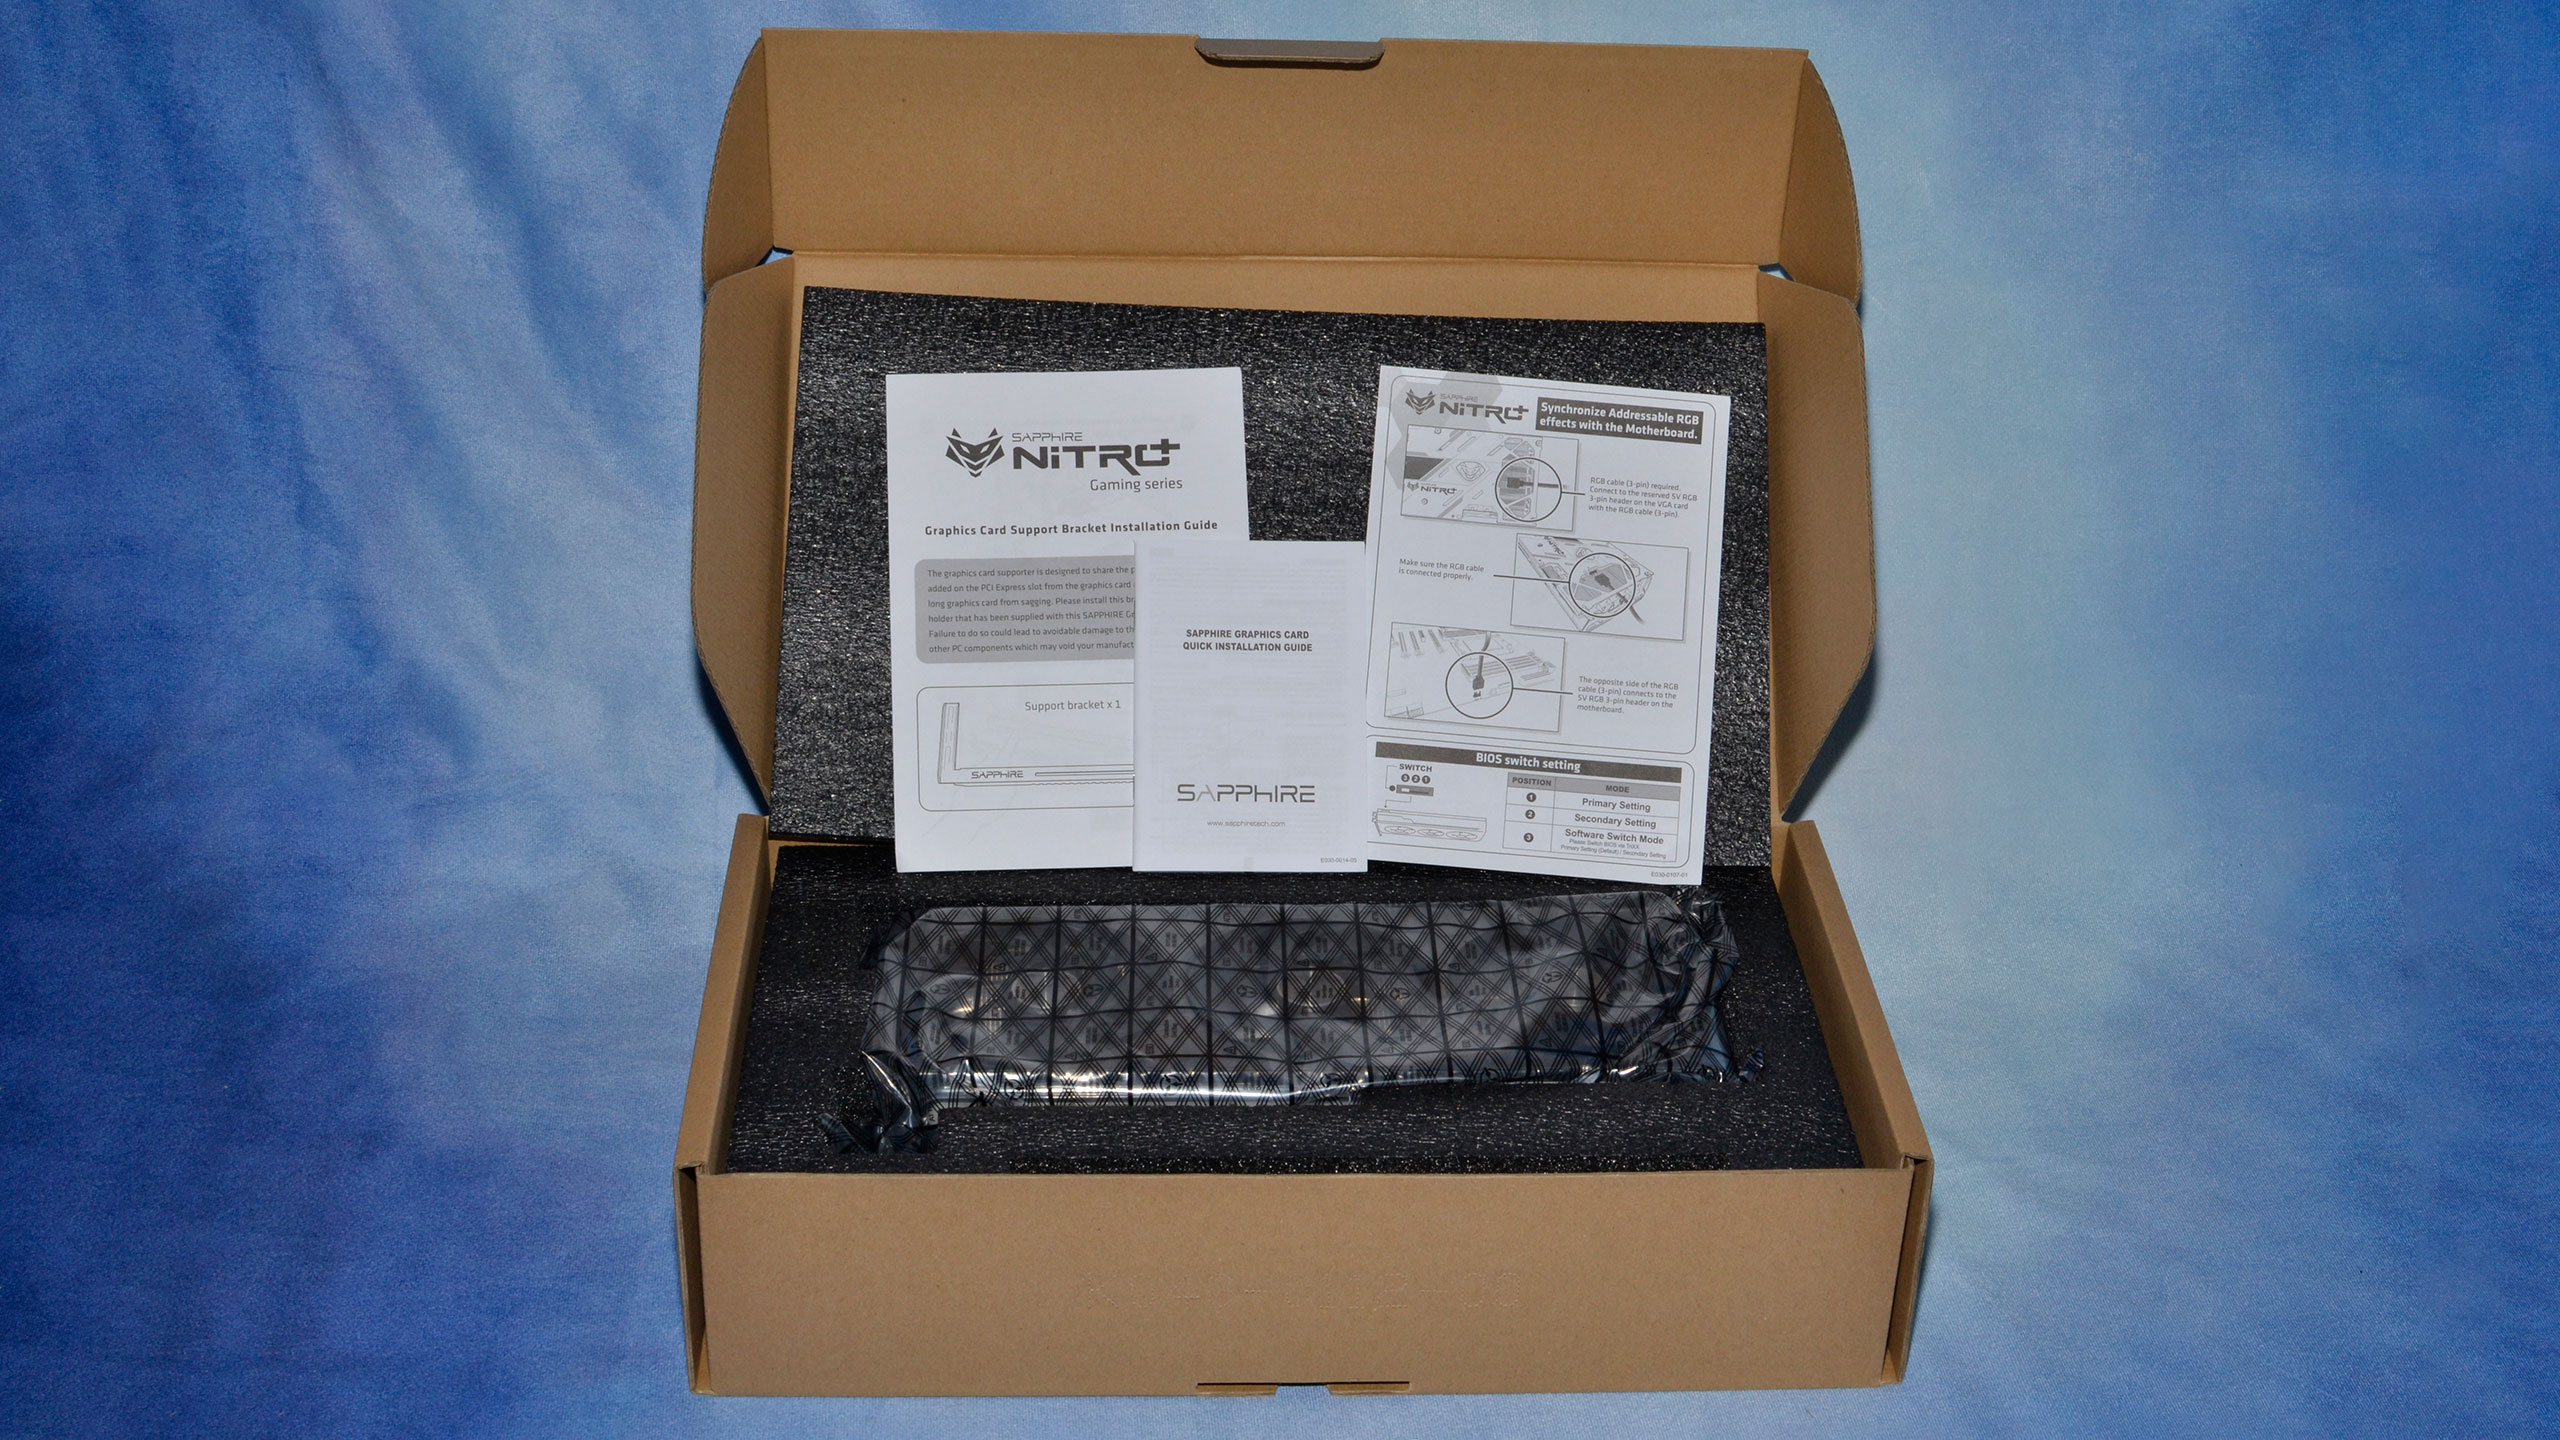
There's plenty of padding around the card to protect it during shipping, plus a support bracket to help prevent card sag and an ARGB cable that can be used to let your motherboard control the card's lighting.
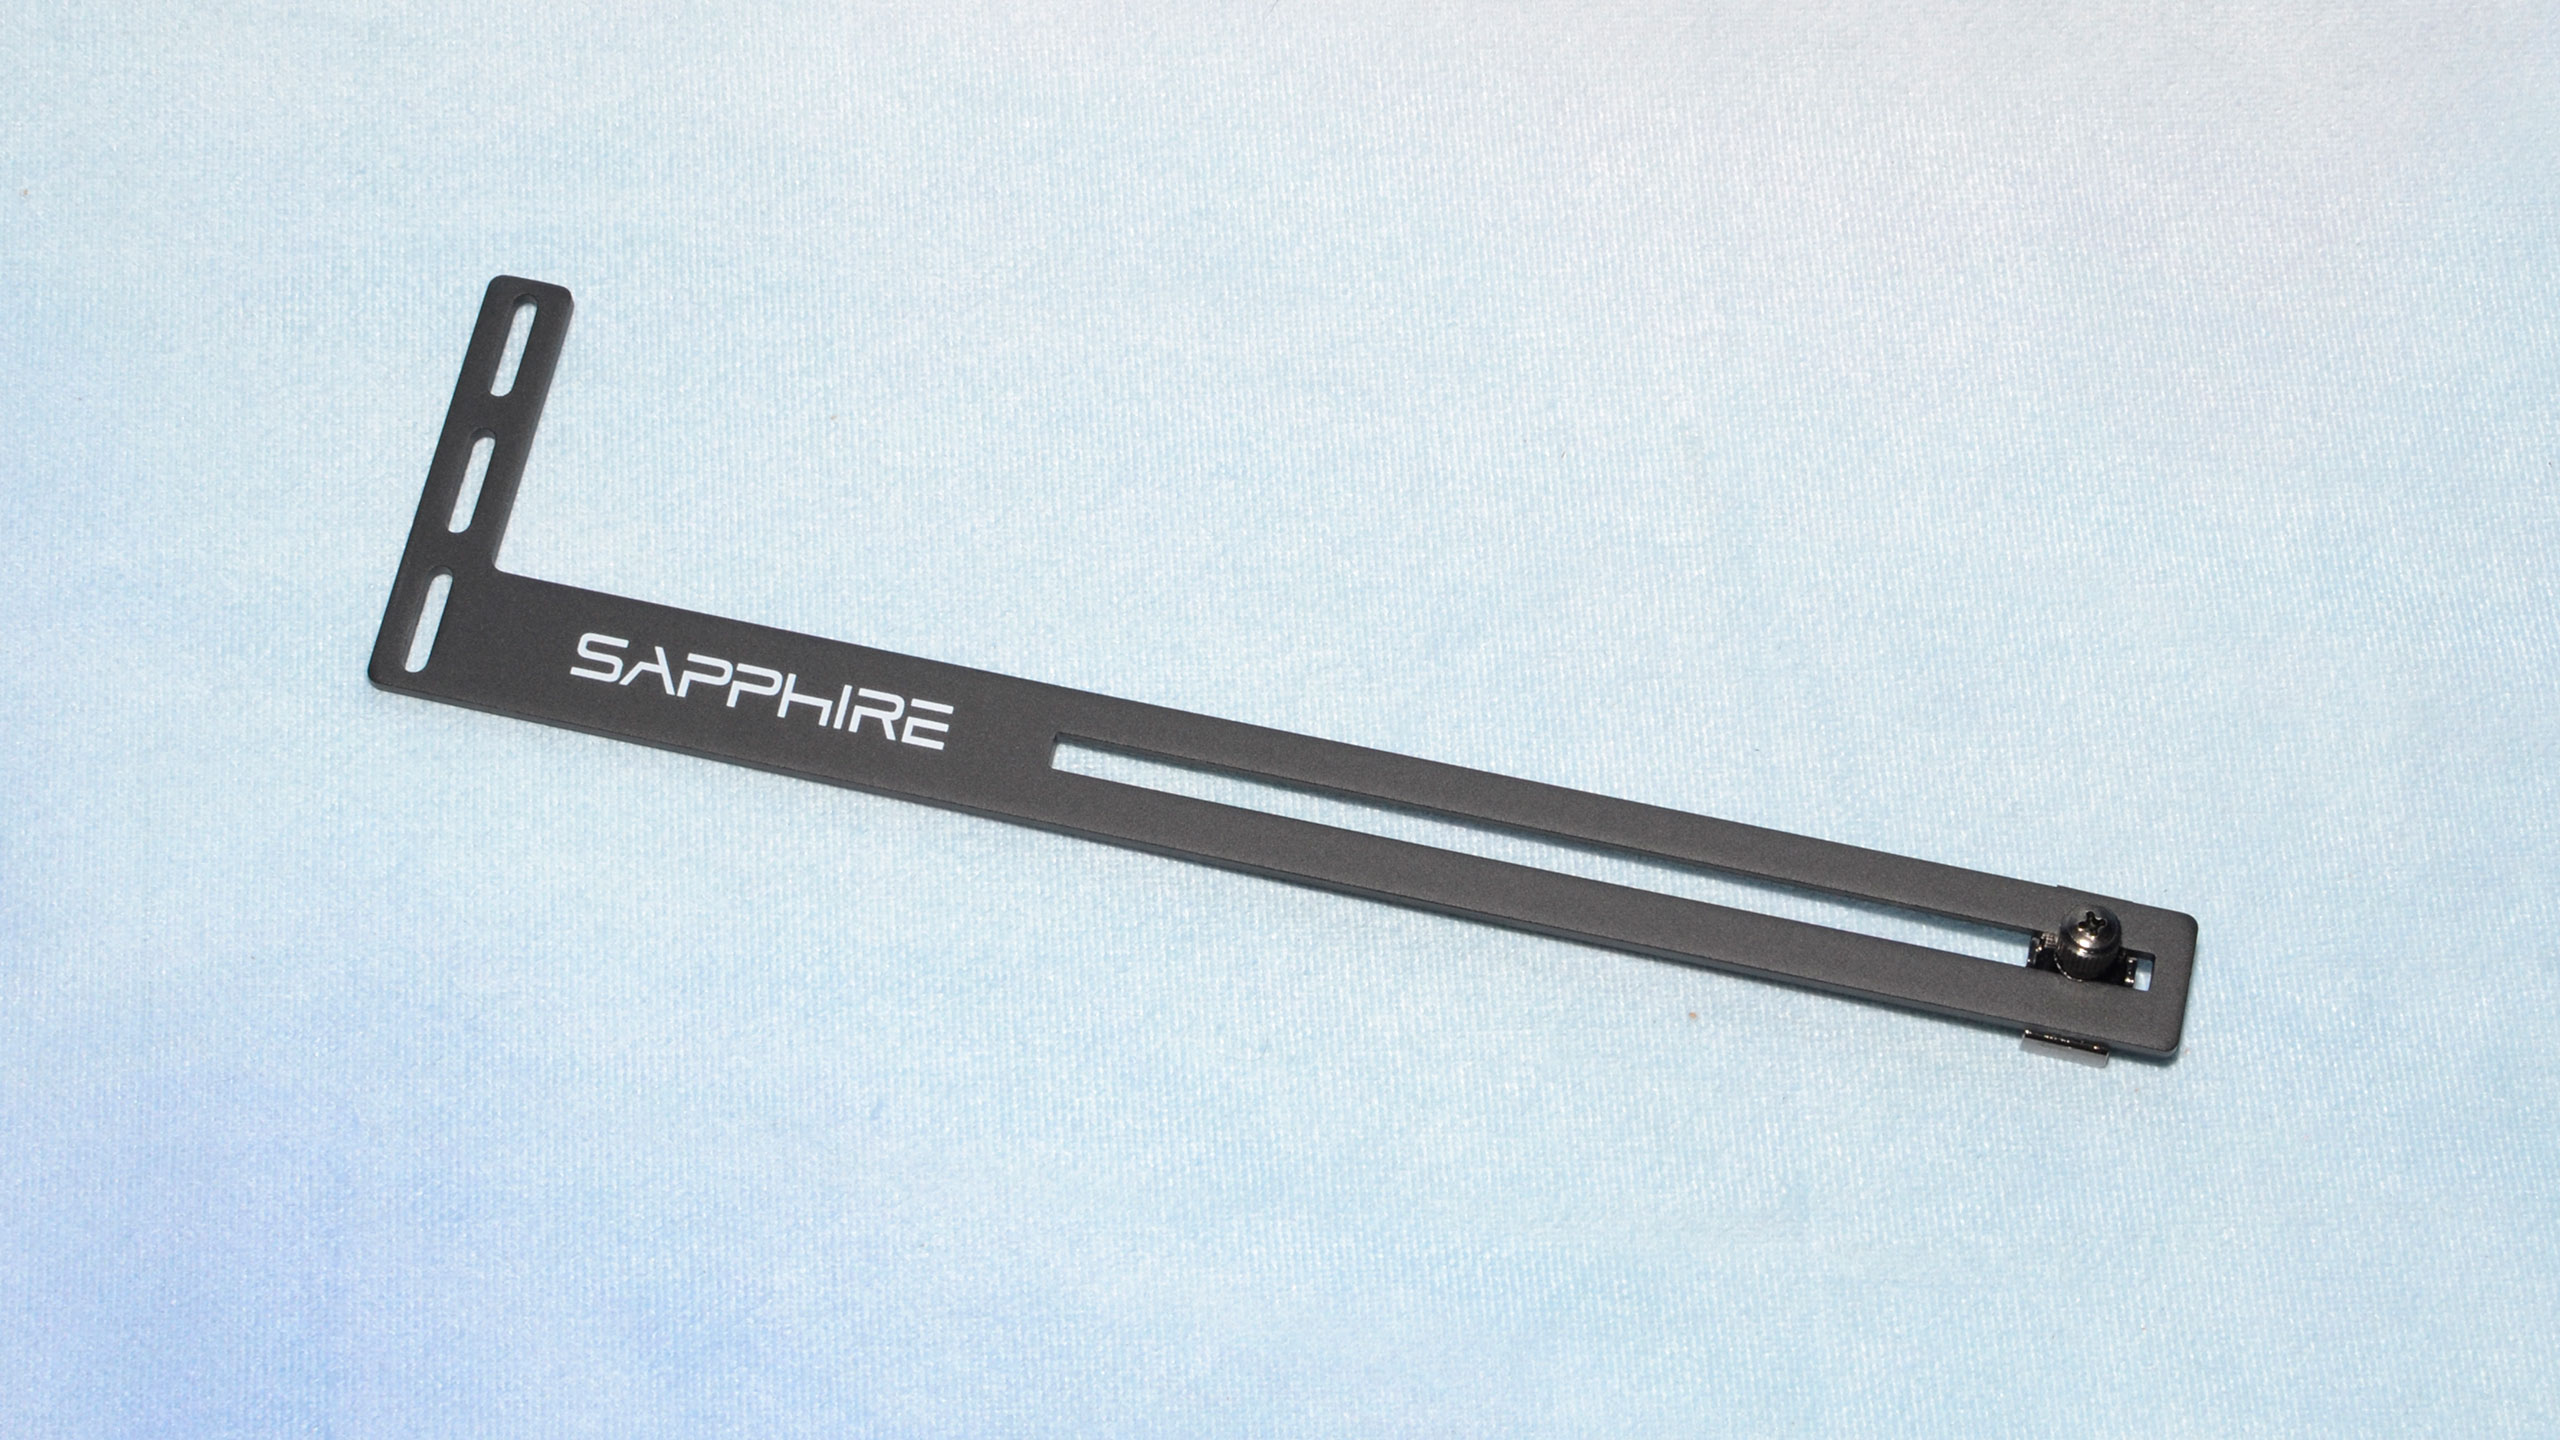
A quick word on the support bracket: It's a bit finicky to install, since it has overlaps on at least one of the screws that holds the graphics card in place. It has three positions for screws, but the width of the 7900 XTX Vapor-X means you'll only use one of them (and perhaps one of the empty IO slots below the card). The good news is that it won't slide around when you're moving the case, but for someone like me that regularly swaps GPUs, it's less convenient.
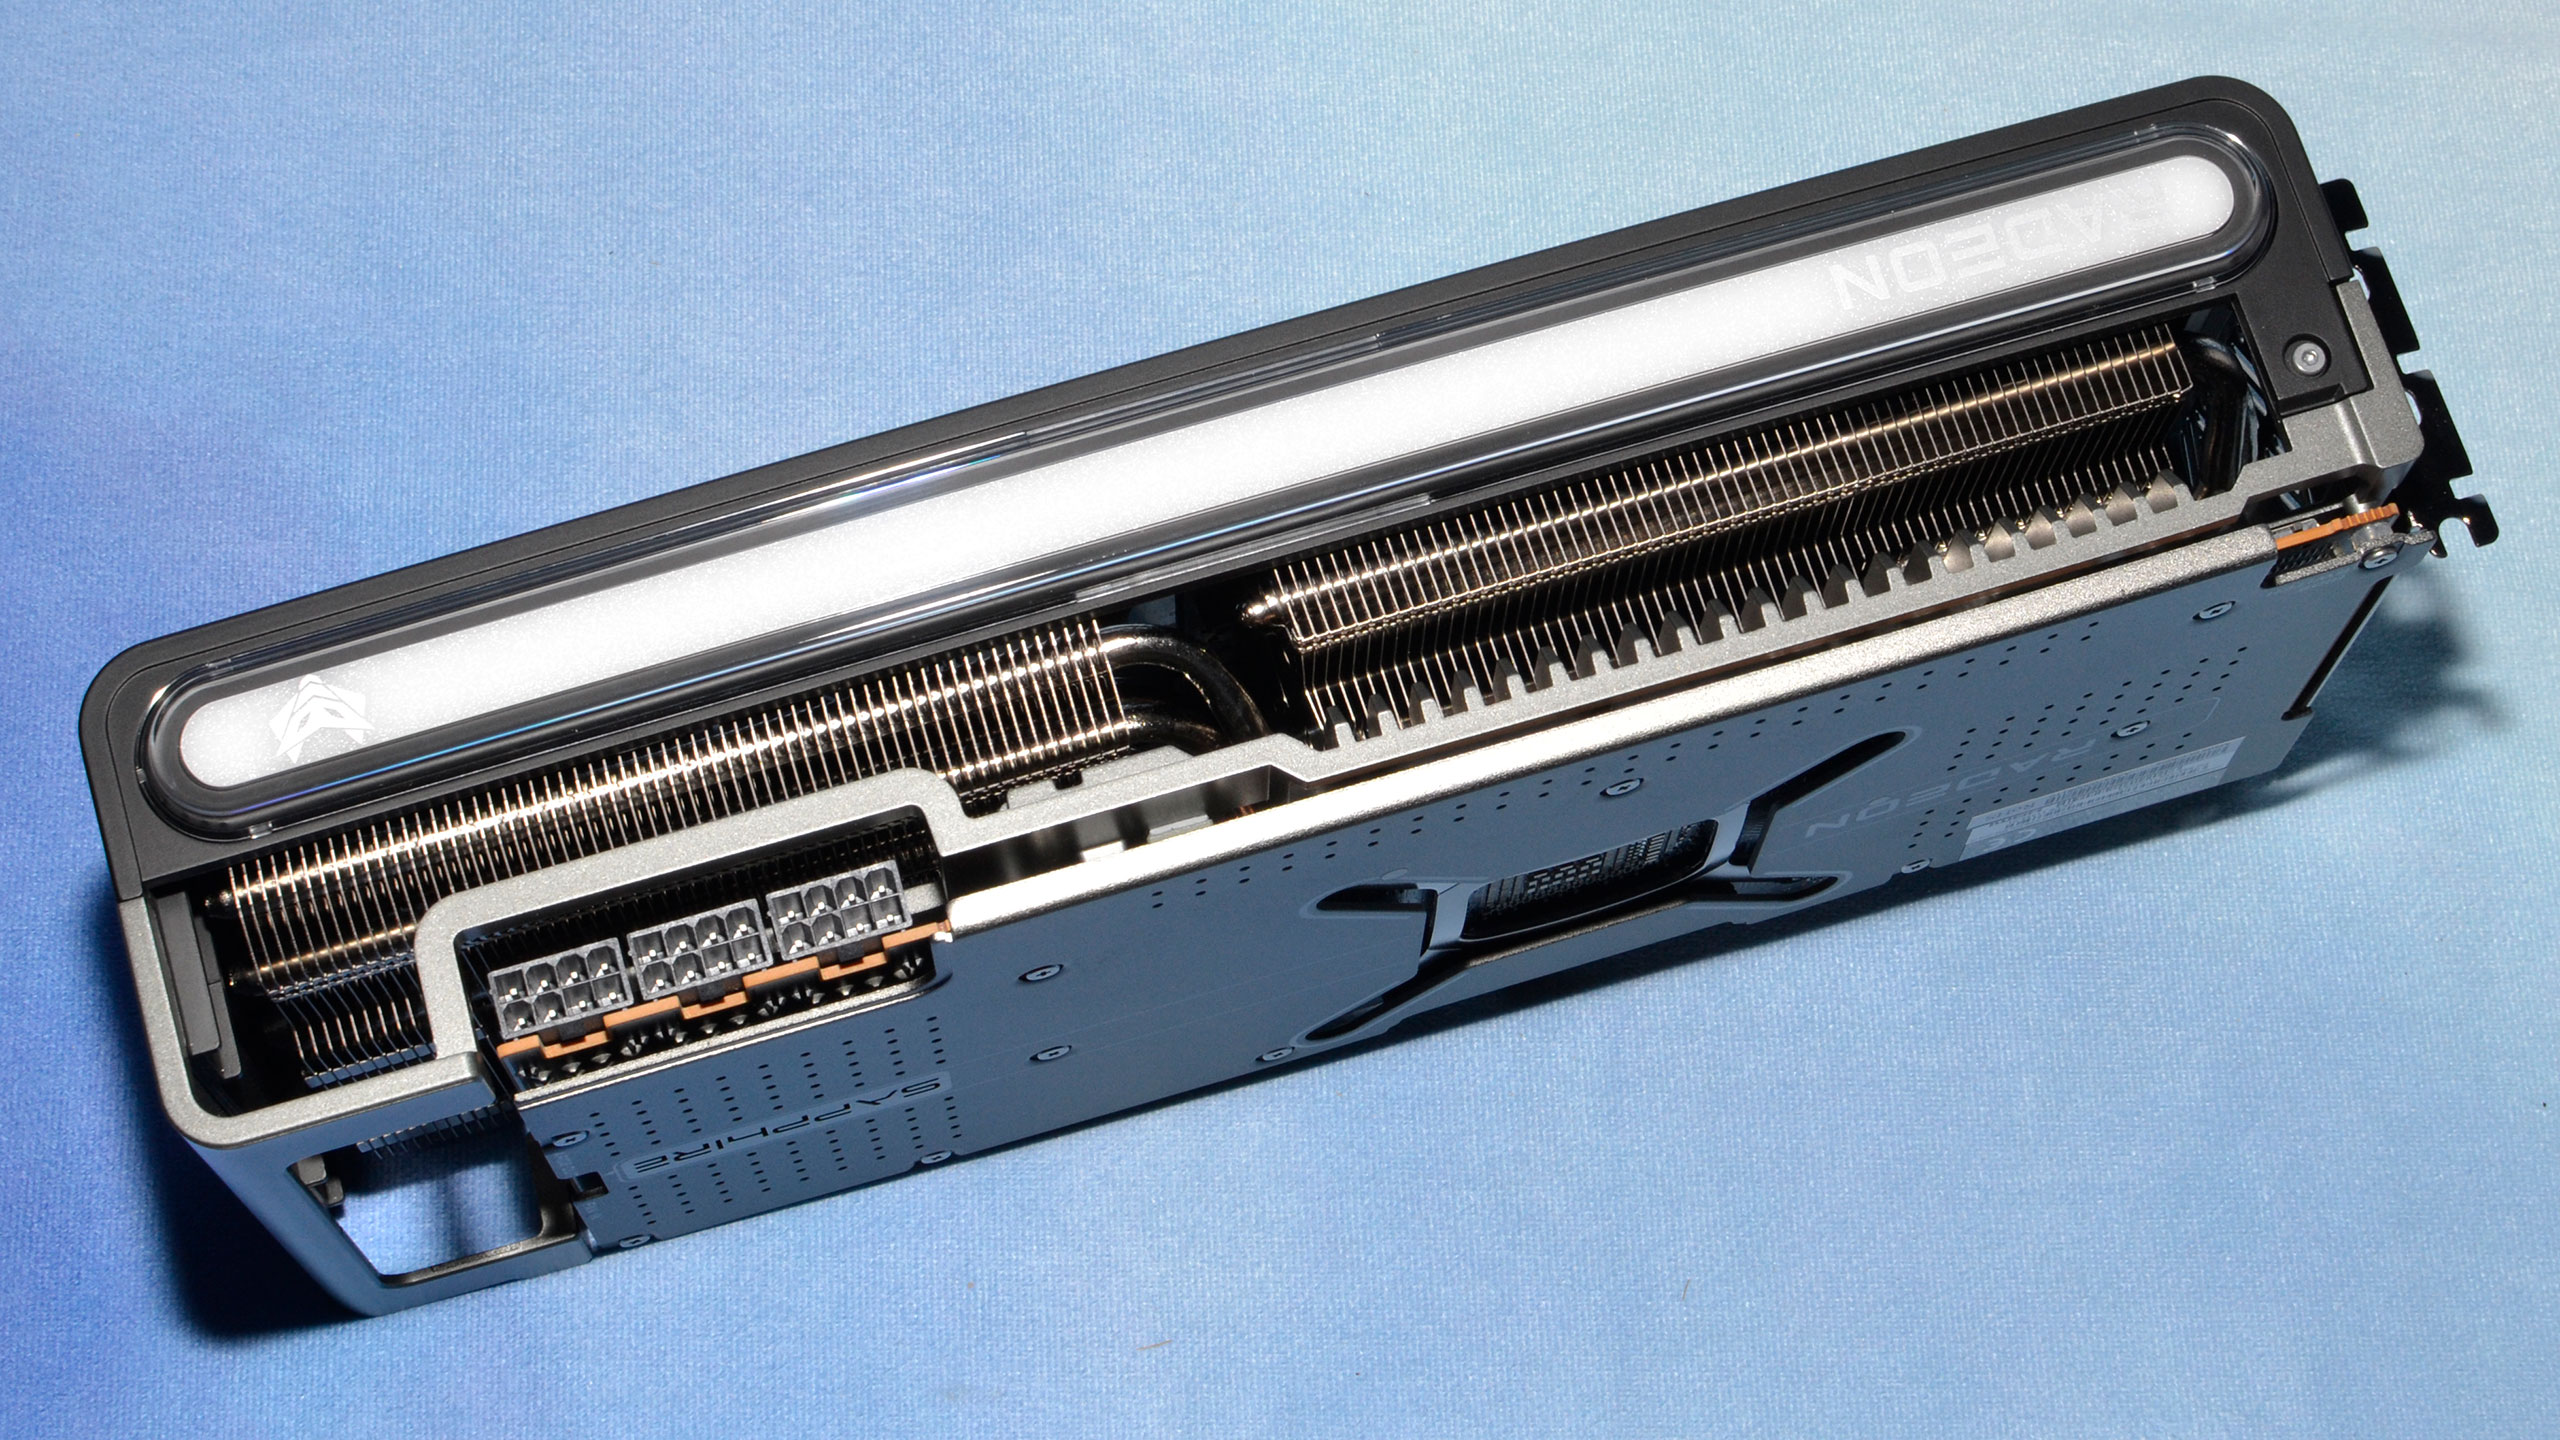
The card incidentally is quite large. It measures 321 x 134 x 72 mm and weighs 1948g. That's lighter and slightly smaller than most of the third-party RTX 4090 cards we've reviewed of late (see: Asus ROG Strix 4090, Colorful 4090 Vulcan, Gigabyte 4090 Gaming OC, and MSI 4090 Suprim Liquid-X), but not by much — it's also slightly longer and thicker than the 4090 Founders Edition. You'll need 3.25-slots of clearance, though at least there's a triple-slot IO bracket to help support the card.
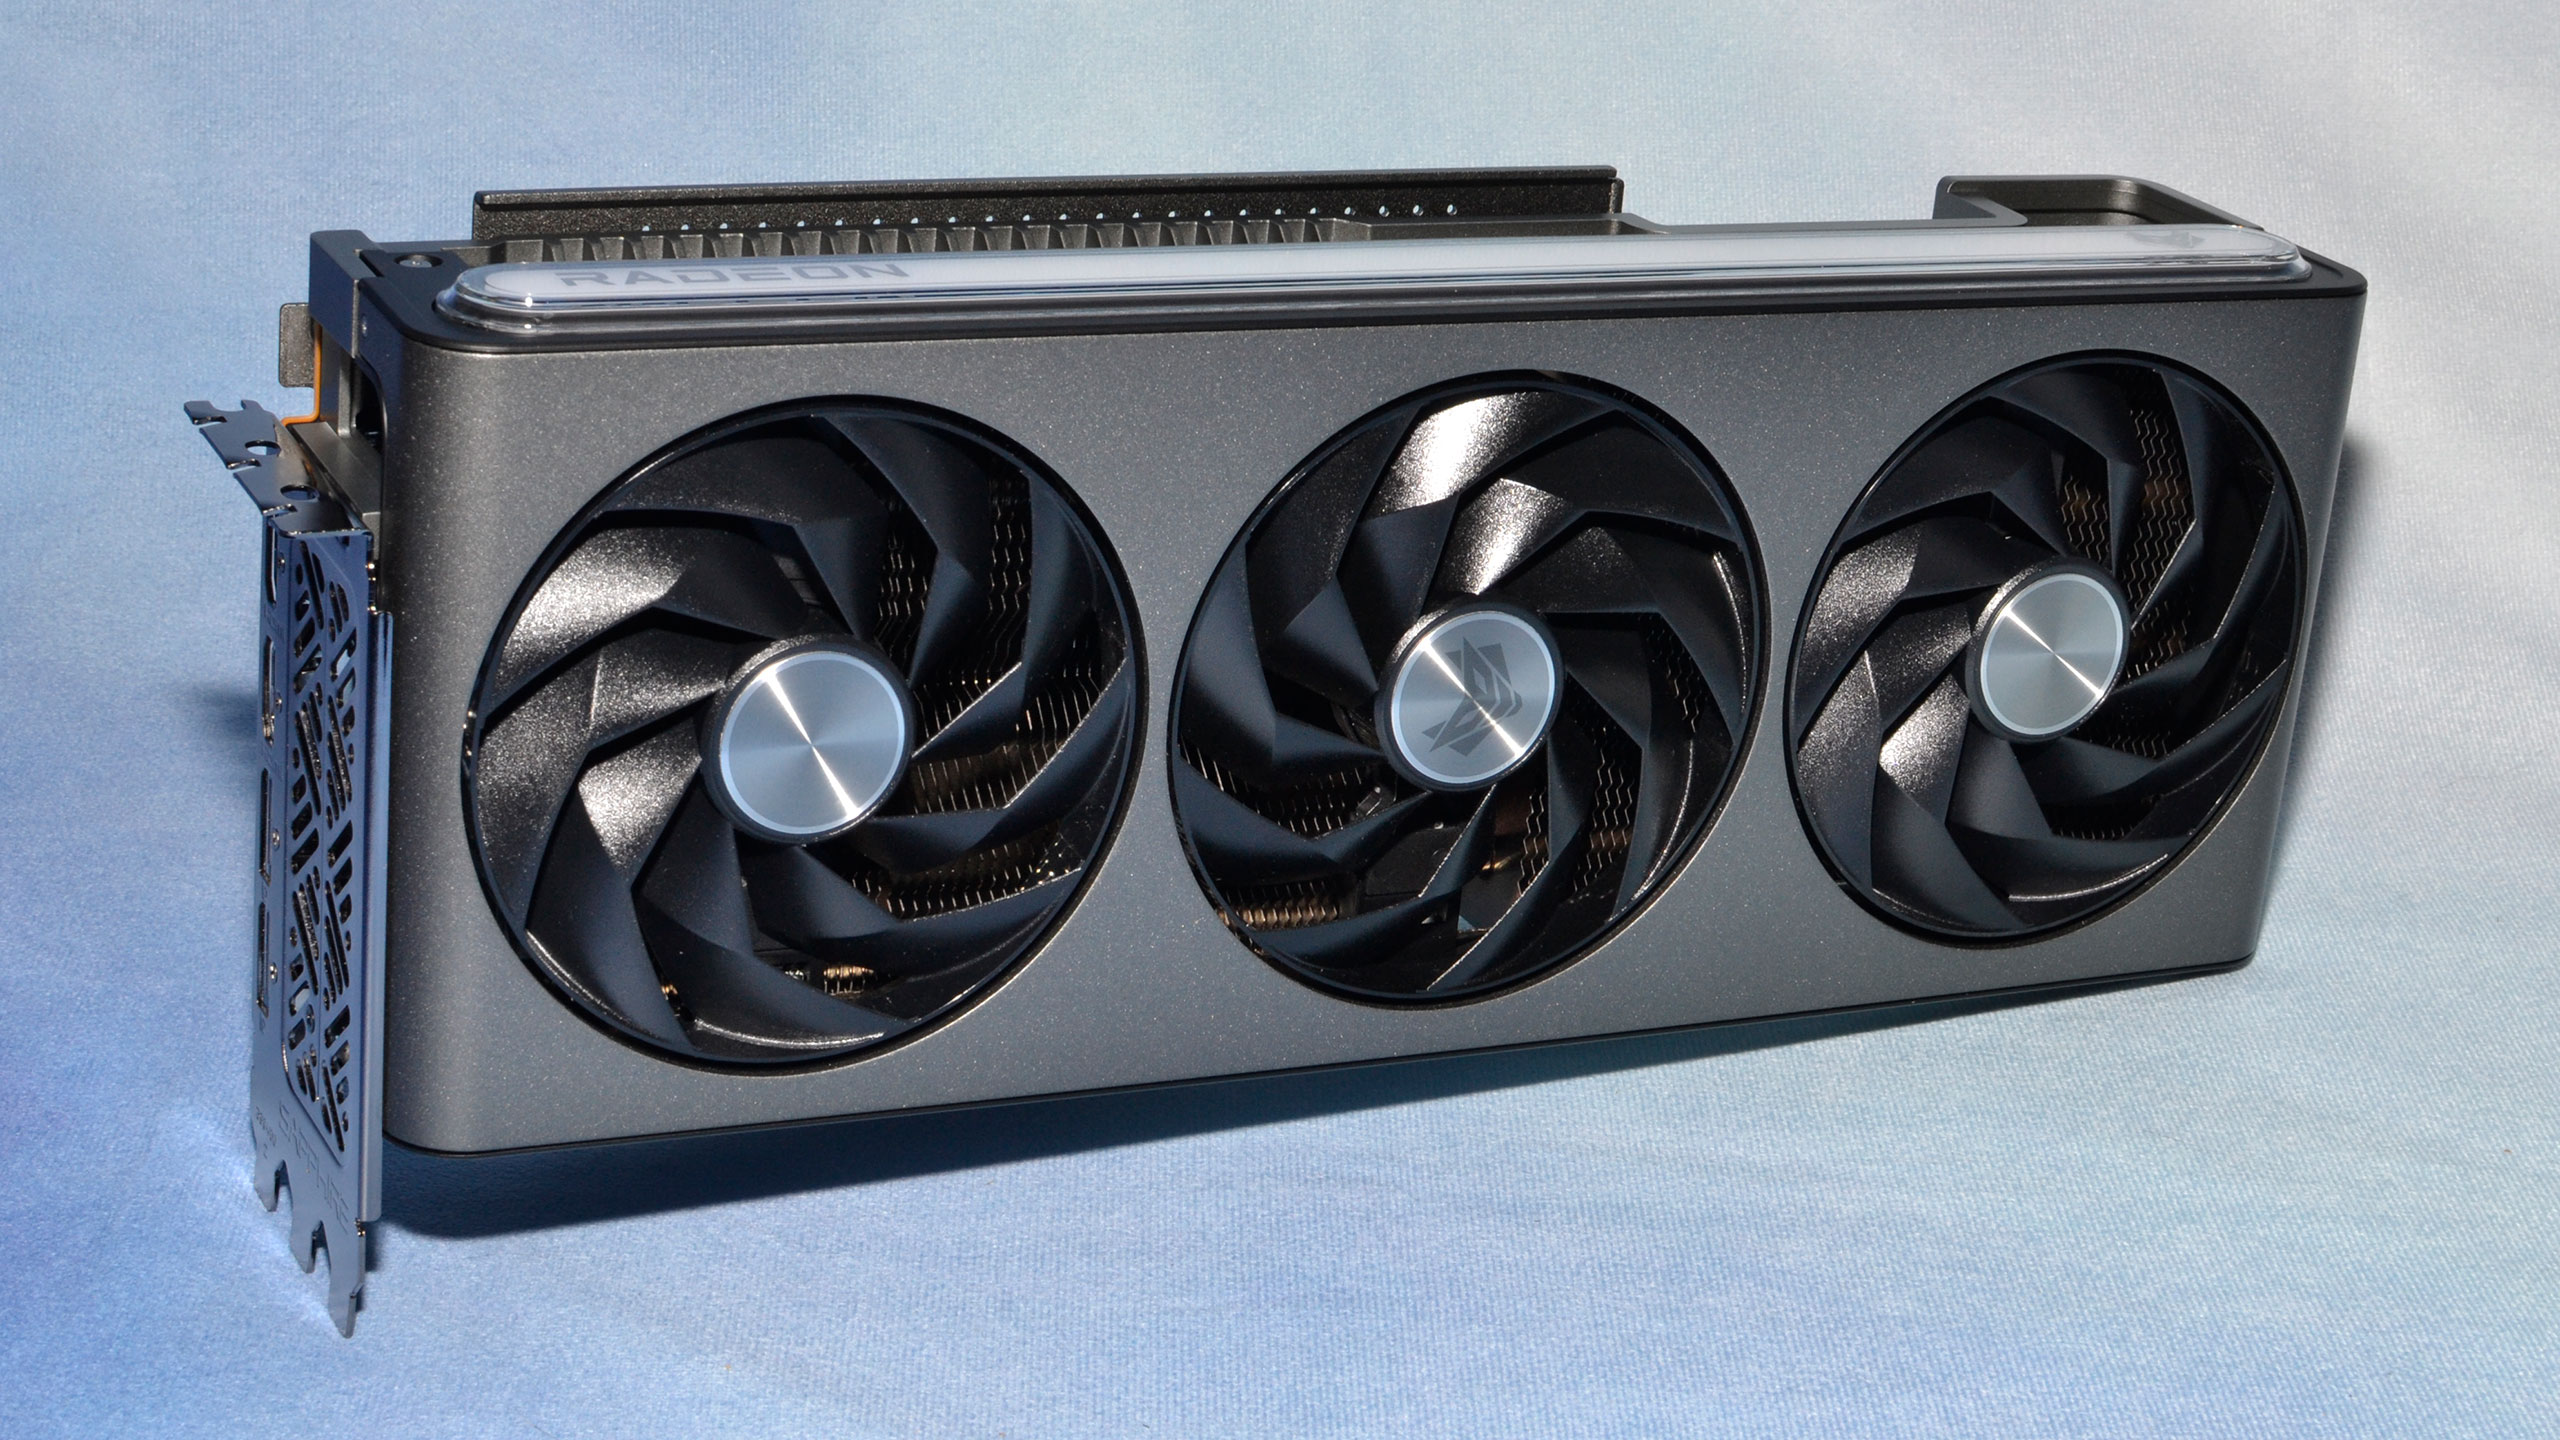
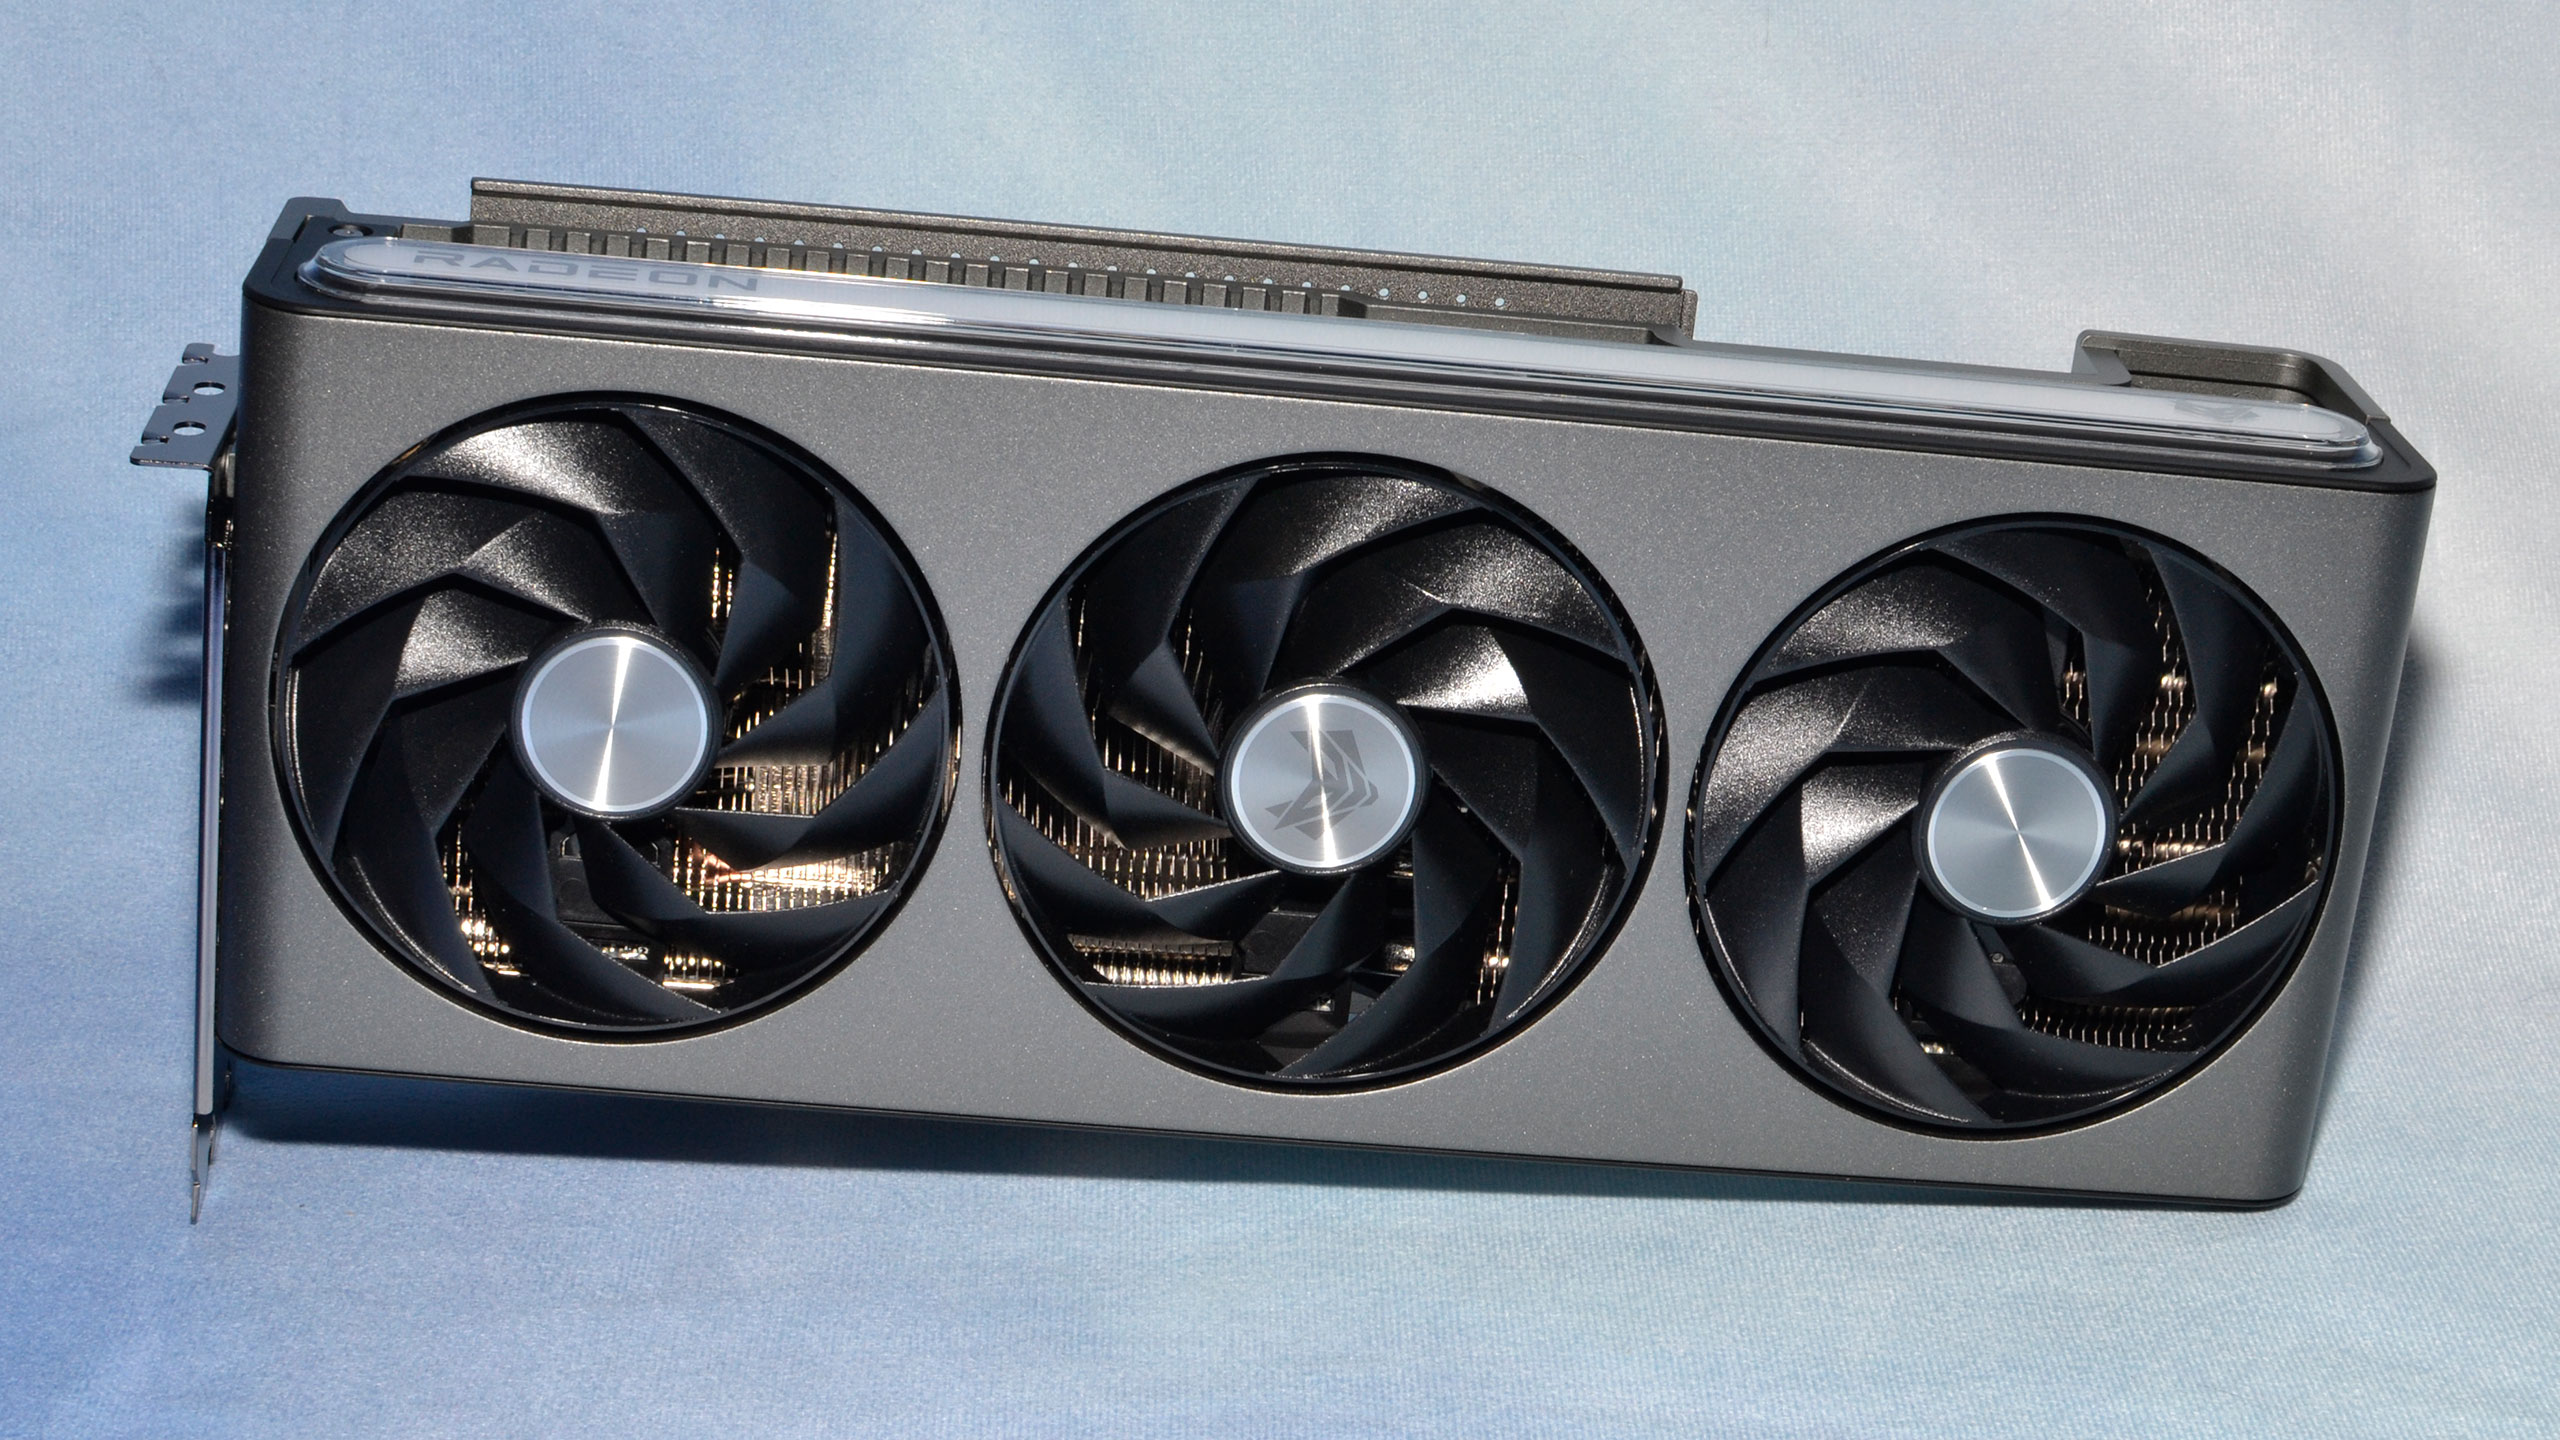
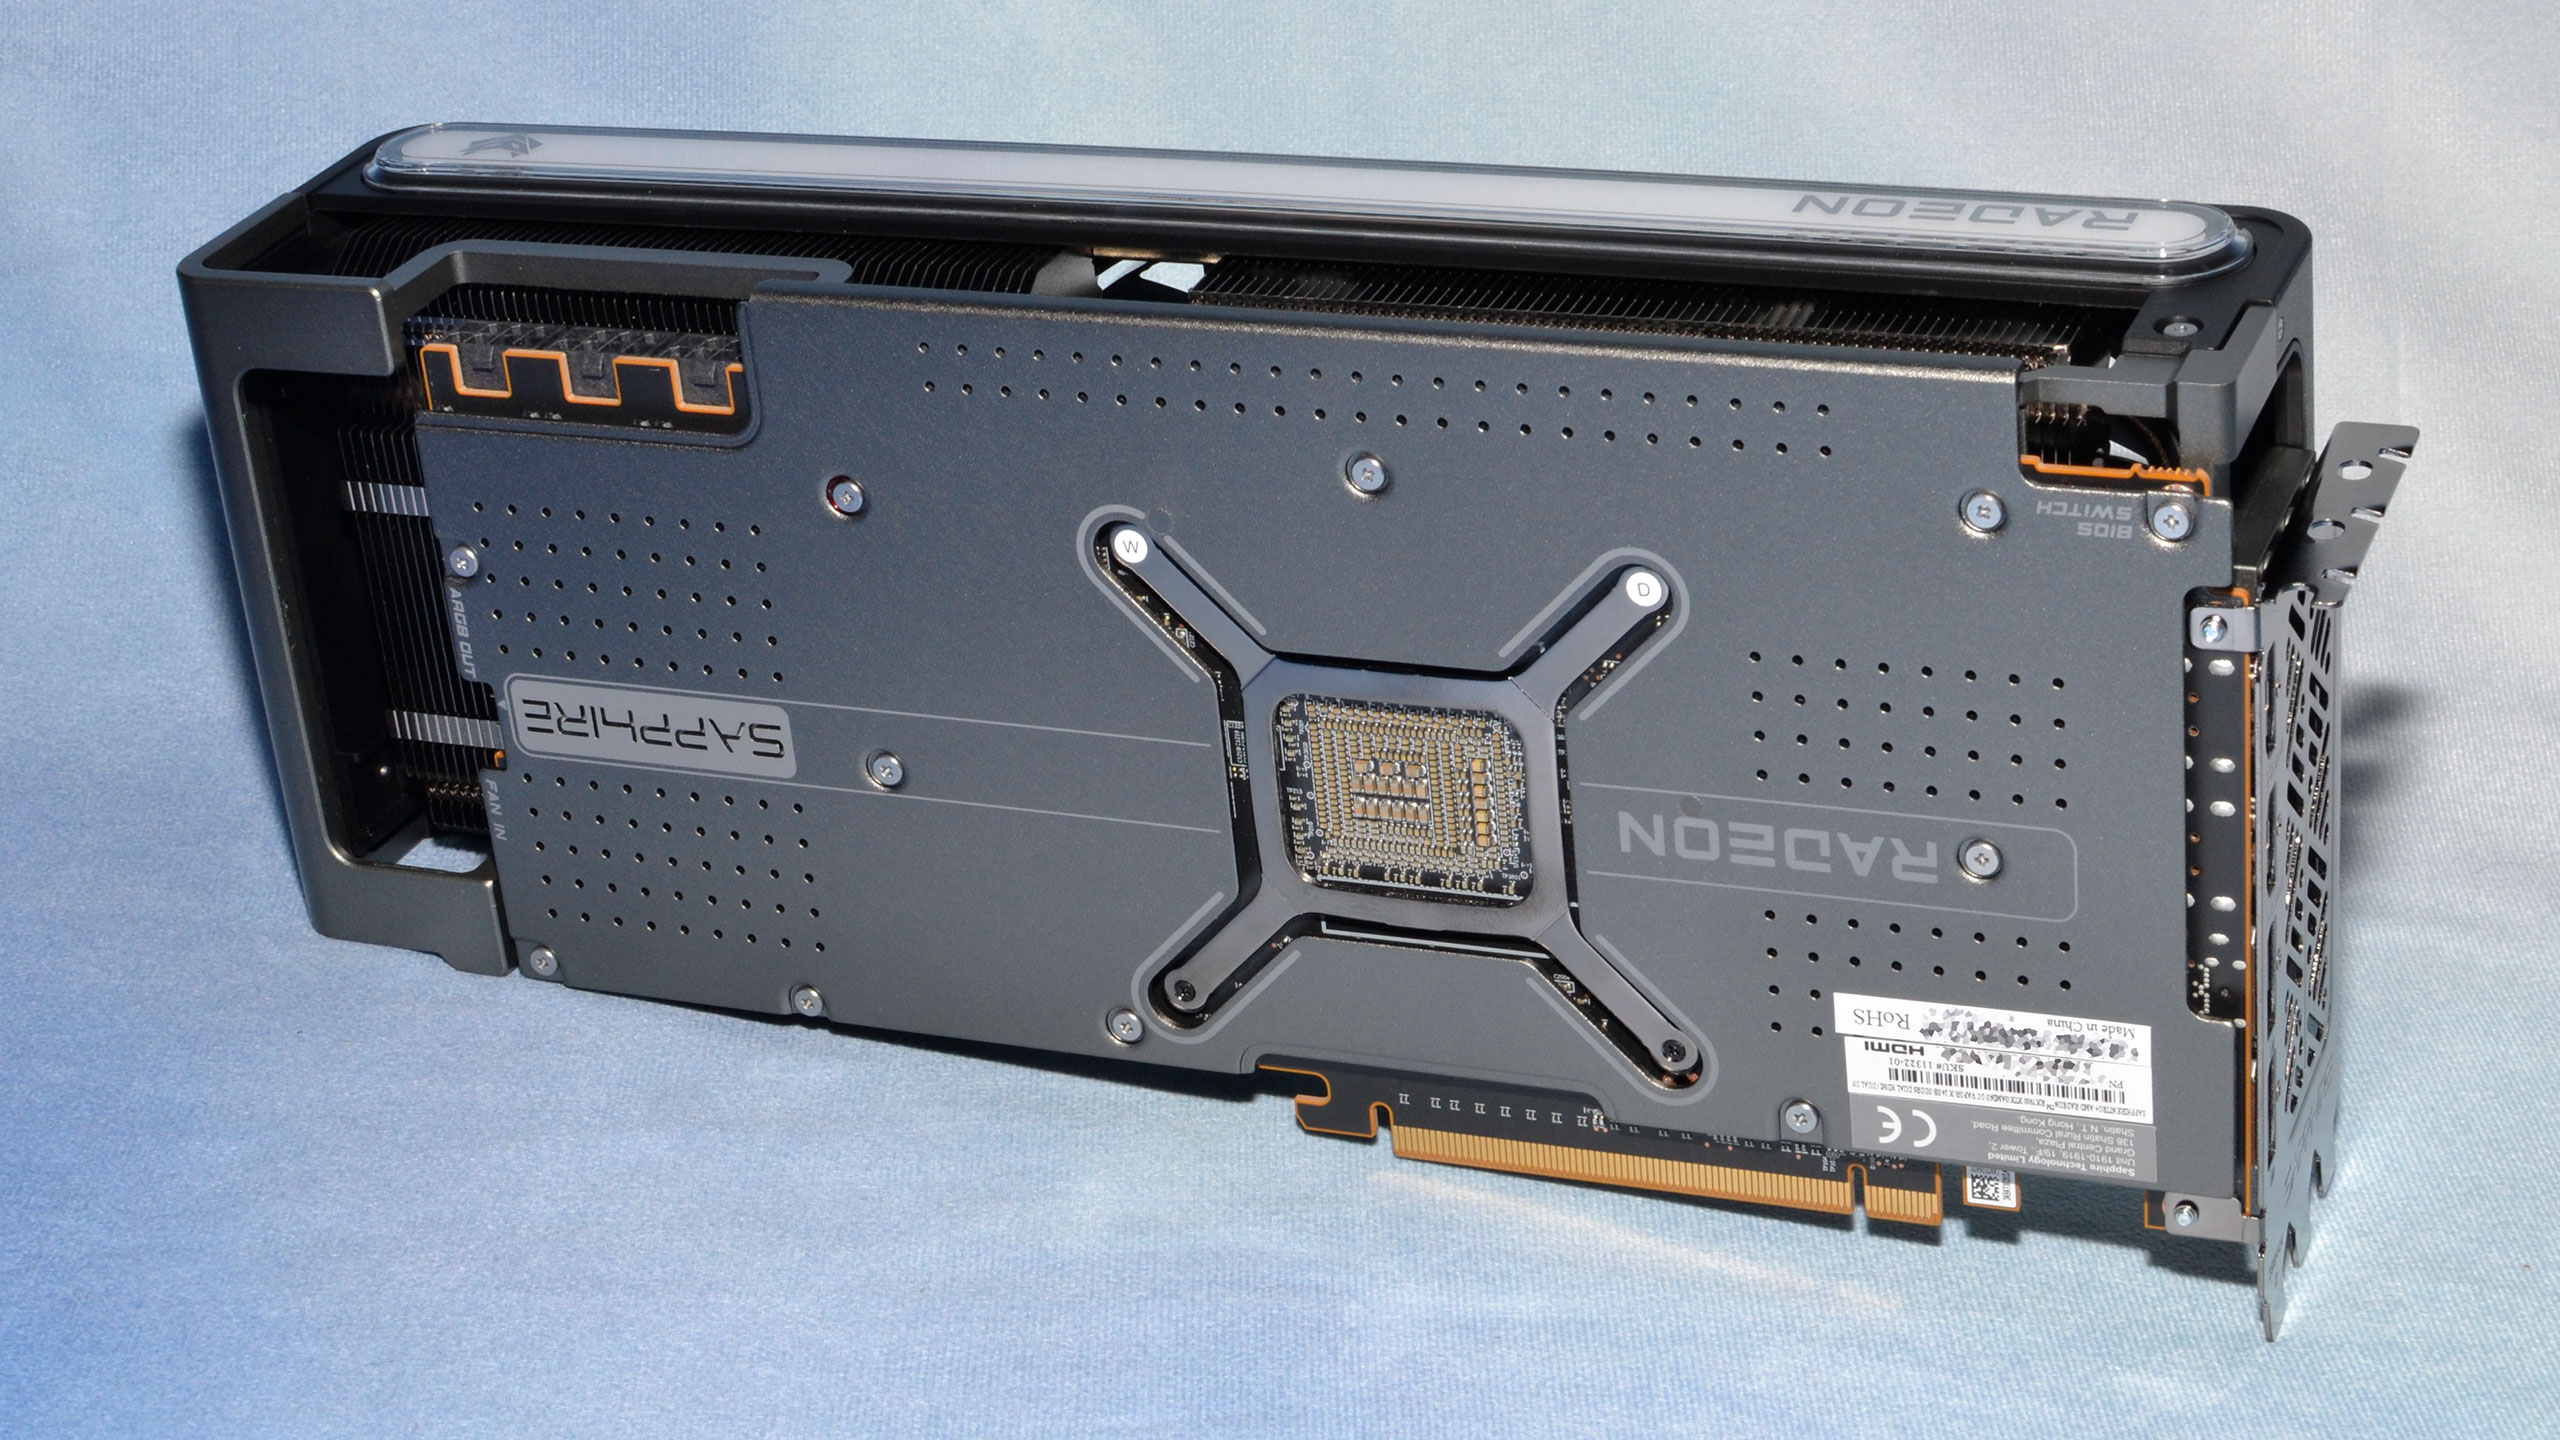
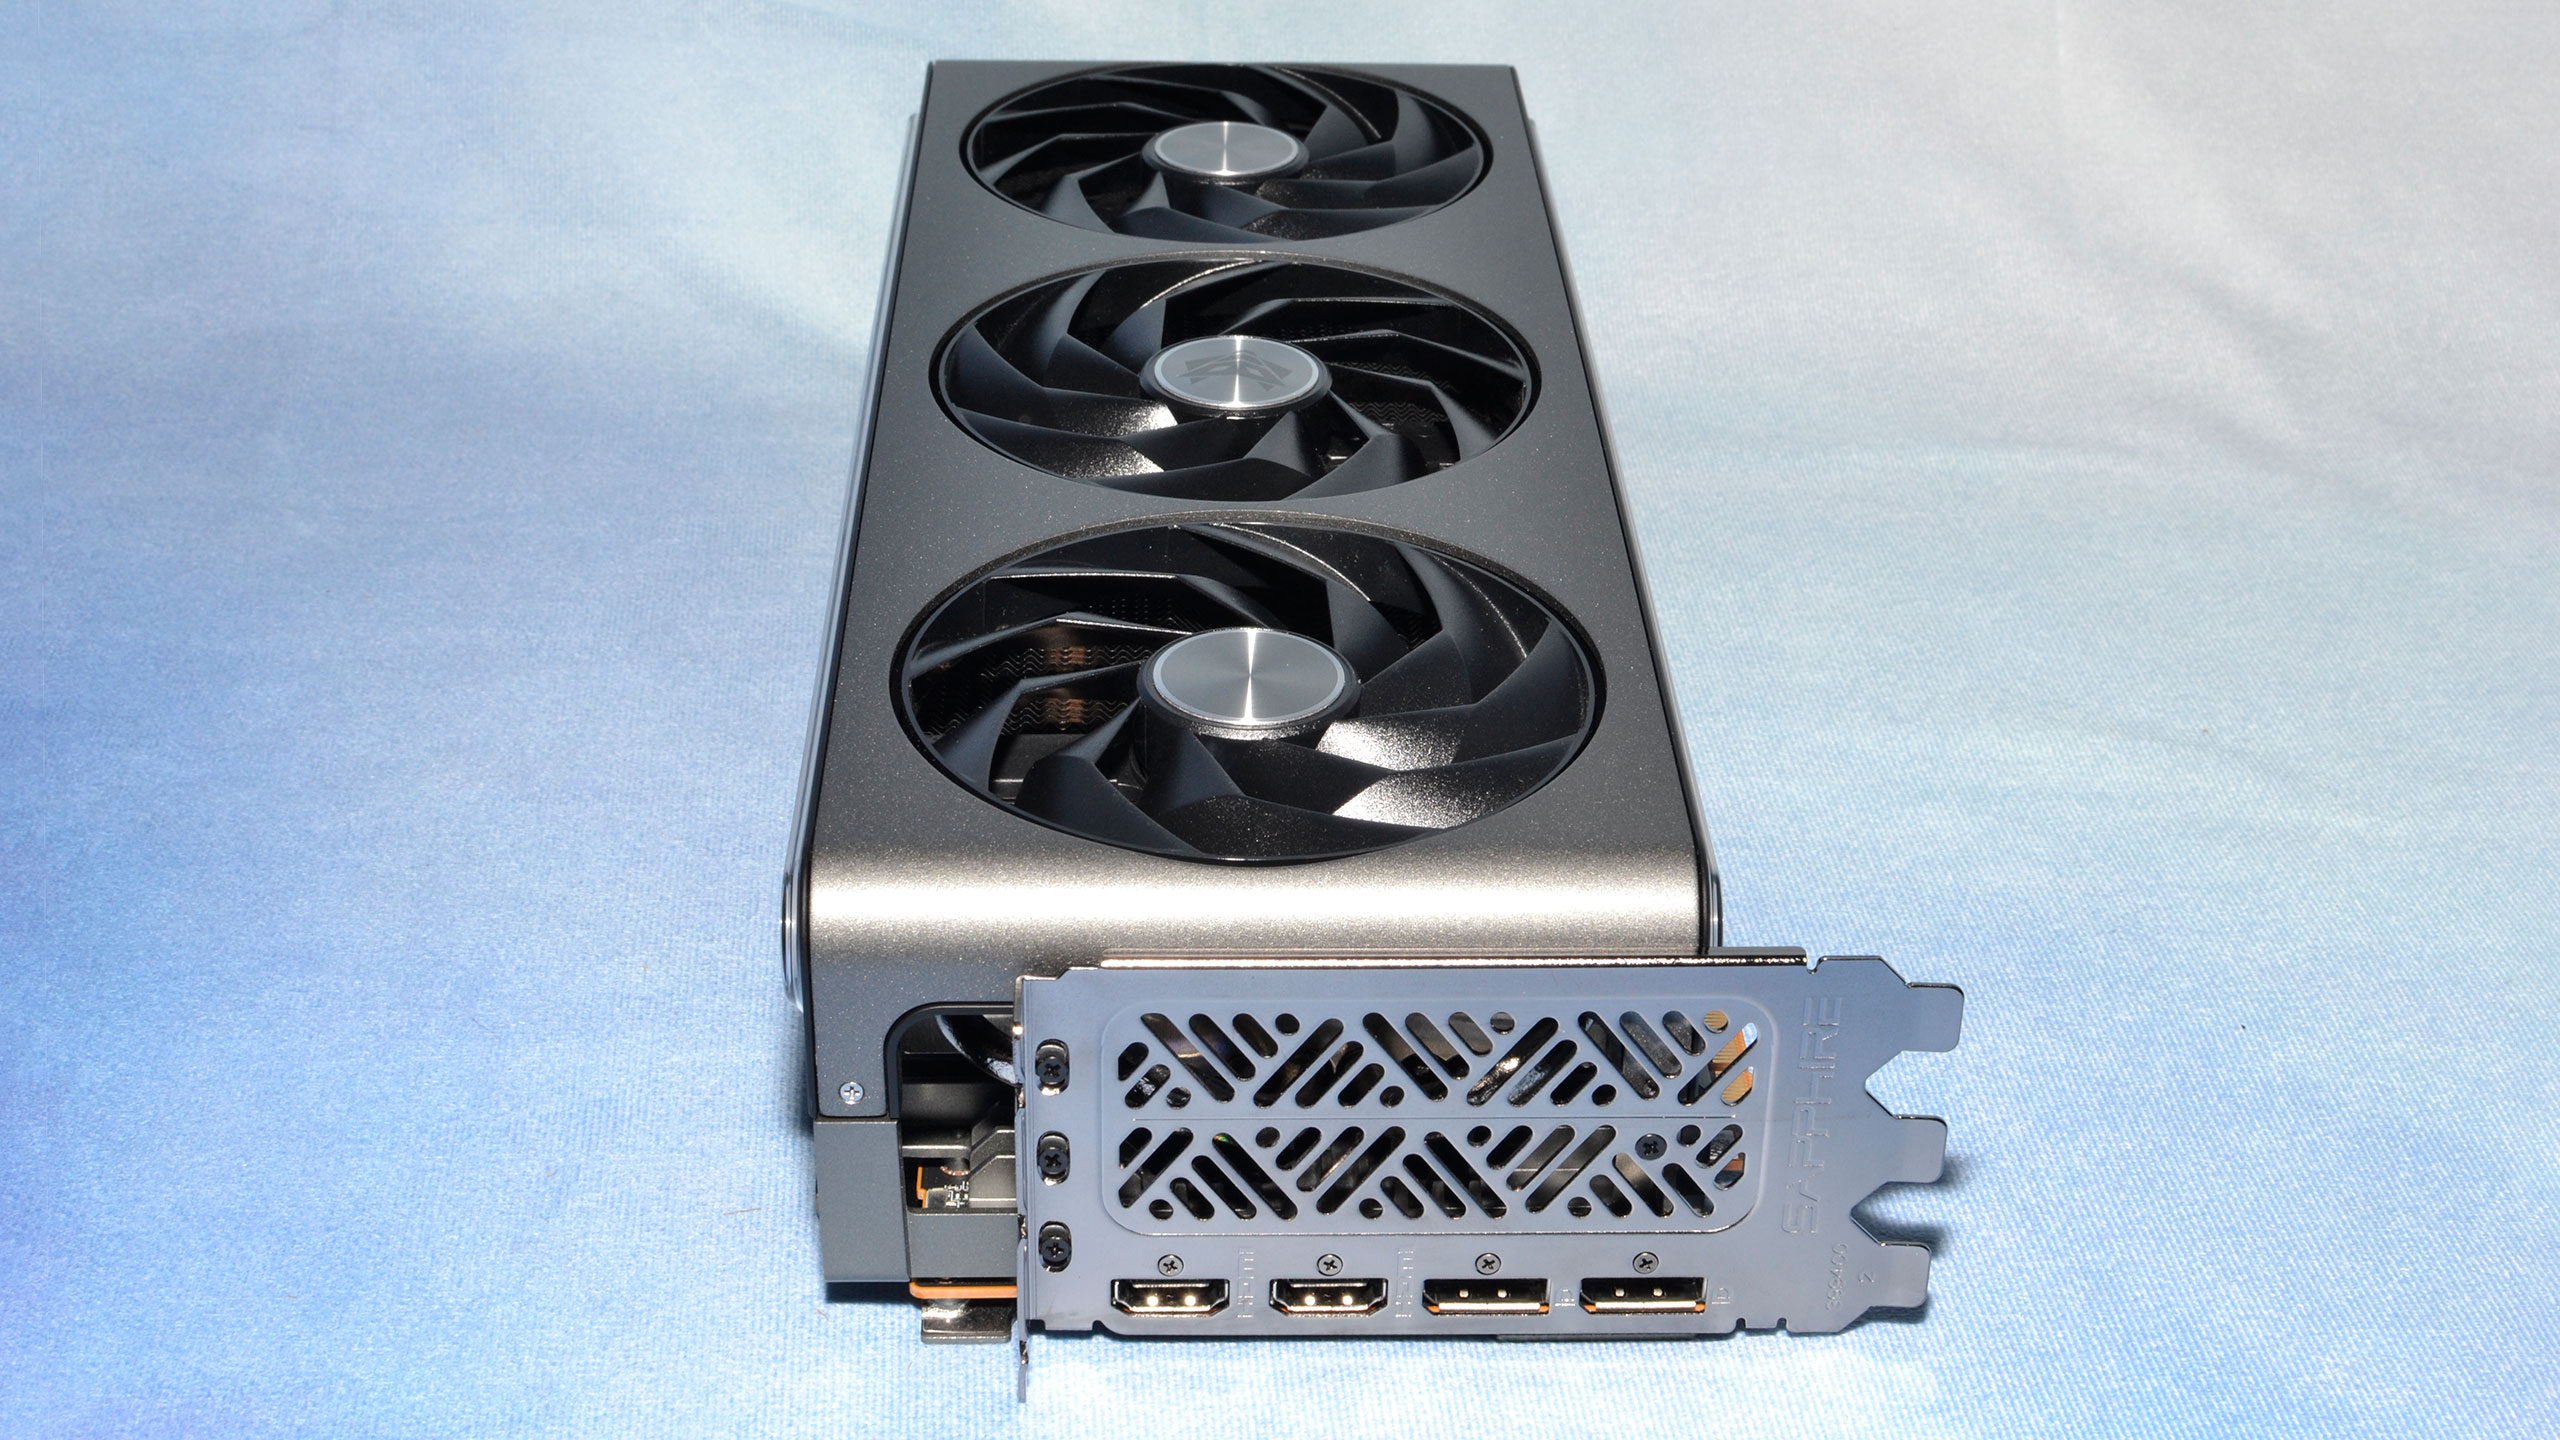
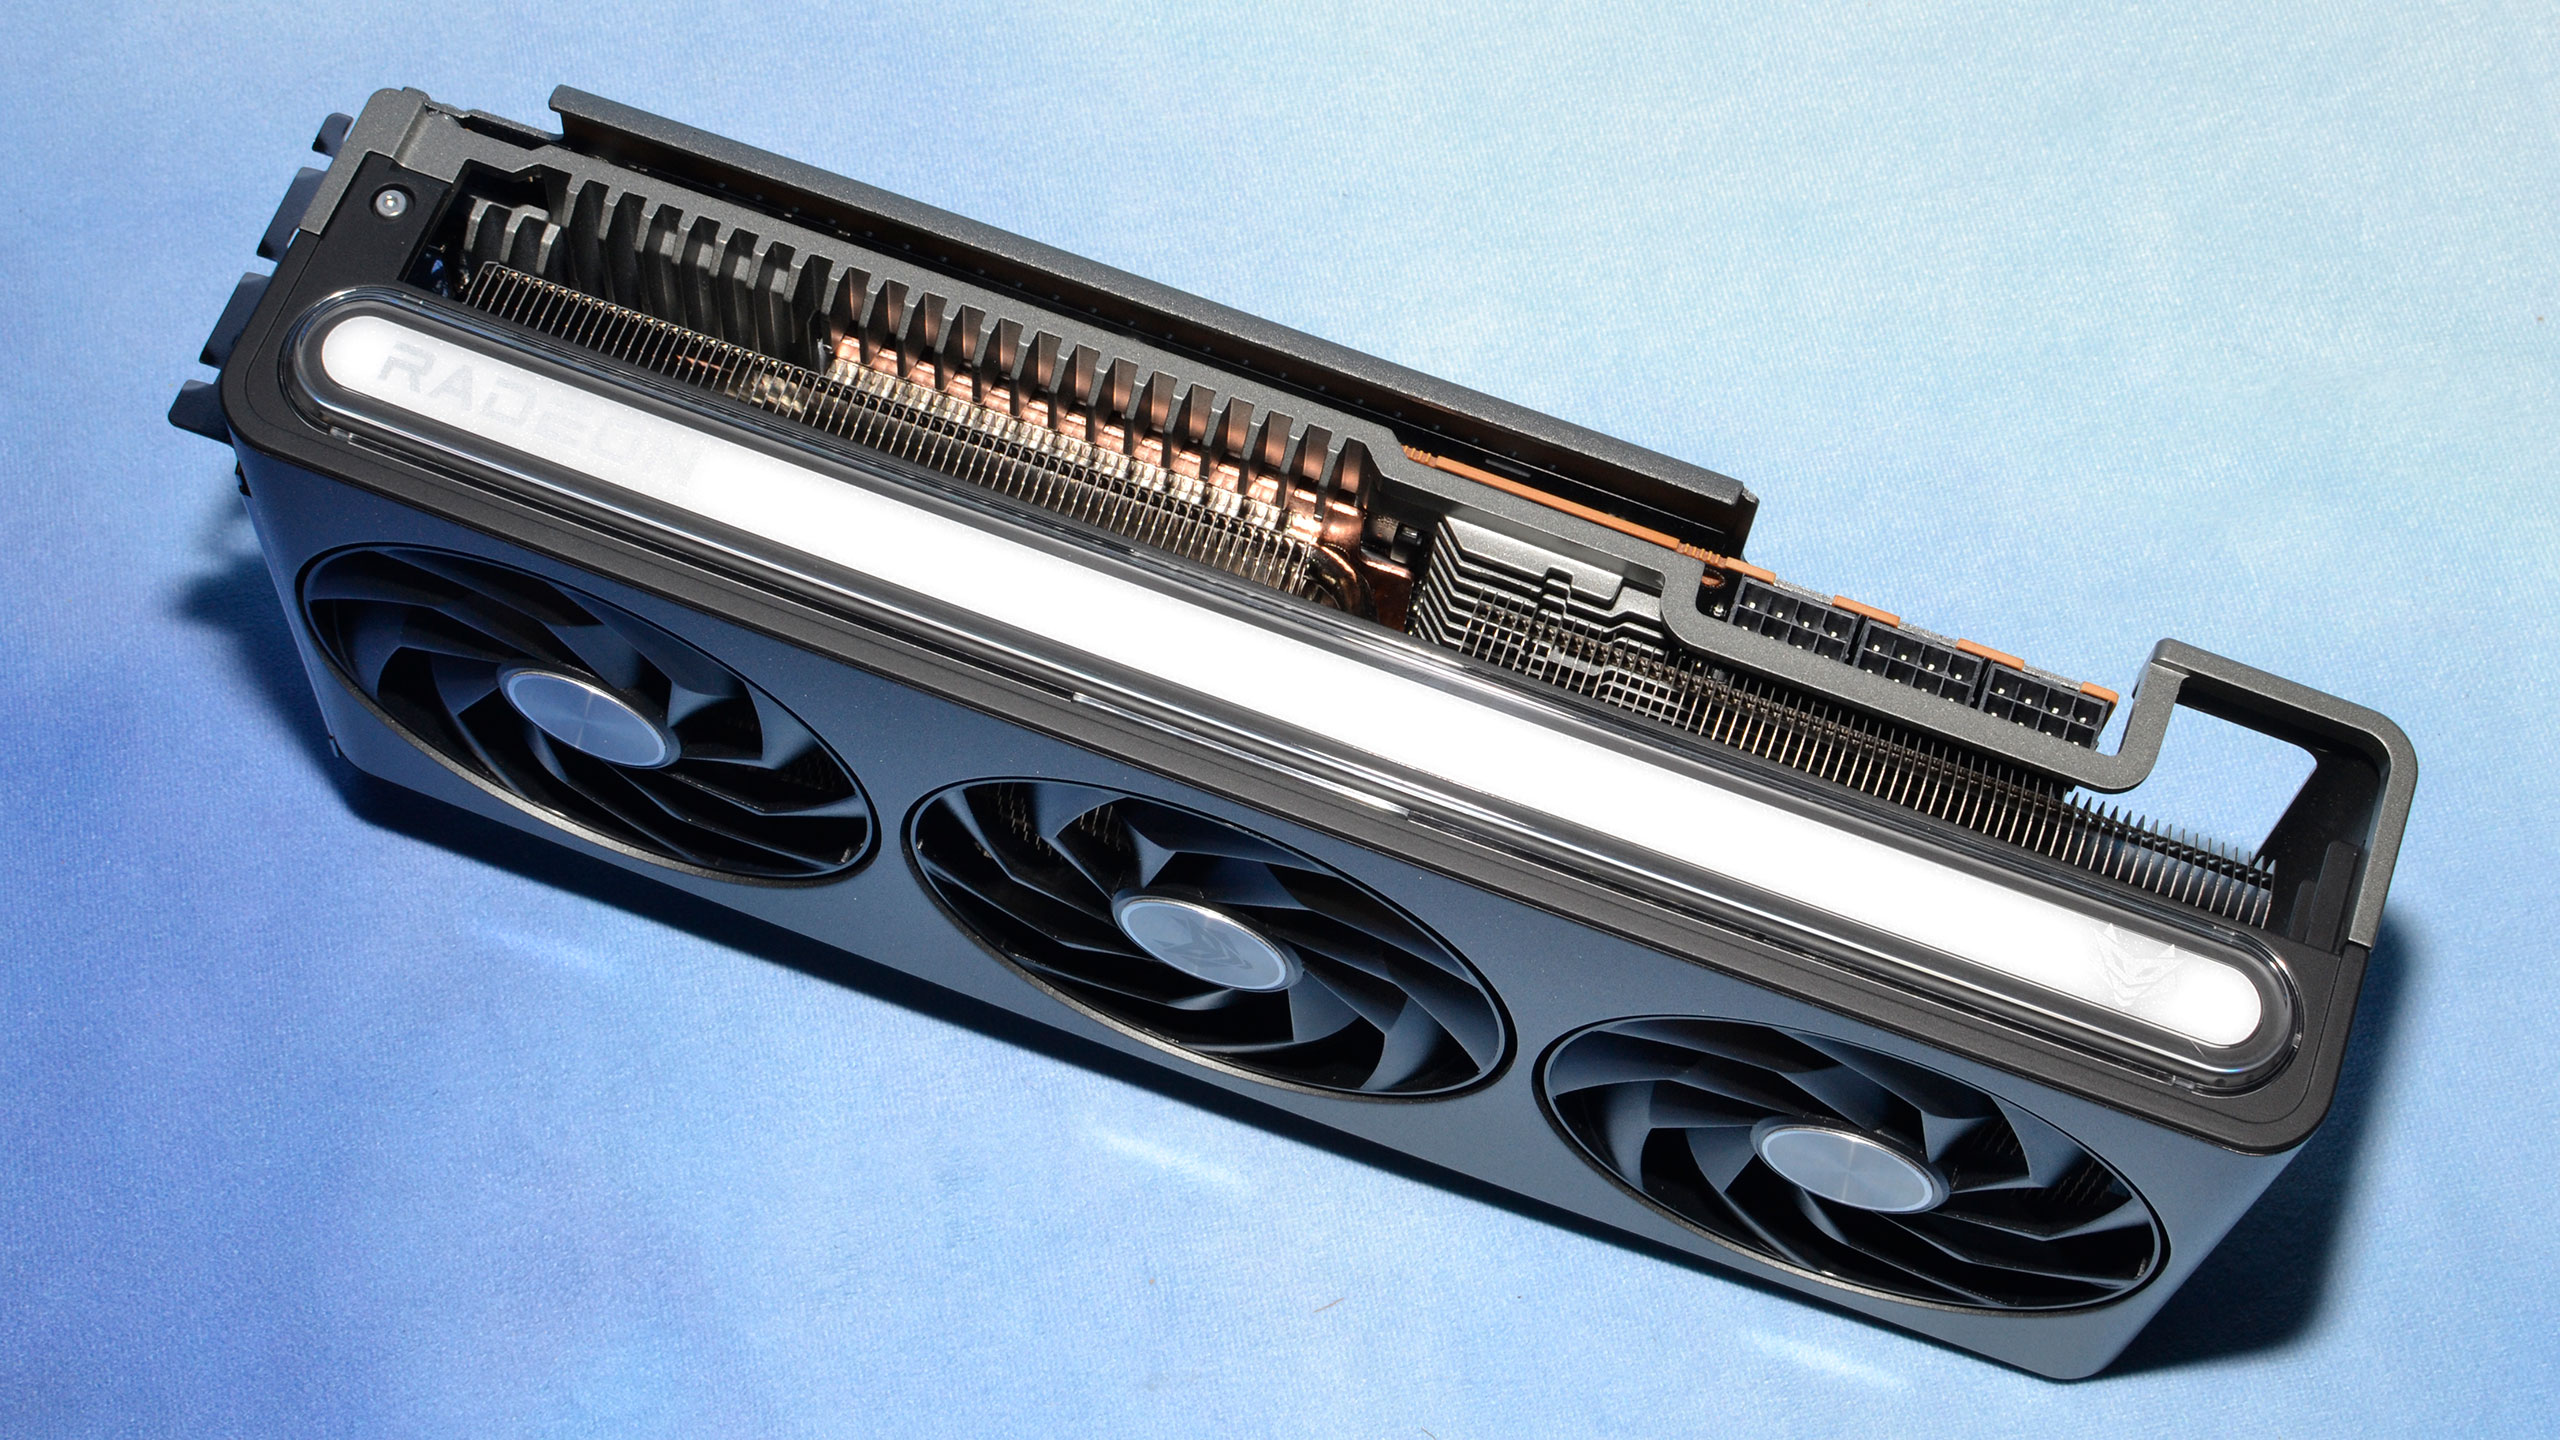
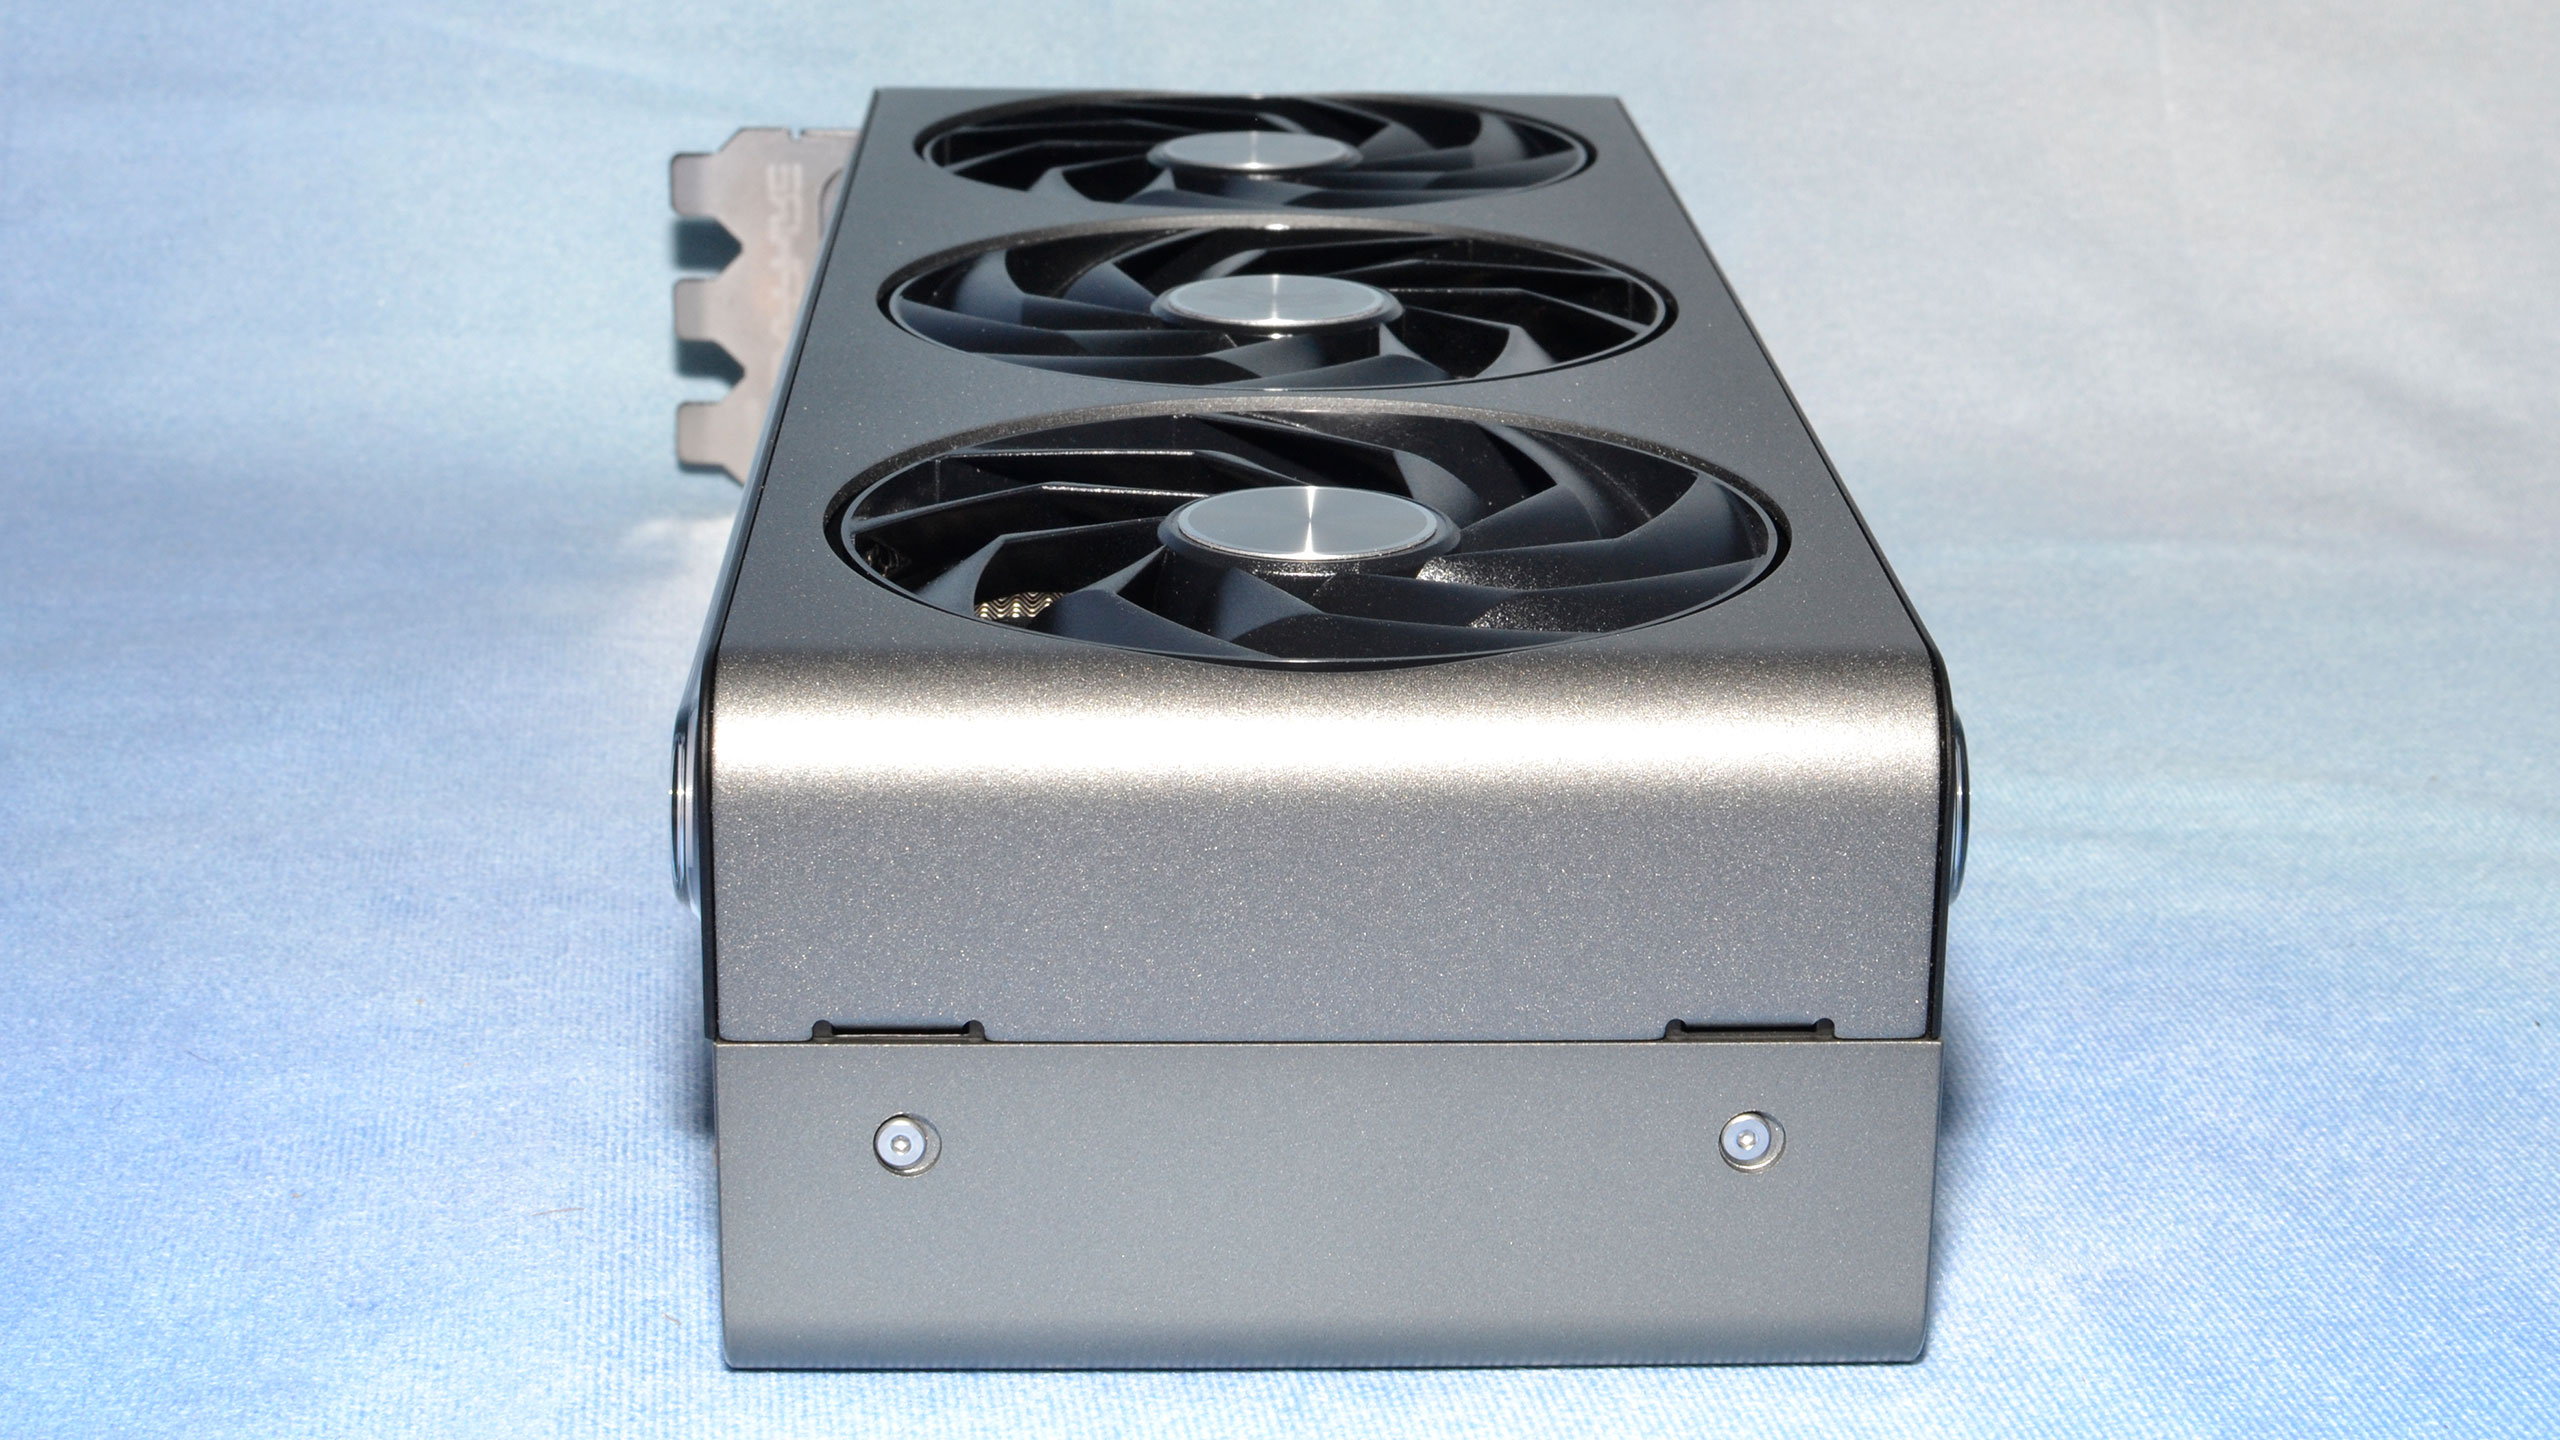
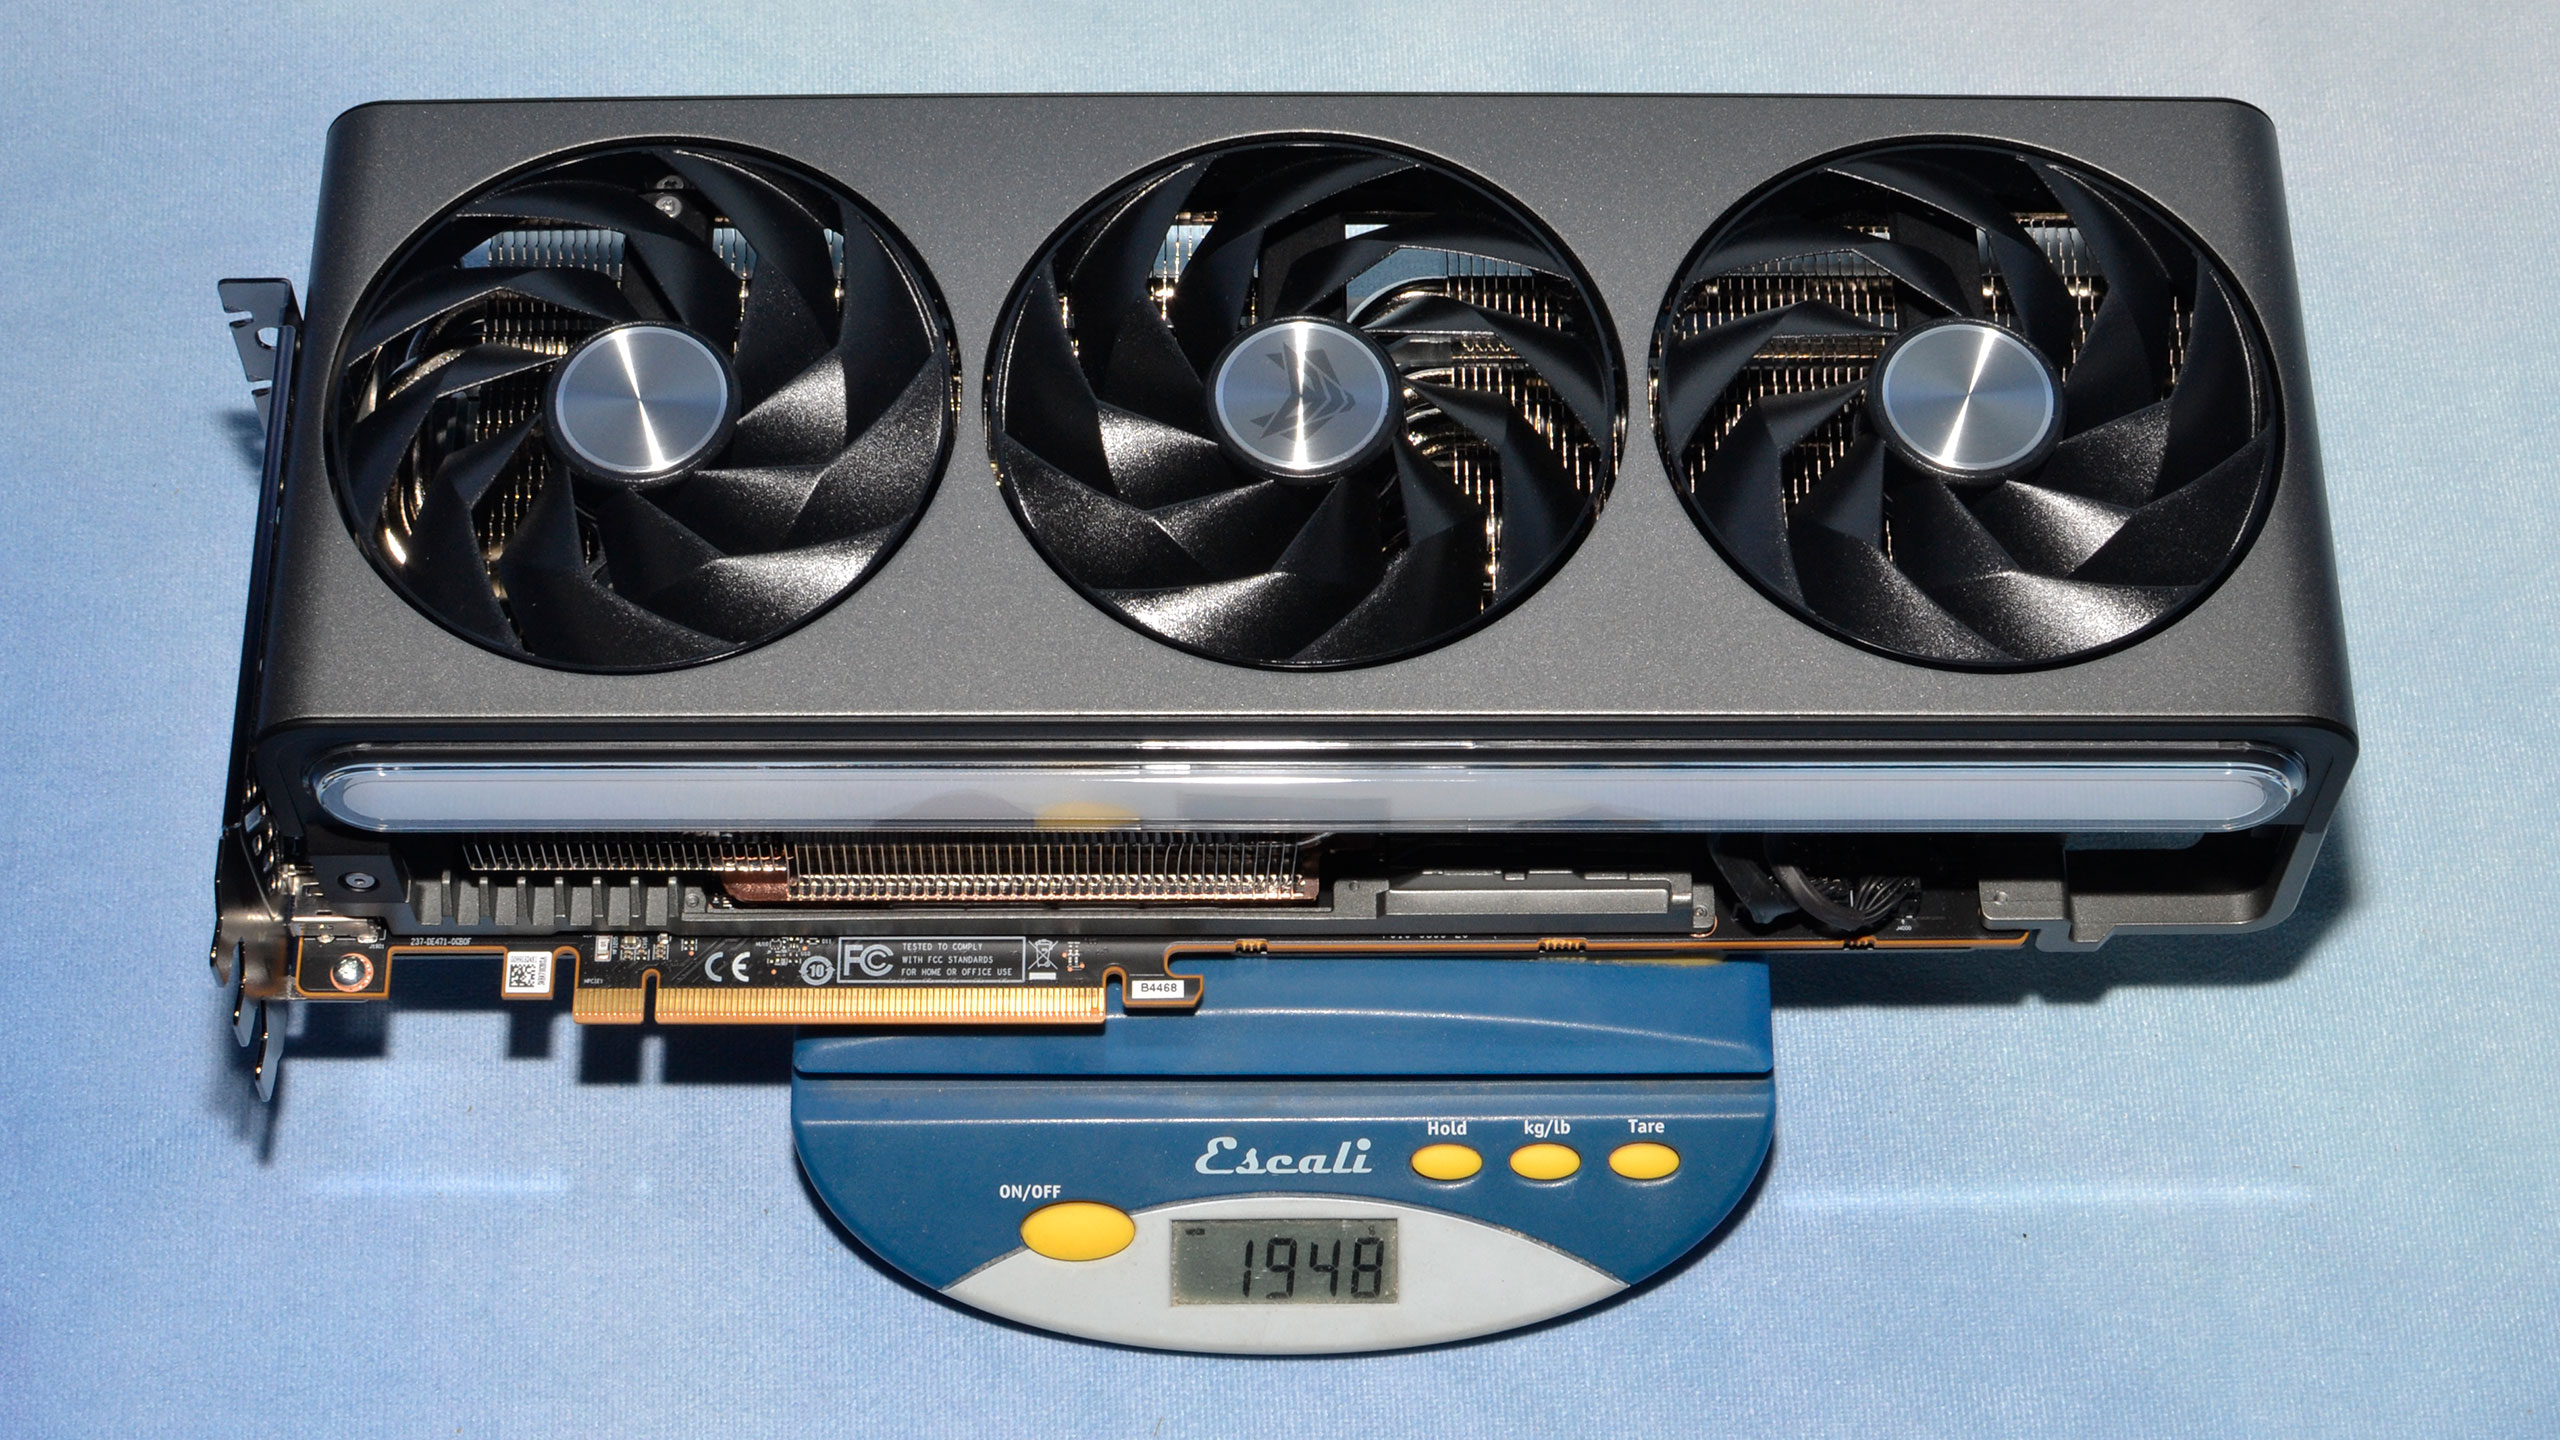
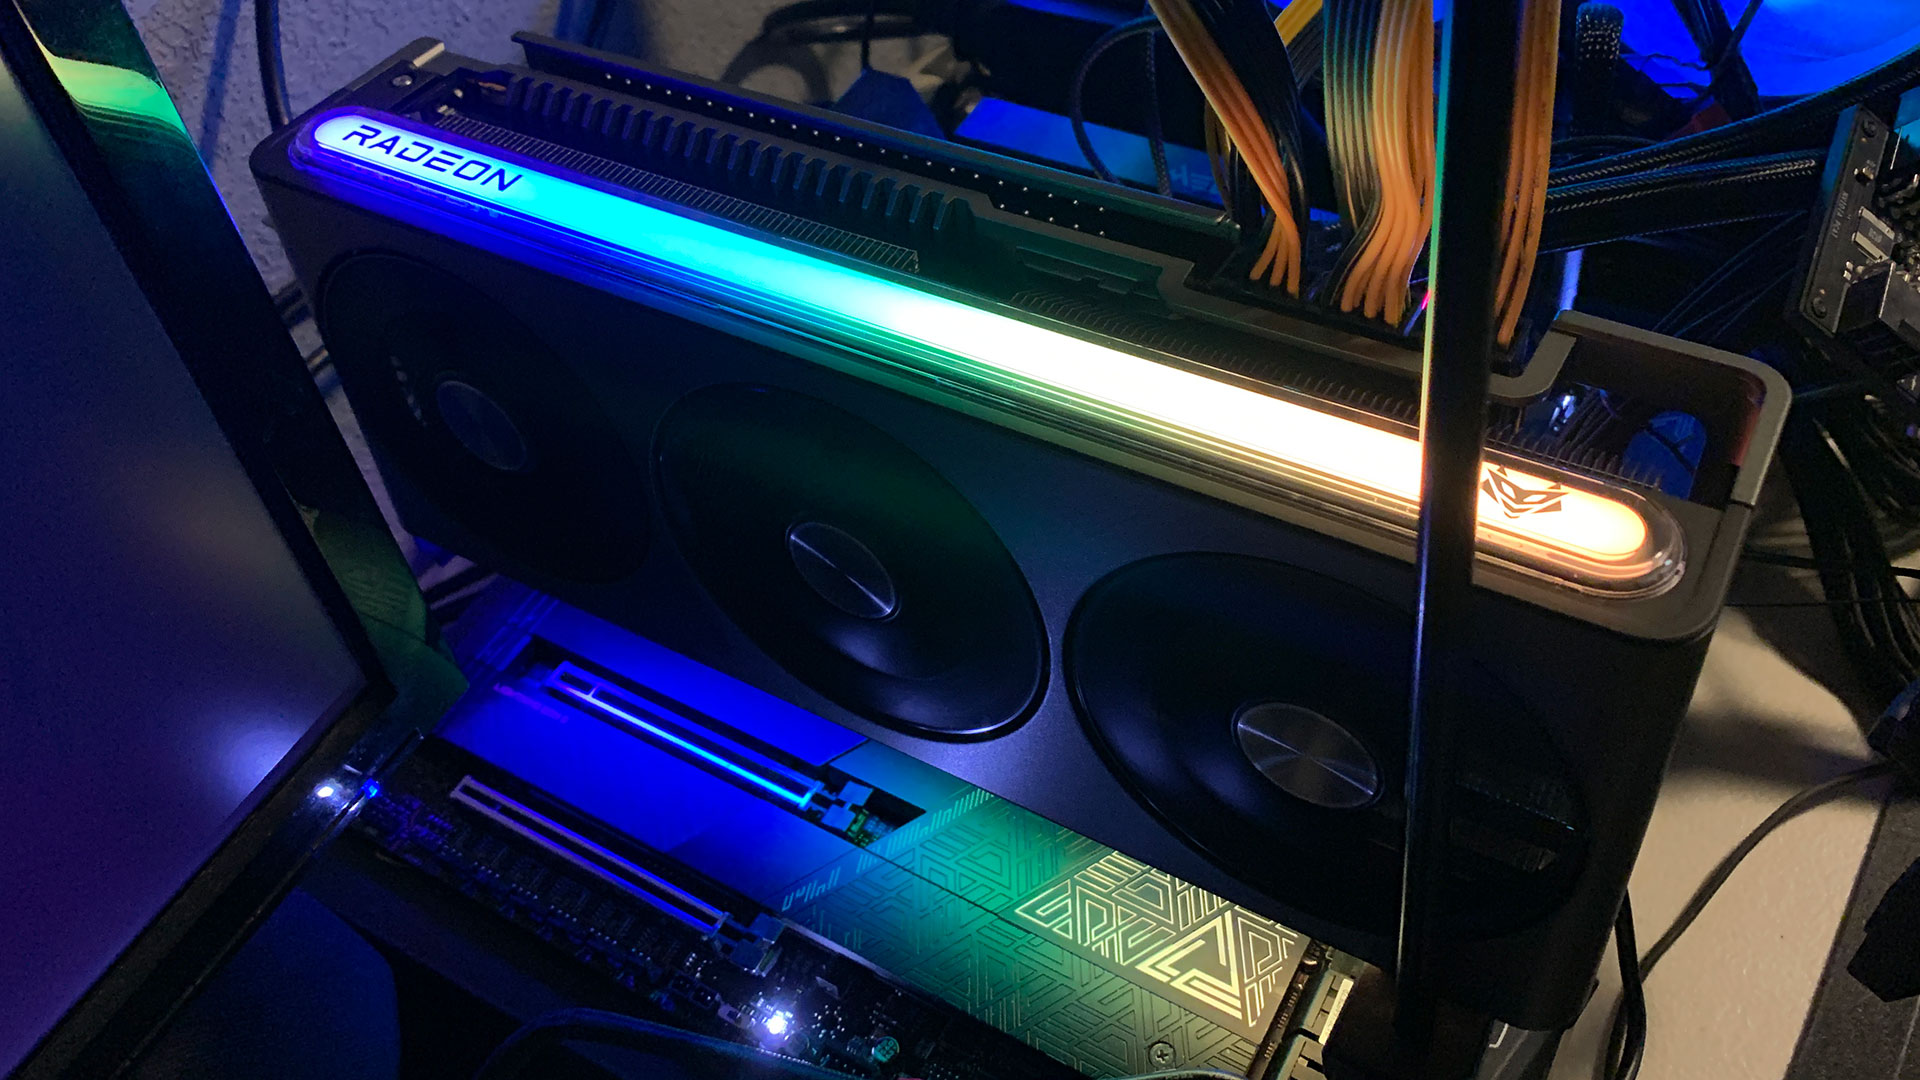
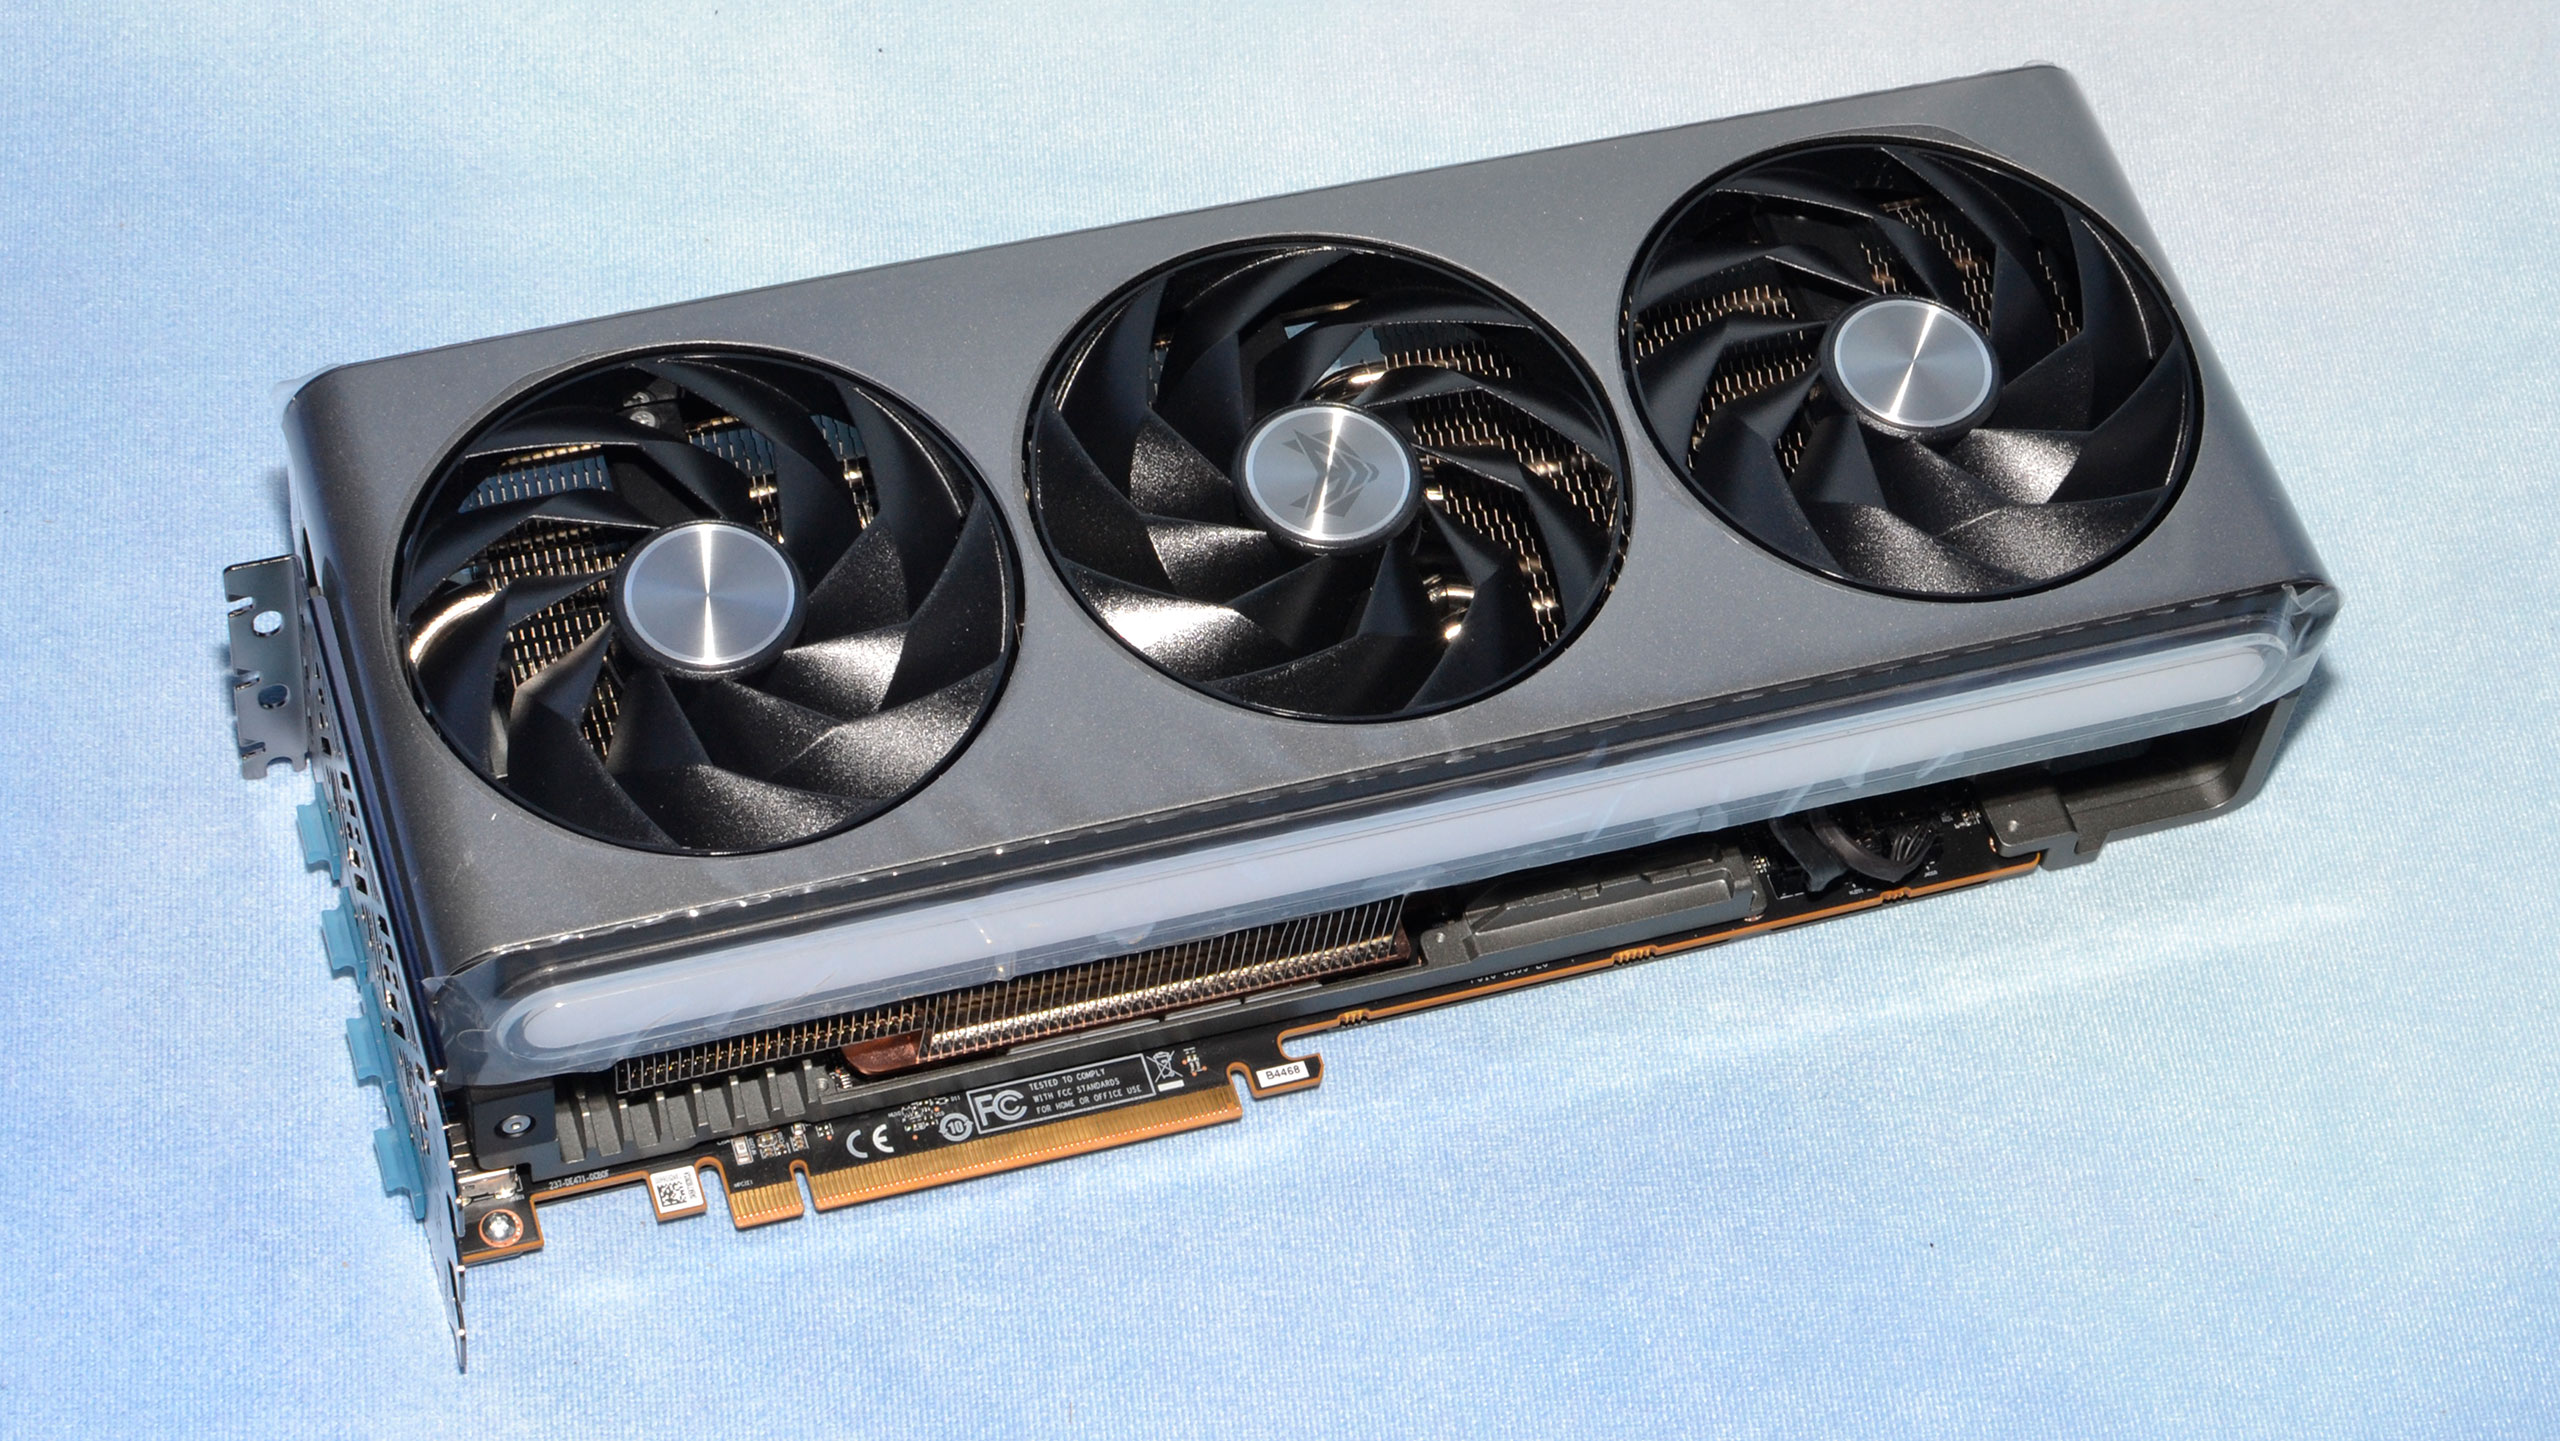
Sapphire uses a fairly common triple-fan cooling setup with custom 95mm fans. The blades on these fans are also a new innovation, with an angular design that we're told helps improve airflow and reduce noise levels. The fans also include an integrated rim to improve static pressure and airflow, and finally the center fan spins clockwise while the two outer fans rotate counterclockwise, which reduces turbulence and noise.
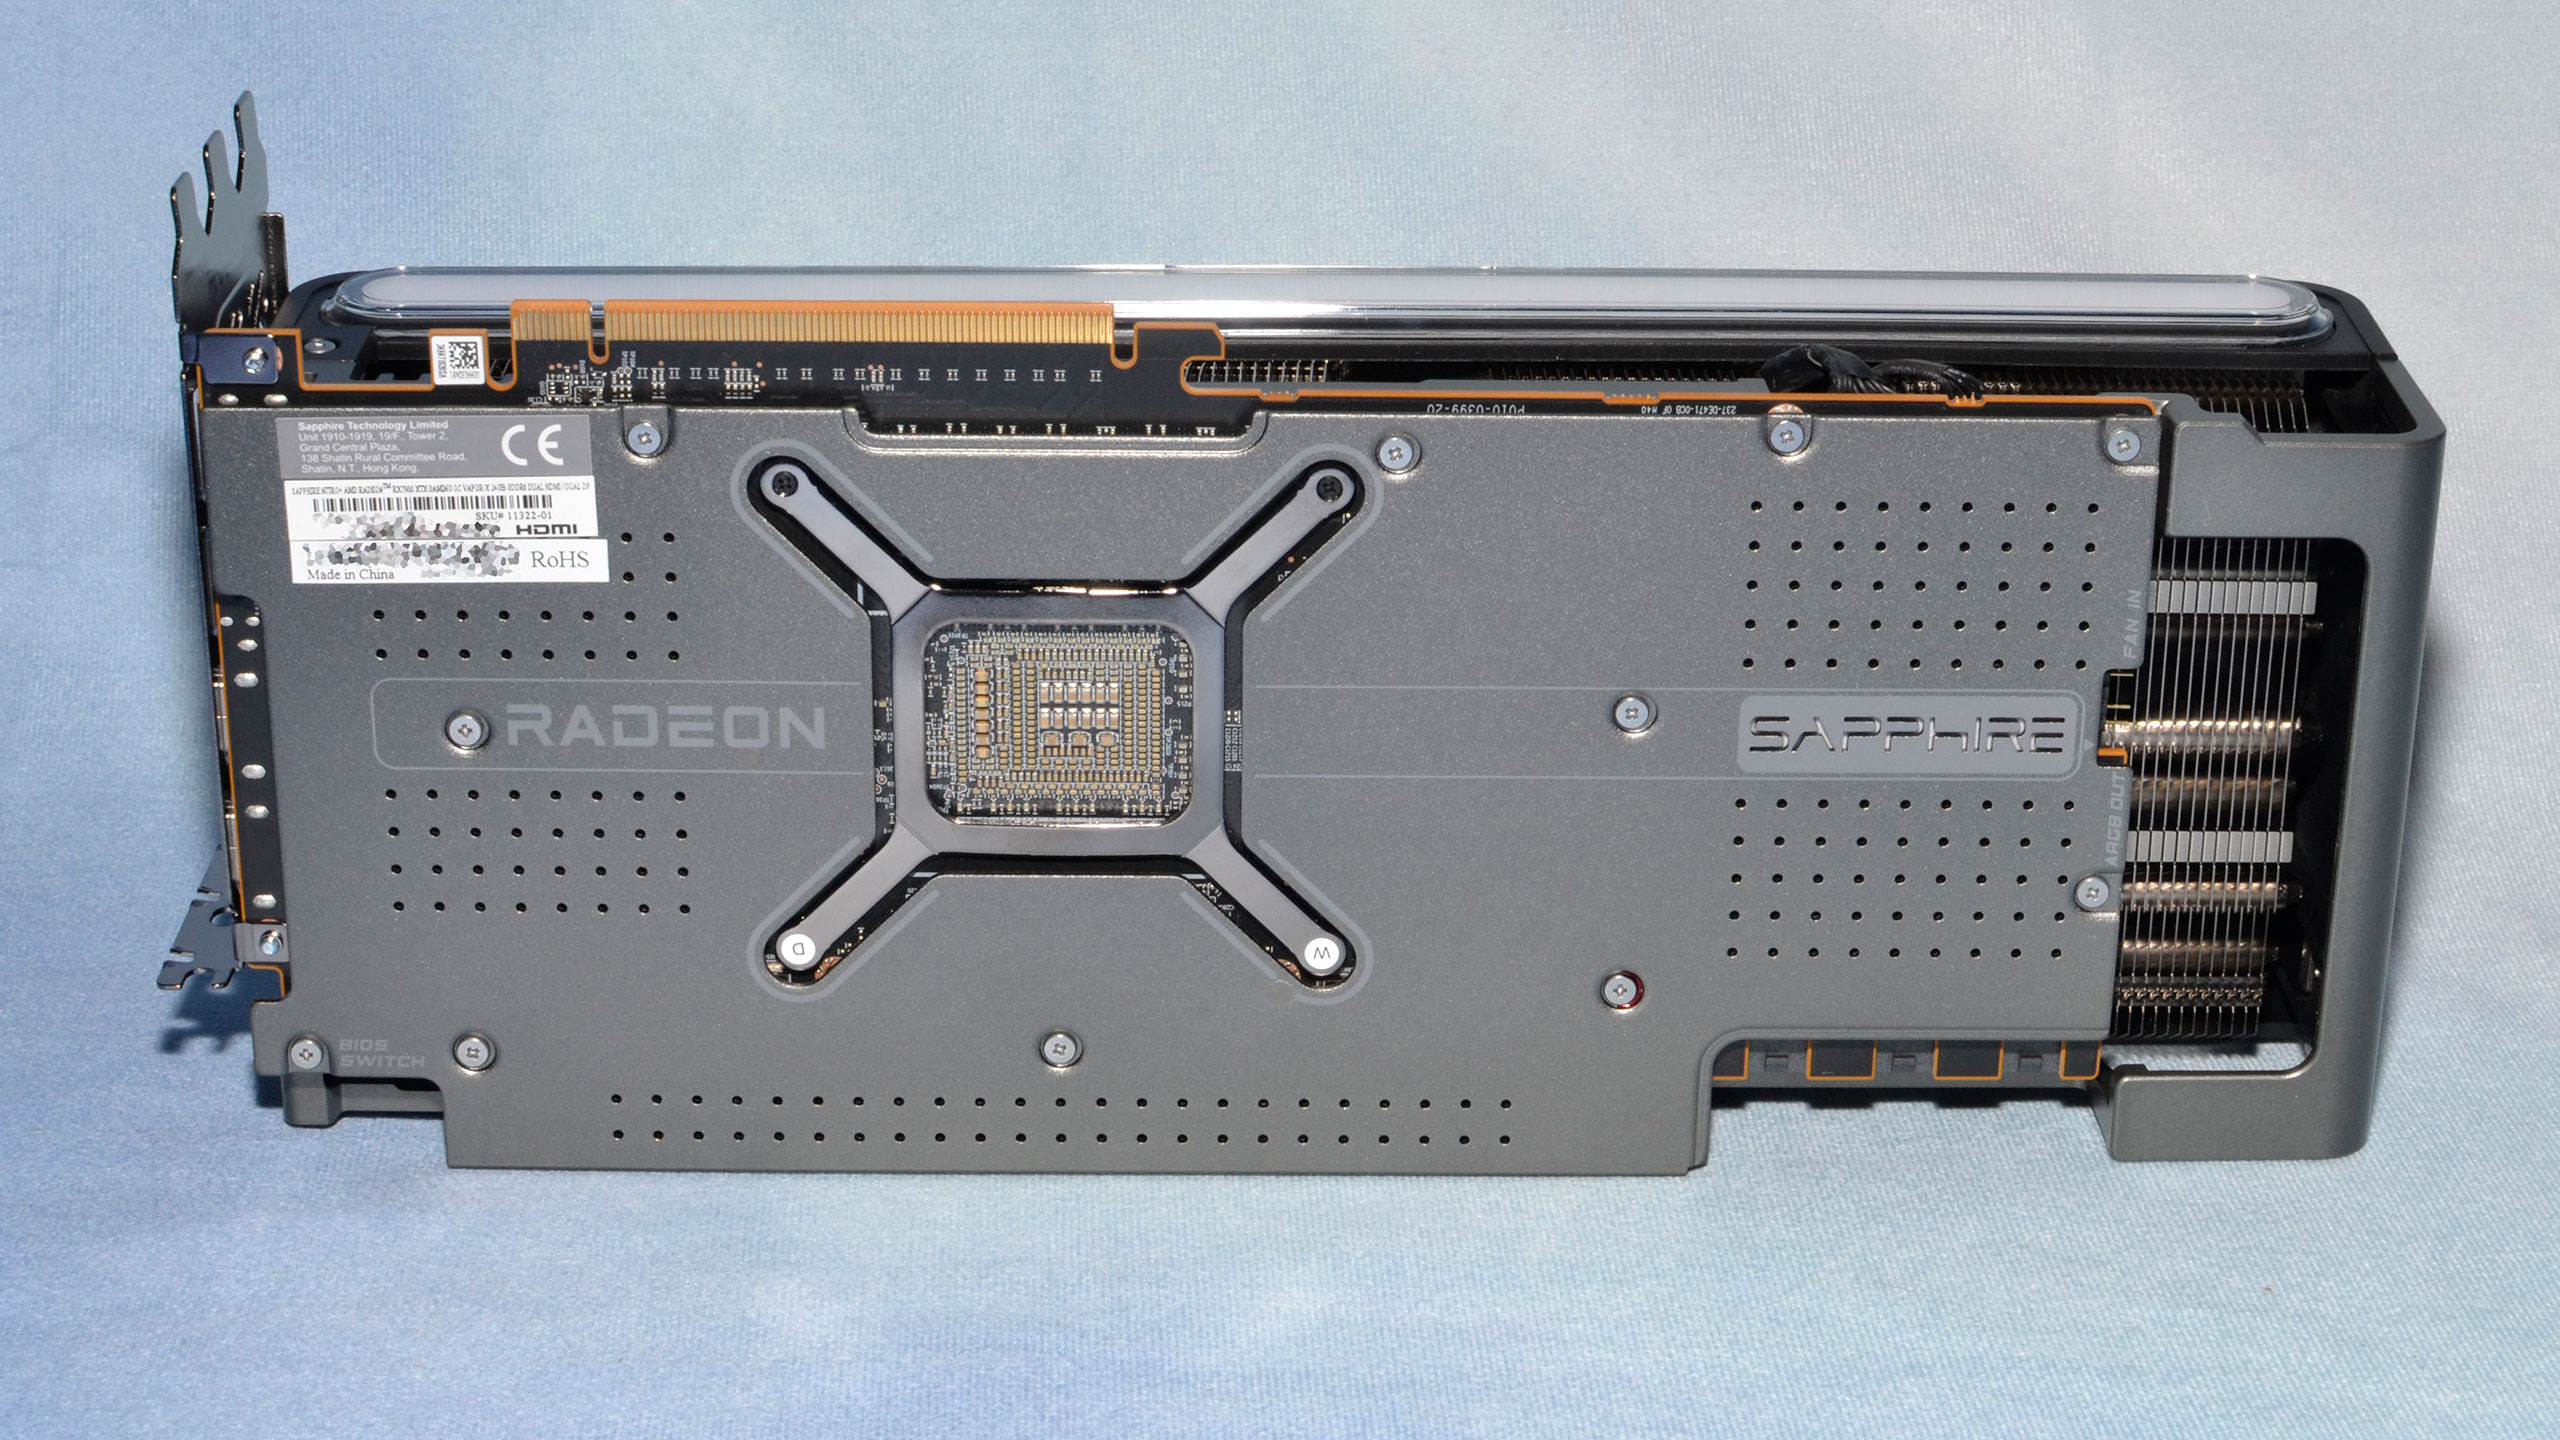
Sapphire takes a slightly different approach on the display outputs, with dual HDMI 2.1 and dual DisplayPort 2.1 (54 Gbps). The DP2.1 outputs technically support a slightly higher bandwidth… but only if you have a DP2.1 capable monitor, which are hard to come by. Even our Samsung Odyssey Neo G8 32 with its 4K 240 Hz support still uses DP1.4 (with Display Stream Compression for 240 Hz).
Sapphire does use a triple 8-pin power connector design, and part of that is because the Vapor-X is rated for 410W — 55W more than the reference 7900 XTX. As usual, you get greatly diminishing returns for the increased power. We'll hit the numbers in a bit, but the Vapor-X consistently uses about 50W more power, a 15% increase, while performance typically only improves by up to 2%.
Sapphire RX 7900 XTX Nitro+ Vapor-X Teardown
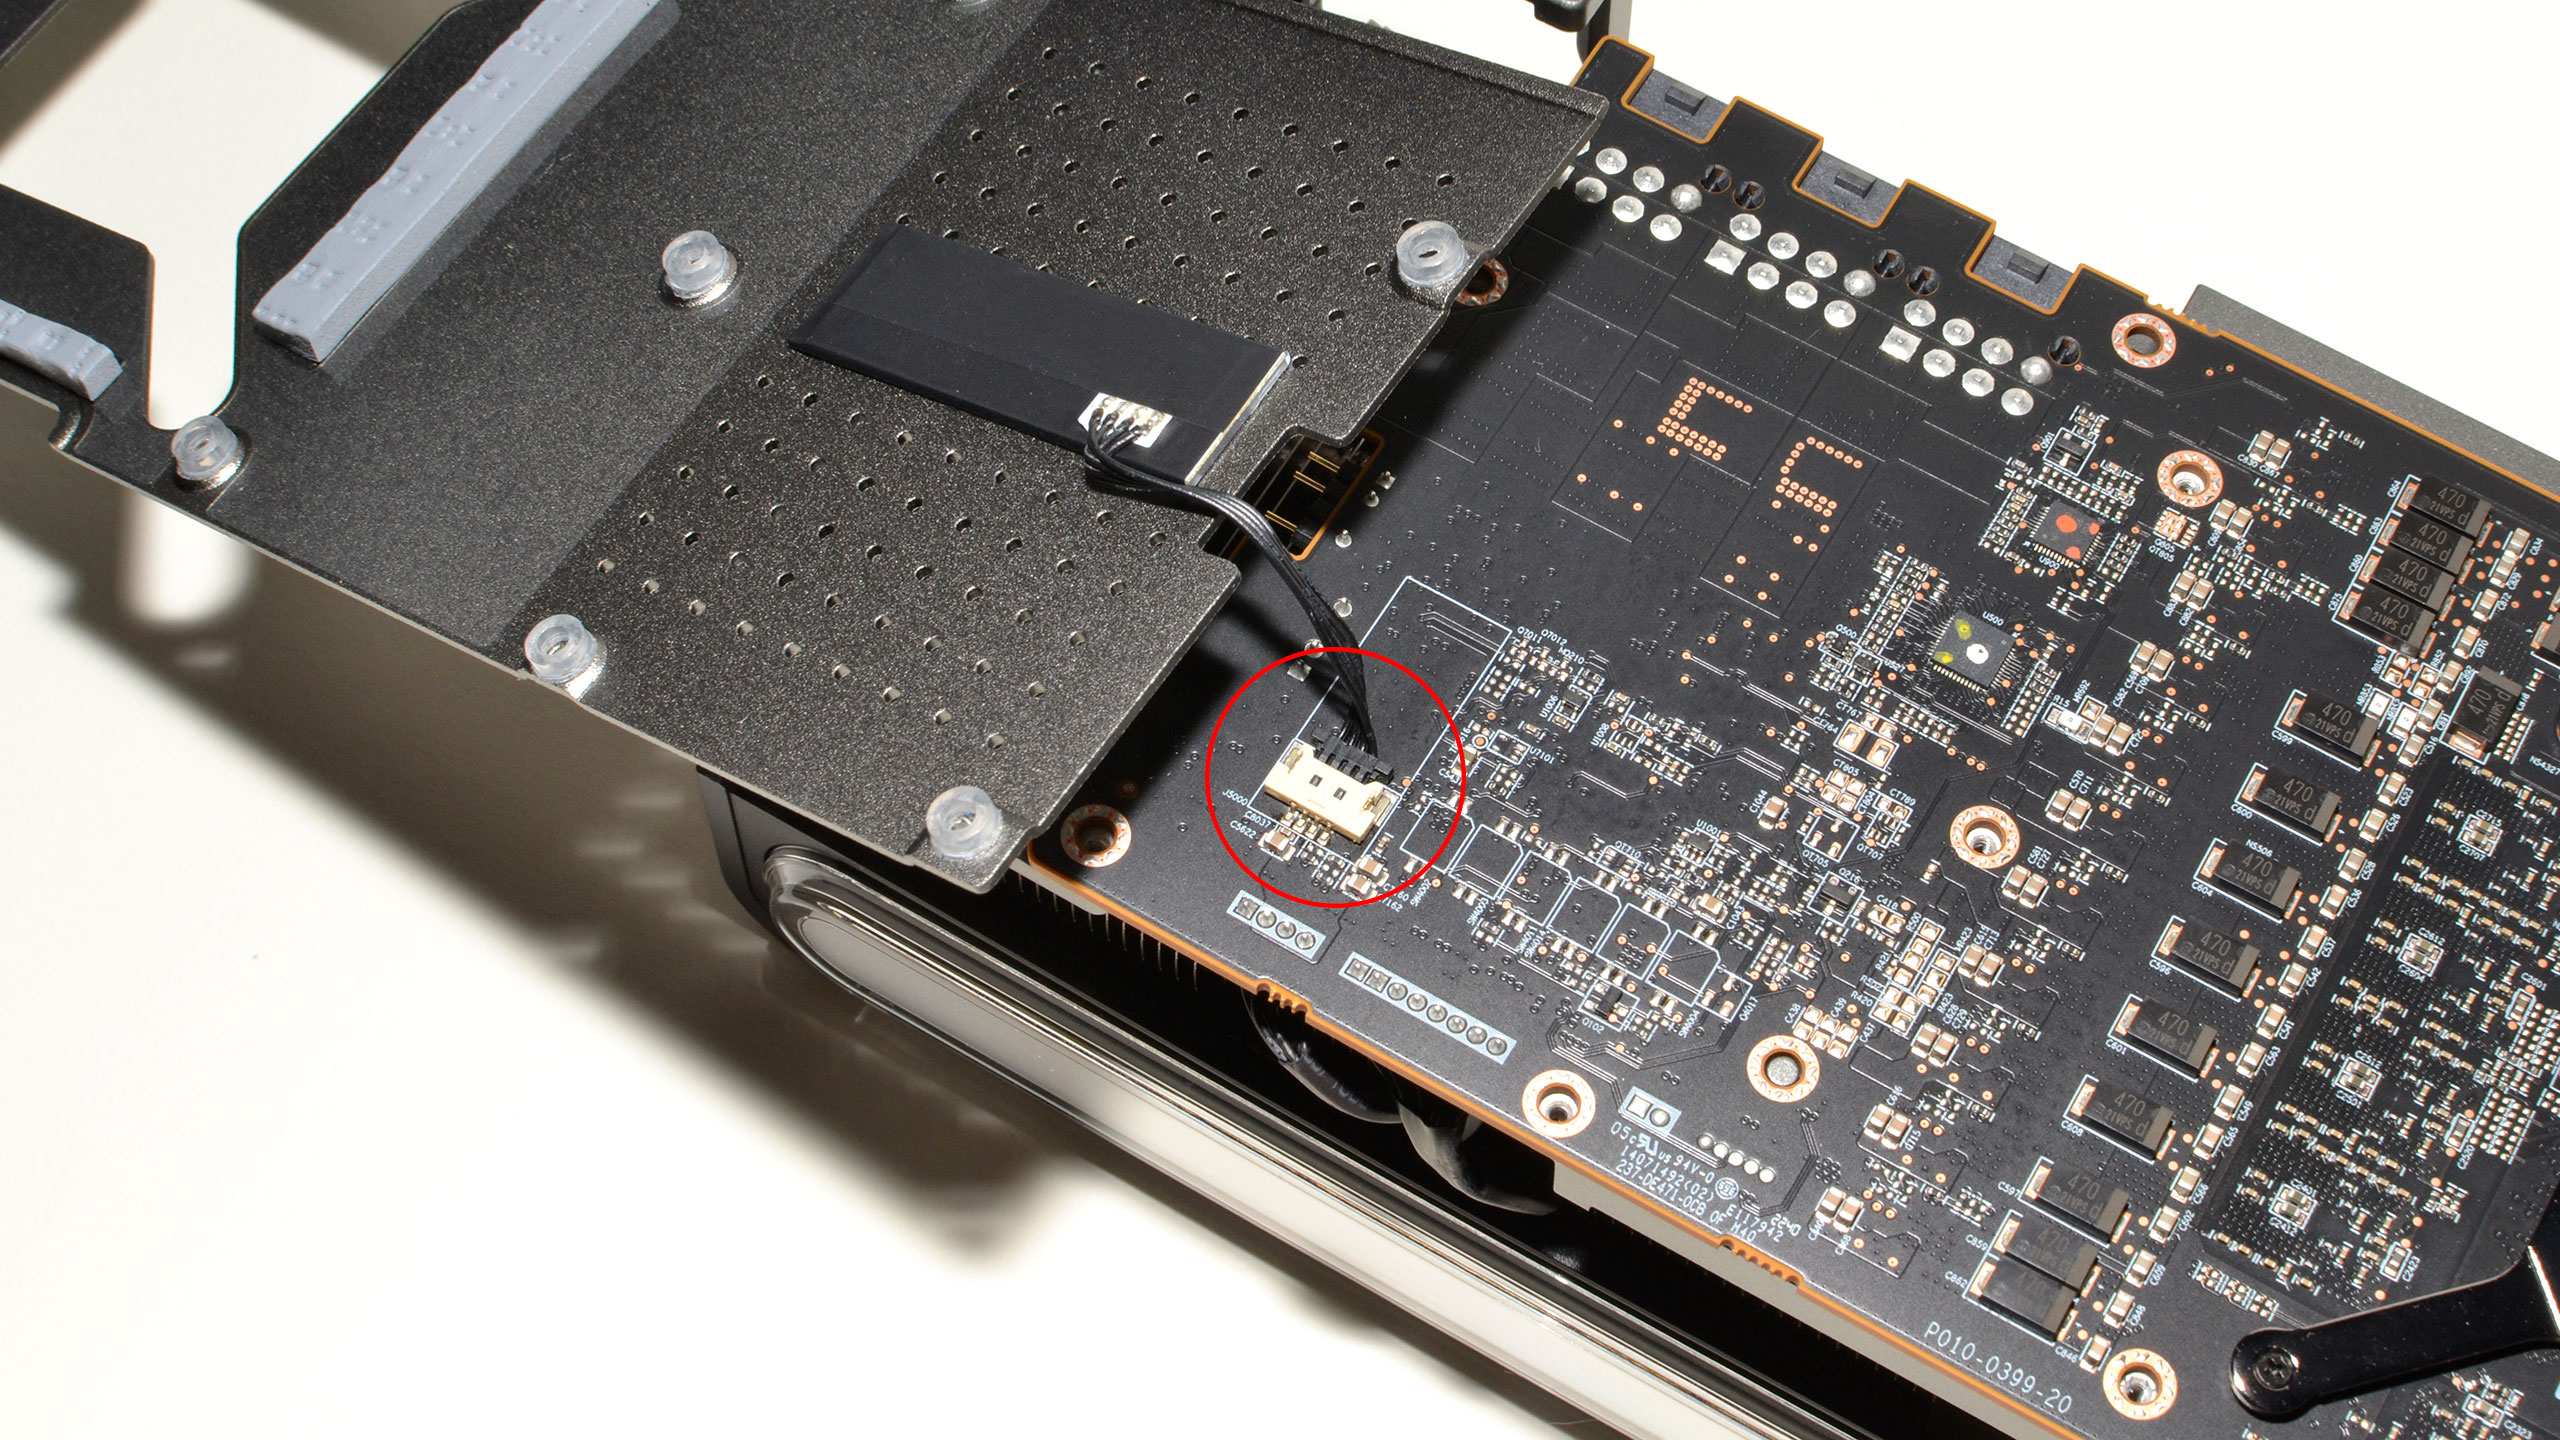
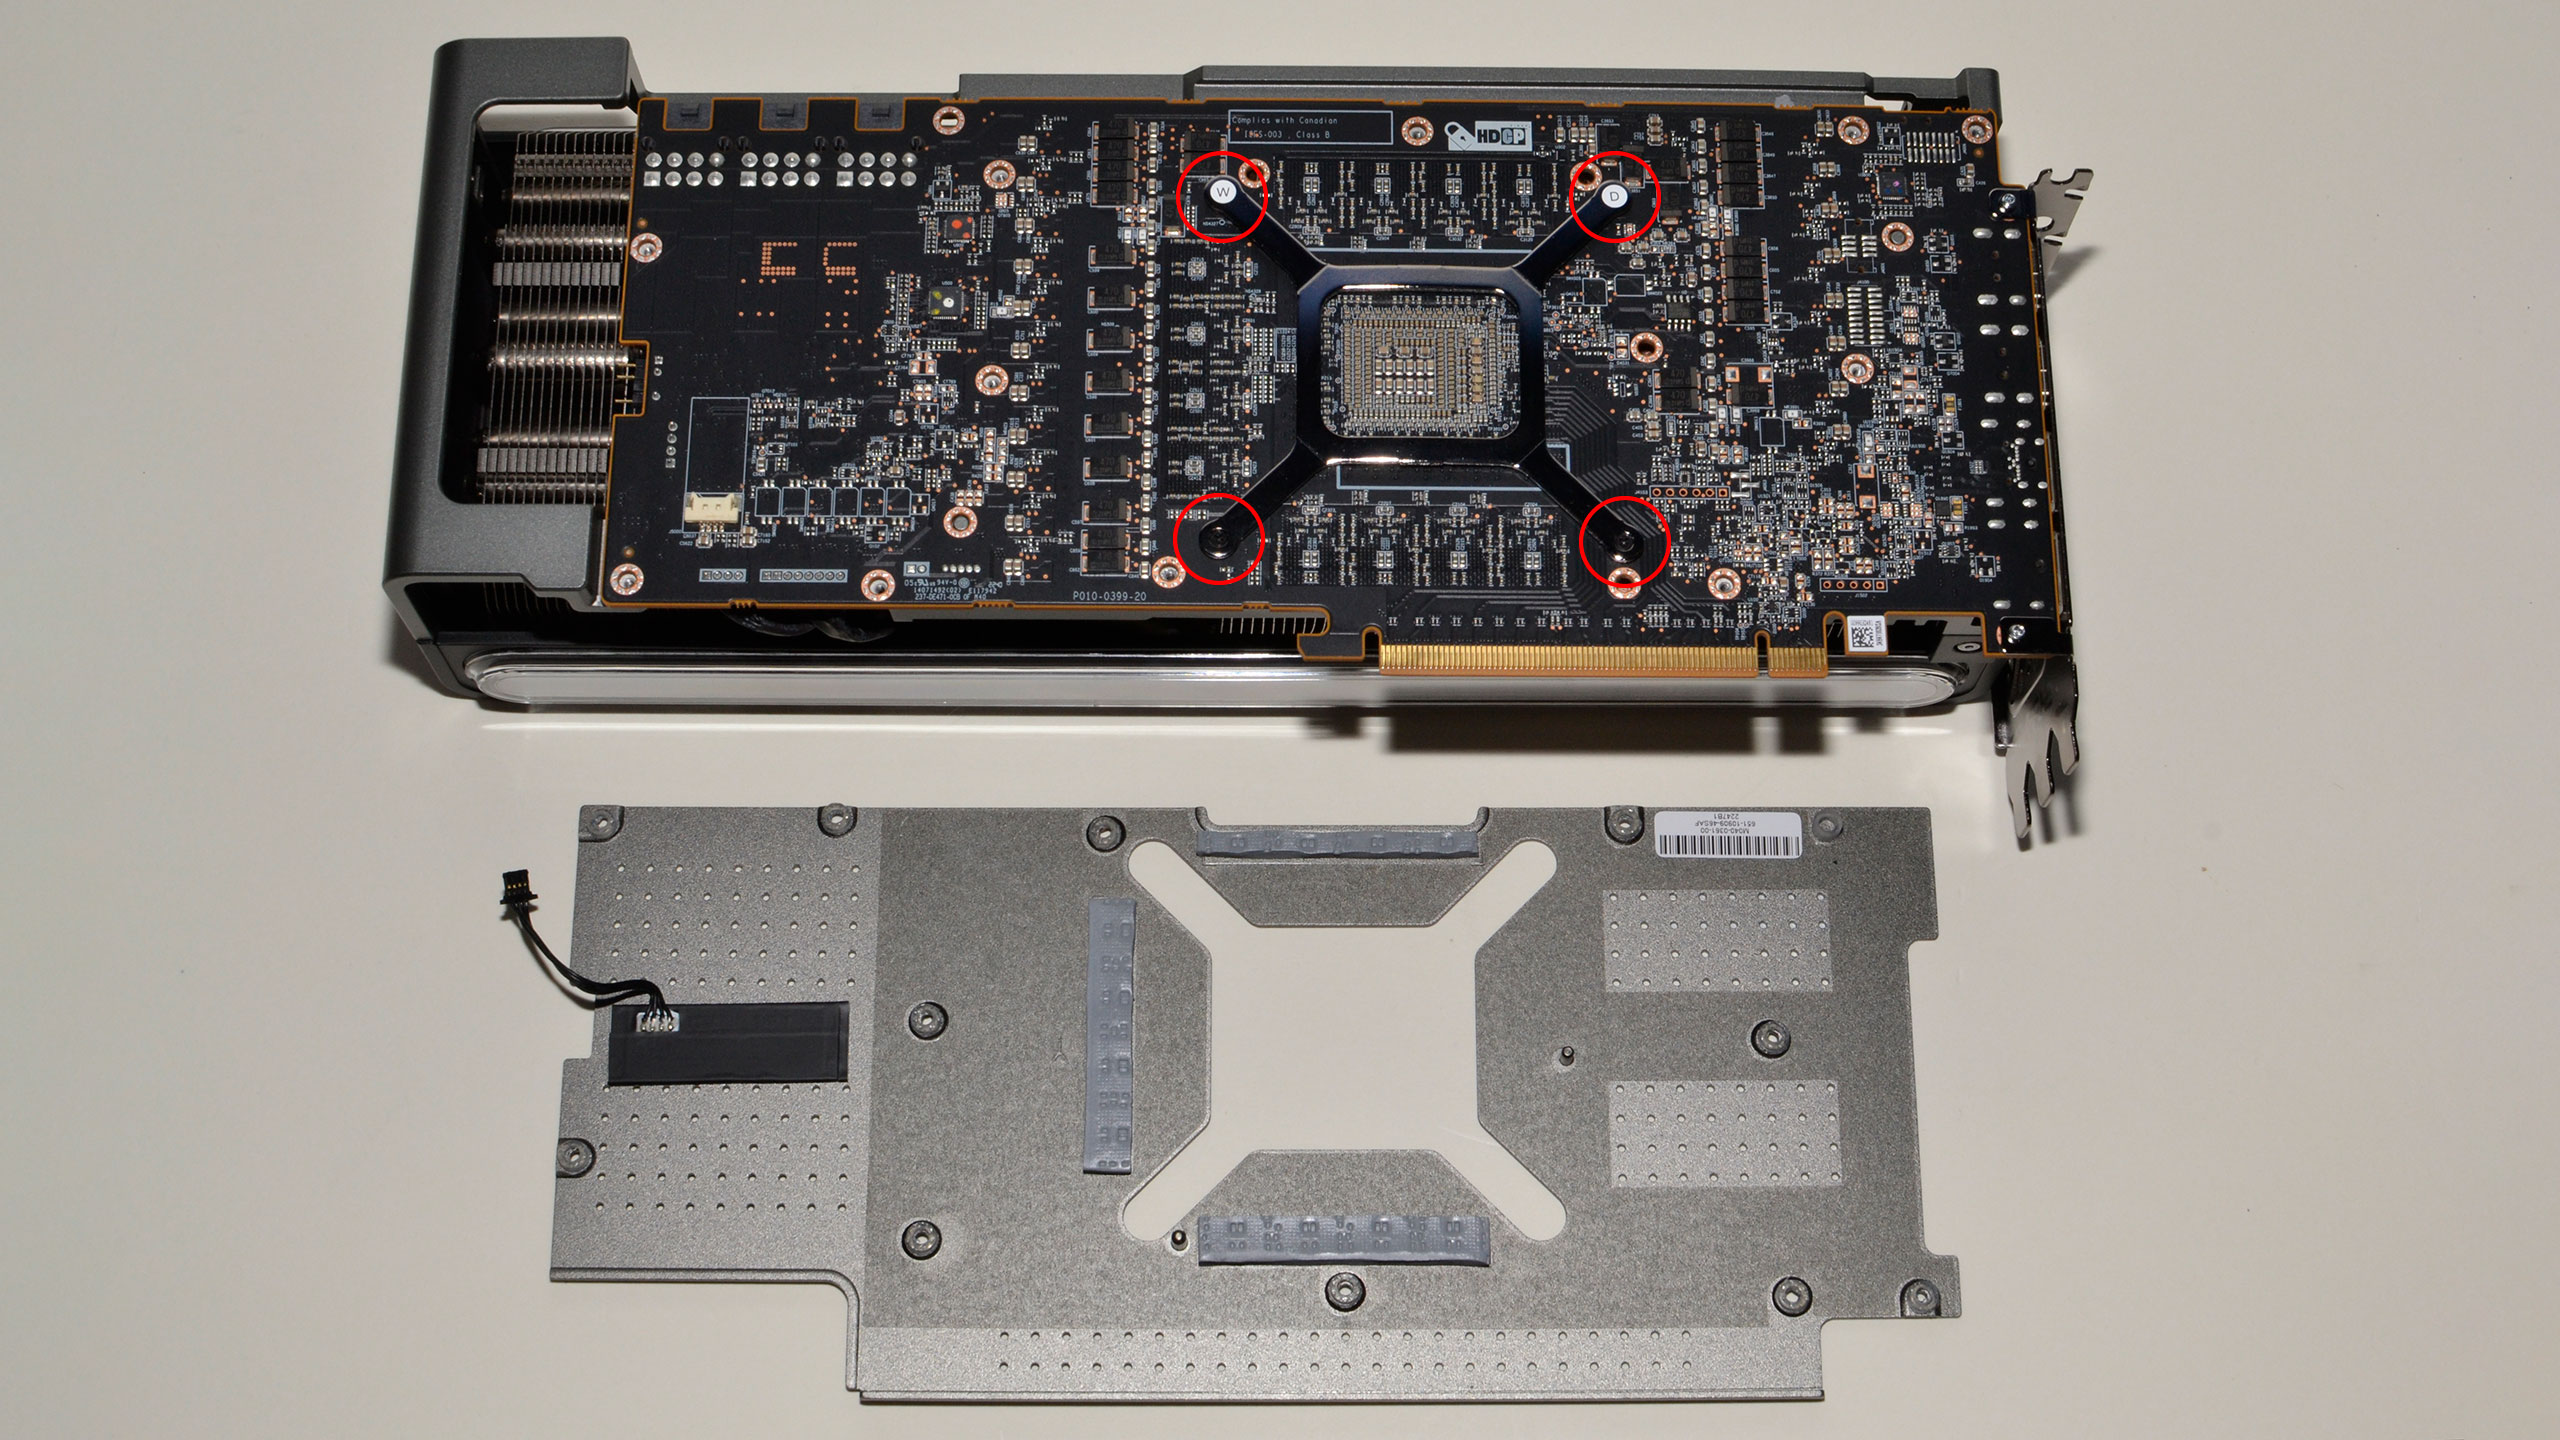
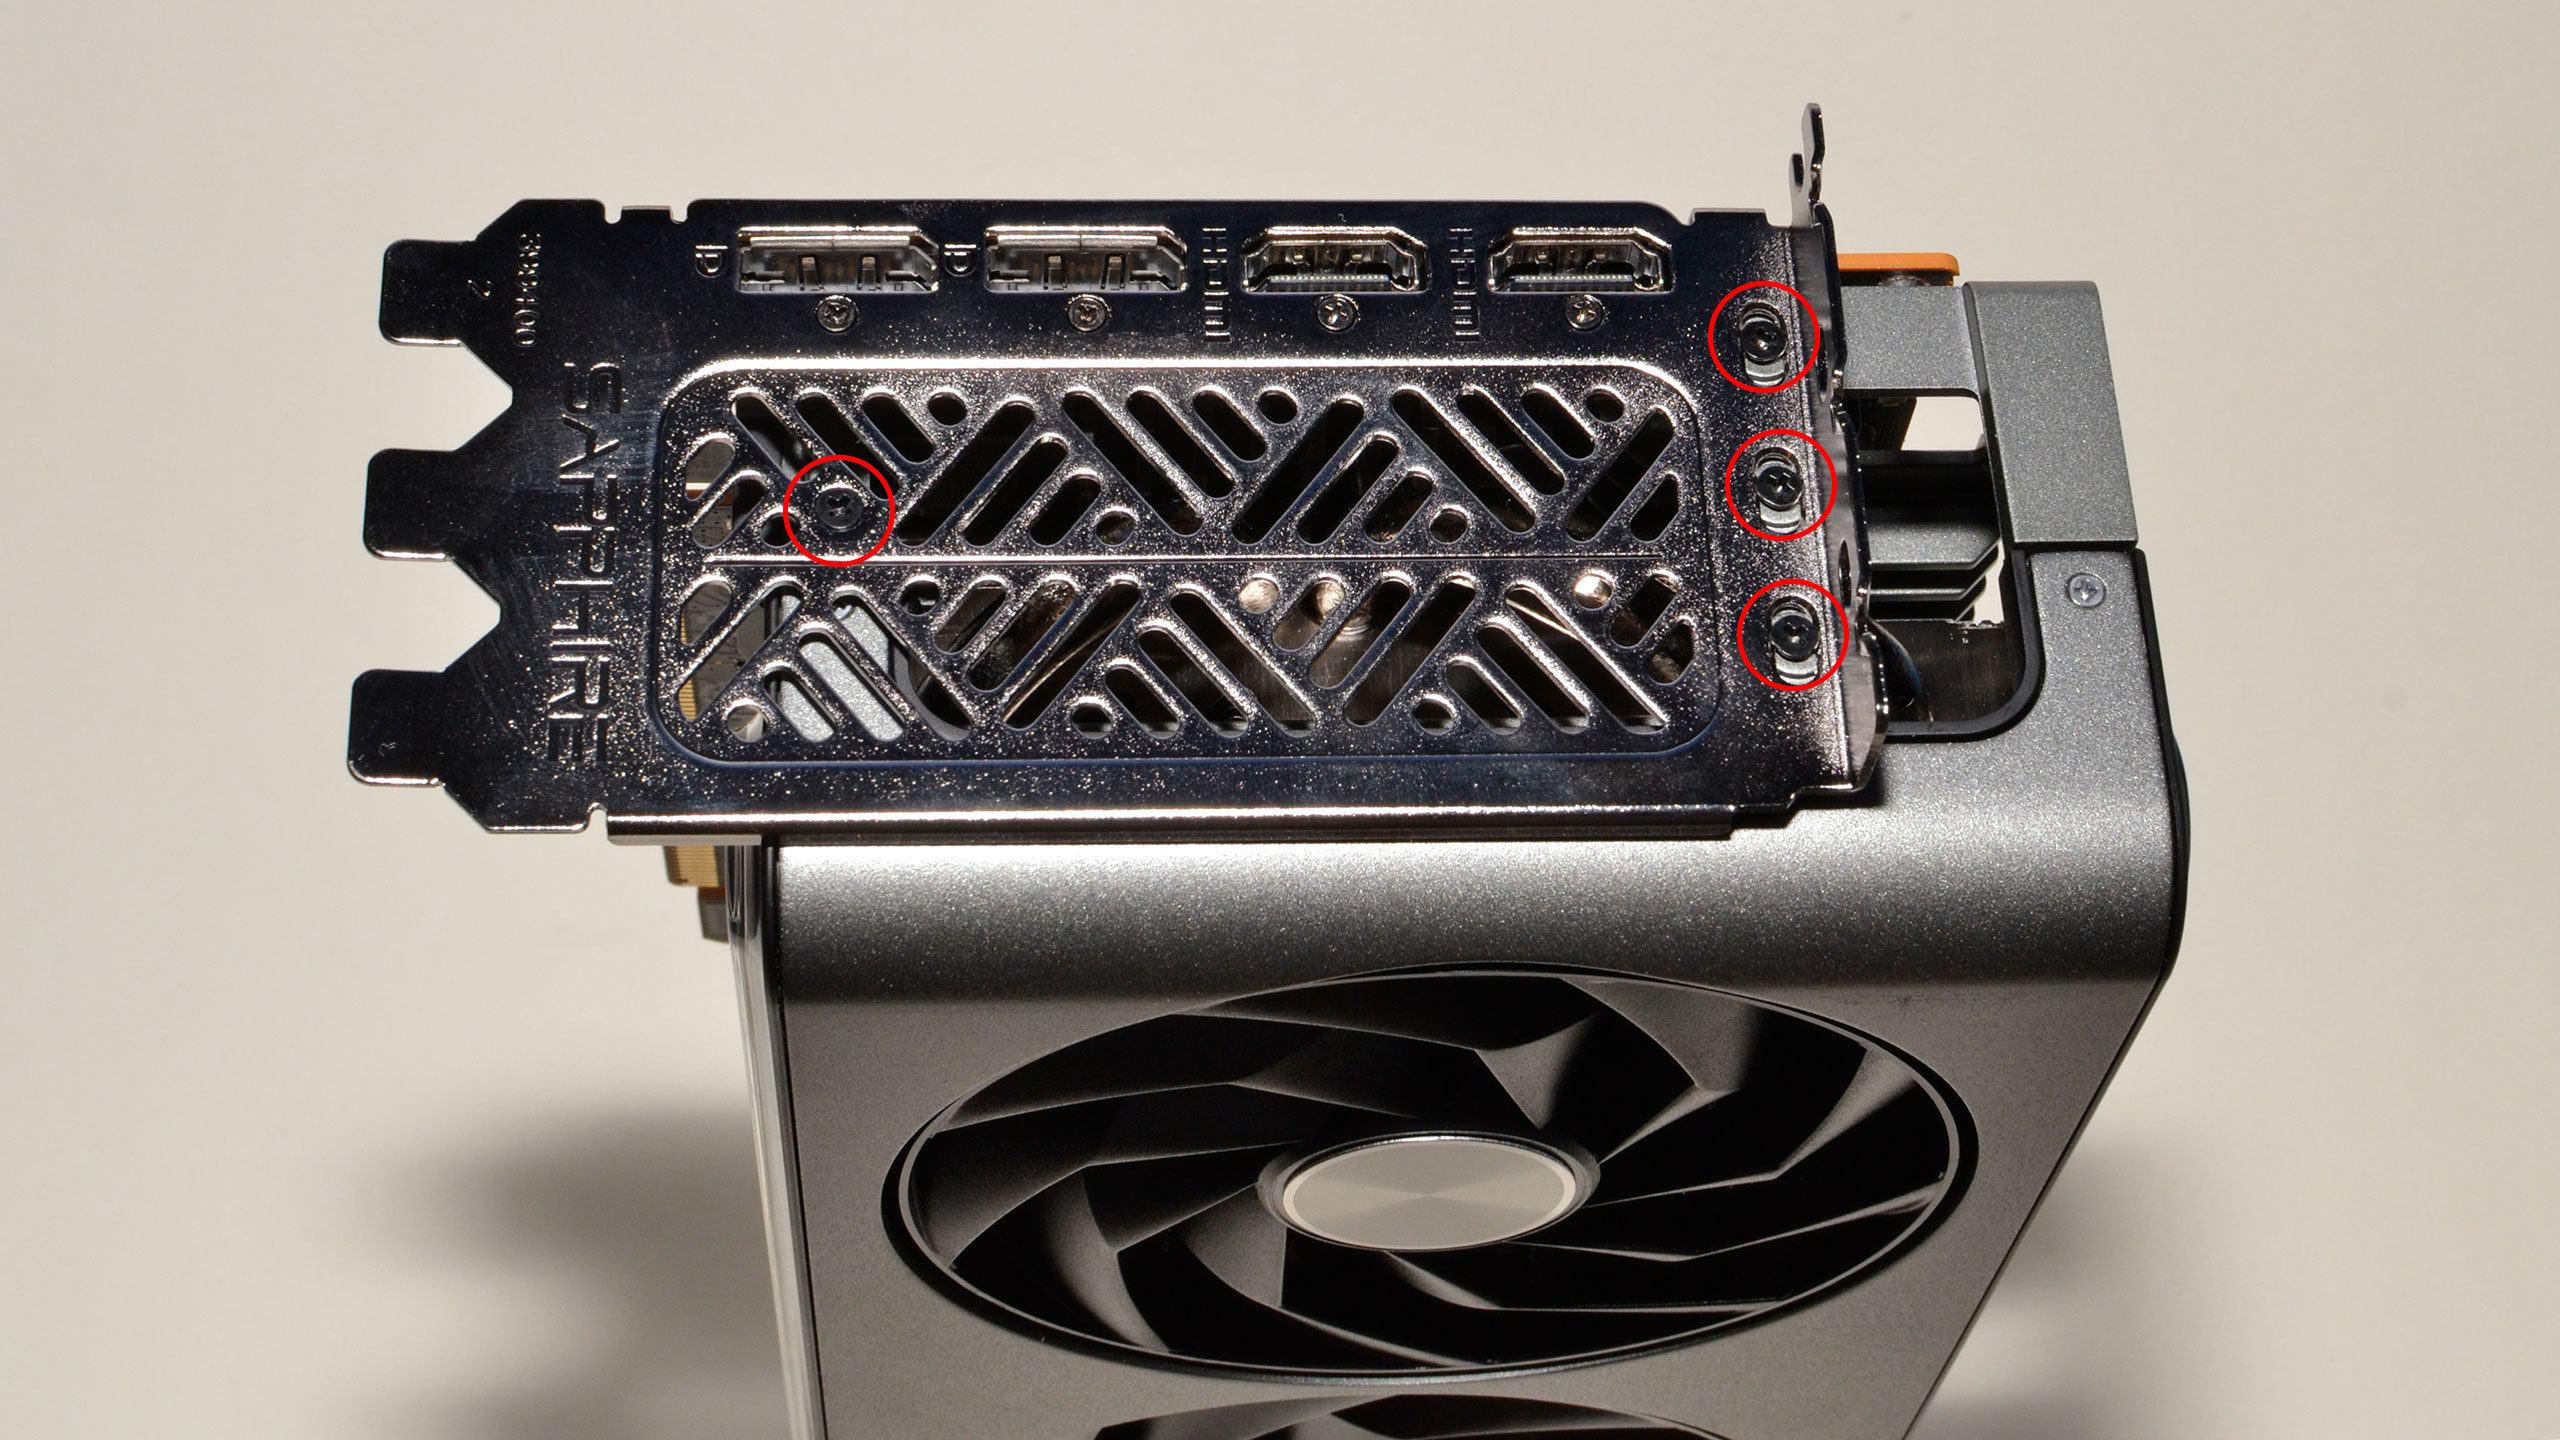
Dismantling the Sapphire Vapor-X isn't particularly difficult, though there are a few extra steps. There's a reinforcing frame around the cooling, and the best order of disassembly isn't immediately obvious. I took it apart one way, but realized in the process that it would have been better to take a slightly different approach. The gallery below shows, more or less, how I proceeded, but I'll note where things should diverge.
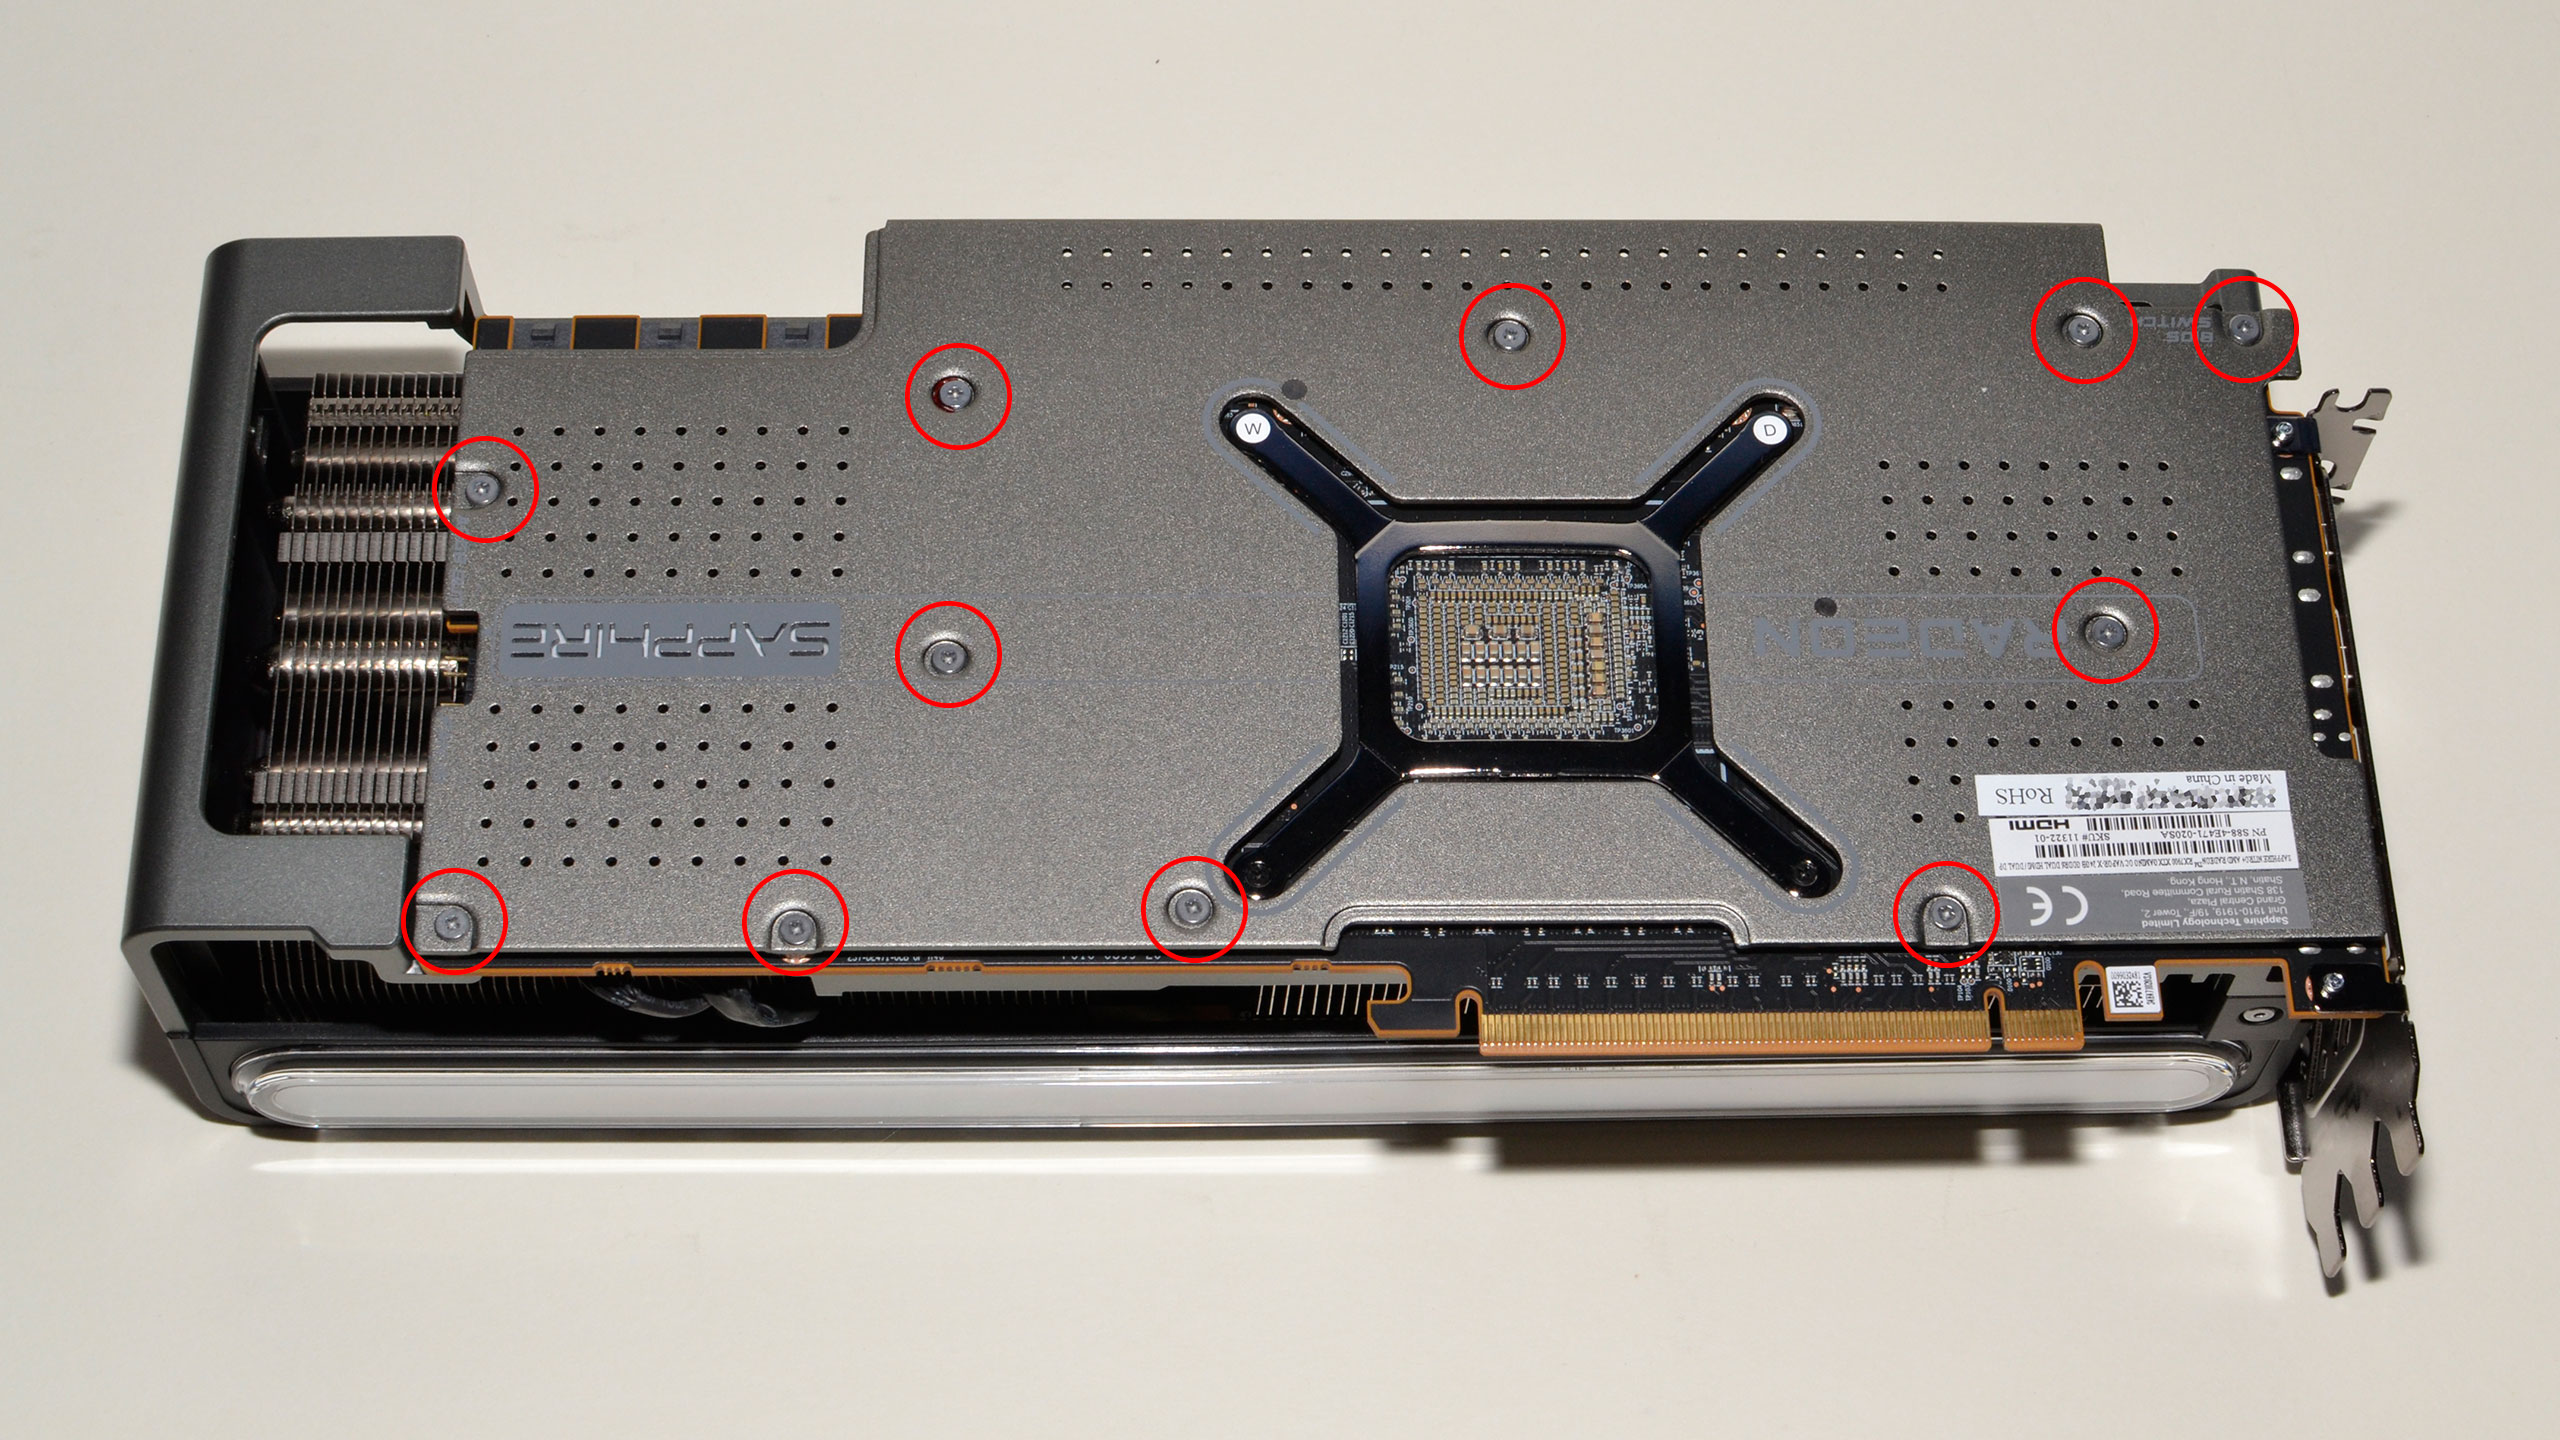
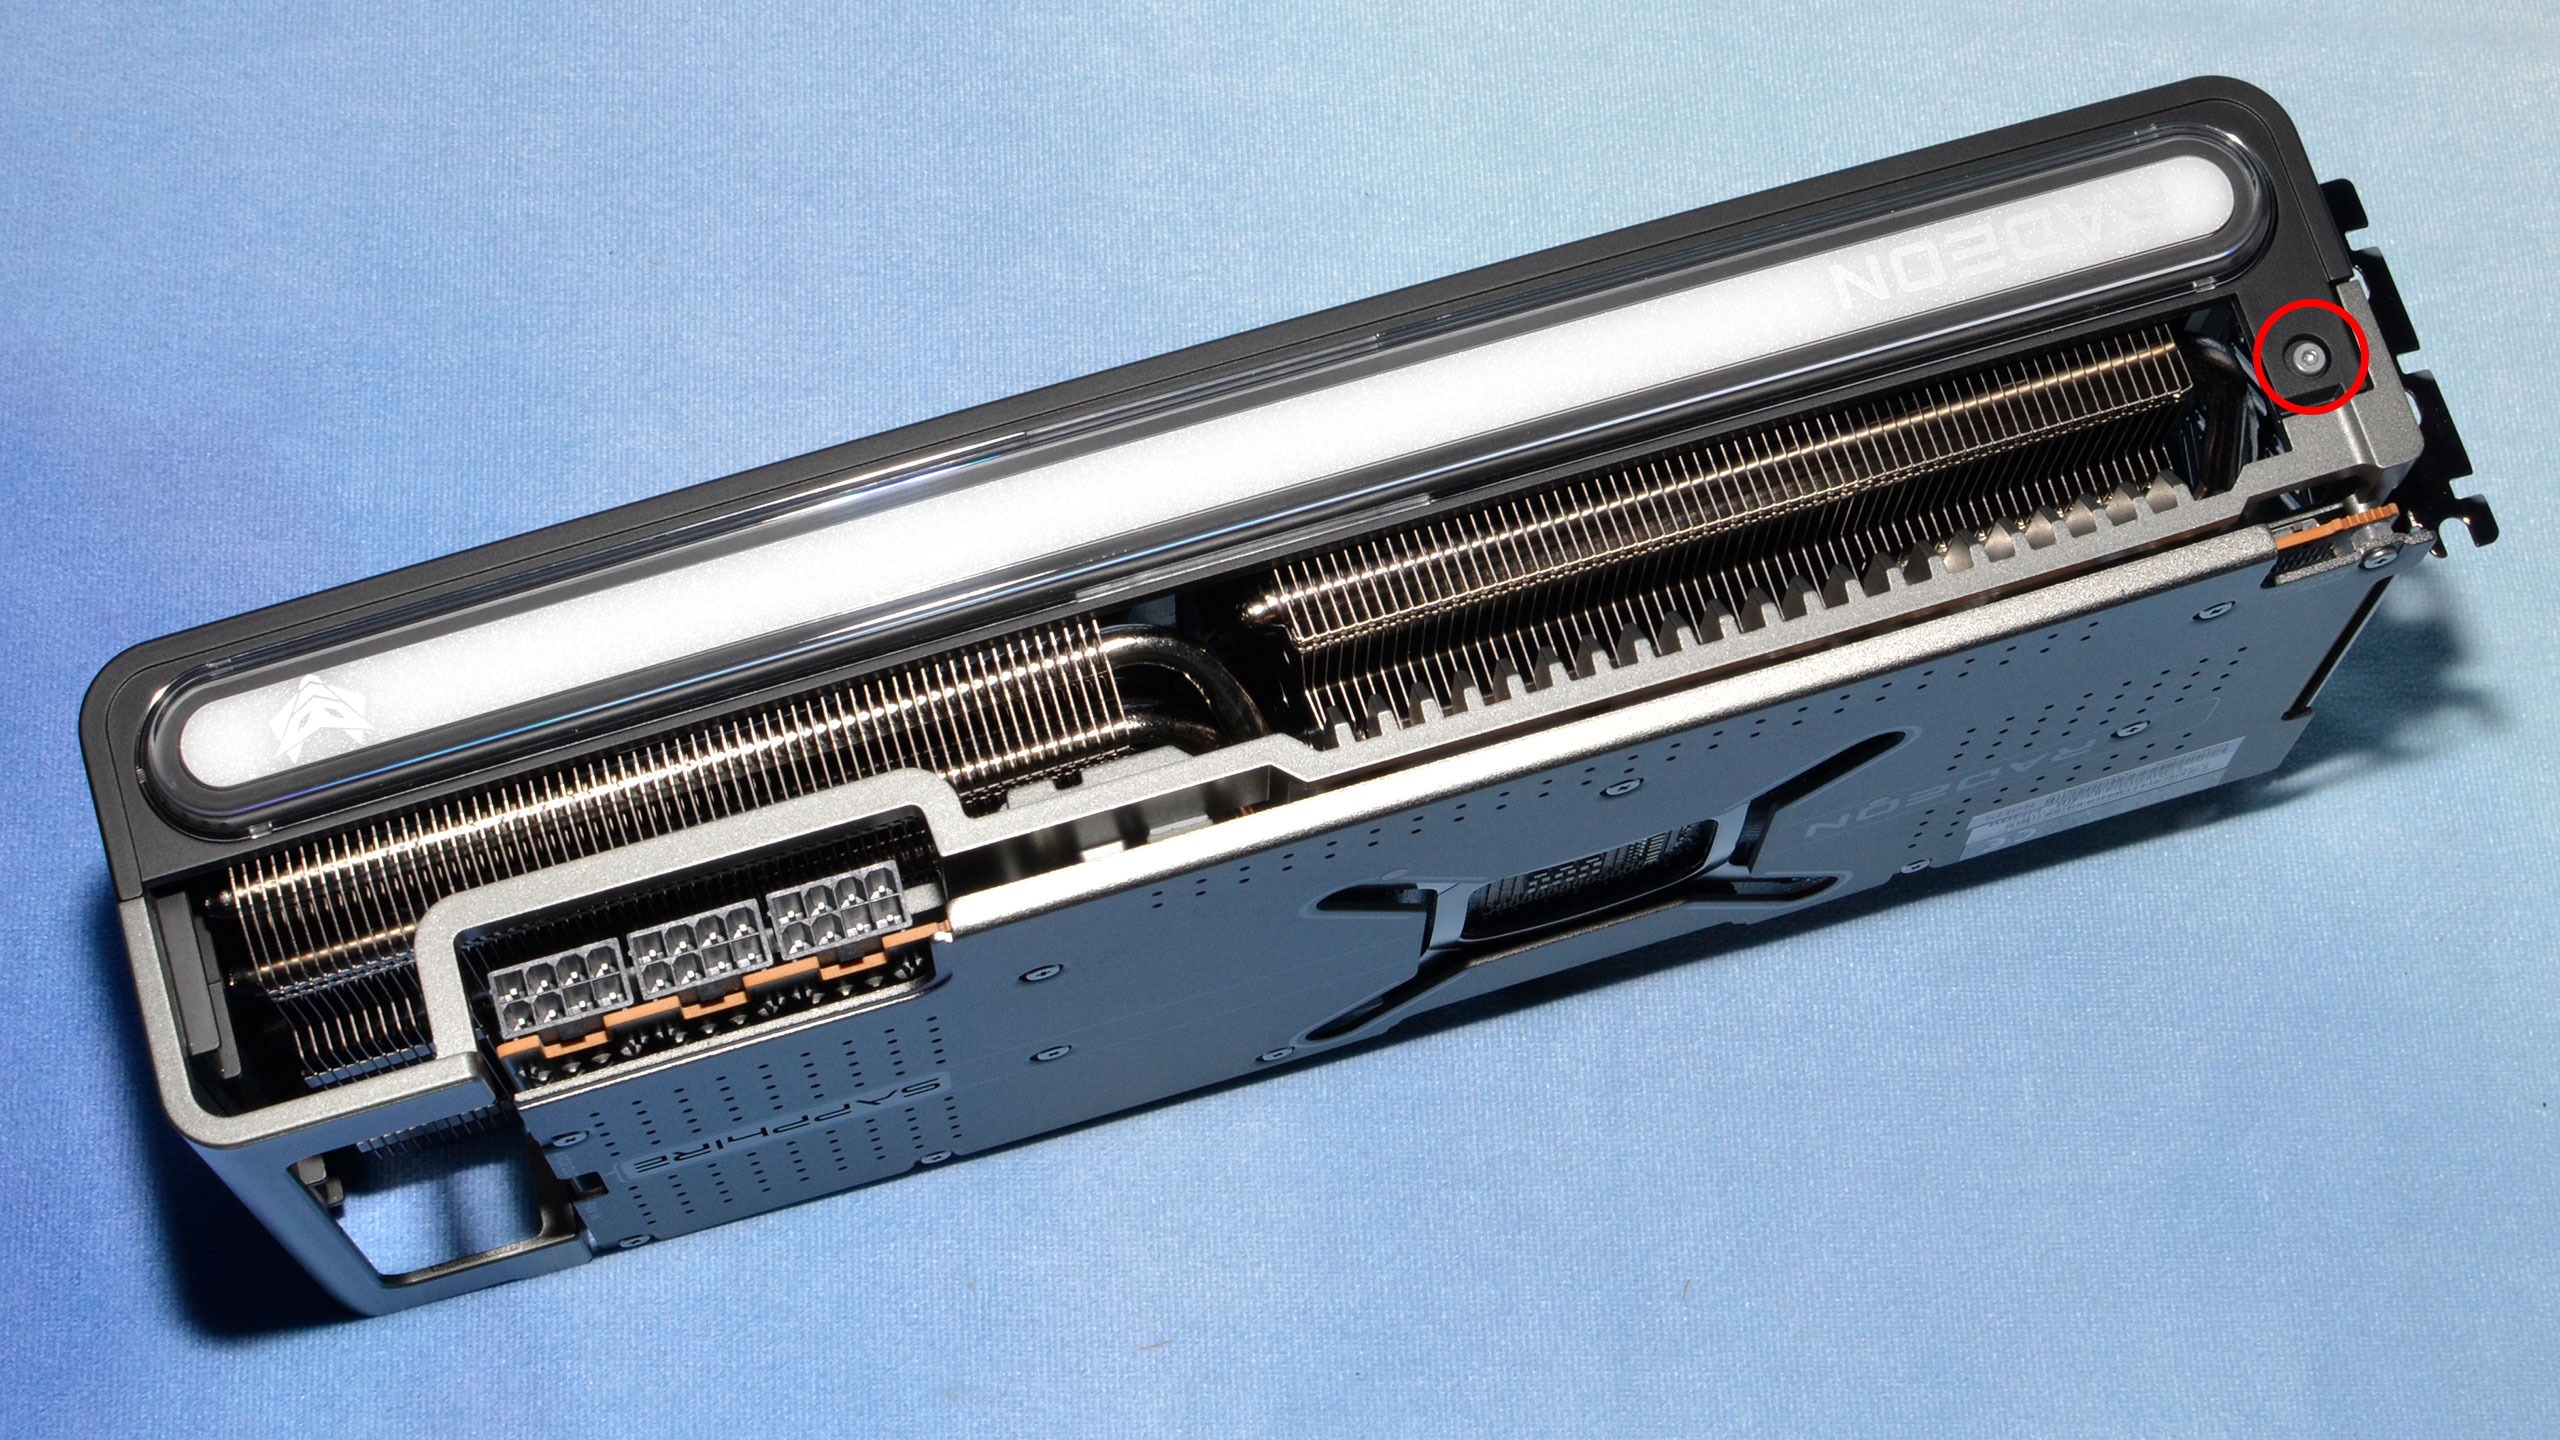
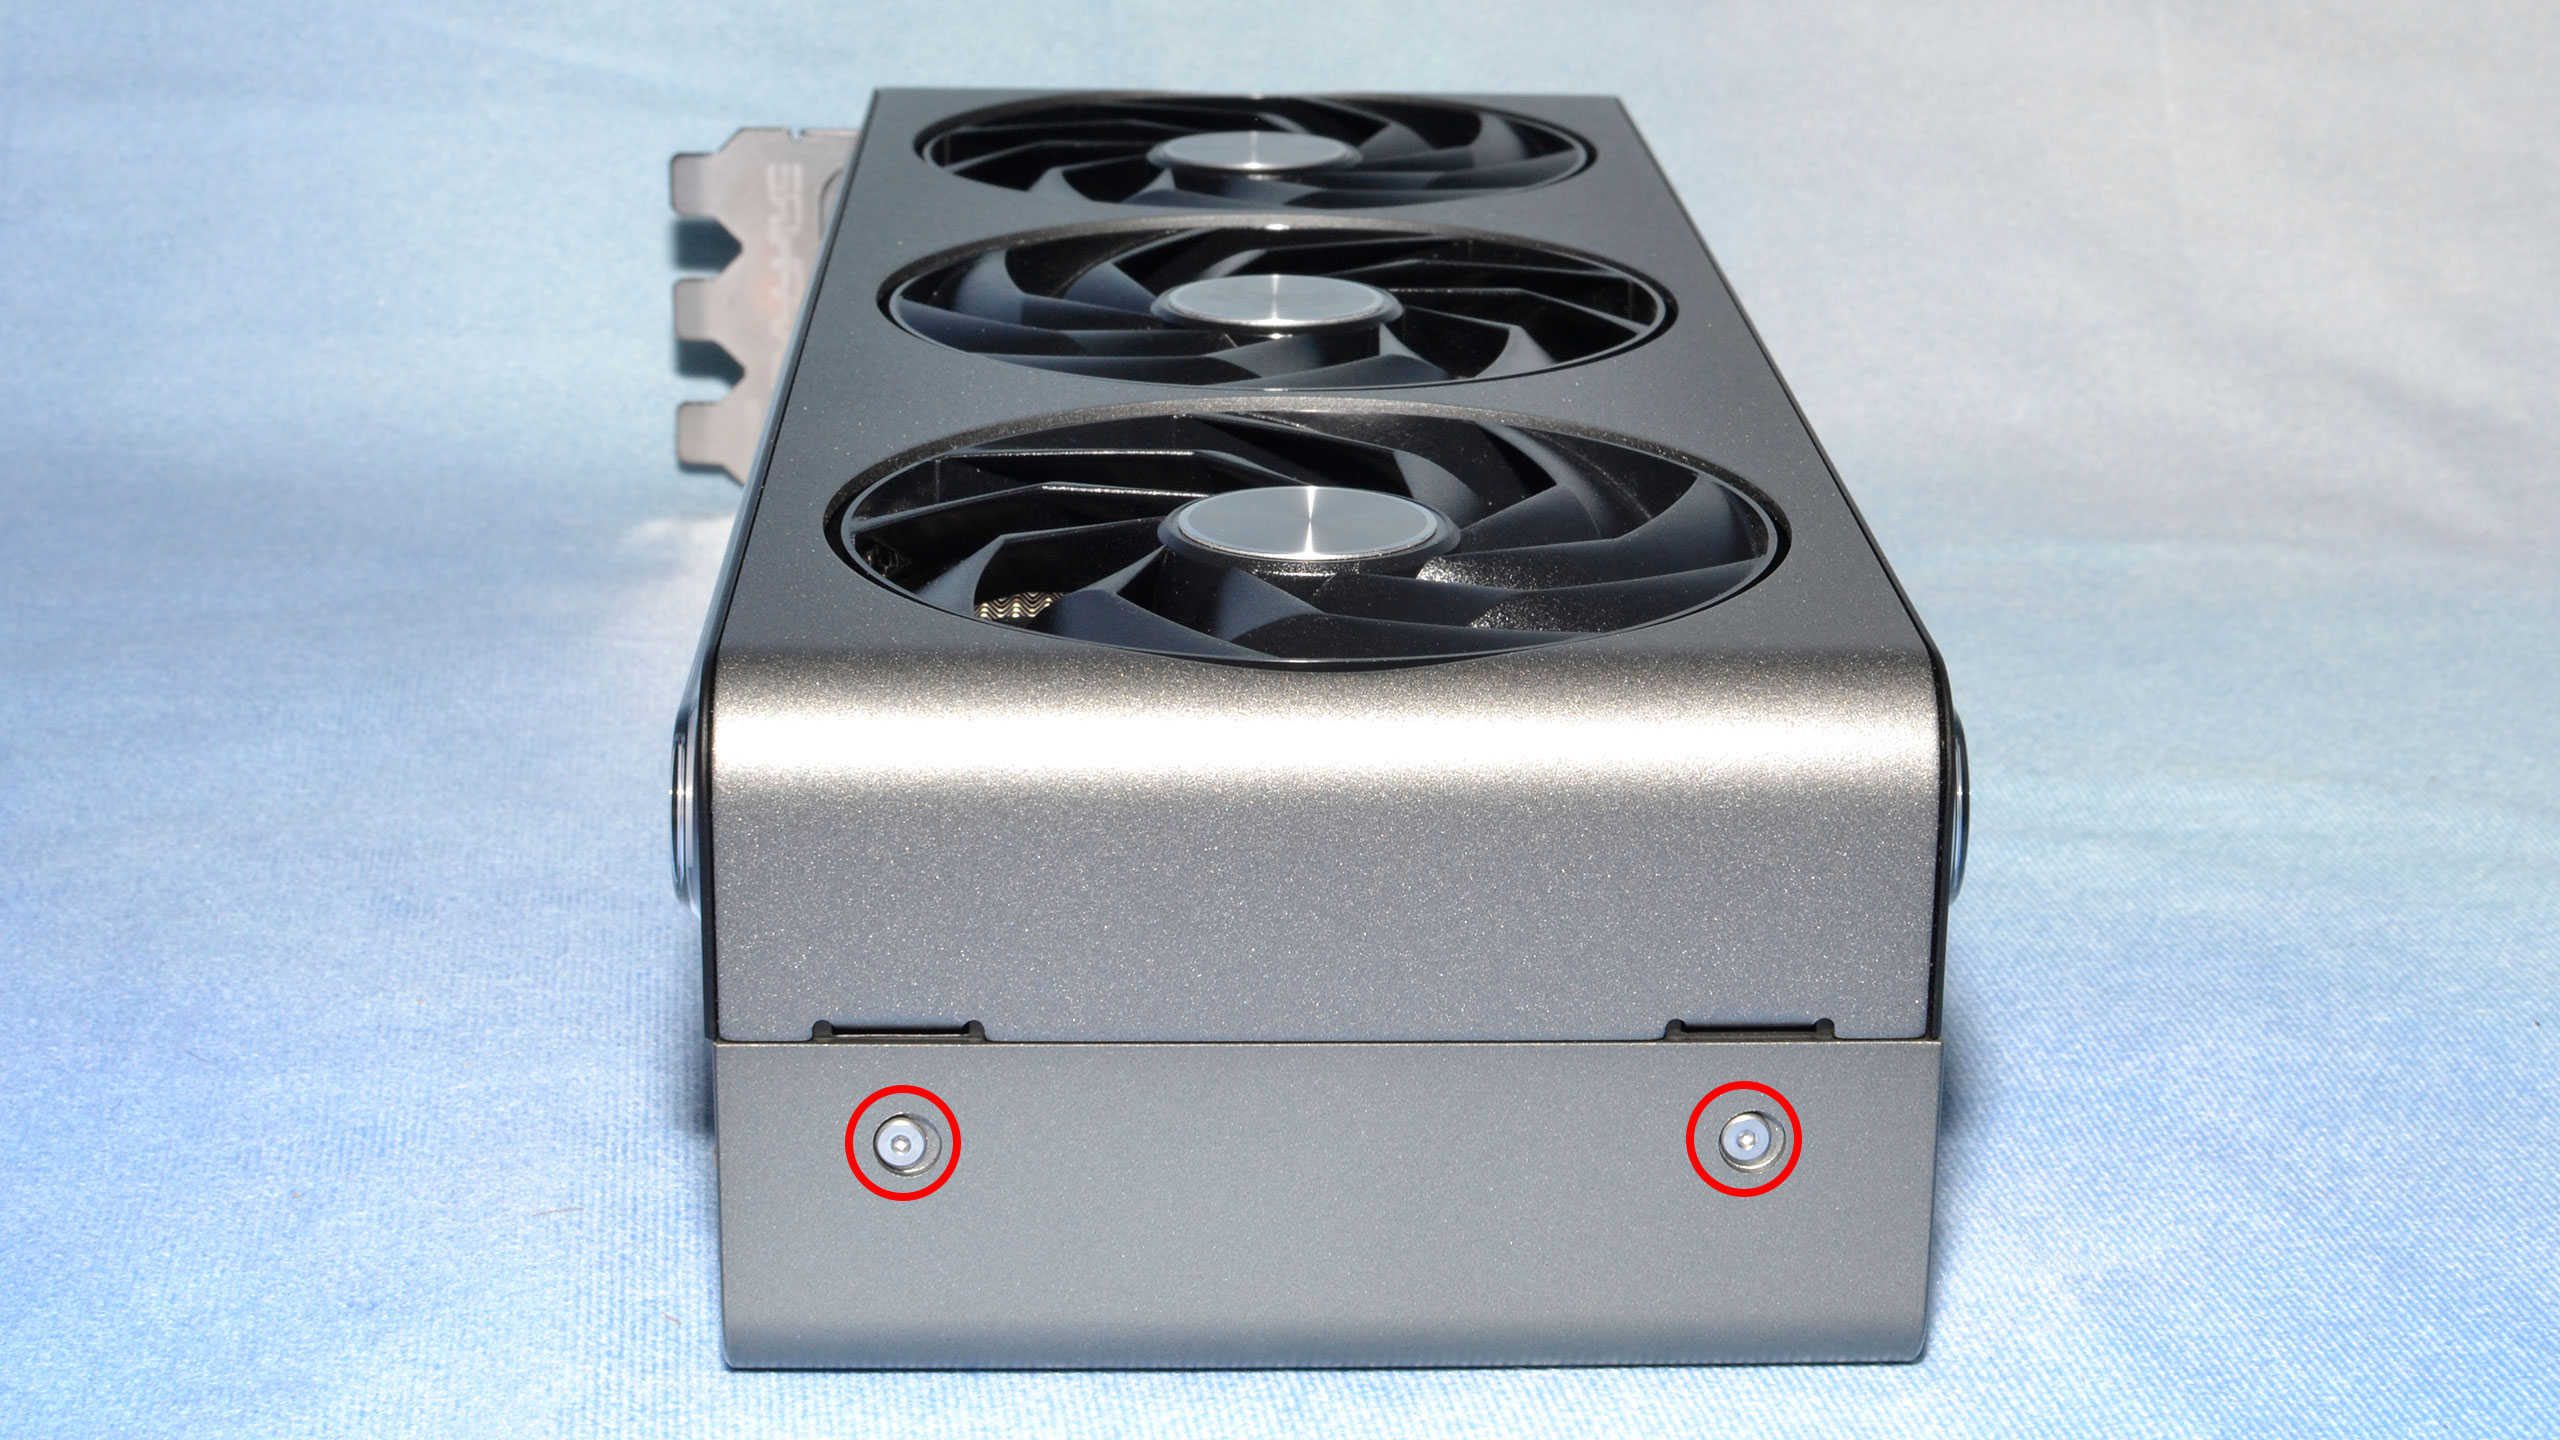
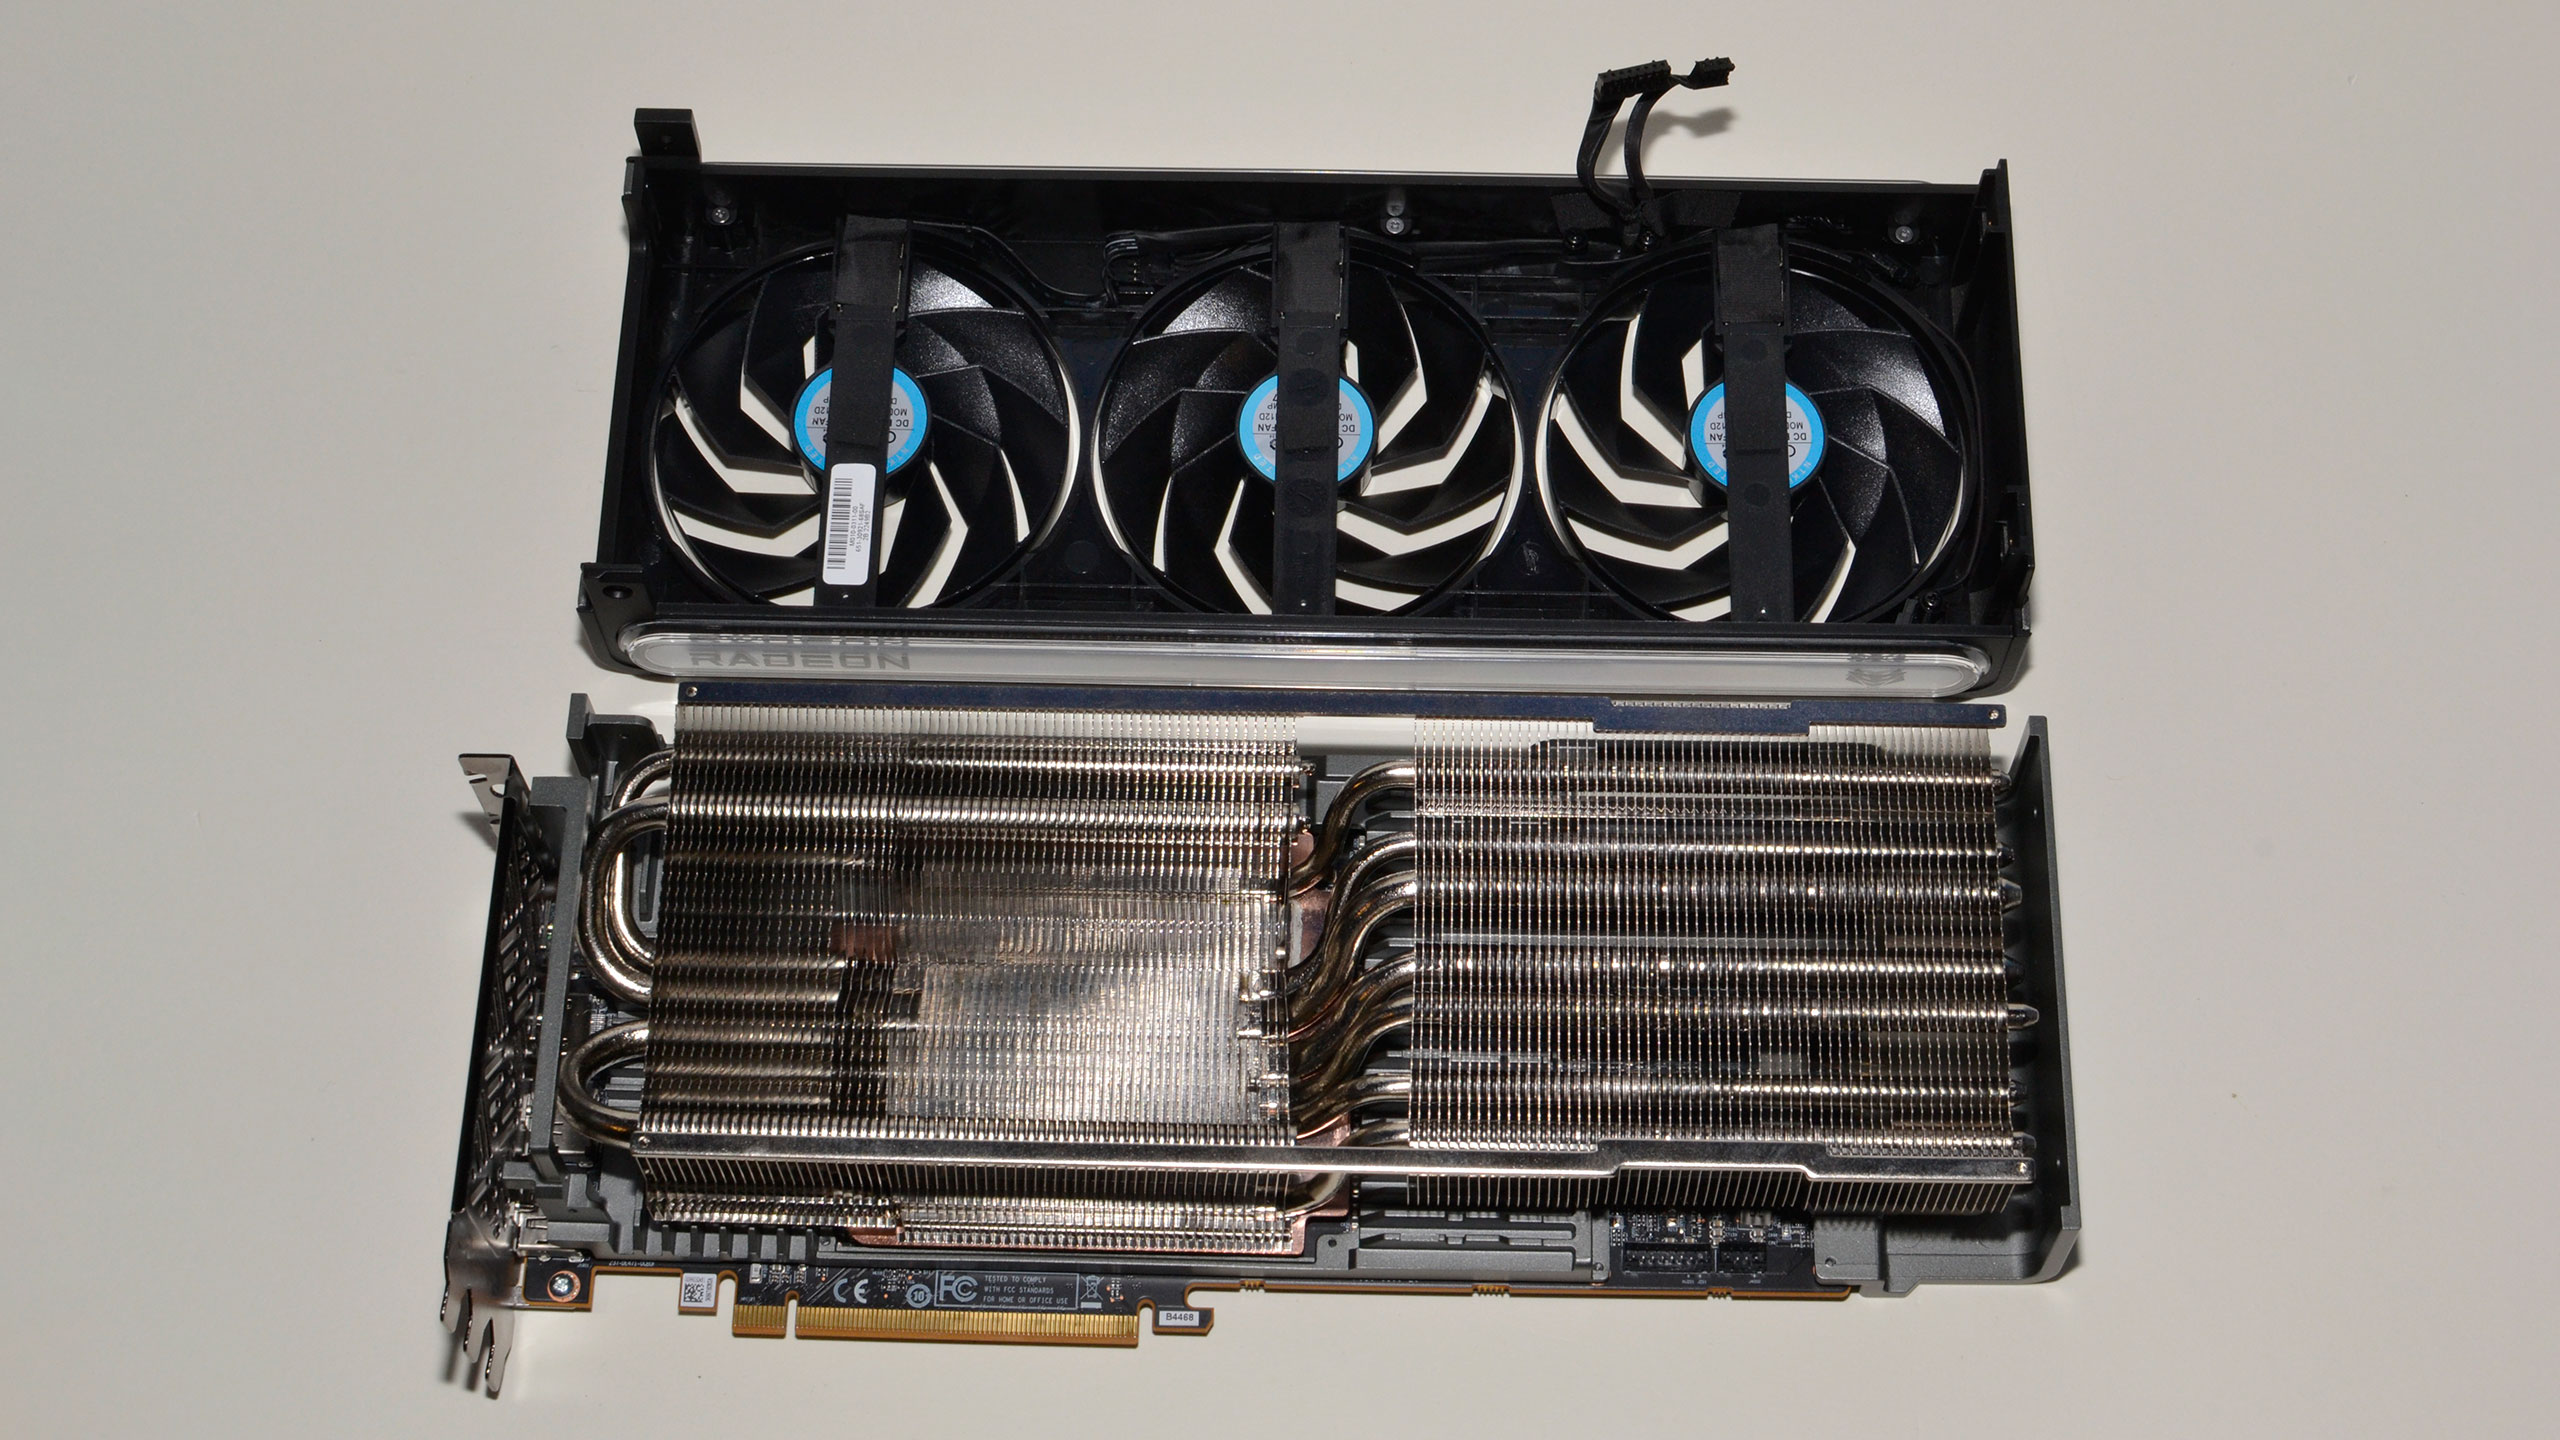
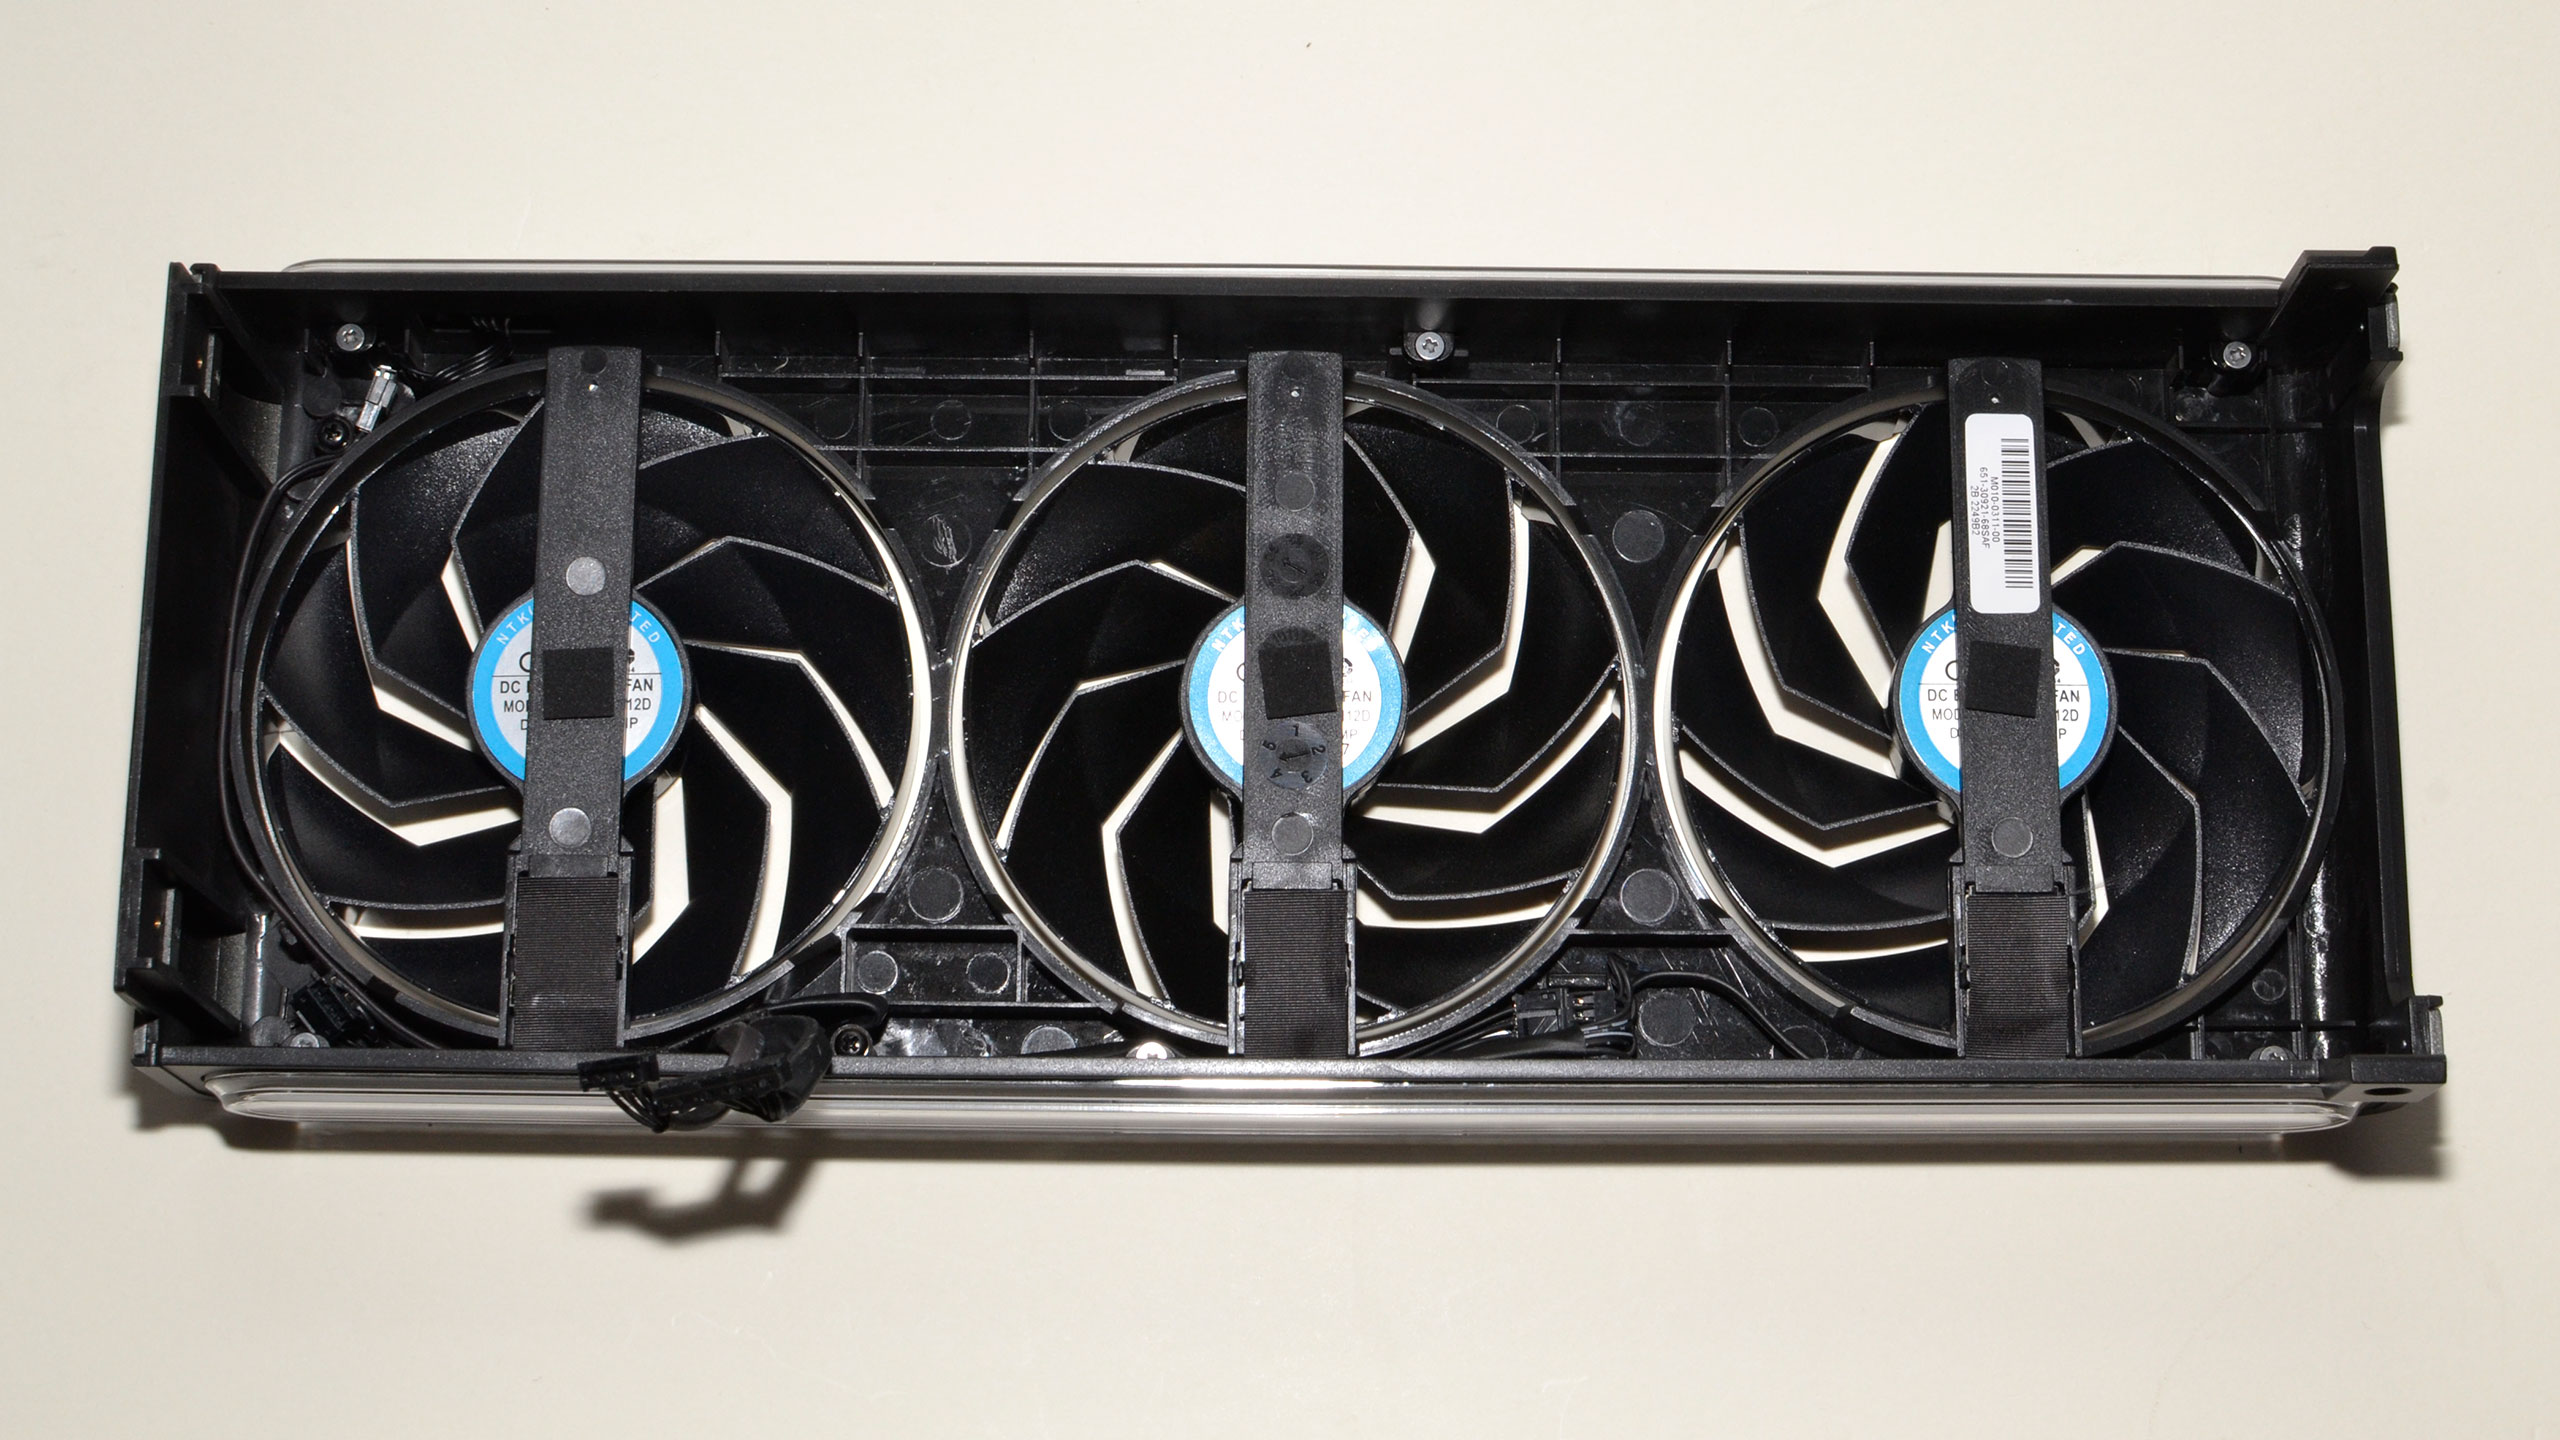
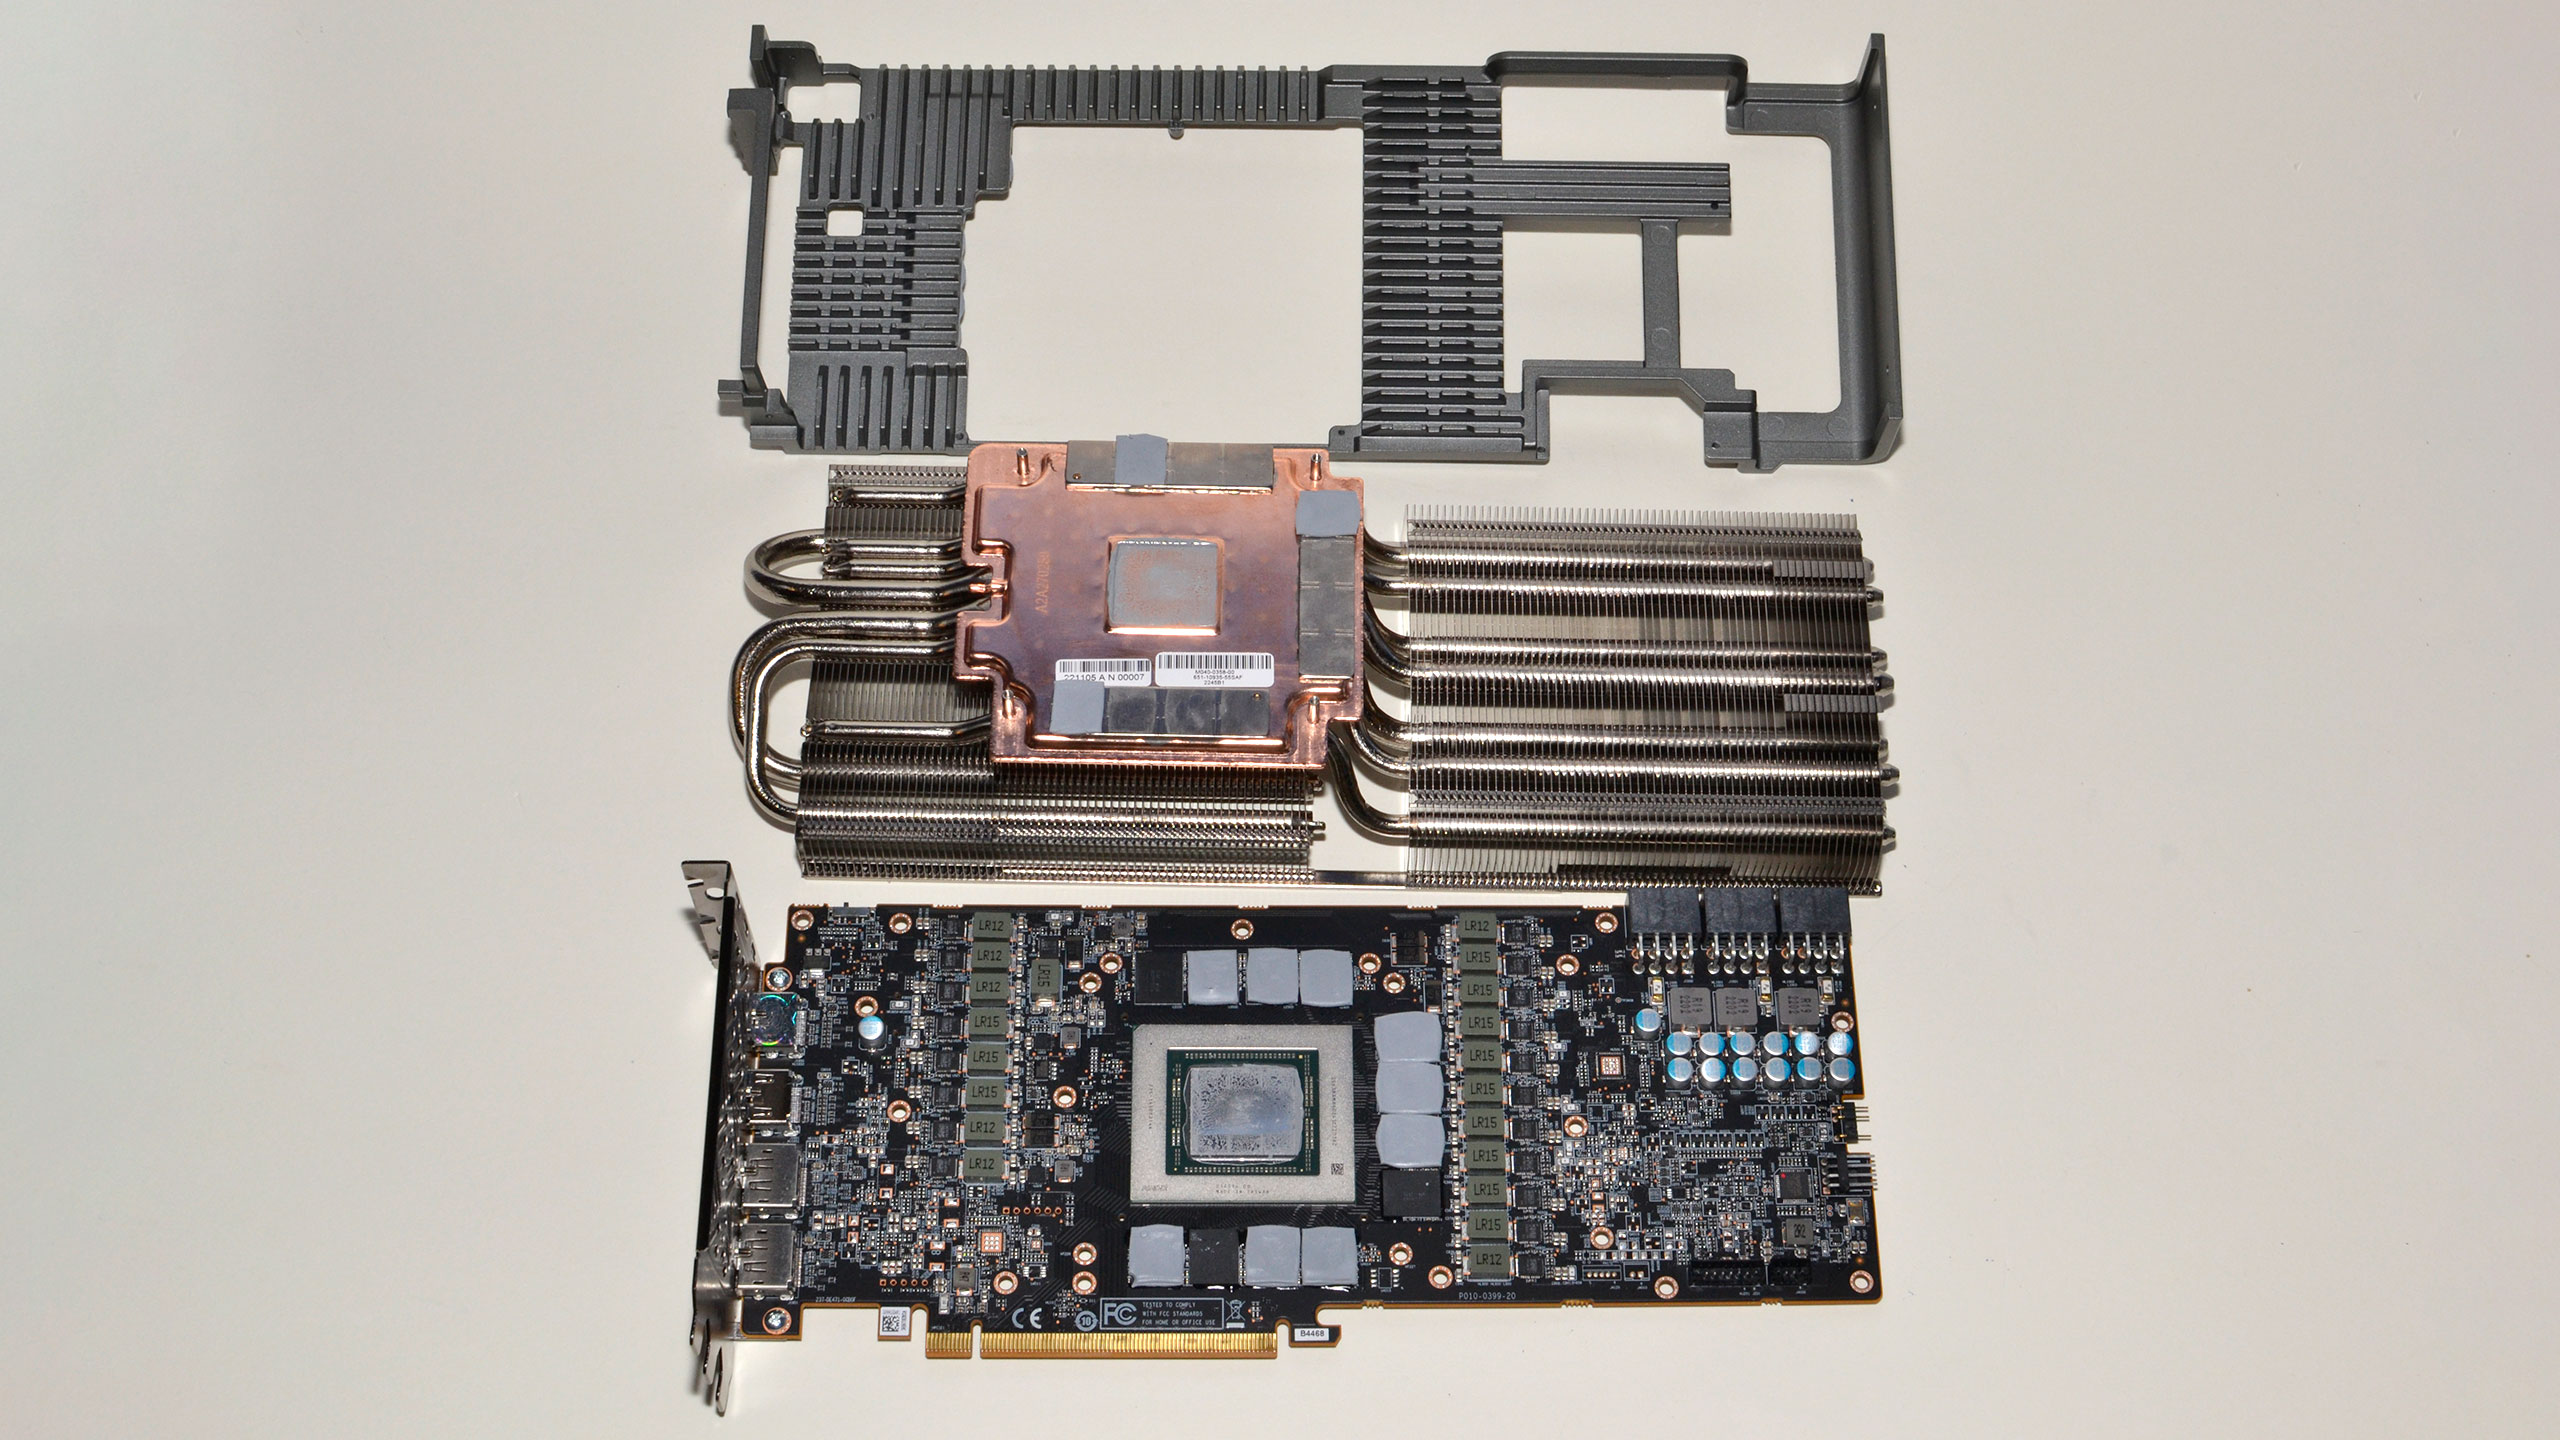
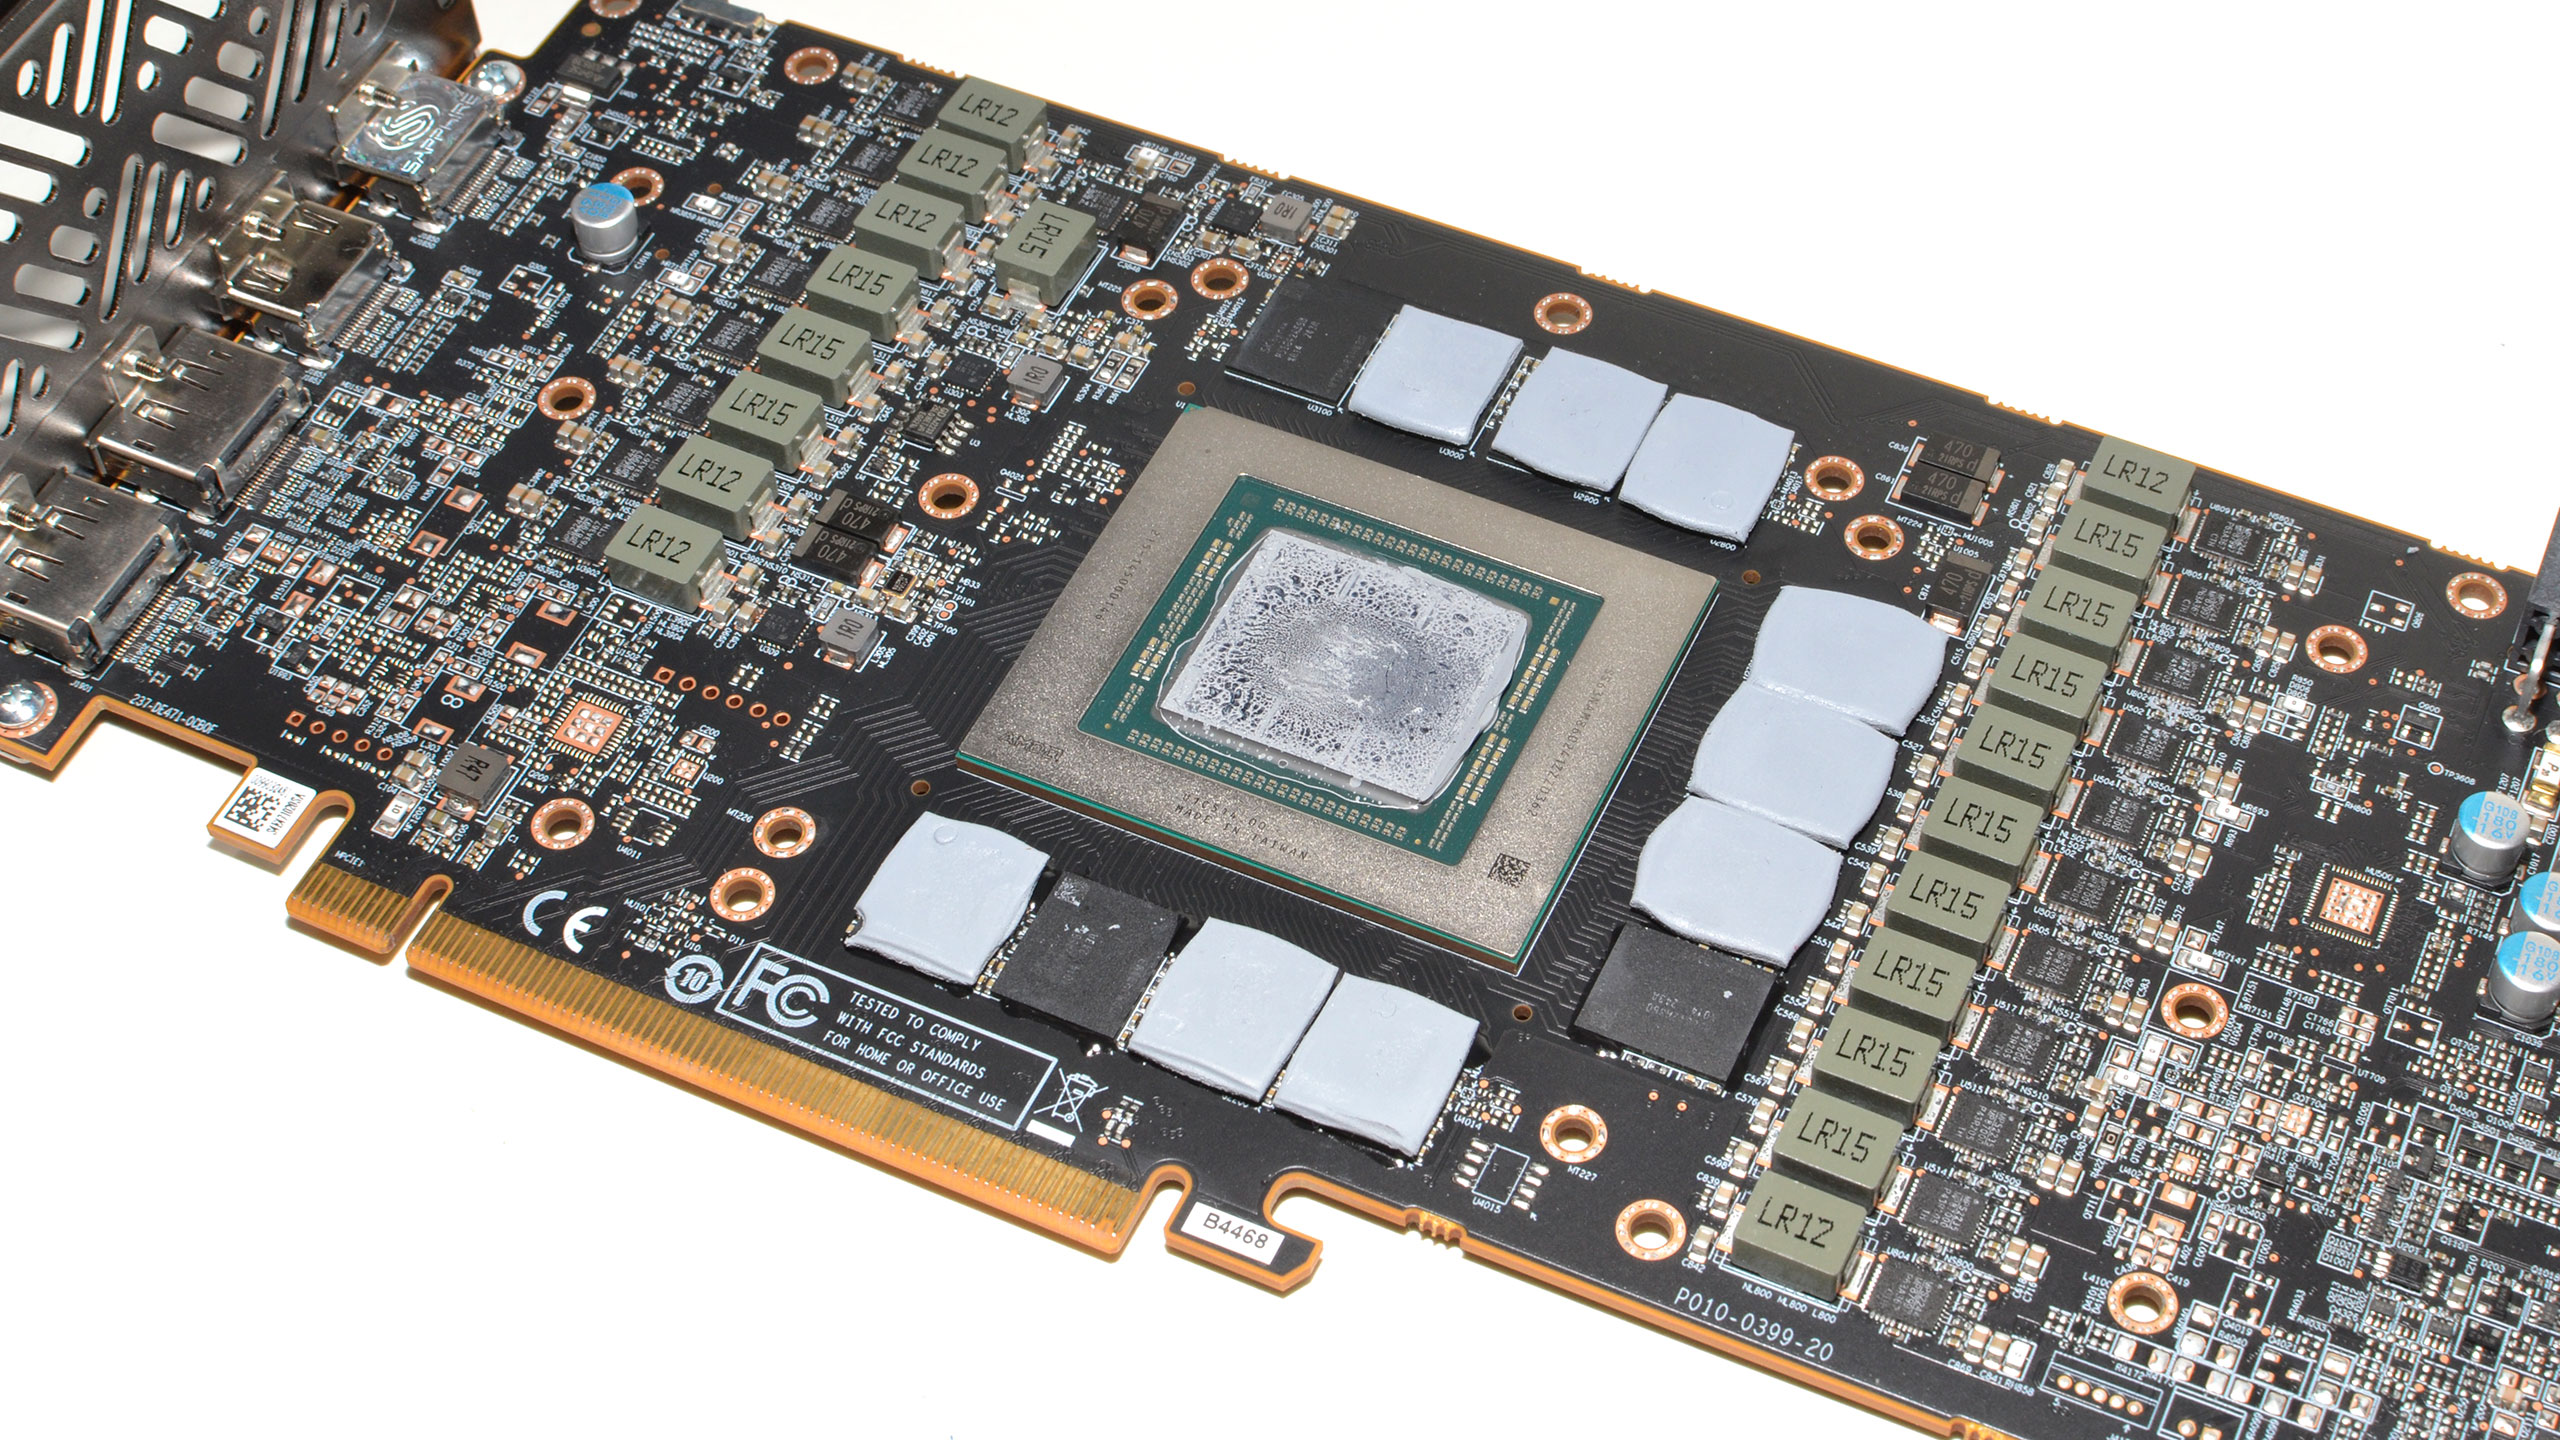
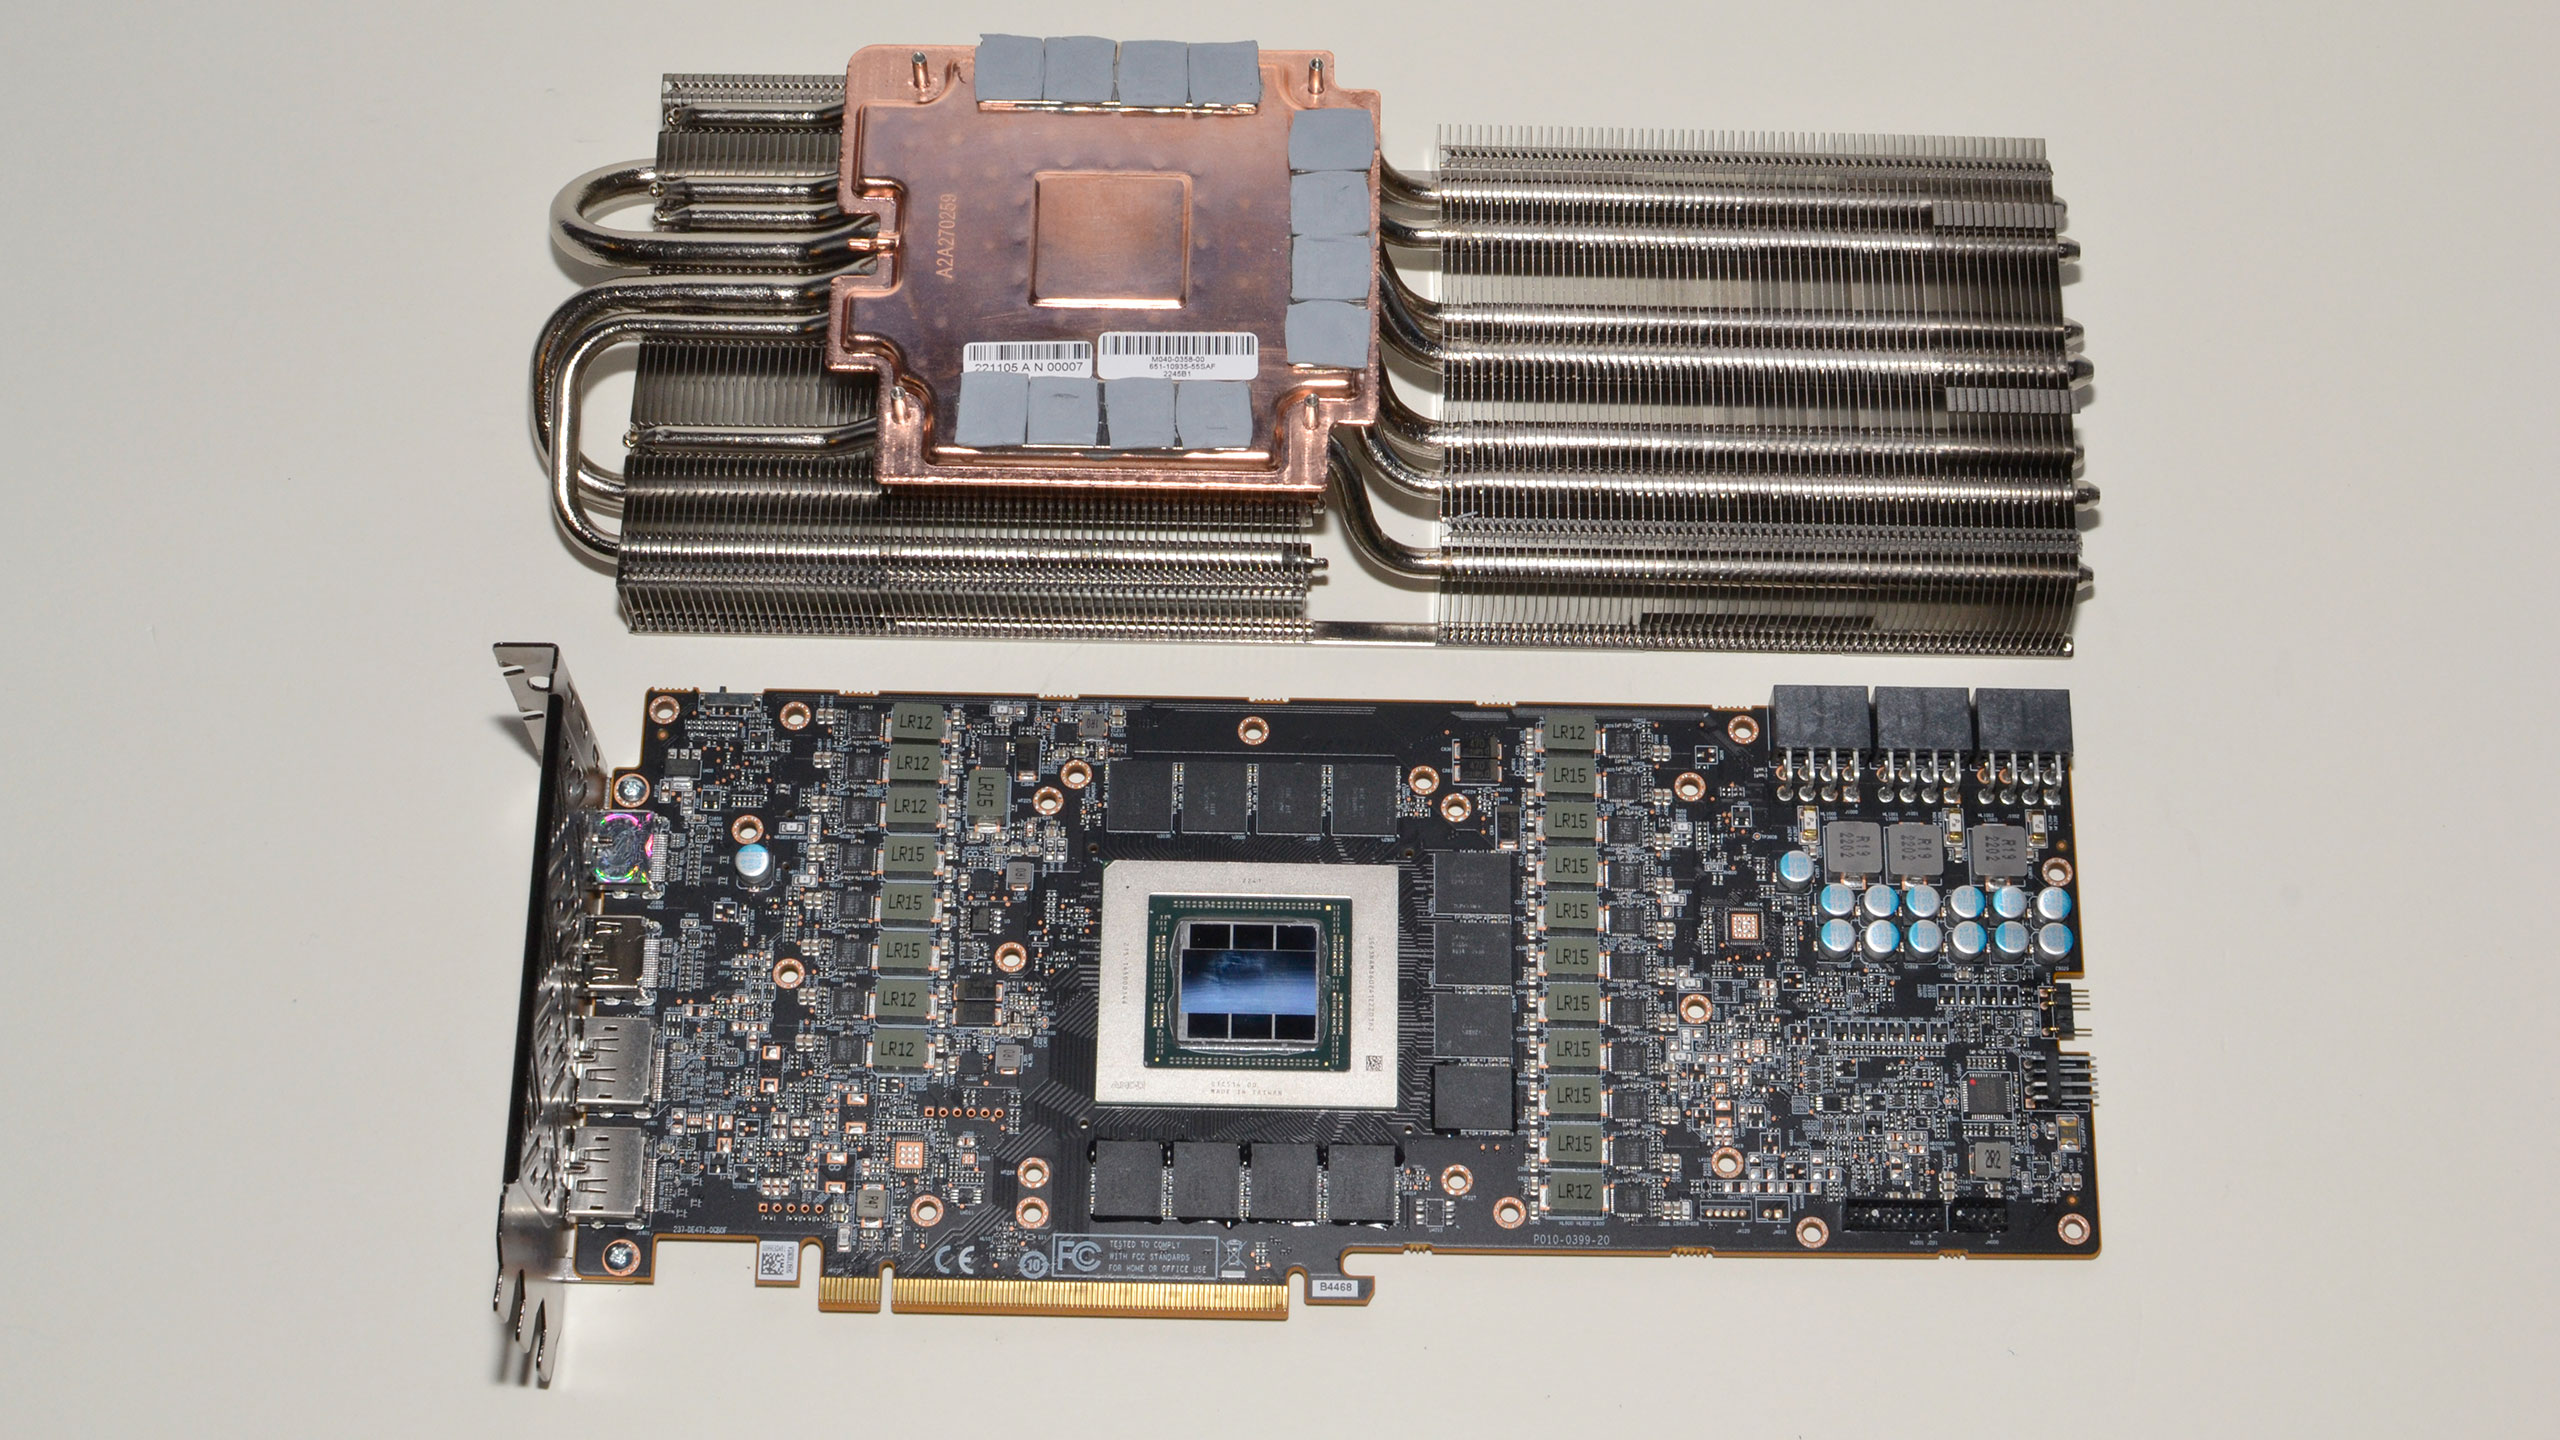
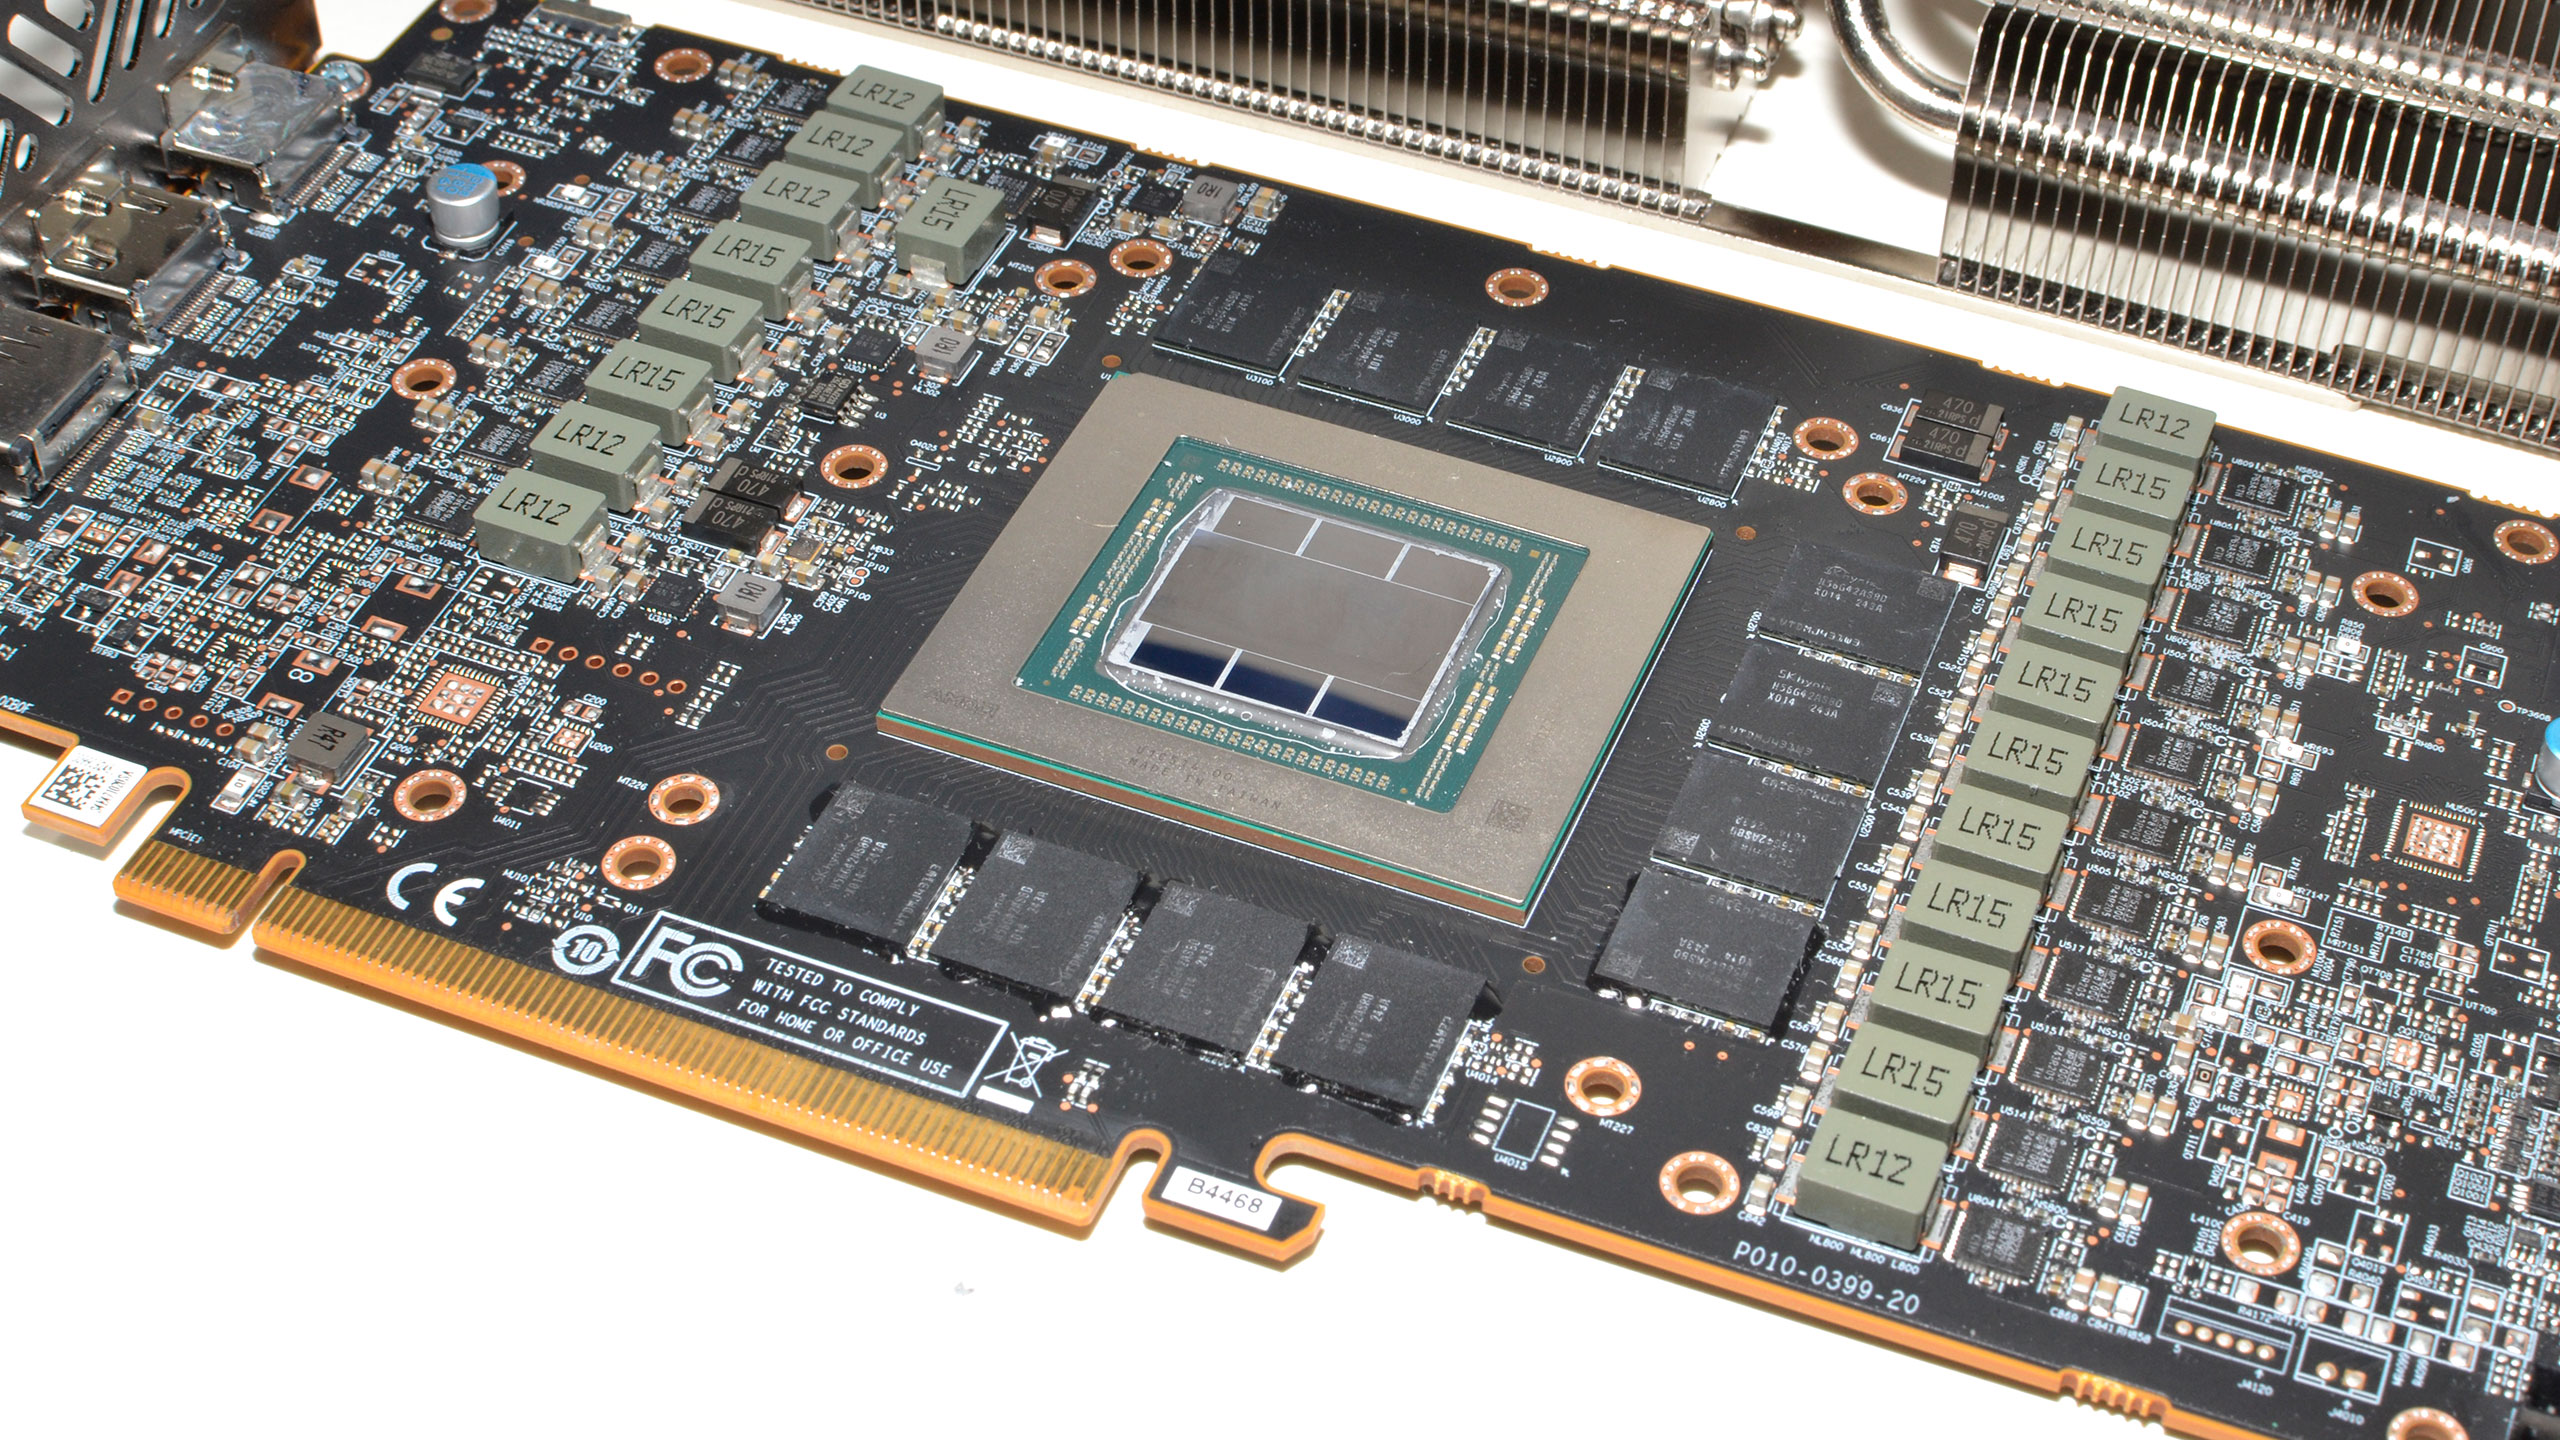
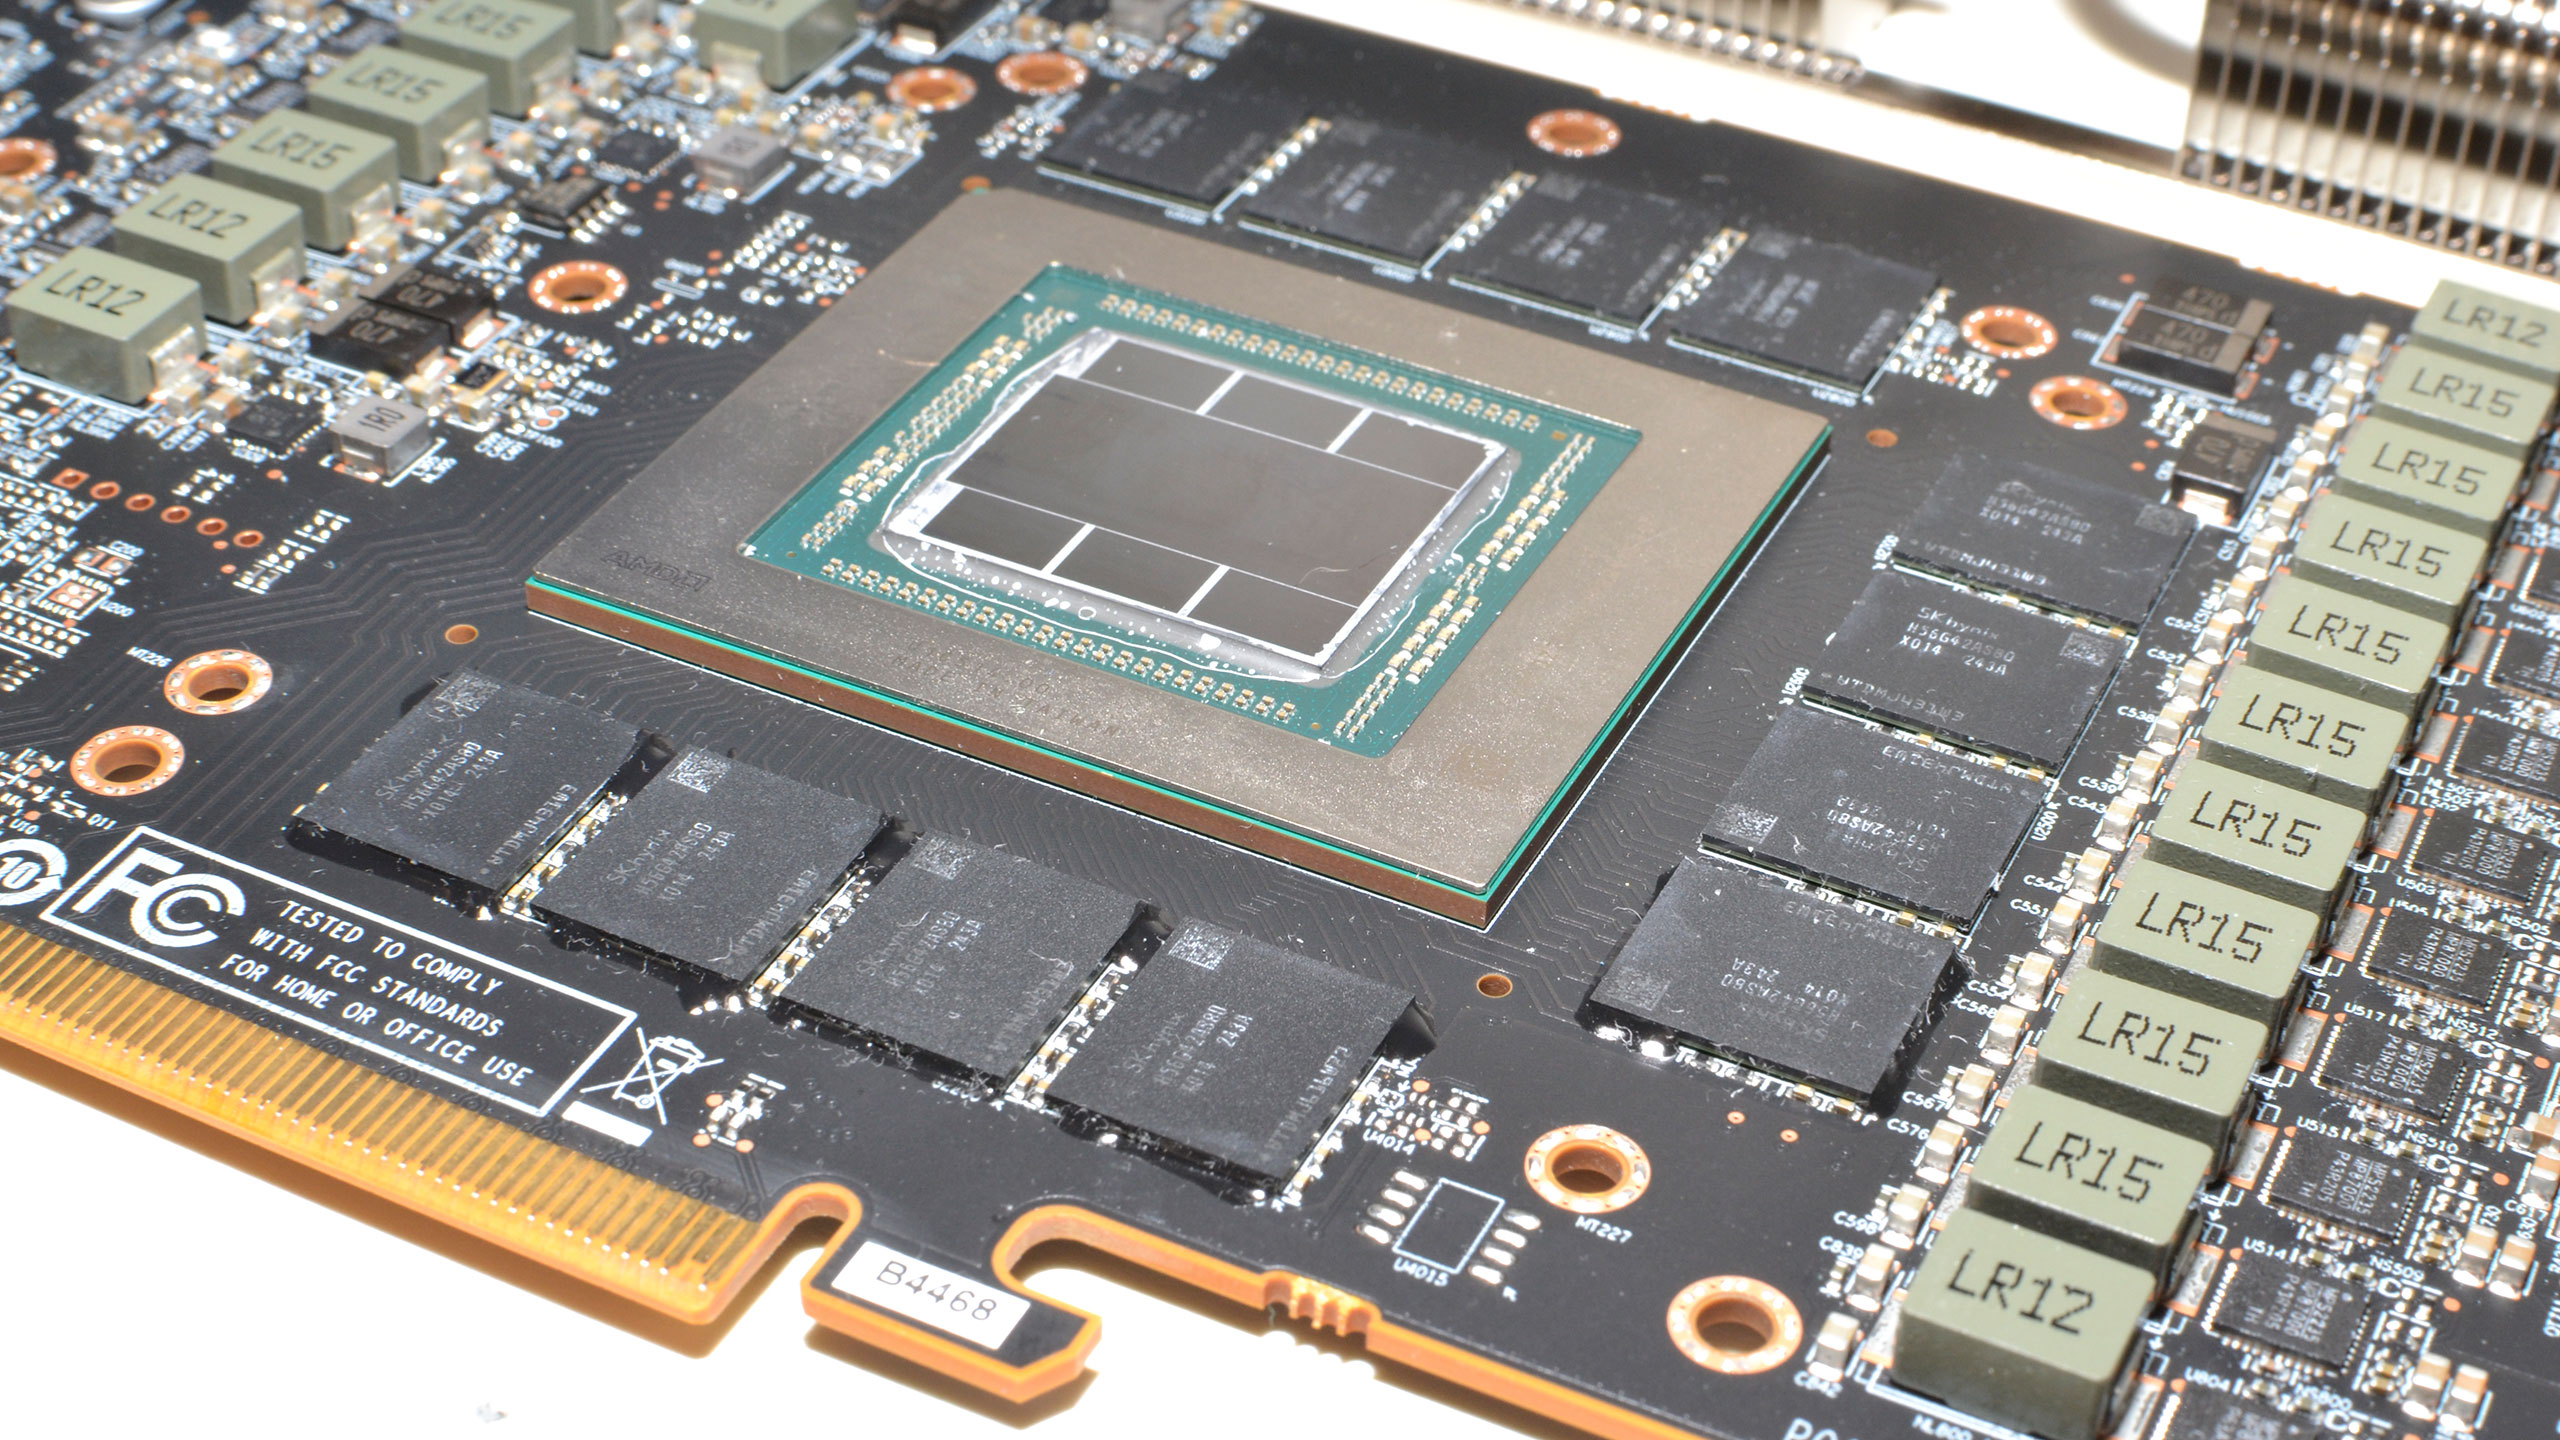
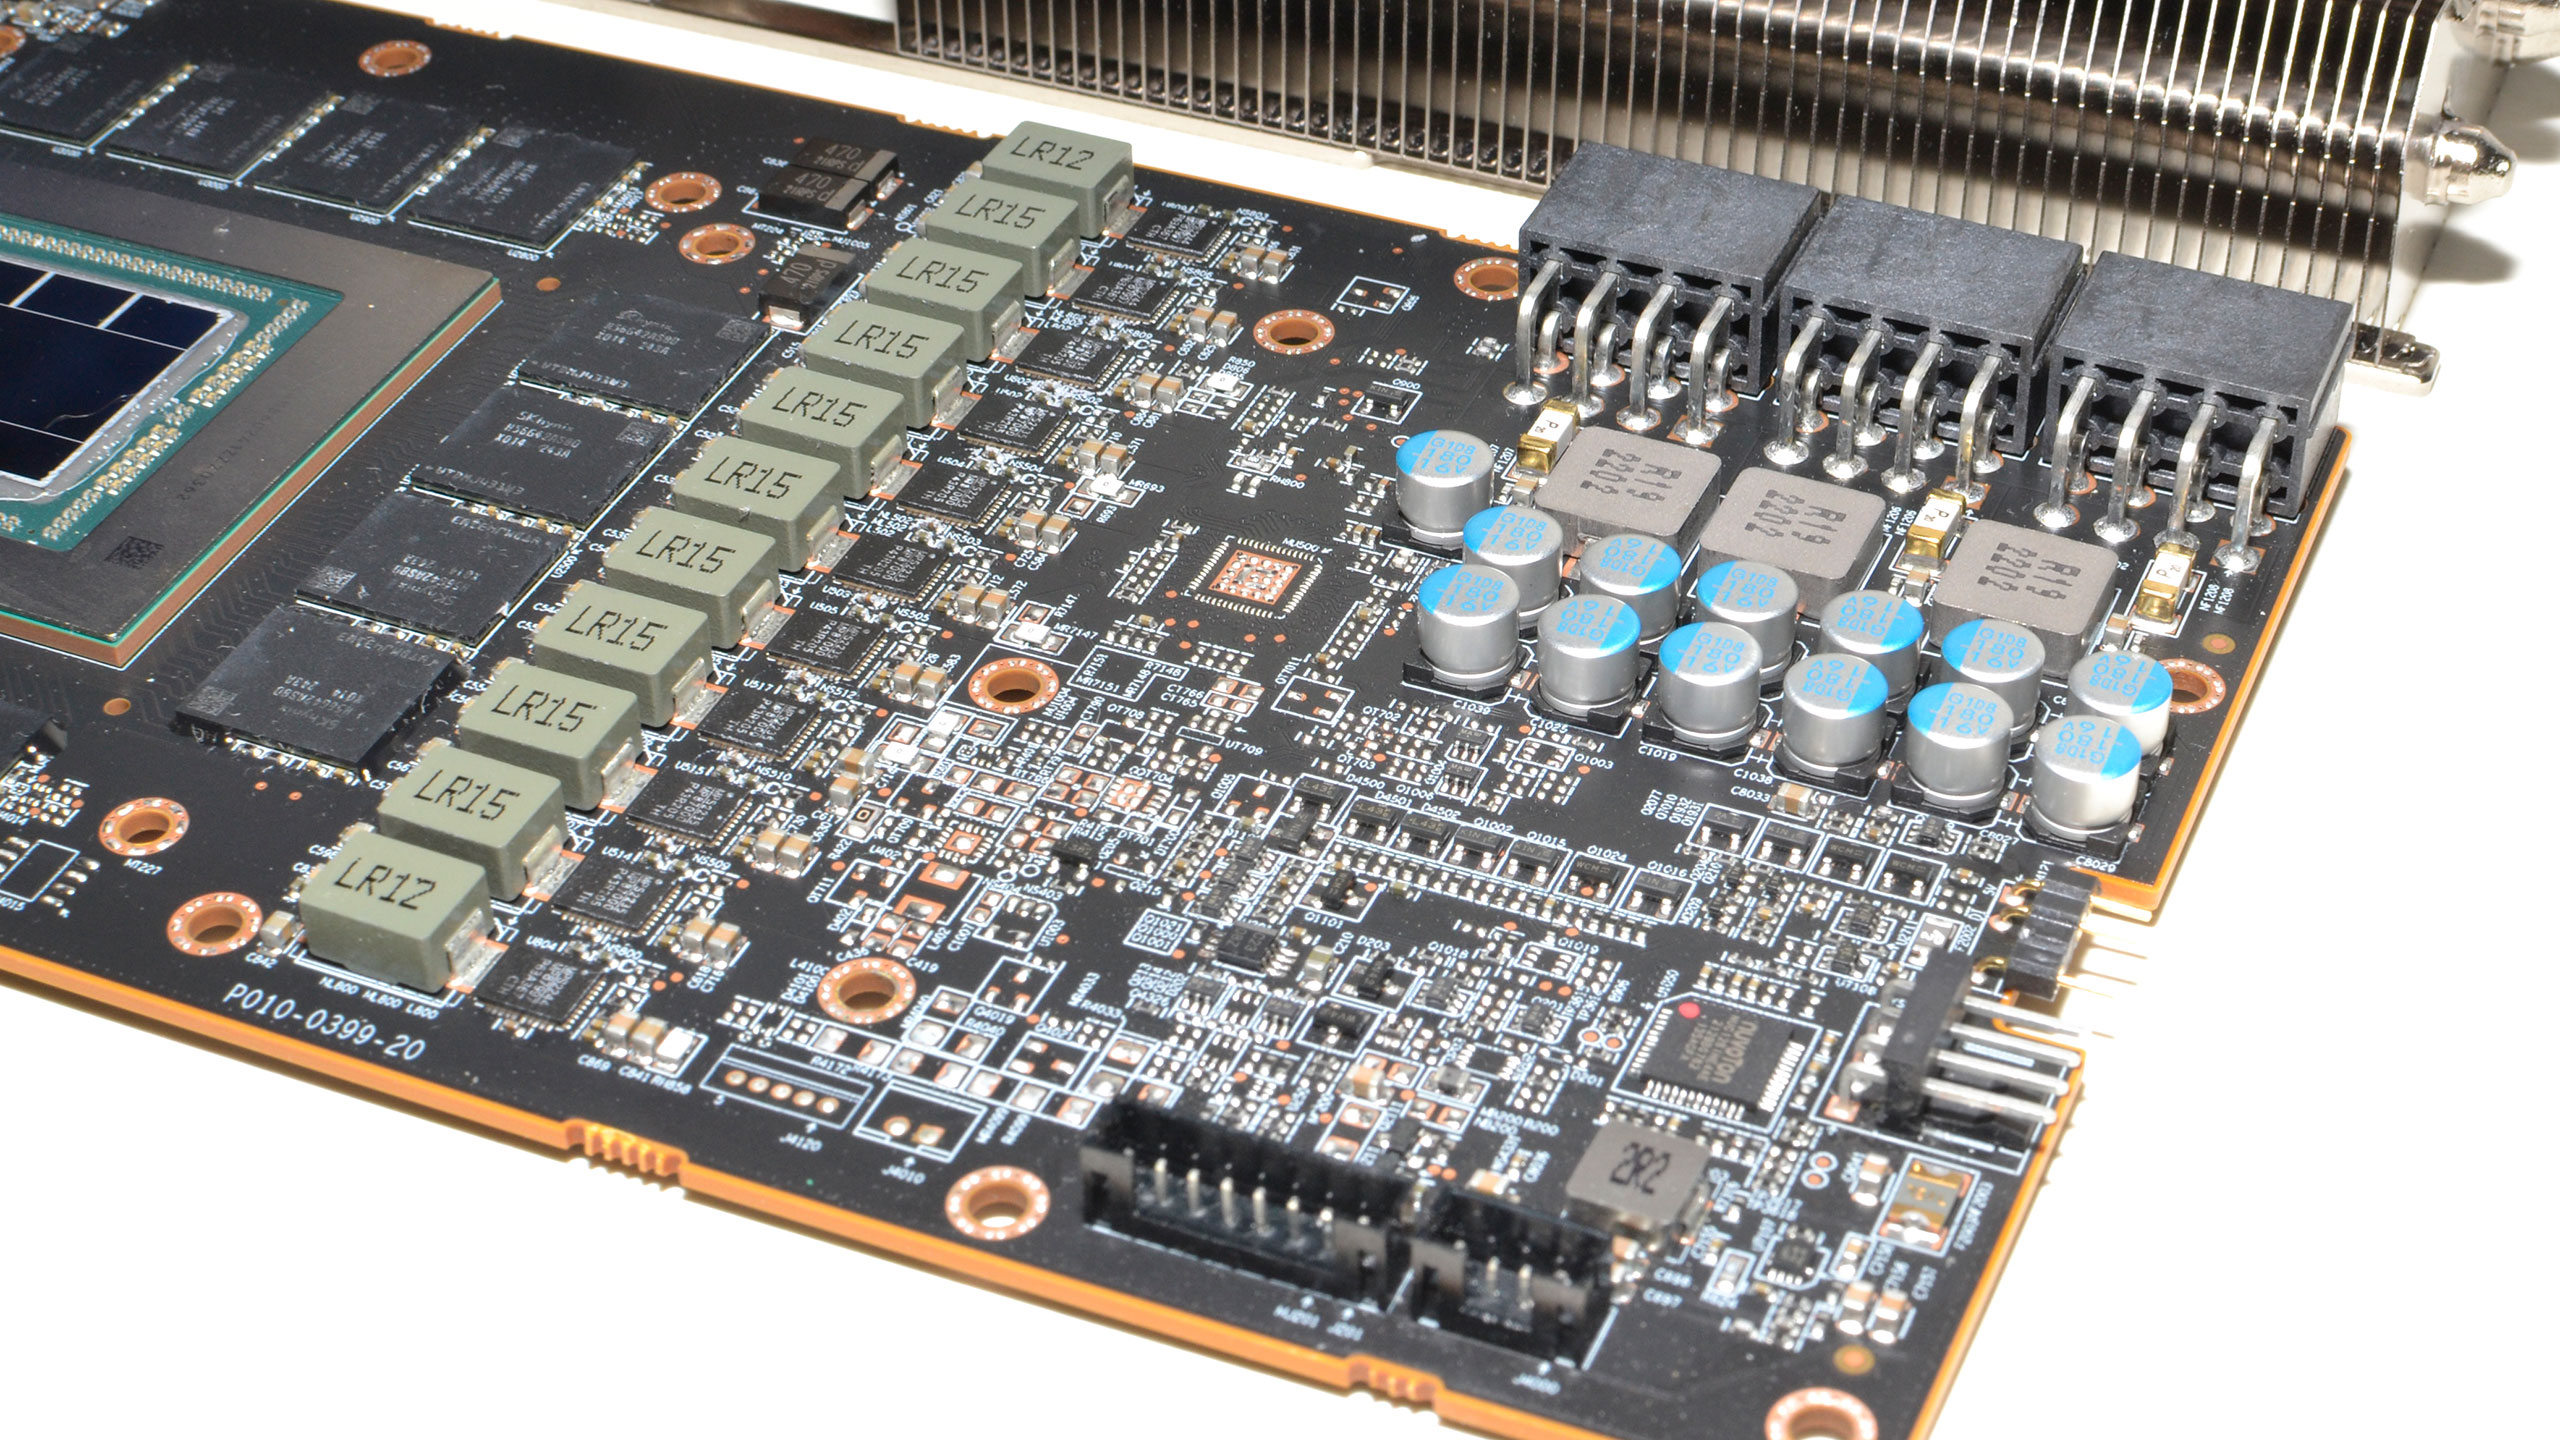
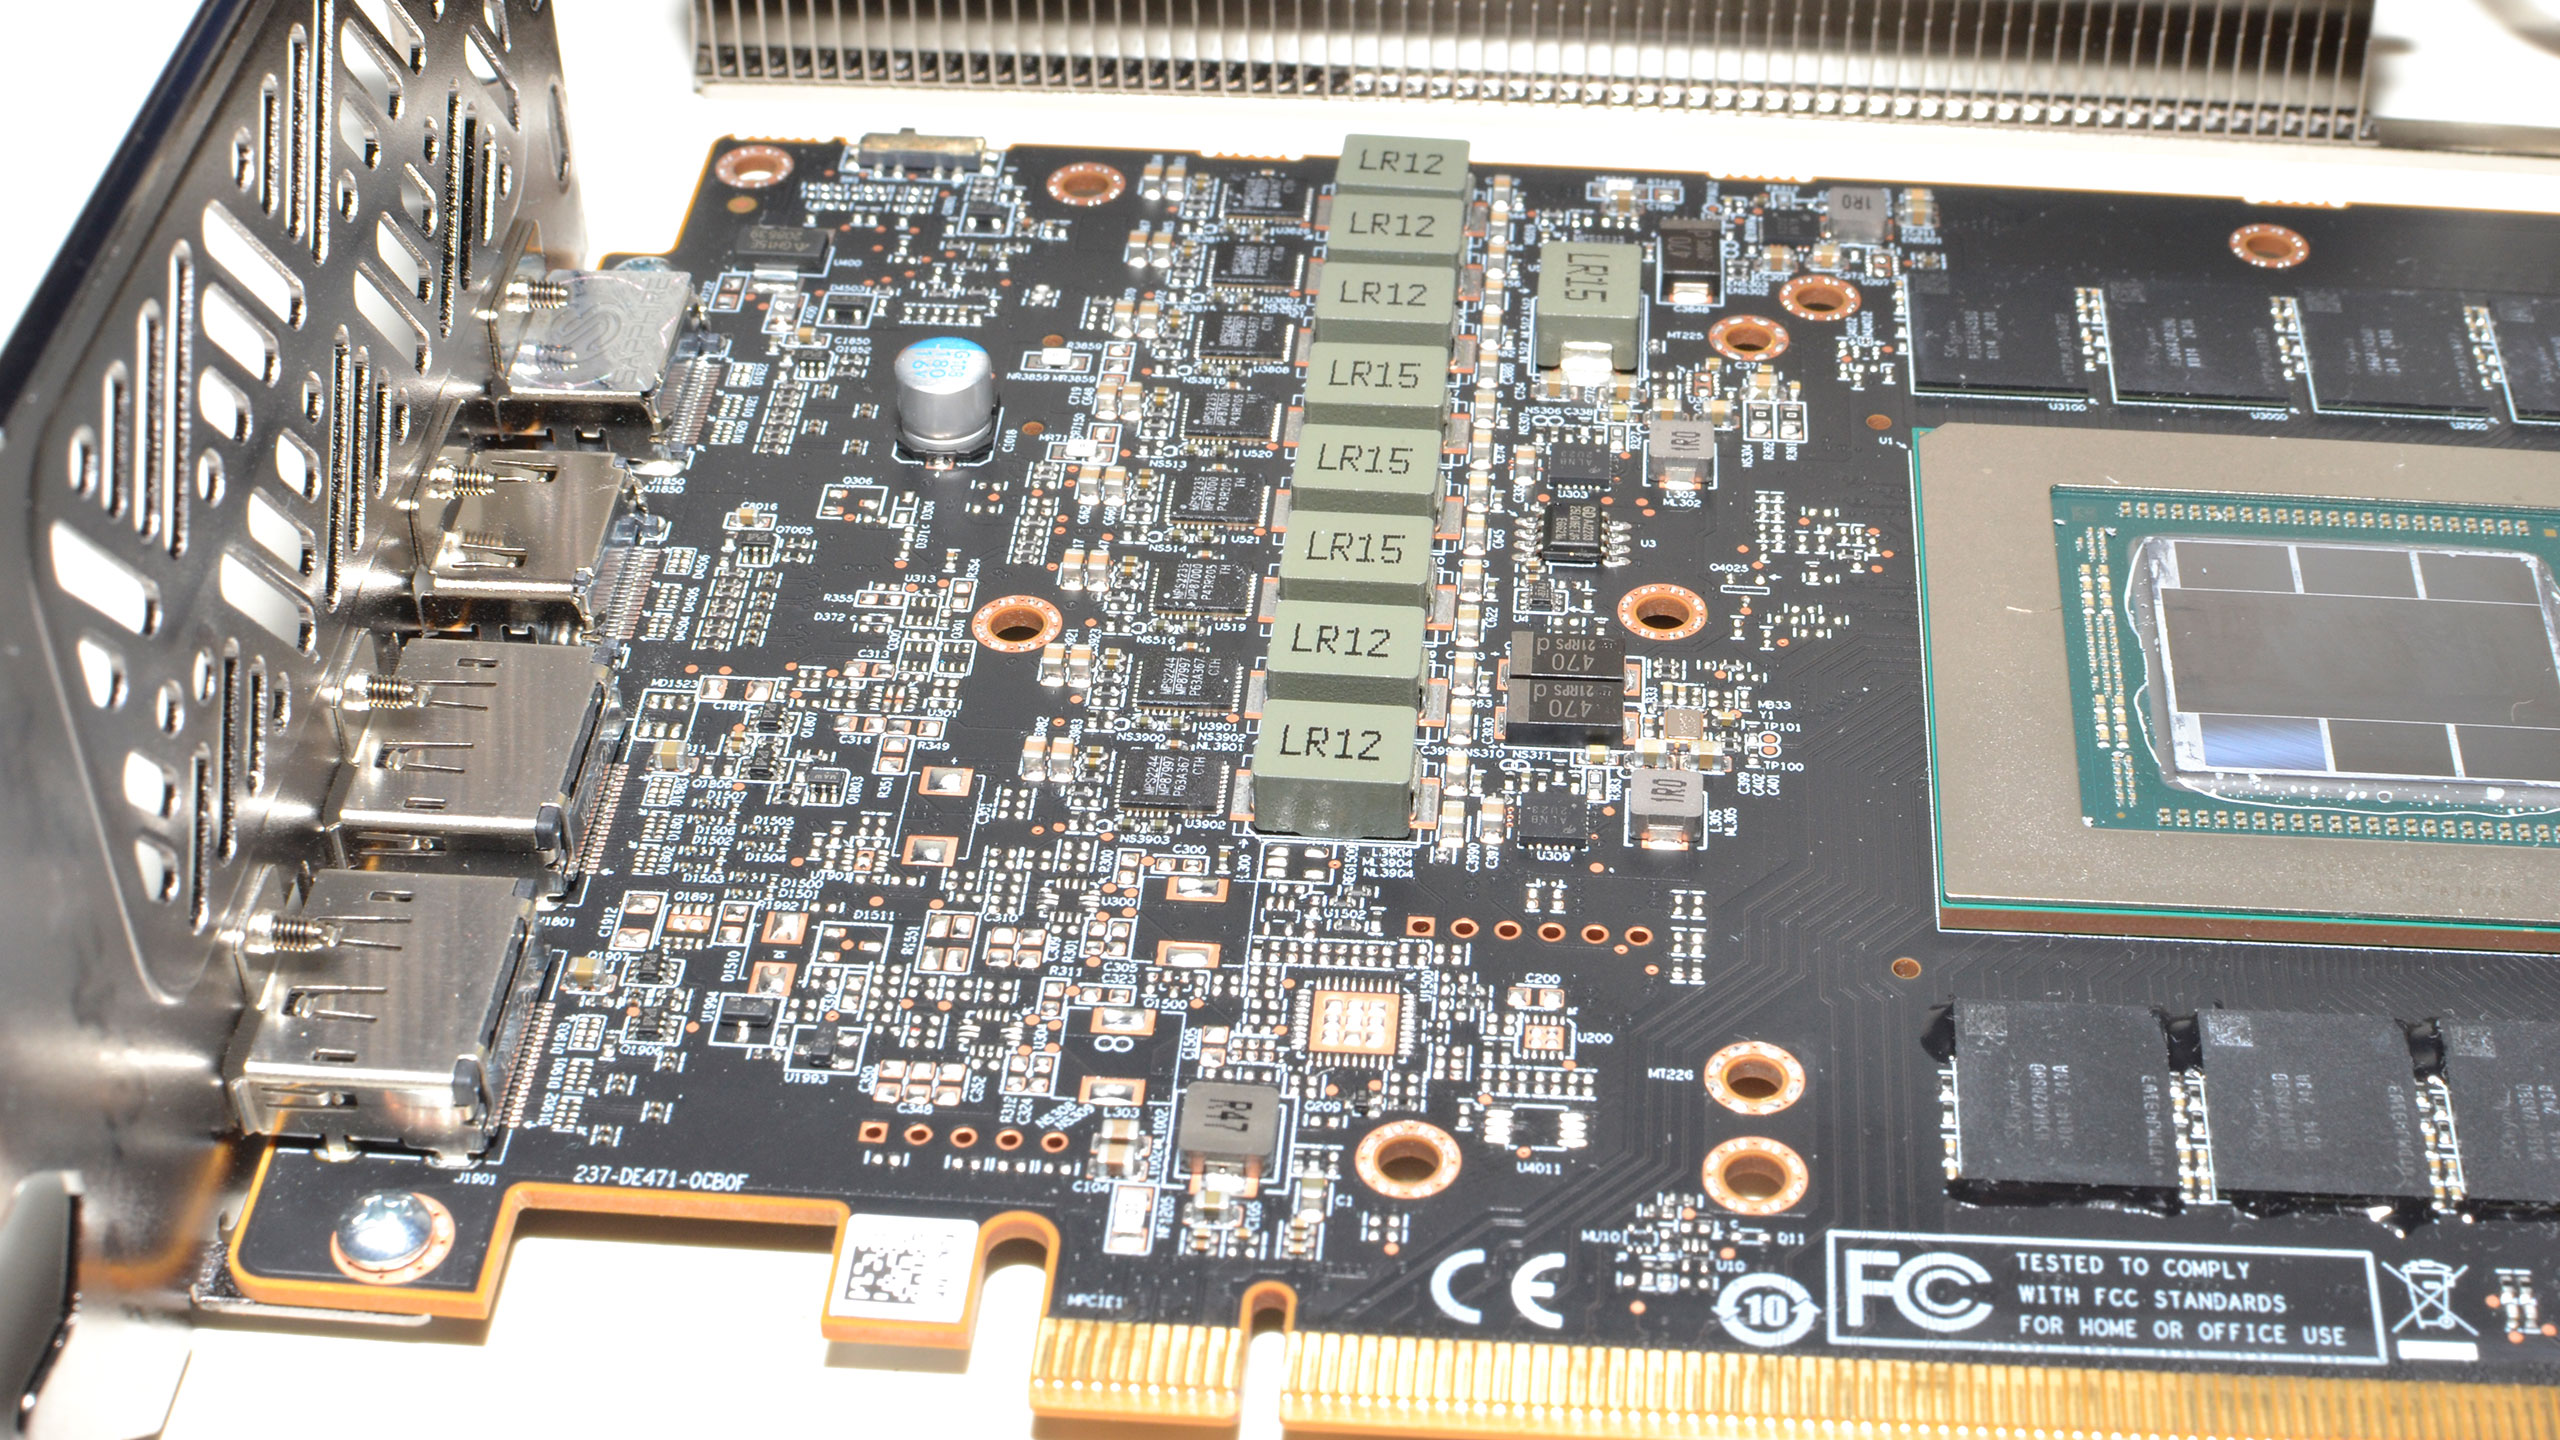
The first thing I did was to remove the ten Phillips head screws securing the backplate, but you're perhaps better off removing the top of the metal shroud with the three fans first. That's images five through nine in the above gallery. You'll need an Allen wrench set to do that, I'm not sure of the exact size I used, but it's relatively small, like in the 2mm range.
Being able to get easy access to the fans does have an advantage, as those are one of the most common failure points on graphics cards. Take out the four screws as shown and the top should come off, at which point you'll also want to disconnect the fan and RGB LED cables.
You can proceed with the rest of the teardown from here, starting with the backplate. There's another LED cable connecting the plate to the PCB, so be careful to disconnect that before pulling the plate away.
Next, there are four more (smaller) Phillips head screws on the IO bracket that you'll want to remove. Then there are four more screws that hold on the back pressure plate, two of which have stickers that may or may not void your warranty. Once all of these are out of the way, you should be able to pry the heatsink off the GPU and GDDR6 memory, and the extra heatsink/frame should also come off.
That's about it for the teardown, and you can see the GPU, inductors, VRMs, GDDR6, and other components in the rest of the pictures. Our particular sample uses twelve SK hynix 16Gb (2GB) memory packages labeled "H56G42AS8D X014" that corresponds with the "10.0 GHz" memory listed at the website.
There are 20 relatively large VRMs present, seven of which are LR12 modules and the remaining 13 are LR15. Sapphire appears to be using a 17+3 phase VRM design (though feel free to correct me if I got that wrong).
- MORE: Best Graphics Cards
- MORE: GPU Benchmarks and Hierarchy
- MORE: All Graphics Content
Get Tom's Hardware's best news and in-depth reviews, straight to your inbox.
Current page: Sapphire RX 7900 XTX Design and Teardown
Prev Page Sapphire RX 7900 XTX Nitro+ Vapor-X Review Next Page Sapphire RX 7900 XTX Overclocking and Test Setup
Jarred Walton is a senior editor at Tom's Hardware focusing on everything GPU. He has been working as a tech journalist since 2004, writing for AnandTech, Maximum PC, and PC Gamer. From the first S3 Virge '3D decelerators' to today's GPUs, Jarred keeps up with all the latest graphics trends and is the one to ask about game performance.
-
zecoeco This one narrows the gap even more with the RTX 4090.Reply
It tells me that AMD can offer an RTX 4090 beating card with a lower price tag, but for some reason they're not interested in the beyond $1000 market. -
-Fran- Thank God Sapphire is actually cheaper in the EU than any other AMD partner XDReply
Vis a vis, this card is the same price as PowerColor and Asus models.
Such a great performer, but I don't like this design xP
Regards. -
DavidLejdar Over here, Vapor-X sells for 1,499 Euro, and 7900 XTX for 1,269 Euro (including 19% VAT in both cases). And sure is quite a price difference for such a FPS difference. And then there is the RX 7900 XT, going for less than 1,000 Euro now.Reply
For the time being, I am fine with the RX 6700 XT (OC) though. At 1440p and ultra settings, I do get at least around 70 FPS in a number of games I tried so far.
A better GPU would increase the FPS, but it won't improve the built-in graphical assets of many a game, which are ever so often designed to run on consoles, where even the PS5 comes "only" with a peak performance of 10.3 TFlops. And a PC port usually doesn't redesign all of it, which means that a RX 6700 XT with 12.4 TFlops is not easily falling behind in that regard, especially when alongside a resonable CPU and a Gen4 SSD (which the PS5 and Xbox already have, for the increased transfer rate as well for the lower latency). -
cknobman IMO Ray Tracing today is like 4k gaming was back in the 1080ti generation.Reply
Its possible but requires too many compromises and should only be used in specific cases.
We need 1-2 more generations before ray tracing will be mainstream.
So right now I could care less about ray tracing, especially at anything above 1080p. -
Elusive Ruse Good stuff Jarred, thanks. Great card but at anything above $1000 it's criminal. Not like a thousand dollars is a fair price mind you.Reply -
redgarl So AMD AIBs card are costing more than reference cards and it is a con, but Nvidia ones are as worst but it is fine....Reply
You wonder why we can take you guys seriously?
OCJYDJXDRHwView: https://youtu.be/OCJYDJXDRHw -
redgarl You cannot find a 4090 at MSRP. They orbit around 1800$. And in all honesty, the 7900XTX AIB card can OC and be between 10-15% from a 4090.Reply -
redgarl The performance of this card is impressive, however the aesthetic is horrible. Even if the XFX model perform worst, it is still provide enough headroom for a similar OC, and at least, it is one of the best looking GPU available.Reply -
Sleepy_Hollowed Damn, if this was at MSRP I'd think about it, but it's a lot.Reply
A little issue I have is that I don't know why game engine companies don't have an option to turn on Ray Tracing on cut scenes only and then none during gameplay, I'd be down for that, not that there's much difference on how games look most games anyways. -
Exploding PSU Always liked Sapphire cards, and this one is no exception. I personally buy GPUs mostly on aesthetic (after considering pricing obviously), as performance-wise GPUs of the same series from different brands probably aren't really that different between each other, especially for a casual user like me. I mean, maybe a couple degrees difference in temperature or a single-digit percent in FPS, but honestly not enough for me to feel it.Reply
I liked the last year's model better (the Nitro Pure one), albeit I'm extremely impartial to white parts and random geometric shapes. The RGB look tasteful to me, albeit I personally wouldn't set it to rainbow colours and would settle to strictly static colour, kind of elegant.
Hey, that's just my opinion. From my short experience hanging around the forums I know any mention of RGB would invite open combat on the comments so... just to be on the safe side, the "you do you" disclaimer.
If I were in the market for a new GPU, I might consider picking this one up. But nah, I'm waiting for Yeston's turn.
I made fun of the box art on Sapphire's RX 6950 XT Nitro+ Pure, and I'm happy to say the blue and black artwork on the 7900 XTX is less ugly. Not that it really matters once you unpack the card.
Full transparency, the product packaging was part of the reason why I chose my current GPU. Yeah I know, doesn't make sense and all, but hey glad you mentioned the box... Cheers
