Seven $260-$320 X79 Express Motherboards, Reviewed
With 40 lanes of PCIe 3.0 connectivity to host all of our high-bandwidth devices, LGA 2011 certainly qualifies as a premium processor interface. Today we examine seven X79-based motherboards that offer high-end features at a more palatable price.
GA-X79-UD3 UEFI
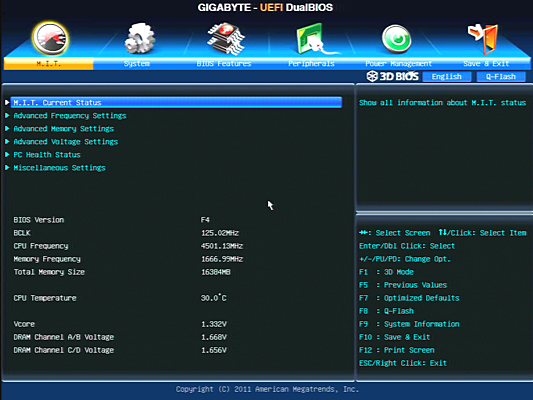
Gigabyte’s UEFI remains unchanged from our previous review, with the same over-abundance of features and menus to set just about anything an overclocker desires. Gigabyte says the F4 revision we used includes over-current protection for the CPU voltage regulator, while the later F7 revision recently proved itself in a recent record-breaking overclock.
Gigabyte even burns a little space by breaking some items into unnecessary submenus, while providing others with redundant locations. Ratio settings found in the Advanced Frequency Settings menu are, for example, also found in the submenus of each component they refer to.


Though most motherboards have trouble setting our CPU to multipliers beyond 36x, we were still able to get 4.5 GHz from the X79-UD3 using 36 x 125 MHz. Gigabyte made these settings easier to achieve by allowing higher Intel Turbo Boost ratios to be reduced. It's worth noting, though, that the “Real Time CPU Ratio Control in OS” option that sets all ratios simultaneously triggers the bug in our CPU when it's enabled.
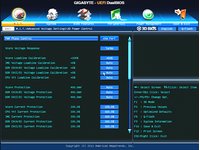
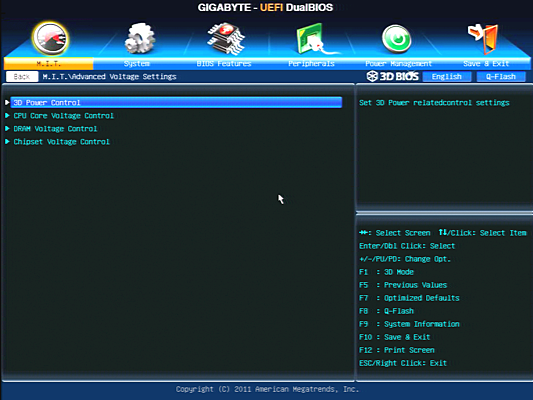
Gigabyte’s Advanced Voltage Control submenu gets tedious, with several sub-submenus that appear overloaded, and others that should have probably been folded into a combined page. We can understand why, for example, the 3D Power Control submenu is set apart:


Two pages of settings adjust everything from loadline calibration to PWM frequency on both the CPU core and DRAM. The X79-UD3 even extends memory current protection settings to per-channel levels, though we’re not sure why anyone would want to have lower limits on one channel than another.


While CPU voltage, DRAM voltage, and PCH voltage are all necessary settings in an overclocking board, spreading these across three menus simply complicates navigation.


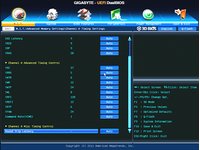
Setting DRAM Timing Selectable to “Quick” in the Advanced Memory Settings submenu allows all channels to be set simultaneously. Meticulous experts can also set each channel individually.
Get Tom's Hardware's best news and in-depth reviews, straight to your inbox.
-
Crashman jprahmanSo when will we see results with a C2?It's going to take around a month to prepare another roundup...so I guess good news comes with bad news, sorry.Reply -
Crashman amuffinfoxconn boards are pretty good.They've been making decent enthusiast boards on-and-off for a while.Reply -
morne Quick coment on looks only (I know its specs that count not looks but oh well)Reply
ASRock X79 Extreme6/GB - very nice all black looks better than gigabytes atempt
Asus P9X79 Pro - new baby blue they use on all the boards... not for me
ECS X79R-AX - looks like my old pentium 2 board with the white slots
Foxconn Quantumian-1 - i like i like gives a feeling of the ROG ASUS boards
Gigabyte X79-UD3 - rip of from the ASRock X79 Extreme6/GB (lol) plus the southbridge heatsink looks old fasion and ugly.
Intel DX79SI - now this board for me looks good actualy more than good looks the best :) must be the scull lol
MSI X79A-GD65 8D - also very nice love the blue + Black.
If you have one of the boards and i insulted it, wasnt the intention, just my view of the board>
-
stingstang My only question is.. Why do you guys need 6 freaking $1050 processors? Good golly gosh!Reply -
ubercake Great descriptive article.Reply
One thing I'm not sure of is the acceptance and actual usage of eSATA. While practical at some level, is anyone actually using this MB feature or is this one of those things the MB producers can skip out on like parallel and serial ports? I'm not sure enthusiasts are all that into using their eSATA ports?
Personally, I think this is one of those money saving opportunities MB producers should consider. -
geekapproved After the X58 anal pounding, you would be a moron to buy a X79. It's life is predicted to be even shorter than X58.Reply -
morne Actualy i agree with you ubercake, i have never used my E-sata, and with usb 3.0 out doubt anyone still uses E-sata if they have before.Reply


