10 Mammoth CPU Coolers: Size Does Matter
Installation
The user who wishes to install this cooler has a lot of work in store. First, the mainboard has to be dismantled, and - at least for socket 478 and the Athlon64 sockets - the retention module has to be removed. Then, a new backplate must be installed, which Asus calls an "H Backplate" because of its shape. A foam overlay protects the motherboard.
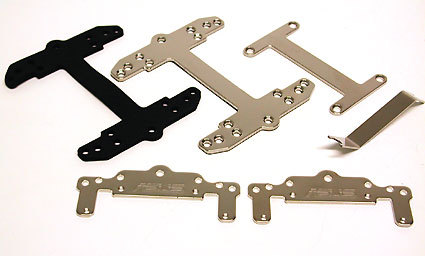
H-Plate and the fastening plate
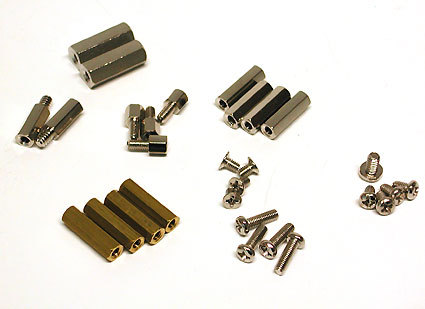
Now the going gets tough: four screws are inserted into the H-Backplate and secured from the front with nuts. Deciding which screw to use where is somewhat difficult; you would be advised to have a ruler around. The terms M3x10 or 5-M3x18 can be rather confusing for those who lack experience in a machine shop.
The large number of screws baffles the mind
While turning the screws, both the metal plate and the foam below it should be held in place. After all the screws have been attached, the board can be turned back over.
Now three metal sheets have to be fastened to the cooler. Although the cooler comes with instructions, it's not easy to figure out which screw to put in which sheet from which side - this is a cooler for real tinkerers.
With the help of this newly assembled metal sheet, the cooler can finally be attached. Don't forget the thermal compound! A mini Allen wrench is used to attach the cooler with four hexagonal bolts. That sounds easy enough, but because of the size of the cooler it is rather difficult, especially when the motherboard has already been mounted back into the case.
Get Tom's Hardware's best news and in-depth reviews, straight to your inbox.
Overall, you should allow an hour to install the cooler. The box coolers from AMD and Intel are certainly much quicker to install.

