Tom's Hardware Verdict
The Elegoo Neptune 4 Pro takes the already impressive Neptune 3 Pro and adds a part cooling fan, Klipper firmware, linear rods, and more features while keeping the price surprisingly low.
Pros
- +
Powerful direct drive extruder
- +
“Sport” mode part cooling fan
- +
Linear rods enable fast printing speed
- +
Synchronized dual Z-axis threaded rods
- +
Textured PEI build platform excels at part adhesion
Cons
- -
Build platform leveling requires manual input
Why you can trust Tom's Hardware
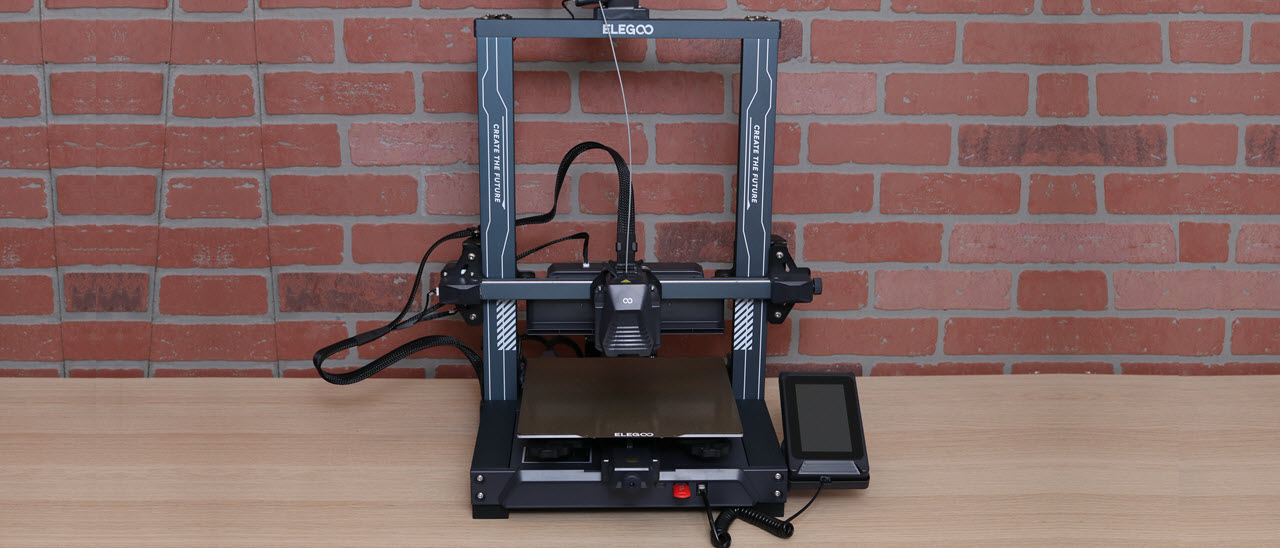
Not just another Creality Ender 3 i3-style clone, the Elegoo Neptune 4 Pro offers an impressive list of features including a large part cooling fan mounted to the X-axis, a direct-drive extruder with a 5.2:1 gear reduction ratio, Klipper firmware, and more. The Neptune 4 Pro offers an upgrade over the similarly-spec'd Neptune 4 in the form of linear rods on the X and Y-axes instead of the typical V-wheel configuration. The calibration is a mixed automatic / manual process, and is the primary weak point in this otherwise impressive machine.
When considering the features on the Elegoo Neptune 4 Pro and weighing them against the <$300 price point, it’s easy to see how this printer makes it on the list of Best Budget 3D Printers. The assembly of this printer is simple enough for first-time users, but the feature set will allow them to grow into the machine without needing to replace it. The simplified interface of Elegoo Cura provides a similarly friendly experience while remaining powerful enough for prosumers.
Specifications of Elegoo Neptune 4 Pro
| Machine Footprint | 18.70 x 17.52 x 20.28 inches (475mm x 445mm x 515mm) |
| Build Volume | 8.85 x 8.85 x 10.43 inches (225mm x 225mm x 265mm) |
| Material | 1.75mm PLA, PLA+, TPU, PETG, Nylon, ABS |
| Power Supply | 310W |
| Bed Leveling | 121-Point Automatic Mesh Leveling |
| Nozzle | .4mm |
| Max. Nozzle Temperature | 300°C / 572°F |
| Max. Bed Temperature | 110°C / 230°F |
| Printing Speed | 30-500mm/s (Suggested Speed: 250mm/s) |
| Build Platform | Magnetic Flexible Removable PEI Platform |
| Connectivity | USB, microSD |
| Interface | 4.3-inch Color Touchscreen LCD |
Unpacking and Assembling the Elegoo Neptune 4 Pro
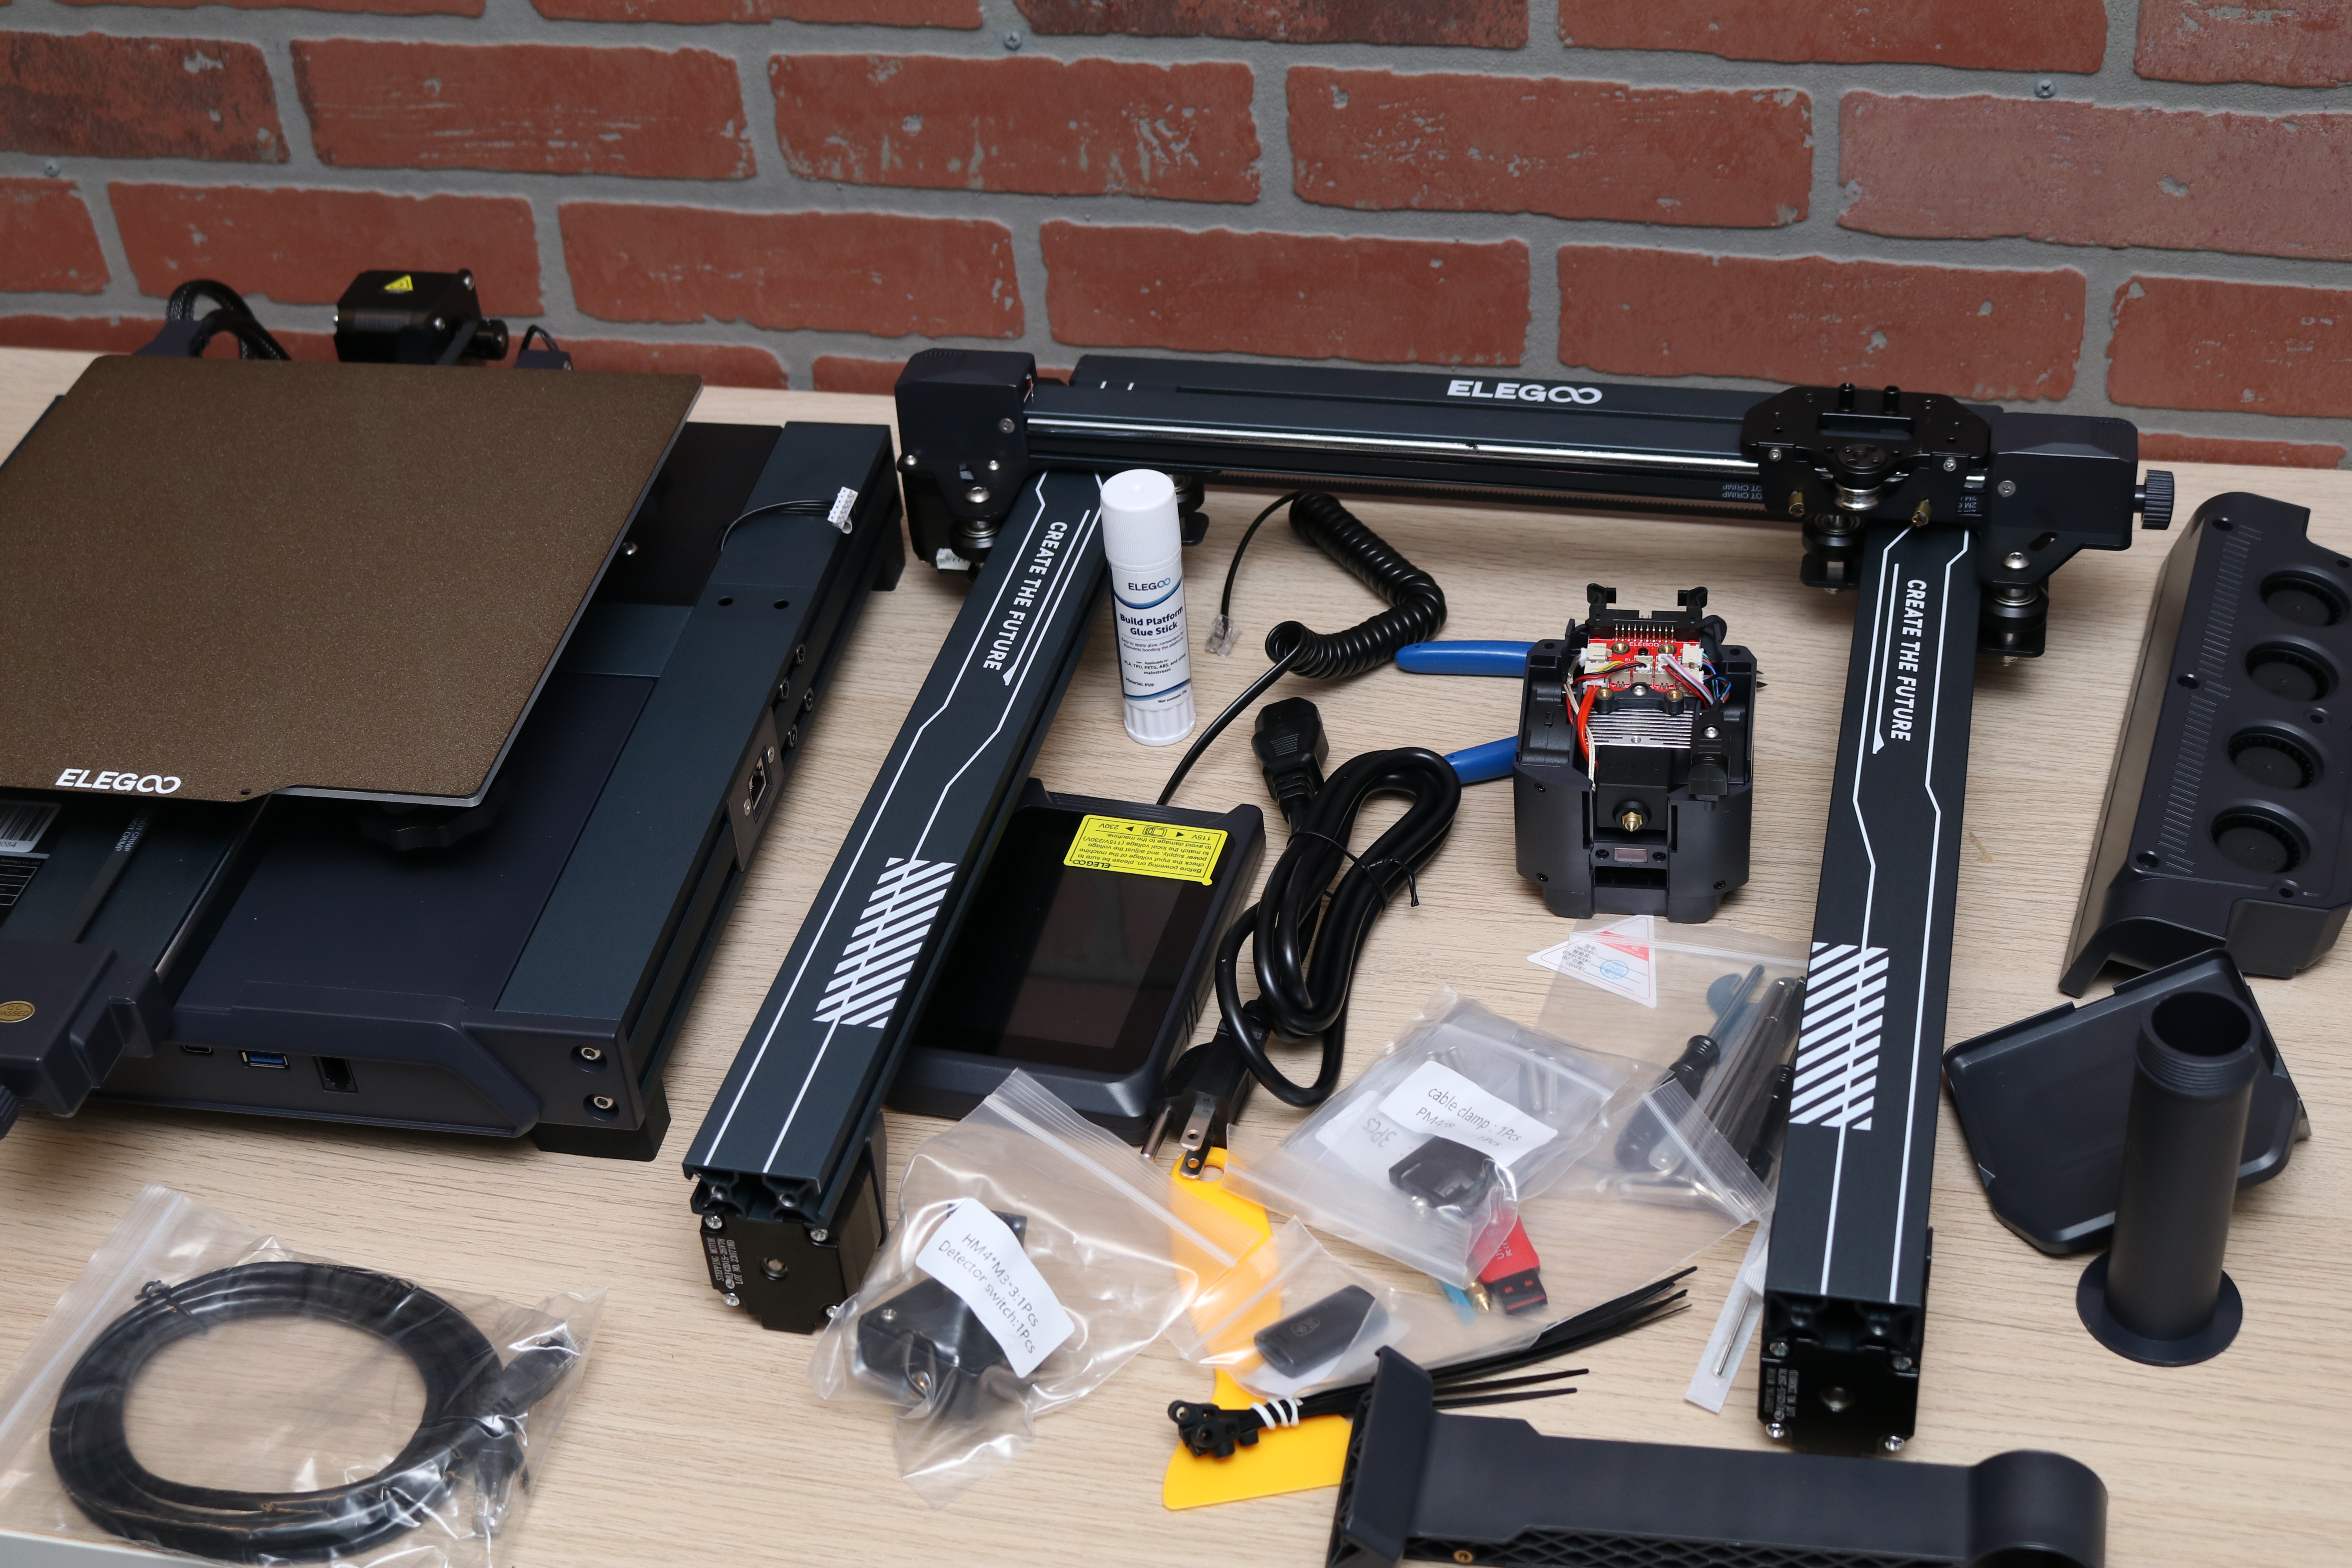
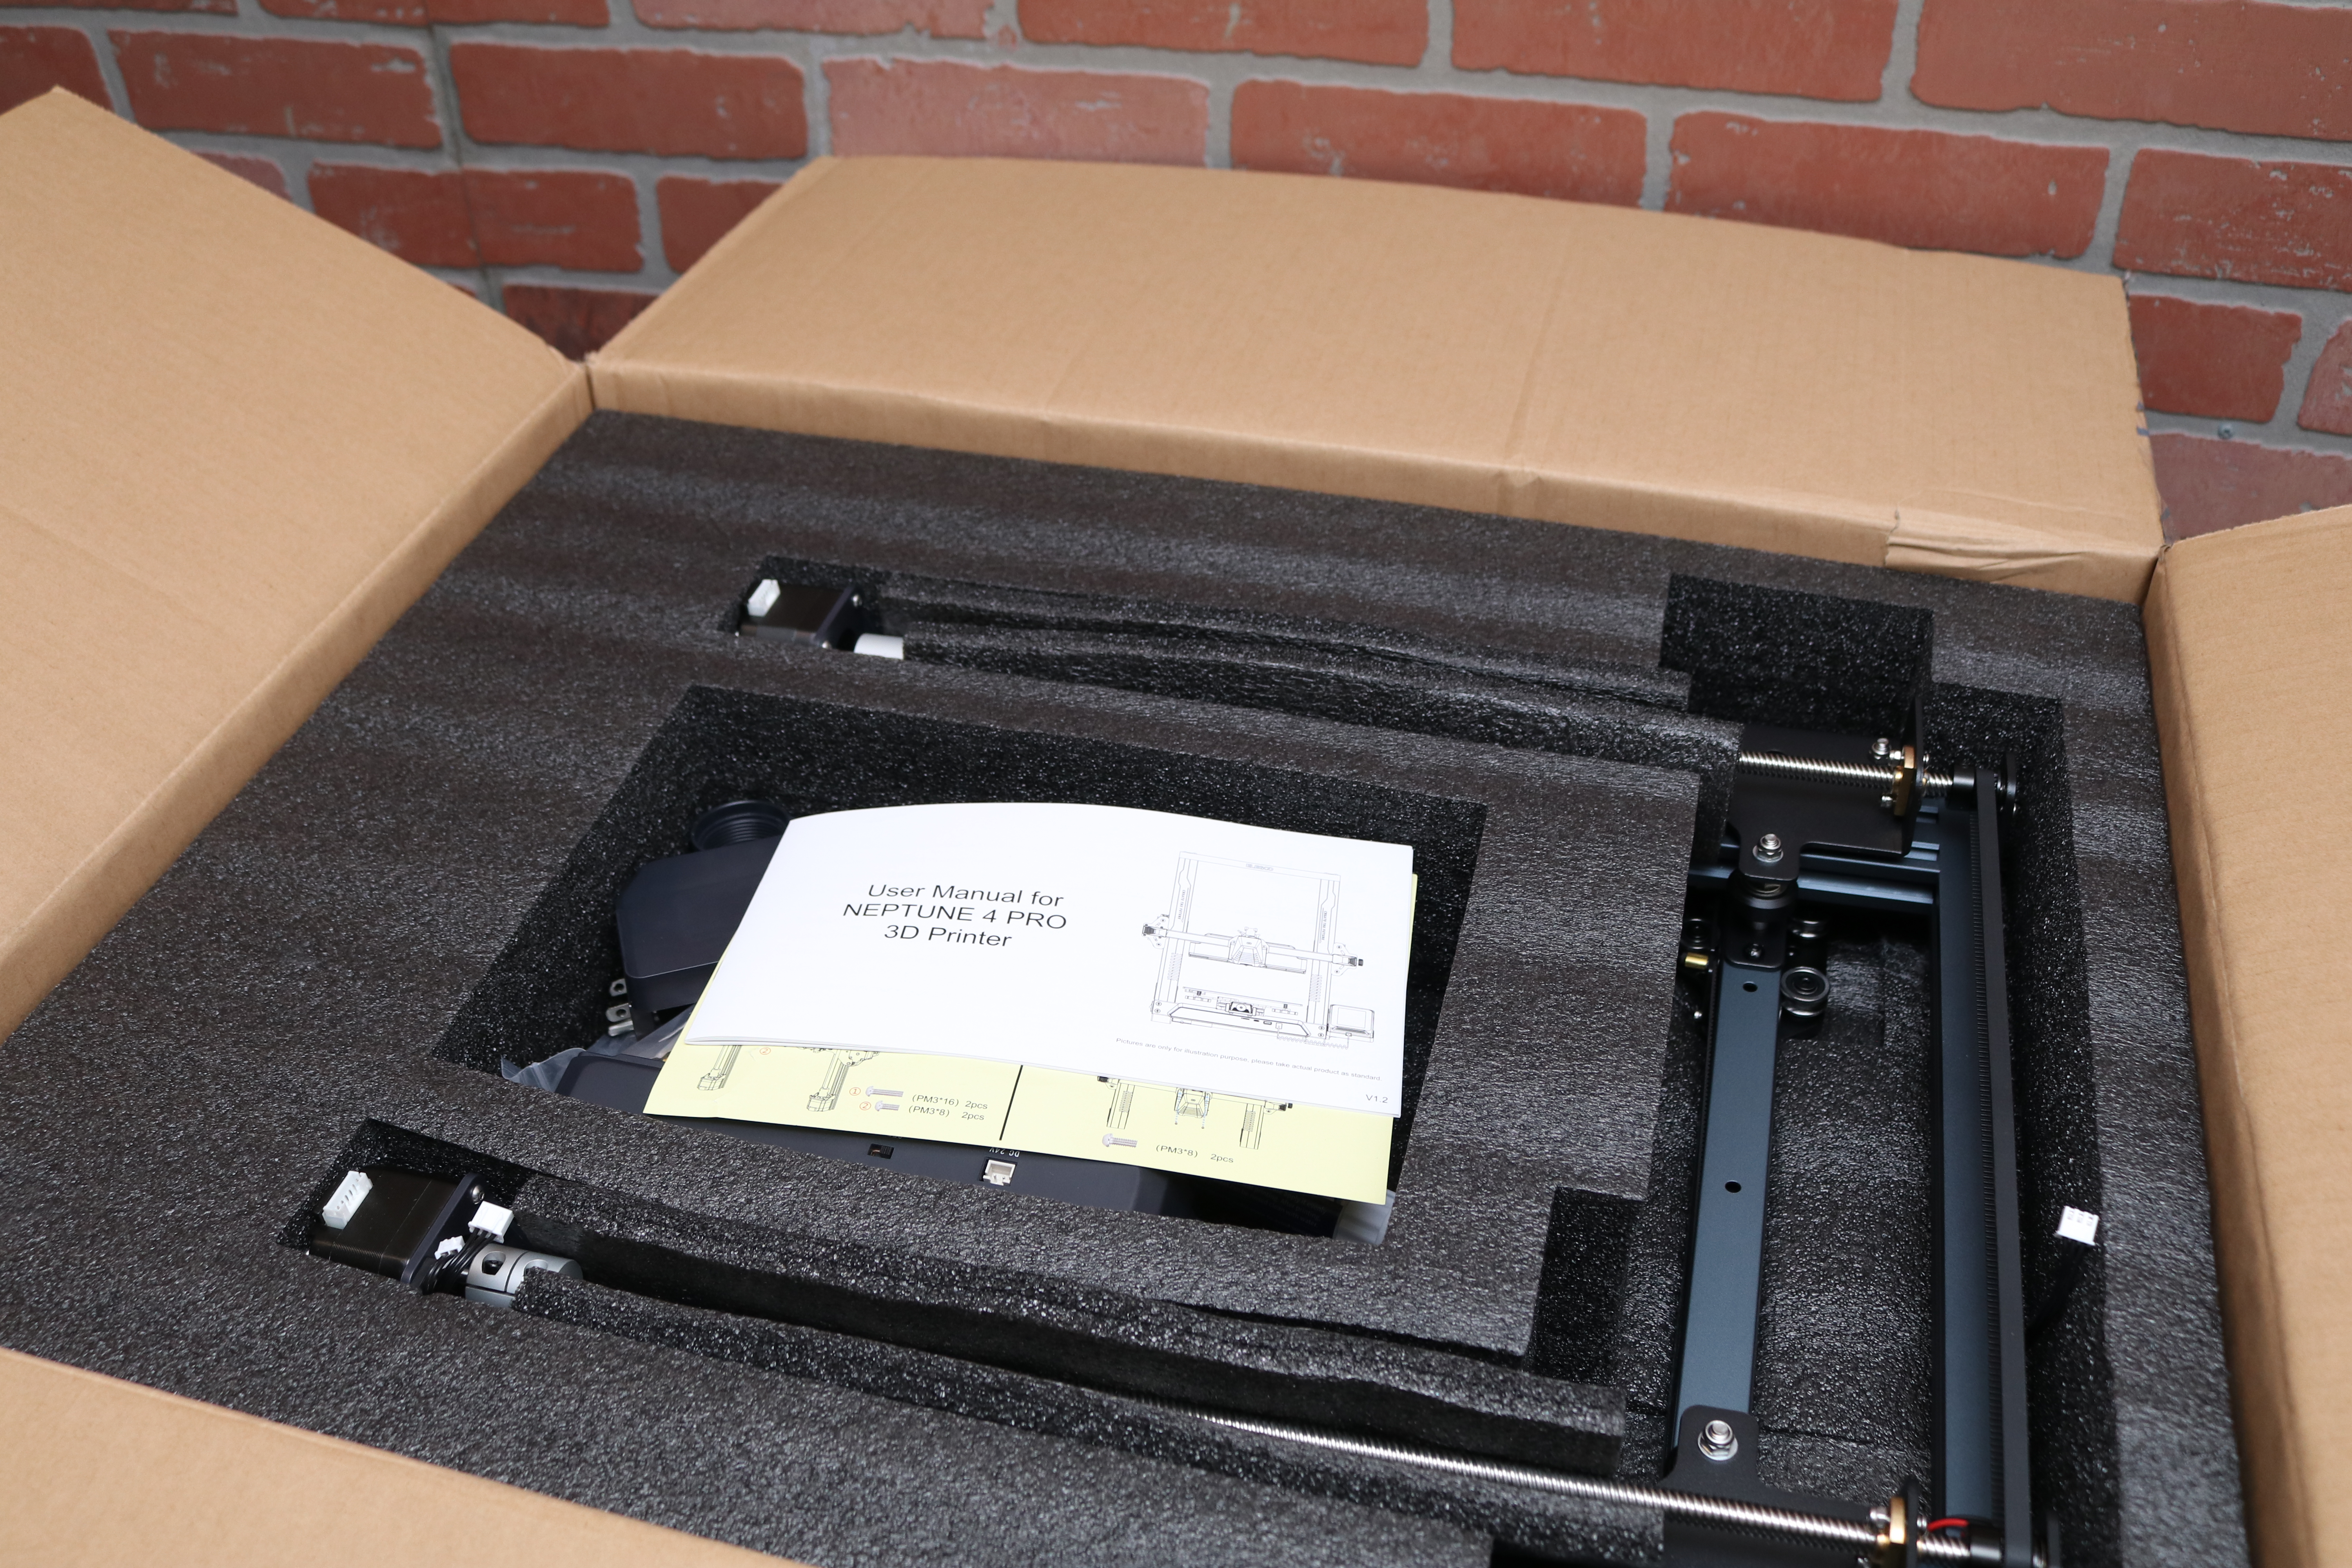
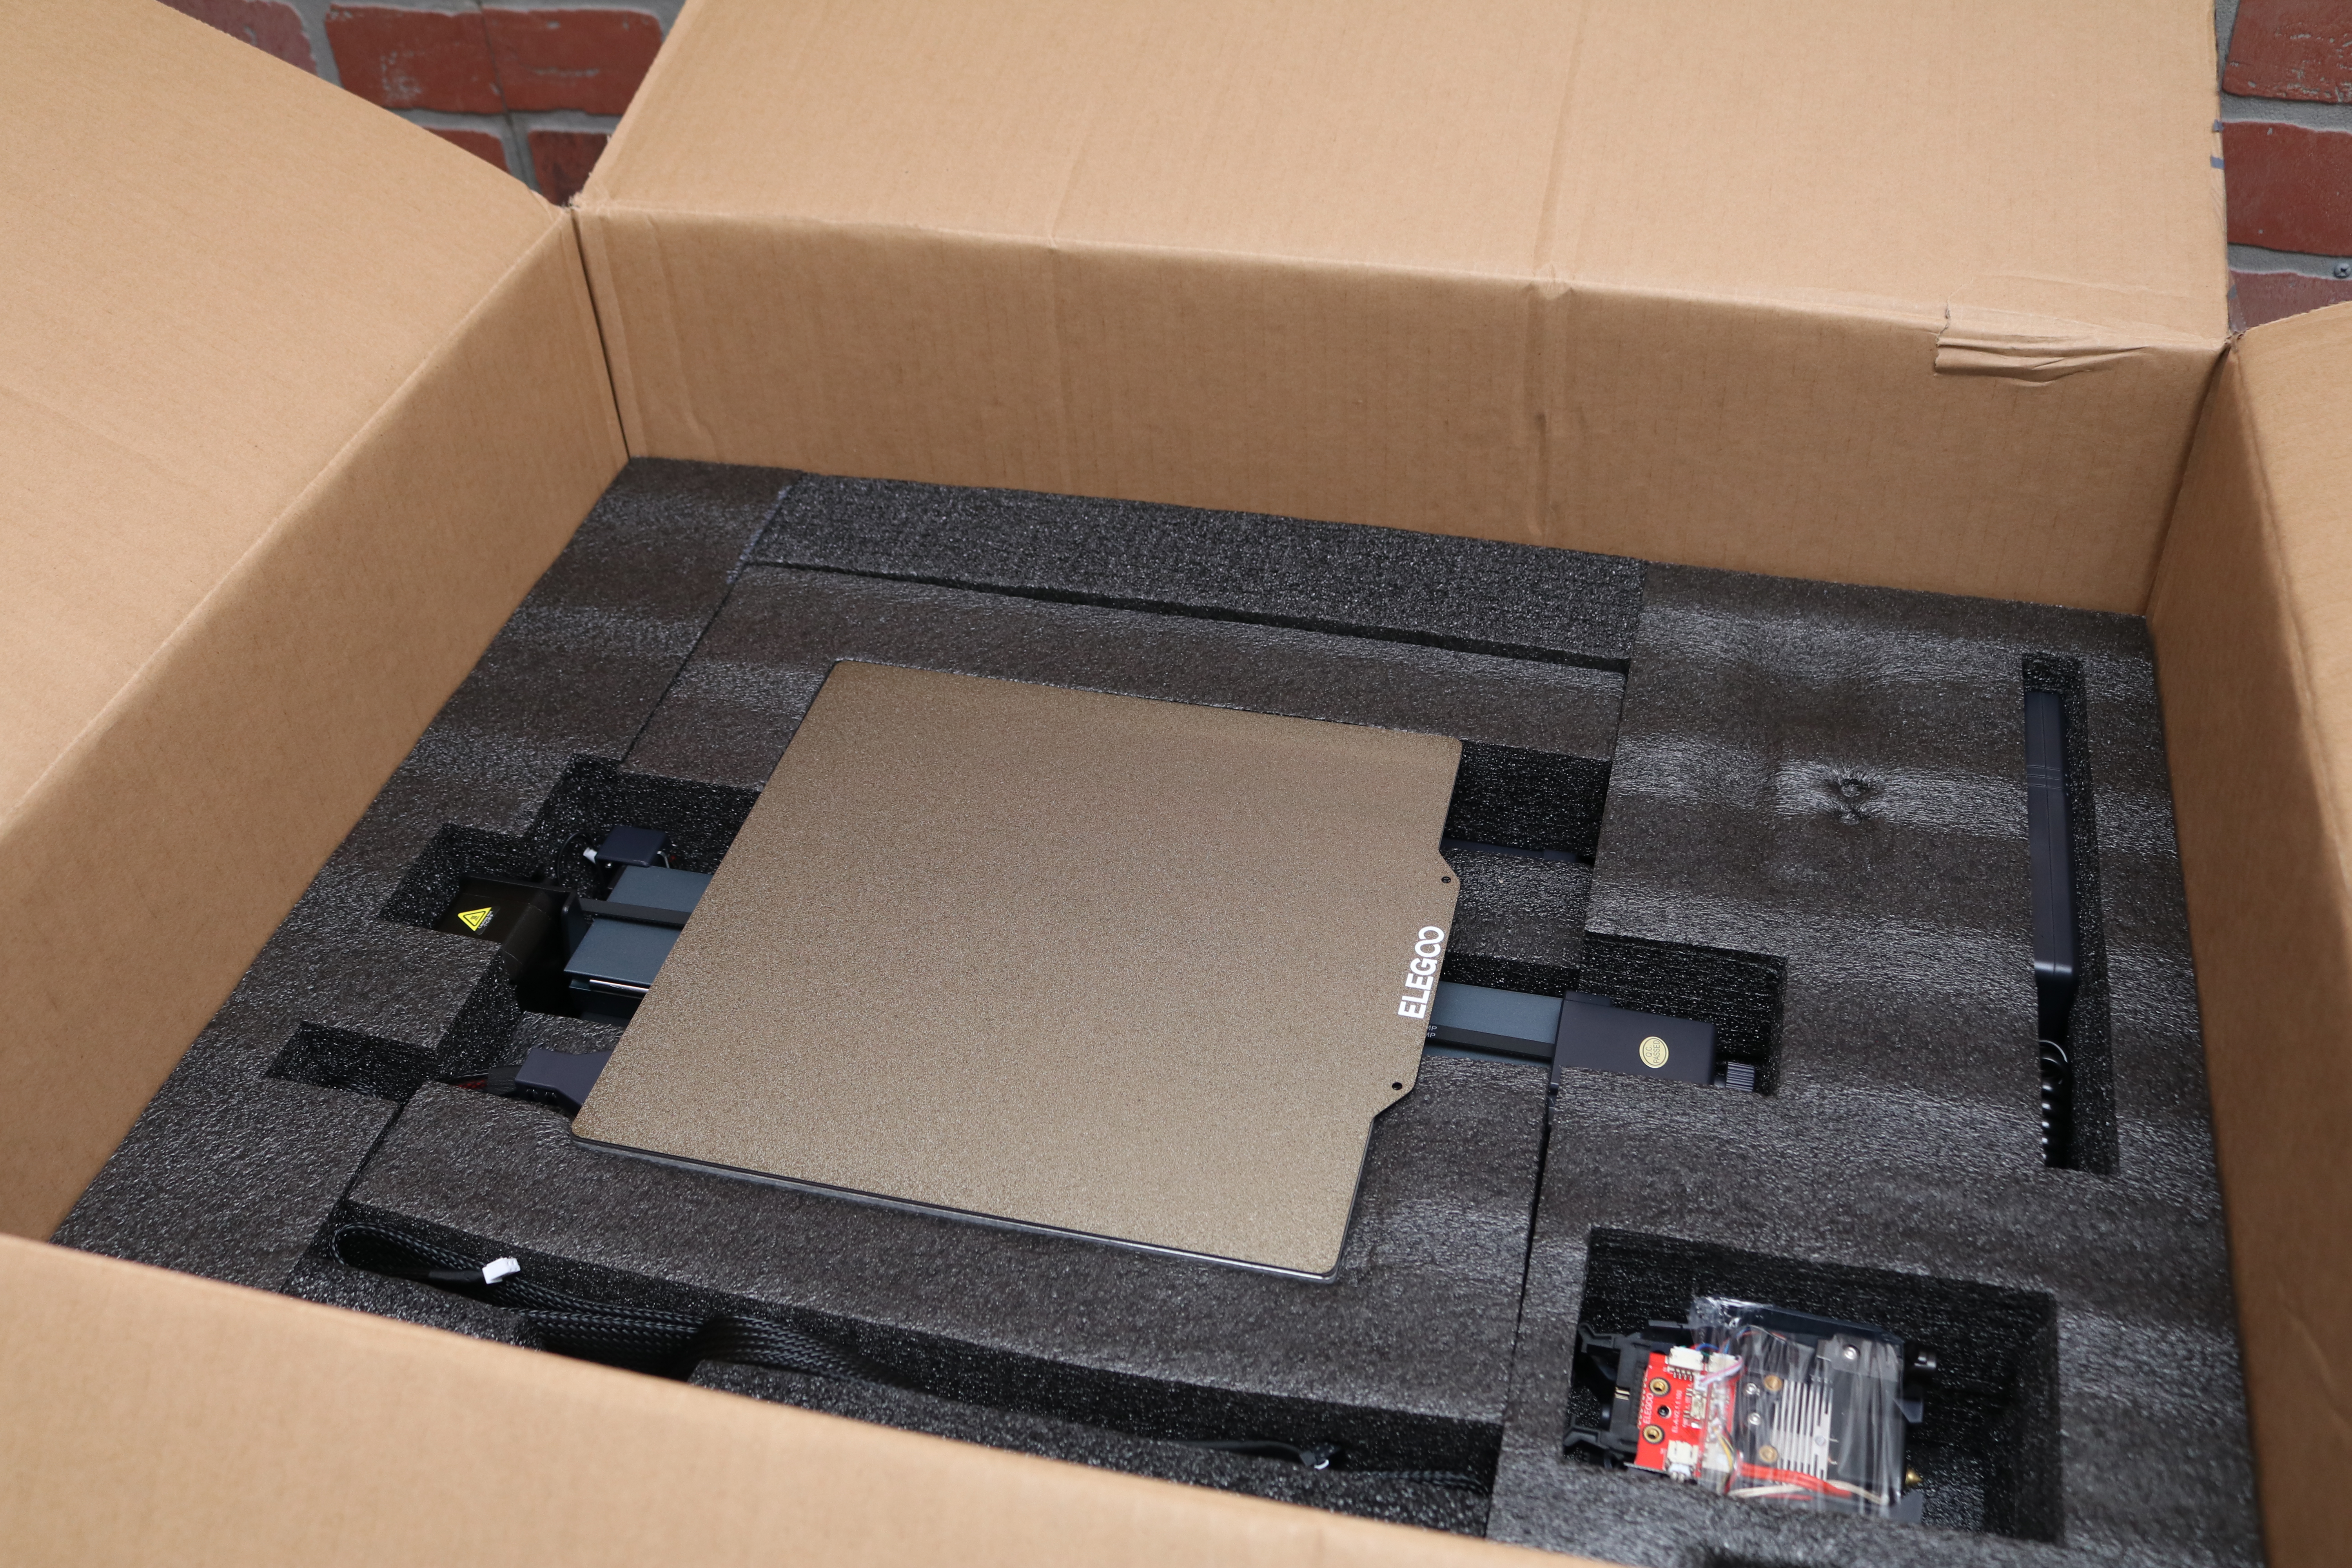
Included in the box of the Elegoo Neptune 4 Pro are all the tools you need to start printing (filament cutter, plastic scraper, Allen keys for assembly, etc.) as well as a USB thumb drive that contains slicer software, some demo models, and various other files.
The printer is very efficiently packed into a small box, an impressive feat considering the build volume of the printer relative to the size of the box in which it arrives.The X-axis frame, Y-axis base, and Z-axis motors are pre-assembled, making the Neptune 4 Pro assembly a relatively low-effort one.
The Neptune series of printers strikes a balance between DIY kit printers like the Creality Ender 3 Pro which require extensive assembly and prosumer machines like the Flashforge Adventurer 5M Pro which are ready to print right out of the box.
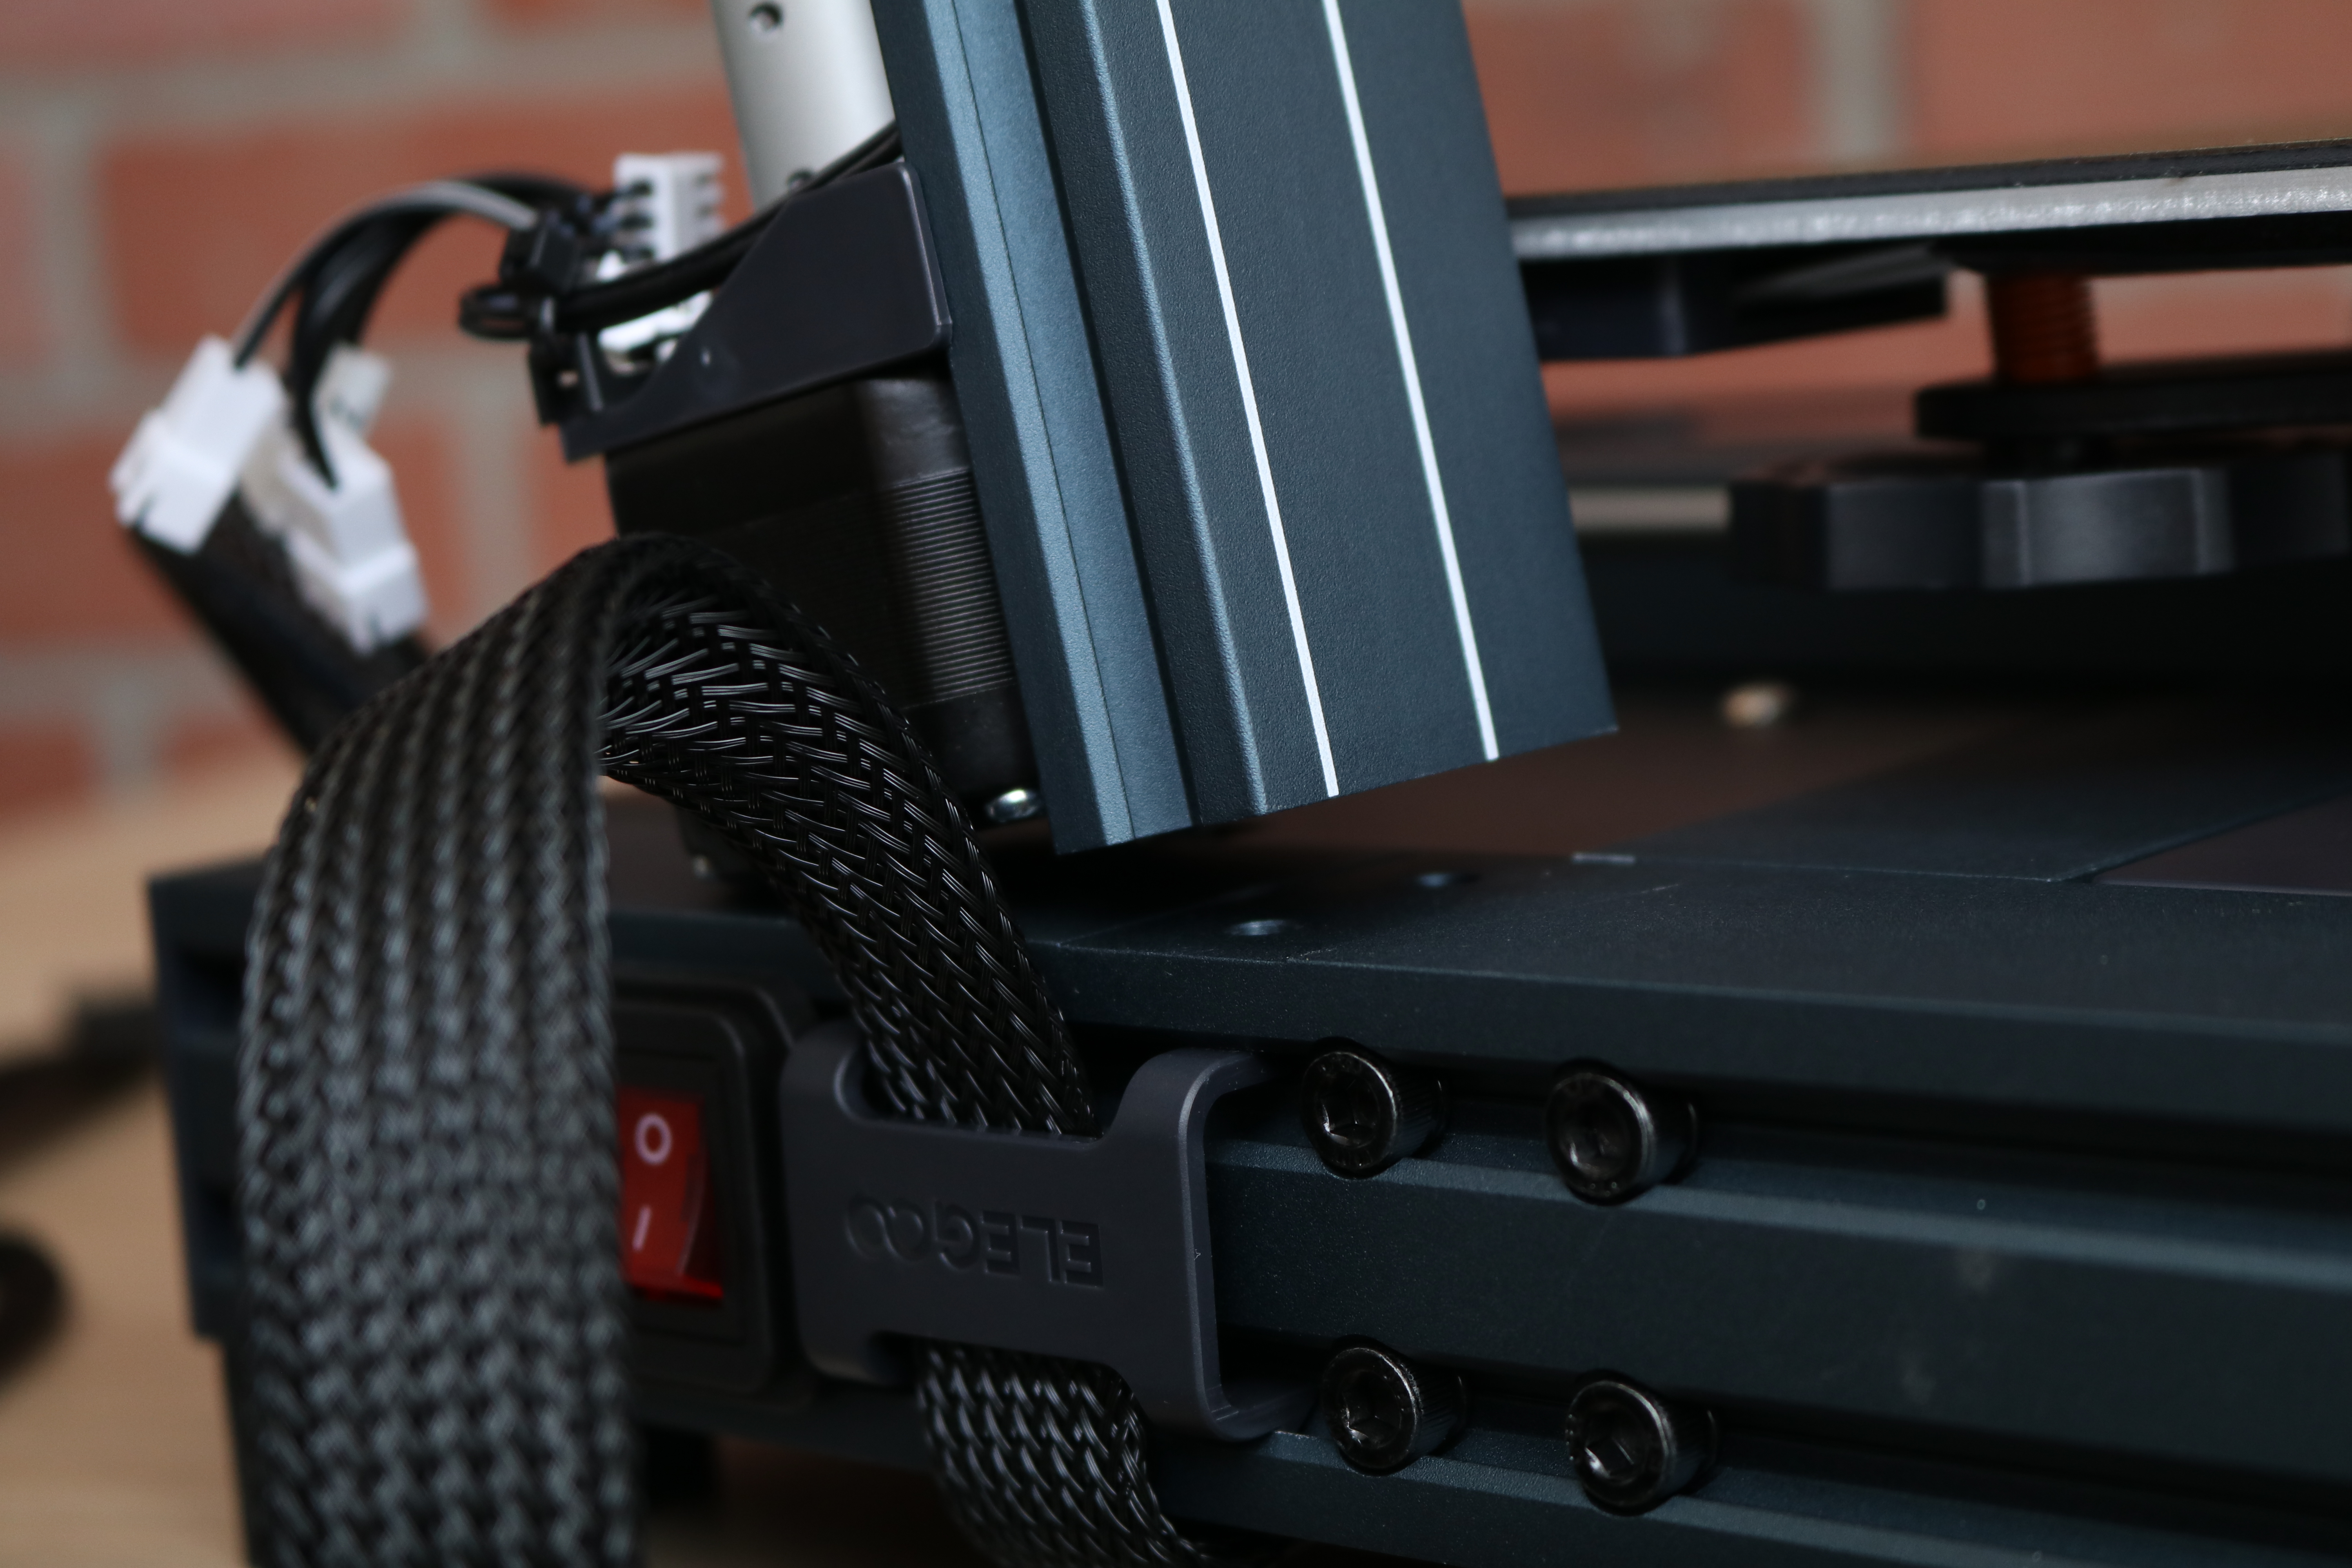
The Neptune 4 Pro assembly process is a simple one, and shouldn’t pose a problem to beginners who have never used a 3D printer before. Once the bolts under the base have been inserted and the wires have been connected, the printer is ready to power on.
Design of Elegoo Neptune 4 Pro
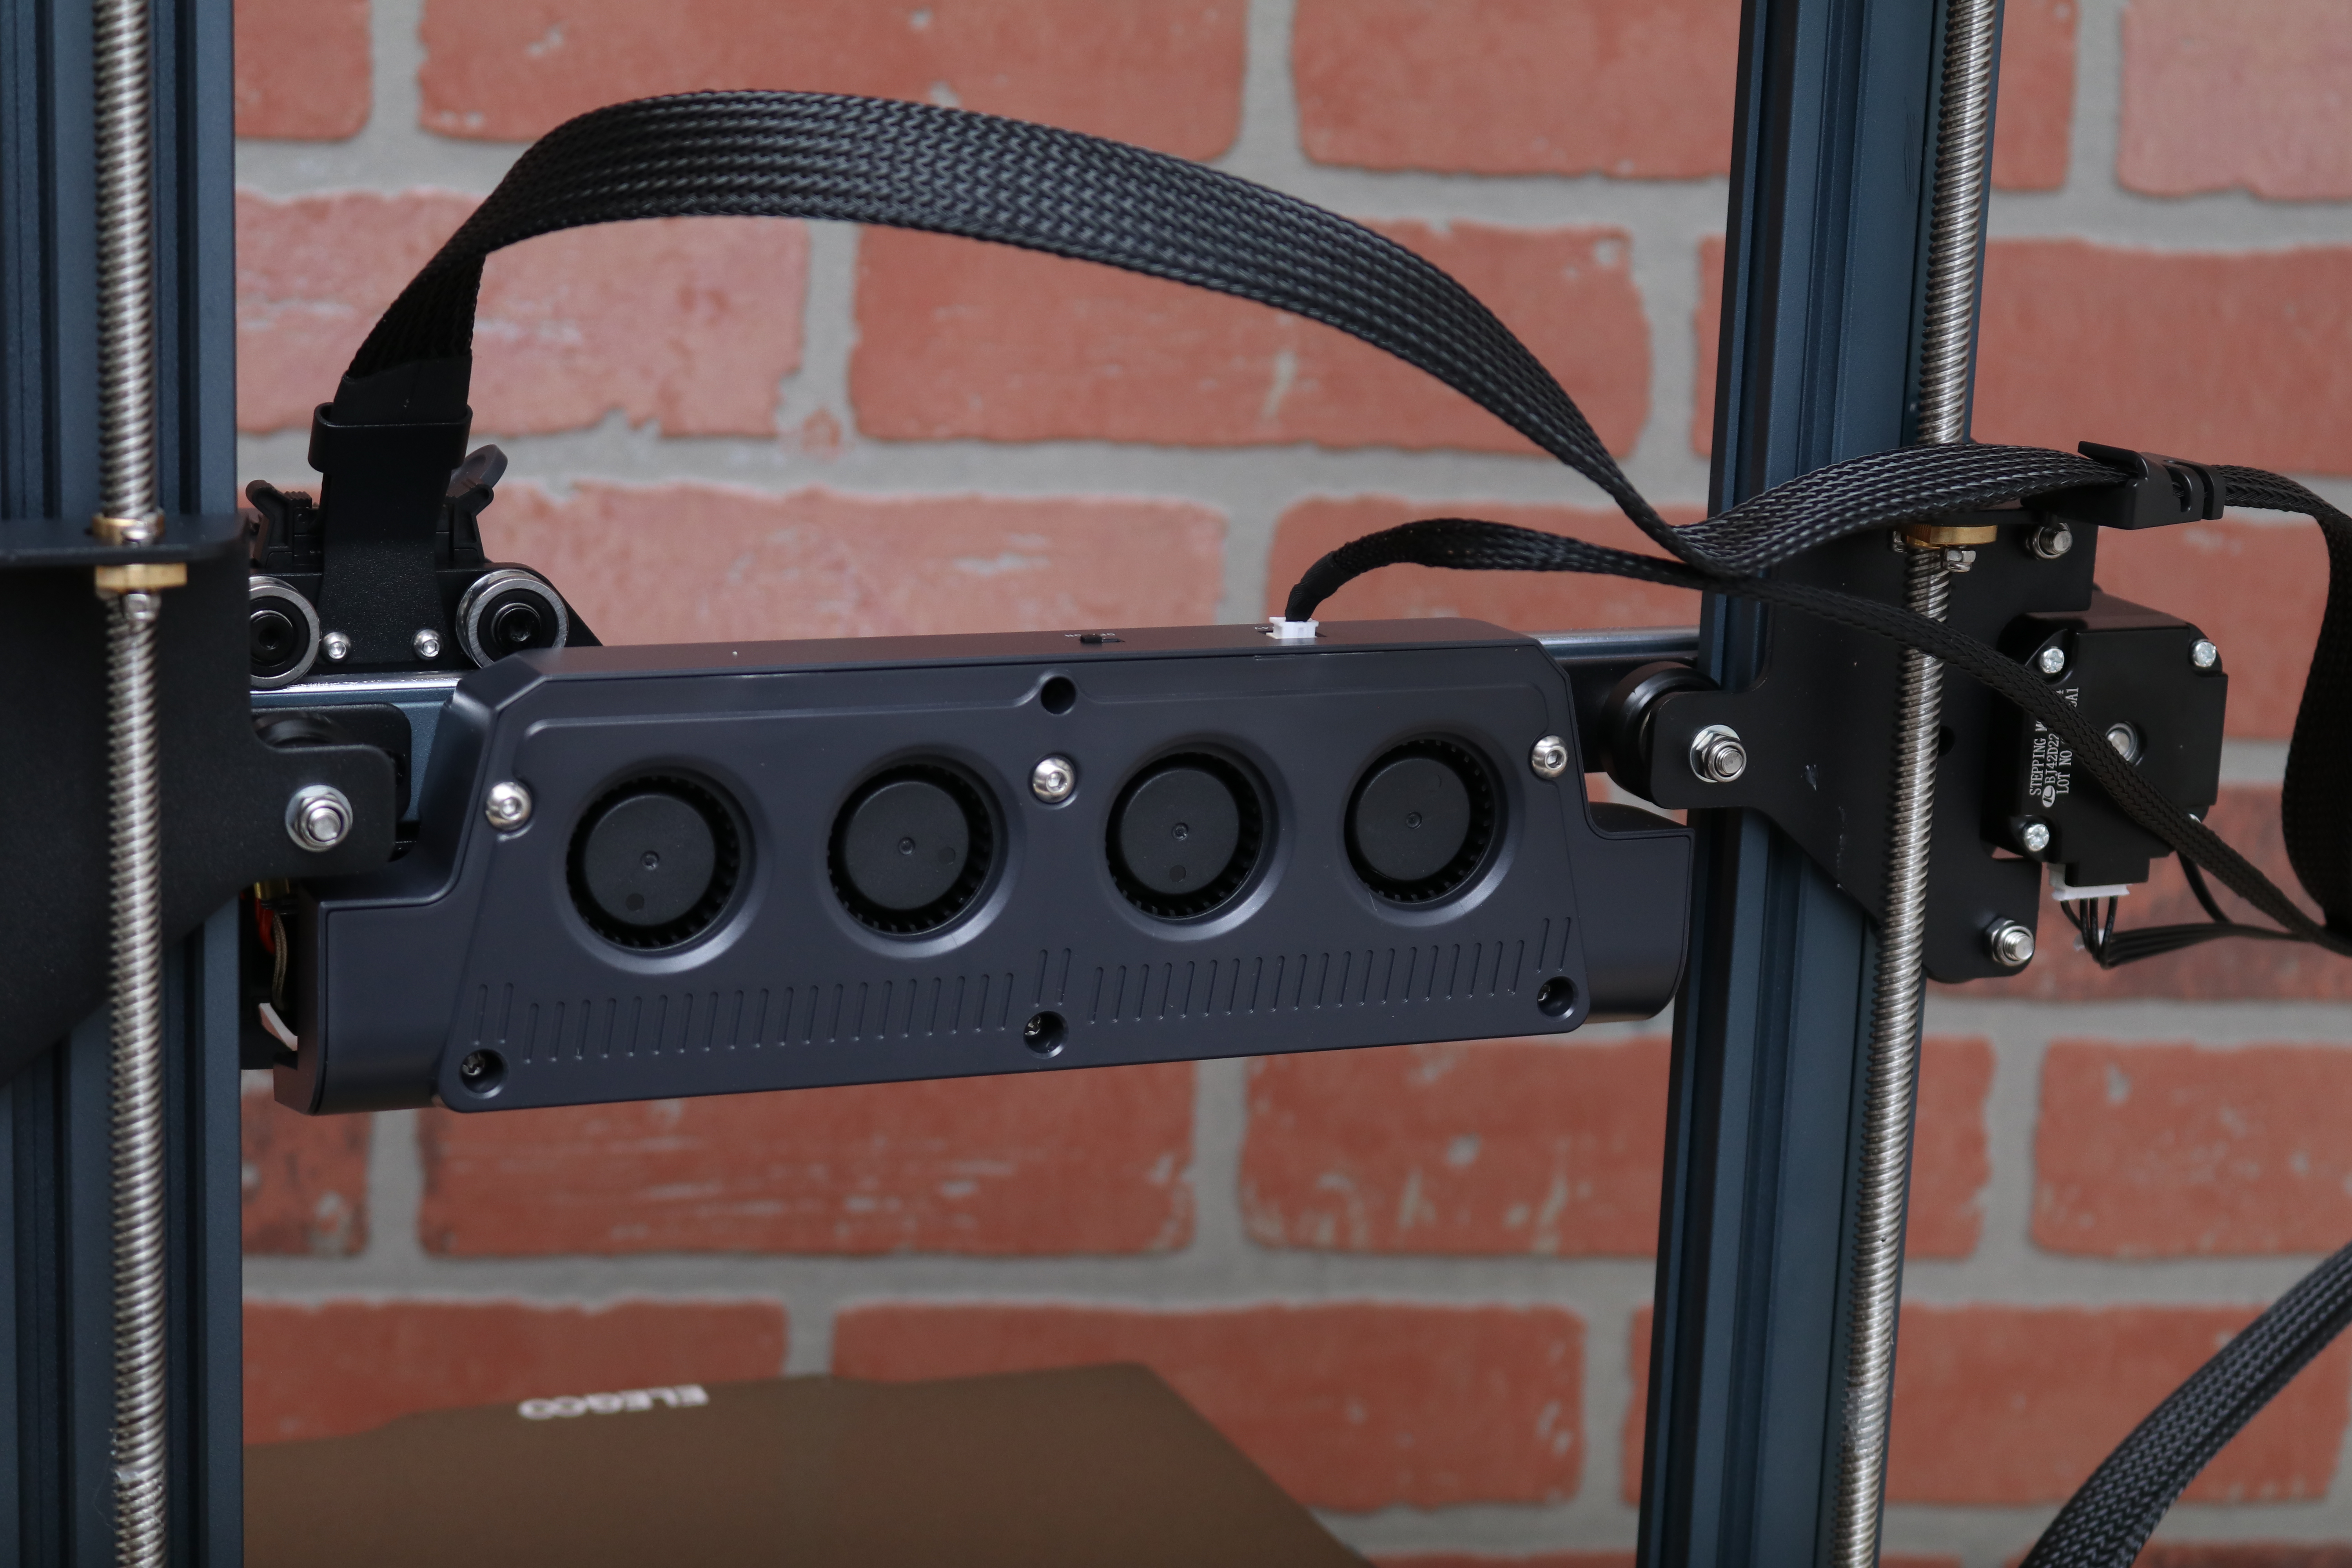
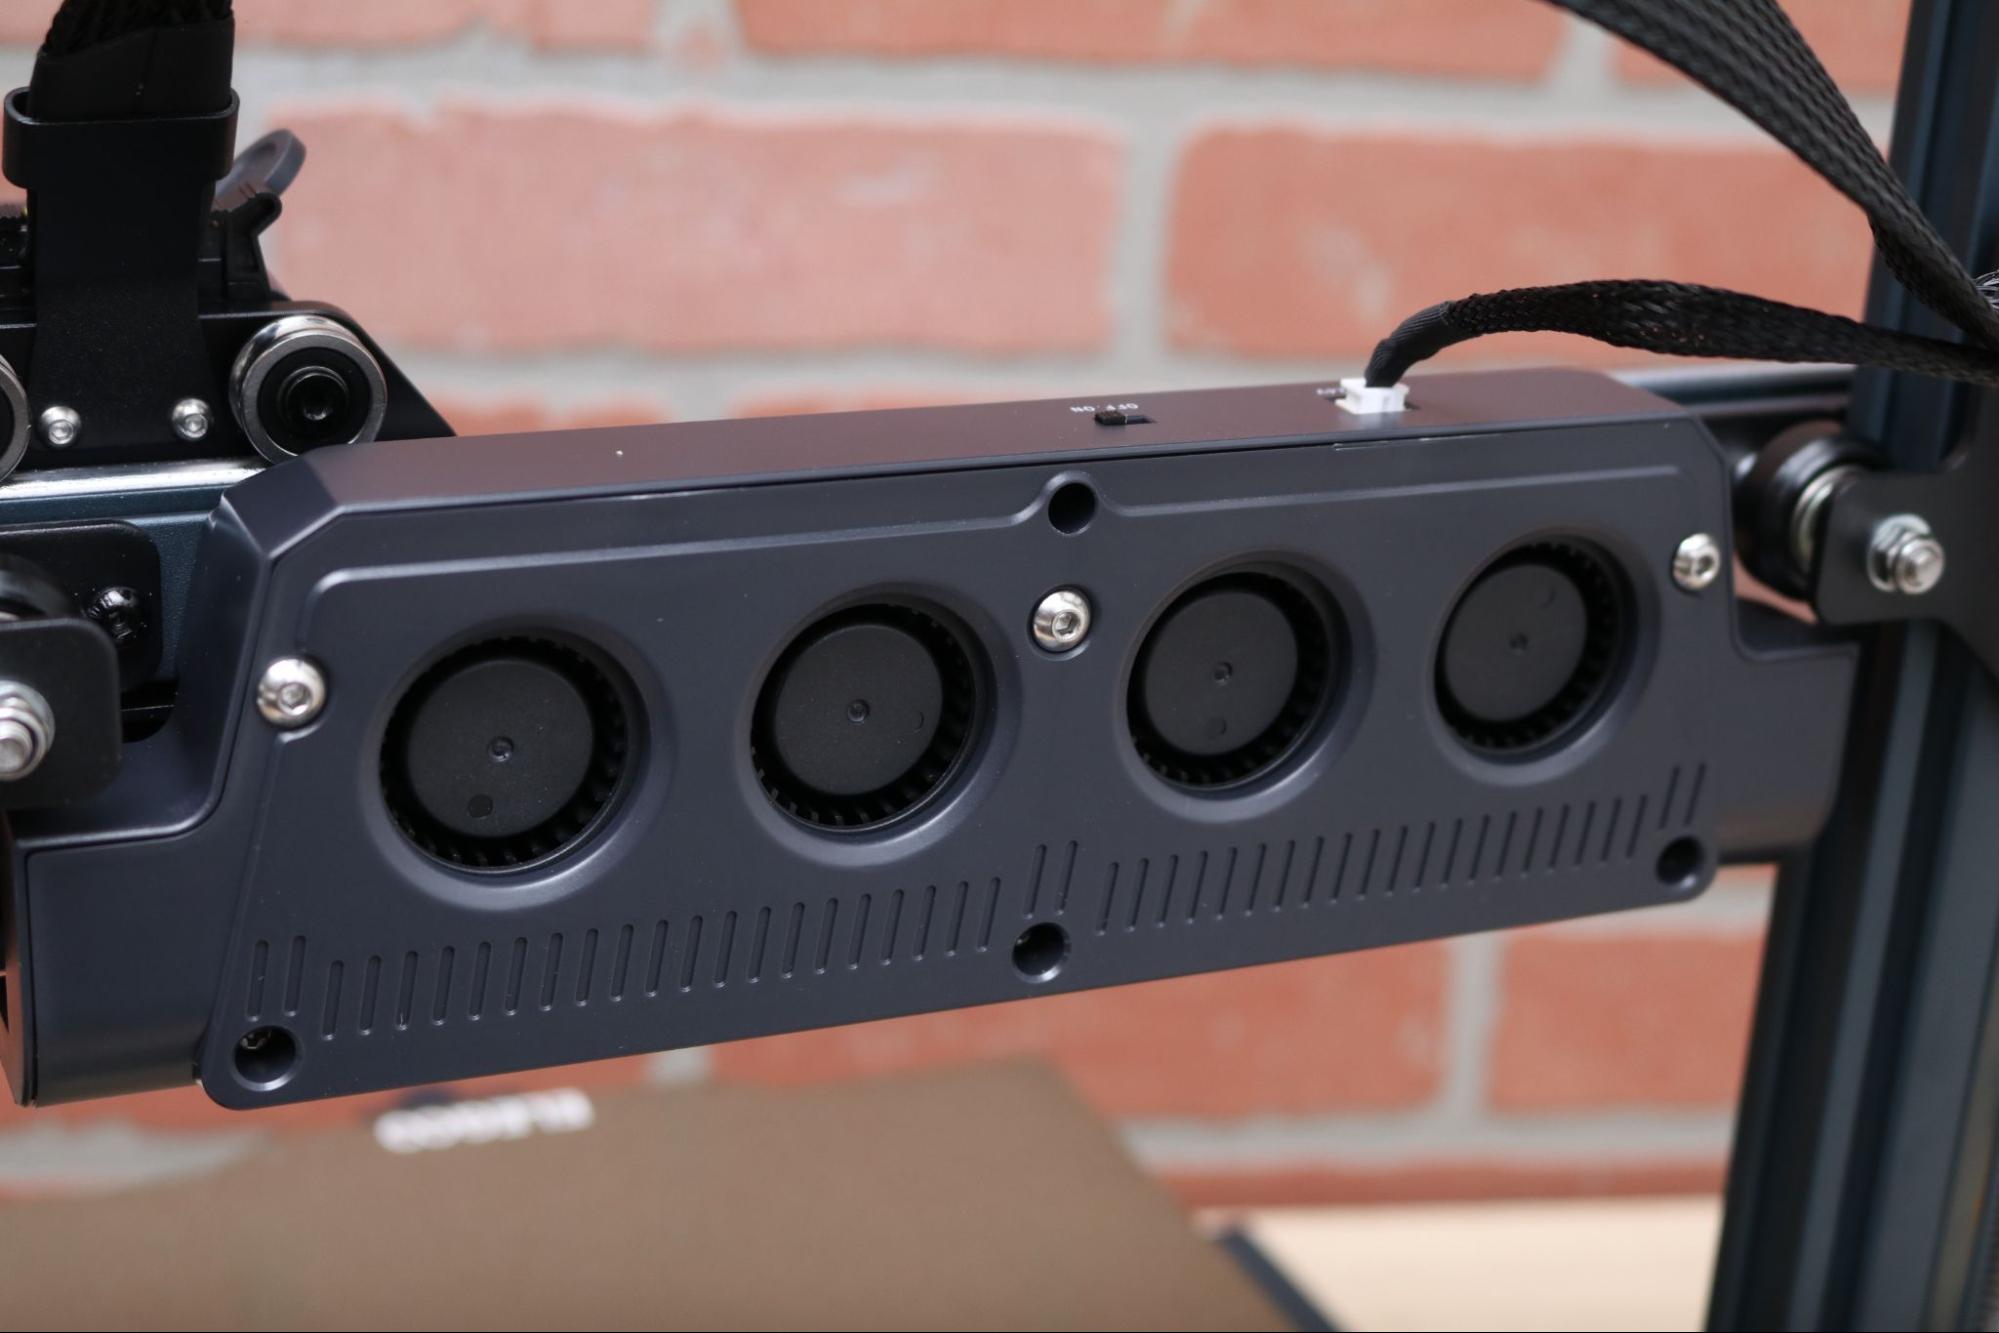
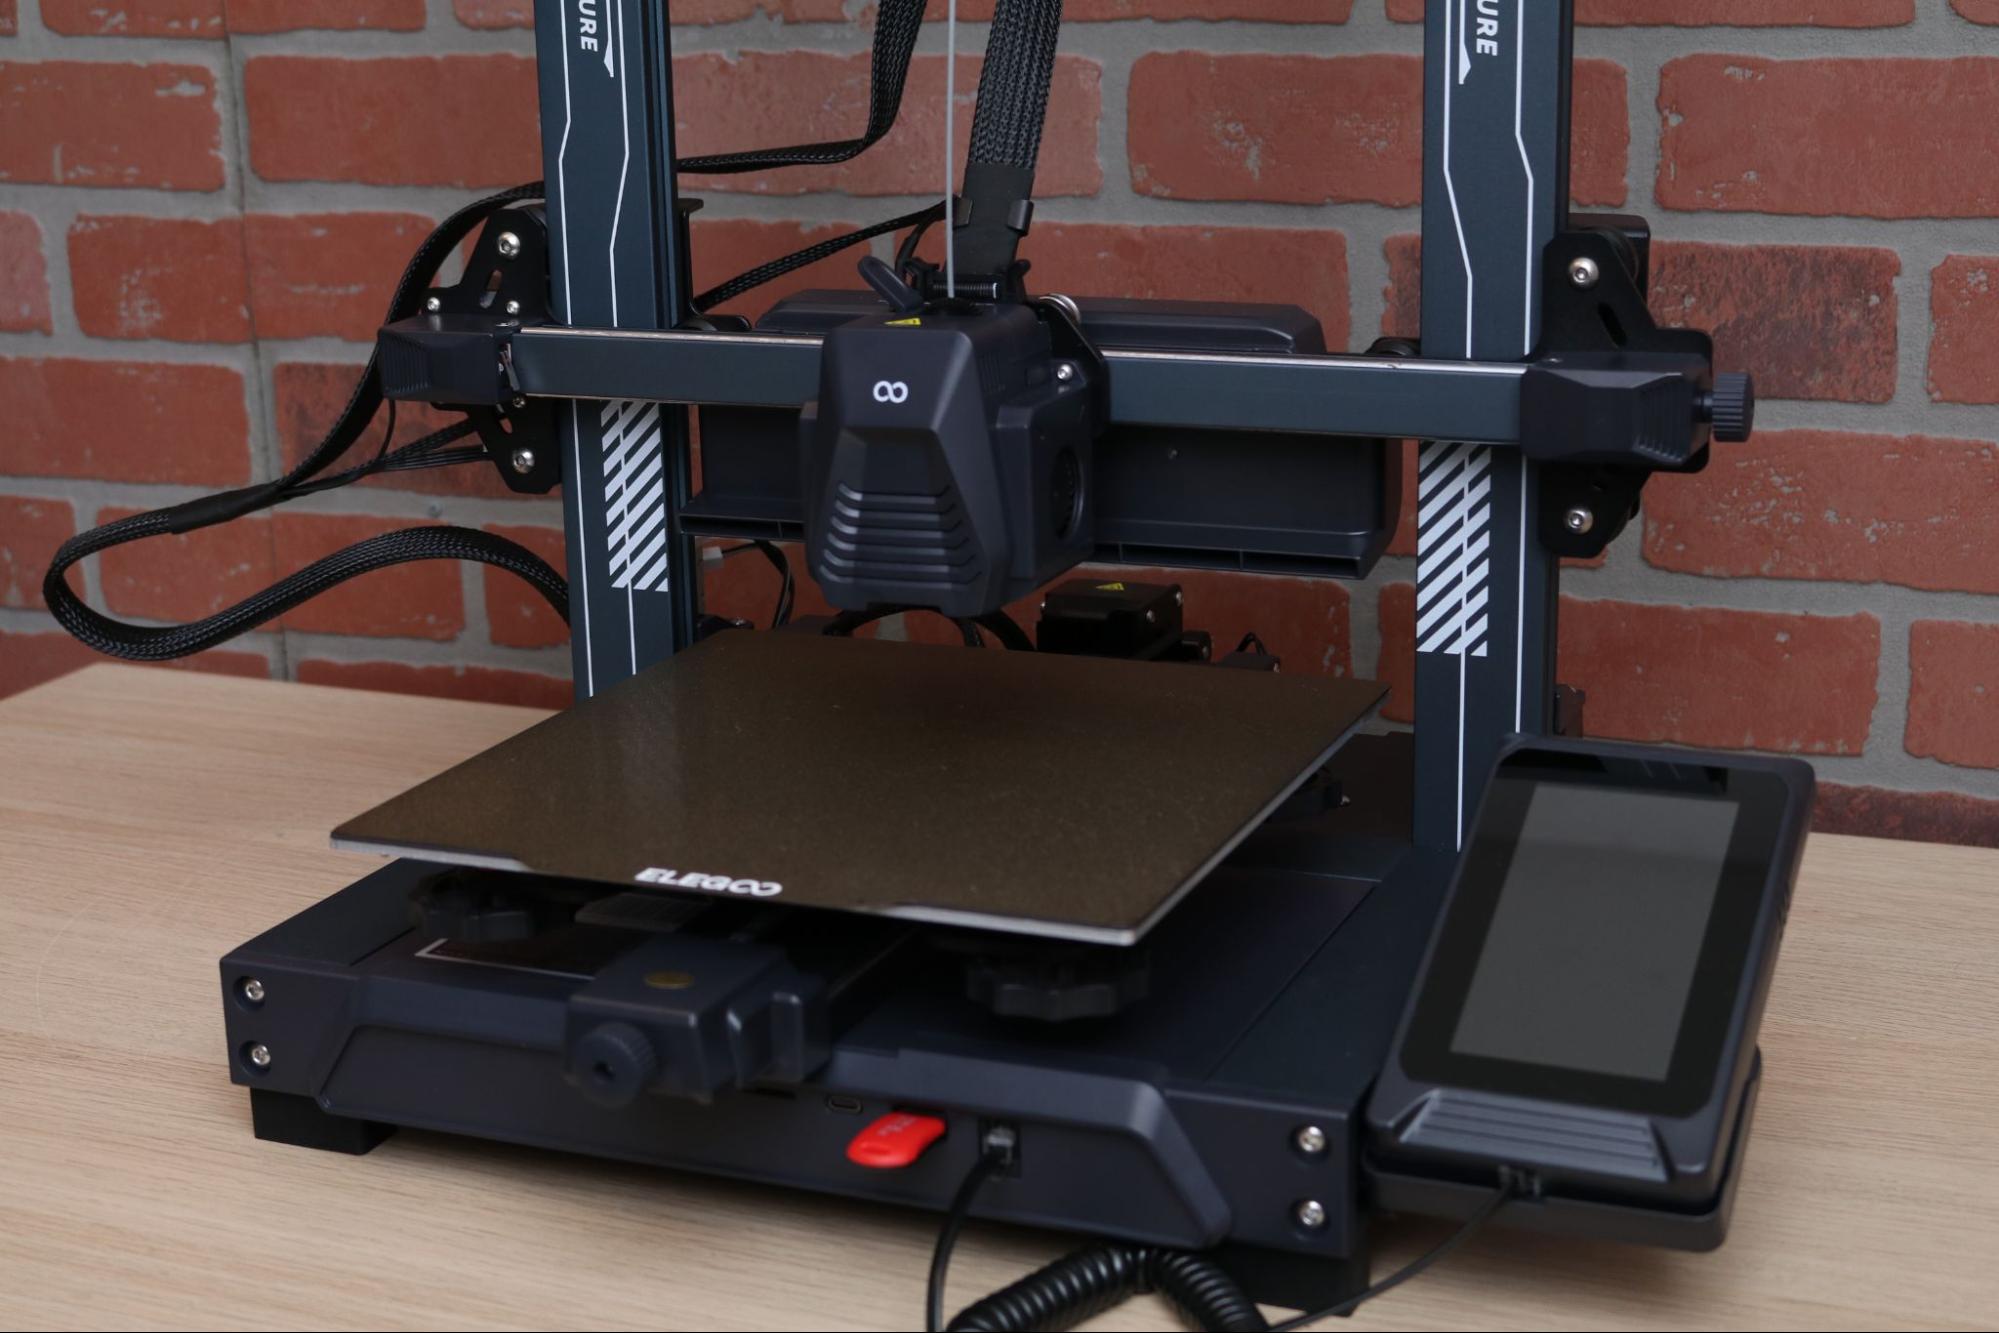
Right off the bat, the most noticeable feature on the Elegoo Neptune 4 Pro is undoubtedly the large part cooling fan assembly that is mounted to the X-axis. This assembly contains a total of four 4020 ball bearing blower fans that blow air parallel to the build platform, directly across the extruder. When printing a material like PLA, this fan acts to rapidly cool material immediately after extrusion, preventing thin or long overhangs from warping up or deforming.
Get Tom's Hardware's best news and in-depth reviews, straight to your inbox.
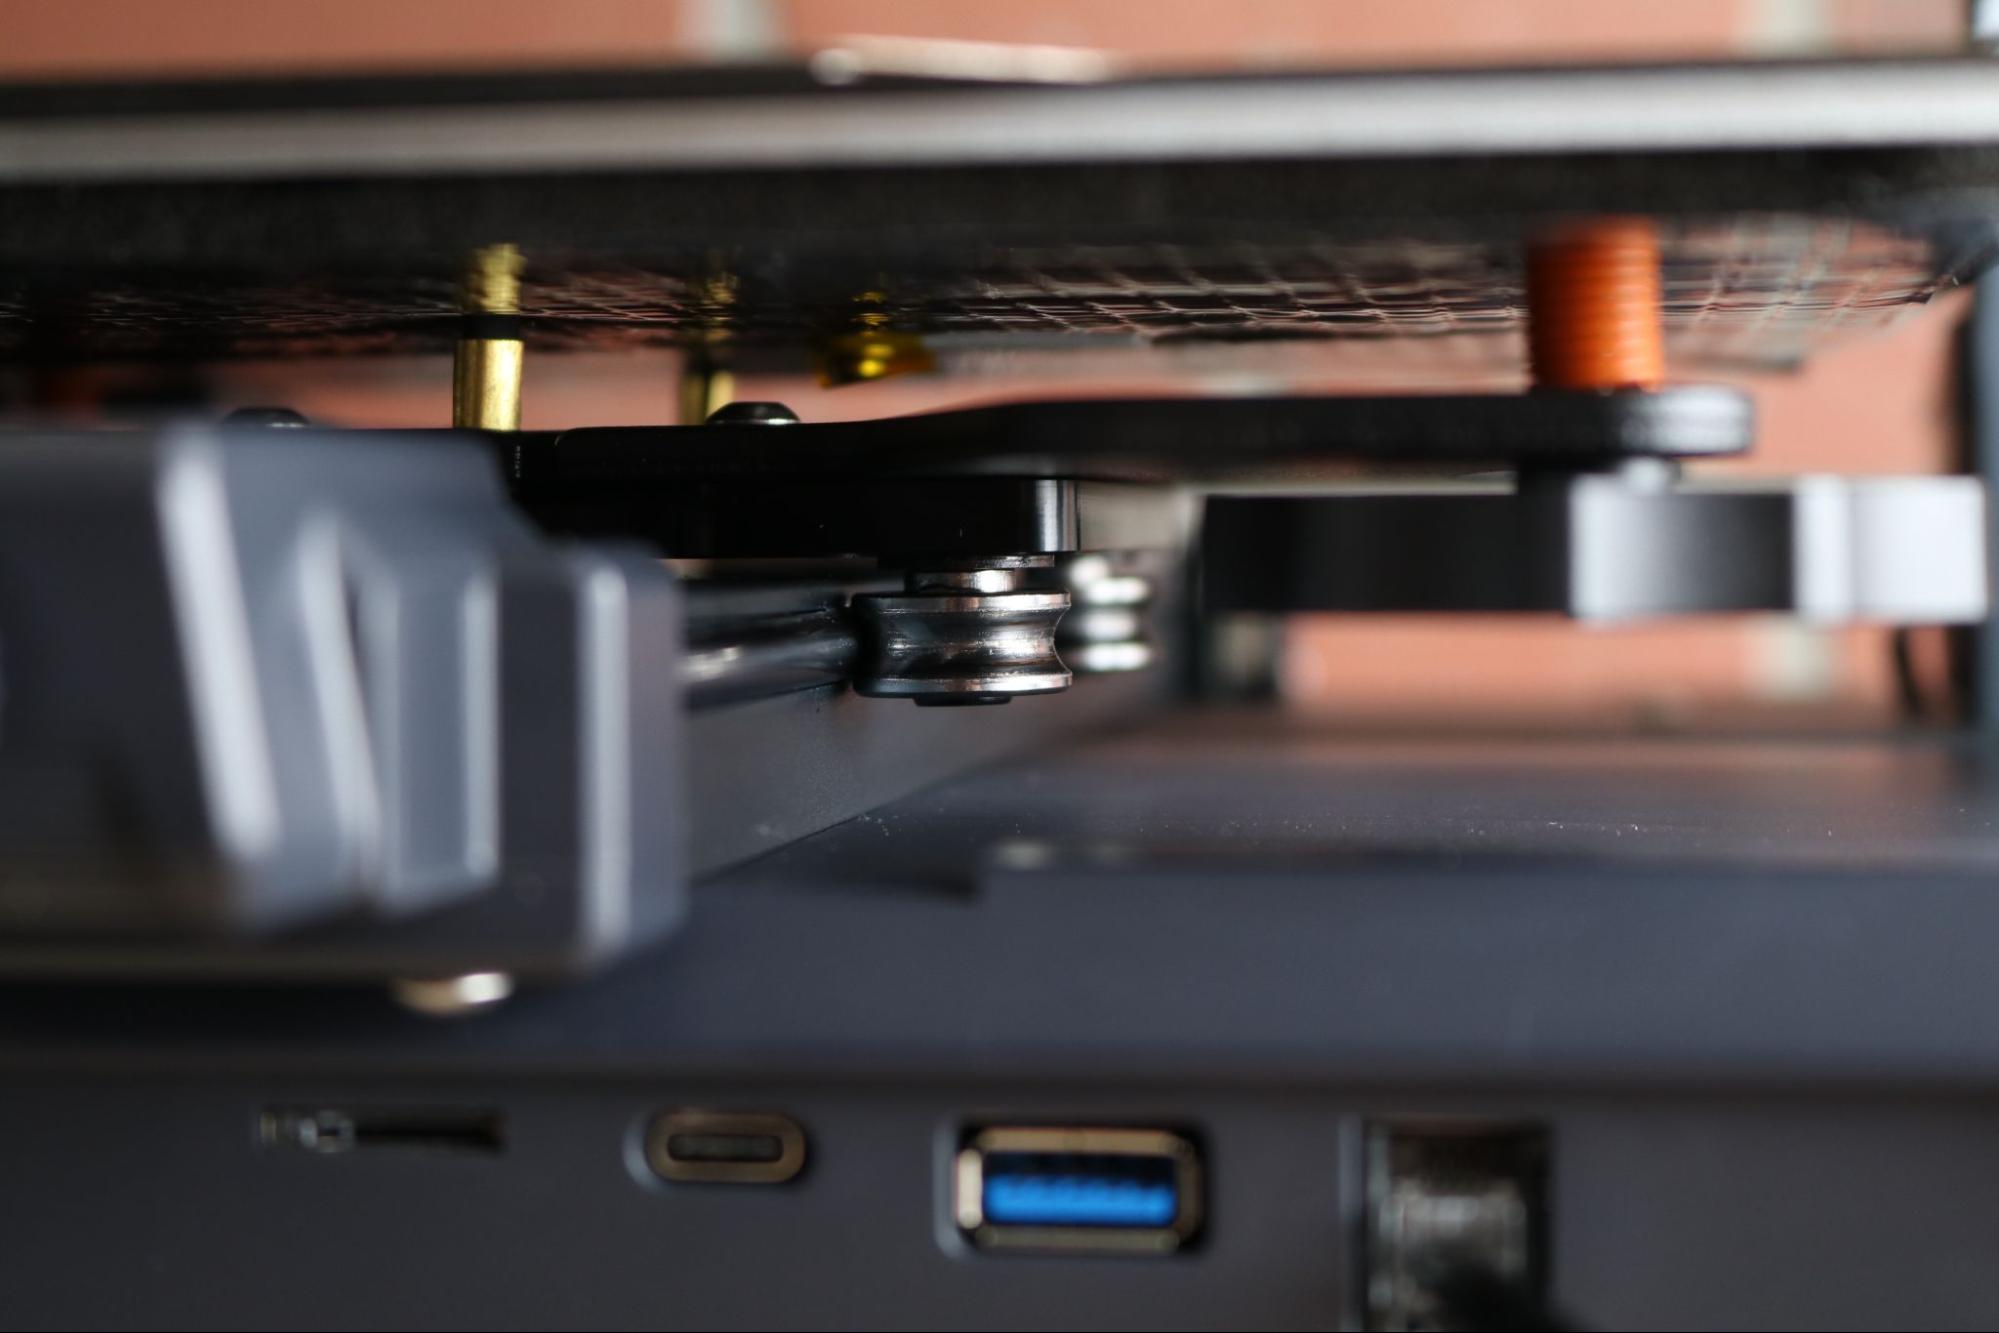
The Neptune 4 Pro is hiding a new surprise in plain sight, with metal rods on the X and Y-axes offering a smoother motion system compared to V slot wheels riding over aluminum extrusions. This is a less-common sight on sub-$300 printers, and gives a more professional and polished appearance that stands in contrast with the bright lettering on the frame.
Like other printers in the Neptune 3 and Neptune 4 families, the large ‘CREATE THE FUTURE’ text printed on the aluminum extrusions will likely be a polarizing design choice for most users. The stylized lines, patterns, and text look like they were pulled straight out of Cyberpunk 2077, and the gunmetal gray color of the printer makes it immediately identifiable against a near-endless parade of jet-black i3 clones.
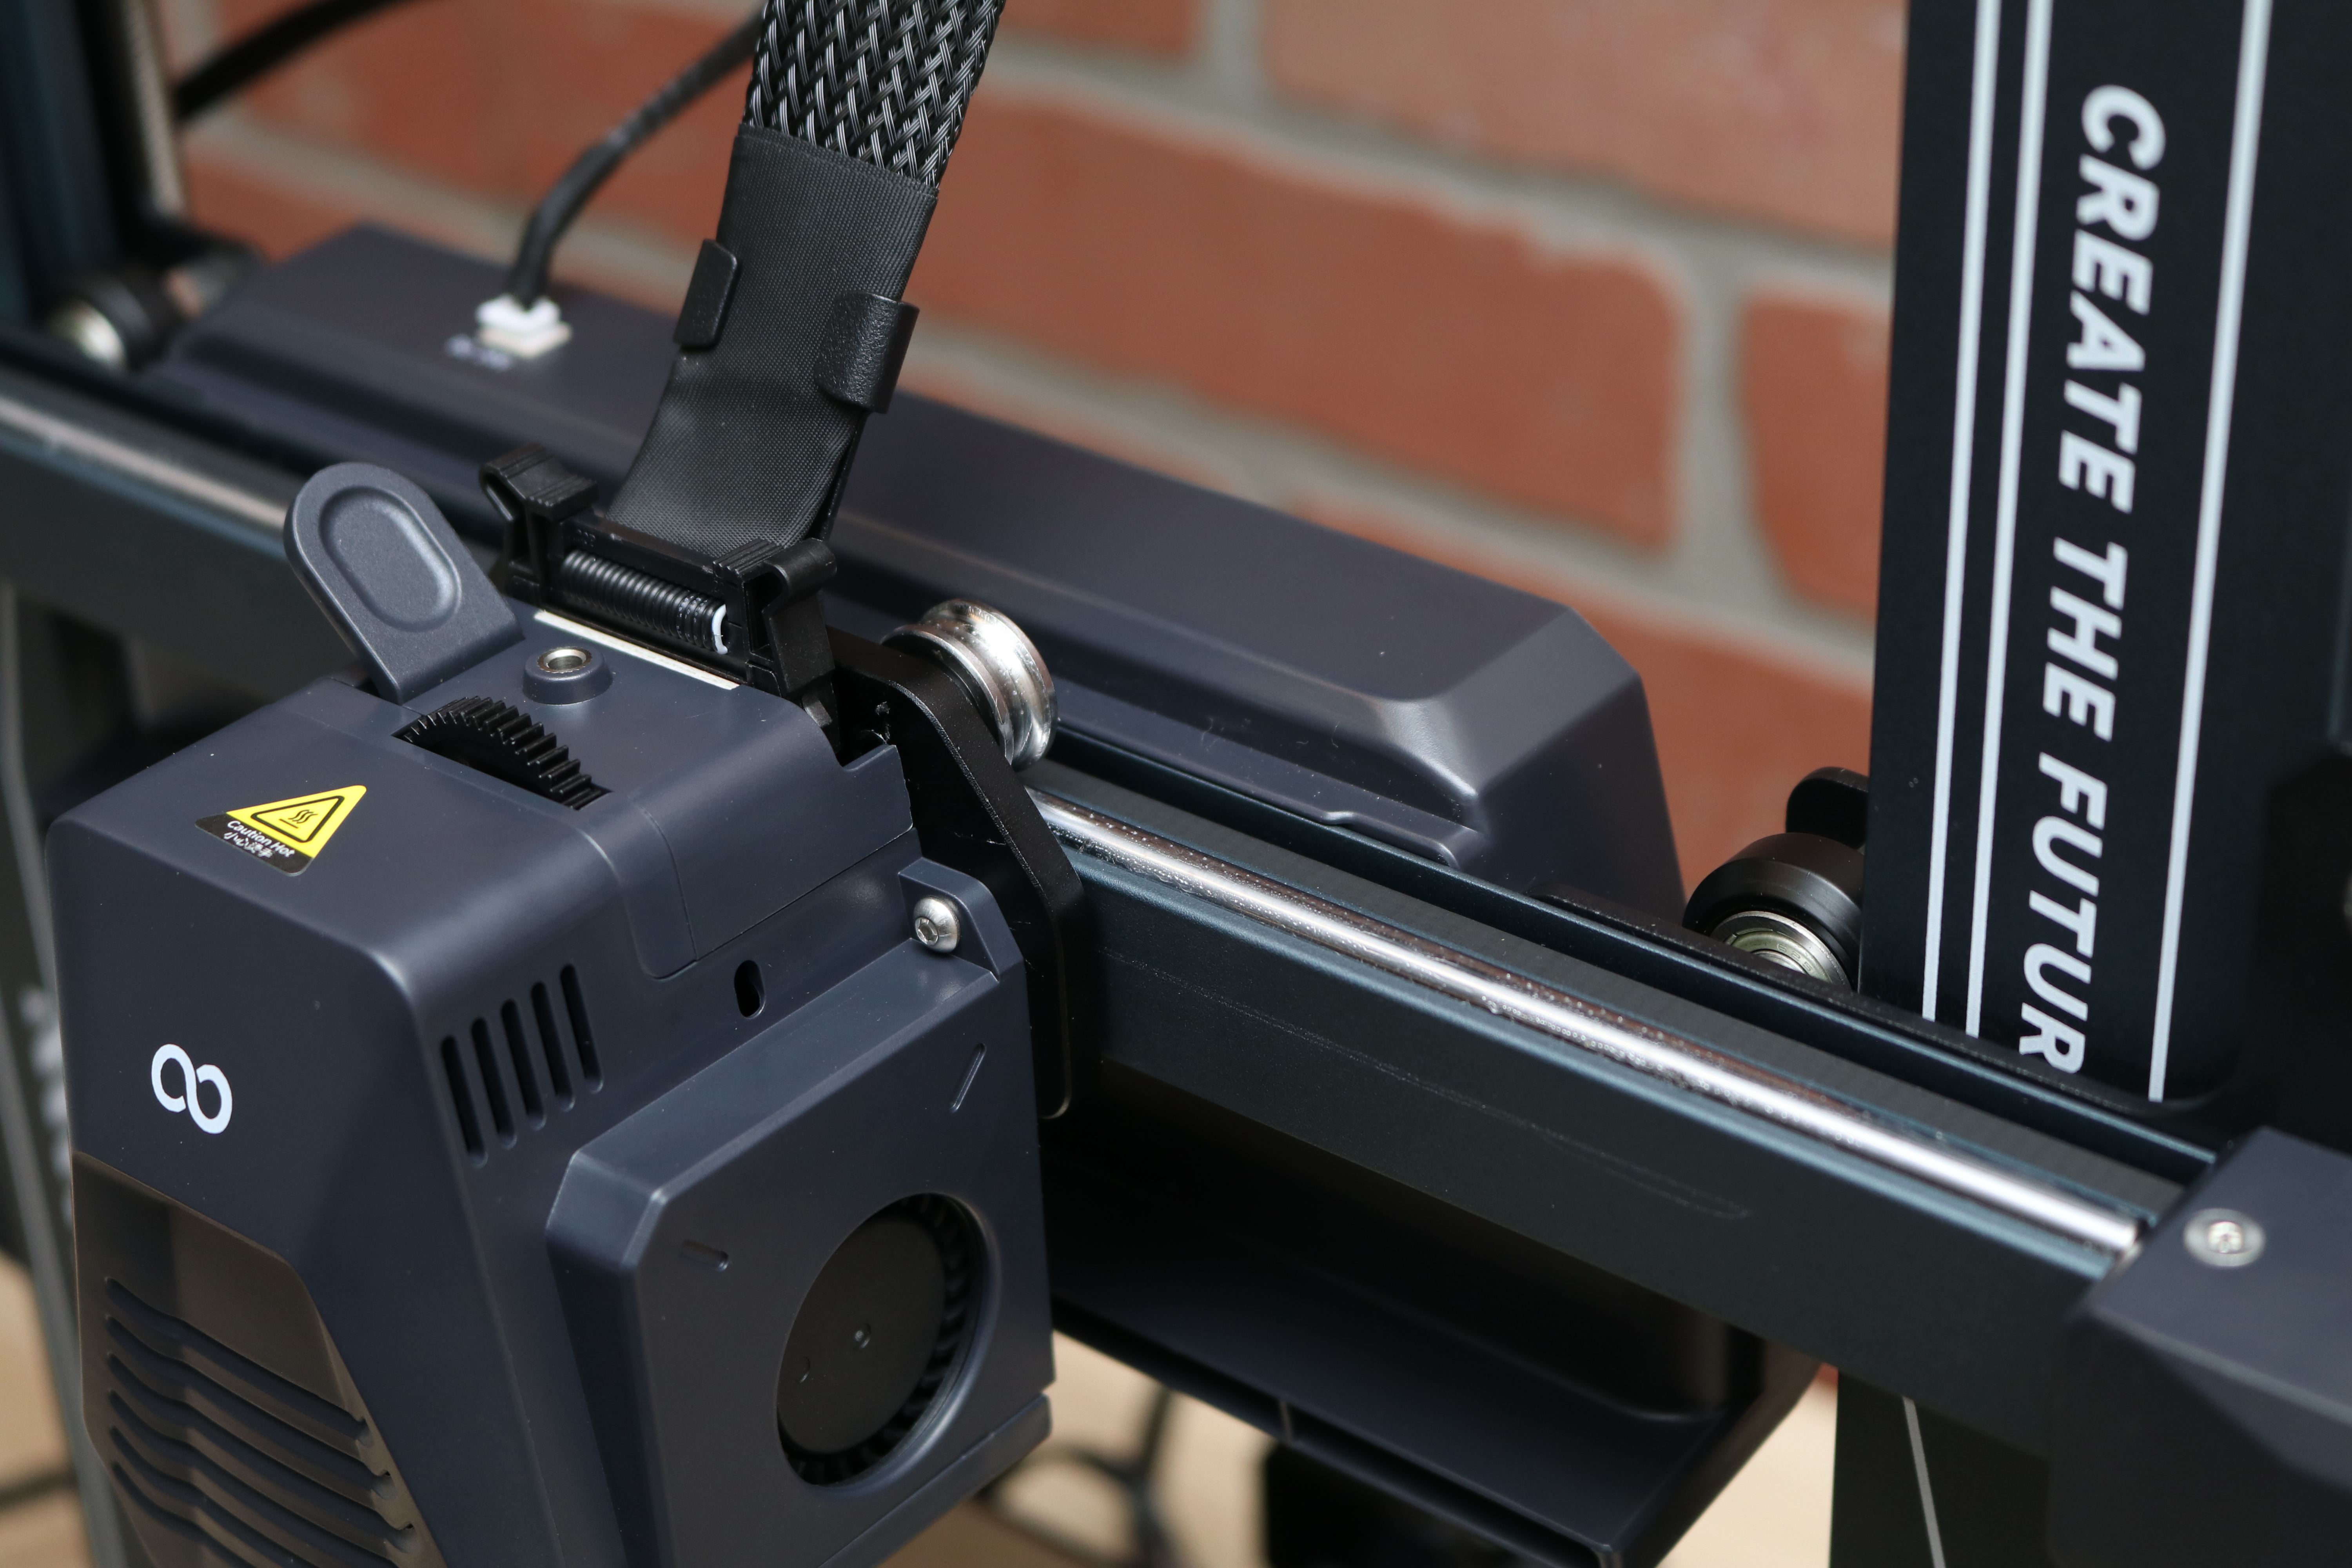
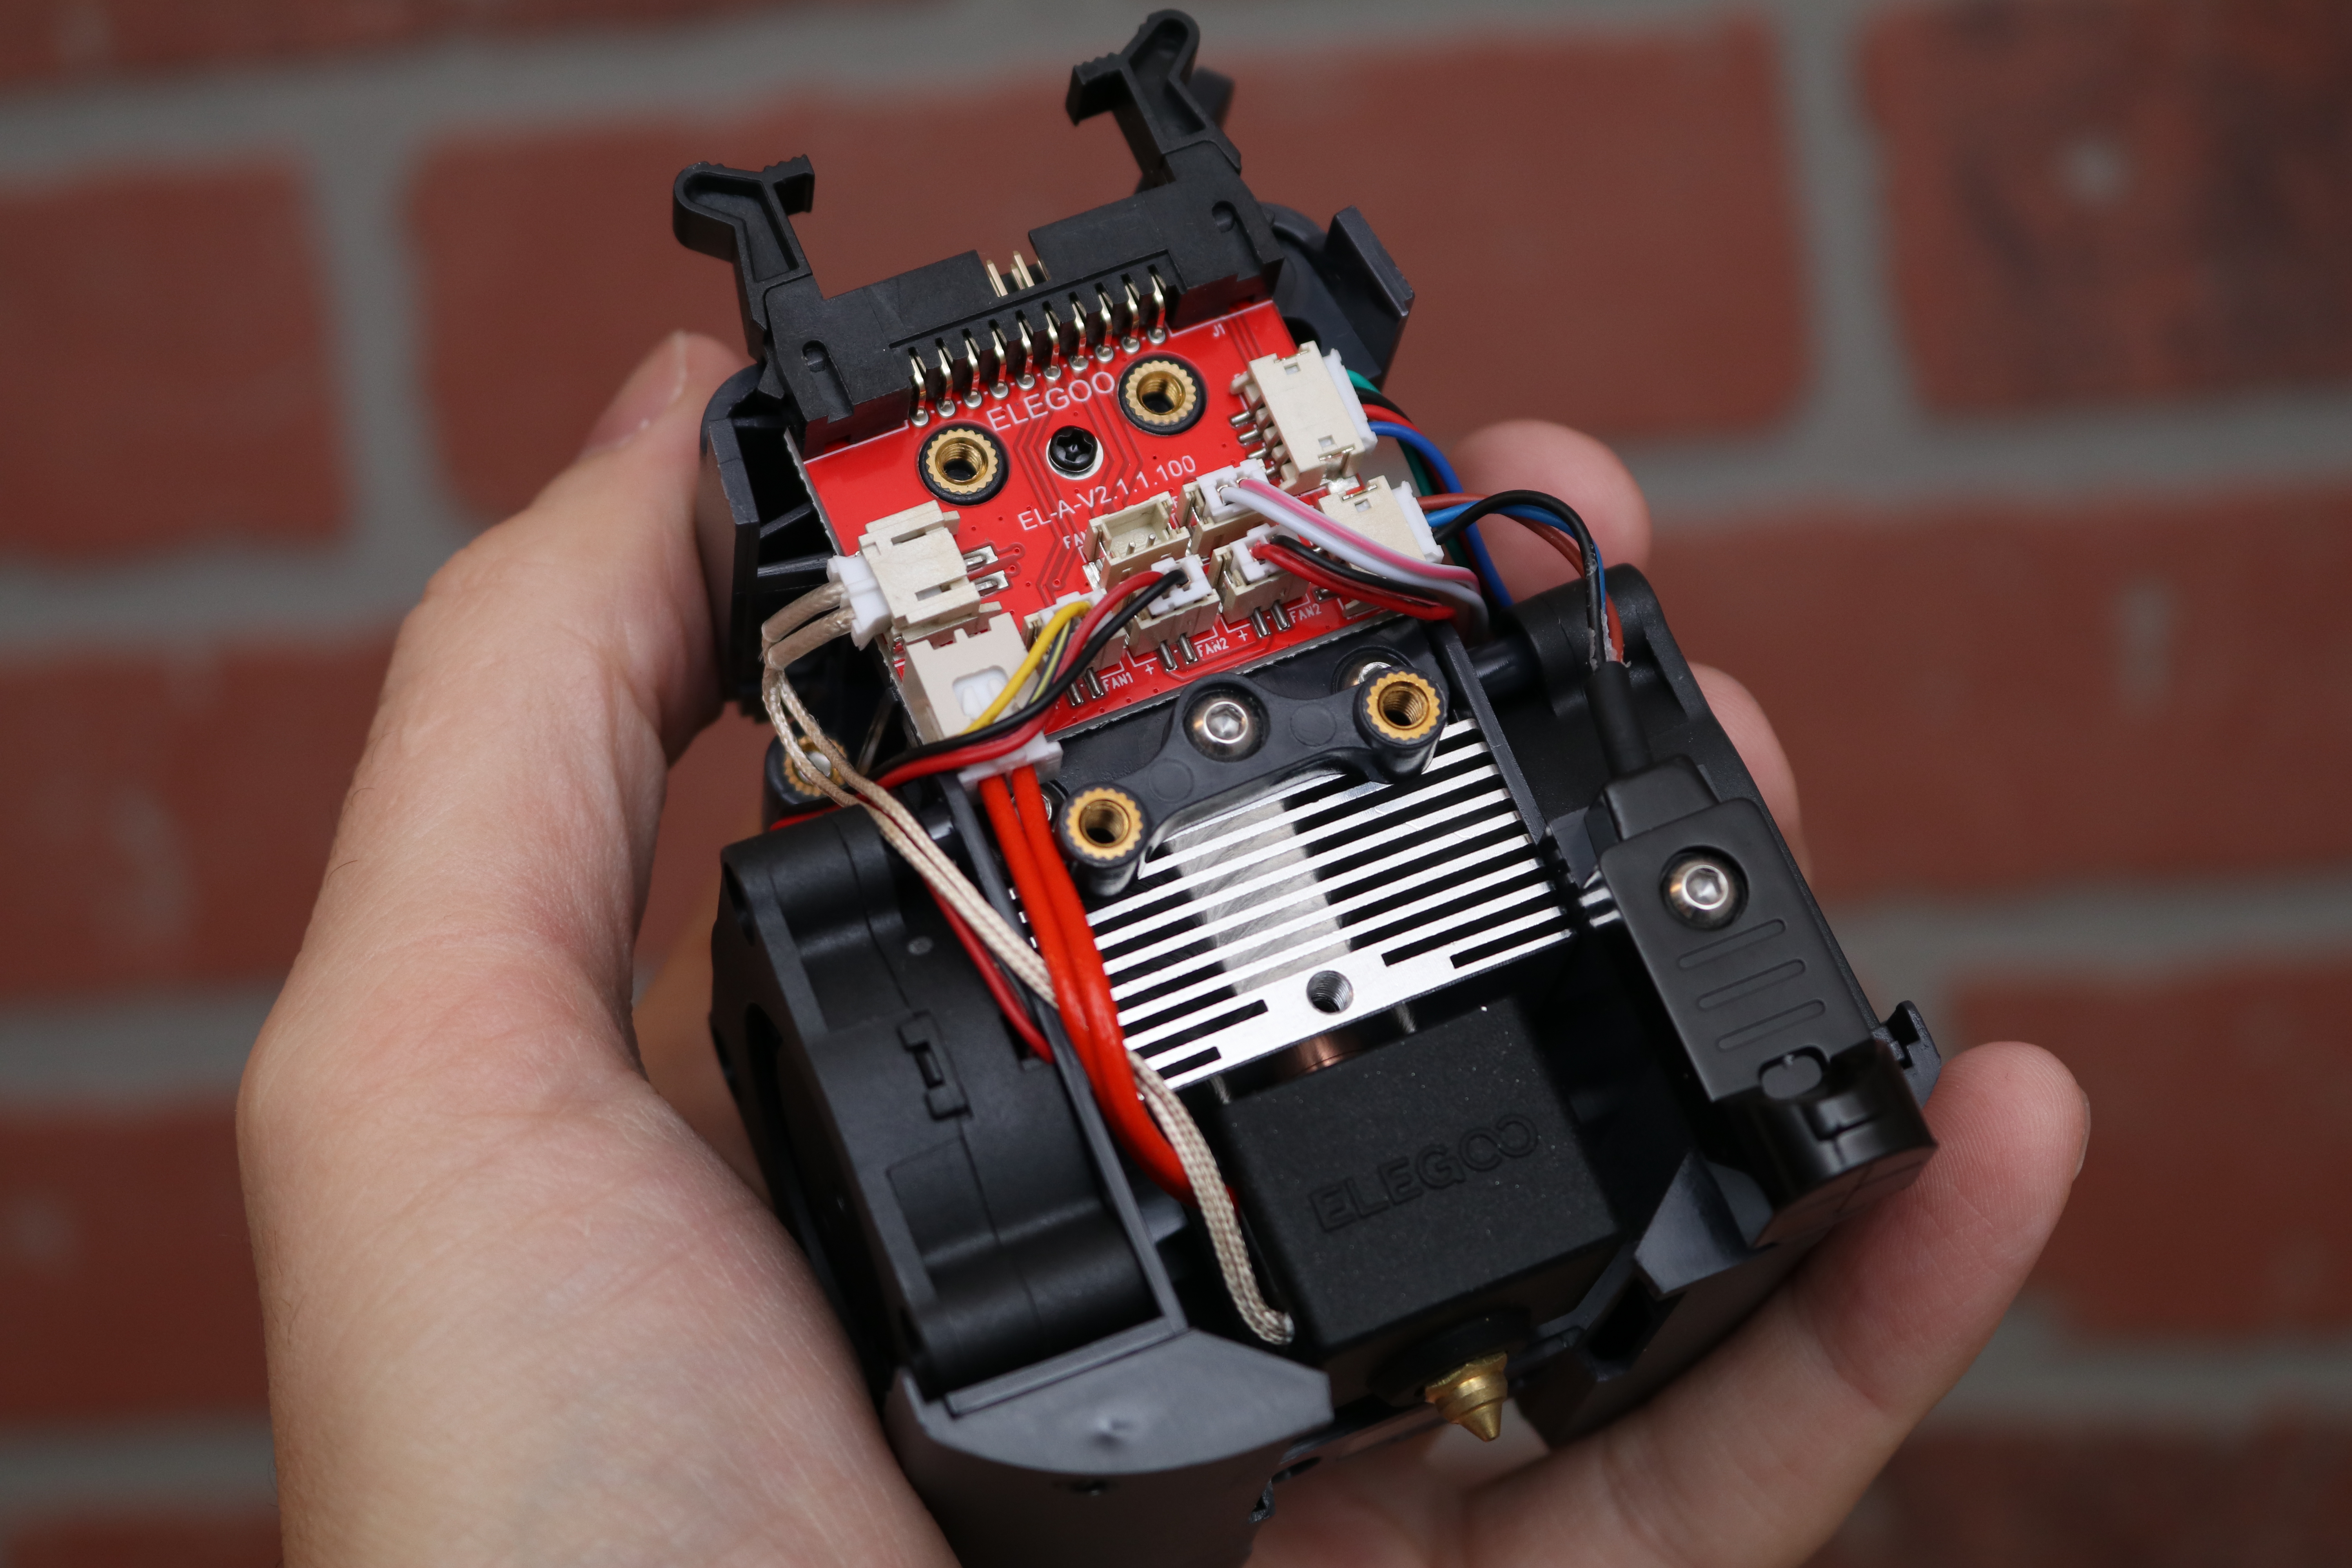
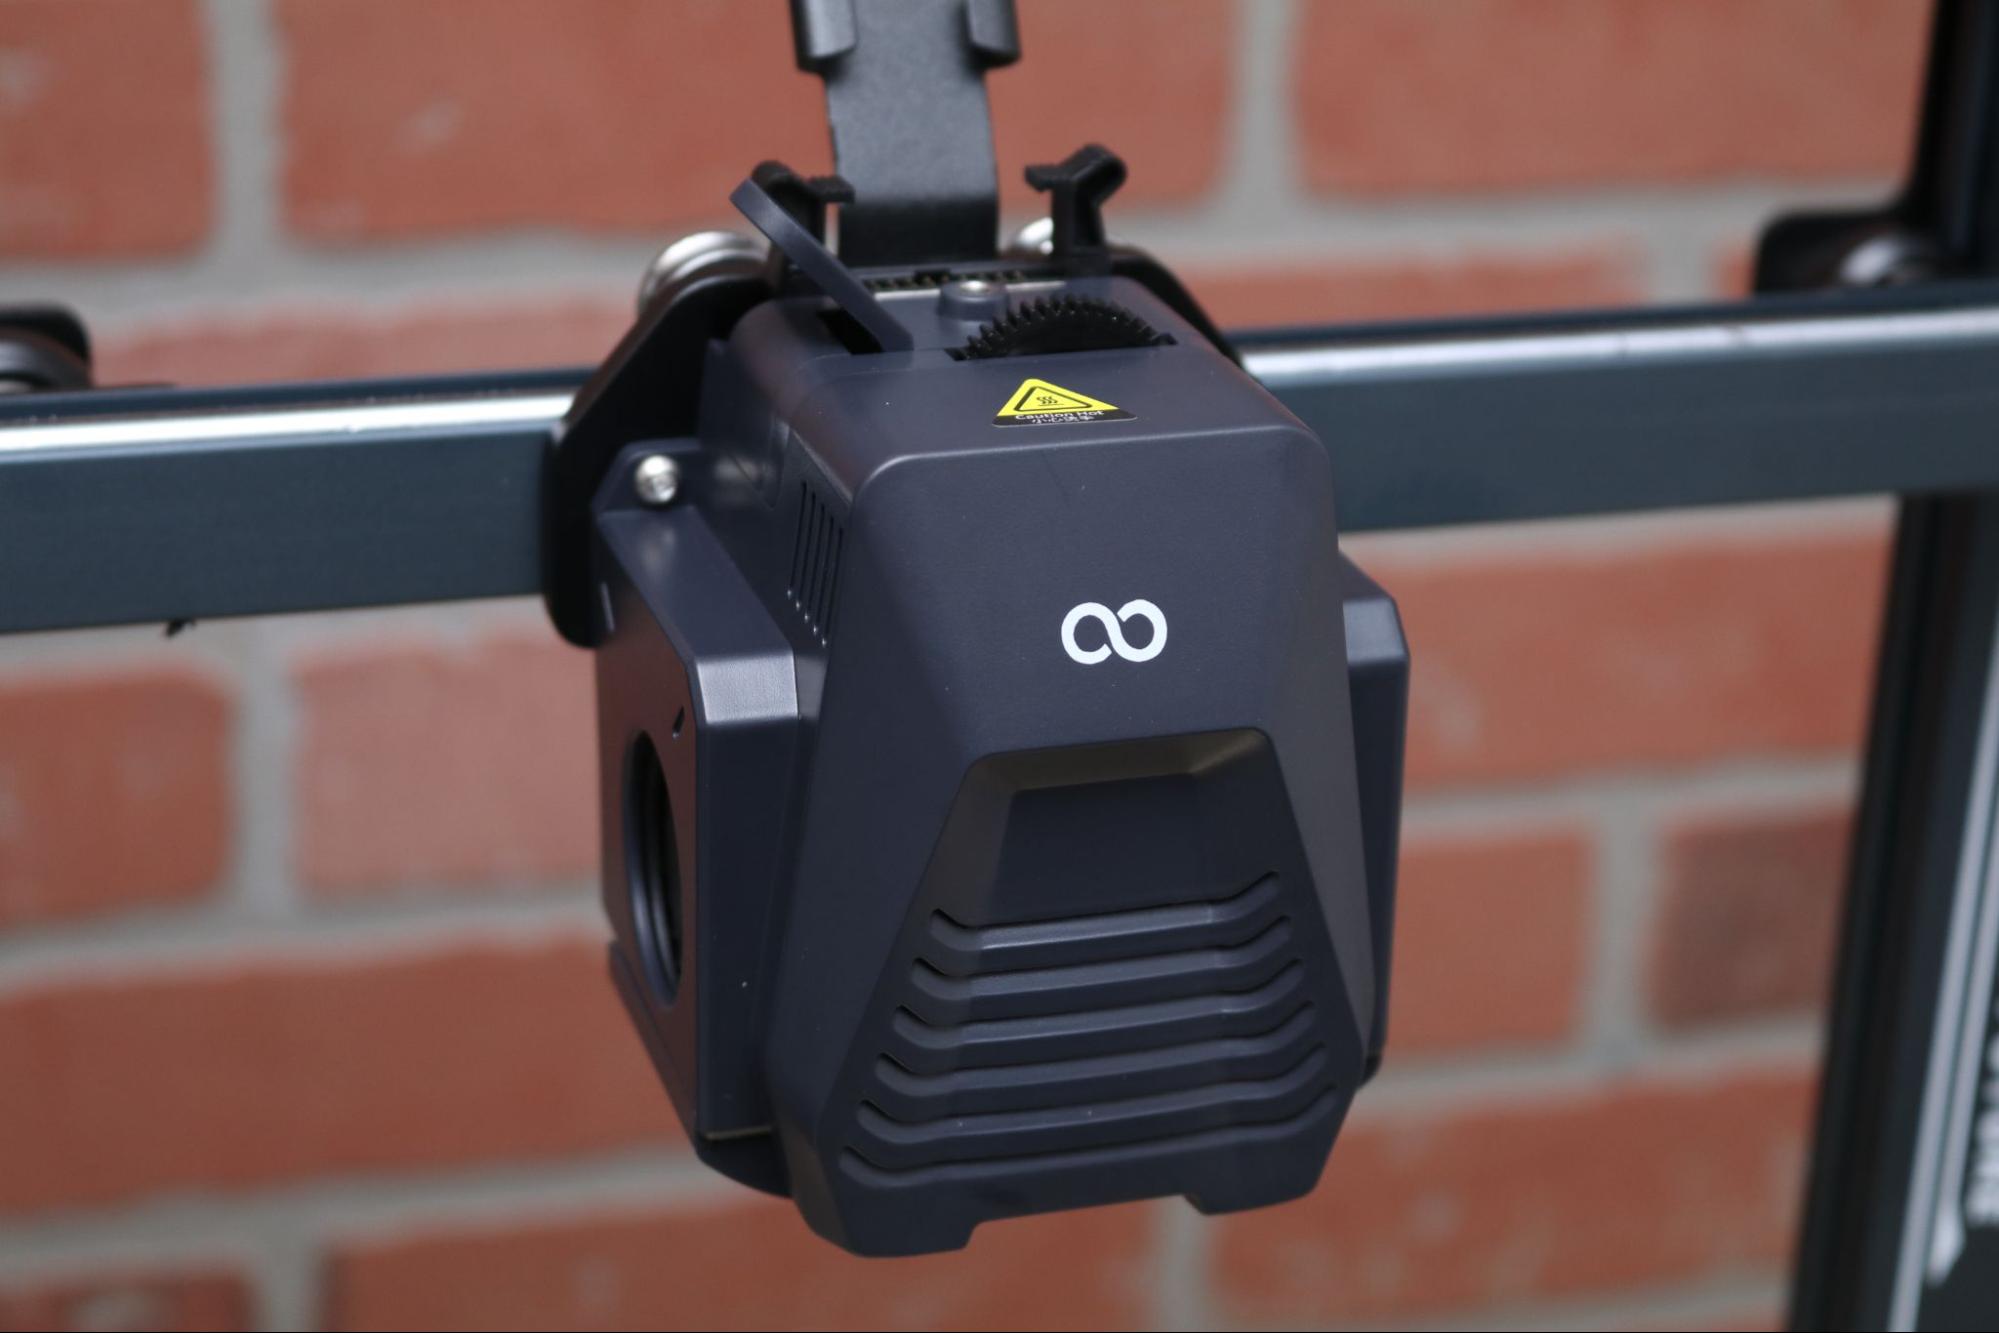
The extruder module is substantial, and it’s worth taking a look inside to see what's included. It contains a pair of 4015 ball bearing part cooling fans, one on each side of the extruder to provide immediate cool air over the printed part. It also has a dual gear configuration with a 5.2:1 gear reduction ratio to consistently push material through the hot end while the hot end cooling fan prevents heat from creeping up the copper-titanium bi-metal throat.
The extruder module also has the leveling probe integrated into the frame, while the wiring is all routed through the rear of the unit into a flat ribbon cable terminal that connects to the printer. The lever on the top of the unit holds one of the drive gears in place, and pushing down allows the user to easily insert filament between the dual gears. All in all, it’s an impressively designed hot end that packs a lot of features into a single dense unit.
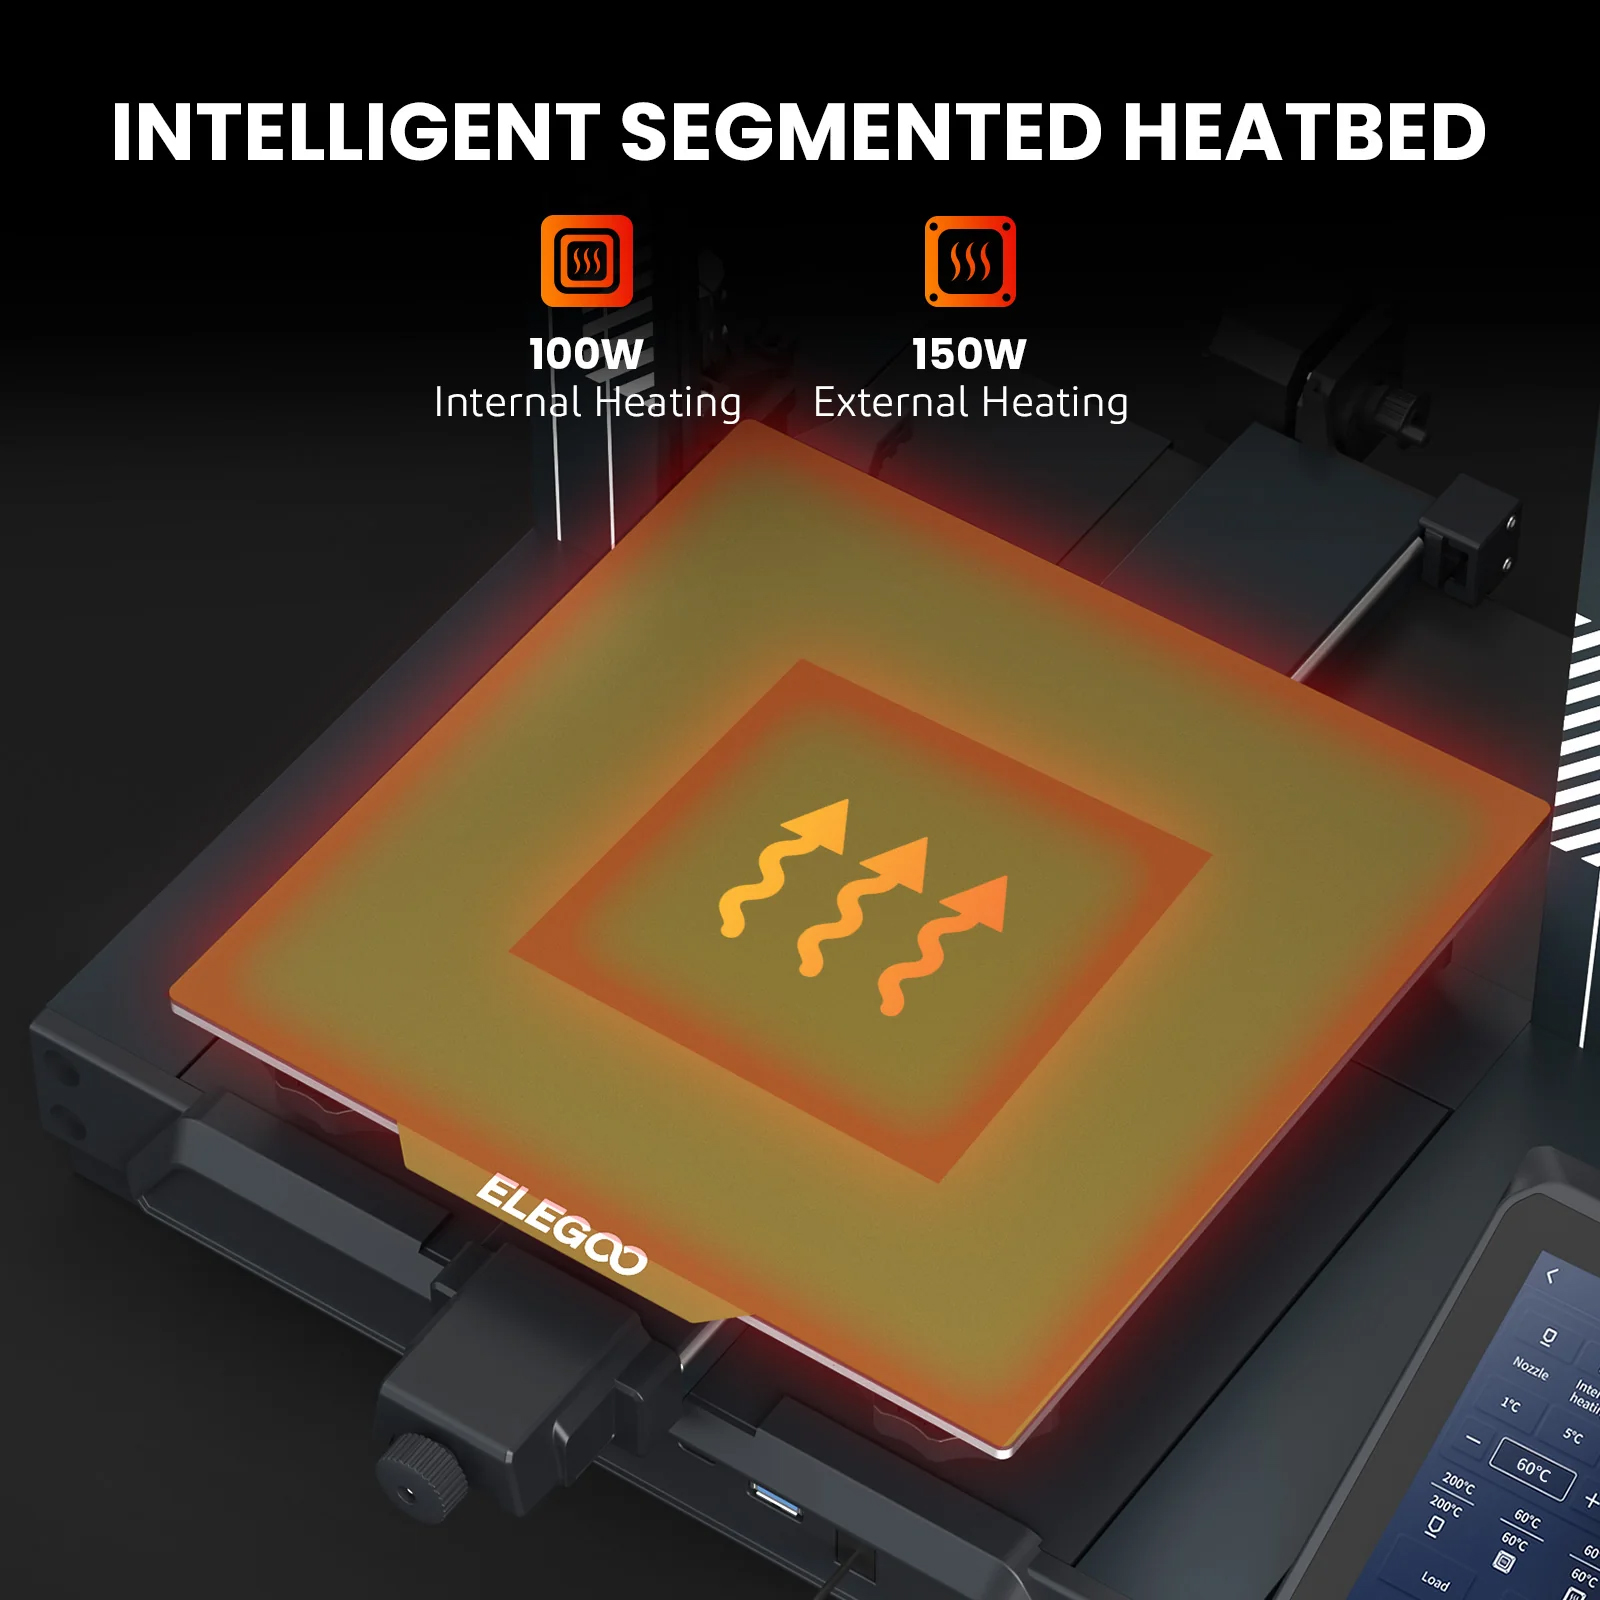
The Neptune 4 Pro uses a segmented approach to heatbed design which is notable as an energy-saving feature as well as an additional level of control over the printer. The heatbed has a 120x120mm area in the center which uses only 100W to heat, while activating the remaining area uses the full 250W to heat.
Printers like the Prusa XL use a grid of individual heating elements to provide heating only in areas where parts are actively printing, which makes sense. If you’re printing a tiny Benchy, you don’t need to provide heat to the large platform.
The Neptune 4 Pro strikes a balance between a single surface and this modular approach, and will likely be popular with energy-conscious customers concerned with the total power consumption of their print farm.
User Interface on Elegoo Neptune 4 Pro
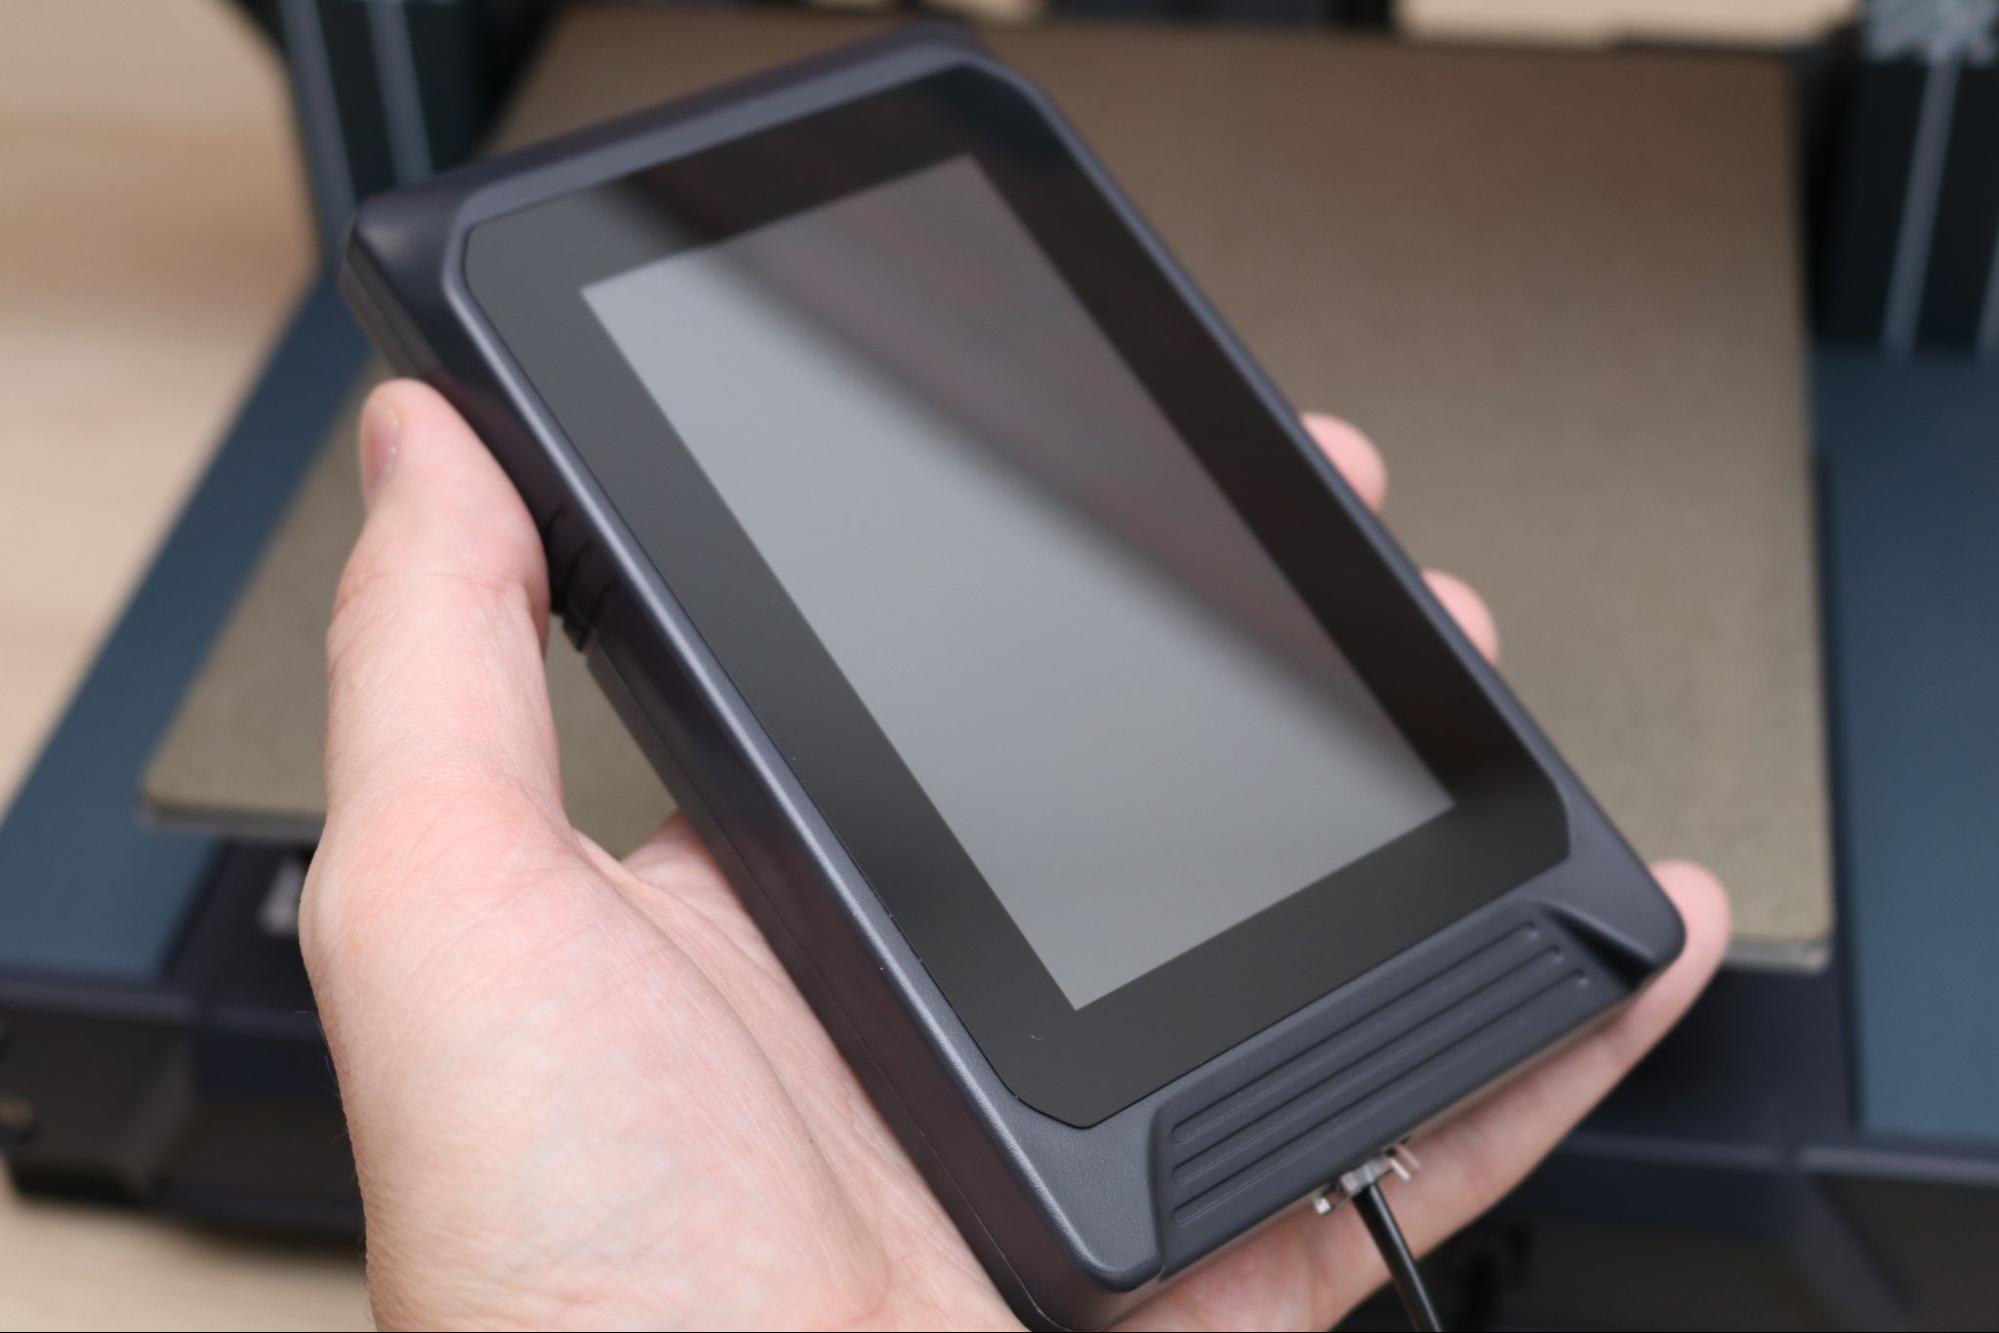
The Neptune 4 Pro uses a 4.3-inch LCD touchscreen to access the Klipper interface for starting prints, moving the motion system, and other functions. Elegoo has kept the interface consistent with the other printers in the Neptune line, so the Klipper functionality is hidden behind an interface that looks like it would be at home on a printer running Marlin firmware.
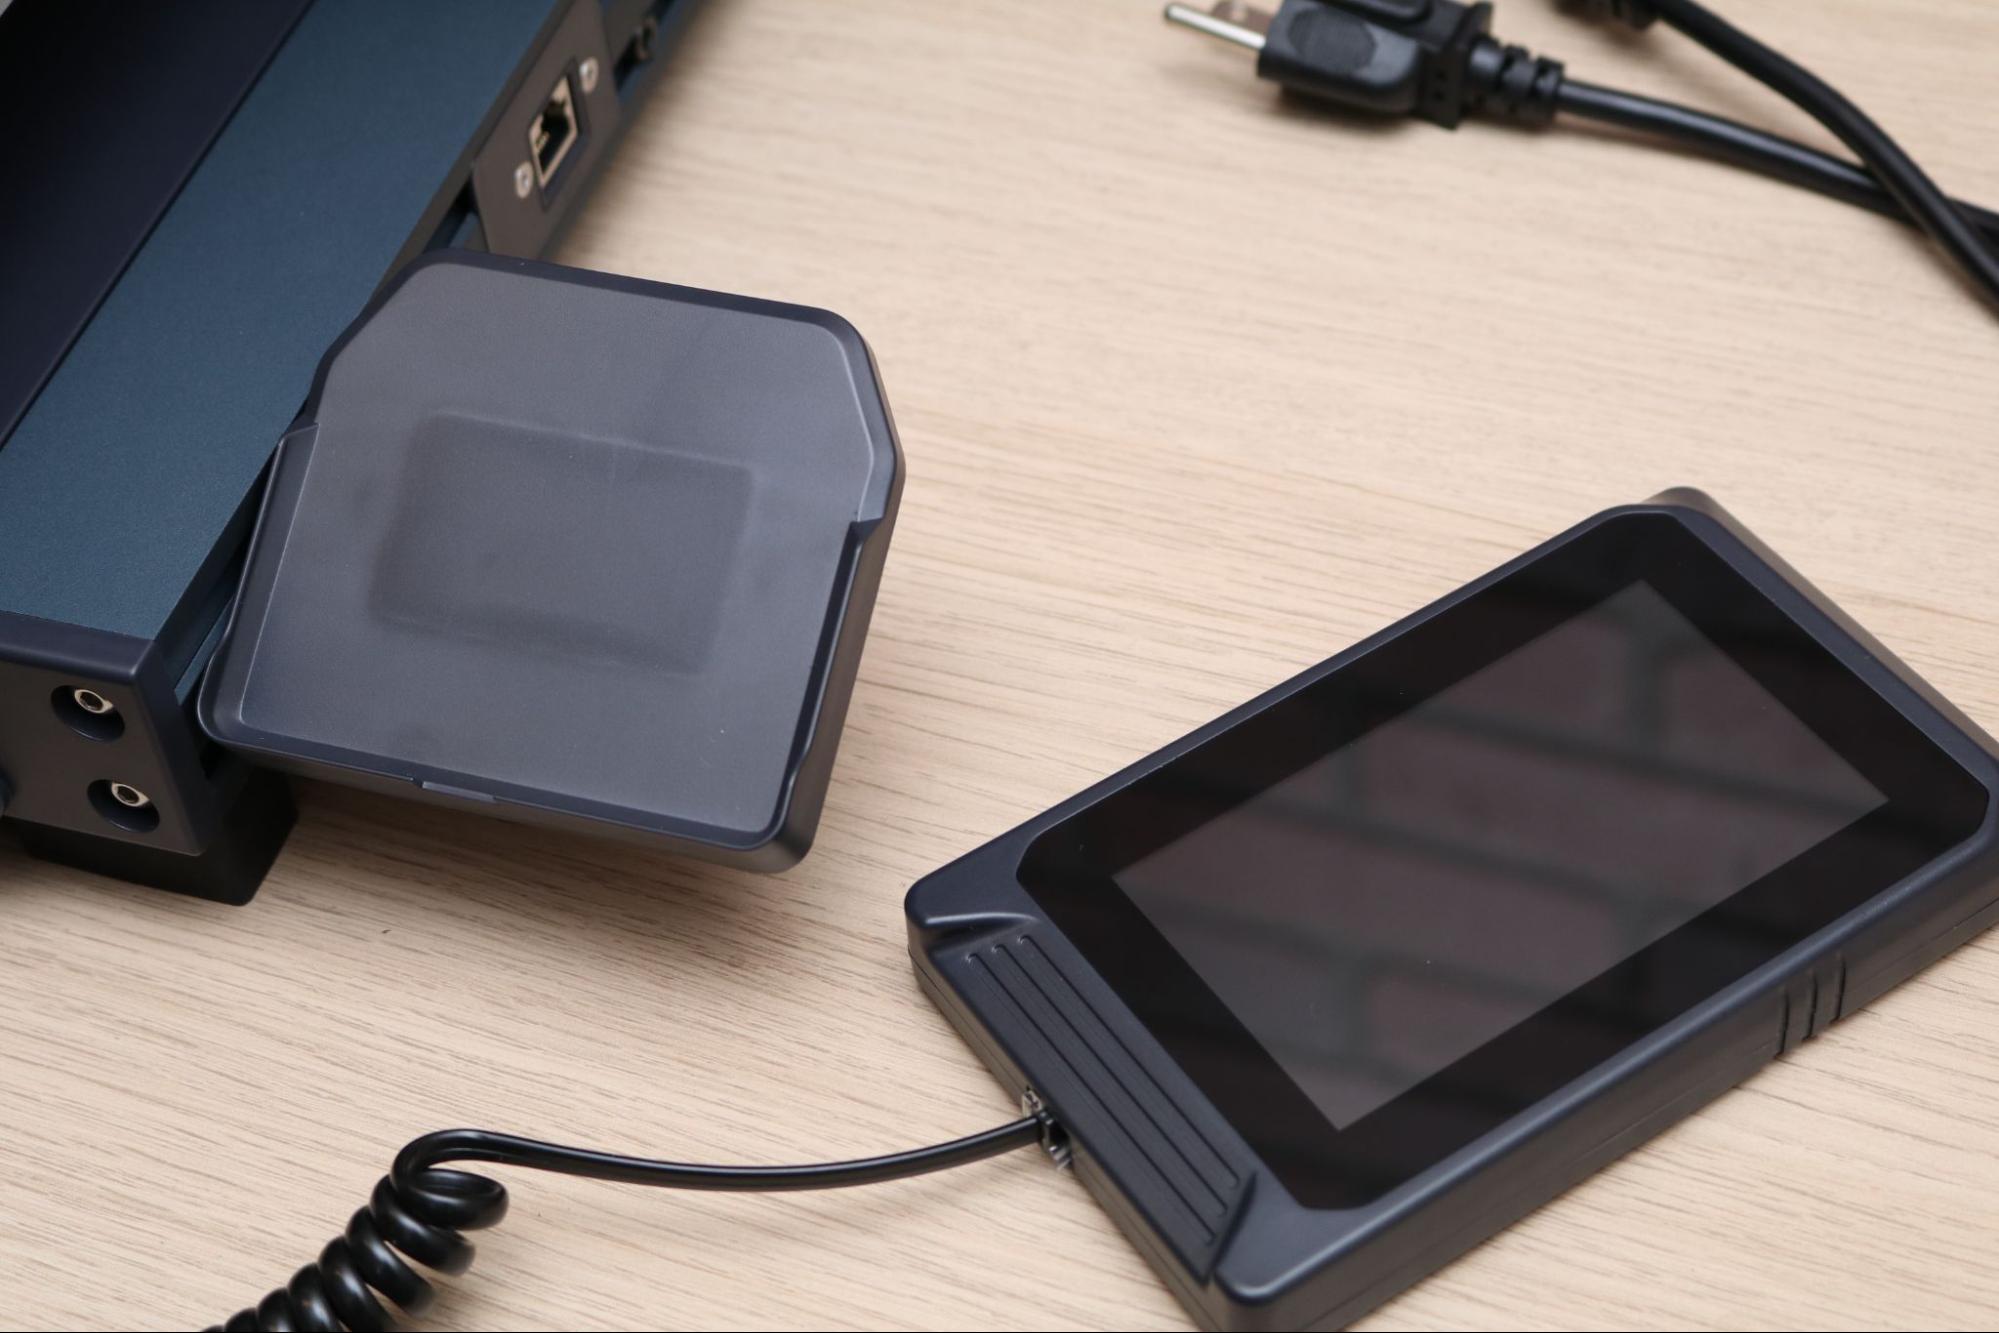
Like other printers in the Neptune 3 and Neptune 4 family, the touchscreen on the Neptune 4 Pro is held in place with an embedded magnet and uses a retro-style curly cord to connect to the printer. This isn’t a common feature on printers, but I’ve found that it does tend to be surprisingly useful for moving the screen around during sensitive operations like calibrating the platform.
Calibrating and Leveling Elegoo Neptune 4 Pro
Unlike printers like the Prusa MK3S+, the Neptune 4 Pro combines an automatic leveling probe with manually adjustable wheels to level the build platform. This feels like a downgrade from the Elegoo Neptune 3 Pro, which used a permanently mounted build platform and automatic probing to complete a fully-automated leveling process.
By introducing adjustable wheels, Elegoo has shifted some of the calibration work back on the user, something that may cause frustration to users unaware that the wheels may sometimes work themselves loose during printing or moving the machine. The best 3D printers typically feature a higher level of automation, freeing the user from tedious calibration and adjustments to get the perfect first layer.
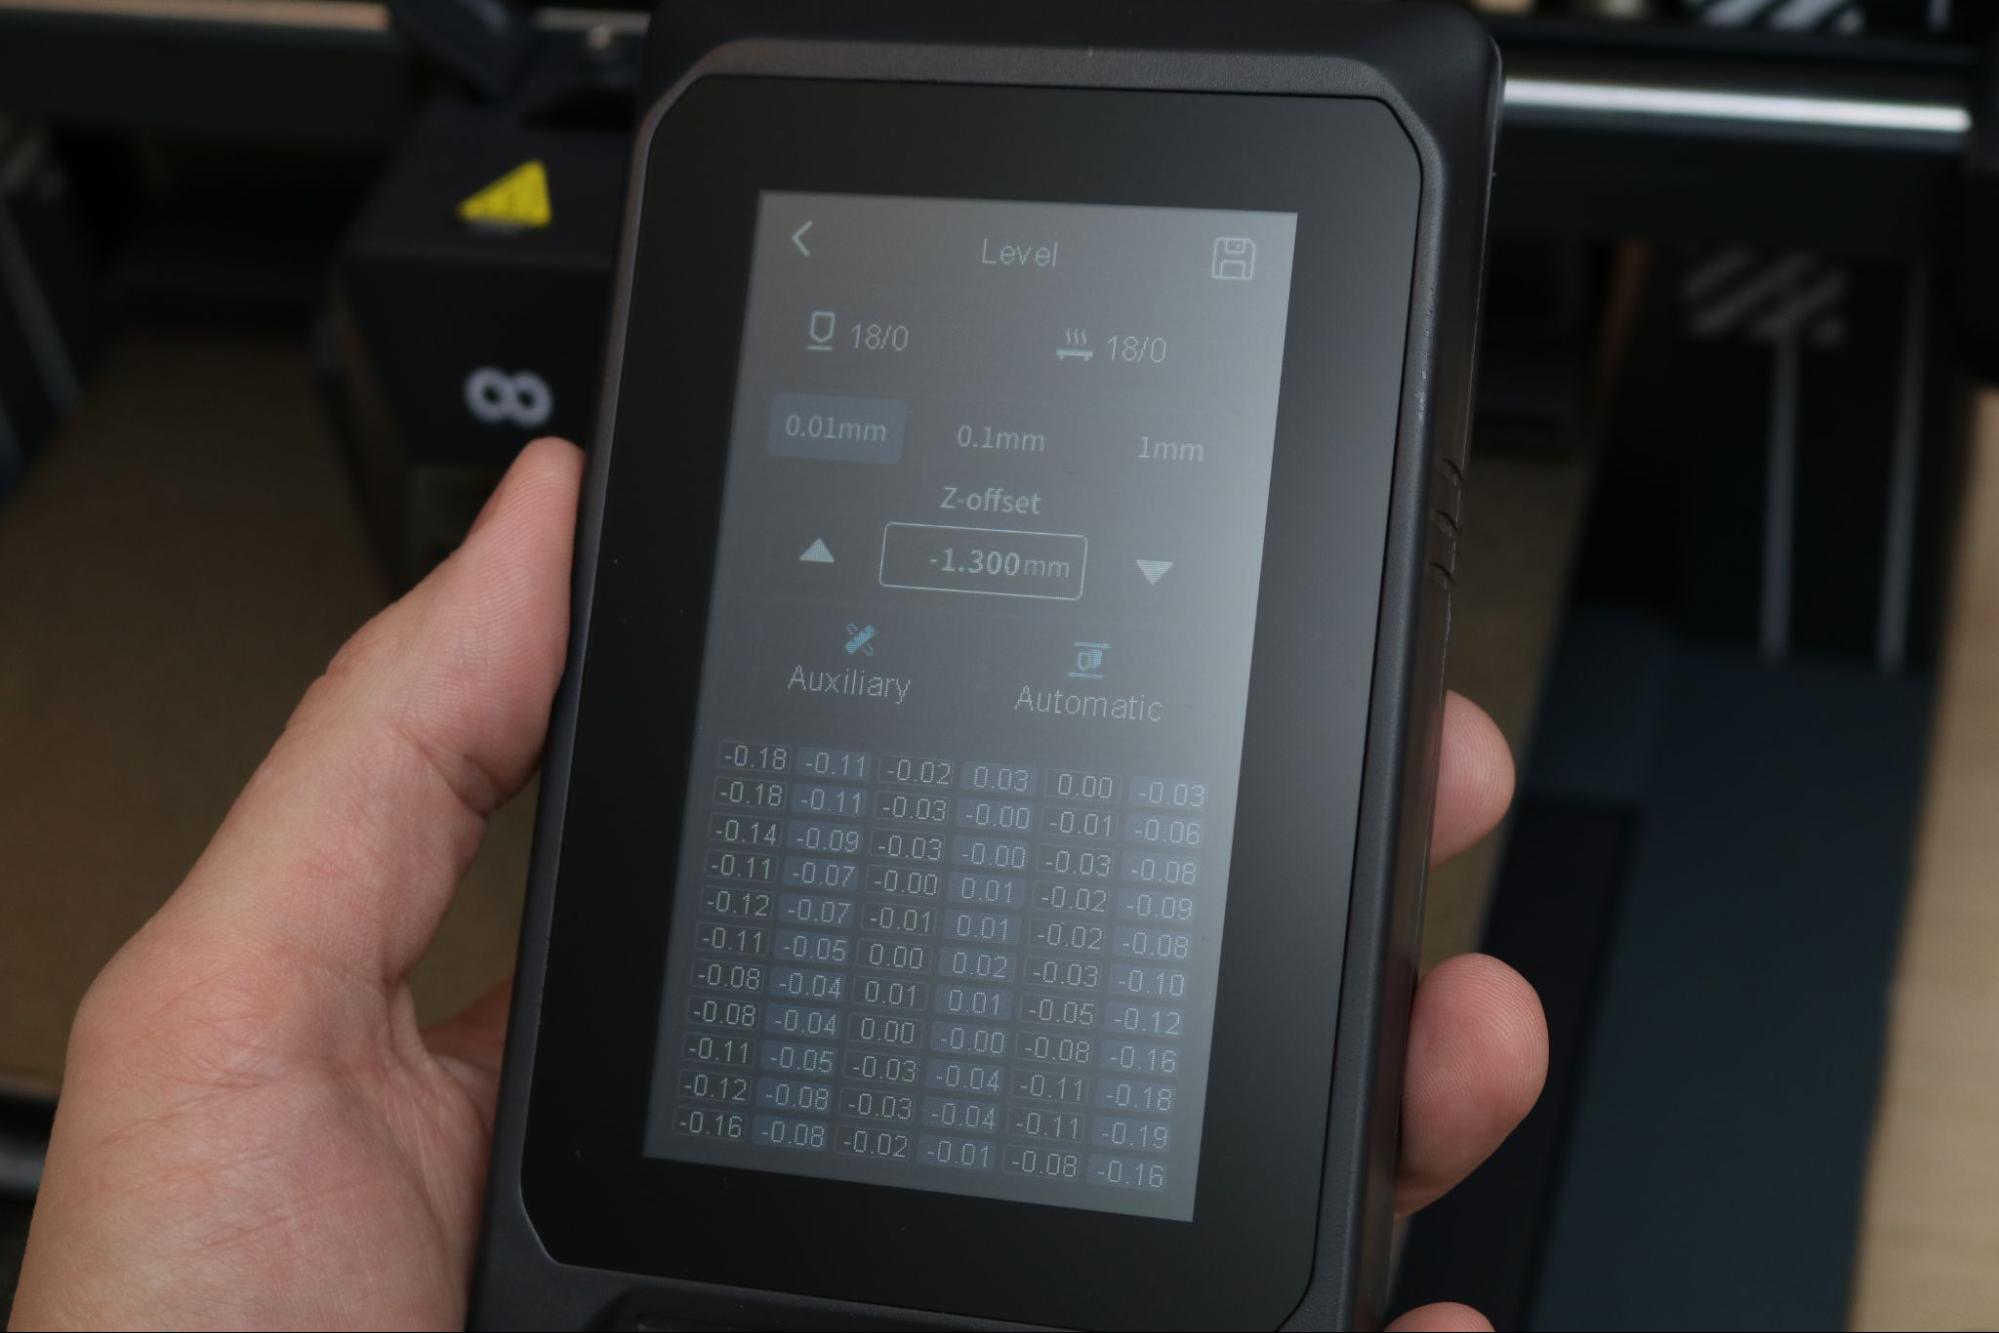
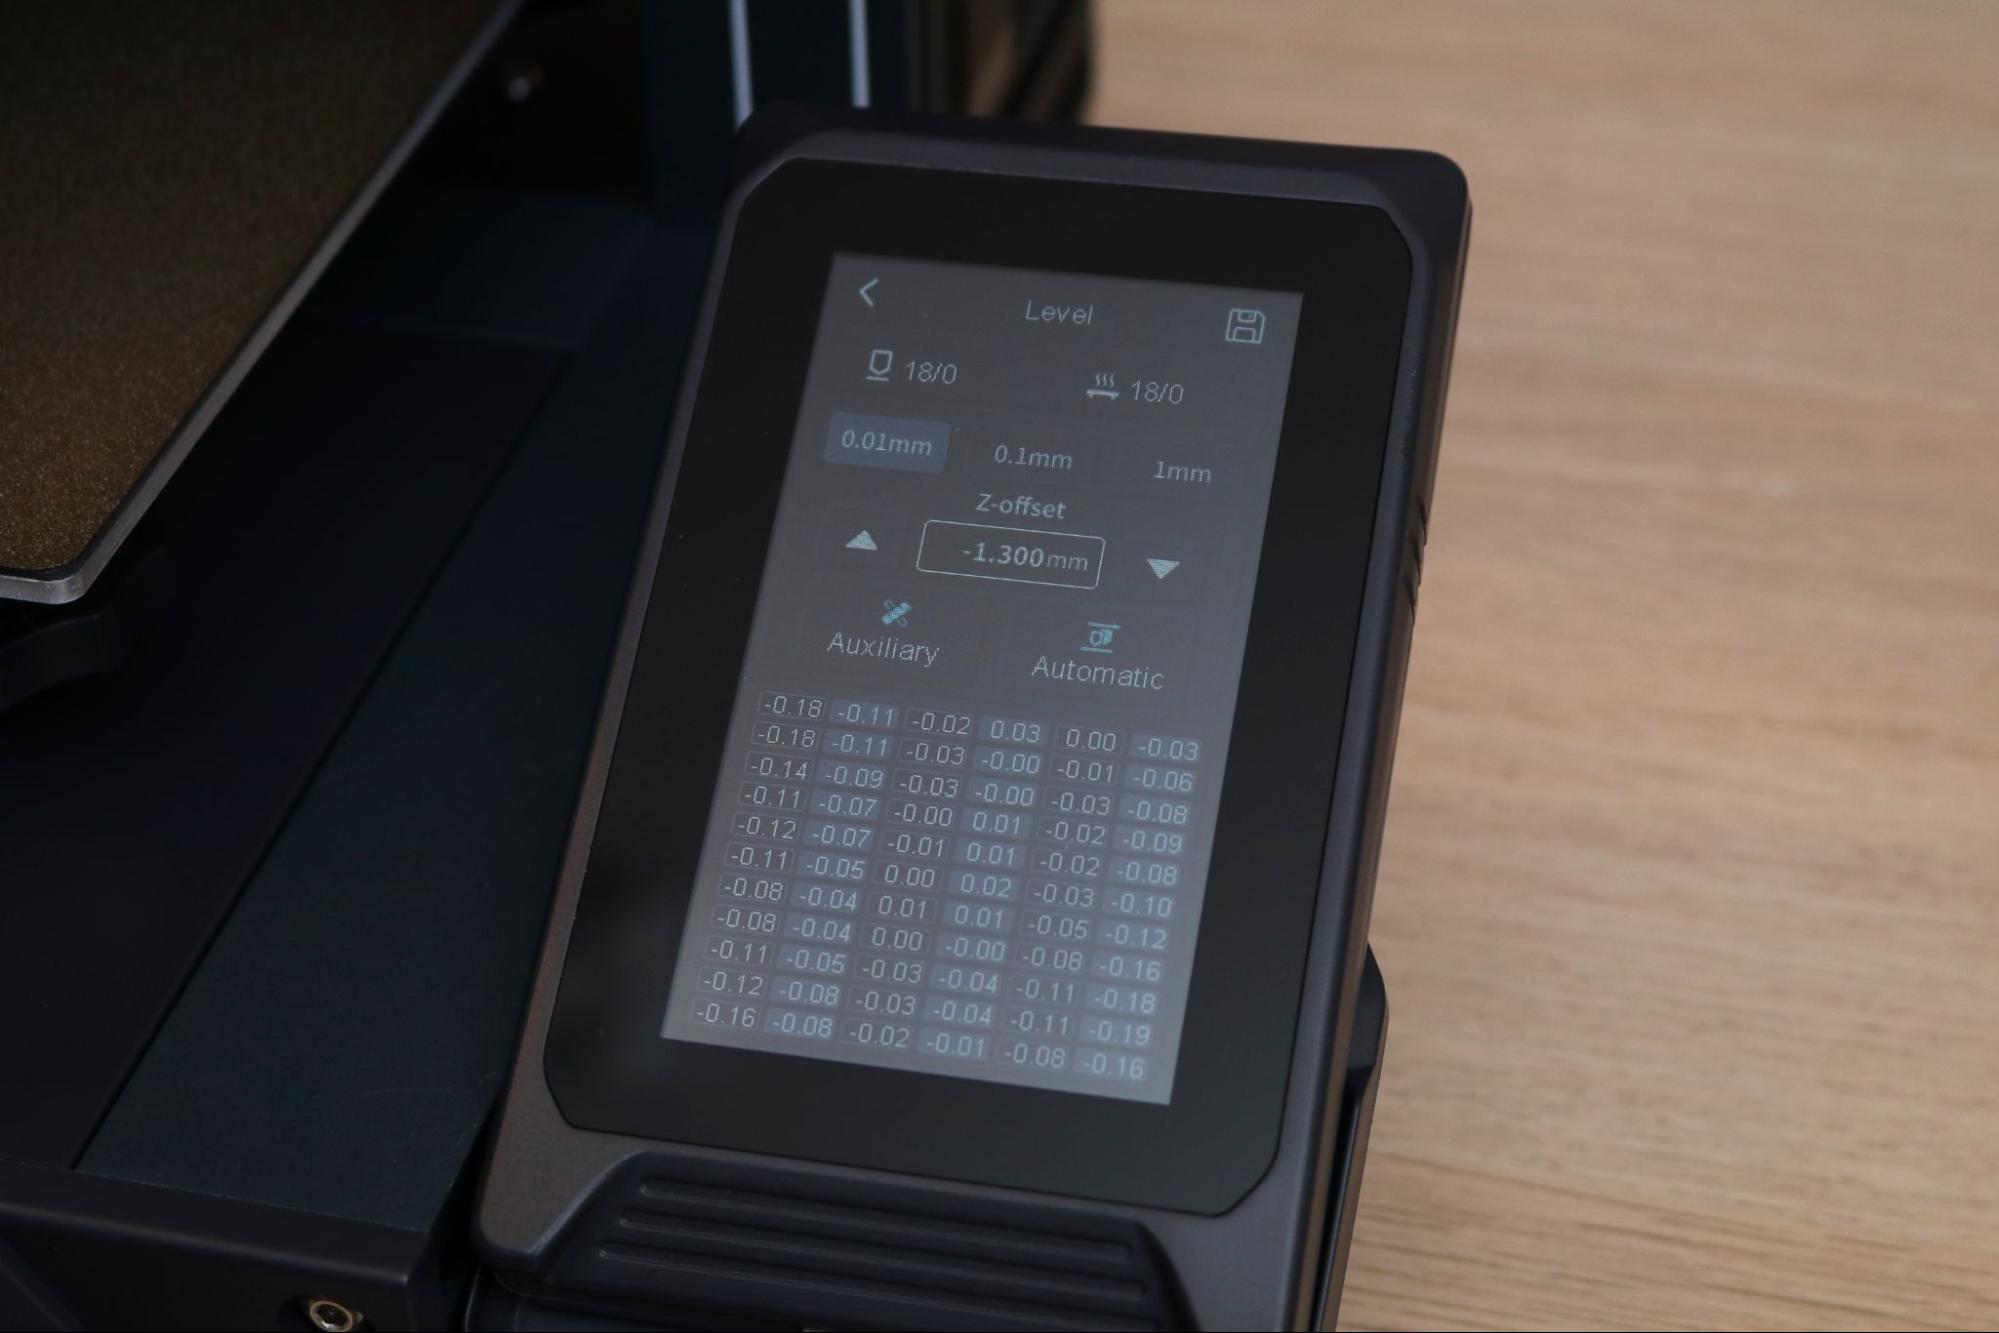
Pressing the Level icon on the main menu will bring you to the calibration page, which shows the current offsets for each available point, the Z-offset, and the “Auxiliary” and “Automatic” platform leveling functions.
The “Auxiliary” function allows the user to move the nozzle to each individual corner of the platform and manually adjust the wheels until the nozzle is properly offset from the platform. Adjusting one corner will also change the others, so this process should be repeated a few times for the best results.
Once the “Auxiliary” leveling is complete, the “Automatic” leveling function will heat the platform and automatically move the nozzle through a series of points and record the offset at each point. This process takes a few minutes, and after saving the overall Z-offset should still be checked to confirm that the nozzle is set correctly.
While this process allows for significantly more granular control over the leveling, it’s probably overkill for most beginners. Advanced users would likely prefer a more automated system that allows them to avoid having to manually turn leveling wheels and storing Z-offsets to calibrate the platform.
Build Platform on Elegoo Neptune 4 Pro
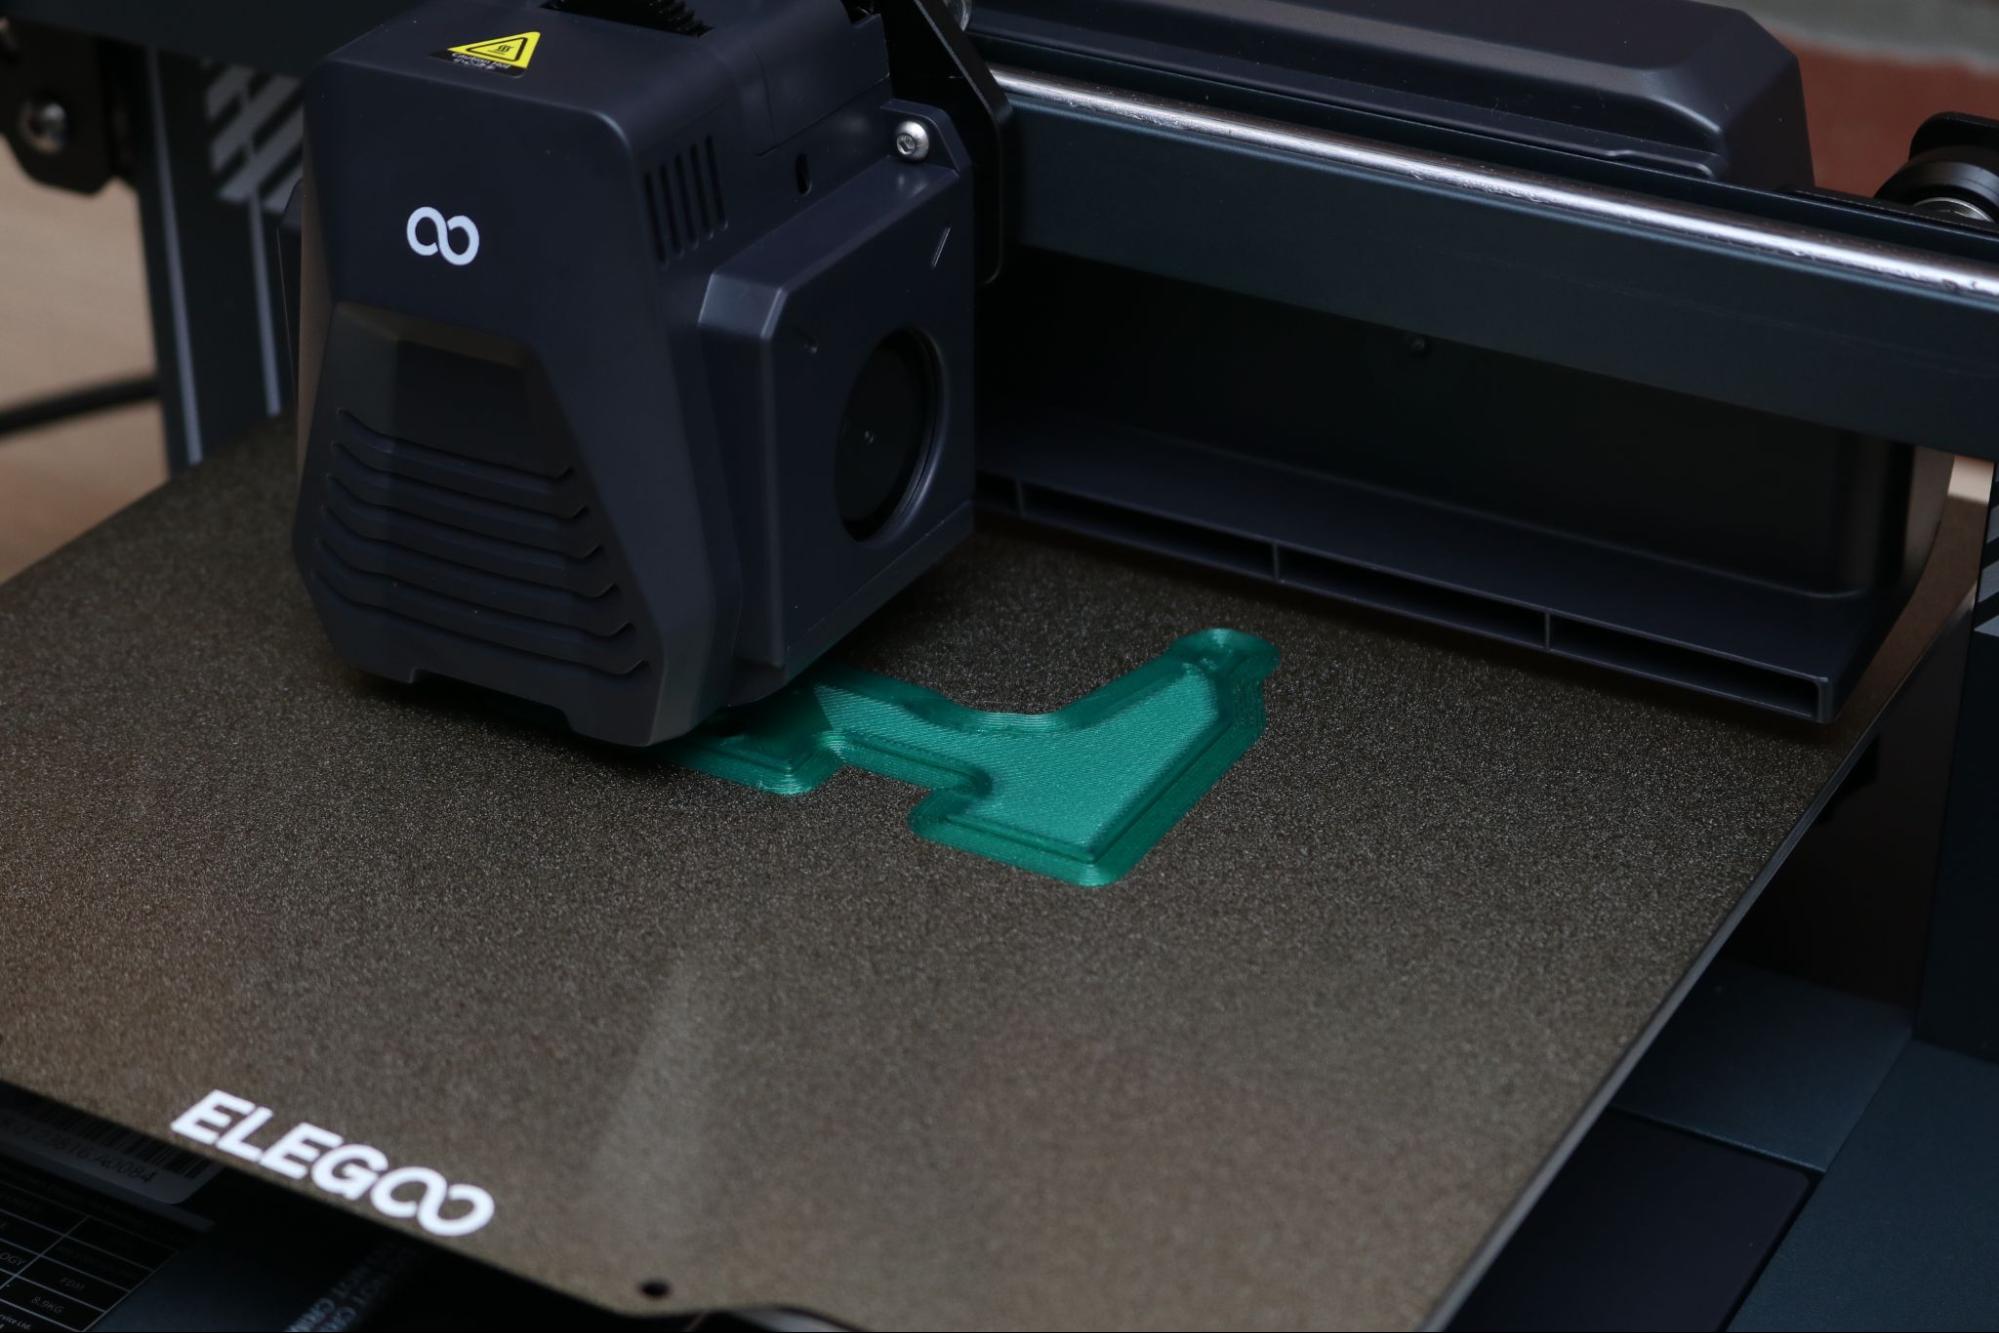
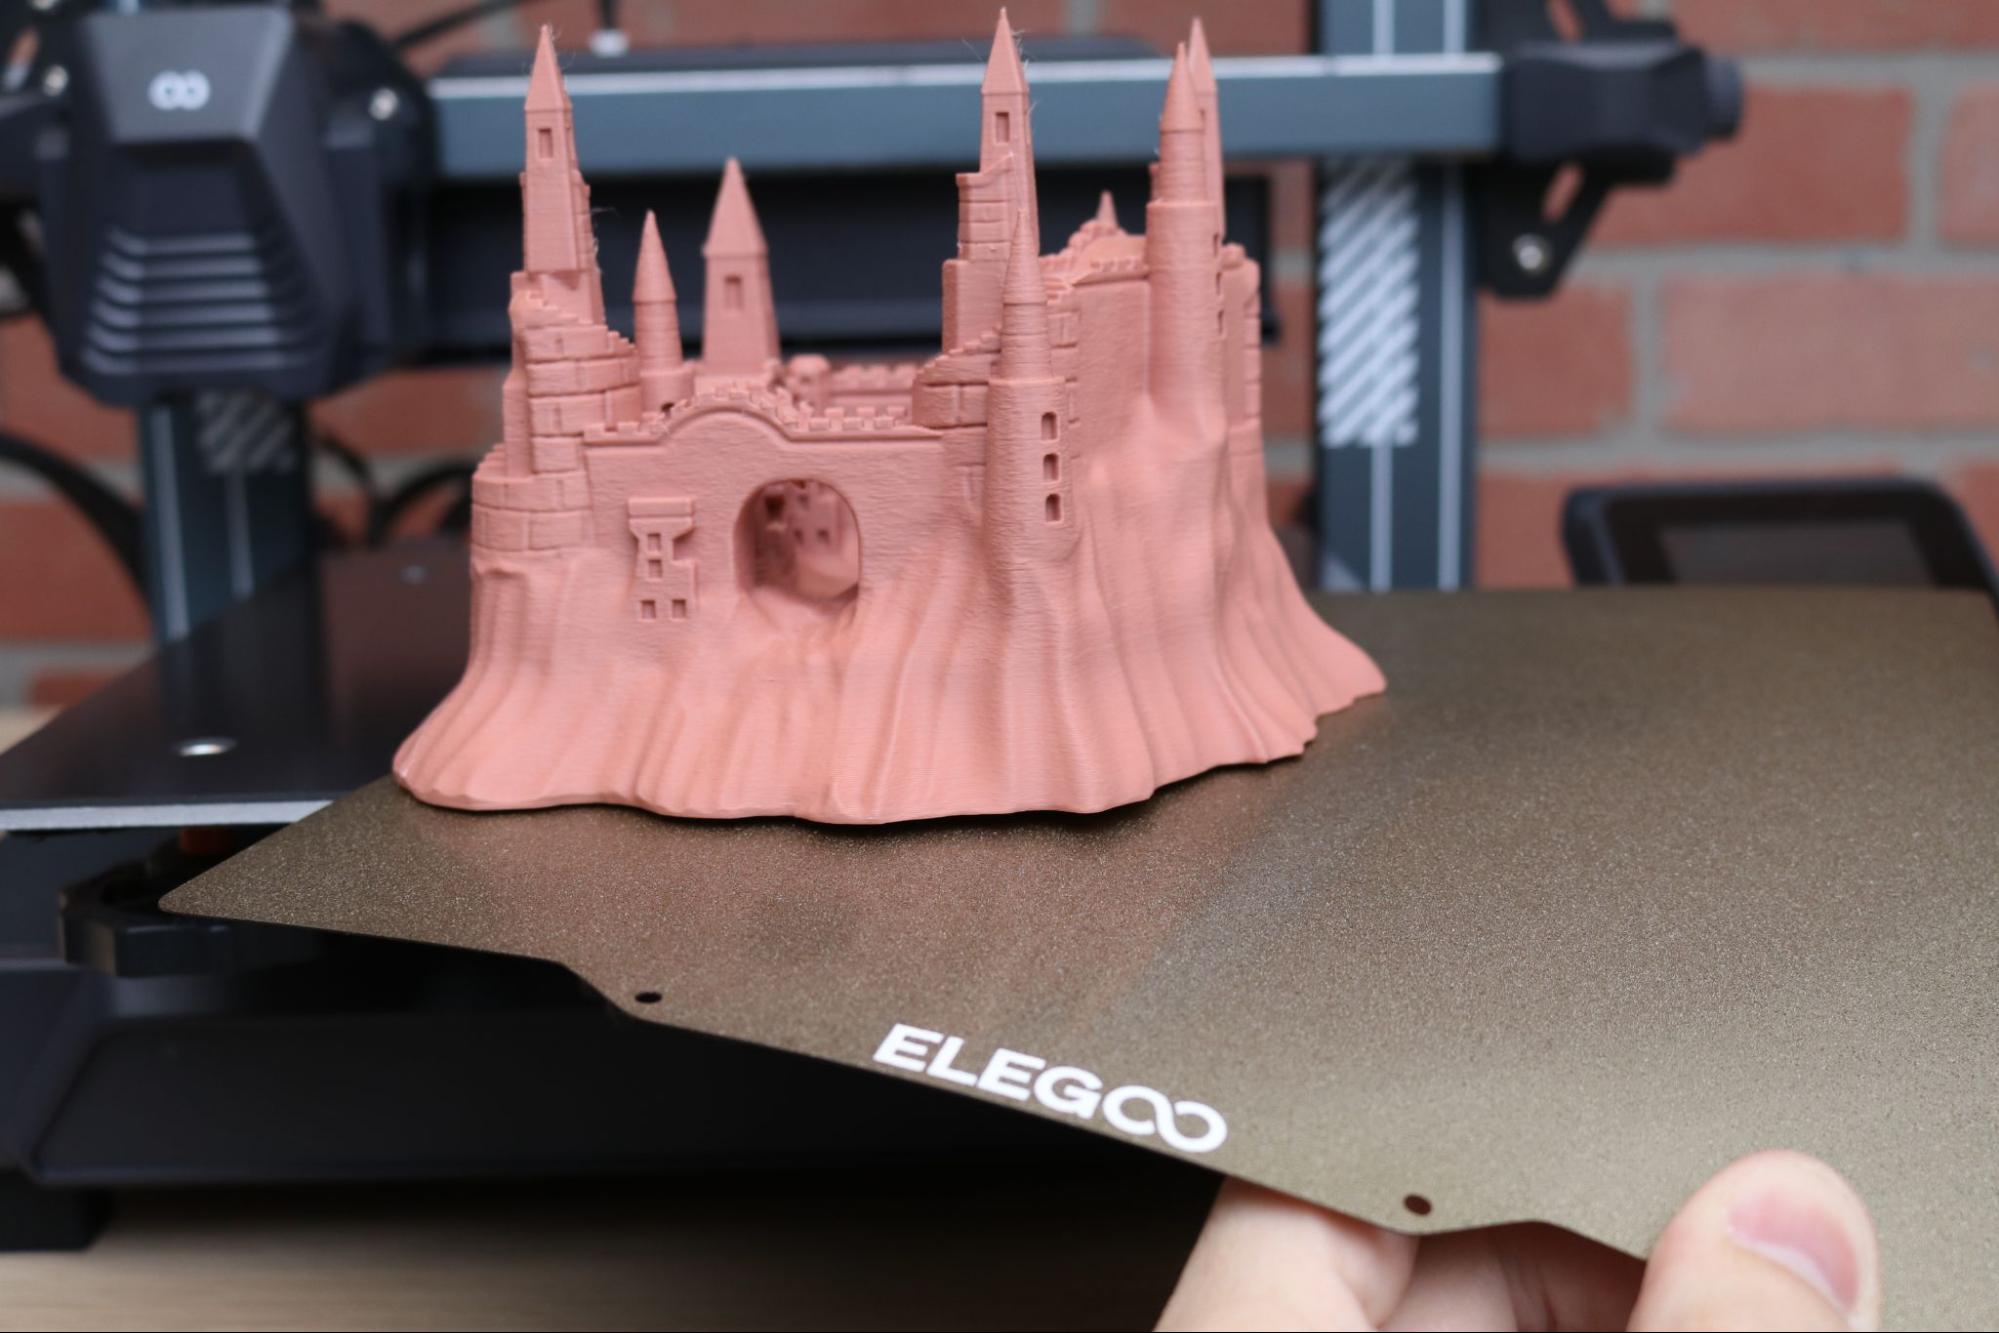
The textured PEI sheet included with the Neptune 4 Pro is best-in-class for adhesion, and the relatively thin sheet can easily be flexed and deformed to remove parts after printing. PLA material sticks to the platform with a strong bond when heated, but after cooling parts can be removed with almost no effort. Small parts, large parts, and everything in between adheres to the platform without releasing during printing.
The PEI sheet uses a complex textured surface to offer superior adhesion during printing, and the part will release from the plate after cooling. This textured surface will translate over to the part, leaving a gentle texture on the bottom surface of the printed model. Whether or not this is a good thing is subjective and ultimately determined by the application, but I find the textured surface looks much better than the mirror-shine typically seen on the bottom of models printed on glass build platforms.
Part Cooling Fans on Elegoo Neptune 4 Pro
The four blower motors in the large part cooling fan assembly can be toggled through the interface of the printer. The three available modes are “Mute”, “Normal”, and the full-tilt “Sport” mode (previously known as “Violent Mode”).
Switching to Sport mode activates the fans at full speed and sounds like turning on a leaf-blower aimed directly at the printed part. Make no mistake, the printer is not quiet in this mode and can easily be heard from across a room or through a door, so you’ll want to make sure you’re not printing while on a Zoom call.
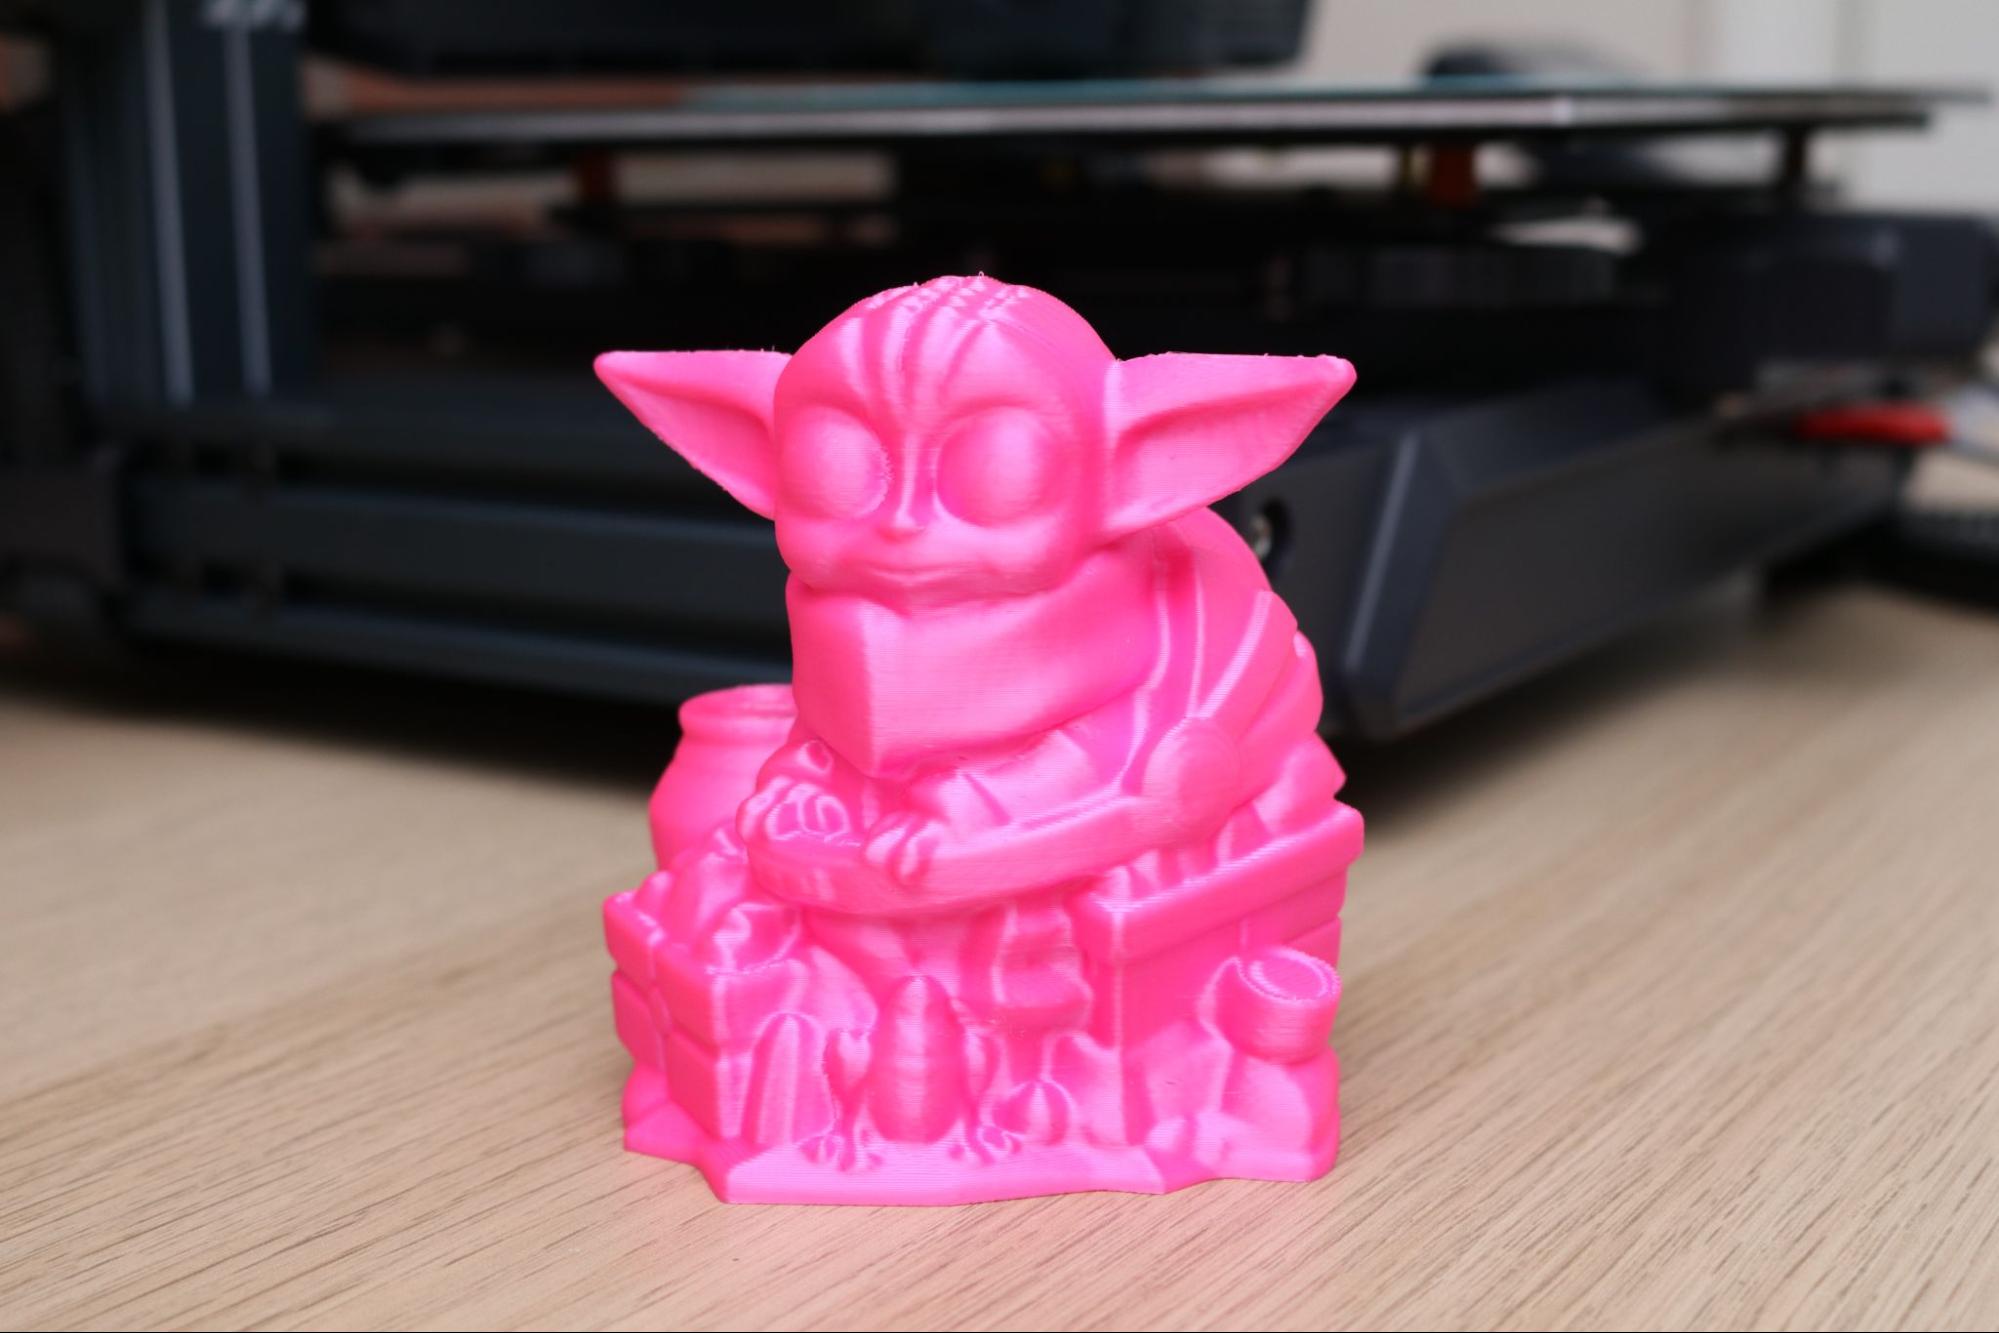
Considering the Neptune 4 Pro is advertised as having a maximum print speed of 500 mm/s, it makes sense that the part cooling system would be robust enough to handle cooling large amounts of material as they are being printed. I was impressed with the ability of this cooling fan assembly to immediately cool down PLA, which allowed for some impressively steep overhangs (like the bottoms of the ear on the above Grogu model) that didn’t warp up after printing.
Printing Demo Models on the Elegoo Neptune 4 Pro
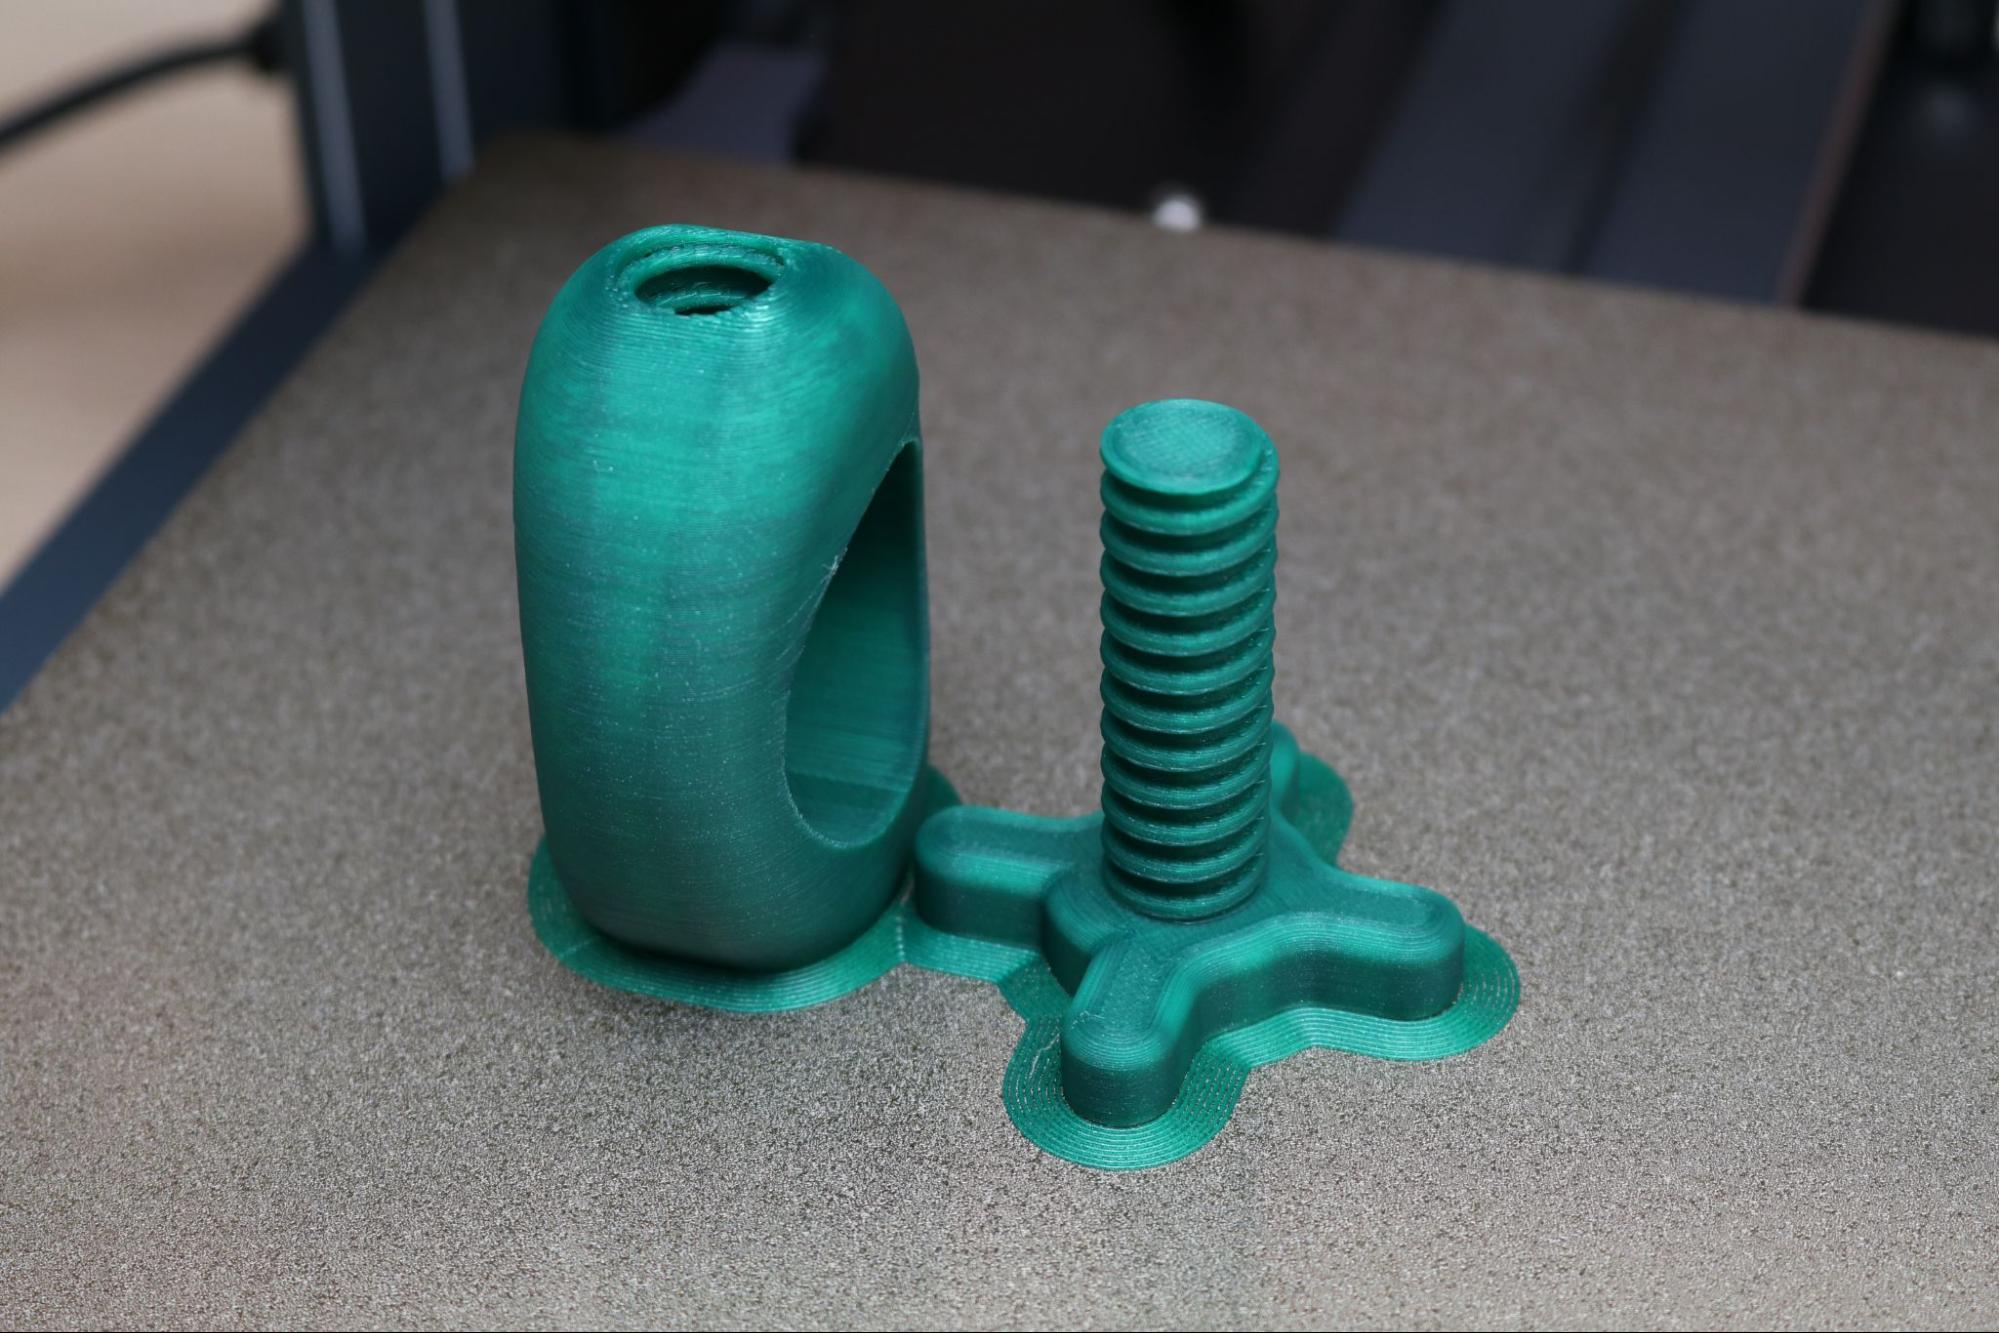
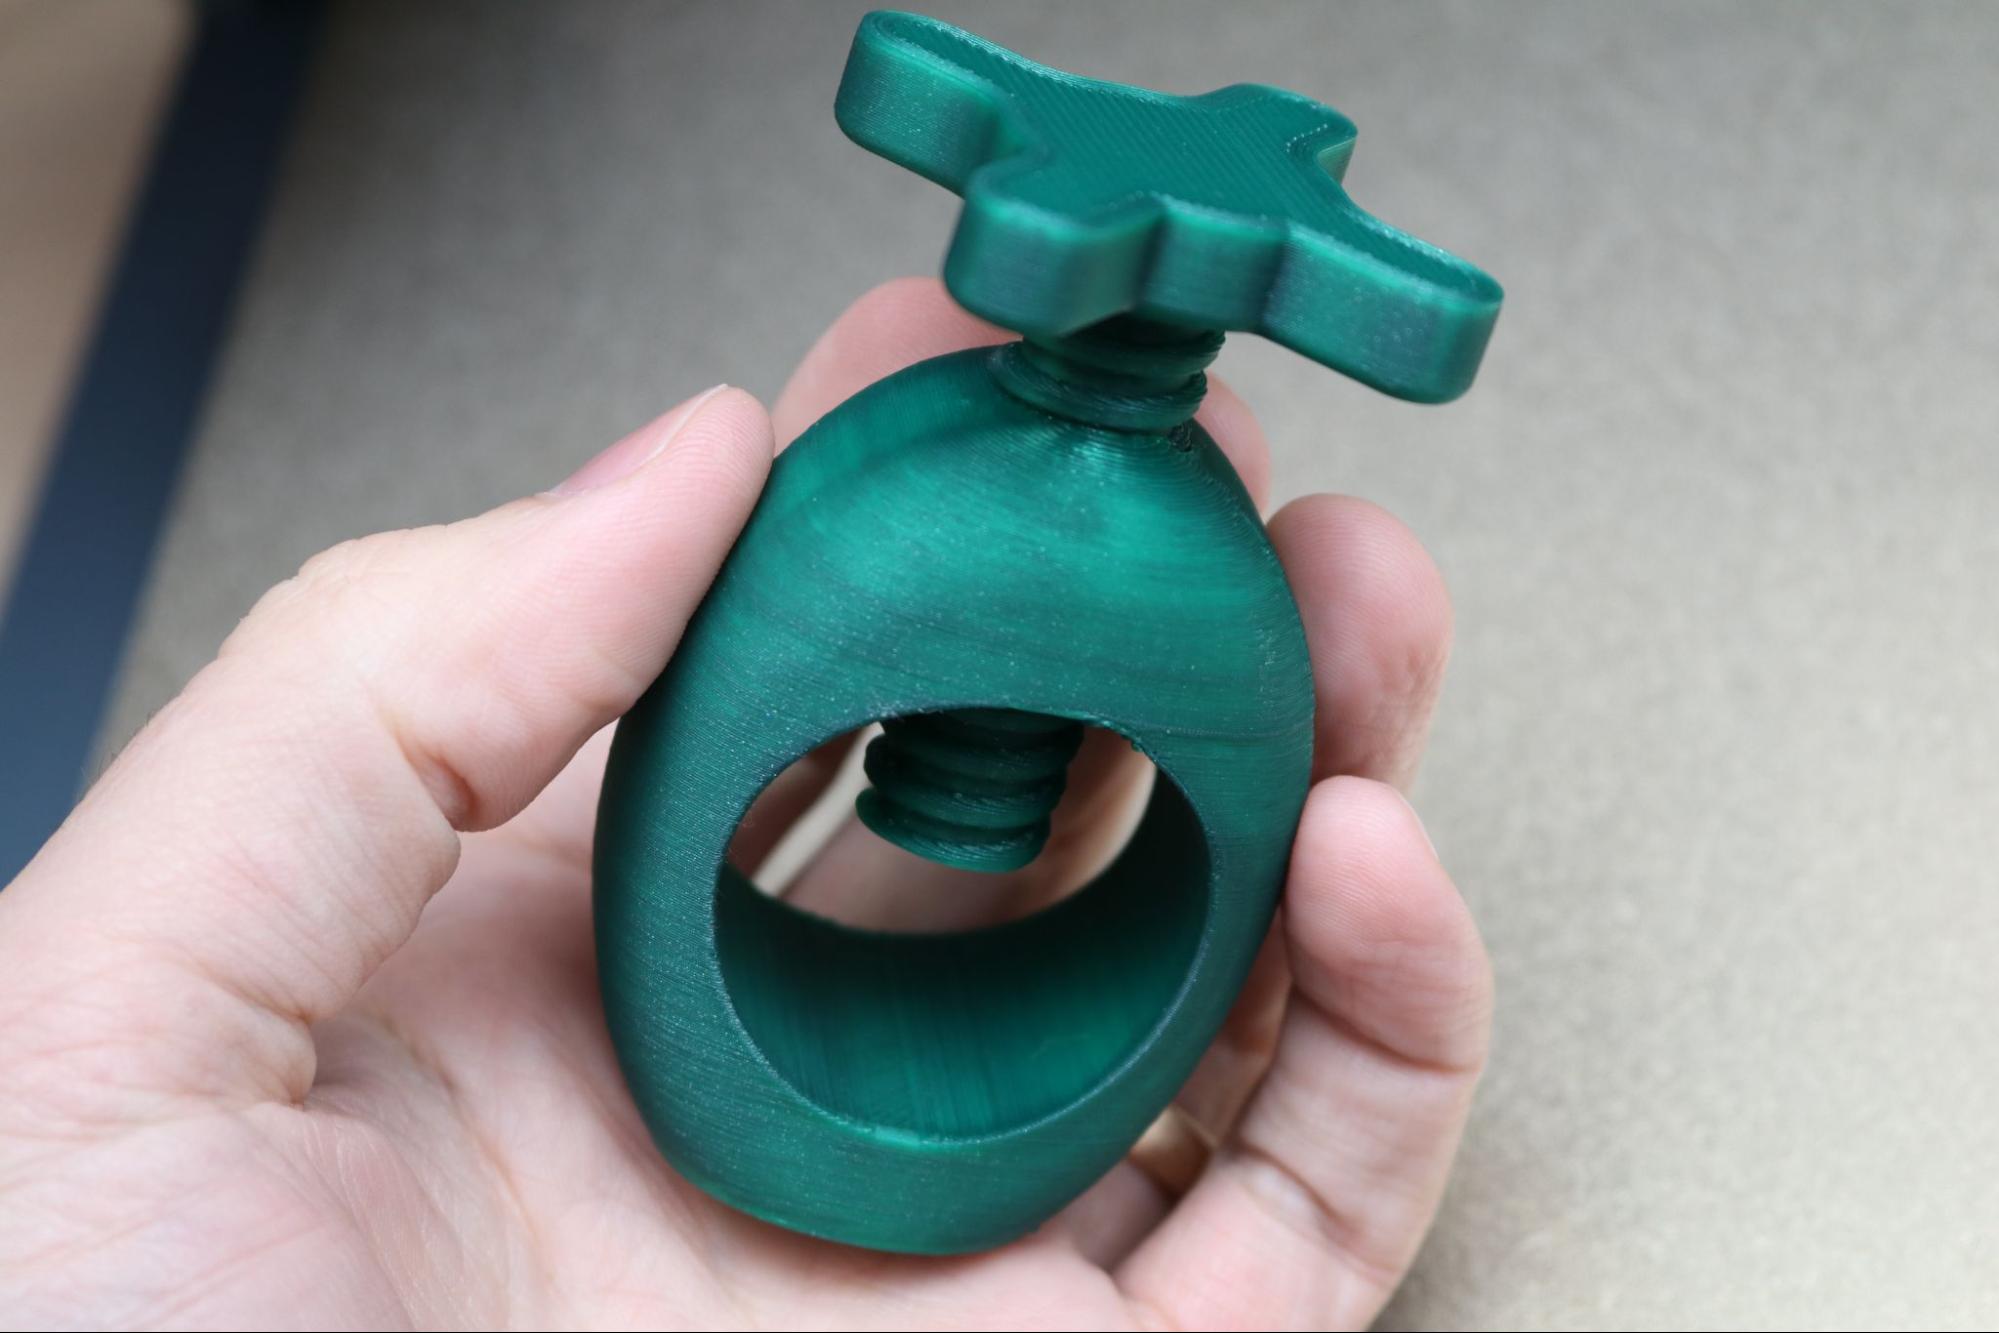
The Elegoo Neptune 4 Pro includes multiple demo prints on the USB thumb drive and goes above and beyond to help users understand what they are printing. Instead of just a file named “demo.stl”, the Neptune 4 Pro includes a full folder for each model with the original .STL, a pre-sliced .gcode file, and a picture showing what the model should look like after printing.
A fun example is the “Nutcracker” model, which prints in two pieces and results in a functional and useful object. Printed in Prusament Opal Green PLA, the model finished in about an hour and a half and worked as intended. (See our list of the best filaments to find good ones for your print).
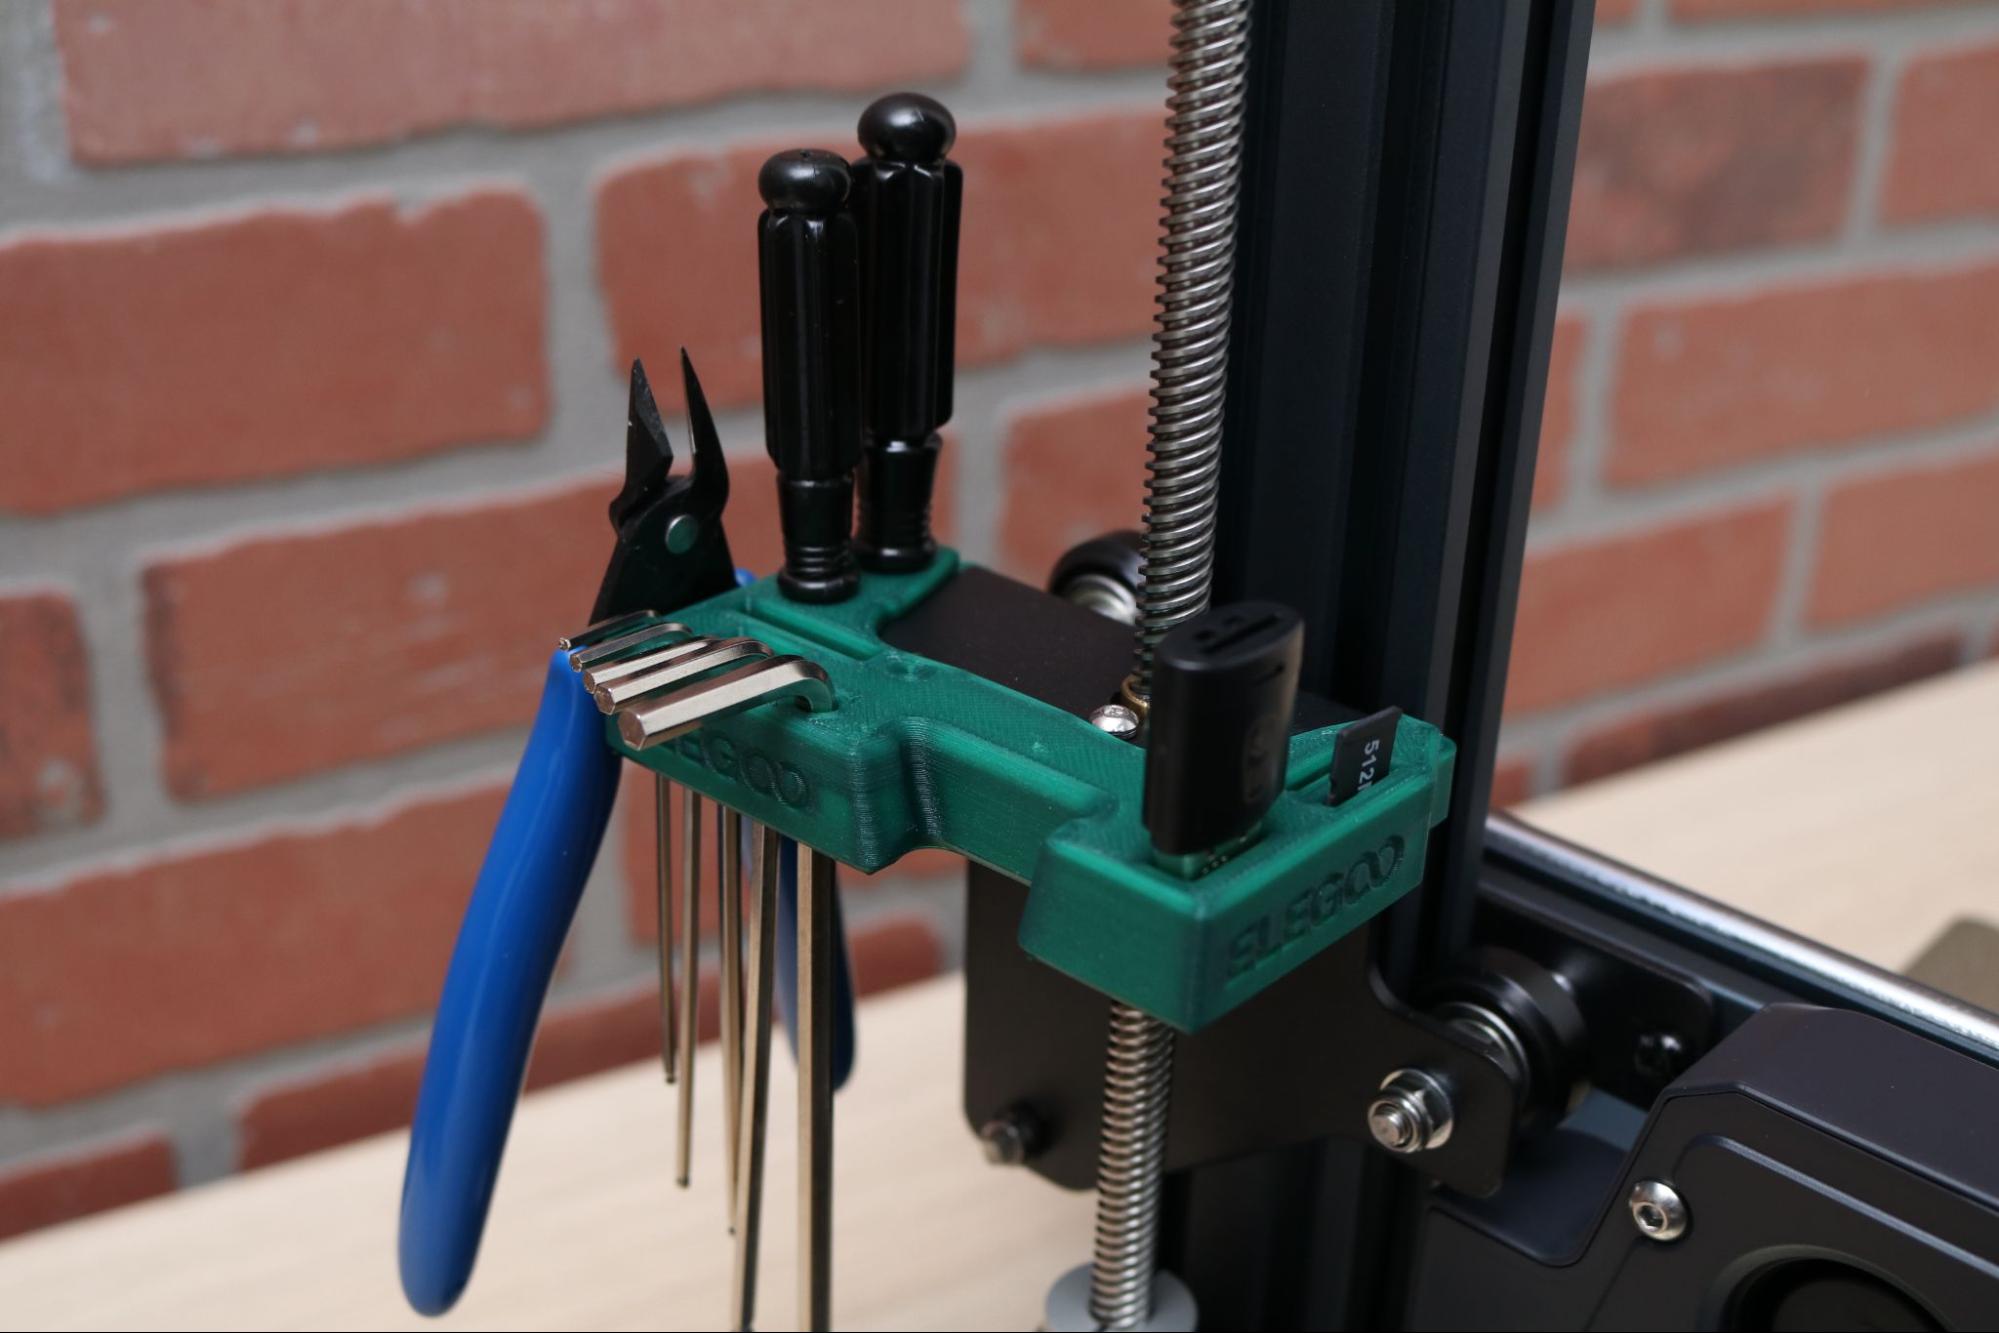
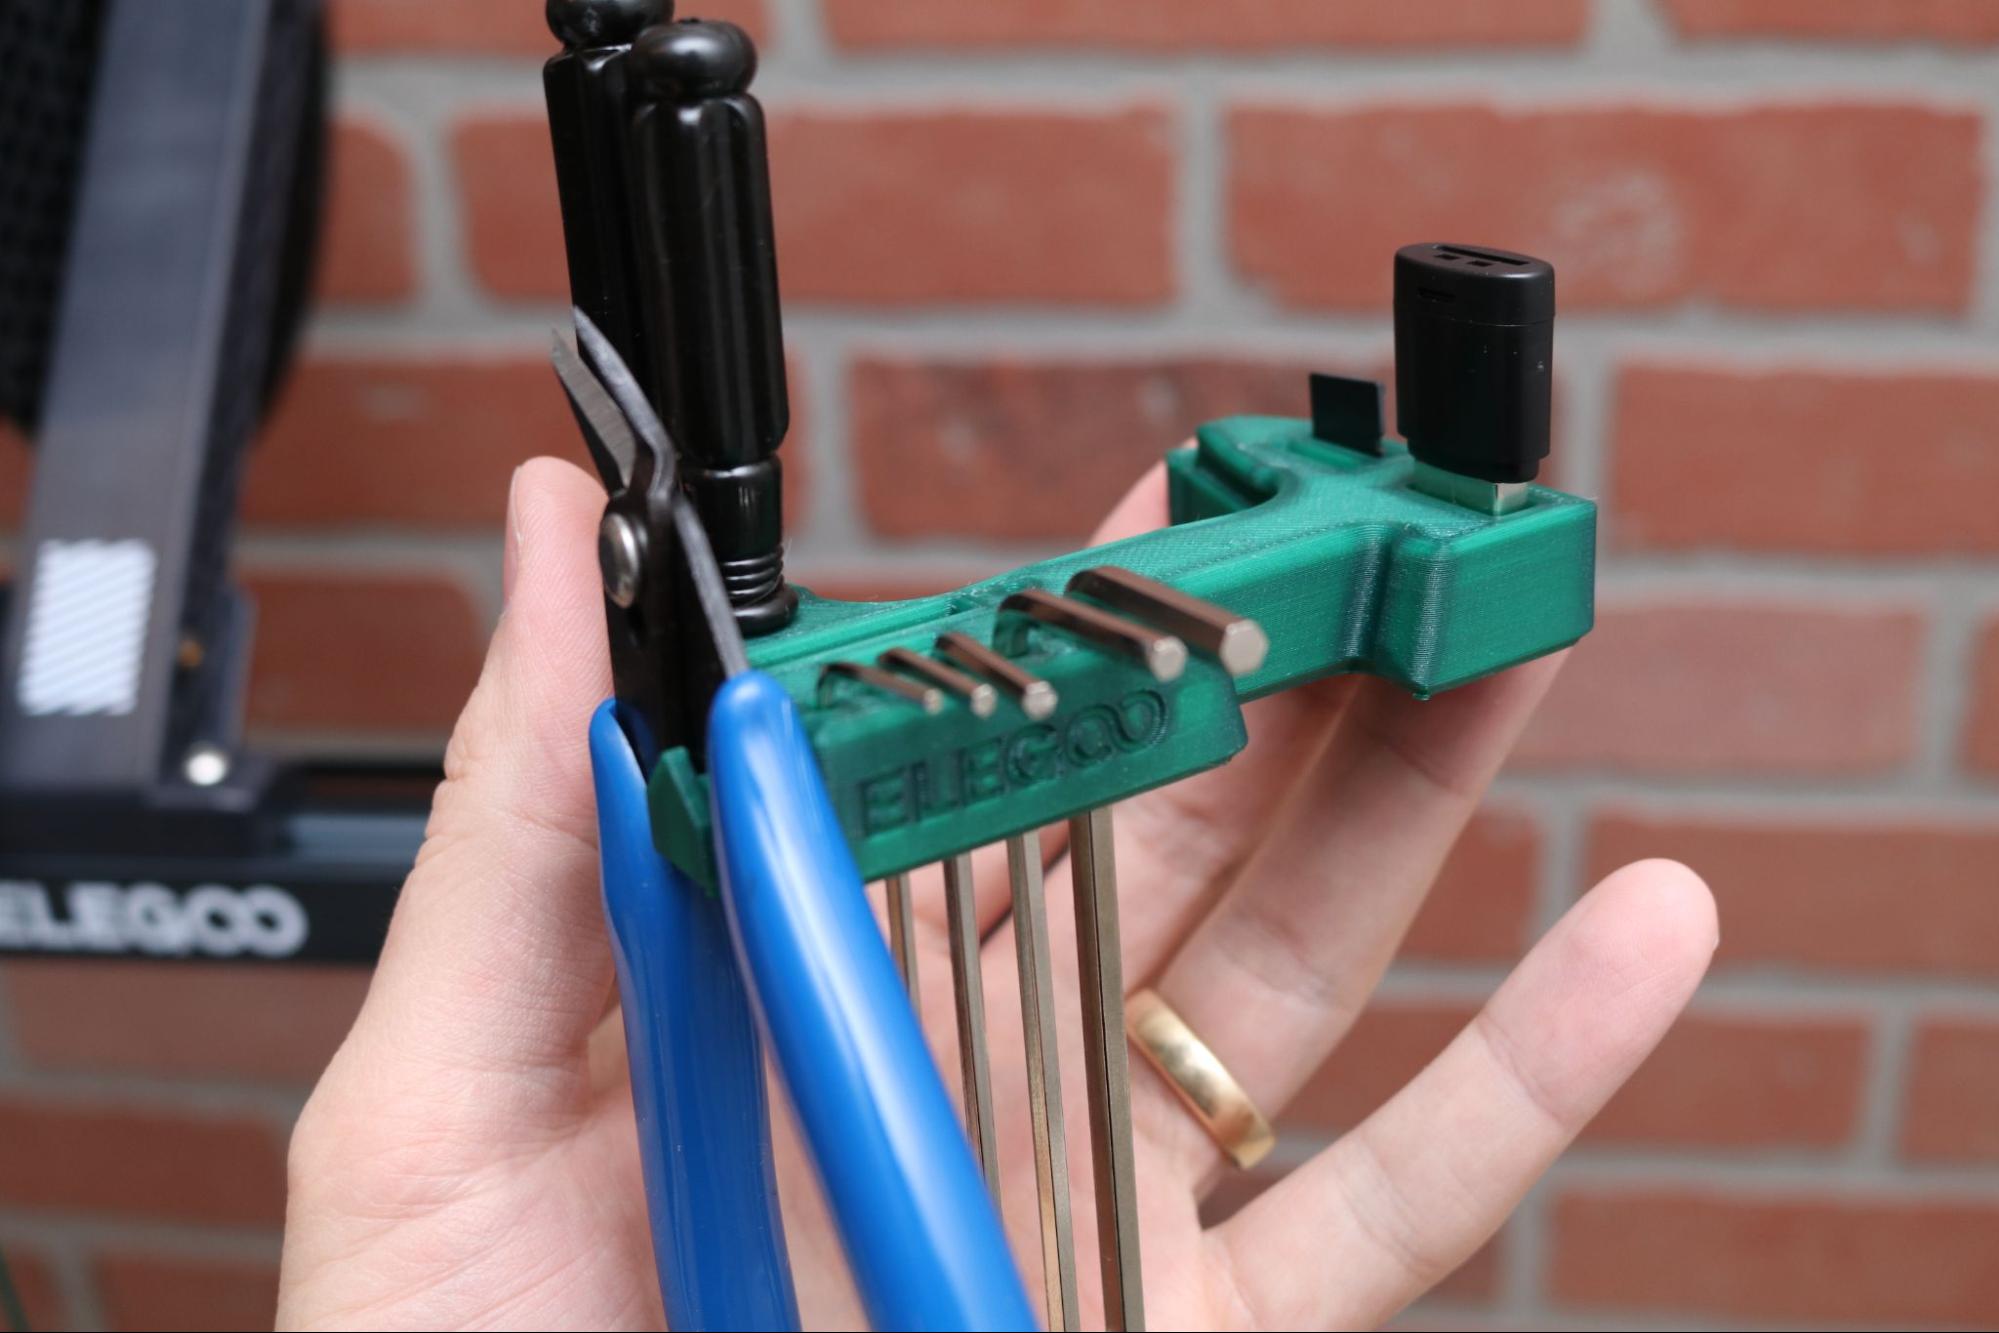
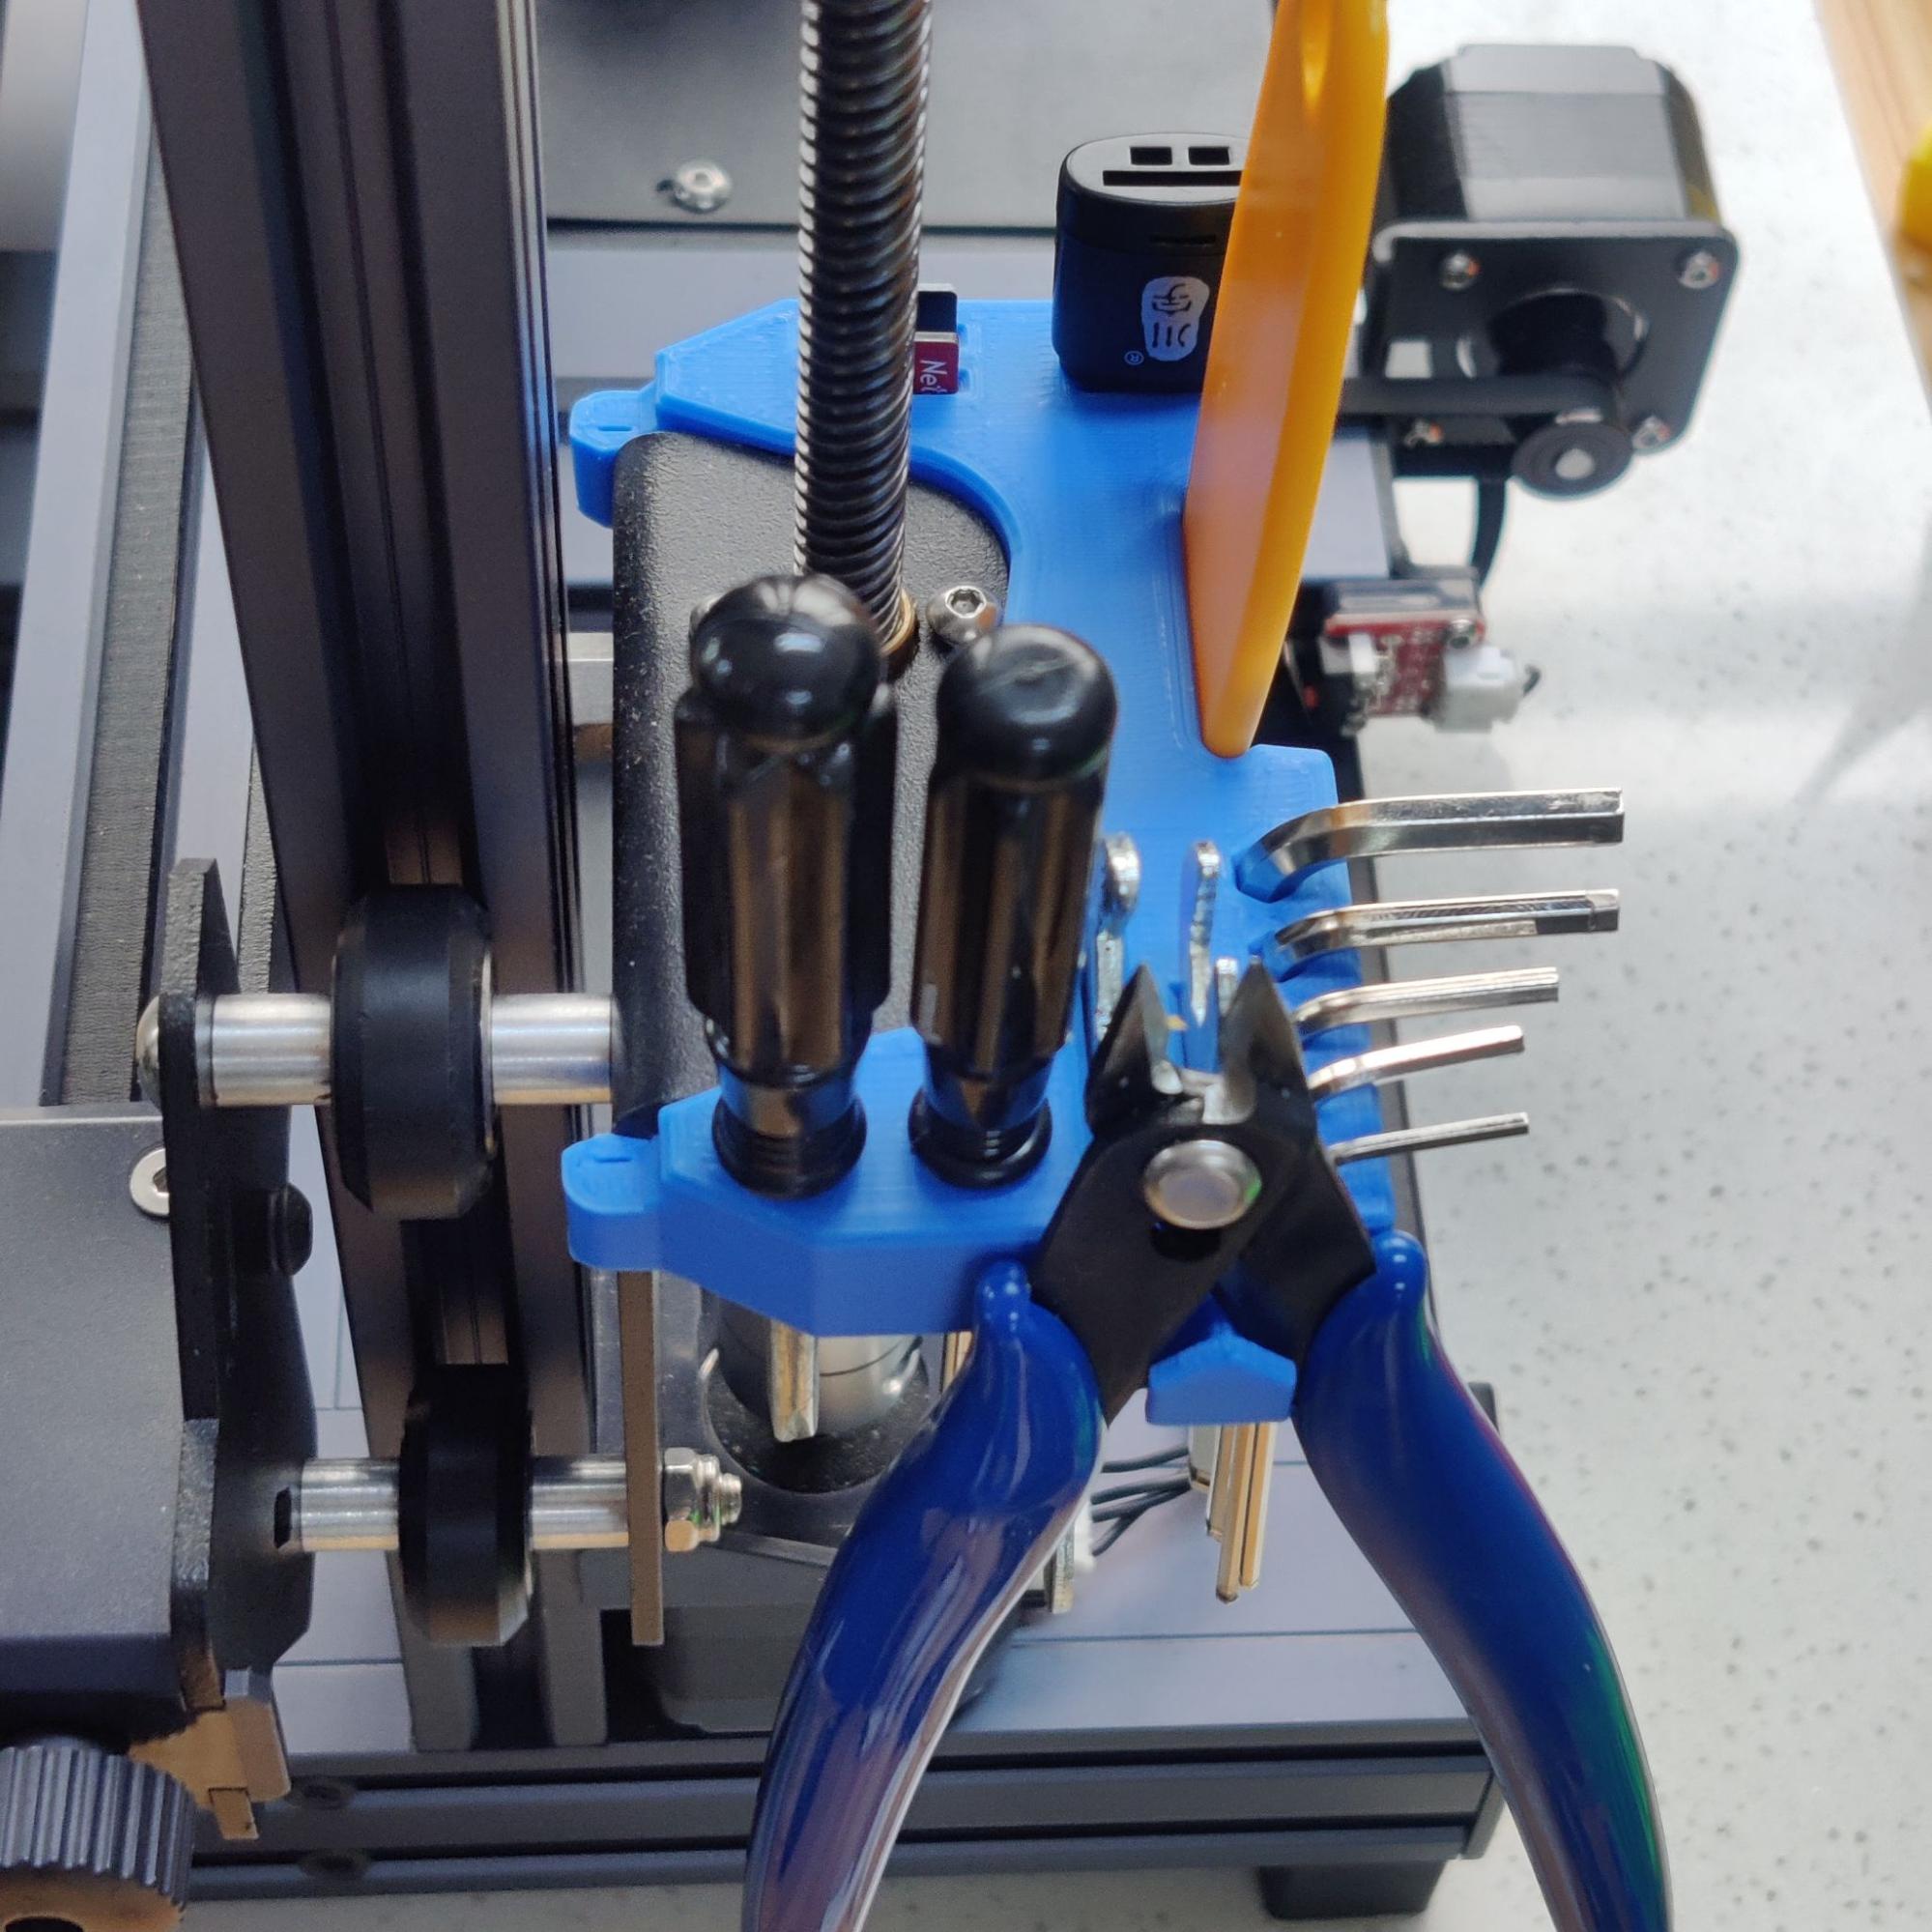
The “Tool holder-V2.stl” model is one of my all-time favorite demo prints originally seen with the Elegoo Neptune 3 family of printers, and I was happy to see it return for the Neptune 4 Pro. This model provides a place to hold the various Allen keys, screwdrivers, and even the USB drive included with the Neptune 4 Pro in a single place.
This model shows off the accuracy of small holes, legibility of fine text, and the overall ability of the Neptune 4 Pro to create functional parts. Elegoo also helpfully includes a picture of this model attached to the printer with the various tools in their respective places, a helpful guide for beginners not sure of how to put everything together.
Slicing Software for Elegoo Neptune 4 Pro
The Elegoo Neptune 4 Pro ships with Elegoo Cura 4.8.0 loaded on the USB thumb drive, a fully-featured slicer based on UltiMaker Cura. This slicer has profiles for Fine (.12mm), Normal (.2mm) and Extra Fast (.28mm) printing so beginners won’t spend much time tweaking settings or changing settings to get a good print.
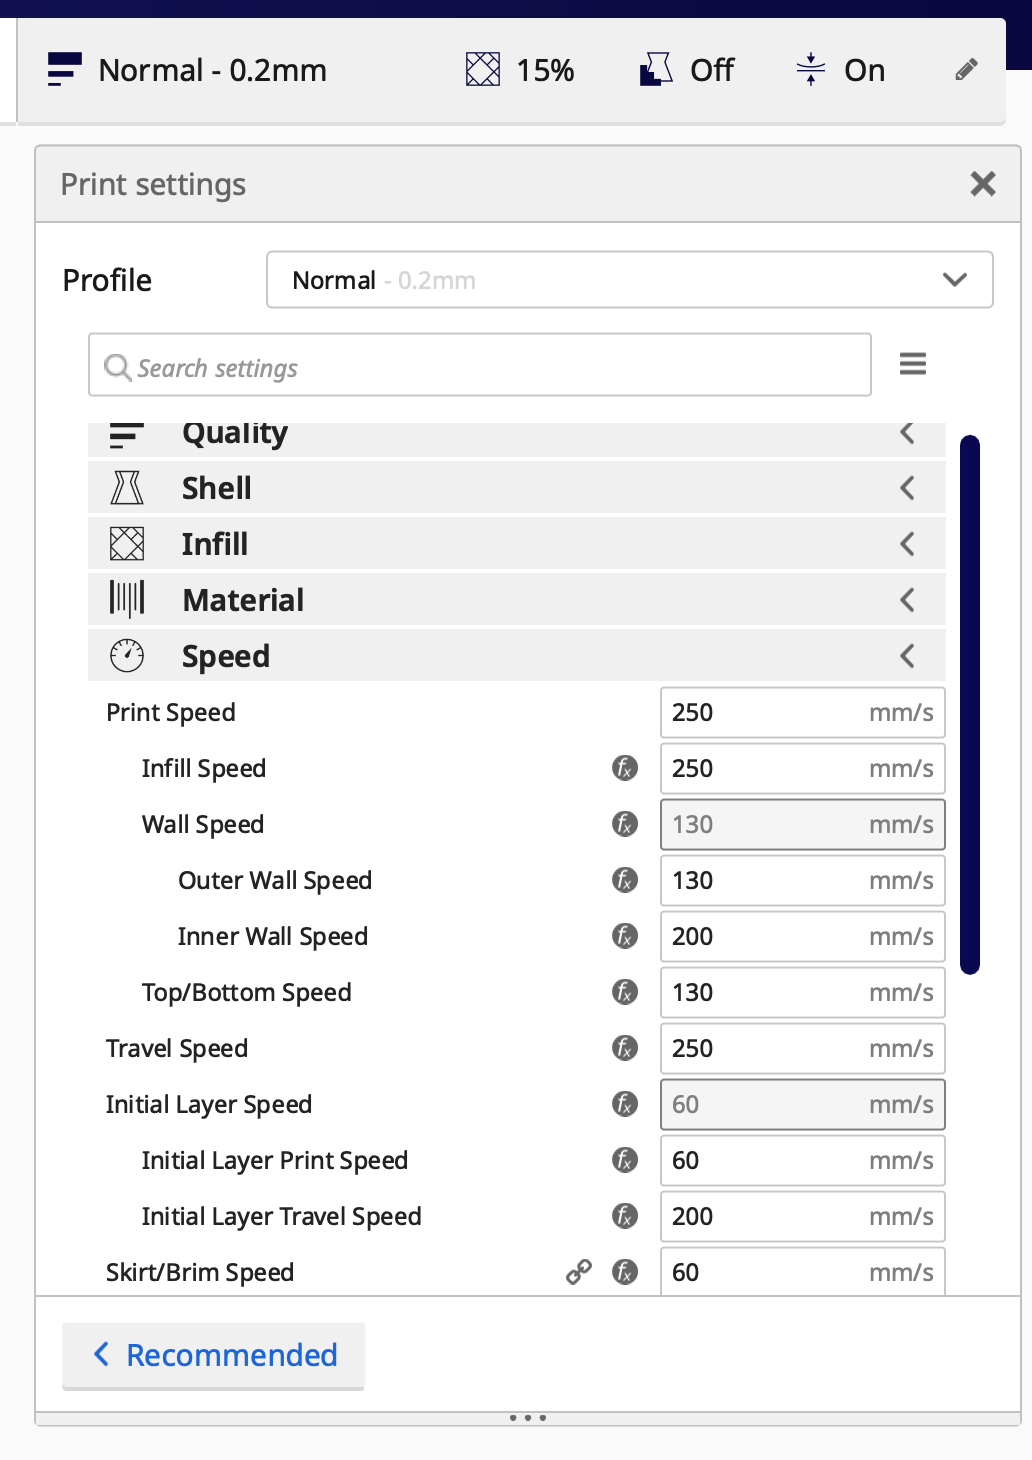
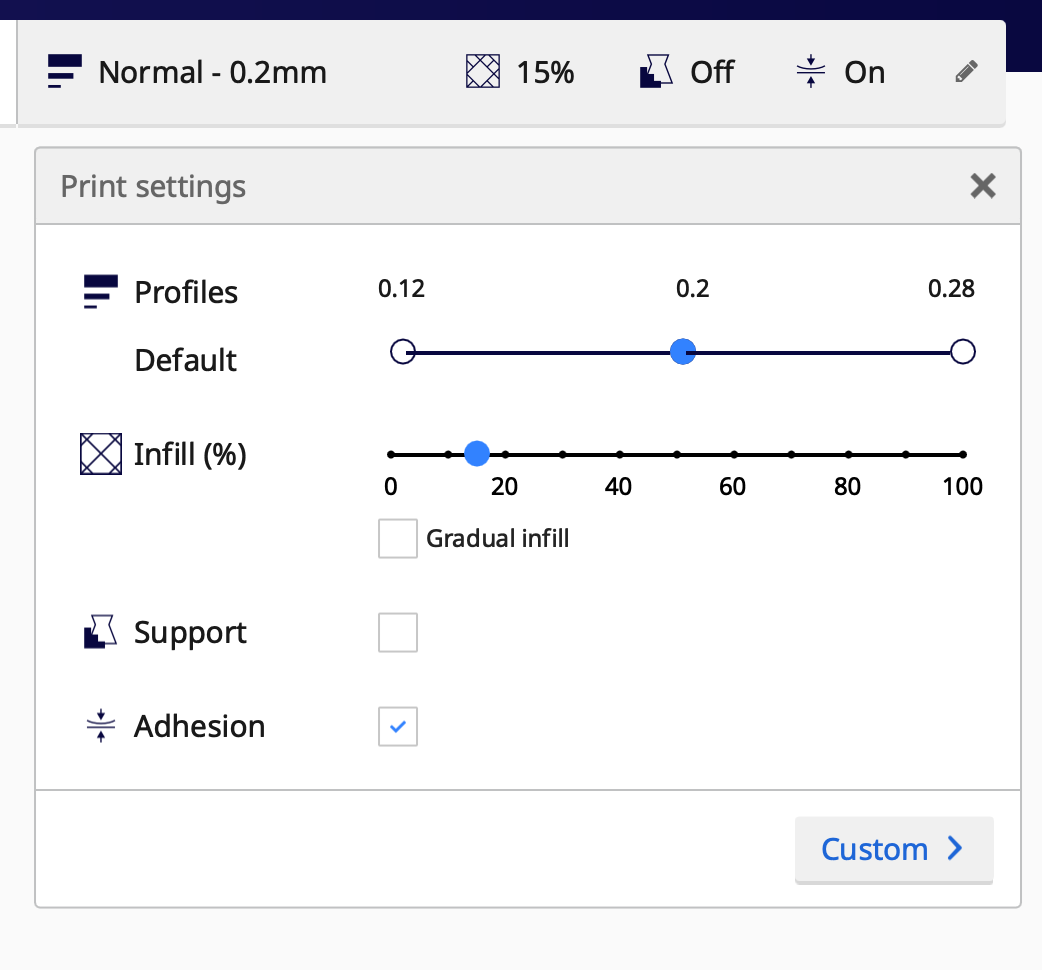
Elegoo Cura offers two interfaces for adjusting settings: Recommended and Custom. The Recommended interface offers a quick way to toggle between profiles while adjusting the amount of infill and a few other select settings. For beginners, this offers a quick way to get up and running without having to worry about things like adjusting the fan speed at a specific layer. However, for users interested in much more granular control, the Custom interface offers control over a wide range of parameters for advanced users or for complicated prints.
Printing on the Elegoo Neptune 4 Pro
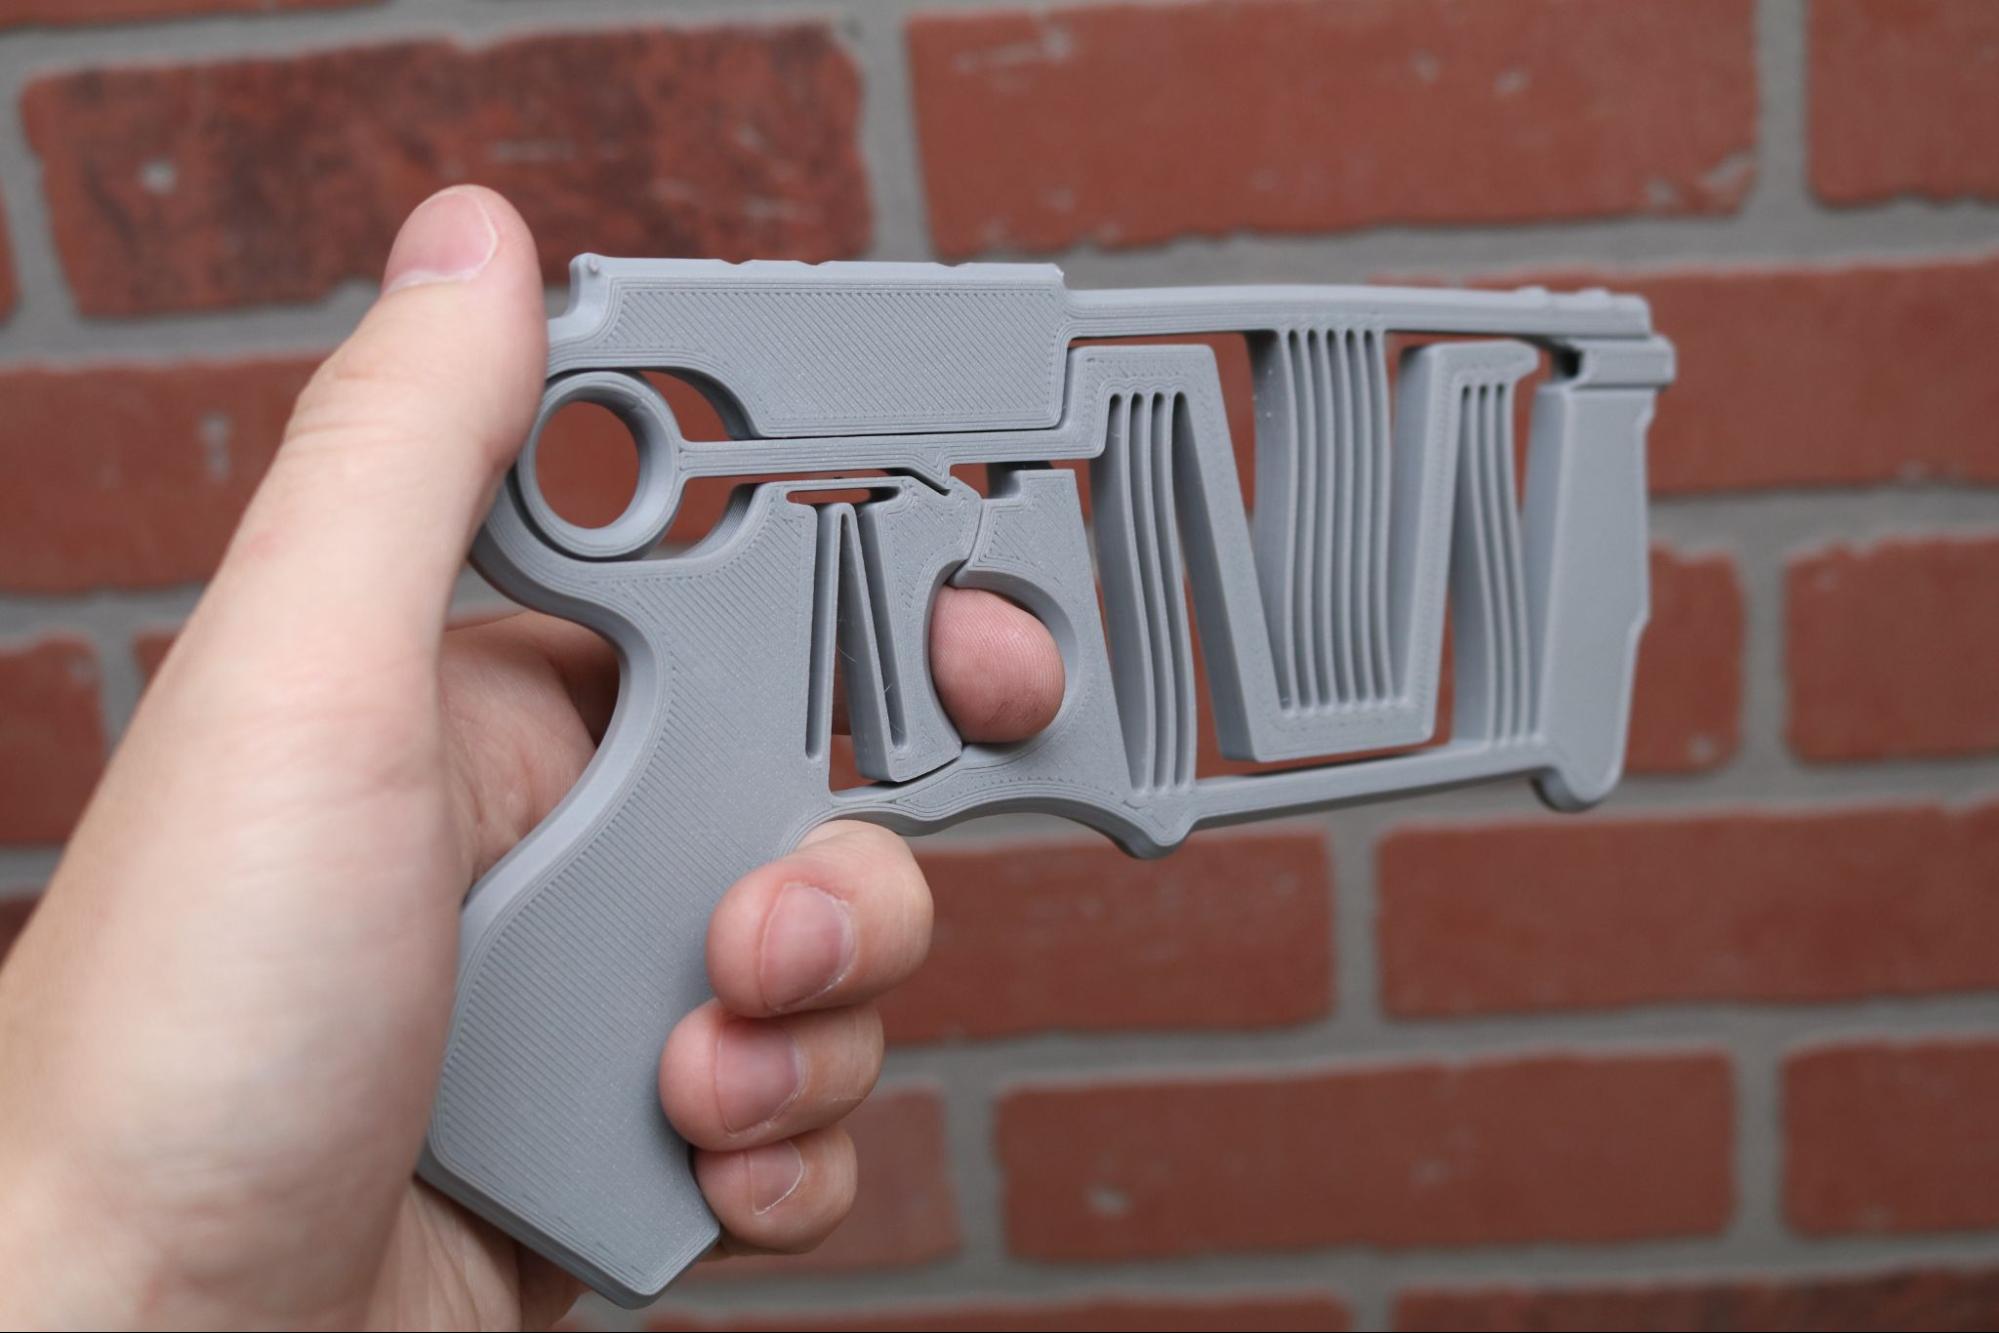
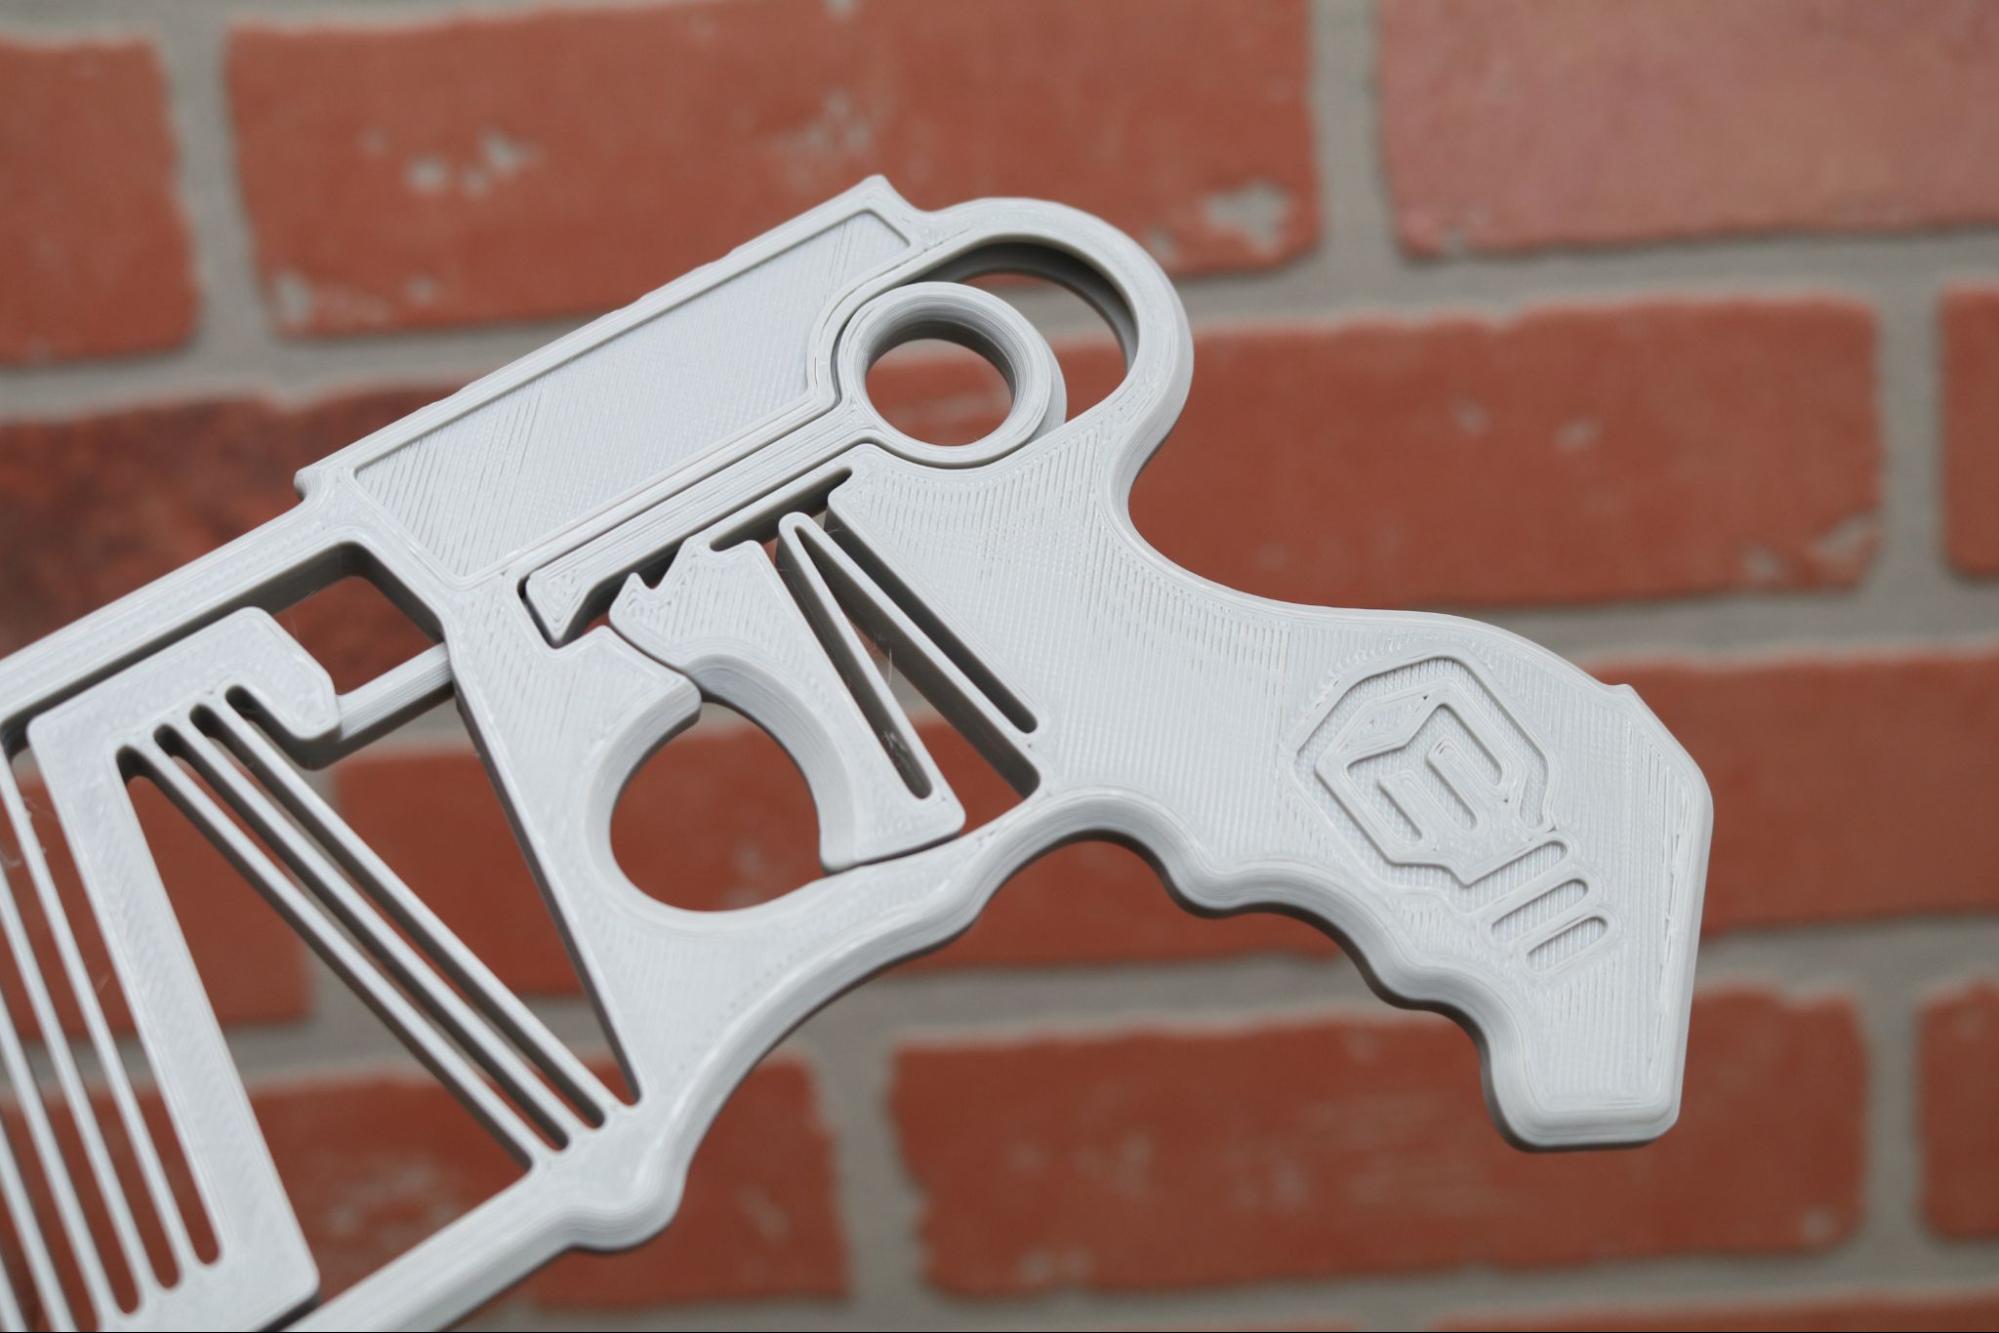
Printed with Elegoo Grey PLA at .2mm layer height, the One Piece Compliant Mechanism Blaster by BYU_CMR printed in just over two hours and worked perfectly after the first print. This model uses a compliant mechanism to allow a hammer to pull back and be released upon pulling a trigger. This model was designed with Design for Additive Manufacturing in mind, and it provides a surprising amount of flexibility for a part made with PLA.
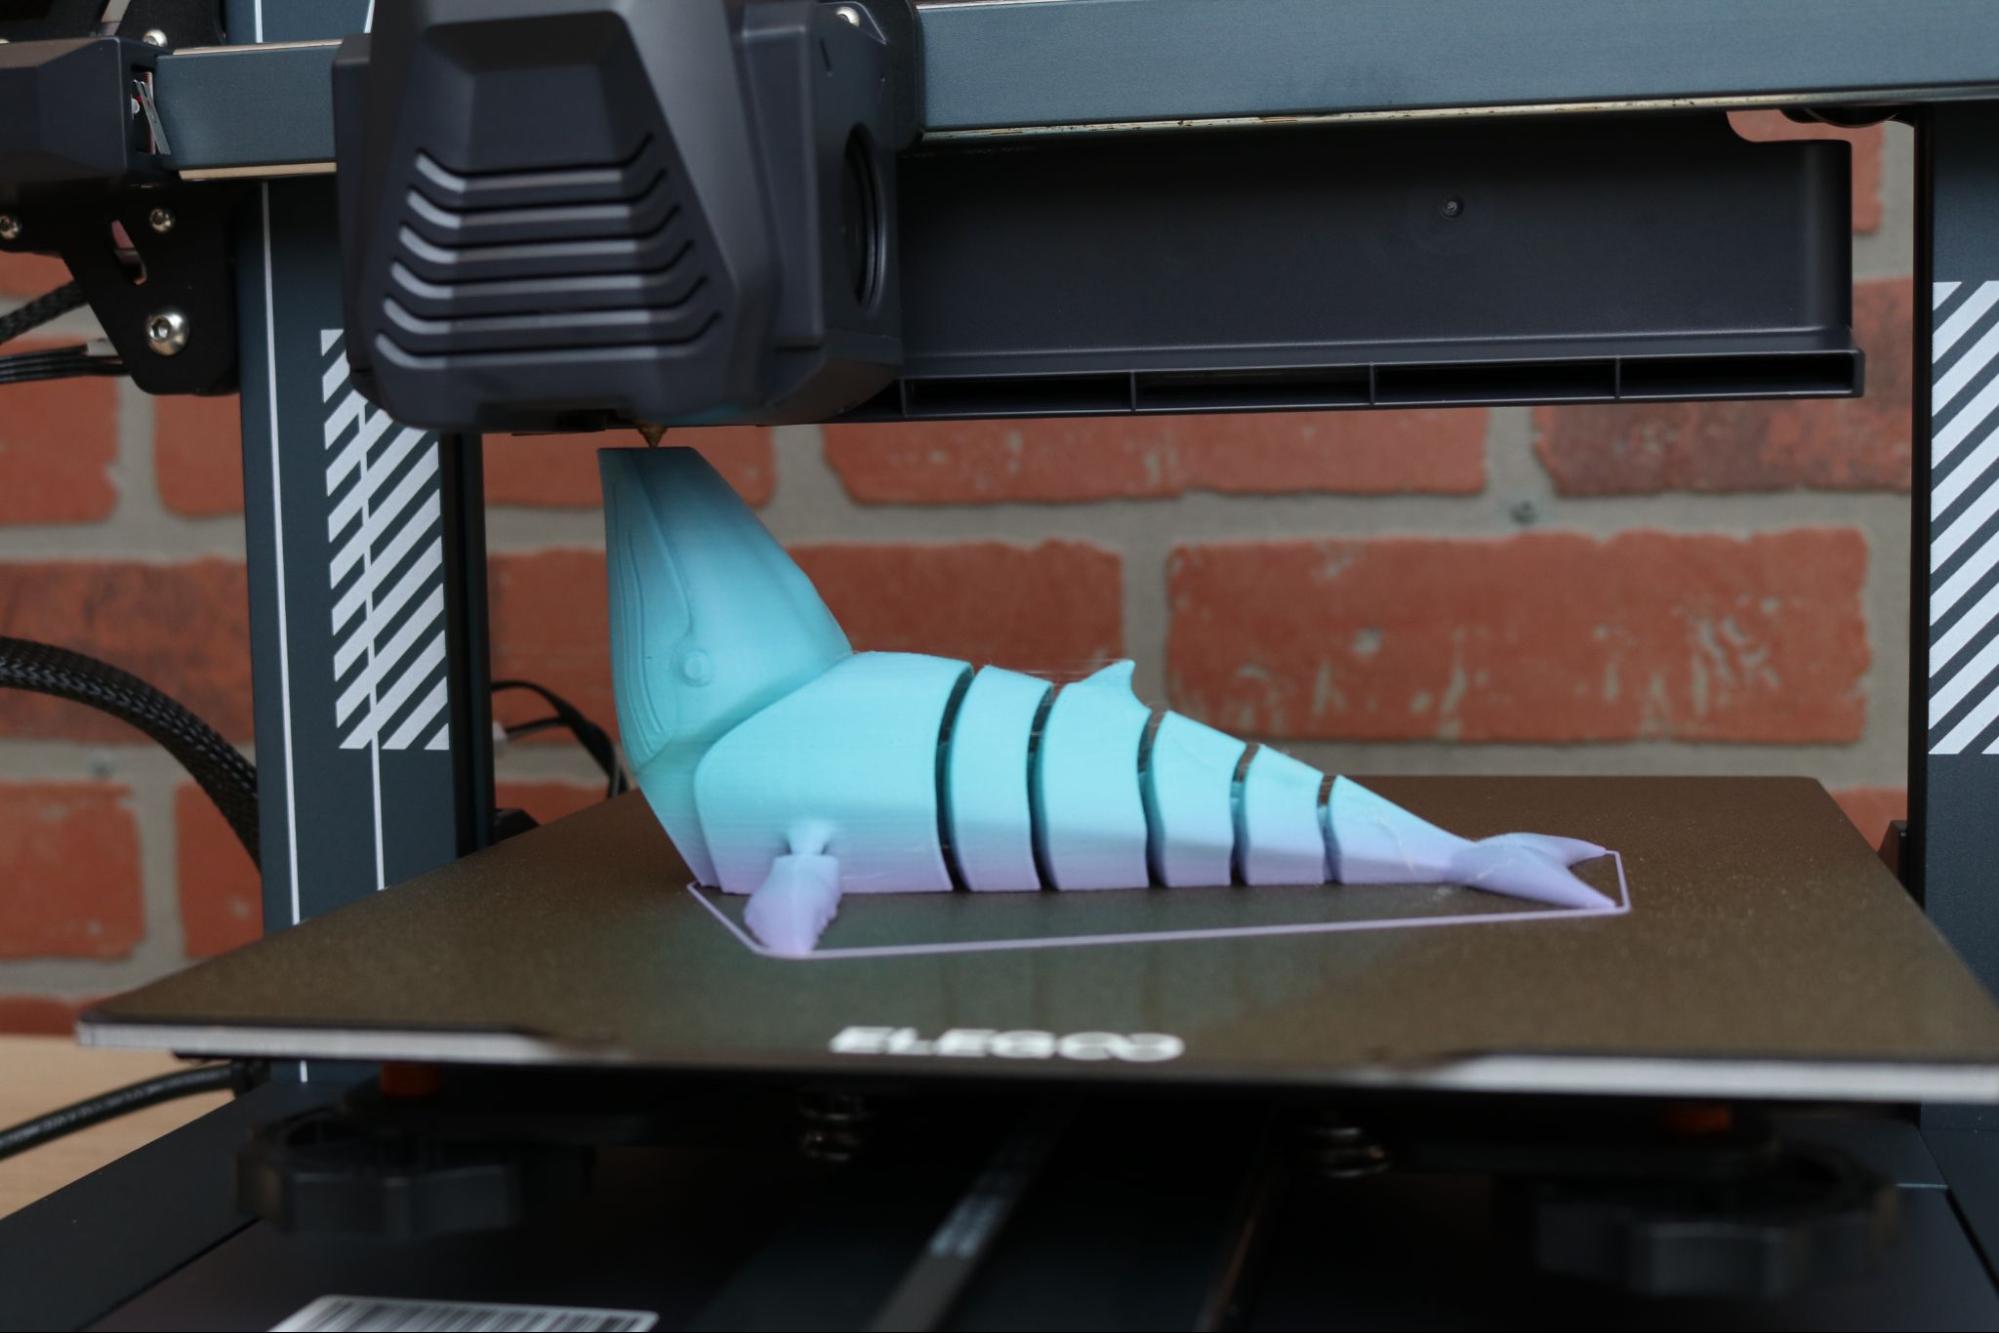
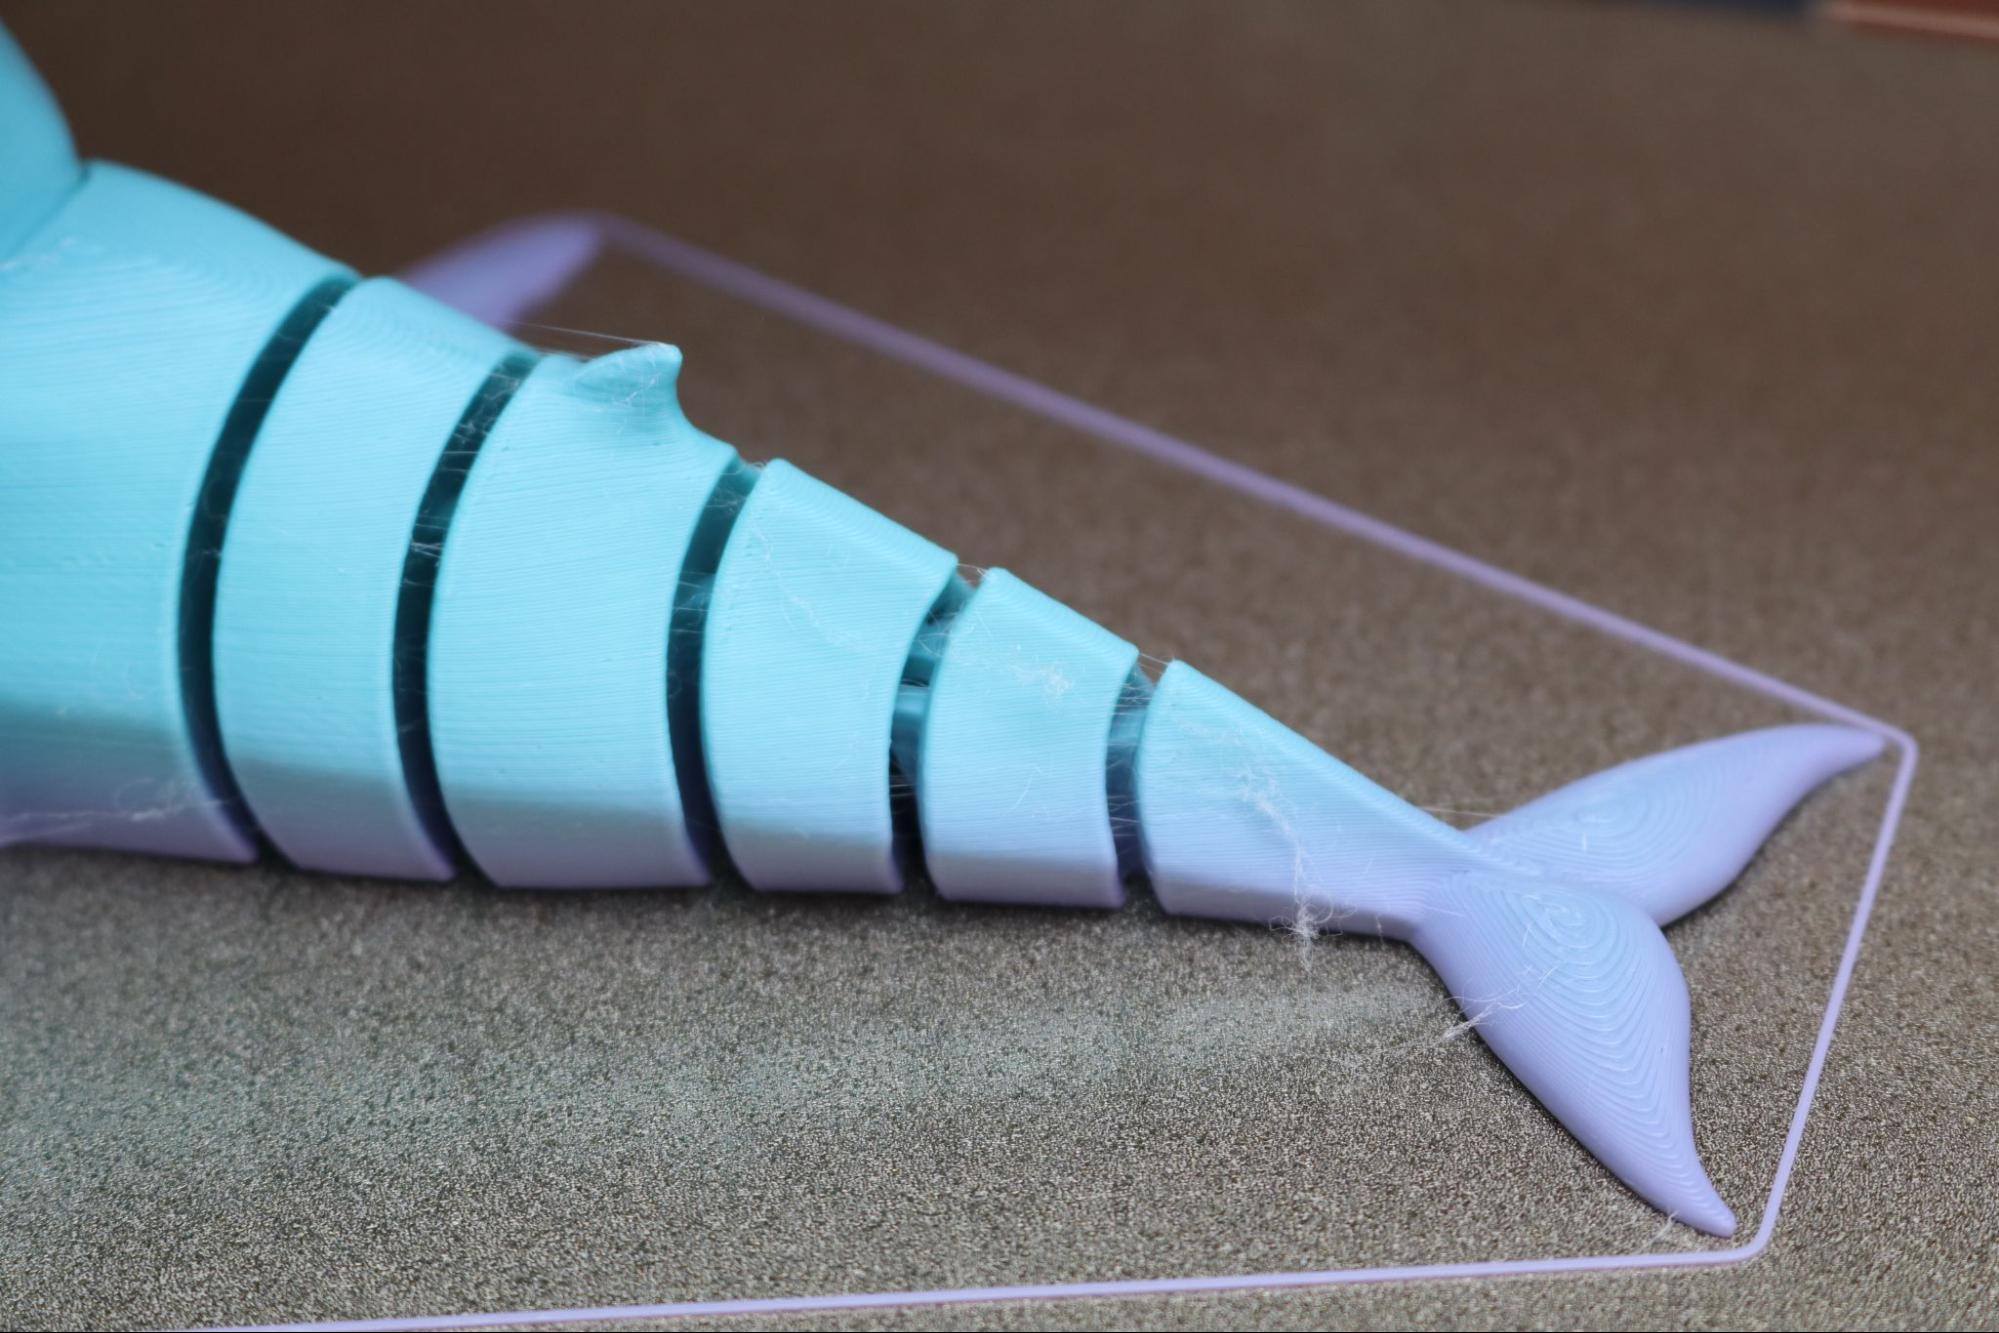
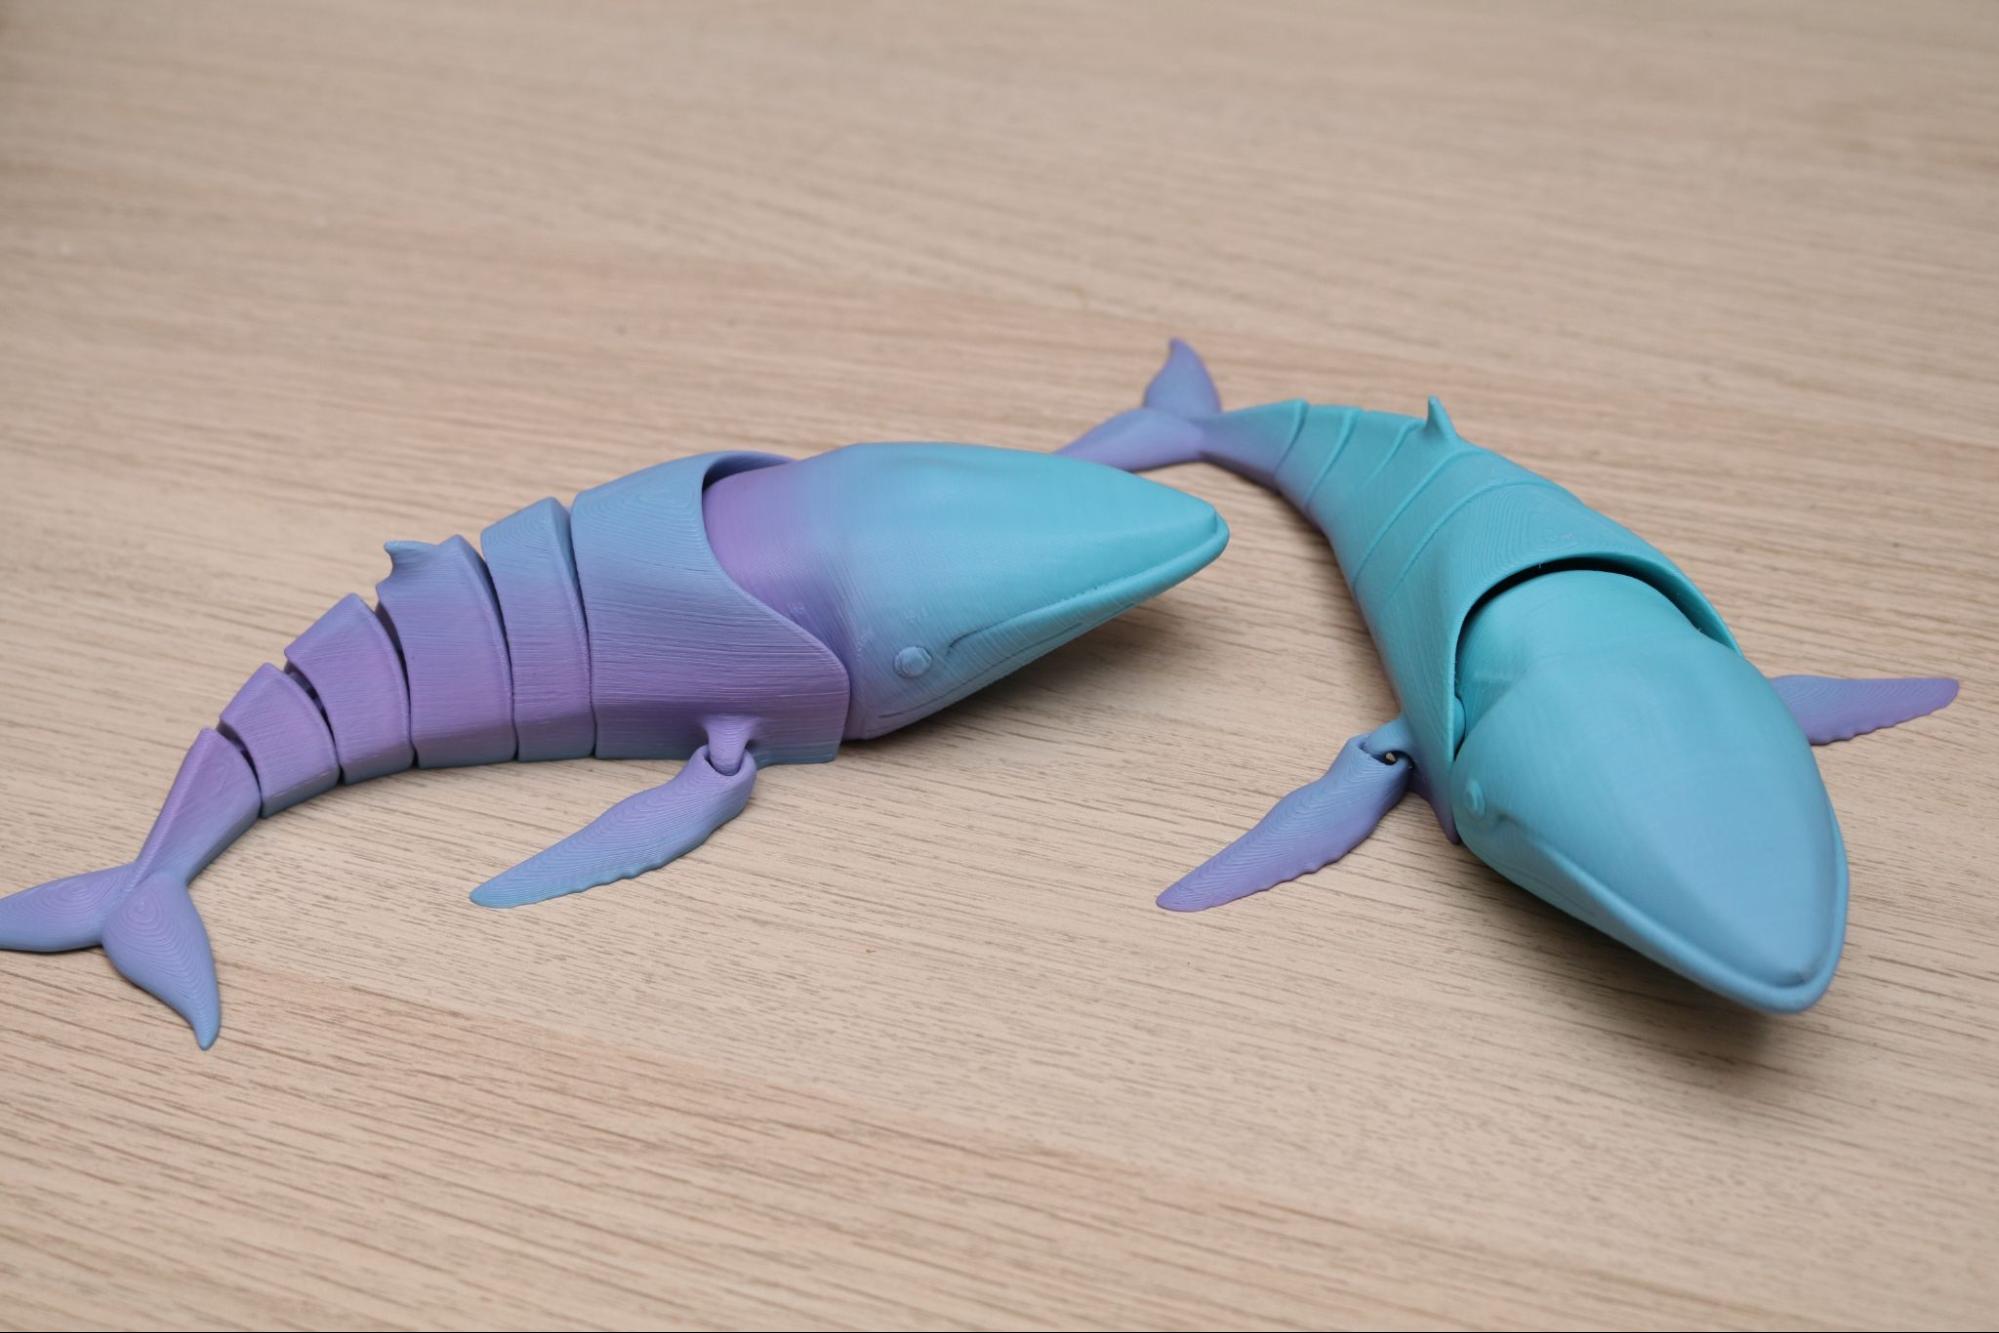
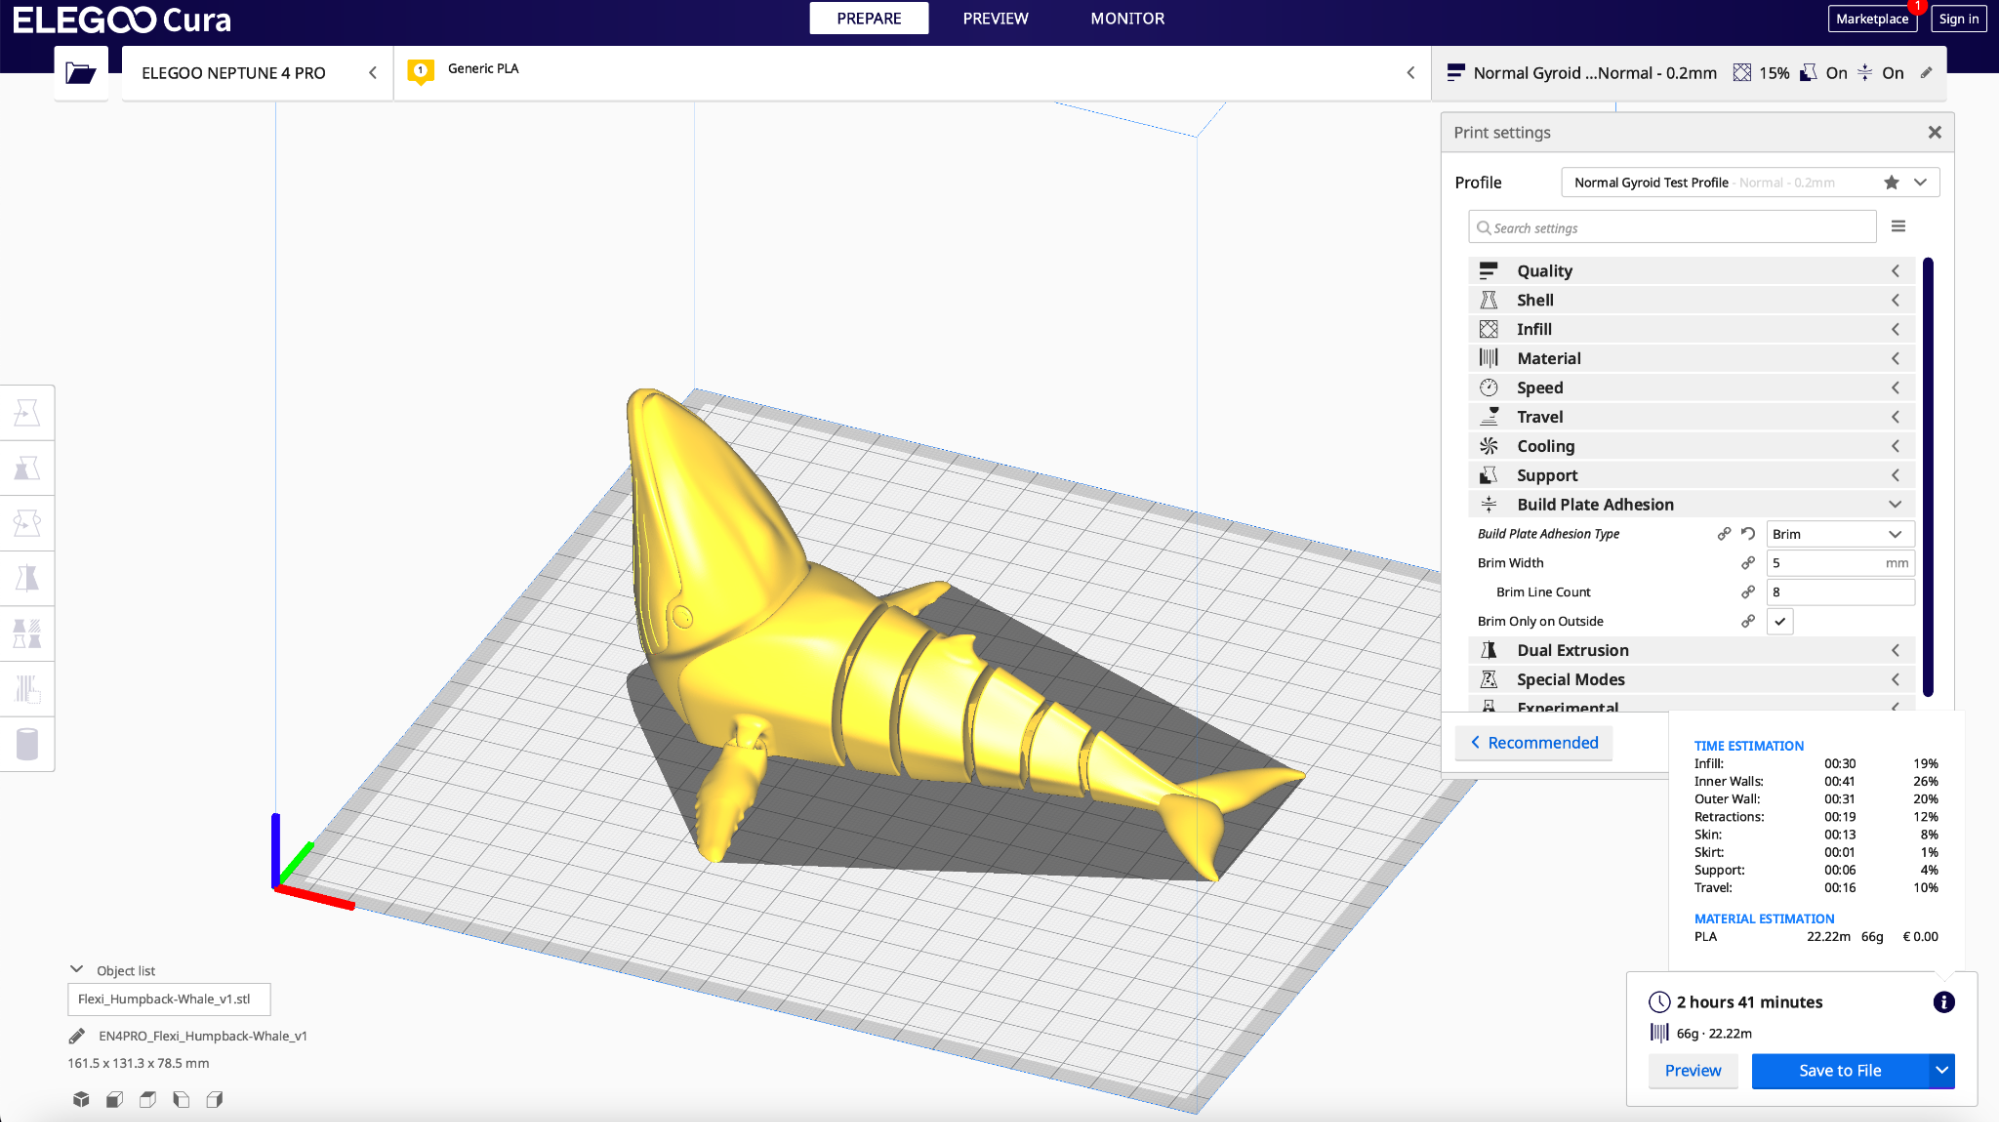
There are many articulated 3D models, but the Flexi Humpback Whale by 3D_FlexSeeds has a clever twist in the way it is designed. The head of the whale is printed facing up, which allows for a great range of articulation after printing and also adds an interesting effect when printed with material that transitions between colors. The Matte Gradient Aquarius PLA by Sliceworx transitions rapidly between colors, which results in a whale that appears to be printed in multiple pieces.
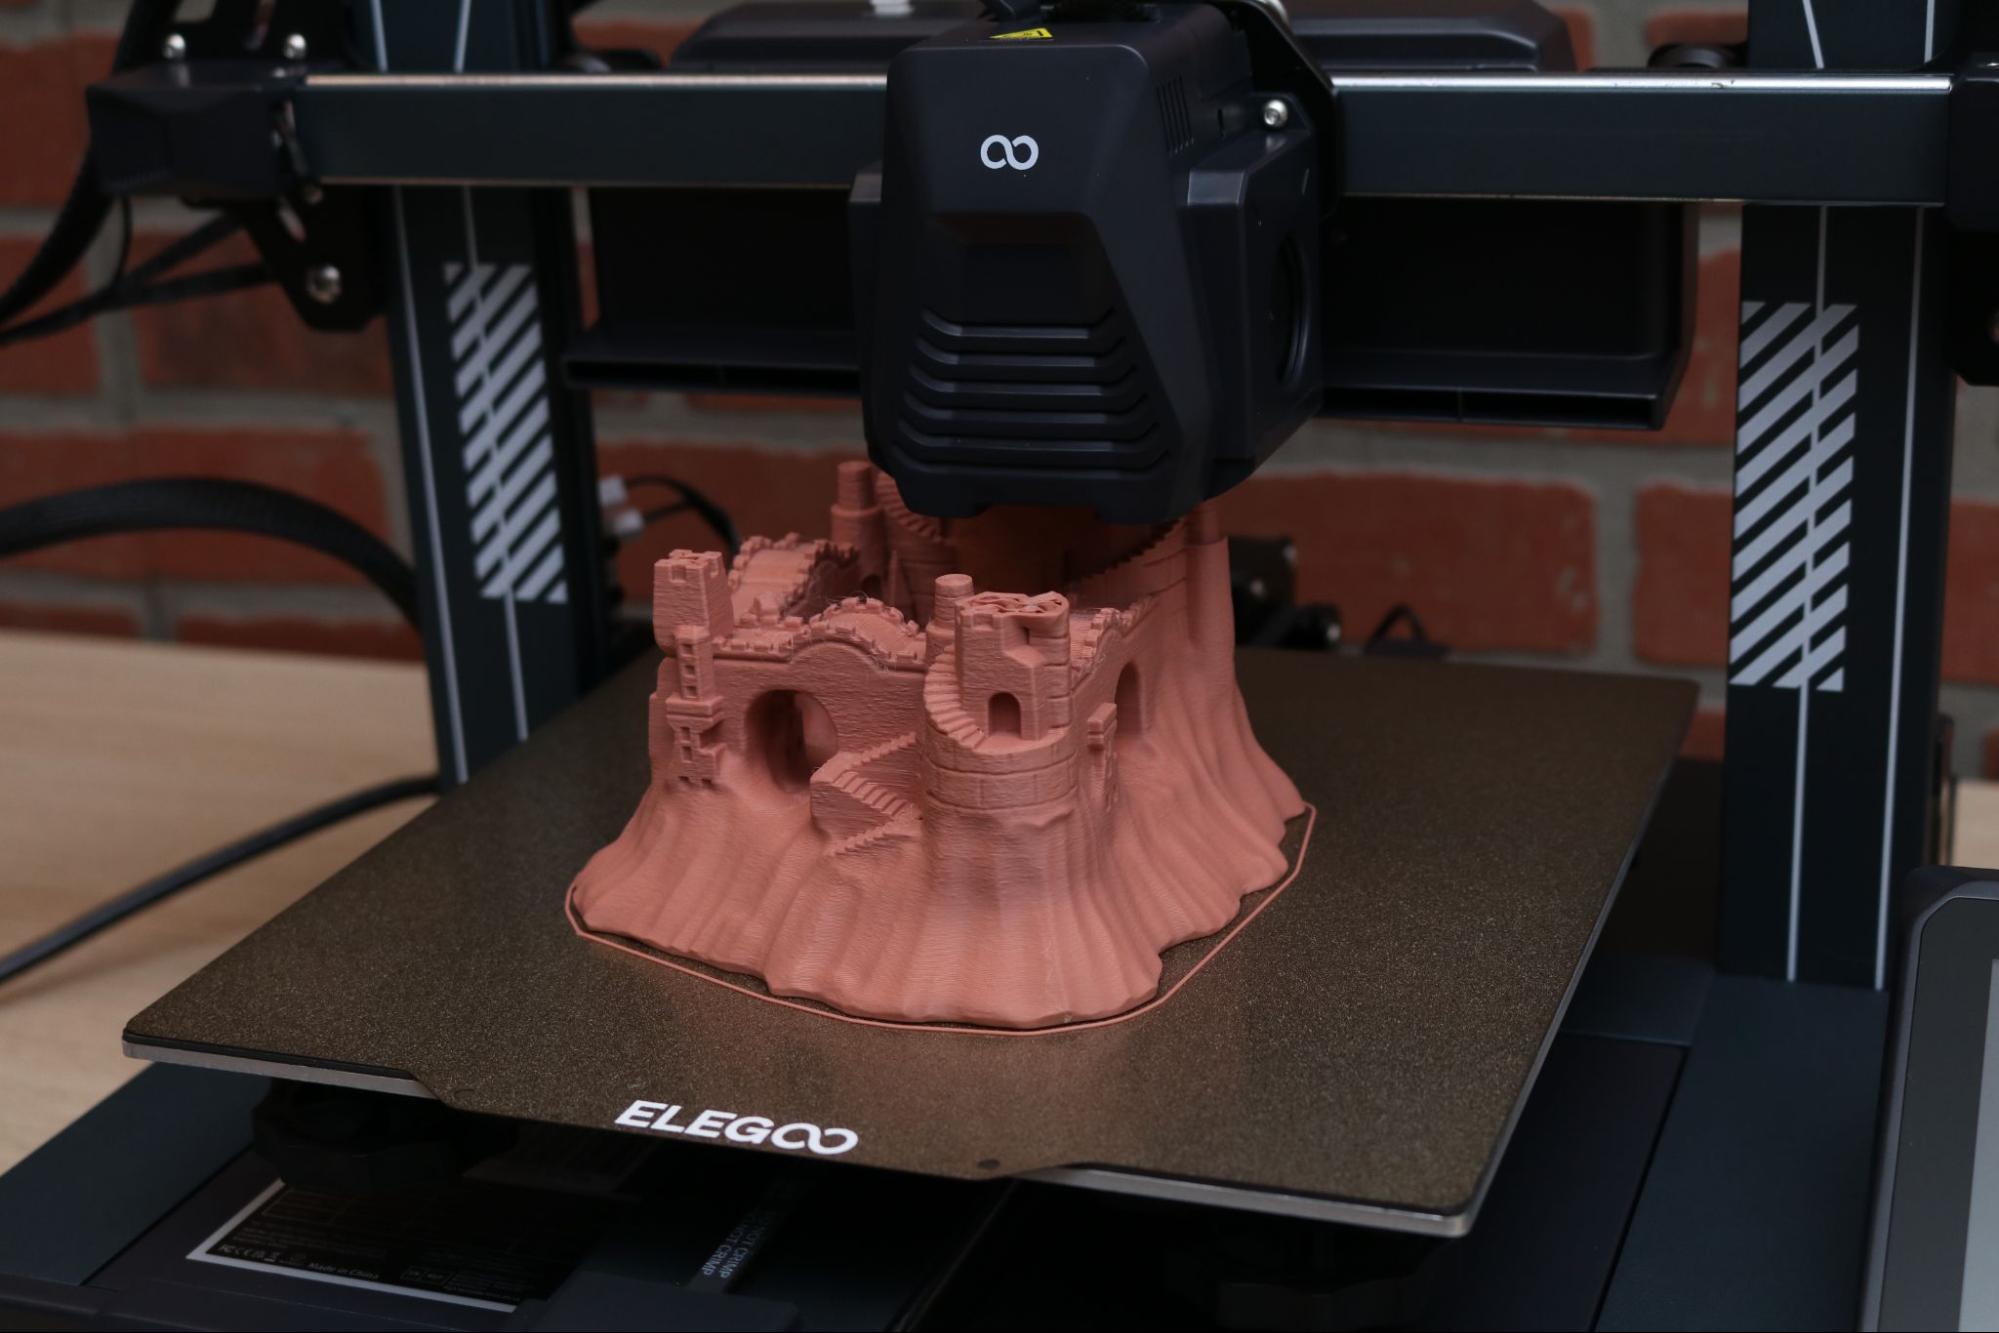
The textured build platform of the Neptune 4 Pro lends itself to printing models that have wide cross-sections at the base, like the Sandcastle model by Kijai. Models with wide cross-sections like this can sometimes warp or curl during printing, but the textured platform kept this model locked in place. Sliced with OrcaSlicer using the default 0.2mm printer profile and printed in 9 hours and 14 minutes, this model is an impressive testament to the hardware of the Neptune 4 Pro.
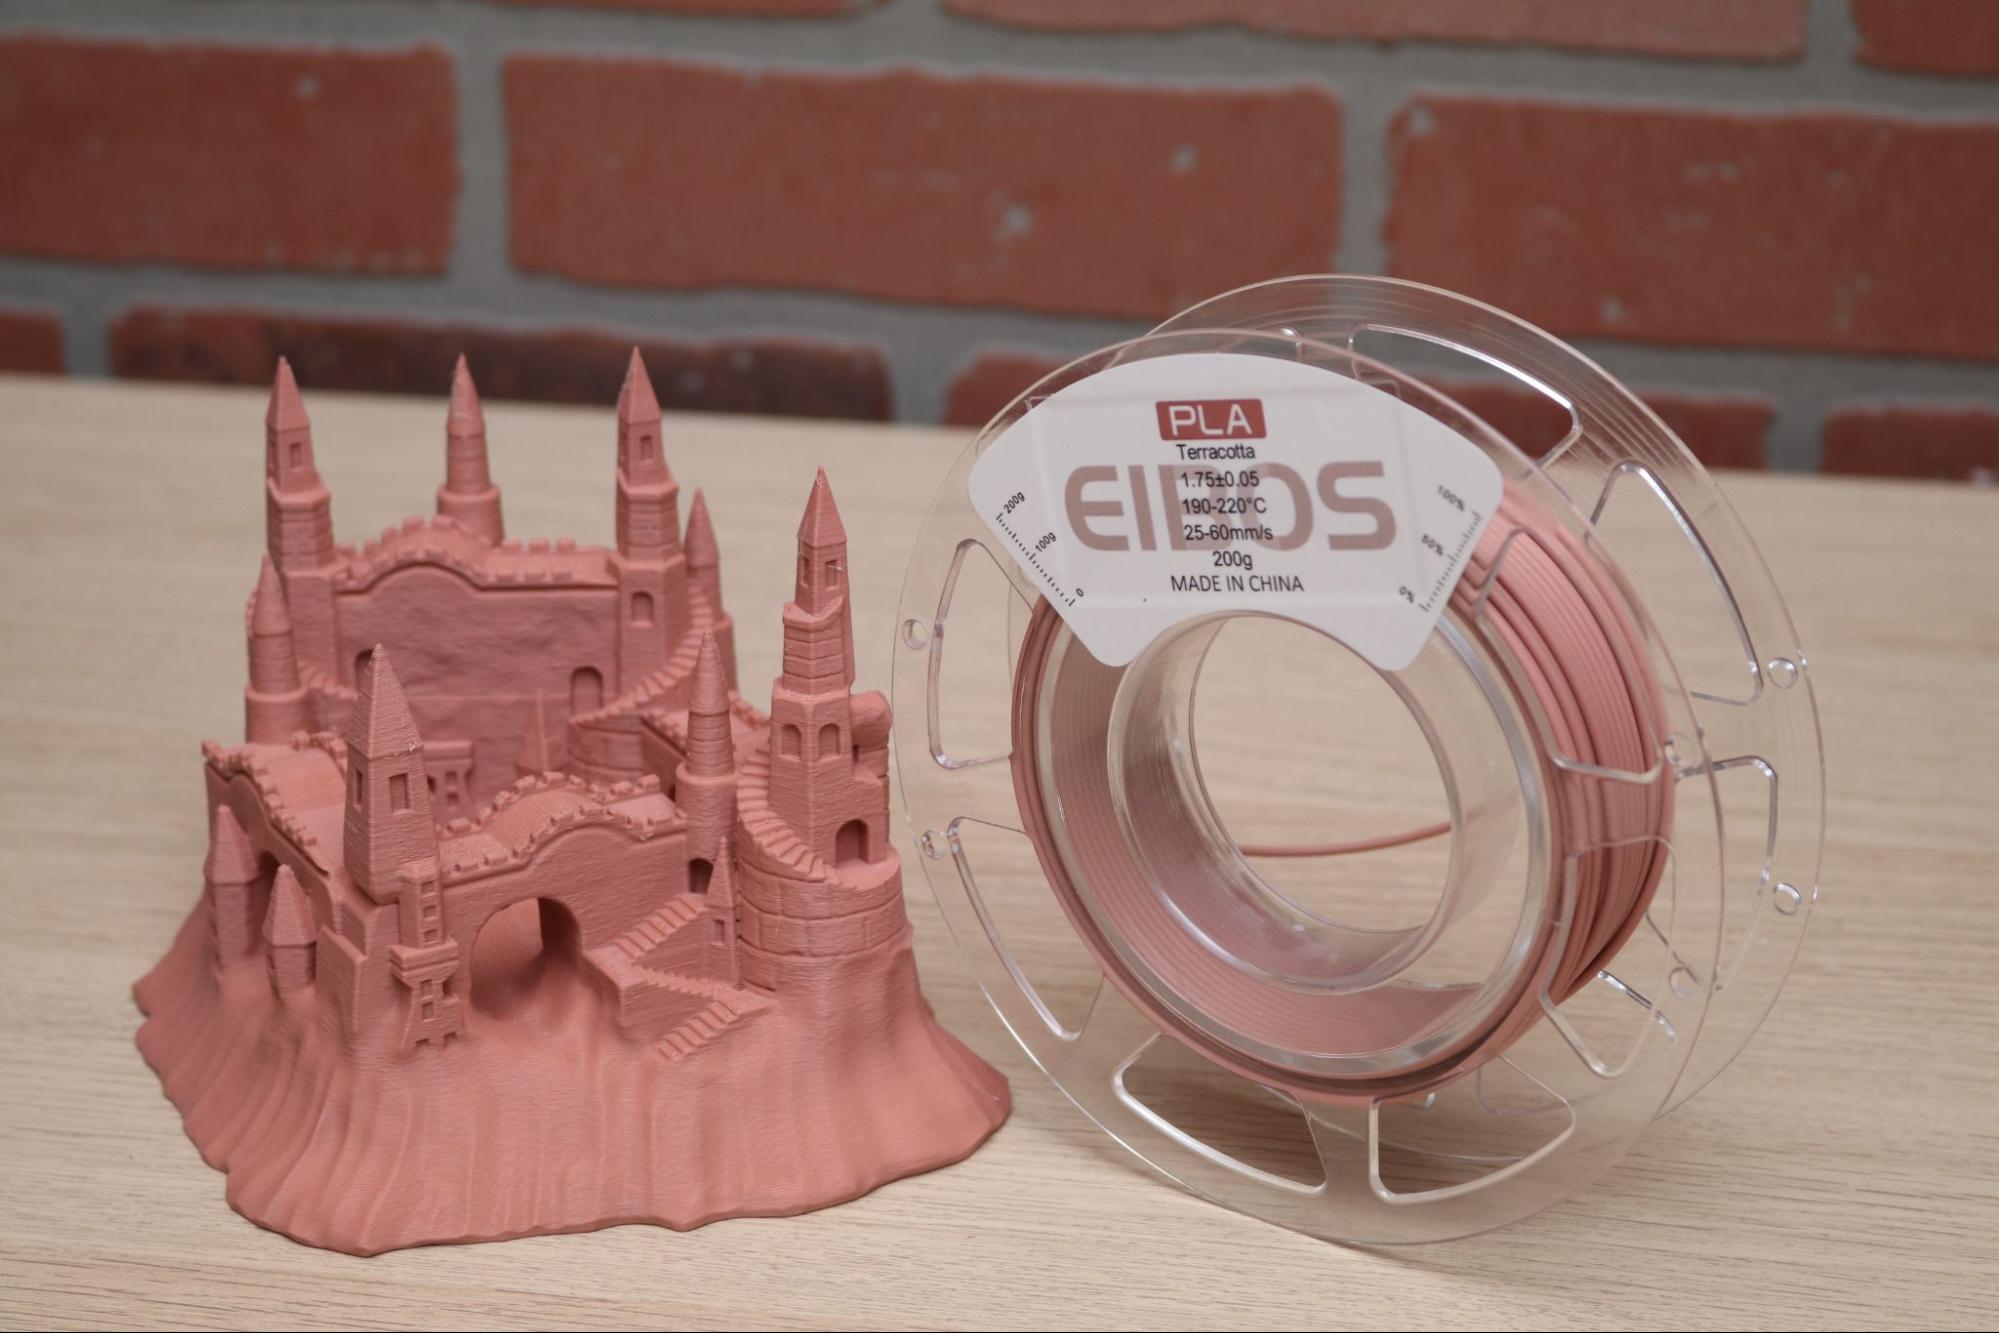
Model: Sandcastle by Kijai
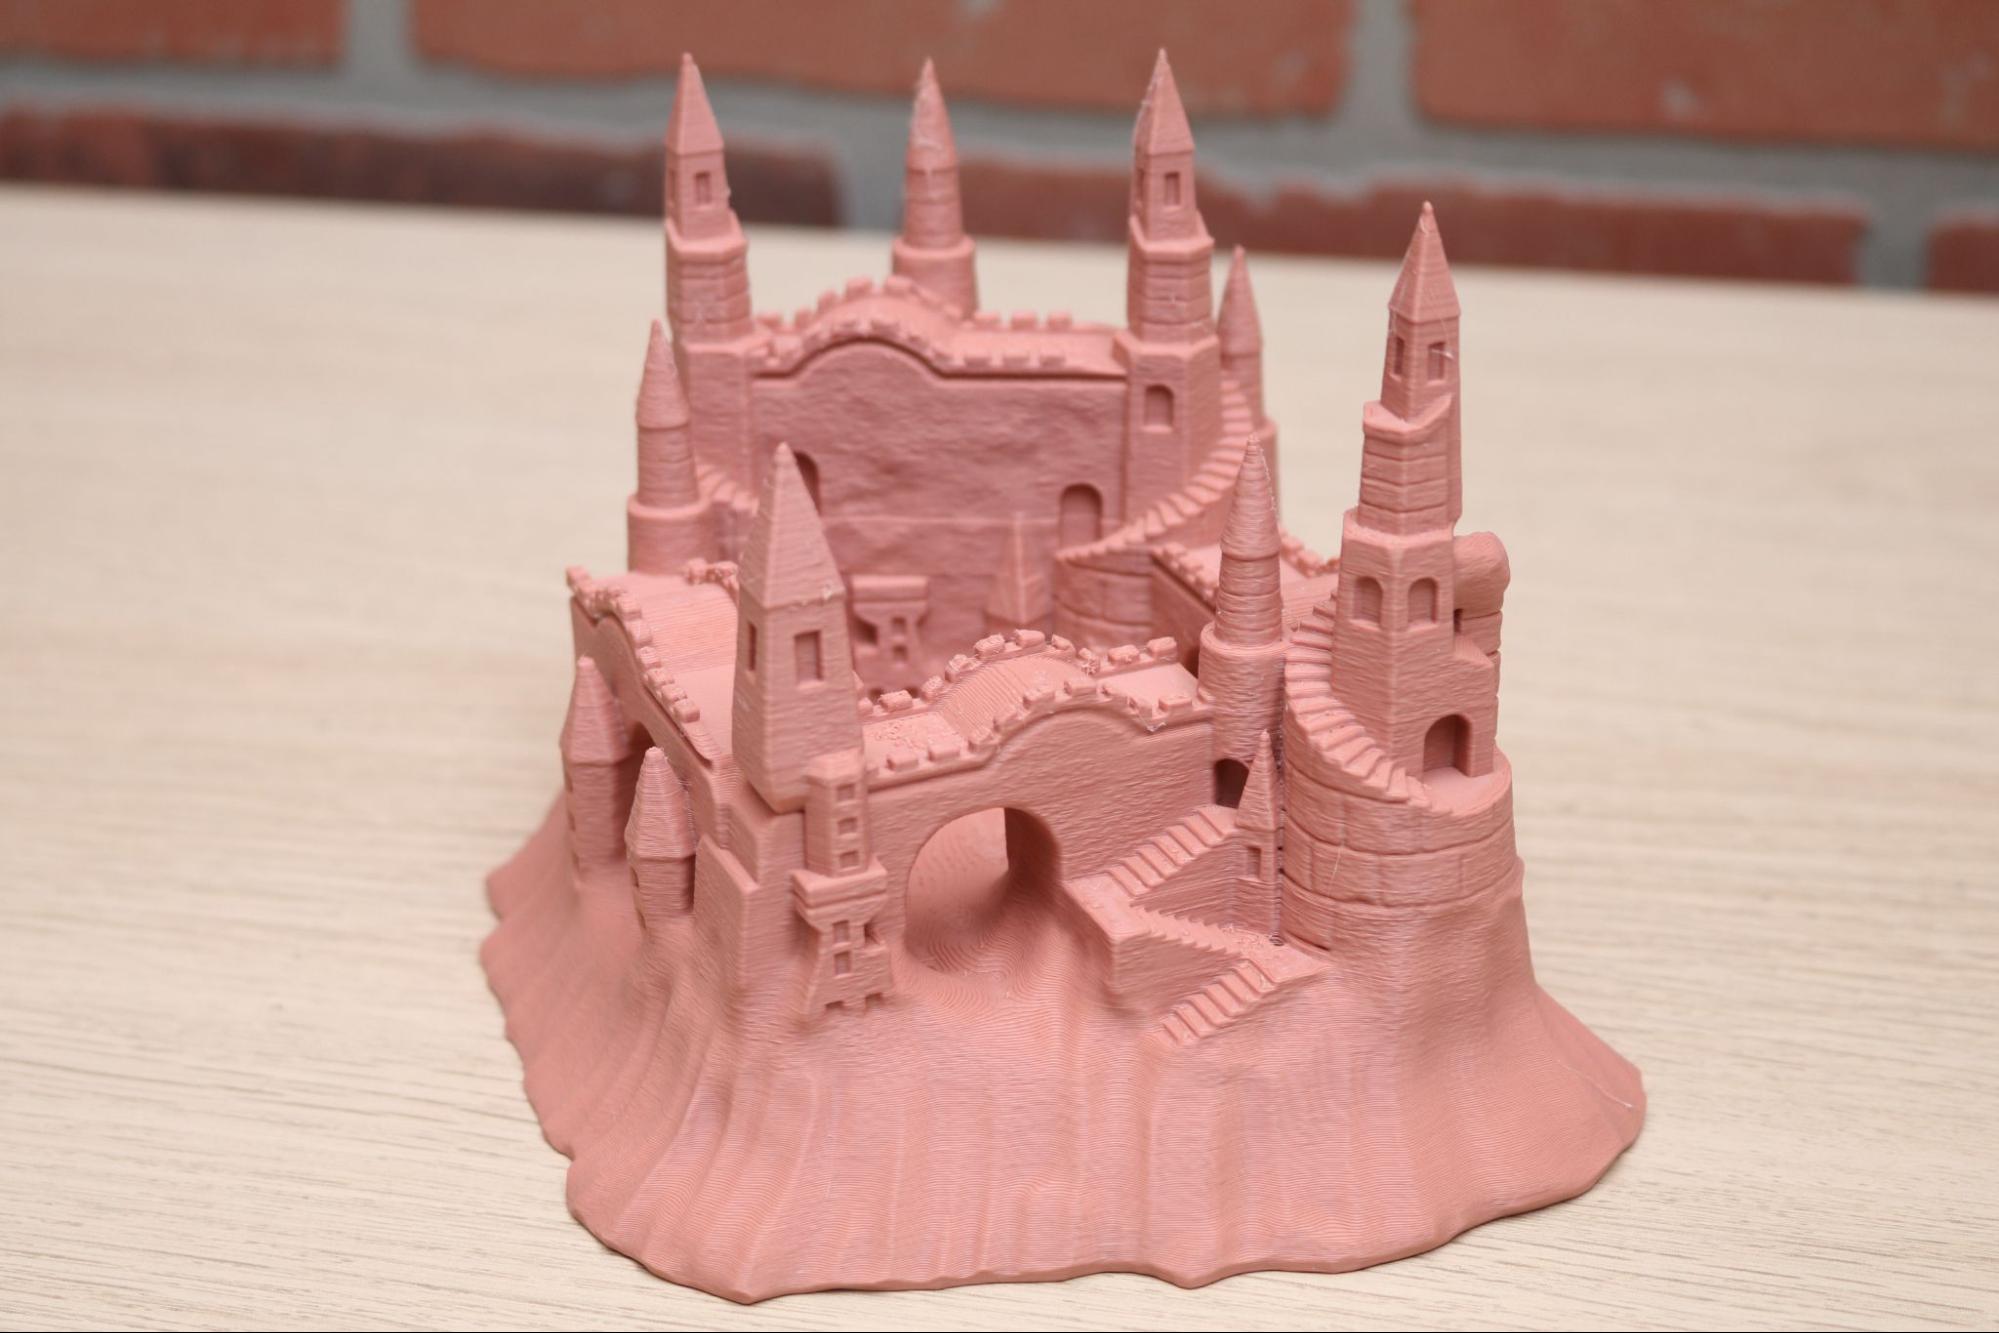
Model: Sandcastle by Kijai
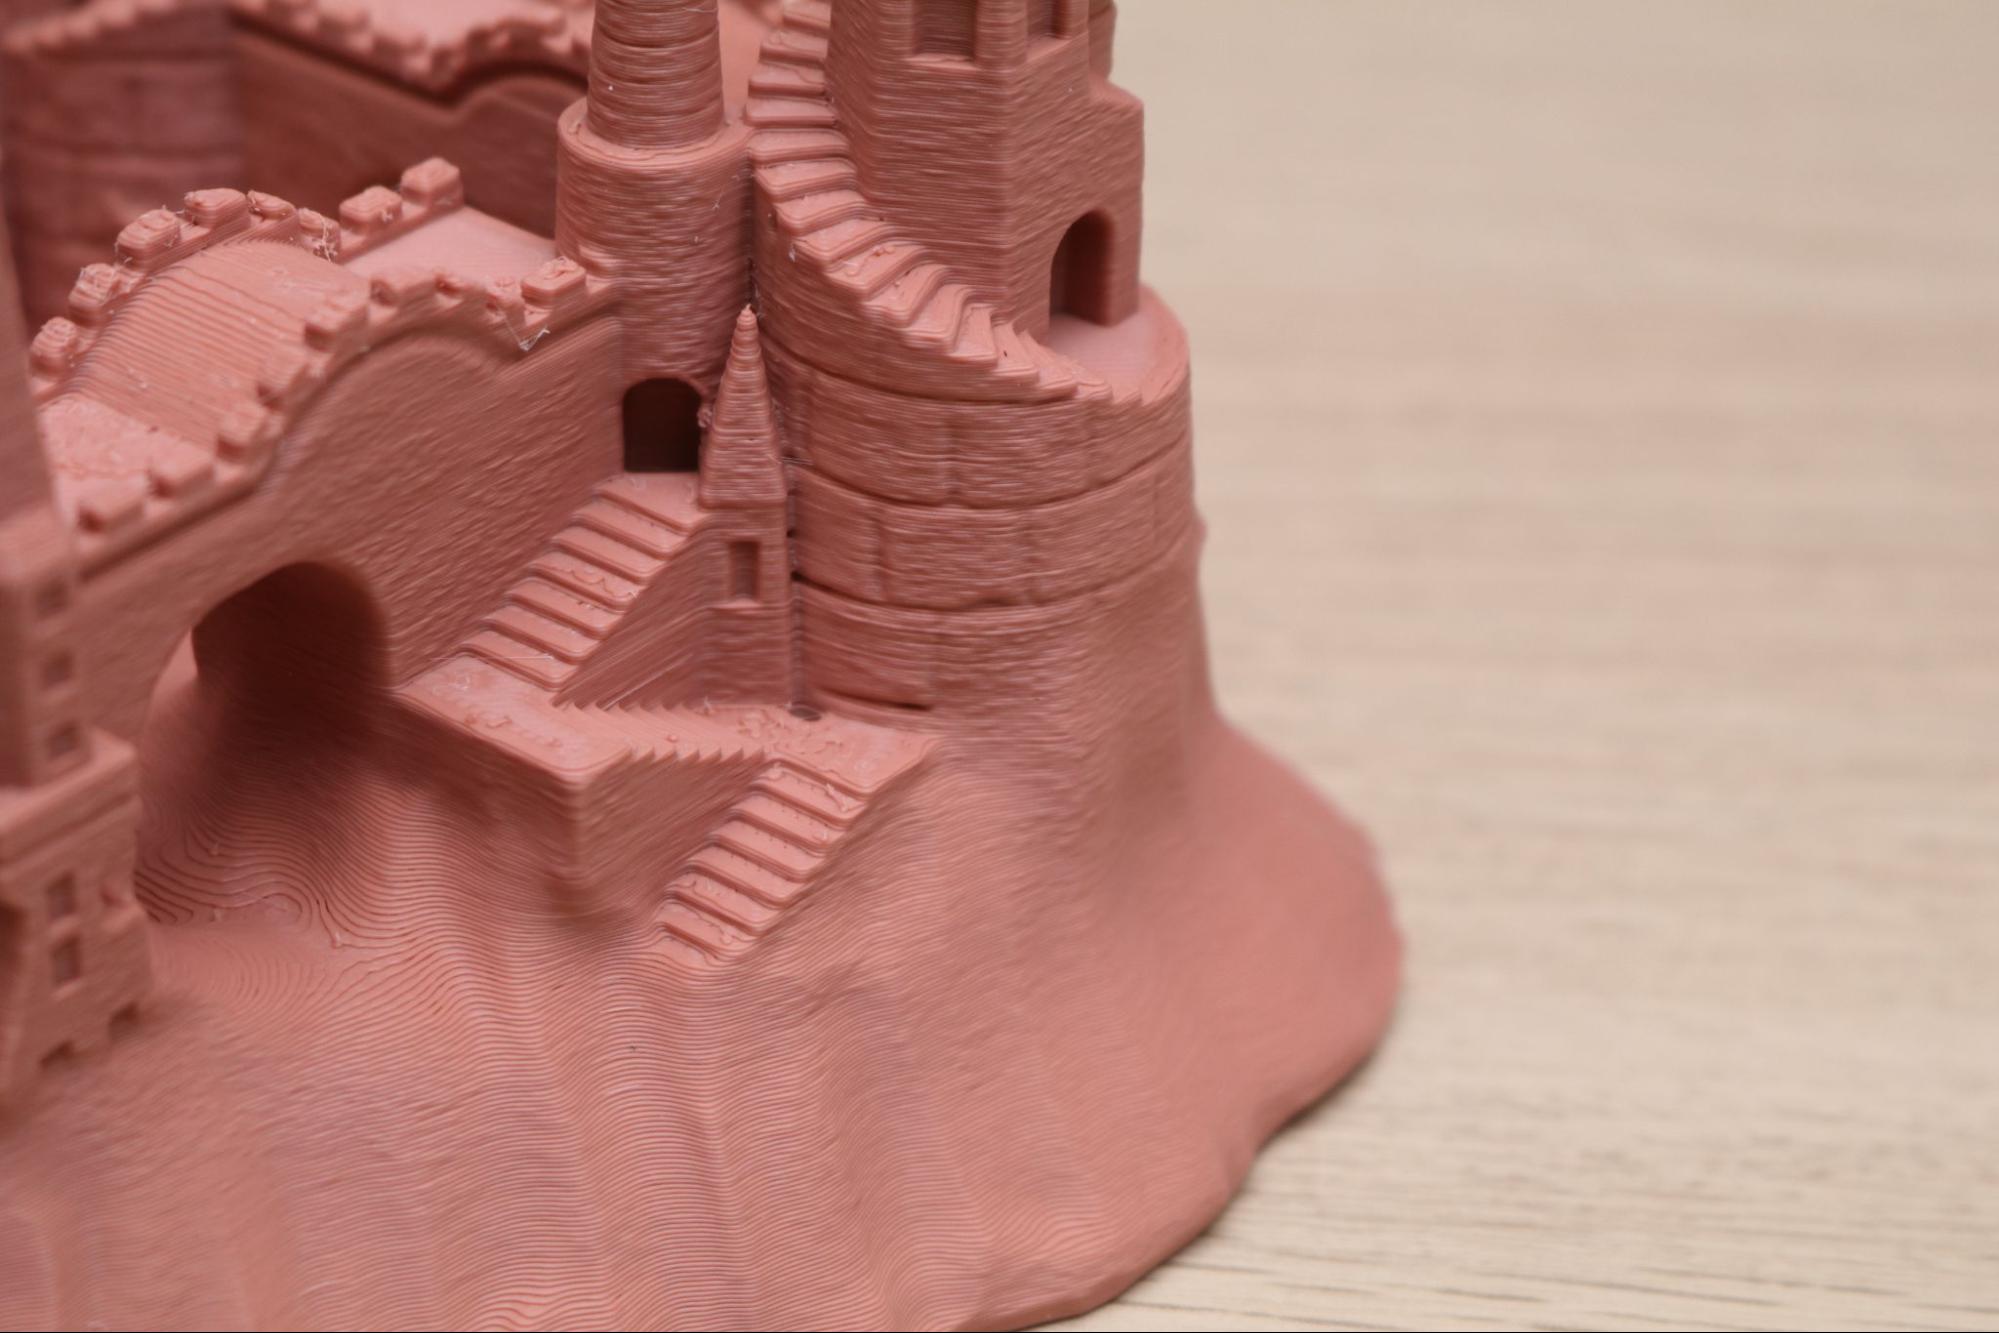
Model: Sandcastle by Kijai
The matte finish of the EIBOS Artism Series Terracotta PLA gives the sandcastle model a clay-like look. The model has a sculpted texture, so the layer lines are effectively hidden on the vertical surfaces and it’s not immediately apparent that the model was made with a 3D printer. The shallow curves on the bridges and the windows are where layers can be more easily seen, but it’s still an impressive output considering the sub-$300 list price of the Neptune 4 Pro.
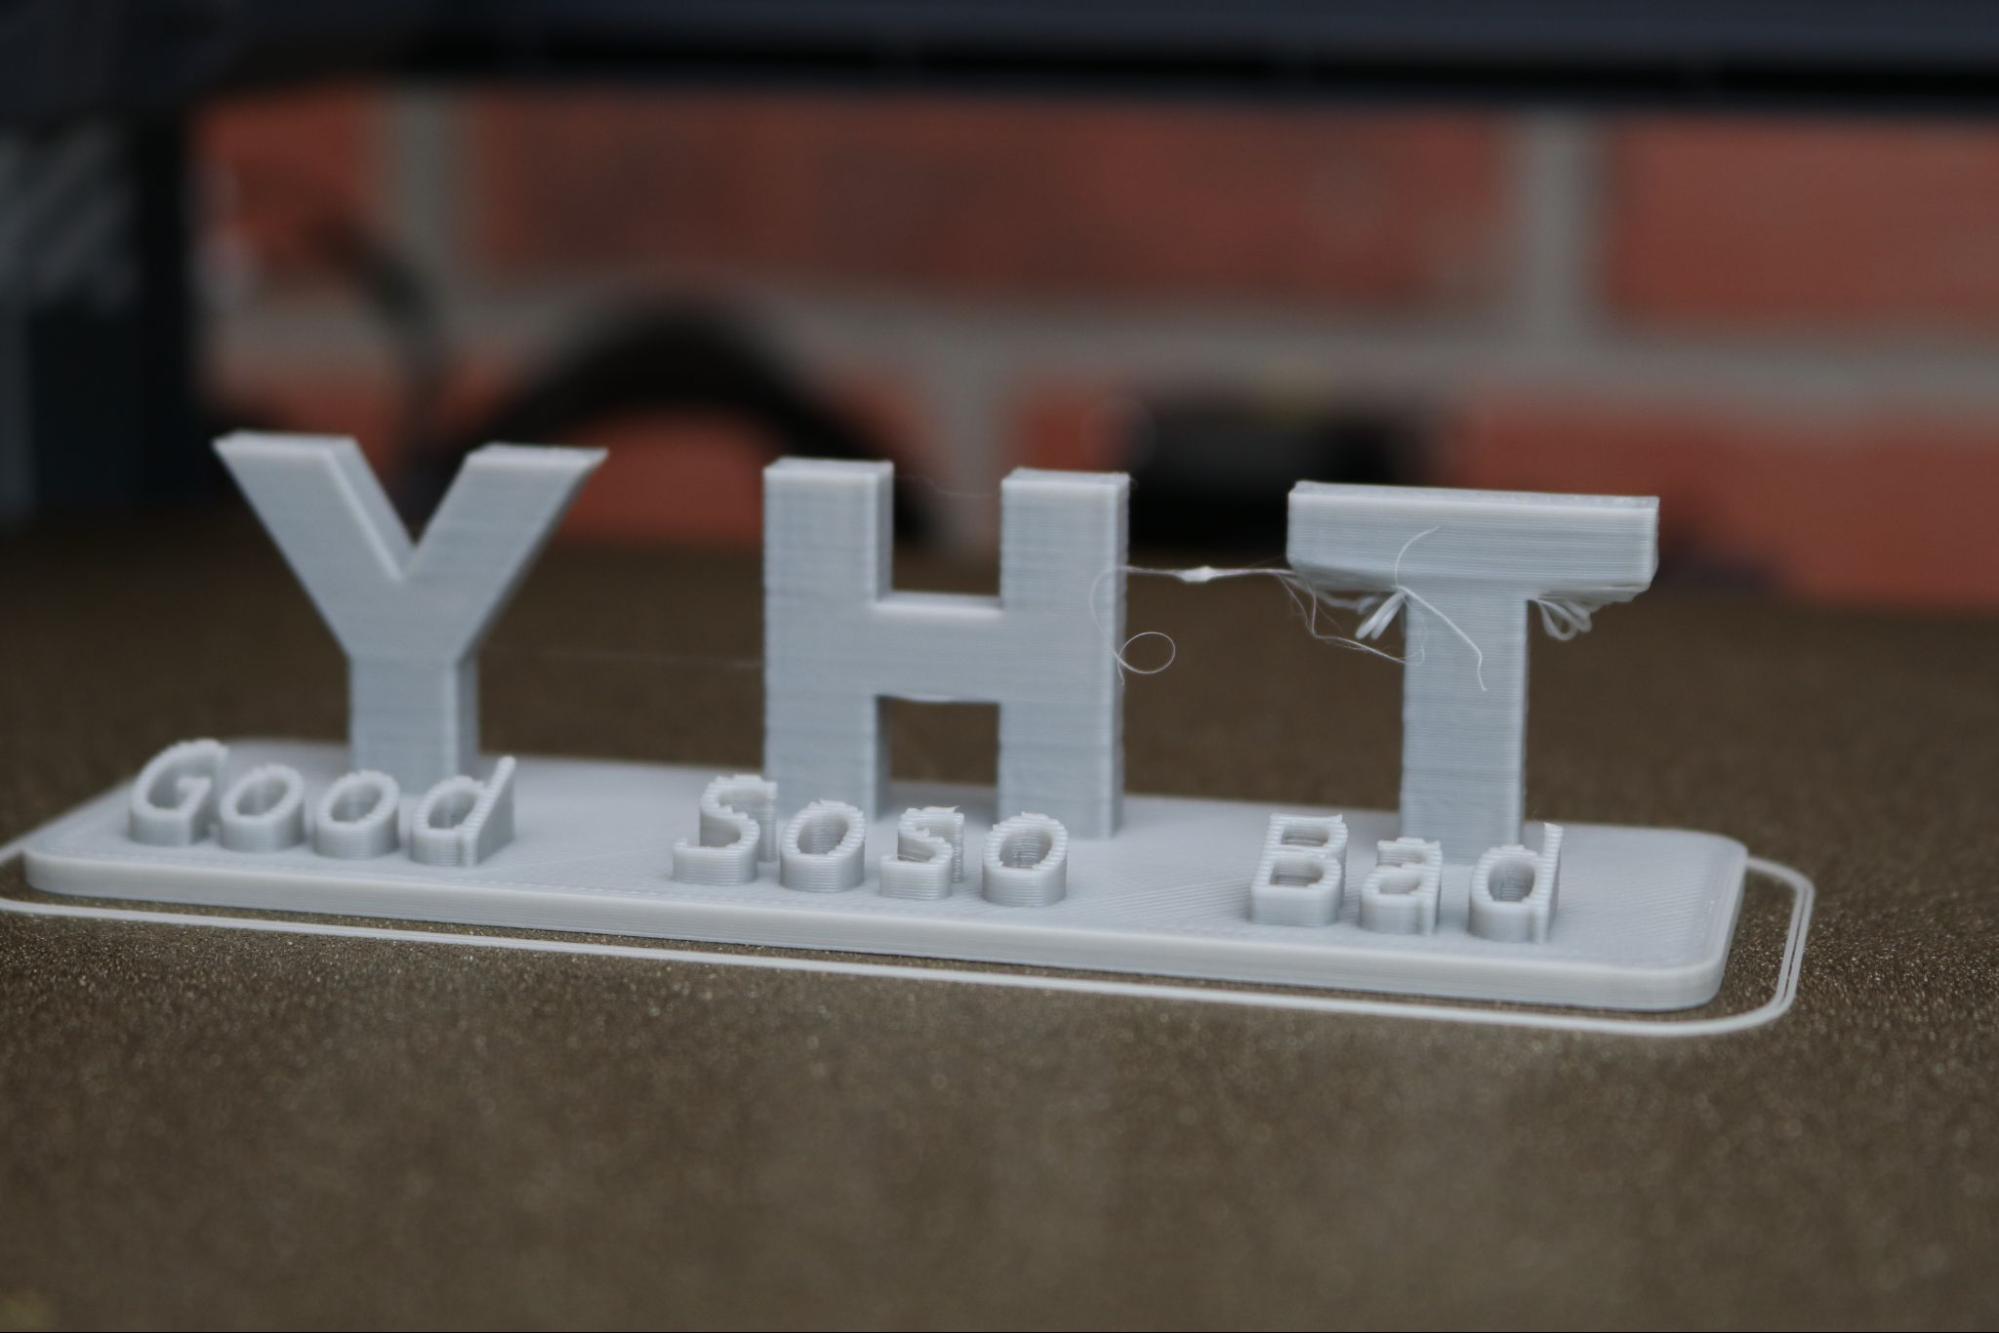
Model: YHT Rule by Eunny
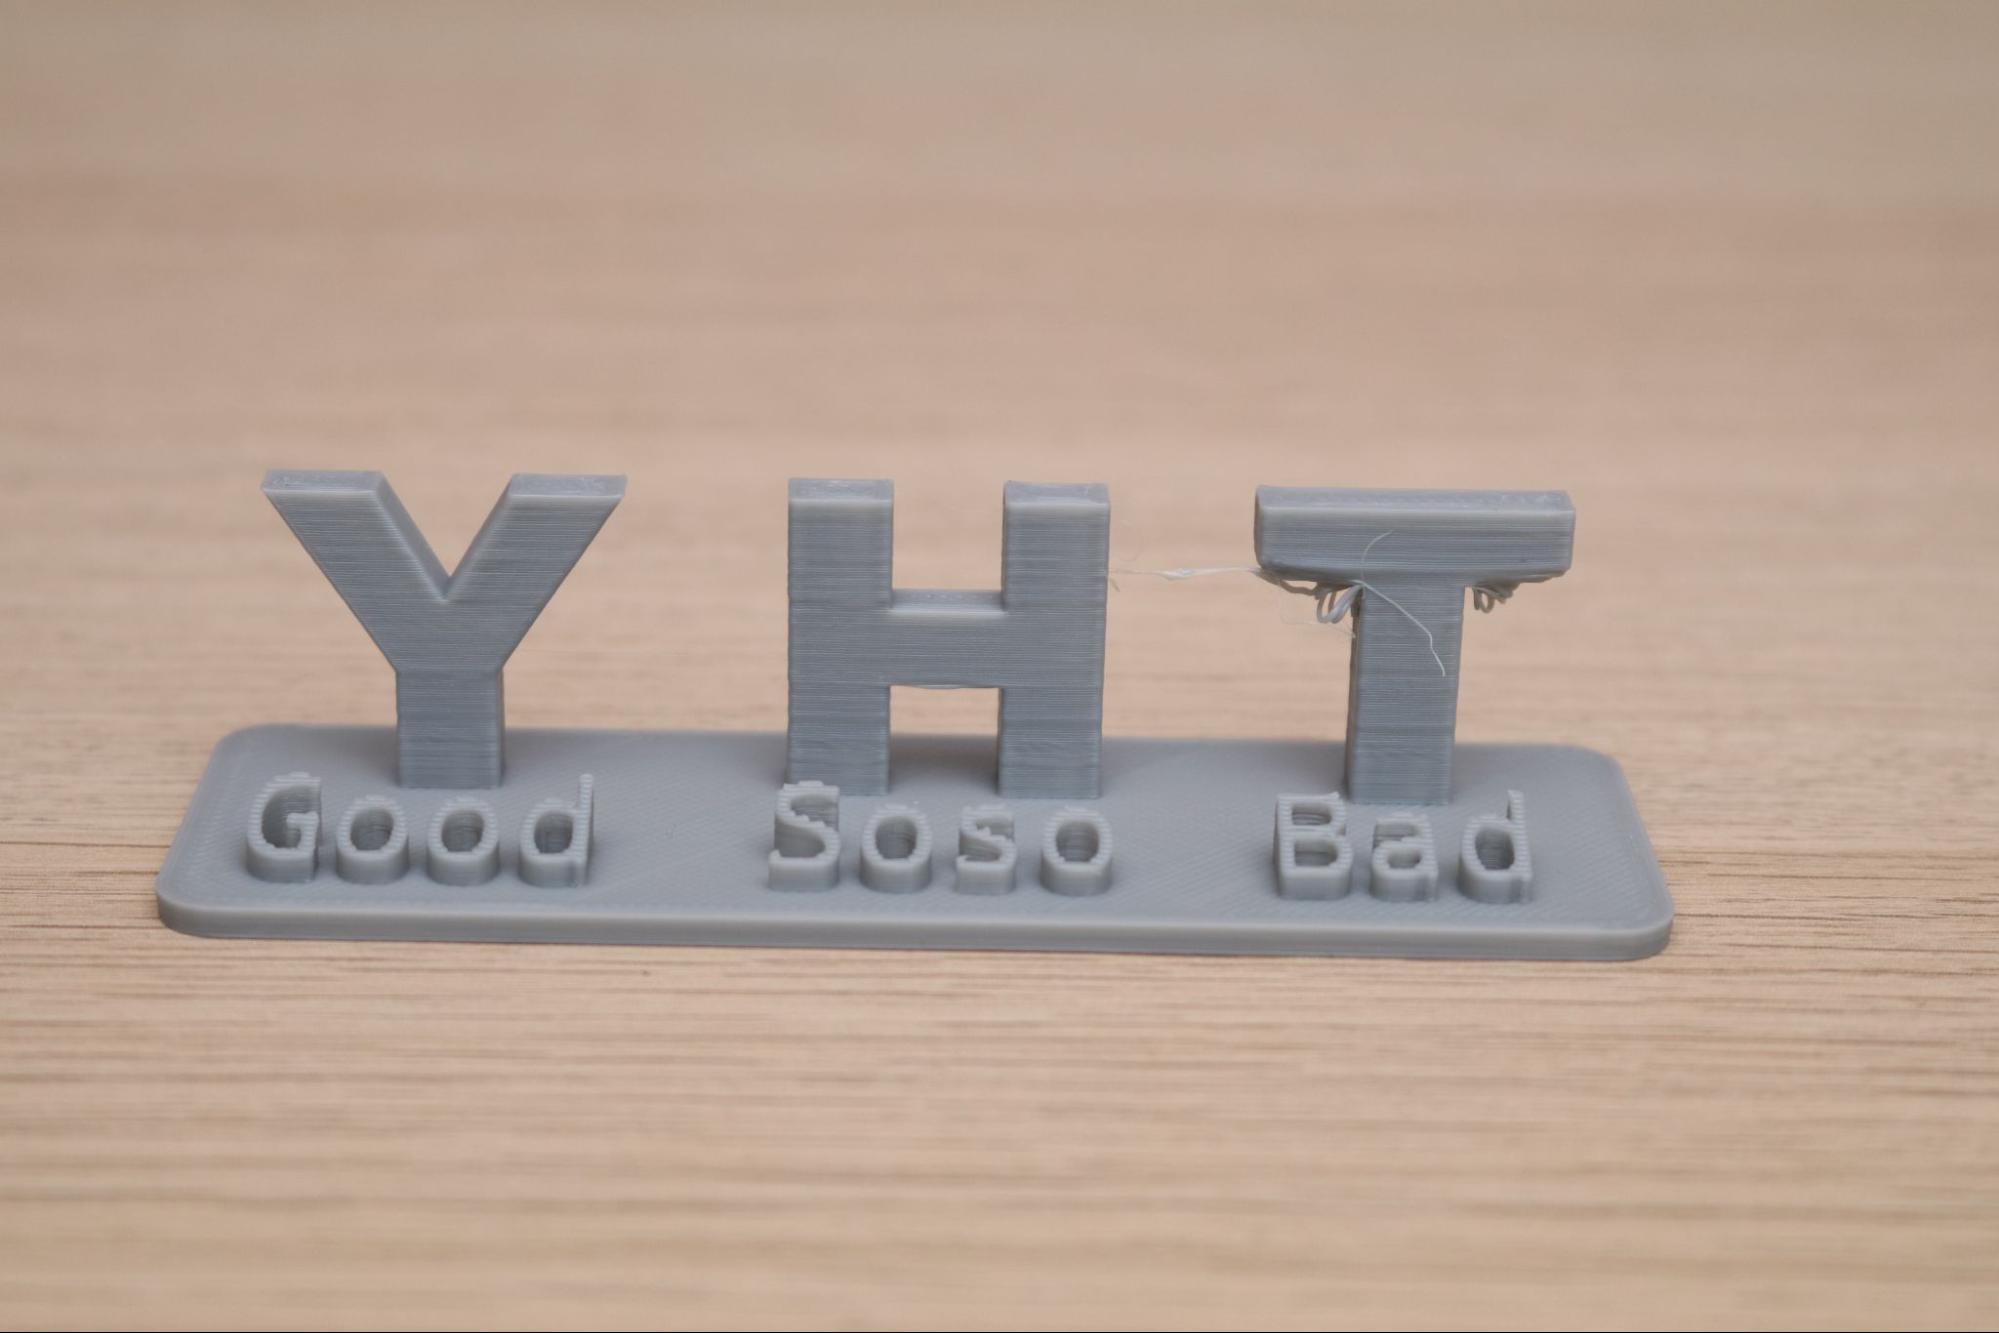
Model: YHT Rule by Eunny
Equal parts interesting model and cautionary tale, the YHT Rule 3D model is a physical demonstration of best practices for Design for Additive Manufacturing. This model highlights what happens to unsupported (or cantilevered) features as well as bridges during the 3D printing process. Despite being a nearly impossible geometry to print on a filament extrusion 3D printer, the Neptune 4 Pro was able to resolve the detail fully on the Y, very well on the H, and the T recovered after only a few layers.
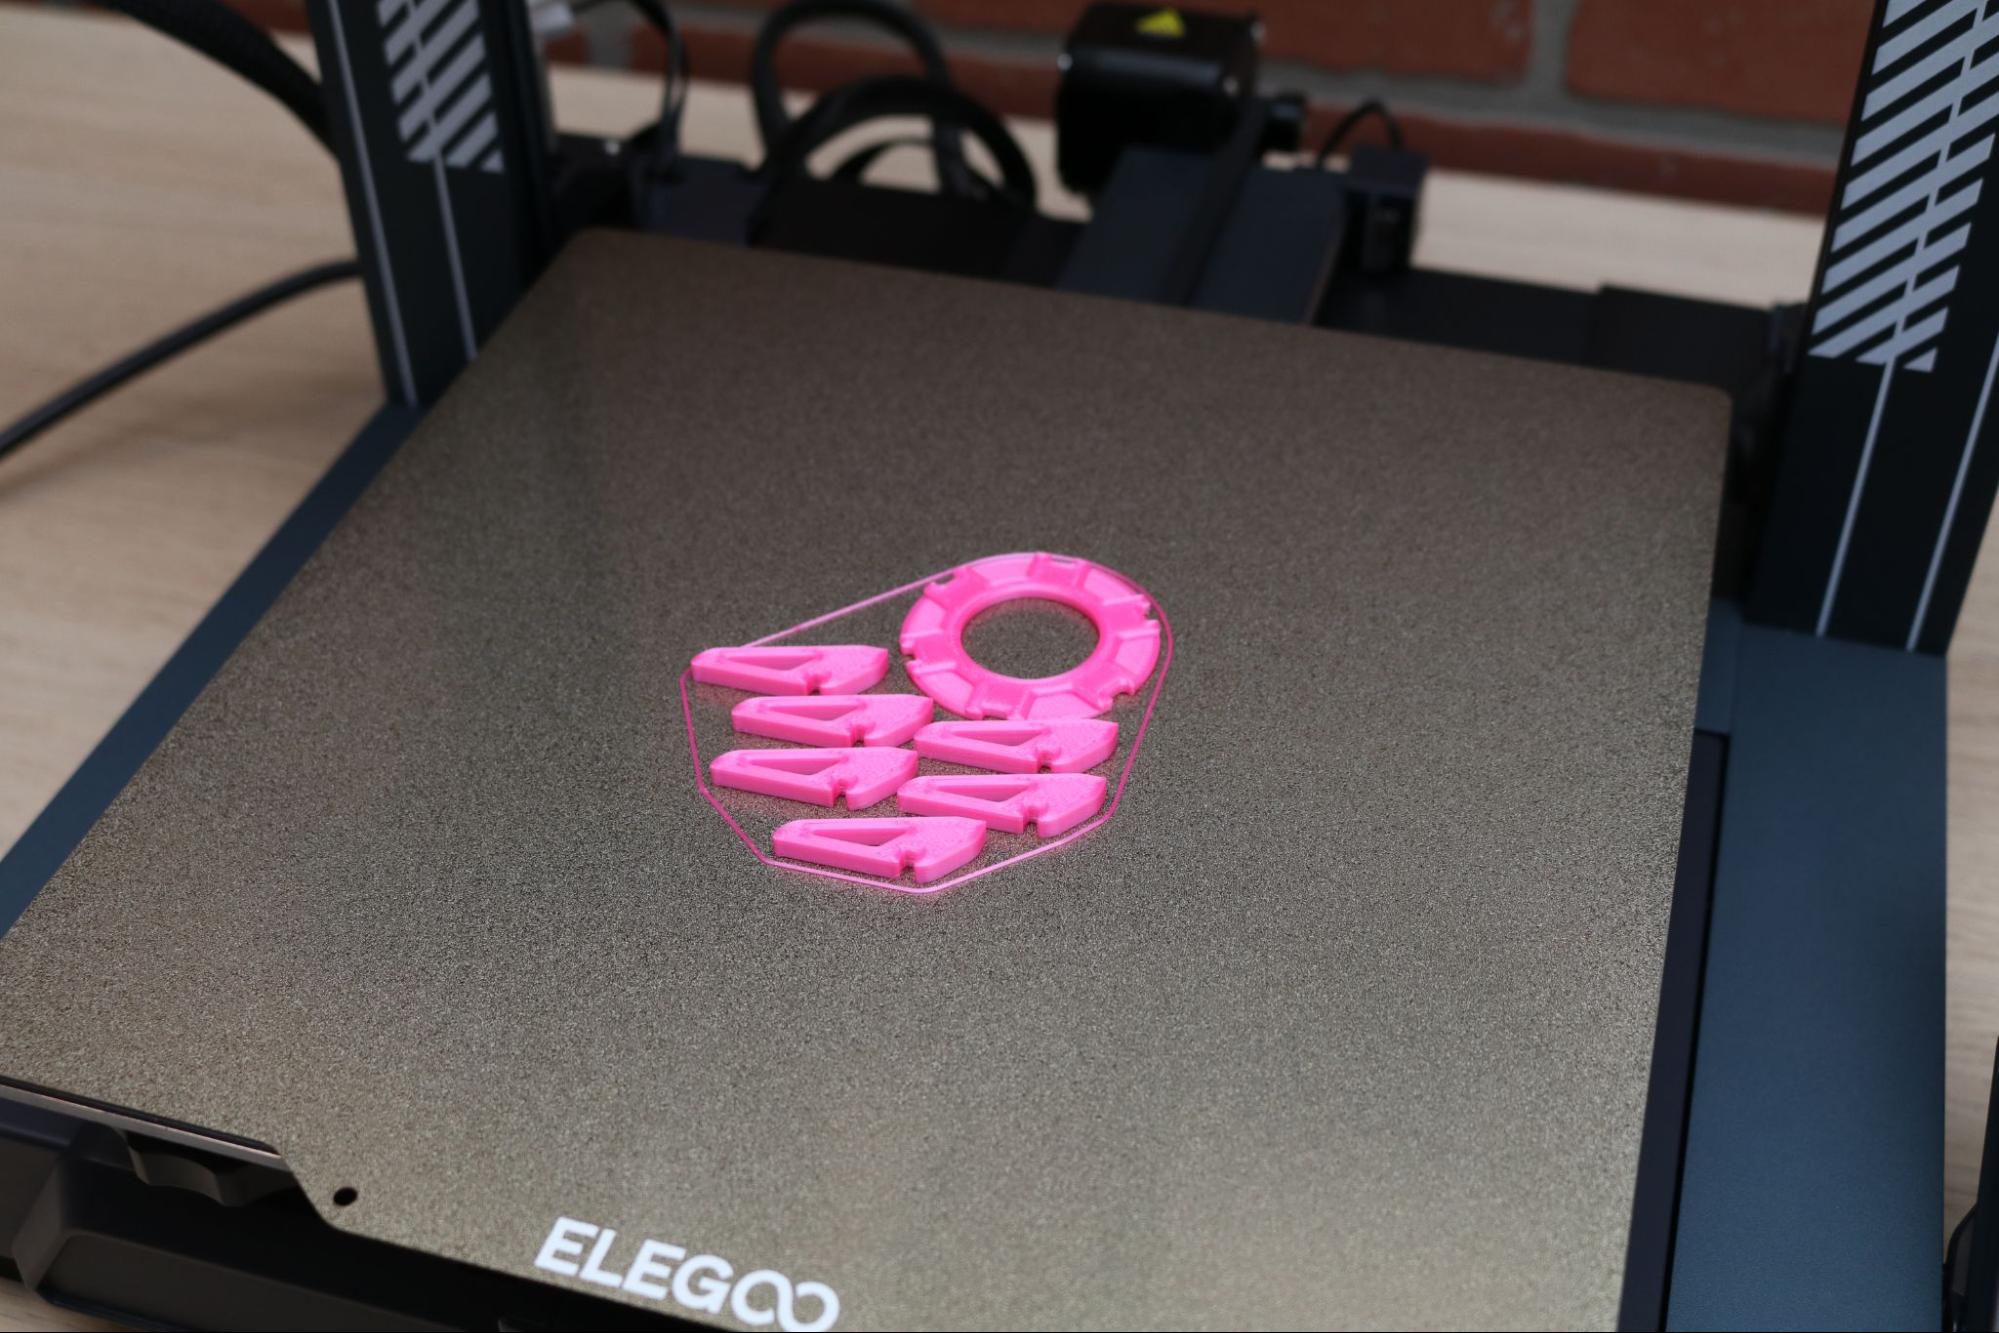
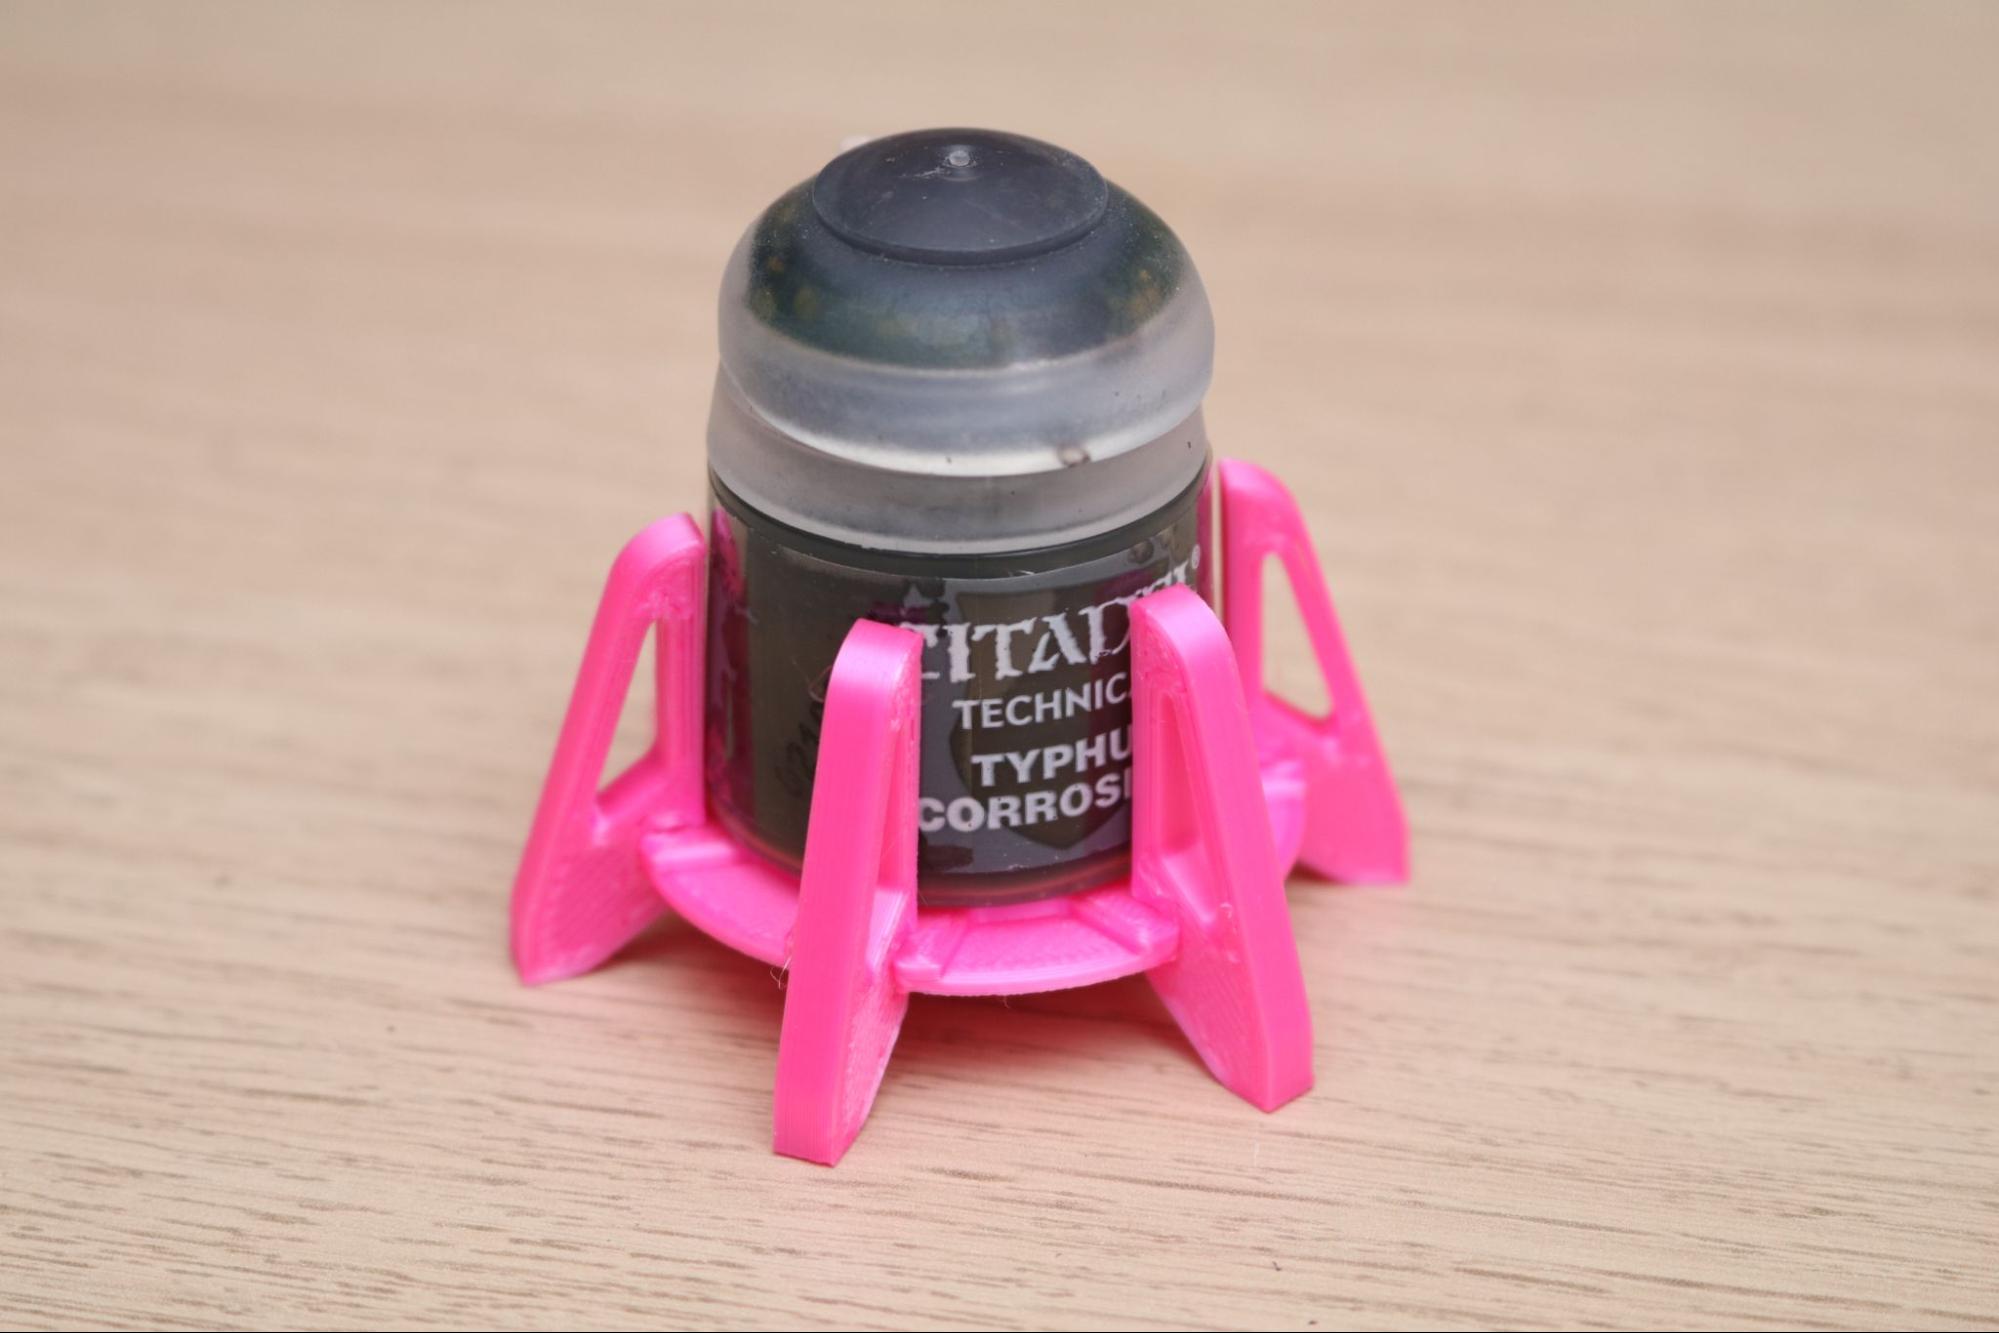
Sliced and prepared with OrcaSlicer using the default .2mm slicer profile, the No-Spill Nuln Oil Paint Holder by GenePool is a perfect example of a print that would normally raise an eyebrow due to the number of small parts printed simultaneously. Even with no brim, raft, or adhesives, this 7 part assembly with multiple thin walls stayed firmly adhered to the build platform during the entire 24 minute print. After cooling, the part could practically be brushed off the platform and assembled.
Printing the High Speed Benchy on Elegoo Neptune 4 Pro
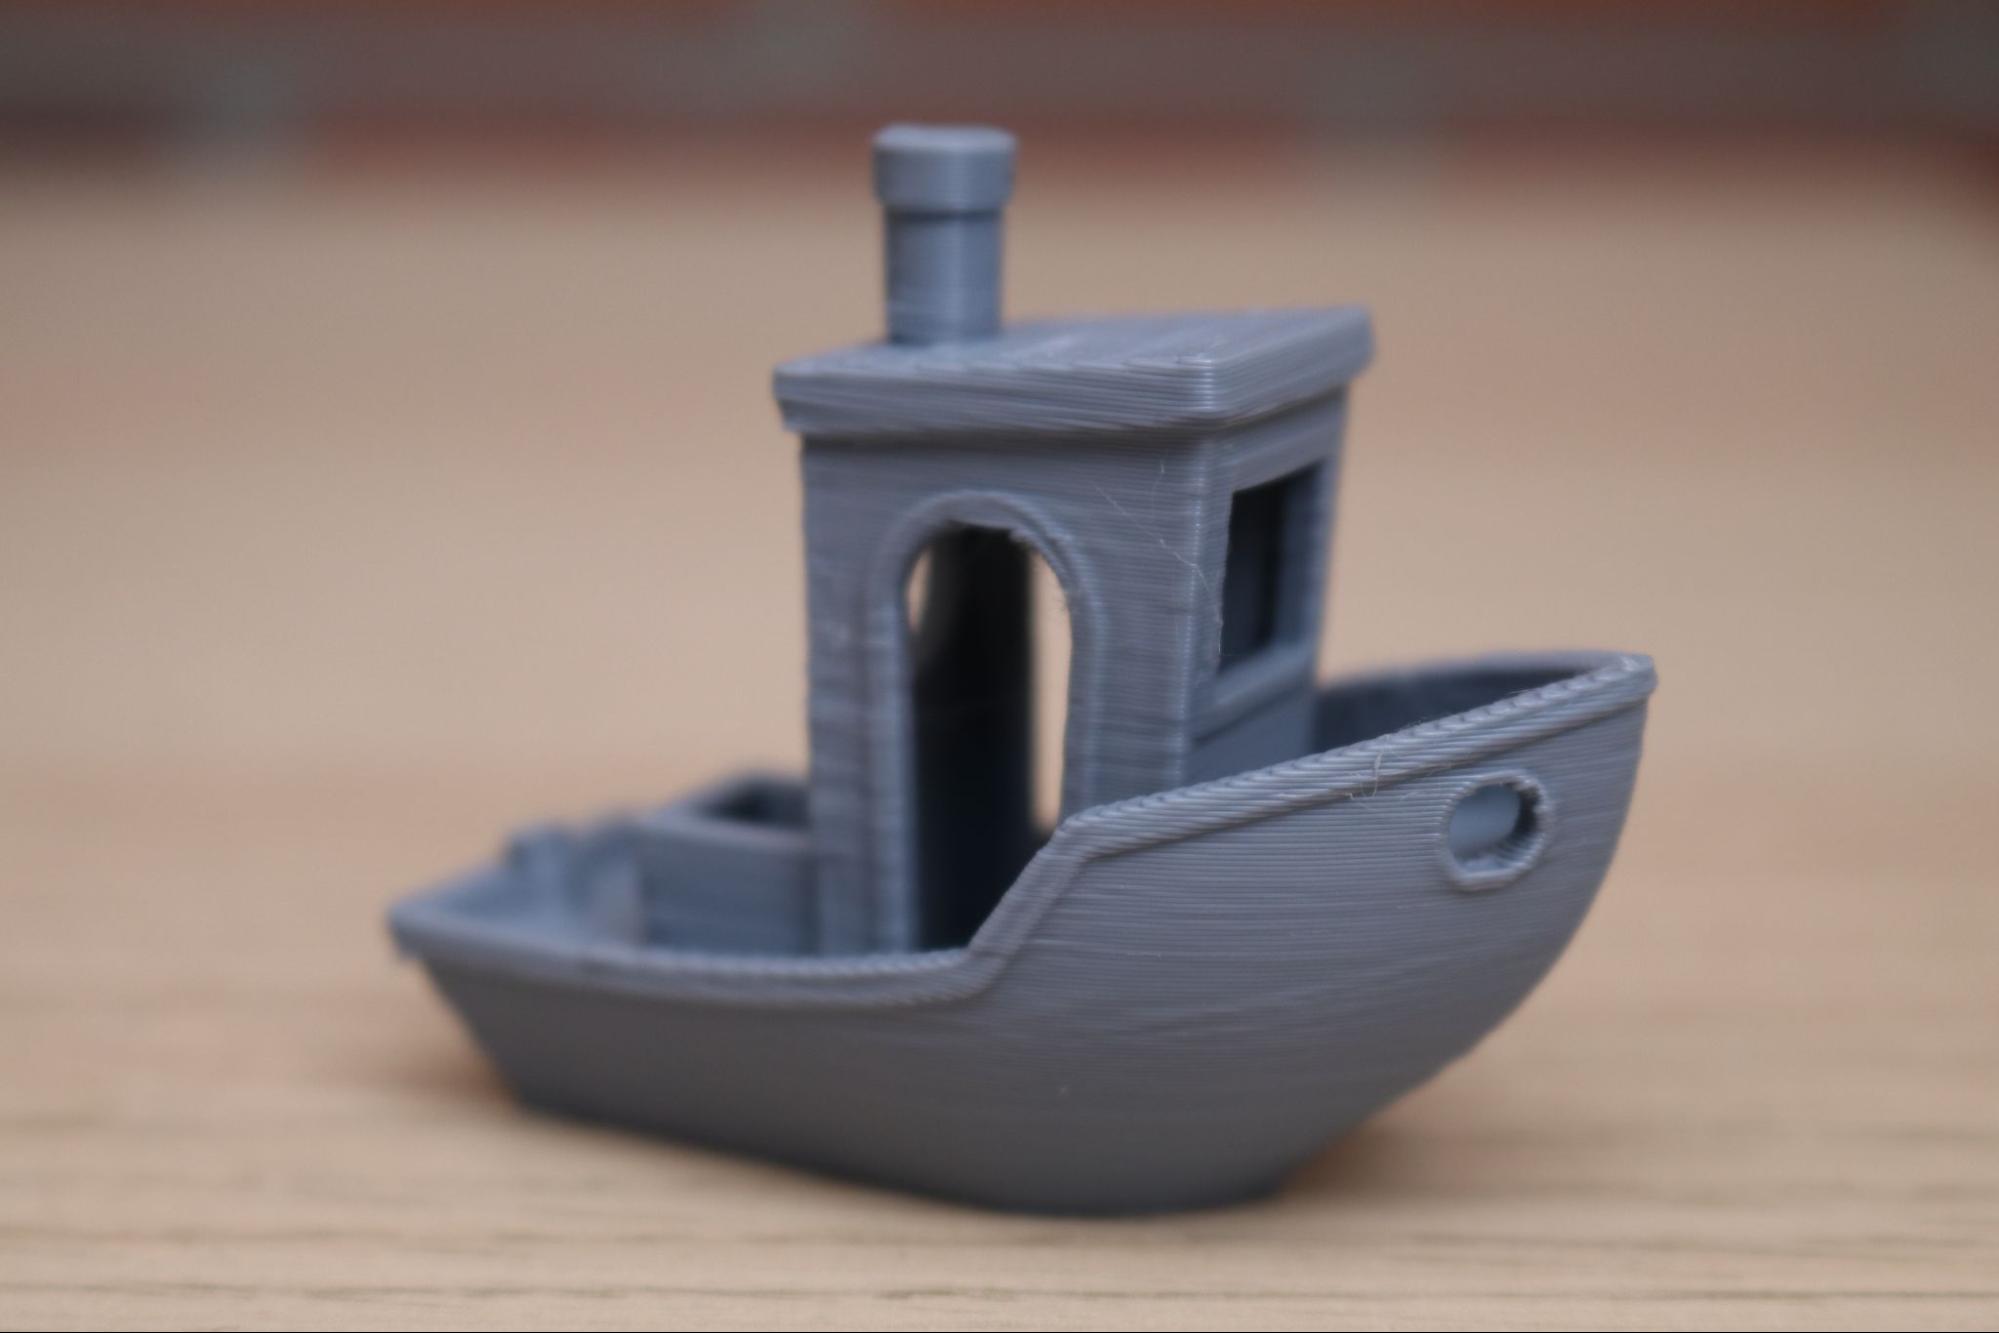
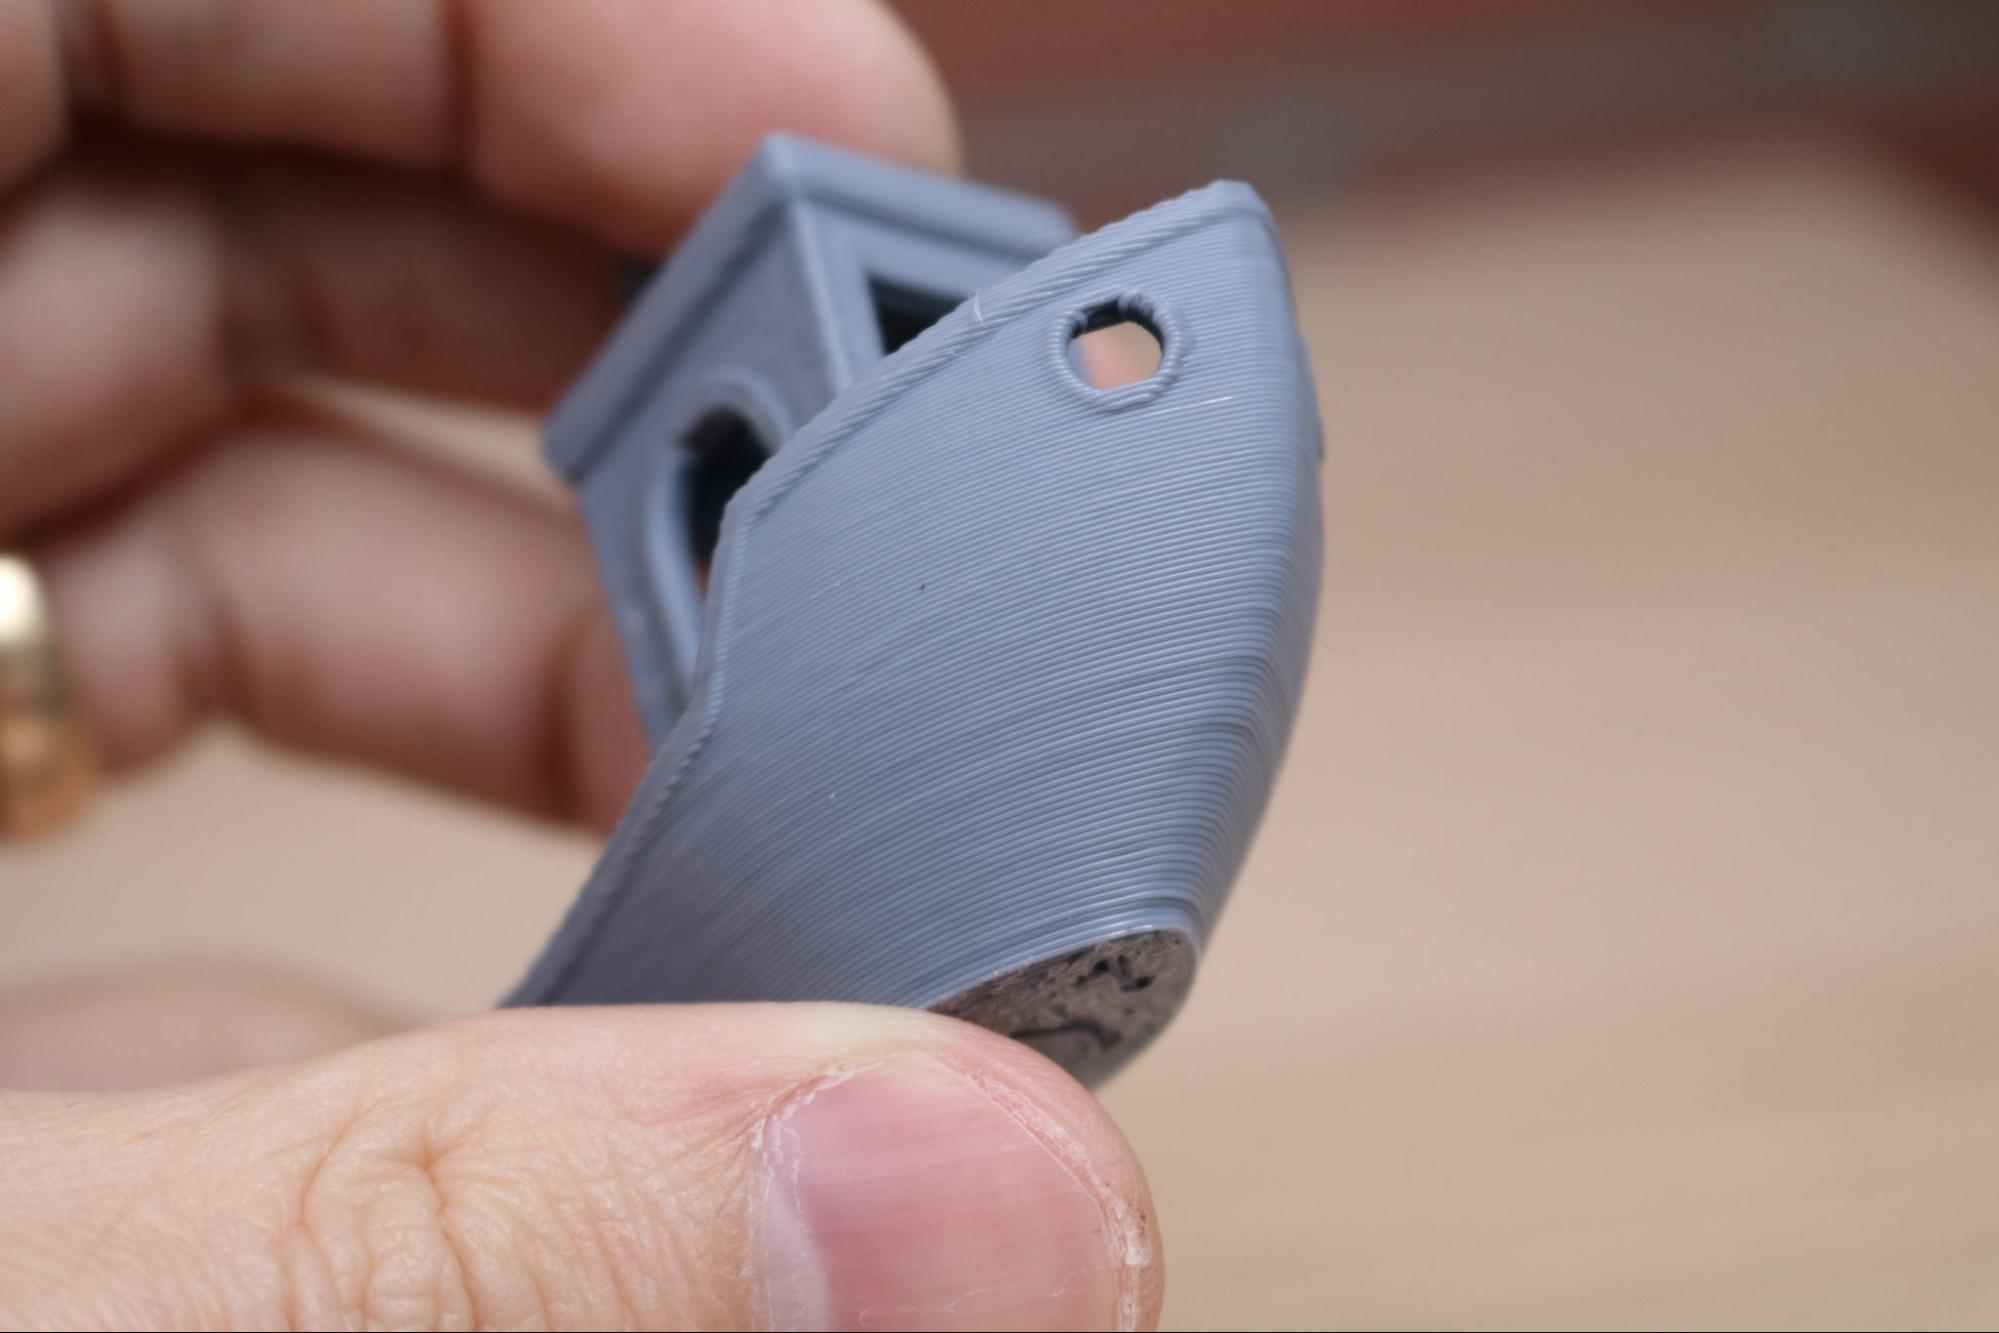
The Elegoo Neptune 4 Pro includes a pre-sliced Benchy model titled ‘EN4PRO_3DBenchy-18min.gcode’ that prints out in 18 minutes. This printed model has been heavily optimized for speed, and the result is impressive considering the relatively short print time. The Neptune 4 Pro takes the gloves off with this print, and the extruder whips around during infill moves at an impressive pace.
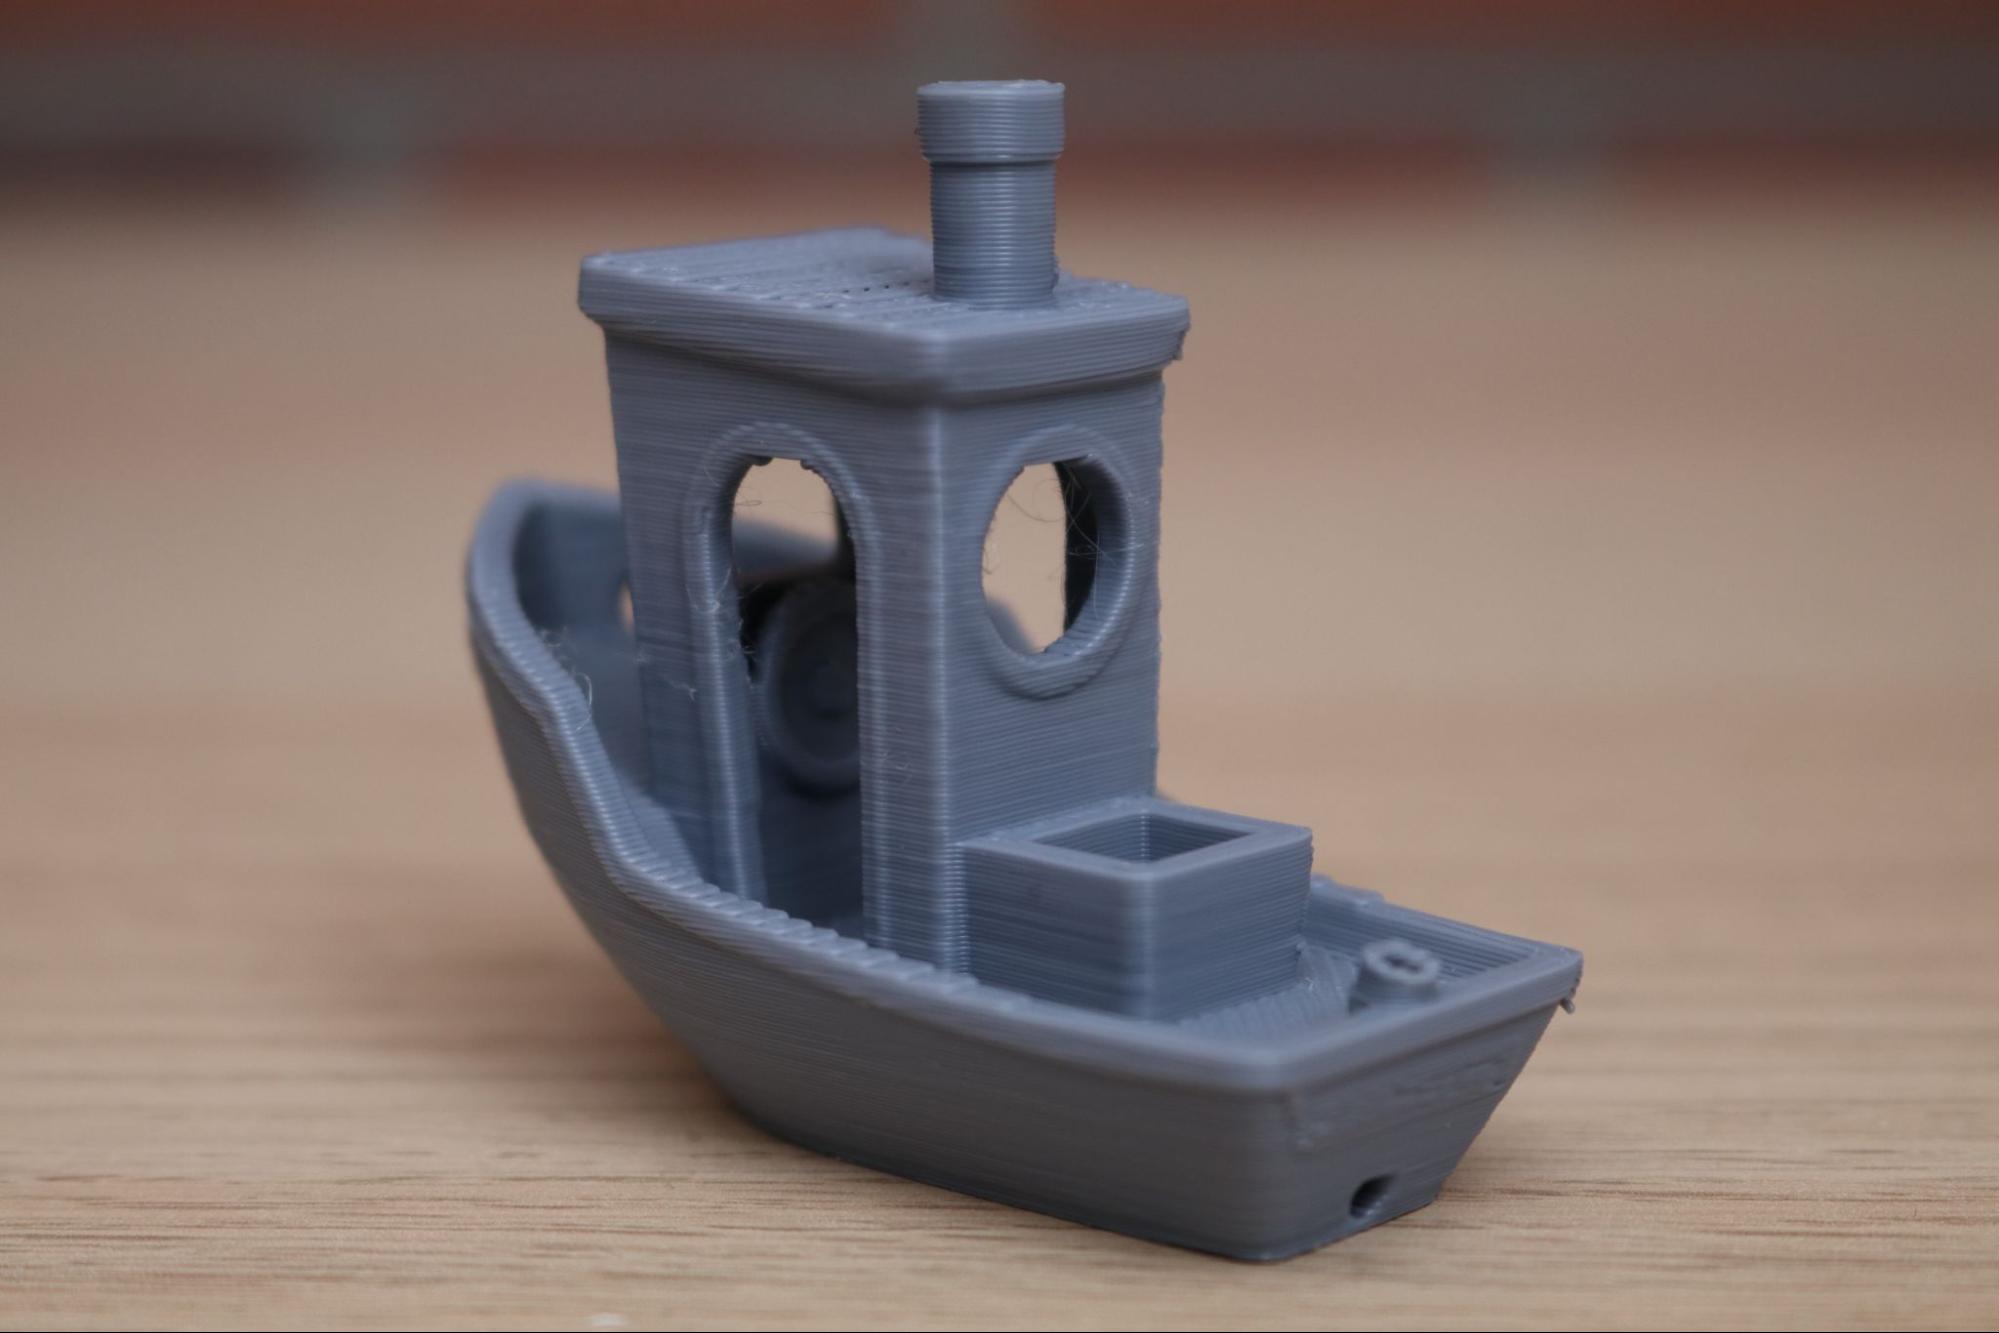
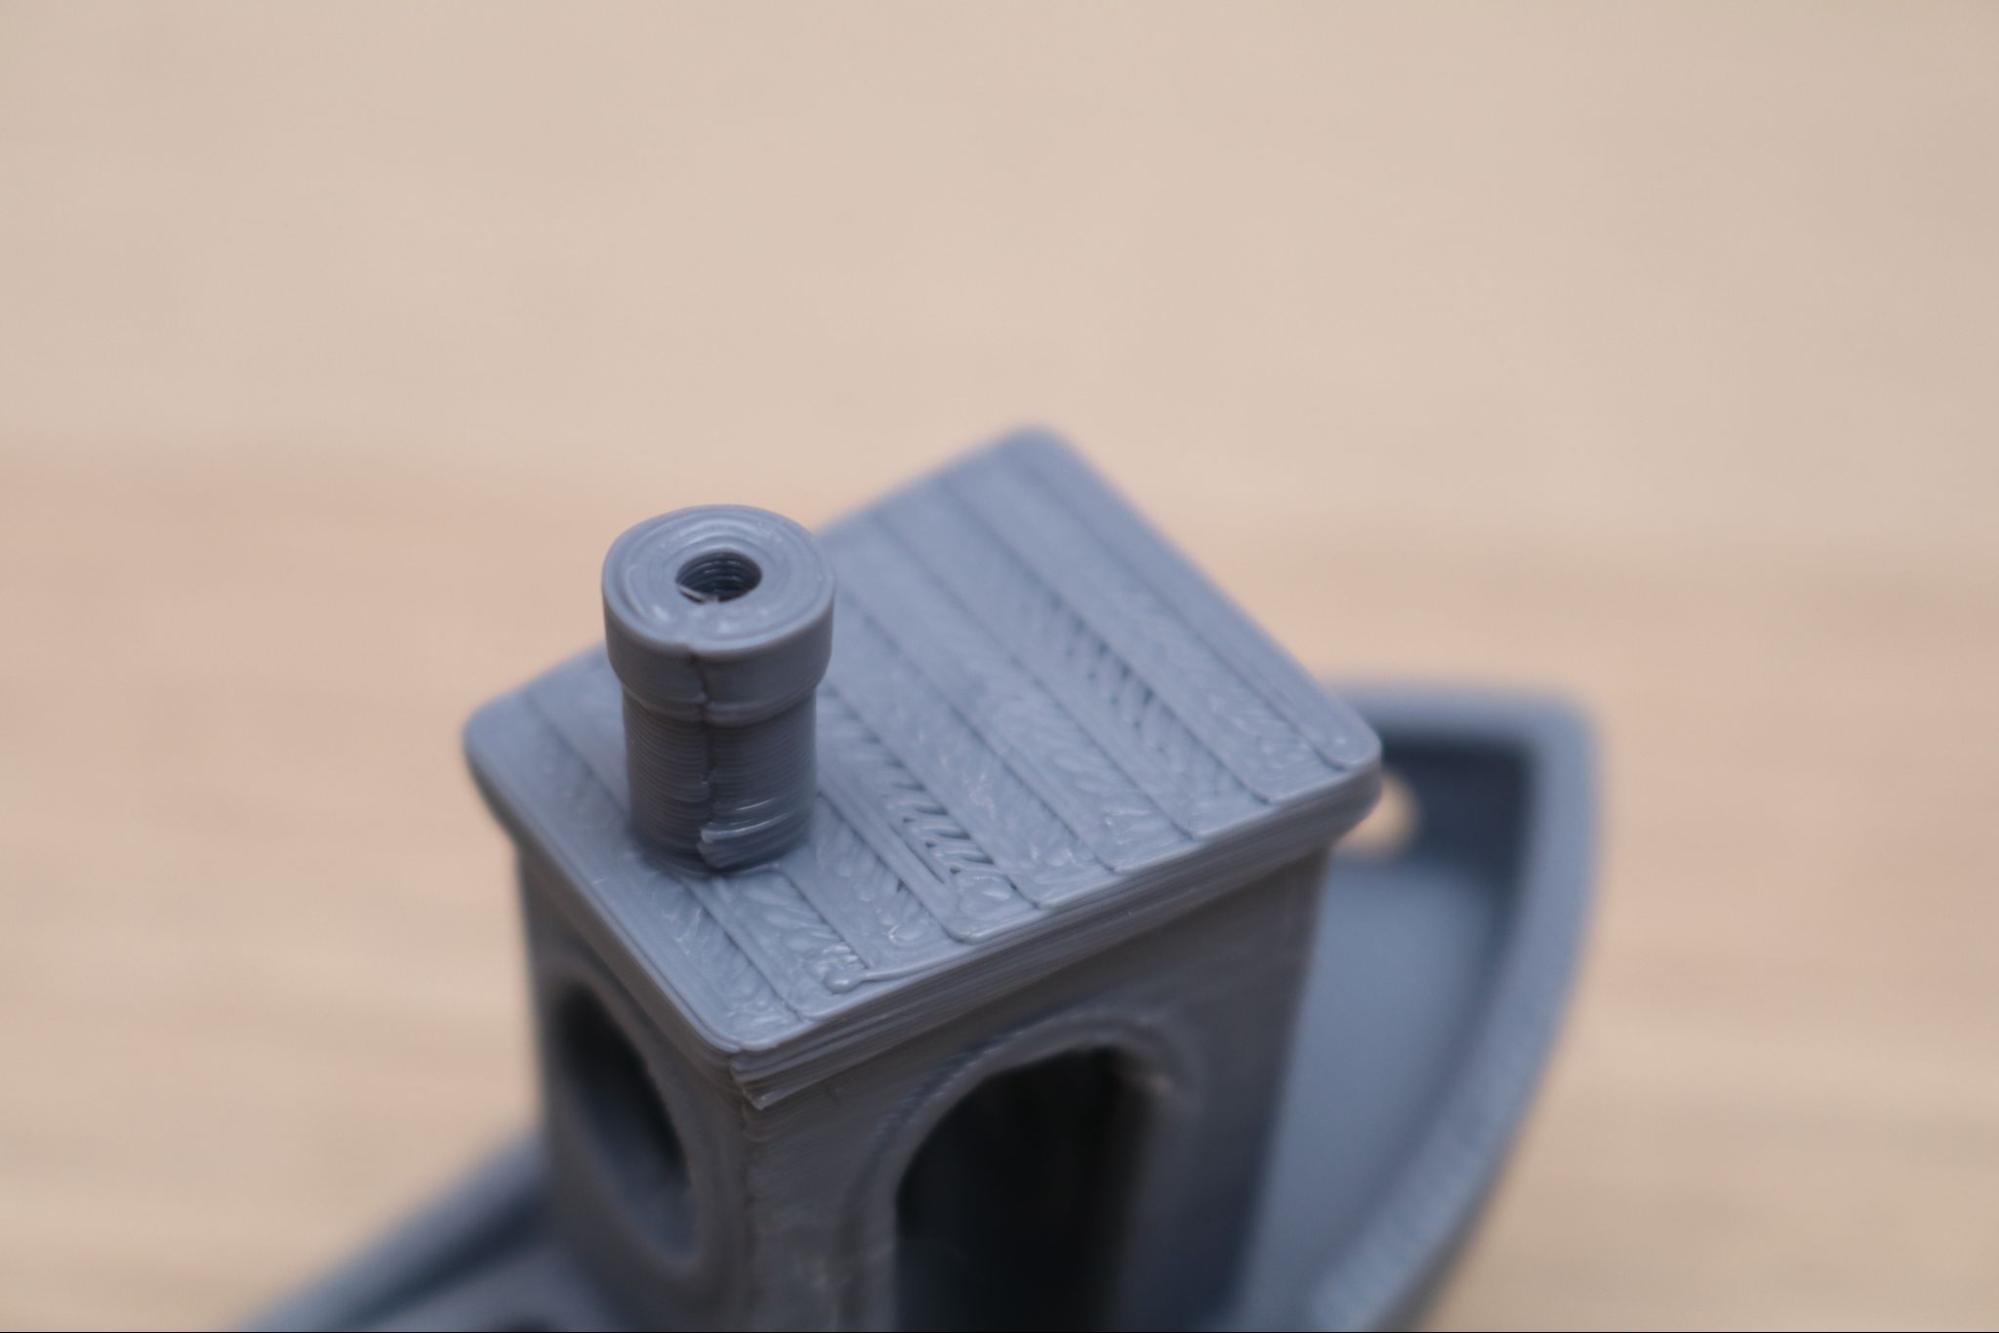
The printed model has only faint banding on the hull, and the various features (smokestack, steering wheel, etc.) are all clearly defined and free of major defects. This model is impressive on its own, and the sub-19 minute print time makes clear that the Neptune 4 Pro is ready to take on all competition in the high speed filament 3D printing market.
Bottom Line
The Elegoo Neptune 4 Pro is a formidable printer, and effectively crushes the competition in the sub-$300 price range with wildly fast print speeds and an impressive part cooling system. The lack of a fully-automated build platform leveling system stands out as a step backwards from the previous generation Elegoo Neptune 3 Pro, but the linear rods and increased print speeds will likely make it easy for most users to overlook.
Other direct drive printers like the Creality Ender 3 V3 SE are offered at a lower price point, but the lack of Klipper firmware and high-speed capabilities make the value proposition a bit more difficult. Moving in the other direction, prosumer printers like the Prusa MK4 and the Bambu Labs P1P offer a more stream-lined user experience but come in at a higher price point.
The Neptune 4 Pro is the smallest printer in the Neptune 4 family, which includes the larger Neptune 4 Plus and Neptune 4 Max. The Neptune 4 Pro is offered at $299 + shipping directly from the Elegoo site, or can be purchased for $359 with free shipping on Amazon. If you’re interested in getting started with Klipper and want to experiment with a high-speed printer, the Elegoo Neptune 4 Pro will likely be an easy selection.
MORE: Best 3D Printers
MORE: Best Budget 3D Printers
MORE: Best Resin 3D Printers

Andrew Sink first used a 3D printer in 2012, and has been enthusiastically involved in the 3D printing industry ever since. Having printed everything from a scan of his own brain to a peanut butter and jelly sandwich, he continues to dive ever more deeply into the endless applications of additive technology. He is always working on new experiments, designs, and reviews and sharing his results on Tom's Hardware, YouTube, and more.
-
F4zedMotion Pretty decent write-up. I have one and love the printer - I think it's important to point out that it uses a custom branch of klipper, which isn't kept up to date that often and you're not able to keep both the OS and klipper in sync the latest updates without a high risk of voiding your warranty and bricking the device.Reply
