


Tom's Hardware Verdict
It’s unusual to find a 3D printer that lives up to the hype, but the Bambu Lab X1-Carbon is one of the best prosumer desktop FFF 3D printers on the market.
Pros
- +
Rigid steel frame, aluminum shell, and CoreXY motion system
- +
LIDAR-assisted automatic calibration and inspection
- +
High-speed multicolor printing with AMS
- +
Enclosed build volume
Cons
- -
PEI Textured Plate not included
- -
Default purging process wastes material
- -
Nozzle replacement is a complicated process
Why you can trust Tom's Hardware Our expert reviewers spend hours testing and comparing products and services so you can choose the best for you. Find out more about how we test.
Originally launched as a Kickstarter campaign in May 2022, the Bambu Lab X1-Carbon with AMS has gone on to become an industry standard in the prosumer market. Capable of extruding high temperature materials, printing with multiple colors simultaneously, and offering advanced print controls, the X1-Carbon has a list of features that is rapidly changing the landscape of desktop 3D printers. LIDAR-assisted bed leveling, automatic flow calibration, and a webcam that can automatically generate a timelapse are among the features that come together to create a printer that somehow feels greater than the sum of its parts.
It’s worth noting that Bambu Lab has found itself at the center of a few controversies, including printers that started printing without prompting, accusations of malicious network traffic, and accusations of logging inappropriate information. Bambu Lab has responded to all of these issues directly, and continues to directly address customers via the Bambu Blog. Most recently, Bambu Lab has indicated it will allow users to choose to install third party firmware, a hot-button topic in the traditionally open source desktop 3D printer community. Despite all of this, Bambu continues to release new and innovative 3D printers at a pace that is currently setting the standard in the desktop and prosumer market.
The Bambu Lab X1-Carbon provides premium features, and as a result carries a premium price tag. Priced at $1,449, the X1-Carbon is more expensive than most of the best 3D printers, but you get what you pay for. The X1-Carbon with AMS has a reputation of being a printer that “just works”, and during testing it did exactly that. The Bambu Studio software is intuitive enough for beginners but also offers advanced functionality for power users interested in getting the most out of their machines. In addition, the companion Bambu Handy mobile app is perfect for remotely checking the webcam in the machine.
Specifications of Bambu Lab X1-Carbon
| Machine Footprint | 15.32 x 15.32 x 23.23 inches (389mm x 389mm x 590mm) |
| Build Volume | 10.08 x 10.08 x 10.08 inches (256mm x 256mm x 256mm) |
| Material | 1.75mm PLA, PETG, TPU, ABS, ASA, PVA, PET |
| Power Supply | 350W |
| Bed Leveling | LIDAR / Force Gauge Automatic Mesh Leveling |
| Nozzle | .4mm default - 0.6mm, 0.8mm, and 0.2mm optional |
| Max. Nozzle Temperature | 300°C / 572°F |
| Max. Bed Temperature | 120°C / 248°F |
| Printing Speed | 500mm/s max. |
| Build Platform | Magnetic Flexible Removable Platform, textured PEI optional |
| Connectivity | microSD, Wi-Fi |
| Interface | 5-inch Color Touchscreen LCD |
Included in the box: Bambu Lab X1-Carbon


The Bambu Lab X1-Carbon is packed tightly into a shipping box, with foam brackets outside and inside the machine to reduce the risk of damage during transit. In addition to the printer and all required parts for printing, the X1-Carbon also includes a glue stick, lubrication for the motion system, and three 250 gram spools of material (PLA, PLA-CF, and Support for PLA). Notably absent was a microSD card, required for print jobs sent remotely.
The AMS is shipped inside the X1-Carbon, screwed down with a temporary bracket that prevents it from rattling or moving during shipping. Getting the AMS out of the printer requires removing a few bolts, and doesn’t take much time.
Assembling the Bambu Lab X1-Carbon


Assembling the X1-Carbon (including the AMS) takes about 30 minutes from start to finish. The included Quick Start instructions include step-by-step instructions for each subassembly, and there are multiple QR codes which link to instructional videos showing detailed walkthroughs. Non-technical or first time users shouldn’t run into any major issues, and experienced users will have the X1-Carbon up and running in no time.
Leveling the Bambu Lab X1-Carbon


The X1-Carbon uses a combination of LIDAR and analog force sensor to measure the calibration of the printer and set the Z-offset when printing. The leveling process is automatic, and can be completed before each print to get a consistent first layer.
The first layer inspection is an additional feature which will tram the LIDAR sensor over the first printed layer to check for any areas that didn’t adhere during printing. This additional check adds a few minutes to the total print time, but I found that it worked well during testing. It correctly detected a print that had I deliberately partially lifted from the platform and paused the print so I could inspect the layer instead of continuing.
Loading Filament in the Bambu Lab X1-Carbon

The X1-Carbon has a filament spool bracket on the rear of the printer, which can hold a single spool of filament that feeds directly into the printer. Using the onboard display, filament can be loaded from either the spool holder or the top-mounted AMS. The X1-Carbon will prompt you to indicate the type of material and color when loading, which can be synced to the Bambu Studio slicer app. When running a multicolor print, the LCD will also prompt users to map the print color to the colors currently loaded in the AMS, a helpful feature for visualization.
Design of the Bambu Lab X1-Carbon

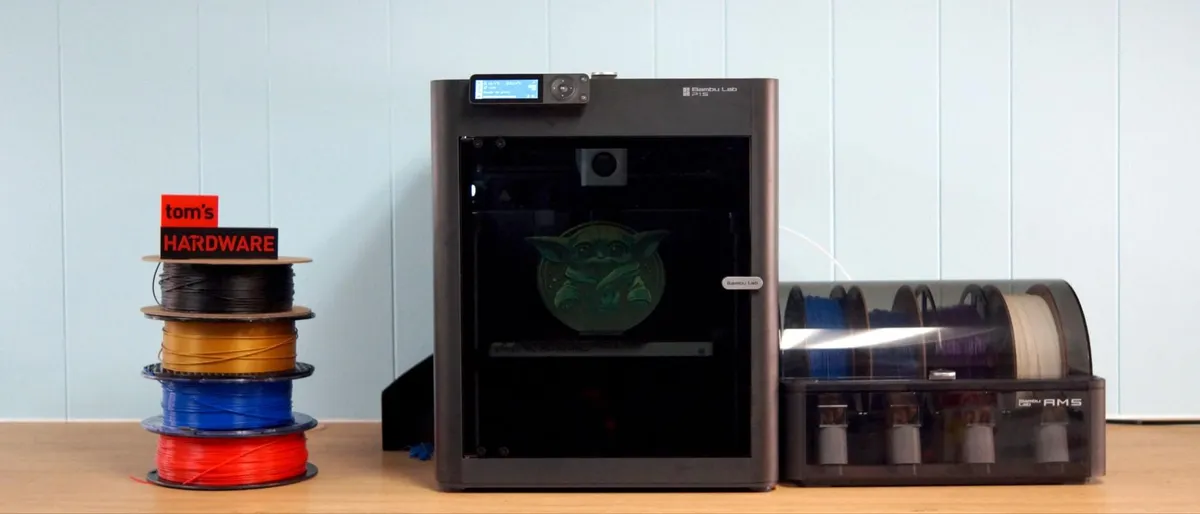
The shell of the Bambu Lab X1-Carbon is made from a combination of aluminum and glass, making it instantly recognizable and distinct from the typical appearance of i3 derivative machines like the Prusa MK4, Elegoo Neptune 4 Pro, and other open-format printers. The top-mounted LCD, glass door, and lack of visible external wires give this printer an appearance that would be right at home next to an Apple iMac.

The X1-Carbon uses a CoreXY motion system with carbon fiber rails on the X-axis that allow for lightning fast print speeds without compromising on quality during rapid movements. The Z-axis uses a single motor connected to three lead screws that move the build platform. The XY gantry is stationary in Z, so the entire platform drops during printing instead of raising the extruder incrementally after each layer.

Attached to the front of the hot end is a part cooling fan that splits the exhaust into two vents pointed directly underneath the nozzle. The hotend on the X1-Carbon is a proprietary one, and replacing the nozzle also involves replacing the hotend (currently available from Bambu Lab for $14.99). It's a time-consuming and complicated process which requires spreading thermal paste to attach the thermistor and screwing in a fan. The fan and thermistor don't come with the hotend so your best bet might be to spend $35 on a complete assembly with those parts attached.This hotend is rated up to 300°C with a max volumetric flow of 32mm³/s when using ABS.

In addition to the fans built into the cooling module, the X1-Carbon also features an additional cooling fan on the left side of the chamber. This fan is attached to a tapered exhaust that directs the air into the shape of a curtain which blows directly across the area where filament is extruded.
This additional airflow allows material to cool more rapidly during high speed printing, similar to the fan module on the Elegoo Neptune 4 Pro. This fan can be manually controlled along with the part cooling fan and chamber exhaust fan via the Bambu Studio app or from the printer directly.


The LIDAR system on the X1-Carbon is an interesting one, as it provides feedback that is useful both for Z offset calibration as well as material flow calibration. With an advertised resolution of 7μm, the toolhead-mounted LIDAR sensor scans the initial print lines as well as the first printed layer to check for defects, making it a useful tool for automated workflows. I found this to be a useful tool during my testing, and the flow calibration (in conjunction with the automated build platform leveling) resulted in parts that had clean and consistent bottom layers.

In practice, I was impressed with the LIDAR sensor and can clearly see the impact it has not only on the calibration but also on the ability to add another closed-loop feedback system to the printer. Similar to the Prusa SL1S (a feature-rich resin 3D printer), the X1-Carbon shows the value of feedback in a 3D printer, as the printer is able to detect specific problems before they result in a scrapped build.
Bambu Lab Automatic Material System (AMS)

The Bambu Lab X1-Carbon isn’t the first multicolor/multi-material extrusion-based desktop 3D printer on the market, but it brings a new level of plug-and-play simplicity for beginners and experienced users alike. The Bambu Lab Automated Material System (AMS for short) holds four spools of filament, and up to four units can be daisy-chained for a total of 16 possible colors using the optional AMS hub. The AMS is a freestanding unit, and can be positioned either above or to the side of the printer.

The AMS is a sleek piece of hardware, with only two visible connections (one PTFE, one wiring terminal) on the rear of the unit. The semi-opaque top cover lifts up to provide access to the spools of filament, making filament changes a quick operation. Sensor-rich and capable of providing real-time feedback, the AMS can detect filament tangles, switch materials upon runout, and use an RFID-based system to detect what material type and color are loaded (Bambu Lab chipped material only).

The AMS allows the X1-Carbon to print multiple materials while only using one nozzle; an approach that has both advantages as well as disadvantages. Switching between materials is possible through a purging process which involves cutting, retracting, and replacing the filament with a second material. A priming tower is also created, which allows the material to equalize in pressure before printing to prevent blobs. This allows the X1-Carbon to print multiple colors in a single print using only one nozzle.

An example of this style of multicolor printing is the Frog model by Harald Andersson. This model has been sectioned into multiple pieces by the original designer, so printing it in multiple colors is as easy as assigning materials to each individual piece. Using the four colors I loaded in initially (Bambu matte PLA in purple, Bambu matte PLA in green, Prusament Jet Black PLA, and JAYO marble PLA), I assigned colors to each separate body and then sent the build to the printer via Wi-Fi.


There are two main factors to consider when evaluating the print: the quality of the print, and the quality of the color separation. Printed using the 0.2mm Standard X1C profile, the layers are consistent in height, there are no skipped or missed layers, and the overall quality of the model is good. The different colors are evenly separated, and there is no bleed from the dark black material into the green material on the head.

Bambu Studio estimated a total material usage of 115.45 grams: 28.46 for the model, and 86.99 for the purged + tower material. I weighed the frog at 28 grams, and the total purged material at 96 grams. This is a considerable amount of waste material for a single print, but it’s worth noting that it is a non-linear relationship. The total waste material is related to the number of color changes, not the number of models. Adding an additional model (or several) doesn’t substantially change the amount of purged material, only the amount of model material.

Bambu Studio is capable of creating multiple builds in a single project, which is a helpful way to compare material usage or total time for different print configurations. I printed the Drippy Drum by davemoneysign in two different ways: one with both parts on the same platform and also printing the pieces individually.


Printed separately, the purple component printed in one hour and six minutes, using 29 grams of material. The green component printed in two hours and 42 minutes, using 106 grams of material. The combined print took just over 12 hours and produced a substantial amount of purged material, but did complete without any operator intervention.
If filament use isn’t a primary consideration, the ability to run multiple colored prints in a single build is a compelling use case. The amount of purged material can be reduced in a number of ways including reducing the amount of purged filament, purging into infill, etc.
Build Platform on Bambu Lab X1-Carbon

The X1-Carbon ships with the Cool Plate by default, which is a double-sided combination of the Engineering Plate (used for PETG, ABS, TPU, PA, and PC) and the Cool Plate sheet (PLA). Bambu Lab offers individual replacements (and includes two extra with the printer), as the sticker is a consumable.
While the sheet is noted by Bambu Lab as being a consumable, there are no guidelines on the lifespan or number of prints which can be expected from each sheet. Interestingly enough, the FAQ states that the Cool Plate “Cannot be used without glue stick”, while the writing on the plate states “GLUE STICK CAN HELP”.

In addition to assistance with adhesion, the glue stick is used to create a temporary barrier between the material and the plate, as the part can stick too well to the sticker and tear it during removal. Bambu Lab also offers a textured PEI sheet as an optional accessory, similar to the one that ships on the A1 and the A1 Mini. I didn’t use the PEI sheet in this review, but those tend to be my preference over the flat surface on the Cool Plate as they give printed parts a more even appearance.
Given the relatively small difference in price (Cool Plate is $23.99, Textured PEI is $37.99), it’s surprising to see the printer ship without this plate as an option. If you look at our list of the best 3D printers, you’ll notice many of the top-ranked machines use textured PEI as a build surface. This is due to the fact that texture PEI is easy to remove parts, easy to clean, and durable. Not including a PEI sheet with the X1-Carbon feels like an oversight that would add significant value without incurring significant additional costs.
Printing Demo Models on the Bambu Lab X1-Carbon

The Bambu Lab X1-Carbon includes several test prints that are pre-sliced and loaded into the internal memory of the printer. These are a combination of fun and functional, with several tools available (screw thread gauge, cool plate sheet applicator, etc.) and some just for fun (Benchy, soldier with a shield for holding SD cards, etc.).

The first model I printed was the phone holder model, which only requires one color and prints in 1 hour and 38 minutes. I was curious as to how this model would articulate, and was pleasantly surprised to find that it had several satisfying mechanical snap-fits. This is a well-designed model, and the test print results in three different sizes.


The second demo model printed in 3 hours and 19 minutes using JAYO marble PLA. This model uses tree support structures (also sometimes called organic support structures), and I was impressed with how easily they could be removed. I was a little less amused at the lack of an included microSD card with the X1-Carbon, a surprising oversight which means you’ll need to provide your own to send cloud or Wi-Fi prints.

Rather than shipping with a slicer installed on an SD card or a USB drive, the Bambu Lab X1-Carbon instead includes instructions for users to download the latest version of Bambu Studio. Based on PrusaSlicer, SuperSlicer, and including contributions from the 3D printing community, Bambu Studio (currently on v1.8.4.51) is a powerful slicer software that offers printer management, a live video feed, color painting, and many other features.

The Device tab on Bambu Studio offers a live view from the 1080p integrated webcam, granular control over the various systems (fans, heaters, motion), and a readout from the AMS showing what materials are loaded into the system.
During printing, the webcam can be used as a live video feed to show print progress, and the estimated time until completion is displayed at the bottom of the screen. A timelapse can also be created, which captures a single frame per layer and stitches them together into a video showing the part being printed from an empty build plate.

The Color Painting mode in Bambu Studio allows users to select areas with a variety of tools (height, fill, sphere, etc.) that are used to indicate which material will be used in that area. For a simple test, I imported my Voyager Combadge model, selected the top face, and set up a two color print (silver and gold). I used the fill tool, and it was a one-click operation to select the upward-facing surface of the model.


Bambu Studio automatically creates a purge tower by default, as well as calculates the amount of purged material between each color and displays this information in the preview tab. This model printed in 33 minutes, and the colors printed with no issues. The model looks good overall, and I was impressed how sharp the transition was between the silver and gold colors.


Bambu Studio estimated a total of 6.73 grams of model material usage and a total of 3.75 grams of purged + tower material usage. My scale rounds to the nearest gram, but I found the total of 6 grams for the model and 5 grams for the purge + tower to be reasonably close to the estimated material usage. Overall, the slicer provides an intuitive and fast way to add color to models via the AMS.
Printing on the Bambu Lab X1-Carbon


The enclosed chamber of the X1-Carbon is ideal for printing high-temperature engineering materials like ABS, Polycarbonate, and others. I’m currently getting ready to start an LDO Voron 0.2-S1 build, and I wanted to use the X1-Carbon to print the brackets and other printable parts using ASA. I downloaded a full plate of printable parts, sliced them with Bambu Studio using default 0.2mm settings, and ran the print with Prusament Prusa Orange ASA.


This build is a challenging one for several reasons. Printing multiple parts simultaneously means that a single failure can potentially compromise an entire build, and high temperature materials are typically more sensitive to adhesion issues. I used the Engineering Plate side of the platform and a thin layer of the included glue stick to aid with adhesion, and the build finished successfully in two hours and 16 minutes.
The parts all printed flawlessly, and I was impressed with not only the quality of the parts but also the ease at which they were printed. Notably, the X1-Carbon did not activate the chamber fan during printing, so there were no noticeable fumes from the ASA. For users who are sensitive to fumes or odor during printing, this is a feature worth noting.

The Not a Singing Frog model by SparkyFace5 is a great example of how the color painting tool of Bambu Studio can be used to quickly create a multicolor model. This model is imported as a single shell .stl model, so individual bodies can’t be selected by shell. Instead, using the provided paint tools (primarily fill and sphere), the model was painted in about 5 minutes to use a total of four colors.

Printed with Prusament Jet Black PLA, Prusament Pineapple Yellow PLA, Bambu matte PLA in green, and Sunlu matte white PLA, this model printed in 17 hours and 12 minutes. Bambu Studio estimated a total of 75.8 grams of model material, and 310.49 grams of purged + tower material. Weighed on a scale, the model was 73 grams and the purged material weighed 252 grams, a little ways off from the initial estimate from the slicer.


Overall, the model looks good, and the color separation between the lightest white and darkest black material is clean and crisp. It’s an impressive print, and the quality of the model is definitely what I would expect from a prosumer machine configuration that costs nearly $1,500. The .2mm layers are consistent, and the challenging overhangs of the area underneath the hat (printed without support material) did not delaminate or droop.

Bambu Studio can also import 3MF files, which are capable of storing more than just geometry data. The adorably recursive Bambu Lab Build Plate Coaster by 3D Chihuahua is available to download in multiple formats, including a 3MF that has multiple builds already set up with colors and materials assigned to each body. I only made one adjustment to the print settings (changing the top solid pattern to a Hilbert Curve to give it a more textured appearance), and ran the file otherwise as-is.


Since I’m printing on the Cool Plate (smooth, no texture), I flipped the model so the text was facing upwards. The Hilbert Curve surface gave it a rough and gritty texture instead of a smooth one. It works well as a coaster, and it’s a fun example of the multicolor abilities of the X1-Carbon.
Printing the High Speed Benchy on Bambu Lab X1-Carbon

To help understand the performance of this printer relative to other similar machines, Tom’s Hardware has created a benchmark test to determine print speed, quality, and performance relative to similar machines. Using a set of specific print parameters and a specific material (Inland PLA in Grey), printers like the Bambu Lab X1-Carbon can be tested and compared with similar machines.


On the hierarchy of Speed Benchy prints, the X1-Carbon is unsurprisingly towards the top with a print time of 15 minutes and 29 seconds. Using the same settings as the other printers, the Benchy that was printed on the X1-Carbon shows a few speed-related defects. The hull has a clear band where the transition to solid layers occurs, and there is some banding around the cabin. Overall, it’s still an impressive print considering the sub-16 minute print time.
Comparison to the Bambu Lab P1S
For users looking for a less expensive machine with similar functionality, the Bambu Lab P1S with AMS (which won an Editor’s Choice award when reviewed) offers similar functionality but lacks a few of the more advanced features of the X1-Carbon. A key difference is the lack of a LIDAR scanner, which is useful not only for bed leveling but also flow calibration when testing new materials.
Users will additionally not be able to run the LIDAR-enabled first layer inspection, another key feature of the X1-Carbon. There are other differences (including the questionable choice of a LED interface with a control pad), but the LIDAR is likely the one users will notice first.
The Bambu Lab P1S with AMS is currently listed at $949, making it exactly $500 cheaper than the $1,449 X1-Carbon. Depending on your intended application, this difference in price may be something to consider when selecting a printer.
Bottom Line

The Bambu Lab team has found itself repeatedly at the center of controversy, most notably with an incendiary blog post titled “Let the arms race begin”, which laid out an ambitious roadmap towards market domination. In the nine months since that post, Bambu Lab has launched multiple new machines, created a file repository called MakerWorld which is rapidly gaining new designers and users, and has continued to make surprisingly direct blog posts.
The X1-Carbon is not an open-source 3D printer and uses certain components that do not have source material available for reference. For customers who are interested in the philosophical side of 3D printing, it can be aggravating to see a company “taking” from open source ideas but not sharing developments back with the community. However, the popularity of the X1-Carbon continues to soar and clone machines like the Creality K1 continue to appear, reminiscent of the rise of the original Creality Ender 3 Pro.
Currently listed at a package price of $1,449 for the Bambu Lab X1-Carbon and AMS, it’s hard to find as capable a printer in this price range that offers such a clearly compelling value. Not just a high temperature material 3D printer, the X1-Carbon offers something for everyone with easy color painting in the slicer, fast and simple setup, and advanced sensor-rich functionality.
If you’re interested in creating multicolor 3D prints at a lower price point, the $559 Bambu Lab A1 and $459 Bambu Lab A1 Mini are both equipped with the AMS lite, which can print up to 4 colors simultaneously. The Bambu Lab P1S, at $949 with the AMS, is also a better bargain, but neither of these other Bambu printers has the LIDAR. For even cheaper options, see our list of Best Budget 3D Printers for recommendations.
Printers like the $599 Flashforge Adventurer 5M Pro also offers fast print speed in an enclosed chamber, but lack the polished user experience of the X1-Carbon. Those looking for an open-frame printer with premium features will prefer the Prusa MK4, which goes for $799 and has a $299 MMU for handling multiple filament spools at once. However, if you can afford its price, it's hard to argue against the Bambu Lab X1 Carbon.
MORE: Best 3D Printers
MORE: Best Budget 3D Printers
MORE: Best Resin 3D Printers
