Razer's Second-Generation Blade Notebook Review: Focusing On The Z
Razer recently sent us its second-gen Blade, complete with a Core i7-3632QM quad-core CPU and GeForce GTX 660M. Eight gigabytes of memory, a 500 GB hard drive, and an SSD cache round out this 17" gaming notebook. Would you believe it's less than 1" thick?
Internal Components
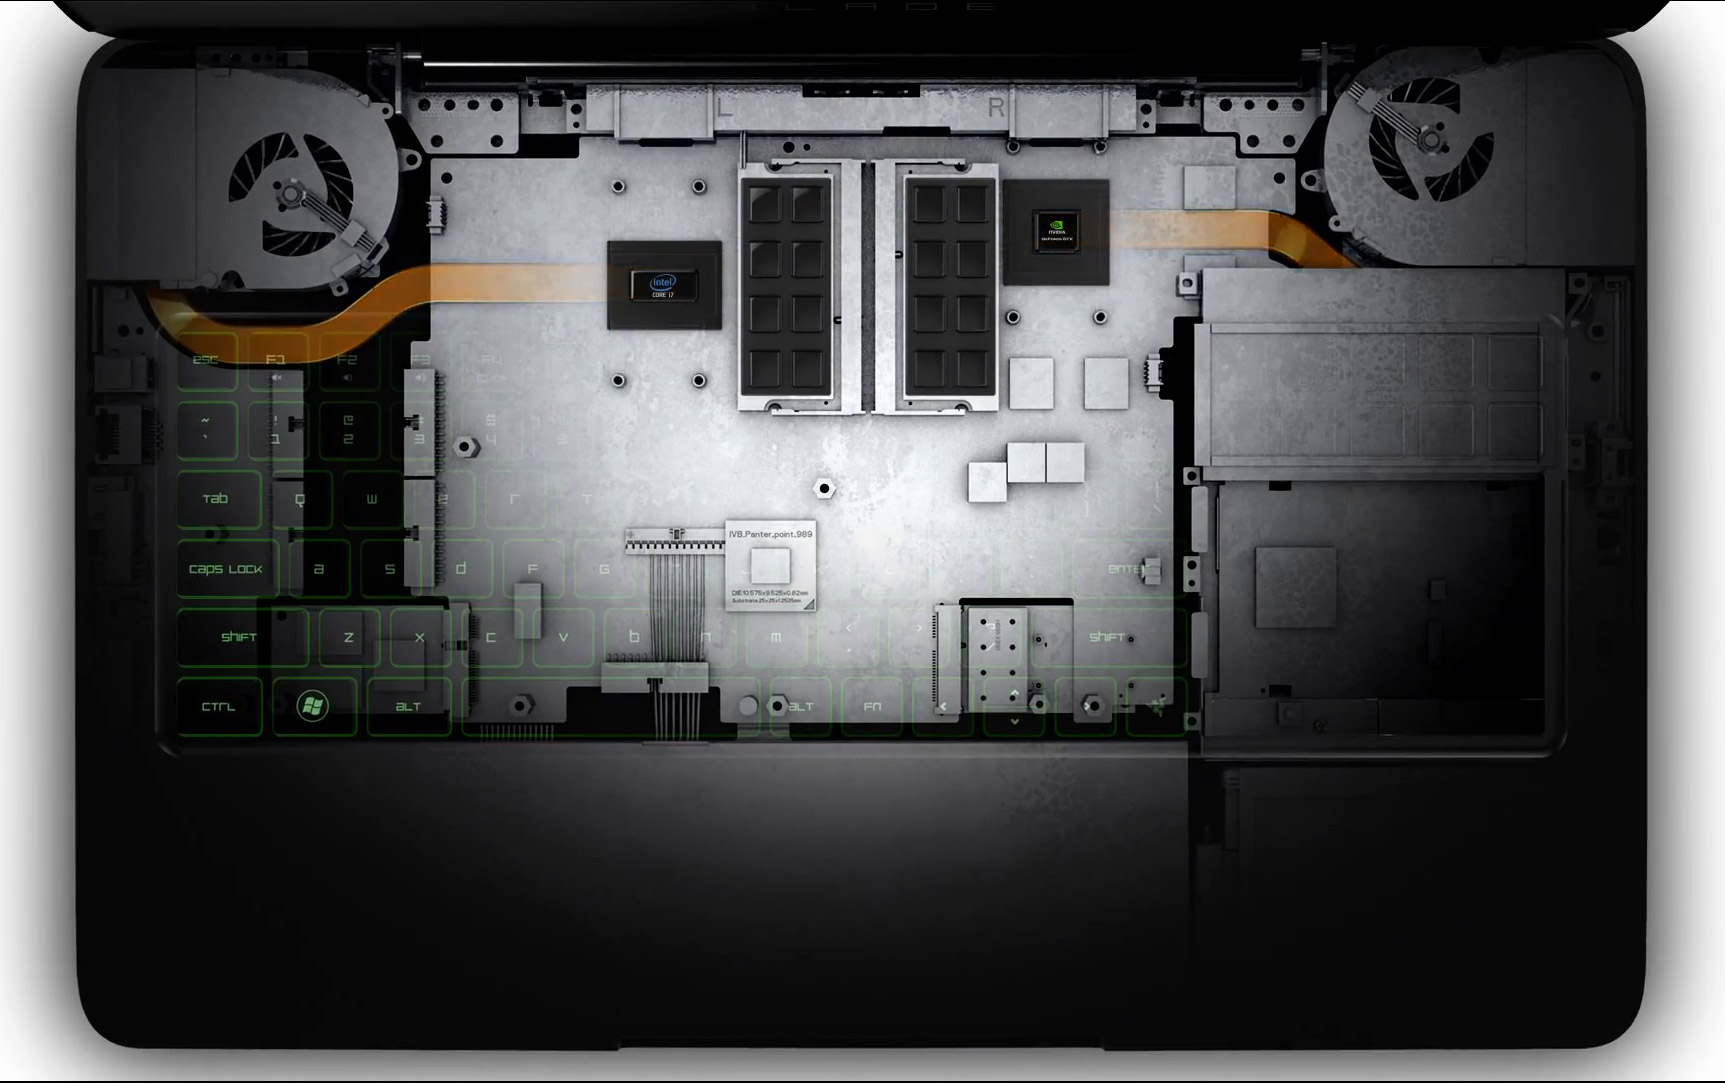
Unfortunately, removing the Blade’s bottom panel voids a customer's warranty, and Razer requested that we not remove it either. This does not make us happy. Although the company prevented us from taking pictures of the notebook’s internals, Razer directed us to the promotional video that contains brief renderings of the cooling system. Still, we wish that we were able to capture the CPU and GPU thermal solutions in action, because they do a great job of expelling heat from the machine.
Razer positions the Blade R2 as a closed system with no user-serviceable parts. The company only offers one configuration, and your only choice is between Windows 7 or 8. You can also pick a one- or two-year warranty (both of which are voided if you open the system). While Razer isn’t the only company to discourage user upgrades, this may be something to consider if you’re used to swapping drives and upgrading RAM. It could also present an issue if you ever need to clean dust from the Blade’s vents.
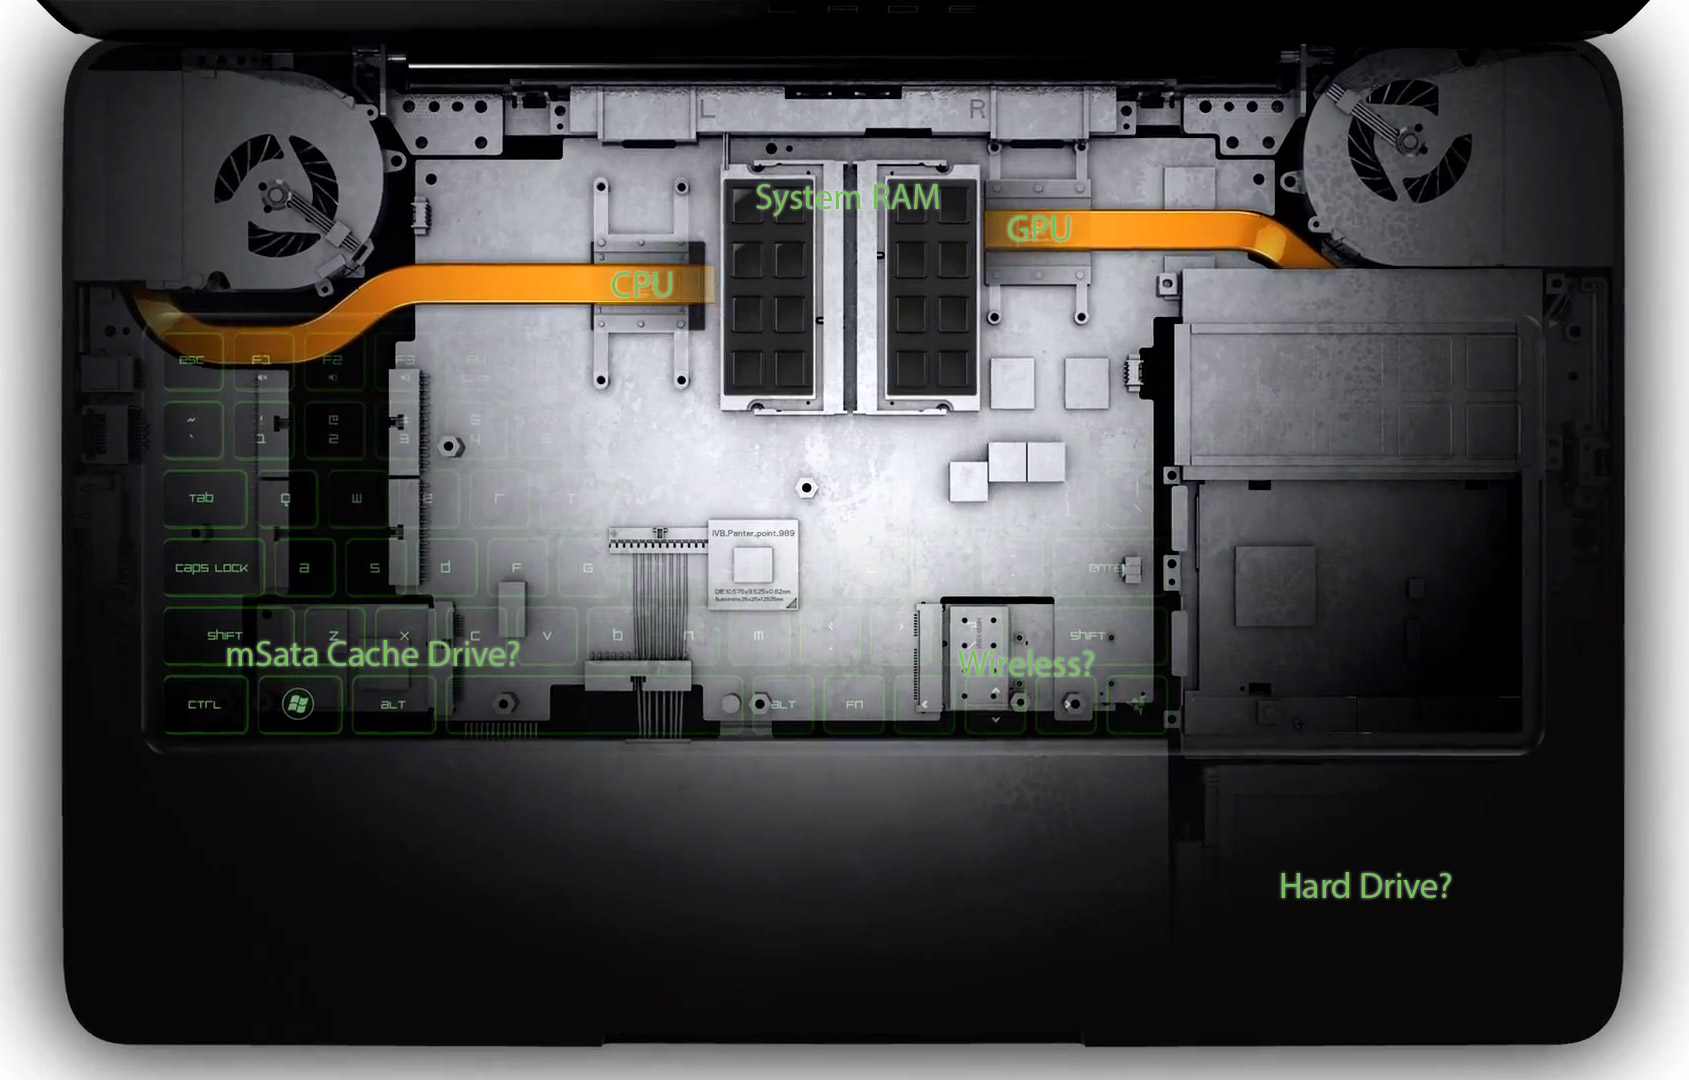
The screenshot below is from Razer’s promotional video. We tried to label what limited components we were able to see in this rendering.
It also appears that the hard drive is located in the bottom-right corner, directly beneath the machine's palm rest. Putting my ear up to the chassis seemed to confirm this.
We also think that there's a PCIe slot for Intel's Centrino Advanced-N 6235N Wi-Fi/Bluetooth card directly under the arrow keys on the keyboard. Meanwhile, it looks like Lite-On's LMT-64M3M mSATA SSD (used for caching) is under the Windows key.
Although we didn't label it, we're guessing the battery is located to the left of the hard drive, below the keyboard. The battery is not obvious in any other part of the system, and keeping it away from heat would help minimize wear over time. Since we were asked not to take the machine apart, a lot of these are just educated guesses, though.
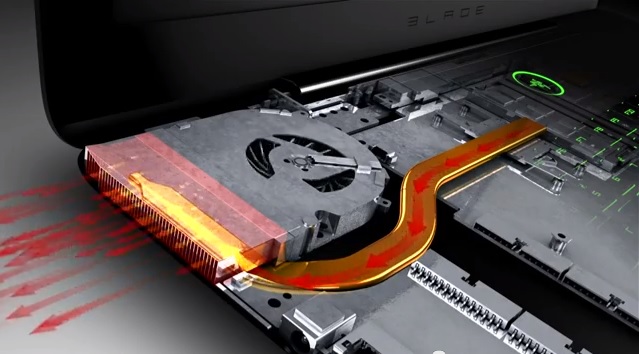
In this second capture from Razer's video, we see the CPU cooling in more detail. It looks like the heat sink may be mounted directly to the top and/or bottom of the chassis to also transfer heat into them as well as the heat pipes going to the fans. The bottom of the machine does get very warm, which seems to support this. The 75-minute heat run you'll see shortly supports this as well, since the hard drive slowly increased in temperature as the entire chassis warmed. Again, we cannot be 100% sure since we can’t remove the panel.
Get Tom's Hardware's best news and in-depth reviews, straight to your inbox.
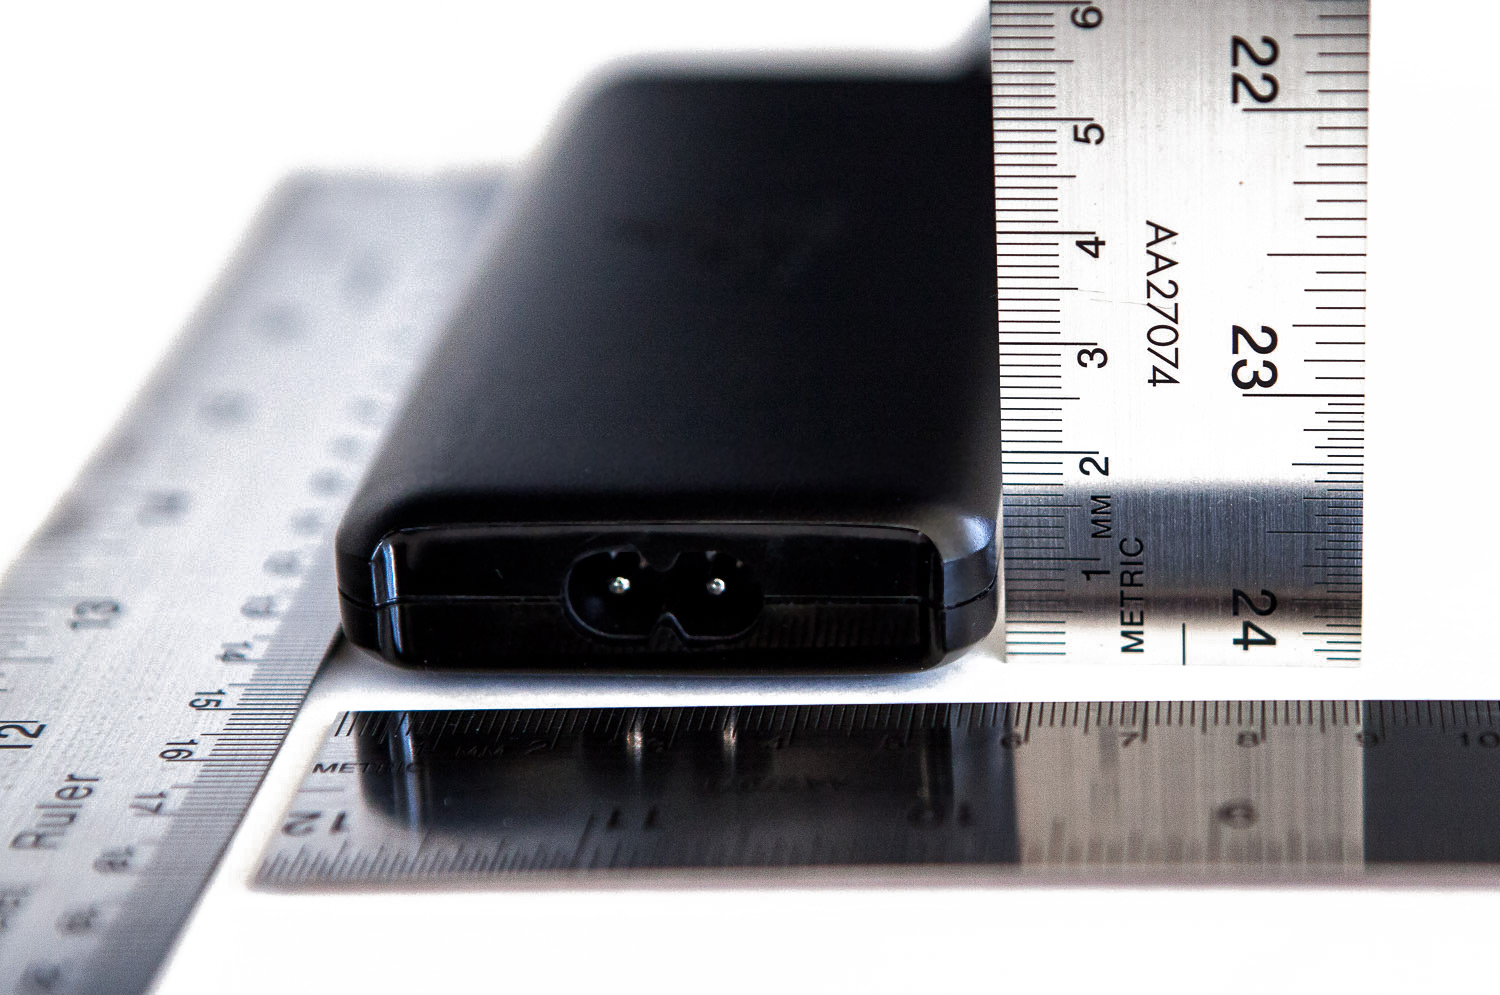
One component that did make a serious impression was the Blade R2’s power adapter.
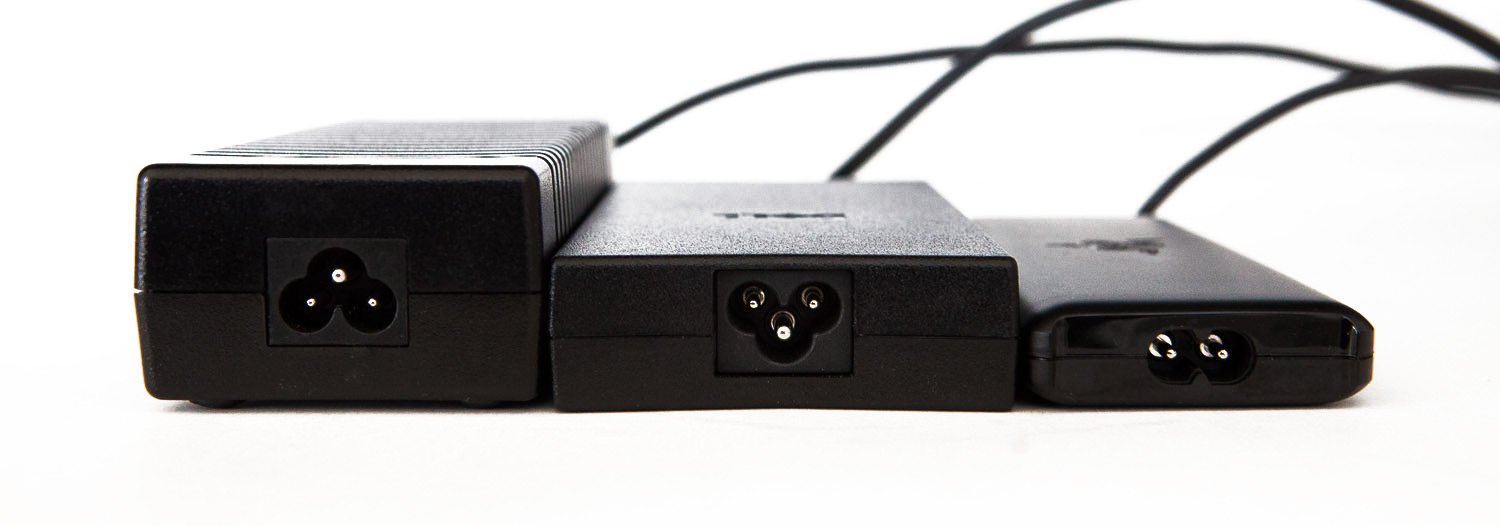
The included 120 watt power adapter is custom-built for the Blade R2. Weighing less than a pound, it’s much smaller than similar units, and can actually deliver more than its rated output. In the images below, the Blade’s adapter is compared to two other adapters that having similar power ratings; Razer's is on the right.
Not everything is perfect, though; we do have a couple of issues to point out with the Blade’s design.
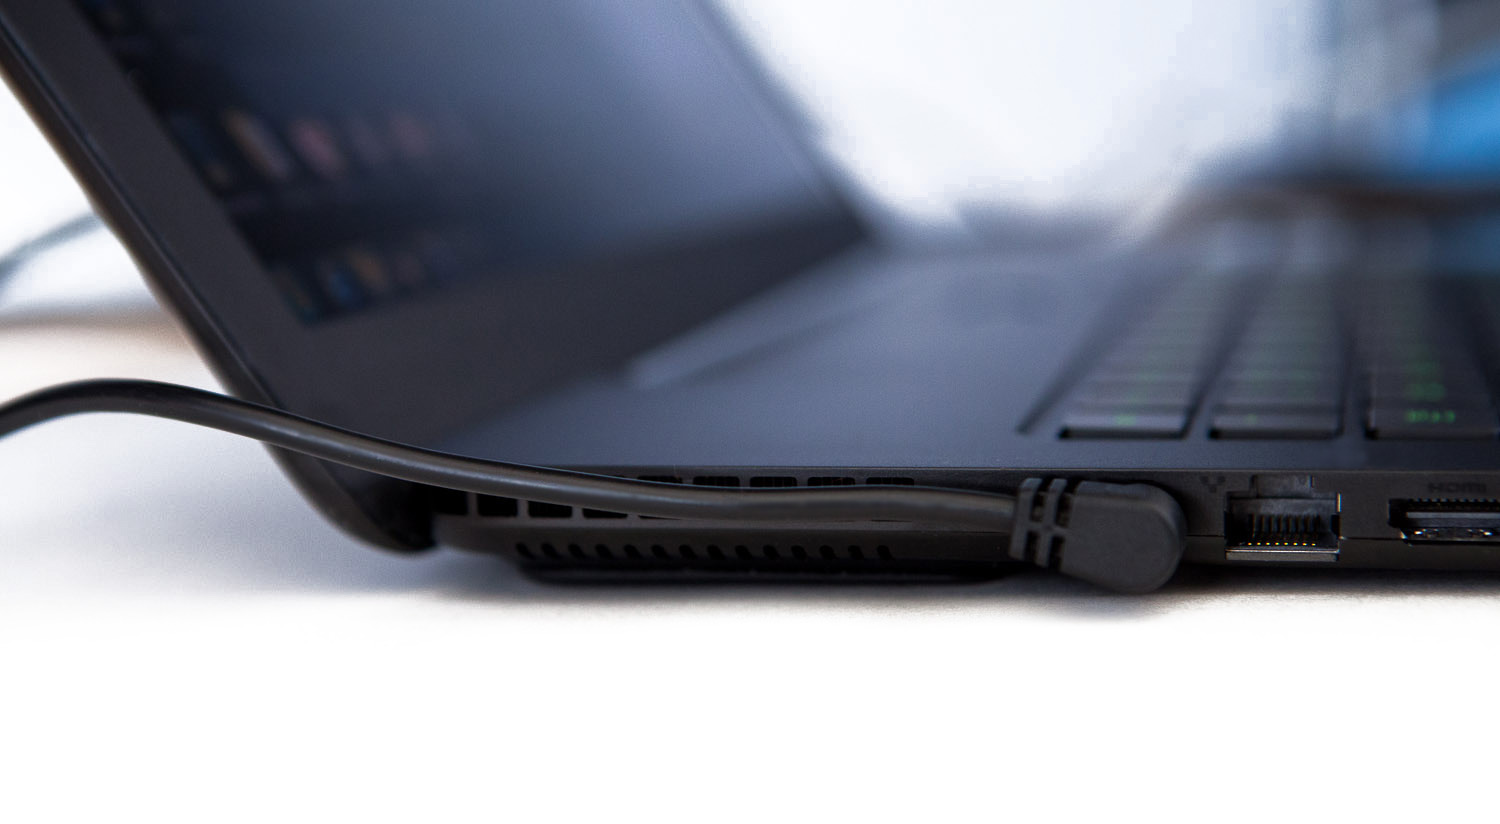
First, with all I/O attached on one side, you can see it gets crowded in a hurry.
Second, the right-angle power plug means that the power cord runs straight back, hugging the side of the machine. This means that the cord is usually right in front of the CPU exhaust vent, which can’t be good for the vent or the cord.
Current page: Internal Components
Prev Page Design And Features Next Page SwitchBlade UI And Keyboard-
ShadyHamster Having all the I/O on the left isn't such a bad idea, keeps the right side clear so cables don't get in the way if you use a mouse close to your laptop like i do.Reply -
mayankleoboy1 Wow, this is a very thorough review! Great work!Reply
This notebook has looked into almost every possible detail. I was particularly impressed that in the heat run, the "WASD" key area was cooler than the rest. This bespeaks extreme attention to details. -
Chairman Ray This is an amazing system. Great job by Razer! I won't be buying it due to the steep price tag, but definitely going to recommend it to those who are willing to pay for the best.Reply -
xpeh While the price is steep, this laptop is definitely one of the best looking gaming laptops I've ever seen.Reply -
g-unit1111 I very badly need to get a new laptop but this one is way too rich for my blood. I would definitely consider this if it were about $1K less.Reply -
Pyree g-unit1111I very badly need to get a new laptop but this one is way too rich for my blood. I would definitely consider this if it were about $1K less.Lenovo Y580/Y500 GT650m SLIReply -
slomo4sho xpehWhile the price is steep, this laptop is definitely one of the best looking gaming laptops I've ever seen.IMO having a $1000 gaming desktop and spending $500-600 on a laptop when Haswell comes out is probably much more economical for the occasional gaming on a laptop paired with a sold desktop to enjoy the higher quality graphics. Even at $2500, this laptop can't even keep up with the $500 budget gaming build from last month.Reply -
de5_Roy nice review. :)Reply
my real amusement came from the apu-powered laptop's performance, though. it bottlenecked the discreet gpu so badly.... :D -
corvak Gaming laptops have never been priced in a range that makes them worth buying for me. They don't really have enough battery life to really take advantage of portability, and the price/performance is in a whole other league if you compare it to any desktop build.Reply
Even buying a cheap laptop for travel use alongside a gaming desktop is likely to come in cheaper than many of these.
-
Goose_Nipples ARMY'S KA-Bar?!?!?!?! Hooooooold up my friend. Devil dog here who's jimmies have most assuredly been rustled.Reply
