Processors On The Rocks VOL. 2
The Mounting Process, Continued
Asetek suggests that you cover the whole socket with heat conduction compound (included in the Vapochill shipment in large quantities) to reduce the risk of condensation. It's a messy job and we decided against it, because it messes up the motherboard and the processor. However, we only ran Vapochill for a few weeks and not for several months. Therefore I suggest that if you are certain that you will stick to the CPU and the motherboard, you follow Asetek's advice and smear the thermal compound all over the poor socket. We cannot supply any pictures of that, since I just couldn't do that to any of my test motherboards. We did not run into any problems due to condensation, but we never ran the systems for more than a few days.
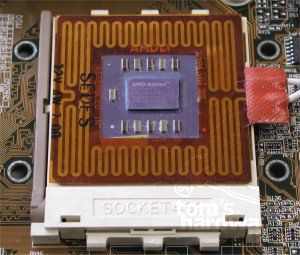
Now you place the CPU into the socket. You will need to push down the CPU while closing the lever, because the insulation pad is higher than the socket and pushes against the processor. Either you have attached the heating element to the processor already before its insertion, or you need to stick the little heating foil onto the processor now. It is probably wiser to do it after the insertion of the CPU, because otherwise you may fix the heating element to the CPU with the cable going into the wrong direction.
The cable should obviously not go across the socket lever, nor should it run towards the mounting notches of the socket where the clamps of the evaporator kit will be fixed. Therefore there's really only one direction in which the cable should go, which is shown in the picure.
So far everything was very easy, but now there comes the tough and dangerous part. The mounting of the evaporator kit seems very easy, but it bears the high risk that you might damage the die of your processor, especially if it should be an Athlon or Duron CPU.
Get Tom's Hardware's best news and in-depth reviews, straight to your inbox.
Current page: The Mounting Process, Continued
Prev Page Extra Fan Next Page The Mounting Process, Continued