Microsoft BPOS: Managing The Cloud
SharePoint Highlights
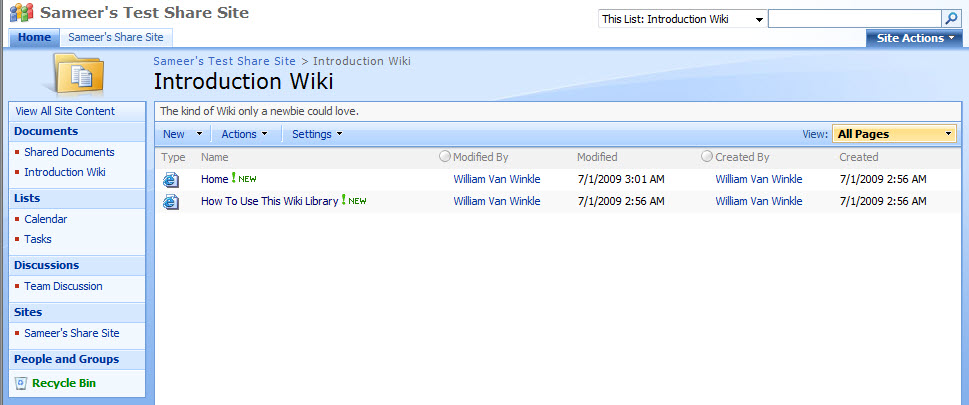
Go back to the Site Actions pull-down menu and select Create. Let’s start with the left column, Libraries, and create a wiki. If you’ve never created a wiki before, but at least know from Wikipedia how useful and dynamic a wiki can be for cataloging and cross-linking a wealth of information, then you’ll find this feature as accessible as it is exciting. After you enter a name and description for the wiki site (and select whether or not the document should display on the Quick Launch), a couple of boilerplate pages (Home and How to Use) are automatically created. Then you can feel free to start adding, editing, and deleting pages with the integrated WYSIWYG editor. If this is your first time through SharePoint’s wiki generator, start at the View All Pages link. This will provide a clearer view of how to create new pages and format them through the Settings pull-down. Peek under the Actions pull-down and you’ll see that SharePoint Online can export and synchronize wiki content through several means, including spreadsheets and RSS feeds.
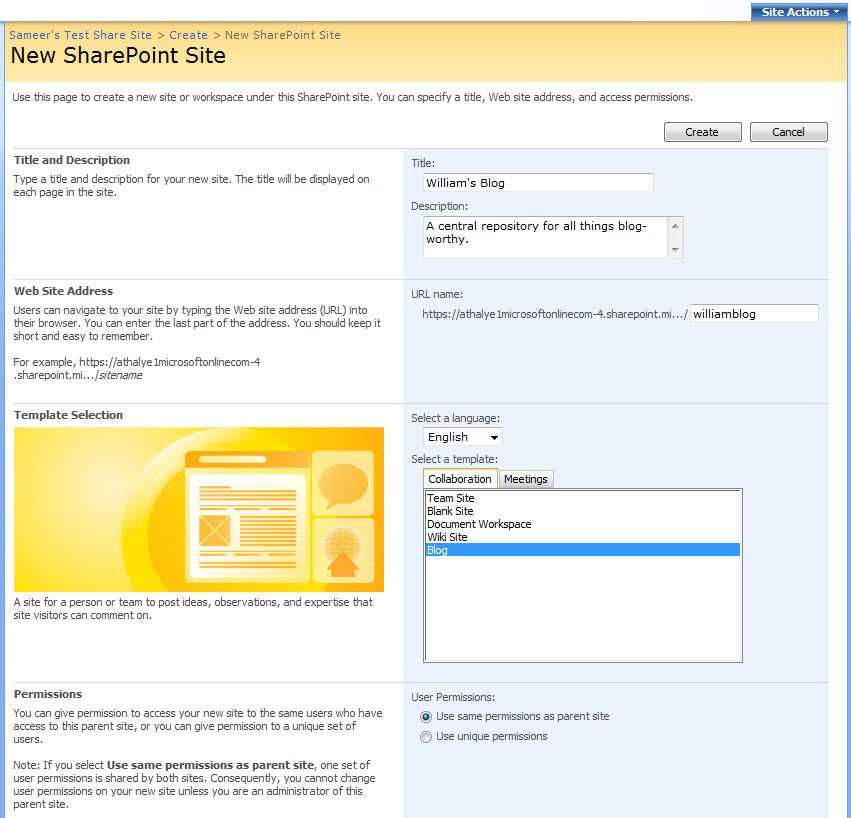
Flip to the far right column, Web Pages, and pick the Sites and Workspaces link. With this, rather than mess with maintaining an outside blog, companies can host as many as they like right within SharePoint. Simply look under the Template Selection area’s Collaboration tab and select Blog. Be sure to fill in the title, description and URL name fields. (The URL name is merely the name of the sub-folder in which the blog’s assets will be stored.) In most instances, it will be fine to accept the default options, including keeping the same user permissions as the parent site. Once the blog is created, you’ll see a short list of Admin Links on the right side of the page. These include the usual creation and management areas, but note the link on the bottom, Launch blog program to post. Clicking through this will register the blog with Microsoft Word and launch its Blog Post template—a nifty short-cut for integrating a much more comfortable post editor.
Another great tool is the survey creator, located in the center column, Tracking. Supply a survey name and description, answer whether the survey should appear on the site’s Quick Launch line, decide if survey takers should be kept anonymous, what types of answers you’ll accept, and several more criteria. After a few minutes, you’ll have your survey questions defined, the answer formats and defaults, and a concluding screen that will allow you, the admin, to either continue editing or manage the survey within the site.
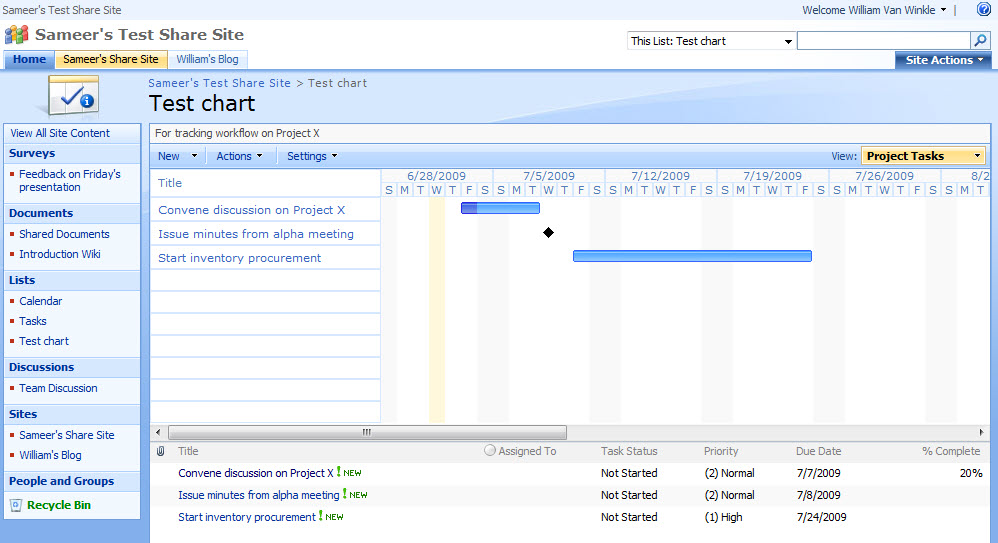
Two links up from Survey is Project Tasks, the essential scheduling tool for anyone or any group that has ever hit the organizational limits of Outlook. Project Tasks creates a Gantt chart, allowing you to create a list of pending events and tie durations, priorities, owners, and more to each item, then view it all in a single overview screen. We suspect that Project Tasks alone may justify the cost of SharePoint Online in some workgroups.
Get Tom's Hardware's best news and in-depth reviews, straight to your inbox.
-
Shadow703793 Wasn't something like this posted earlier? Guess what? Not many care. You are just wasting time imo.Reply -
justchuck69 the article states this at the beginning but i guess some don't read !Reply
Editor’s Note: For background on this article, check out the first article in this series, Microsoft’s BPOS: Cloud Computing’s Silver Lining? -
justchuck69 the article states this at the beginning but i guess some don't read !Reply
Editor’s Note: For background on this article, check out the first article in this series, Microsoft’s BPOS: Cloud Computing’s Silver Lining? -
CircusMusic vfmainHere is free replacement: http://www.officesip.com/messenger.htmlThanks! I was looking into setting up a IM system at work, but didn't want to allow users the ability to connect to the other major networks (MSN, ICQ, etc.)Reply -
3p0cHx would this be a good platform to migrate to if the shop is already running SBS2003? Does this system include licenses for Word, Excel, ppt? Is Outlook only web-based? Do you upload your data shares from SBS2003 to the cloud?Reply


