The Lazy Days of Summer Case Review
Aerocool - Acryclear II, Continued
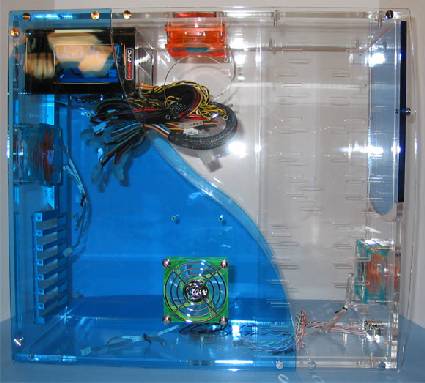
A look inside the Aerocool.
The Acryclear II comes shipped as acrylic panels that require assembly. White cotton gloves are included, and these need to be used during the assembly process to prevent fingerprints and smudges on the panels. Each panel for the Acryclear II comes wrapped in plastic bubble wrap and has to be unwrapped for assembly. Aerocool might want to leave the backing paper on both sides of the acrylic prior to assembly, at least for the side panels, as these are handled the most during assembly. This would help reduce potential scratching and fingerprinting during the assembly process.
The picture-oriented manual provides a very complete guide for assembly of the case. While at times the manual is a little short on written instructions, it includes good pictures that demonstrate the assembly process. You need to allow at least an hour to assemble the case, depending on your level of skill.
For assembly, Aerocool includes screw holders that are inset into the acrylic. This means that, in most instances, you just line the screws up with the screw holders and bolt the sections together. The quality of the construction of the Acryclear II is quite good. Aerocool chose a thick acrylic that does not exhibit bend or twist once the case is properly assembled. This is good news, since you are depending on these acrylic panels to safely hold your computer equipment. While some may liken assembly to a jigsaw puzzle, we found the design of the acrylic and the way it fit together very impressive for this type of construction. Of course it will be important to monitor the tightness of the screws used to hold the panels togeather to make sure that over time that they do not need any additional tightening, this is important to continue to maintain the strength of the cae.
One of the coolest features of this case is that the two panels that hold your 3.5" and 5.25" drive bays can be slid out of the front of the case to add or remove devices from the case just by loosening the thumbscrews that hold these panels for the drive cage in place.. This is a very good idea, as it extends the life of the screws holding the case together since removal of the side panels is not necessary to change out the 3.5" and 5.25" devices.
Get Tom's Hardware's best news and in-depth reviews, straight to your inbox.
Current page: Aerocool - Acryclear II, Continued
Prev Page On To The Reviews Next Page Aerocool Acryclear II, Continued