7 Hot New Water Cooling Systems Tested
Levicom WaterCube: Installation - Quickly Done, But Tricky
One look at the components already reveals the rather fast installation. The WaterCube is placed into two 5.25" slots, just like a conventional drive, and fixed by screws. Special attention should be paid to the hoses. Only if they are firmly pushed into position is the water cooling unit really watertight. As leakages can only be discovered in during operation, it is absolutely necessary to test the system before installing it. At least if the system starts dribbling, this is discovered after a few minutes of operation. However, it requires expert knowledge to be able to switch on the cooling. Levicom provides no adapter to by-pass the ATX power supply. Also the manual does not disclose how this can be done.
Filling it is rather simple in principle. Levicom supplies a bottle of "CoolStuff", so you already have water at hand. And all you need to do is pour this into the equalizing reservoir. This is easier said than done, though, because the lid of the inlet nozzle is difficult to open. In order to avoid damage this is best pulled off carefully and the lid can be opened with a pair of pliers.
Caution is also necessary when filling the water. If water is filled up to the maximum marking then it may drip out from the inlet nozzle. This may damage DVD or CD drives. Those who have a PC case with a rail-mount system should pull out the WaterCube shortly before filling it in order to avoid damaging the drives.
Installing the CPU water block is child's play. The holding bracket is clipped into the retention module and fixed to the water block with one screw. Fastening to the AMD Athlon is done the same way.
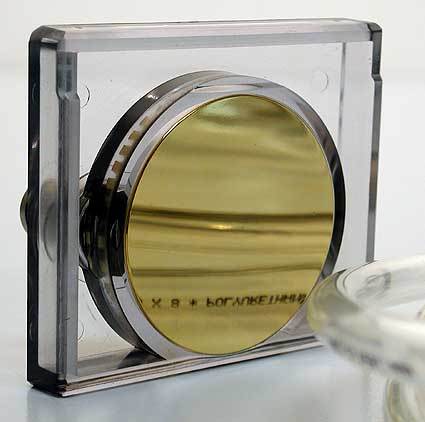
Mirror-like surface of the water block
Get Tom's Hardware's best news and in-depth reviews, straight to your inbox.
Current page: Levicom WaterCube: Installation - Quickly Done, But Tricky
Prev Page Levicom WaterCube: Eye-catcher Next Page Levicom WaterCube: Installation, Continued