RAID on Rye
Fit The Drives And Motherboard

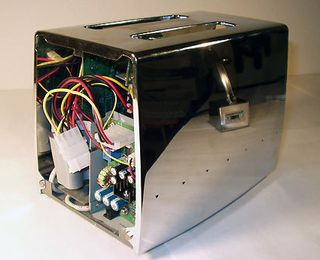
There is over an inch of clearance under my latest toaster system. This allowed for easy placement of, and access to, the network interface, power connection, video interface, keyboard connecter, LEDs and a power switch. Note the aluminum strips that support the drives. The motherboard is attached to one drive; all the remaining interfaces, and the power supply, are attached to the second.
THG: Now comes the fun part.
Dave Goeke: Using the cardboard cutouts, figure out where the motherboard and drives will attach. Fit these components close together and as close to the sides and one end of the interior as possible. All the wires, interface cables, power supply, switches, and mounting brackets end up taking up a lot more space than may initially appear to be the case. Position the drives in such a way that the tapped screw holes on the sides and bottom are accessible, and use these holes for attaching the remaining components.
The first and most crucial assembly task is a sturdy mounting for the drives and motherboard. The remaining pieces are small, light, and can be attached to the drives. These parts and pieces will usually fall into place after the drives and the motherboard are secured.

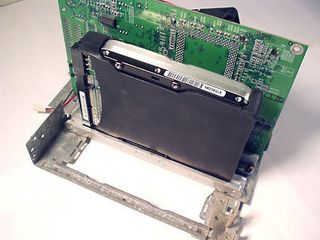
This picture shows the motherboard attached to an aluminum strip that is screwed to the frame of the older system. The drives are attached next to the motherboard, and the power supply will attach to the vertical metal tab on the left.

This picture shows the motherboard and first drive, attached to aluminum strips that are screwed to the frame of the older system.

This picture shows the second drive mounted and the power supply attached. The external power connection is accessible underneath. A cooling fan and Ethernet interface will be screwed onto the top of the second drive using the tapped holes in the drive. The sheet metal box enclosing the power supply was cut and shaped from an old ATX case.
Stay on the Cutting Edge
Join the experts who read Tom's Hardware for the inside track on enthusiast PC tech news — and have for over 25 years. We'll send breaking news and in-depth reviews of CPUs, GPUs, AI, maker hardware and more straight to your inbox.

This picture shows system the system with the cover on.
Current page: Fit The Drives And Motherboard
Prev Page Run The Disassembled Toaster Parts Through The Dish Washer Next Page Cooling FansMost Popular

