Hands Across Four Water Cooling Systems
Installation
With the Exos, installation is done in no time. The cooling block is fastened with retention clips onto the retention module (Pentium 4, Athlon64/FX) or the socket (AthlonXP, Pentium 3) and then fastened with a screw. It may be necessary though to first place the temperature probe, which can demand some time and patience depending on the platform. The hoses screw tightly onto the cooler and are routed through the slot bracket.
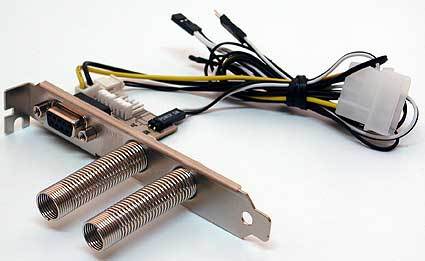
The slot bracket with control panel, hose feeders and kink protectors.
The slot bracket is attached inside the case like a regular card and connected to the power switch contacts on the motherboard and a 5.25" power connector via the two-core cable. That's all the work that needs to be done inside the PC case.
After fastening the connection plug to the tube ends (also in screw-on fashion), the hoses are ready to be connected with the Exos unit. This is quite simple - just stick the hose connectors into the sockets and they snap in by themselves. Lastly, connect the Exos unit with the control panel using the 9-pin cable.
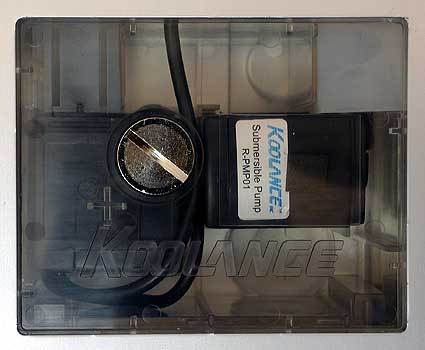
The Exos is filled through this screwcap.
The Exos is now ready to be filled. First open the screwcap using a screwdriver or a coin. Then all you need are a funnel and water, both of which Koolance includes in the package. So you're ready to go. Pour the water in carefully until the reservoir is full. Now the ATX power supply has to be turned on. Koolance provides a cable with the package for jumpering pins 4 and 6 to the ATX power header. A plug adapter would have been optimal here. Nonetheless, the wire end ferrules and heat shrink sleeving are located on the cable ends. Turning on the power supply is no problem thanks to a clear depiction in the instruction manual. The pin headers for 4 and 6 are wrong, however, so if you rely on the plugs' labeling you end up connecting 5V with 5V. The picture in the manual shows the correct pins though. The water has to be poured in slowly and with care until no air is left. After a few minutes you're ready. The pump becomes pleasantly quiet and air collects in the reservoir. The ATX plug should now be reconnected to the mainboard, making the Exos ready for action.
Cooling Performance
Get Tom's Hardware's best news and in-depth reviews, straight to your inbox.
With thermal resistance of 0.15-0.17 K/W (depending on mode setting), the Exos provides excellent cooling performance. You have to find a compromise between cooling performance and noise level with the Exos as well. The differences between the individual settings are only marginal with the Exos, however, with good results obtainable in mode 1 and 2. At a decibel level of 43.4 dB(A), cooling is pleasantly quiet. The number 3 position, in contrast, should only be used by those who are not bothered by noise, as the Exos is pretty loud at 56 dB(A). Cooling performance doesn't change substantially either in that setting.
Current page: Installation
Prev Page Overall Impression, Continued Next Page Corsair Hydrocool 200 Ex
