RAID Scaling Charts, Part 2
Get Tom's Hardware's best news and in-depth reviews, straight to your inbox.
You are now subscribed
Your newsletter sign-up was successful
RAID Scaling Charts, Part 2: RAID 5 And RAID 6
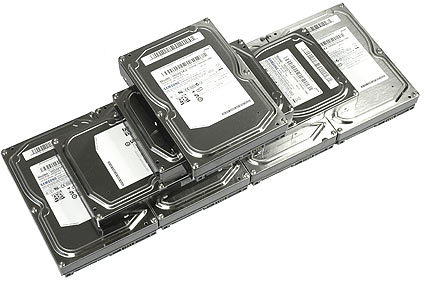
For our RAID tests, we once again use Samsung HM321KJ SATA/300 drives. This time, we benchmarked RAID 5 and RAID 6 setups with three to eight hard drives.
We’ve been talking about RAID a lot during the last few months. RAID technology, which stands for Redundant Array of Independent Drives, was once developed to overcome the limitations of individual hard drives, which needless to say, are not as reliable as they should be. RAID does this by combining multiple drives in various ways. After first showing up in high-end servers, RAID configurations, referred to as RAID levels, have become reasonably affordable and available for more mainstream users. RAID 0 and RAID 1 are easy to implement and hence the most popular choices. These configurations work by creating a so-called stripe set (RAID 0) or by mirroring one drive with another to duplicate data in case one of the drives fails (RAID 1). However, RAID 5 and RAID 6 represent far more elegant options for advanced applications.
Again we’ve used the same test bed as in RAID Scaling Charts, Part 1, to test all possible configurations with RAID 5 and RAID 6 on as few drives as possible, while using up to eight hard drives. These two RAID levels are particularly interesting for storage servers, which should provide a high net storage capacity, while offering a higher level of data protection. A basic RAID 0 stripe set clearly provides maximum performance as it reads and writes from all of the array drives in an interleaved manner. This, however, comes at the cost of data safety, as the risk of a drive defect increases with every hard disk you add: The chance that you might lose data with a five-drive RAID 0 array is five times higher than one with a single hard drive. RAID 1 does the opposite, as it cuts the chances of data loss by half by mirroring data from one drive to another in real-time. Unfortunately, your storage capacity with the same number of disks is 50%, less compared to RAID 0, and two hard drives typically are the maximum number of drives RAID 1 can handle.
RAID 5 and RAID 6 combine performance and data safety, by storing data on a stripe set across multiple drives, while also creating parity data. While RAID 5 distributes the parity information across all drives, RAID 6 goes a step further and generates secondary parity information across the parity-enabled RAID 5 stripe set. A RAID 5 configuration requires at least three hard drives to stripe data and add parity; RAID 6 requires four or more hard drives. While your RAID 5 array will survive one defective drive, RAID 6 can sustain two hard drive failures before your data is lost. RAID 5 has been popular among professional users and servers for many years, while RAID 6 is gaining popularity due to the additional data security it offers. Both can be set up with so-called host-based RAID controllers, which offload the parity calculations to the system processor. Thanks to dual- and quad-core CPUs, these XOR calculations do not create performance bottlenecks anymore, while RAID controllers with a hardware XOR engine will provide transparent support for parity-enabled RAID setups, meaning that the complex storage solution doesn’t tax your performance in any way Compare Prices on RAID Controllers.
Let’s have a look at how RAID 5 and RAID 6 work, how parity is calculated and how these modes perform on our test system. You might be surprised to see that a high-drive count does not necessarily equal high performance, and that RAID 5 doesn’t seem to be a good choice for desktop users.
Join our discussion on this topic
Get Tom's Hardware's best news and in-depth reviews, straight to your inbox.
Current page: RAID Scaling Charts, Part 2: RAID 5 And RAID 6
Next Page RAID 5: Stripe Set With Redundancy
Patrick Schmid was the editor-in-chief for Tom's Hardware from 2005 to 2006. He wrote numerous articles on a wide range of hardware topics, including storage, CPUs, and system builds.
