NEC V801 Review: Benchmarking A Massive 80-Inch Monitor
NEC V801 OSD Setup And Calibration
To say that the V801 can do just about anything is an understatement. We’re not sure there is a source, analog or digital, that it can’t handle. Because of this, we decided to treat it like an HDTV rather than a computer monitor. We’ll take a tour of the vast OSD, but there is so much to cover that it makes the most sense to concentrate on the items relevant to entertainment or computer use.
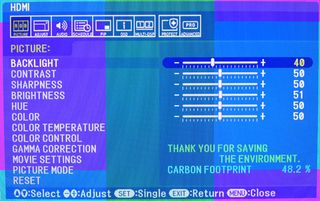
This is the first menu that comes up, and it's where you’ll find the necessary calibration controls. We applaud NEC’s decision to put them in a single menu, which is very intuitively laid out. Like most HDTVs, the backlight and brightness controls are separate. In fact, both contrast and brightness have very small sweet spots where they won’t clip highlight or shadow detail. If you want to control light output, use the backlight slider.
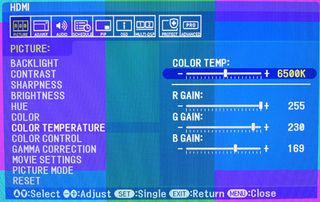
Even though the RGB sliders are marked “gain” there is no bias control. Calibrate the V801’s grayscale using an 80 percent white window and you’ll be rewarded with excellent results. When you start moving the sliders, the overall color temperature changes from 6500K to Custom.
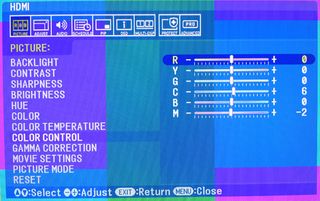
This is the color management system. It only adjusts hue, so all we could do was tweak the cyan and magenta secondaries. Fortunately, the color doesn’t need much help. It’s very accurate right out of NEC's box.
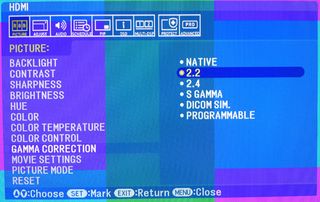
The gamma’s default preset is 2.4; we changed it to 2.2. The other options are for specific content. DICOM is a medical imaging standard. Setting the gamma to programmable lets external software control the preset.

Telecine is another HDTV feature, specifically a video processing algorithm that converts a 24 FPS film cadence to 60 Hz. It’s also known as 3:2 pulldown. Adaptive Contrast plays havoc with gamma and crushes highlight and shadow detail, depending on content. It’s best to leave that option turned off.
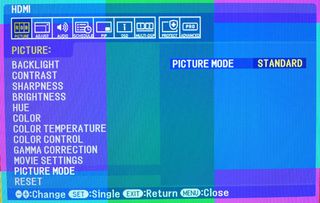
Of the six picture modes available on the V801, Standard, Cinema, and HighBright are fully adjustable. There are two Ambient modes that utilize the built-in room light sensor to modulate the backlight. And an sRGB mode locks out the color temperature and CMS sliders.
Stay on the Cutting Edge
Join the experts who read Tom's Hardware for the inside track on enthusiast PC tech news — and have for over 25 years. We'll send breaking news and in-depth reviews of CPUs, GPUs, AI, maker hardware and more straight to your inbox.
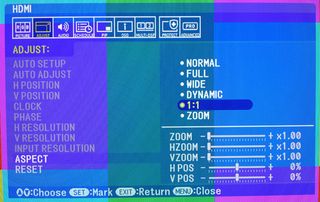
The best choice for maximizing resolution is 1:1, since it maps each pixel from the source signal to the screen without scaling or overscan. We use HDMI for our testing, and this option leaves a gray frame around the edge that blocks 5% of the image. To eliminate it, go to the Advanced Option menu and turn Overscan off. The image adjustment sliders in the lower right allow you to zoom in on part of the image.
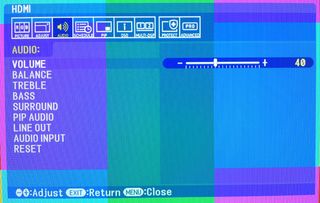
You get a full complement of audio controls that govern the function of the internal 10-watt speakers. If you set Line Out to Variable, you can control the volume of an external sound system with the V801’s remote. The Surround option simulates surround sound by varying the phase (timing) of the two speakers to make them sound like five. However, it makes the sound a little boxy with an artificial resonance that we aren’t fans of. The two-channel sound is just fine on its own.
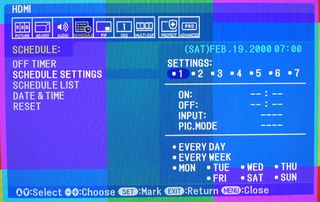
Up to seven scheduling programs are available. Each one can be set to specific on and off times, starting input, and picture mode. This is very handy in commercial applications when you want to run the monitor only during business hours, for example.
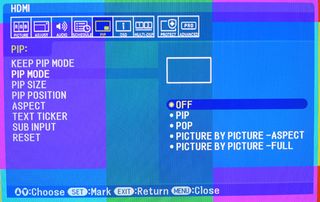
The PIP menu offers a lot of different options. You can have the secondary source in a window or in a side-by-side configuration. The window can be positioned anywhere on the screen. Additionally, you can have a text ticker that scrolls anywhere across the screen.
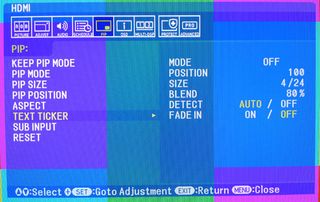
The text ticker is great for news or financial applications where you want to see a scrolling feed along with standard video. Not only can you control the position and size of the ticker, you can alter its transparency with the blend control.
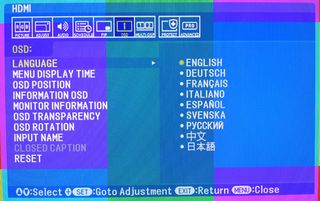
The OSD is available in nine languages.
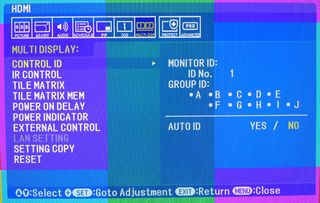
Imagine 100 80-inch panels in a video wall installation. The V801 supports up to 100 screens for display of a single image! You’ll need a distribution amplifier and a whole lot of AC current to do this. Each panel has a unique ID, which you can set here.
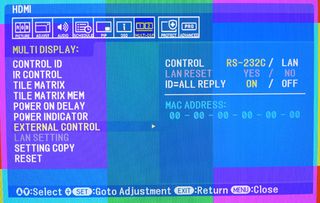
The panels in the video wall can be controlled via RS-232, which is the most common interface for residential and commercial automation systems, or via Ethernet through the V801’s RJ-45 jack. With RS-232 you can daisy-chain the monitors and copy settings from one display to the entire array.
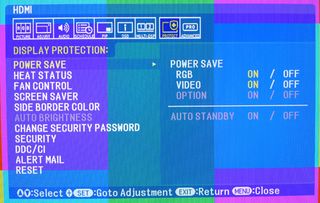
There are all kinds of interesting things on this screen. Power Save shuts down the monitor after a specified time without an input signal. The internal fans can be set to Auto and you can specify a starting temperature. We never heard the fans during normal use except when we powered the TV on. Screen Saver and Side Border Color are options for preventing screen burn-in or image retention. This is not really a problem with LCD panels, but a monitor that is designed to run 24/7 might experience issues over time.
The Alert Mail function is pretty cool. Any V801 connected through the LAN port can email a message to you when a fault is detected.
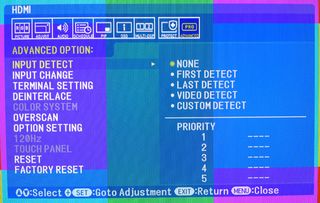
The final menu, Advanced Option, has settings for input handling, overscan, and others that are of interest to those using the V801 as an HDTV. Deinterlace is defaulted to On and should be left that way to properly handle interlaced video signals. The HDMI black level control is under the Terminal Setting option and should be left at the default of Expand to be sure that all 256 steps of the signal are displayed. Color System will change the decoder matrix depending on the source signal. Auto works fine but you can force it to NTSC, PAL, SECAM, 4.43 NTSC, and PAL-60. In the U.S., we use NTSC for all broadcast and disc-based content.
NEC V801 Calibration
Calibrating the V801 was very straightforward and we handled it more like an HDTV than a computer monitor. With separate Backlight and Brightness controls, we were able to set the proper black and white levels, and then use the Backlight slider to adjust light output. In fact the default setting for Contrast is right on the money and Brightness only had to be turned up one click to the correct level. The Backlight control has a huge range, making it easy to set the proper output level for a given space.
The grayscale controls only cover the high range, so we used an 80-percent white window to set a 6500 K white point. You’ll see the excellent results on page seven. We tried out the CMS, but it only controls hue, so it wasn’t of much use. Luckily it isn’t really needed, as the default color gamut is pretty close to the Rec. 709 standard. Our settings are recorded below. We used two different Backlight settings: one for 200 cd/m2 and another for 170 cd/m2, which is our preferred level for TV watching. We also had to set the Brightness (black level) at different points depending on whether the content was PC or video-based. For our benchmarks, we used PC level. For the in-use tests, we used video level.
| NEC V801 Calibration Settings | |
|---|---|
| Backlight | 40 (200 cd/m2), 34 (171 cd/m2) |
| Contrast | 50 |
| Sharpness | 50 |
| Brightness | 51 (PC), 45 (Video) |
| Hue | 50 |
| Color | 50 |
| Color Temp | 6500 K (Custom) |
| RGB | Red 242, Green 222, Blue 169 |
| Color Control | Cyan 6, Magenta -2, all others 0 |
| Gamma | 2.2 |
| Picture Mode | Standard |
| Noise Reduction | 0 |
| Telecine | Auto |
| Adaptive Contrast | Off |
Current page: NEC V801 OSD Setup And Calibration
Prev Page Packaging, Physical Layout, And Accessories Next Page The NEC V801 In Use
Christian Eberle is a Contributing Editor for Tom's Hardware US. He's a veteran reviewer of A/V equipment, specializing in monitors. Christian began his obsession with tech when he built his first PC in 1991, a 286 running DOS 3.0 at a blazing 12MHz. In 2006, he undertook training from the Imaging Science Foundation in video calibration and testing and thus started a passion for precise imaging that persists to this day. He is also a professional musician with a degree from the New England Conservatory as a classical bassoonist which he used to good effect as a performer with the West Point Army Band from 1987 to 2013. He enjoys watching movies and listening to high-end audio in his custom-built home theater and can be seen riding trails near his home on a race-ready ICE VTX recumbent trike. Christian enjoys the endless summer in Florida where he lives with his wife and Chihuahua and plays with orchestras around the state.
-
Someone Somewhere Yeah, 1920x1080... those pixels are 0.92mm square. That's pretty easy to see with the naked eye; far bigger than a full stop.Reply
27.5ppi... *shudders*.
EDIT:
the V801’s size is better expressed in feet: 227.6 (69.37 square meters for the rest of the world)
Ummm... 70 square meters is pretty big. That's about half of the average house. I think you'll find it's ~1.76 m² or 19 ft². -
virtualban For that size I clicked the article in hopes that maybe it was some 8K monitor. Stopped reading after 1080pReply -
baddad I've had a Mits 82" DLP since 2011 I paid $1900.00, that is the heart of my media center, so $9400 for just a monitor is a bit much.Reply
Most Popular

