2.5" External HDD Spring Fever
Hitachi Travelstar 2.5" 2-in-1 Upgrade Kit

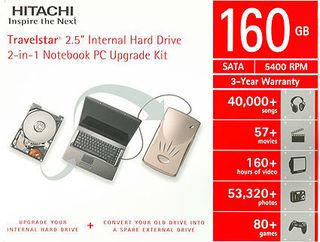
Hitachi's product is different from what we've seen so far. Typically, you either purchase an external storage product, or a bare hard drive, which you install into your computer or into external hard drive enclosures. Hitachi decided to merge the two options by offering the Travelstar 2.5" 2-in-1 Hard Drive Kit. It consists of a 2.5" hard drive (60 GB to 160 GB, 5,400 RPM or 7,200 RPM) and an external drive enclosure.
The intention is to replace your existing 2.5" notebook hard drive with the new Hitachi device and to install your old drive into the external enclosure. Hitachi offers both UltraATA and Serial ATA versions, so you can upgrade either a brand new notebook, whose hard drive may simply be too small, or an older notebook, to which you would like to add a faster or larger hard drive. This way you get a quick, high-capacity system hard drive, and you can keep using your existing drive as an external device for data or backups with a single purchase.
We received the 160 GB SATA version, which consists of a Travelstar 5K160 and a simple USB 2.0 plastic enclosure by Apricorn. It is powered via USB and by an additional USB cable, which you might or might not need, depending on the host system. Most interfaces are USB 2.0 high-power rated, which means they can provide 500 mA. This typically is not enough to power a fast 2.5" hard drive, but tolerances may still be good enough to get away with it.
The first thing you have to do is install the new hard drive into the Apricorn enclosure, because you need to clone the system partition of your existing hard drive onto the new drive before you can go ahead and swap them. The box includes a bootable CD with software by Apricorn, which you have to use to boot your computer and duplicate your hard drive contents onto the new device.
After completing the cloning process successfully, you can remove the hard drive from the enclosure and exchange your notebook hard drive with it. We recommend making sure that the cloning process really was successful by verifying if all your data is present before you erase the contents of the old hard drive, which you should install into the Apricorn enclosure at this point. The old drive can now serve as an external storage device.
Stay on the Cutting Edge
Join the experts who read Tom's Hardware for the inside track on enthusiast PC tech news — and have for over 25 years. We'll send breaking news and in-depth reviews of CPUs, GPUs, AI, maker hardware and more straight to your inbox.
Current page: Hitachi Travelstar 2.5" 2-in-1 Upgrade Kit
Prev Page Cool 2.5" Storage By Hitachi, Seagate, Toshiba Next Page Hitachi Travelstar, ContinuedMost Popular

