Four Full Tower Cases From $150 To $600
Thermaltake Spedo--Build And Installation
Build, Continued
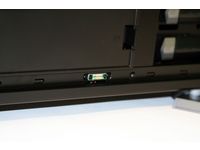
Our favorite Thermaltake innovation is a contact, whereby the side-mounted 230 mm fan gets power as soon as you snap the side panel into place. For the first time that we’ve seen, this means no more cables draped between side-mounted fans and the power supply. Also, the Cable Routing Management system, located behind the case’s motherboard tray, did a great job of hiding fan wiring, unused front-panel headers, and excess power cables.
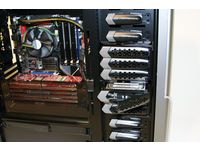
Although the mechanism for mounting hard drives (up to six) and 5.25” drives (up to seven) is made of plastic and not very hardy-feeling, it is still surprisingly convenient. Both of the hard drives in our test platform snapped right in without the need for a screwdriver. Room for expansion slots is similarly generous. Had we wanted to attach three GeForce GTX 280s to Asus’ Rampage II Extreme, we could have, though it would have meant setting aside the Advanced Thermal Chamber technology included as part of Thermaltake’s Advanced package.
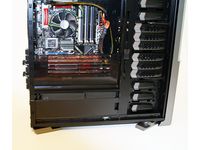
That technology, dubbed ATC3, divides the Spedo into three chambers—similar to ABS’ design, only removable. While it wasn’t too difficult to remove or install, we wonder how many enthusiasts will use the four plastic pieces comprising ATC3, as our thermal results demonstrated the Spedo with the second-highest idle and load temperatures, on average.
Installation
Disassembling and piecing back together the ATC3 added an extra bit of complexity to our system installation. Overall, though, assembling the case is easy—and particularly clean given the integrated cable management system.
Having learned from the three preceding builds, after dropping in the motherboard and securing it into place, we attached necessary front panel leads and SATA cables before installing graphics cards.
Get Tom's Hardware's best news and in-depth reviews, straight to your inbox.
With storage connectivity run to the back of the chassis, it was easy to put the hard drives in their trays, lock them back into place, and attach data/power.
The fan wiring inside of the Spedo is particularly nice because Thermaltake wraps each three-wire lead with a black, flexible sheath.
Once we solved our power supply issues, by bending the steel at the bottom of the case, our Cooler Master UCP 1100 slid right in. It’s worth noting that the PC Power and Cooling 1 kW PSU would have worked as well.
With cables run and hard drives installed, we were ready to add graphics cards. Our only there was trying to get Thermaltake’s screwless slot clamps snapped into place over each Radeon’s metal bracket. The first one closed without issue, but the second slot cover just wouldn’t close on either card. That issue didn’t affect functionality though, and the cards were secured by just a single clamp.
Current page: Thermaltake Spedo--Build And Installation
Prev Page Thermaltake Spedo--Unpacking And Build Next Page Test System And Acoustic/Thermal Performance-
Proximon Thank you Chris, another very useful article. Not enough case comparisons around, as I'm sure you realized.Reply
I'll be sure to add the HAF to my recommendation list. I hadn't before because I thought all the extra holes would hinder cooling more than help. The hole in the MB tray sounds especially useful.
I would have liked to see on of the Cosmos cases included, although I suspect they are simply quieter but hotter. -
malveaux Nice article.Reply
Though, I'm curious. 40db+ isn't whisper quiet. That's freak'n loud. What's up with calling it whisper quiet? -
Pei-chen The three cheaper cases are powerhouses but too big and overkill for most people including gamers. I think the Antec's Three Hundred ($60 a few weeks ago on Newegg) suits the need for most people. 750w PSU are usually enough for SLI/Crossfire so 1000w+ aren't needed.Reply -
malveaux I'm curious when they will start releaseing more cases that have more depth, so that they have more room for today's much larger videocard solutions.Reply -
kubes Ya I agree that case designers should consider making them have more depth. With this in mind though i'm sure vidoe card manufactors will only make their card even longer however.Reply -
antiacid Good article. Now it gives a procedure and template to test other cases as well. It'd be great to have a review of cases which could be "best of" a certain category (cooling, noise, ease of use, weight, etc). It would be even nicer if the results were put in bullet point form and were setup in a table like the ones used in hdd/video card tables. That would make it a lot easier to compare everything.Reply -
avatar_raq I do believe that all the cases available in the market these days are poorly designed especially when it comes to air flow. You may notice that front fans, rear fans, buttom, side and top panel fans -when combined- cause turbulence in air flow that reduces the overall air flow. That's why I buy a cheap $25 case and modded myself!!!Reply
I have so many innovations regarding case designs that I hope someone buys them and excutes them in reality!! -
avatar_raq Here is one of my ideas...Reply
To put it plainly: air needs to be moved in one direction, preferably from down-upwards, since hot air tends to go upward by nature and the hottest part of any system (that's the GFX cards) is located at the lower part..Hence a PSU mounted at the upper part of the case (with its 120-140mm fan), with another 120mm top-panel exhaust fan and two 120mm buttom intake fans will be by far more efficient than all the available cases. To achieve this efficincy I close any other holes (even the ones the manufacturer meant for ventilation) so the air enters the case only from the buttom fans where I put dust filters to minimize dust inside my case. Furthermore I use a case with long "legs" to minimize inhalation of the dust at my desk's surface.
To minimize noise: I use
1.low RPM silent fans.
2.rubber washers between the fans and the case to minimize vibration noise.
3.cover all the interior surfaces with a layer of an insulator, that can be as simple as sponge!!!
4.even design external air ducts that divert the exhausted air (which carries the interior noise) to the back. -
avatar_raq Fortunately many aftermarket CPU and GPU coolers helped me. They can be installed in a way that the fan moves the air upwards. There is evidence that the setup I suggested above reduces -though marginally- the power consumed by the CPU and GPU fans to reach thier designated rpm and increases the lifetime of these fans, since instead of meeting resistance, the one directional air flow helps them.Reply


