Why you can trust Tom's Hardware
We are using the following system for today’s build:
| CPU | Intel Core i5-11600K |
| Motherboard | Asus ROG Strix Z590-I Gaming WiFi |
| Memory | G.Skill Trident Neo 16GB, 3600 MHz |
| Graphics | Zotac RTX 3080 Ti Amp Holo |
| CPU Cooling | Phanteks Glacier One 240 MP |
| Row 5 - Cell 0 | Noctua NT-H2 Thermal Paste |
| Storage | Corsair Force Series MP600 NVMe SSD, 480GB |
| Power Supply | Corsair SF750 |
With this build, we’re using the new ITX case test setup based on the 11th Gen Intel Core i5-11600K processor, paired with an Asus Z590 ITX motherboard and a large, RTX 3080 Ti graphics card. That’s a lot of hardware to throw at an ITX case, but most modern compact cases can handle it, at least when it comes to fitting the large graphics card. But we’re keeping our old RTX 2070 Super on call for when the large Zotac RTX 3080 Ti doesn’t fit. This new setup also allows us to test the claims of PCIe 4.0 riser cable support. But as the Revolt 3 doesn’t use a riser cable, that’s not something we need to worry about this time around.
Step 1: Motherboard Installation

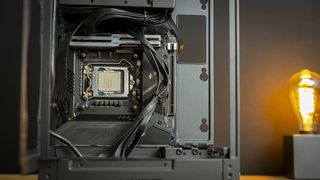
Installing the motherboard into the Hyte Revolt 3 is a breeze. Once the chassis is open, simply bump the pre-routed SATA cables out of the way and slide the motherboard into place and secure it with four screws.
Of course, at this point we did have the memory, CPU, and SSD pre-installed onto the board, but because the back is easily accessible thanks to a large motherboard tray cutout, I did not worry about the AIO yet as I wanted the flexibility of placing the hoses right, and pre-installing it would limit my options.
Step 2: Cable Management

Next, I took care of most of the cable management. Later in the build, the AIO and GPU would be taking up a lot of space and get in the way, so I figured now would be the best time to do up all the connectors, or at least as many as I could.
Hold Your Horses, Am I Seeing This Right?

Okay, don’t laugh at me for being excited about this, but Hyte combined all the front panel connectors for power, HDD and power LEDs into a single connector. Yes, the layout is pretty much standardized across all motherboards. So…can somebody tell me why nobody else is doing this?
Step 3: AIO Installation

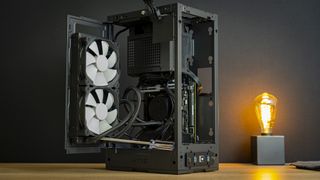
Next, I took to installing the liquid cooler, for which I grabbed a Phanteks Glacier One ML240 unit. I first installed the radiator with the hoses coming out at the bottom, and then played around a bit with the CPU block so that the hoses would end up placed nicely when it shut. And yes, I used a screwdriver as a hood lift for this photo because the hoses kept pulling the radiator shut.
At this point, I decided against installing the AIO’s RGB-illuminated CPU block cover, as it would occupy extra space, potentially blocking airflow – and you can’t see the RGB anyway because there is no glass, so why bother?


With the AIO in place, we have a moment to enjoy the sights of a stuffed Mini-ITX case. There really isn’t a lot of space remaining in here, and I can really admire the internal layout. Of course, cable/hose management isn’t the prettiest thing here, but it’s all covered up with panels anyway, so does it really matter?
Step 4: GPU Installation

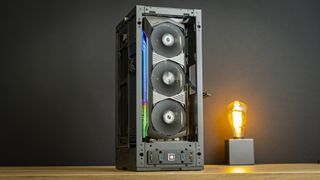
Lastly, it was time to install the graphics card. I was curious to see whether the large Zotac RTX 3080 Ti would fit, but after a few minutes of finagling, it was squeezed right into place. Being a thick graphics card, with the fans jammed straight against the front intake, I actually expect its thermals to hold up quite well, but more about that on the next page.
Build Complete:

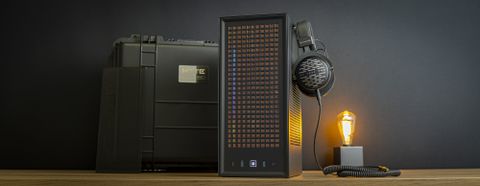
To finish off, I quickly ran the system to see if everything was connected and working before slapping the side panels on. And of course, I couldn’t help but use the copper front filter. It makes the case look a bit like a vintage radio. We’d love to see the company offer up different color options, though, so you could change up the look to match your setup or room decor.


Current page: Hardware Installation
Prev Page Features and Specifications Next Page Testing & ConclusionNiels Broekhuijsen is a Contributing Writer for Tom's Hardware US. He reviews cases, water cooling and pc builds.
-
g-unit1111 I normally loathe iBUYPOWER but that is a pretty nice case there. Given their reputation for shoddy parts though, I'd probably ditch the included PSU and cooler if possible. But that is a very nice design for that type of case.Reply -
helper800 Reply
Agreed, I typically do not see much in-house product from iBUY worth looking at, but this case seems worthy of the award it got. I love the look. The case also seems reasonable to work in for a mITX case, which is not the usual for SFF. I was planning my next build in a few years to be SFF, I may be getting the case a couple years in advanced...g-unit1111 said:I normally loathe iBUYPOWER but that is a pretty nice case there. Given their reputation for shoddy parts though, I'd probably ditch the included PSU and cooler if possible. But that is a very nice design for that type of case. -
g-unit1111 Replyhelper800 said:Agreed, I typically do not see much in-house product from iBUY worth looking at, but this case seems worthy of the award it got. I love the look. The case also seems reasonable to work in for a mITX case, which is not the usual for SFF. I was planning my next build in a few years to be SFF, I may be getting the case a couple years in advanced...
Yeah I think SFF is the future, I'm ready to ditch full towers. iBUYPOWER, Phanteks, and NZXT have shown that it can be done. -
2Be_or_Not2Be Replyg-unit1111 said:Yeah I think SFF is the future, I'm ready to ditch full towers. iBUYPOWER, Phanteks, and NZXT have shown that it can be done.
The Cooler Master NR200 is an excellent SFF case to jump into the rabbit hole of ever dwindling case volume! More like a small mini-tower than an upright shoebox like this one. -
2Be_or_Not2Be What I can't tell from this review is where the video cables go. Do they supply right-angle adapters that go inside the case, or do you have to supply them?Reply
Or do they just expect you to bend your video cables to make them fit? It would be good to know how this critical component is handled. -
helper800 Reply
It is implied that it comes with the case, but you're right, it does not just outright say where it comes from be it them or the consumer.2Be_or_Not2Be said:What I can't tell from this review is where the video cables go. Do they supply right-angle adapters that go inside the case, or do you have to supply them?
Or do they just expect you to bend your video cables to make them fit? It would be good to know how this critical component is handled. -
g-unit1111 Reply2Be_or_Not2Be said:The Cooler Master NR200 is an excellent SFF case to jump into the rabbit hole of ever dwindling case volume! More like a small mini-tower than an upright shoebox like this one.
Yeah I like that style of case. The G.Skill one with the bent glass looks pretty cool too.

