
Tom's Hardware Verdict
Doubling the RAM of the Raspberry Pi 500, now with added NVMe storage, the Raspberry Pi 500+ offers a great experience, but the upfront cost is hard to swallow.
Pros
- +
Awesome thermal performance
- +
Convenient form factor
- +
Keyboard is great
- +
Better power efficiency
- +
Easy access to NVMe storage
Cons
- -
Essentially $200 for a 16GB Raspberry Pi 5
- -
RGB is beautiful but redundant
- -
GPIO access is awkward
- -
No camera or Touch Display connections
Why you can trust Tom's Hardware Our expert reviewers spend hours testing and comparing products and services so you can choose the best for you. Find out more about how we test.
Raspberry Pi has been a bit quiet after a packed 2024, which saw multiple products and SKUs released on a weekly basis. The Raspberry Pi 500 was one of those products, and it received an Editor’s Choice award despite the omission of a PCIe-based storage. Yes, there was space, and yes, the silkscreen had the layout for it, but it was never added to the 500. This led to other Pi community members and me theorizing that a future model would feature PCIe-based storage. It turns out that we were correct, and here we have the Raspberry Pi 500+.
Straight off the mark, the price is $200 (approximately £180). The price of a low-spec laptop, essentially. For the price, we get the same System on Chip (SoC) as the Raspberry Pi 500 and Pi 5, but we also get 16GB of RAM and a 256GB NVMe SSD, not to mention a mechanical keyboard. If you want the Raspberry Pi 500+ as part of a getting started kit, then for $220 (£200) you can pick up the Raspberry Pi 500+ Desktop Kit which comes with a branded mouse, USB-C power supply, official HDMI cable and the Raspberry Pi Beginner's Guide. For the review, I have just the Raspberry Pi 500+.
Is the Raspberry Pi 500+ worth $200, and does it warrant an upgrade over the original Pi 500? Let's find out!
Raspberry Pi 500+ Technical Specifications
| Header Cell - Column 0 | Raspberry Pi 500+ | Raspberry Pi 500 |
|---|---|---|
SoC | BCM2712 SoC Arm Cortex-A76 64-bit CPU running at 2.4 GHz | BCM2712 SoC Arm Cortex-A76 64-bit CPU running at 2.4 GHz |
| Row 1 - Cell 0 | 800 MHz VideoCore VII GPU, supporting OpenGL ES 3.1, Vulkan 1.2 | 800 MHz VideoCore VII GPU, supporting OpenGL ES 3.1, Vulkan 1.2 |
Display | 2 x 4Kp60 micro HDMI display output with HDR support | 2 x 4Kp60 micro HDMI display output with HDR support |
RAM | 16GB LPDDR4X-4267 | 8GB LPDDR4X SDRAM |
Storage | 256GB NVMe SSD pre-installed Micro SD (SDR104 compatible) | Micro SD (SDR104 compatible) |
GPIO | 40 Pin Raspberry Pi HAT Compatible via breakout | 40 Pin Raspberry Pi HAT Compatible via breakout |
USB | 1 x USB 2 2 x USB 3 | 1 x USB 2 2 x USB 3 |
Networking | Gigabit Ethernet | Gigabit Ethernet |
Wi-Fi / Bluetooth | Dual-band 802.11ac, Bluetooth 5 / BLE | Dual-band 802.11ac, Bluetooth 5 / BLE |
Power Button | Soft power button on keyboard | Soft power button on keyboard |
Keyboard | 84, 85, 88-key RGB mechanical keyboard with Gateron Blue KS-33 low-profile switches. | Chiclet keyboard |
Power | 5V 5A via USB C | 5V 4A via USB C |
Dimensions | 312 x 123 x 35.76mm | 286 × 122 × 23 mm |
Price | $200 | $120 Desktop kit ($90 solo) |
Design of the Raspberry Pi 500+

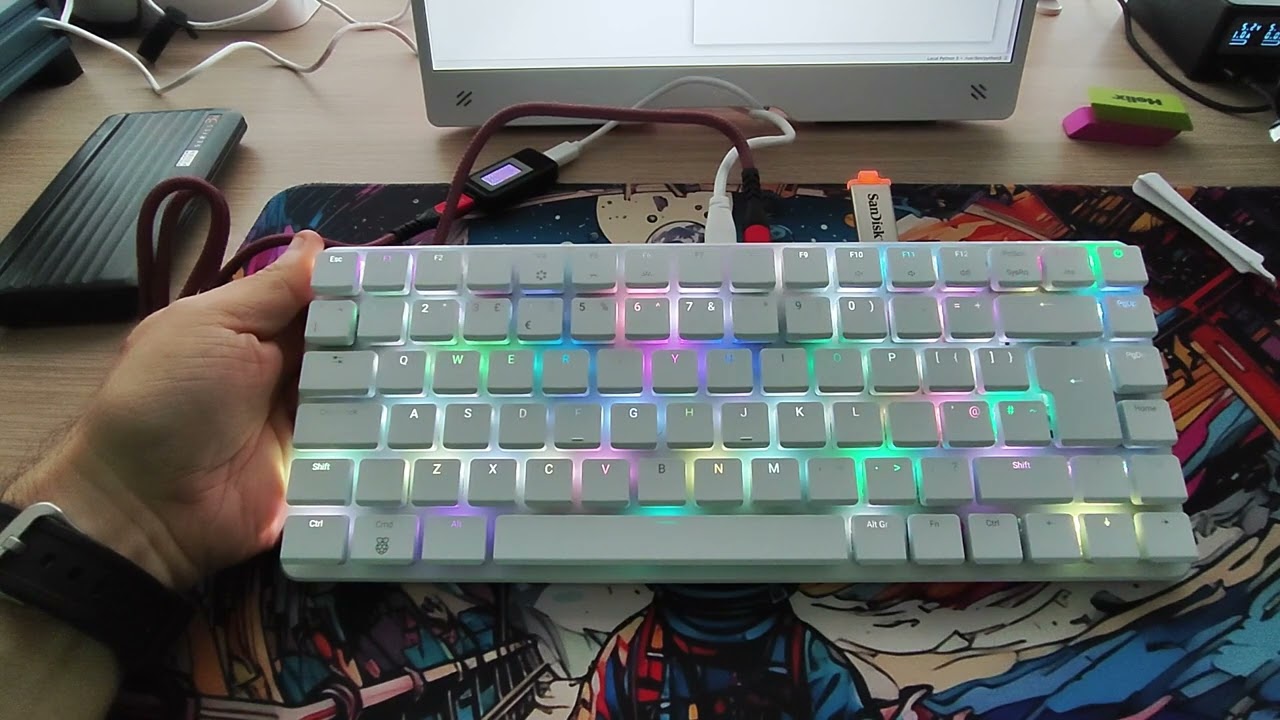
The dominant aesthetic of the Raspberry Pi 500+ is the keyboard. It looks stunning, and the layout is similar to my daily driver, a Keychron K2. Under the keycaps, we have Gateron Blue KS-33 low-profile switches, and as a lover of clicky keys, they please me greatly. This is a keyboard that I could use as a daily driver. Perhaps Raspberry Pi will release the keyboard as a replacement for the official keyboard? Aside from the keyboard, the ports on the rear of the 500+ are identical to those on the 500.
The Pi 500+ and the 500 before it sport the same all-white color scheme, which is boring, but functional. It looks great on your desk, but I loved the Raspberry Pi 400's "raspberry and white" aesthetic.


The Raspberry Pi 500+ is larger than the Pi 500, both in length and height. The bottom part of the chassis is deeper, and the keyboard is longer. The height is most likely to accommodate space for the NVMe SSD, as the key switches are all located in the top section of the chassis. The length difference will be for the standard keycaps used. Yes, you can replace the keycaps if you wish. Using the included key puller, I pulled a few keys off to take a look underneath, then I threw some spare keys from my Keychron spares box on there to prove that they fit.
My pre-release unit has a quirk with the ENTER key, and Raspberry Pi assures me that this issue is not present in mass-produced units. Did I mention that the keys are RGB? Oh yes, a rainbow at your fingertips. Just press the FN and the light key to change the sequence. There are static colors (white and red), animated rainbow effects, reactive keys that shine blue or red, and an off option. The power button, a dedicated soft key introduced on the Raspberry Pi 5 and Pi 500 (the secondary function of F10 for the Pi 400), shines green when the Pi is on and red when in standby. To control the RGB LEDs, Raspberry Pi has released a config tool in the form of a Debian package, which handles all installation tasks for demos and the all-important udev rules.
The package is both a command-line tool and a Python module, which means that we can write our own code to control the LEDs. So I did, and made my usual “Disco” demo.
After a few bouts of trial and error, I managed my goal and I had something like a 1970s disco on my keyboard.

The keen-eyed amongst you will note that, because the Pi 500+ uses the same keyboard wedge design as its predecessors, there is no access to the CSI (Camera) / DSI (Display) connector. Looking at the PCB, there are no connections on the board. If you really need a camera, grab a USB webcam. For displays, there are two micro HDMI ports that support 4K60, so you are well catered to.
Tearing Down the Raspberry Pi 500+


All of the previous Raspberry Pi 00 series machines have been easy to tear down, and the Pi 500+ is no exception. It has to be because we need access to the NVMe SSD. You may never upgrade the drive, but the 500+ introduces Phillips screws that secure the bottom chassis to the keyboard. The final retail kit that I received came with a spudger to leverage the plastic chassis apart. Starting at the opening just below the space bar, I slid the spudger around the seam and the clips popped open.
Initially, I could see two sections of the chassis. The bottom part contained the mainboard, which is covered by a large aluminum heatsink, with only a cutout for the NVMe SSD (note that my pre-release model has a smaller 2230 SSD than what will be included in the retail units). The other part is the custom keyboard plate, which is powered by a Raspberry Pi Pico’s RP2 (RP2040) and not the newer RP2350. There is no need for the newer board, after all, the RP2040 is merely acting as a USB interface.
Also present on the mainboard is a battery connector for a real-time clock, which can be purchased separately.

On the left side of the mainboard is a large unpopulated area, the same as on the Pi 500. This would’ve been for a PoE circuit to power the Pi 500+ over an Ethernet connection, but, just like the Pi 500, it was likely cut as a trade off for cost/capability.


At a glance, the Raspberry Pi 500+ and 500 look identical; in fact, the silkscreen version numbers are the same. The only key differences on the Pi 500+ are the NVMe and moving the keyboard connector from a larger flat flex cable (FFC) to a smaller one. The RP2 is not next to the keyboard connector; instead, it is located on the keyboard PCB, which leads me to believe that RP2 performs keyboard and RGB light control.
The change from a larger to smaller FFC between these versions means that while the mainboard has the same cut-outs and screw holes, you couldn’t transplant the Pi 500+ into a 500 chassis (and vice versa) without some FFC connector and RP2040 desoldering. Of course, the Internet will prove me wrong, and some enterprising maker will do this just for the heck of it. If so, hit me up!
Raspberry Pi 500+ Thermal and Power Performance

Like its predecessors, the Pi 500+ has a huge aluminum heatsink to passively cool the ARM-powered SoC. This means we are almost guaranteed that the unit will run much cooler than the original Raspberry Pi 5. But we must still check. So I ran my usual test script, which records the resting temperature for one minute, then runs a stress test across all cores for five minutes before recording the resting temperature as the system calms down.

The Pi 500+ runs a little warmer than the Pi 500, especially at idle, where it is almost 4C warmer. Under stress, the 500+ is only 1.7C warmer than the 500. The temperature difference can be attributed to the NVMe SSD, which will generate a little more heat inside the case.
CPU Temperature Comparison in Celsius
| Header Cell - Column 0 | Idle | Stress |
|---|---|---|
Raspberry Pi 500 + | 35.1 | 52.7 |
Raspberry Pi 500 | 31.2 | 51 |
Power consumption in Watts
| Header Cell - Column 0 | Idle | Stress |
|---|---|---|
Raspberry Pi 500 + | 2.29 | 6.35 |
Raspberry Pi 500 | 2.6 | 6.36 |

The Raspberry Pi 500+ uses a fraction less power than the Pi 500, which is interesting considering that it has an NVMe SSD inside. The reason for the lower power consumption is that the chip uses the D0 stepping, which removes “all the non-Raspberry Pi specific logic from the chip,” according to Raspberry Pi co-founder Eben Upton, while leaving it functionally identical to the previous chip.

The removal of non-Pi logic sees a 33% reduction in die space and was achieved by removing Ethernet and USB logic; instead, these functions are handled by the RP1 “Southbridge” instead. This is identical to the Raspberry Pi 5 2GB and 16GB models.
Can the Raspberry Pi 500+ be overclocked?

Yes, but I could only manage 2.95GHz. I say “only” because for the Pi 500, I managed 3GHz! This time, the overclock took a little more work, requiring me to tweak the voltage delta to give the CPU a little more juice. But I got there.
CPU Overclocked to 2.95GHz Temperature Comparison in Celsius
| Header Cell - Column 0 | Idle | Stress |
|---|---|---|
Raspberry Pi 500+ OC to 2.95GHz | 38.9 | 67 |
The overclock saw the Raspberry Pi 500+ idle at 38.9C, and then under stress, this went up to 67C. This was still way under the thermal throttle trigger point of 82C. Power consumption at idle was still 2.64 Watts, and under stress, this jumped to 9.65W.
In fact, my log showed 0x50000, which refers to under-voltage, and this was using the official Raspberry Pi 27W power supply. If you plan to overclock, grab the official 45W power supply or source a compatible GaN charger.

Overclocked to 2.95GHz Power consumption in Watts
| Header Cell - Column 0 | Idle | Stress |
|---|---|---|
Raspberry Pi 500+ OC to 2.95GHz | 2.6394 | 9.65 |

I tested using the included 256GB NVMe SSD, which, according to lshw, is a Samsung PM991a PCIe Gen 3 NVMe SSD. Performance was to be expected; we get extra performance when compared to the official Raspberry Pi M.2 HAT on a Raspberry Pi 5.
Raspberry Pi 500+ NVMe Performance at PCIe Gen 3 in MB/s
| Header Cell - Column 0 | Read | Write |
|---|---|---|
Raspberry Pi 500+ | 893 | 778.11 |
Raspberry Pi 5 via M.2 HAT | 837 | 723.16 |
An additional 56MB/s when reading the contents of the SSD to /dev/null means that, in general use, we should see a slight performance improvement, but don’t expect high-performance NVMe. The same is true for write speeds. We get an extra 54.95 MB/s of throughput when writing data to the drive, as per the Raspberry Pi diagnostics tool. Again, not super speedy, but for an SBC (Single Board Computer), we will take every extra we can get.
For all of you eager to know how fast the Raspberry Pi 500+ boots, well, the results are a little disappointing because booting from NVMe took 22.62 seconds, but a Raspberry Pi 500, booting from an A2/SDR104 compatible micro SD card, took just 16.36 seconds. Both Pis are running the latest firmware and bootloader. I also set the Pi 500+ to boot from NVMe first. But the Pi 500’s micro SD card boot won this race!
The Pi 500+ also has a micro SD card slot, compatible with SDR104 and all previous classes of micro SD cards. In fact, it is the same unit as on the Raspberry Pi 500, but the key selling point of the Pi 500+ is NVMe storage. You could feasibly remove the NVMe SSD and replace it with an AI processing unit, booting the OS from micro SD instead. Obviously, without a dedicated camera interface, you will need to get creative and use a USB camera or video source, but it can be done.
Raspberry Pi 500+ versus 500 boot times in seconds
| Header Cell - Column 0 | Time in Seconds |
|---|---|
Raspberry Pi 500 + NVMe | 22.62 |
Raspberry Pi 500 + Micro SD (SDR104 / A2) | 26.55 |
Raspberry Pi 500 Micro SD (SDR104 / A2) | 16.36 |
So, how well does the micro SD card perform on the Raspberry Pi 500+? Well, it came last in my tests at 26.55 seconds, and the culprit is the new bootloader splash screen, which, despite being set to boot from micro SD, hung around far too long. In the grand scheme of things, 26 seconds is no time at all, but we have to test!
Raspberry Pi 500+ versus 500 micro SD performance
| Header Cell - Column 0 | Read MB/s | Write MB/s |
|---|---|---|
Raspberry Pi 500 + | 92.6 | 31.9 |
Raspberry Pi 500 | 94.4 | 32.1 |
I also tested micro SD read and write using my usual tests. Reading the contents of the micro SD card to /dev/null using dd, and using the built-in Raspberry Pi diagnostics test for sequential write speeds. The results are close enough to call it even. So the earlier boot speed difference is clearly down to the bootloader screen.
GPIO access on the Raspberry Pi 500+

The Pi 500+ has the same GPIO as has been standard on all models of Raspberry Pi since the B+ back in 2014. But for the 00 series units, the GPIO is horizontal, and that means to use a HAT, or for a clearer view of the GPIO, you will need a right-angled breakout board. There are boards such as Pimoroni’s Flat HAT Hacker, which are cheap and easy to use. If you want to use the GPIO in a project, you will need a breakout. However, in truth, the 00 series of Raspberry Pi is not really for hardware hackers. If you want to build a project around a Pi, go for the “typical” Raspberry Pi form factor found in the Pi 4 / 5.
I did a test with my own Flat HAT Hacker board, and I can confirm that you can use the GPIO quite easily for basic electronics. If you want to use a HAT, then it may or may not work, as with the introduction of the Raspberry Pi 5, there were changes to how the GPIO is accessed. Now it is accessed via the RP1 “Southbridge” chip instead of the older means of directly accessing it via the CPU and some hacky (but ultimately working) code modules.
I then broke out a Pimoroni Explorer HAT Pro, the same board that I used to teach robotics with at Picademy. This still doesn’t work with the Raspberry Pi 5 series of boards, well, unless you go through multiple hoops and spend an afternoon trying to install it. This aspect of the Raspberry Pi experience still makes me sad, and I long for the days when I could just buy a HAT, drop it on my Pi, and start hacking.
Use Cases for the Raspberry Pi 500+

The Raspberry Pi 500+ is basically the same as the Pi 500 but with more RAM and NVMe storage, which is great, but it comes at a cost. Who would use the Pi 500+? I can see it being a viable home PC for those that don’t need an ultra-powerful PC, or as a child’s first PC. In business, it could be a viable thin client. For educational purposes, it would make a suitable classroom PC.
I was eager to compare the price of a similar Raspberry Pi 5 16GB, the new M.2 compact HAT and the same 256GB NVMe SSD, so I went over to Adafruit and priced it all up.


Before shipping and taxes, the cost came to $229, and we still have a keyboard to purchase. Interestingly, a 256GB NVMe SSD is $20 more expensive than the 512GB version, so save $20, get double the storage and use that $20 to buy a keyboard!
So what does this prove? Well, it shows that in both cases, going the official Raspberry Pi route will cost largely the same, but with the Pi 500+ we have it all contained in a gorgeous looking keyboard. What we lose in function (camera and display access, awkward GPIO) we gain in the form of a singular unit with a great keyboard. But, the Raspberry Pi 500+, like the 500 and 400 before it, is not a platform for electronics / robotics tinkerers. For those enthusiasts, you will need the original form factor Raspberry Pi.
For those of us that grew up during the home computer boom of the 1970s and 1980s, of which I am one, the form factor is nostalgic, and I can see some enthusiasts building their own home computer emulation systems using the Pi 500+, but, they could also do that with the $90 Raspberry Pi 500, or even the older Raspberry Pi 400. A few years ago, I managed to build a competent Commodore Amiga 1200 using my Raspberry Pi 400.
Bottom Line

At $200, the Raspberry Pi 500+ is a considered purchase, which may lead some to consider buying a cheap laptop instead. You could argue that you get a computer and an electronics education platform in one package, but a cheap laptop or an Intel N100 / N150 mini PC and a Raspberry Pi Pico 2 W will offer the same experience for a very similar price.
I really like the Pi 500+, the keyboard is great and it is the pinnacle of the Raspberry Pi 5 series, but the price is hard to swallow as the Raspberry Pi moves from being a cheap single board computer, into an Arm-based desktop computer.
