Radical CPU Coolers from CoolIT
The Freezone
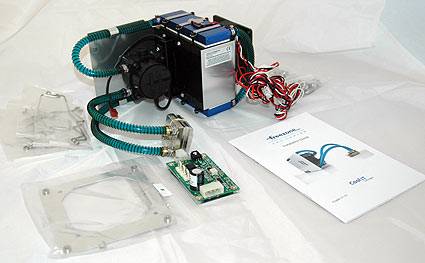
The Freezone is the first of CoolIT's Peltier/Liquid CPU coolers.
Here's how it works, it's quite simple really. Liquid coolant is pumped through a number of thermoelectric cooling blocks that are situated beside the exhaust fan. The cooling side of the TEC lowers the temperature of the liquid coolant. On the opposite side, the TEC is cooled by the moving air of the exhaust fan. The cooled liquid is then pumped into the CPU water block where it cools the CPU, and the coolant is then sent to the TECs again. There's not much to it in theory.
Installation is fairly straightforward compared to a standard liquid cooling system because the Free zone's coolant is in a closed loop: you don't need to drain or add any coolant. CoolIT claims that the Freezone has a lifespan of 50,000 hours, or about 5.8 years of continuous use. Since no maintenance can be performed, after this operational lifetime we assume the Freezone is disposable.
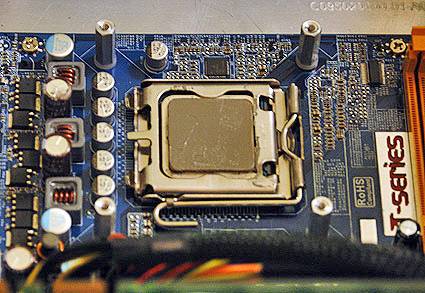
The most involved part of the installation involves attaching the mounting standoffs to the motherboard, which requires the motherboard to be removed from the case. This is a fairly simple procedure.
With the standoffs installed and good to go, the Freezone needs to be placed close enough so that the attached CPU water block can reach the CPU. The Freezone's water block came pre-coated in thermal paste but I removed this and used Arctic Silver 3 as I do in all of my cooling tests, to keep things on an even keel between products.
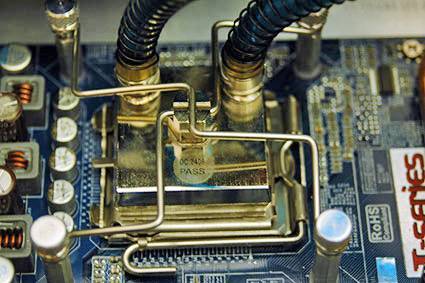
The installation method for the water block is a bit unusual. Two bent wires fit into a groove on the block and hold it in place. There are different wire sets to use depending on the different CPU sockets available. The wires are screwed on to the standoffs to keep everything tight. This procedure was simple, but a little awkward as the hoses connecting the Freezone and the CPU water block weren't all that long.
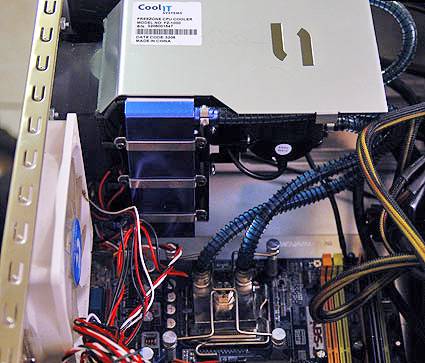
With the water block firmly attached, the Freezone unit was ready to be installed into the chassis. This requires the use of the uppermost exhaust fan port; if there is an existing fan, it must be removed so that the Freezone may take its place. The Freezone can be installed in a standard 80mm or 120mm fan slot, but for the larger fan slot an adapter must be used.
Get Tom's Hardware's best news and in-depth reviews, straight to your inbox.
In my particular chassis, the Freezone's 120mm adapter interfered with a reinforcing bracket in my case. I had to remove that bracket in order to get the Freezone installed. After the bracket was removed, the Freezone was tight, but I managed to screw it into place.
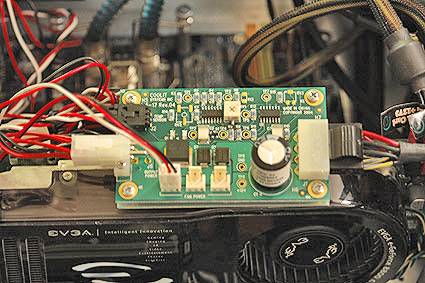
The last component to be installed is the Thermal Control Module. This is a little circuit board that controls the Freezone's power and fans. The board also has a temperature control dial. The TCM comes with sticky pads to mount it in the chassis, but I found the wires from the Freezone would have made a chassis installation difficult, so I opted for a 'floating' installation. I attached the TCM to the wires from the Freezone in addition to a single Molex connector from the power supply.
You set the desired level of cooling with a tiny control dial that must be manipulated with a very small screwdriver, which is not included. This is a little awkward, especially since the dial is not marked which side is the low or high setting. You need to reference the manual to use the dial.
Installation complete! Let's compare the Freezone with its newer, lower budget sibling, the Eliminator.
Don Woligroski was a former senior hardware editor for Tom's Hardware. He has covered a wide range of PC hardware topics, including CPUs, GPUs, system building, and emerging technologies.
