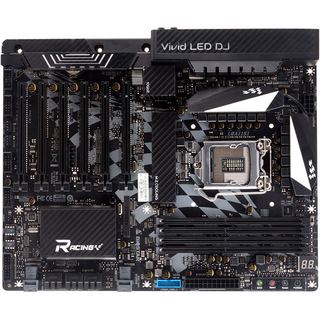
Biostar's Racing 200-Series Motherboards Get Intel Optane Support

Biostar has released several new BIOS updates to bring Intel Optane support to its its Racing 200-series motherboards.
Optane is Intel’s marketing name for the 3D XPoint technology it co-developed with Micron tp serve as a middle ground between an SSD and DRAM. By storing your computer’s most frequently used data, an Optane memory stick allows your system to make less trips between the processor and the much slower mechanical spinning-disk hard drive for data access.
Intel’s Optane memory looks like your average M.2 drive and fits into any M.2 slot on Intel 200-series chipset motherboards. The benefit of Optane memory is that it is much faster and more durable than NAND while also being cheaper and denser than DRAM.
During our initial evaluation of Intel’s Optane memory, we explained the benefits of upgrading as such:
Optane Memory can quickly and easily boost performance at a low price point. Intel designed the technology to speed up hard disk drives, but you can use RST to accelerate solid-state drives as well (more on the following page). You can only accelerate one drive at a time, and even though Intel doesn't officially support it, it can be a secondary drive. This is good news for gamers who already use an SSD for the boot drive and a hard drive for game installations.
Biostar assured us these BIOS updates will make your current system feel a little snappier by reducing boot times and providing faster load times for your favorite games and applications.
Although updating your BIOS is a fairly straight-forward process, the company provided a step-by-step guide to getting the job done:
Stay on the Cutting Edge
Join the experts who read Tom's Hardware for the inside track on enthusiast PC tech news — and have for over 25 years. We'll send breaking news and in-depth reviews of CPUs, GPUs, AI, maker hardware and more straight to your inbox.
- Download the BIOS file from: http://www.biostar.com.tw/
- Copy the BIOS file onto a USB storage device (not NTFS format)
- Power on the motherboard and press ‘F12’ during POST (power-on self-test) screen.
- After POST screen, a menu for BIOS update will appear.
- Select USB device and press ‘Enter’, it will go into the BIOS update screen.
- Use the BIOS file listed on the left to update.
- Wait for the system to load the BIOS file.
- Press ‘Y’ to flash the BIOS and erase DMI data. The system will update the BIOS automatically.
- After reboot, the system will run with new BIOS. Turn-off the computer and install Optane Memory on M.2 slot to enjoy the performance upgrade.
The BIOS files can be downloaded from the following links:
Most Popular

