Printing Your Own CDRs With Ink
The Printing Process On The Models 900 & 960, Continued

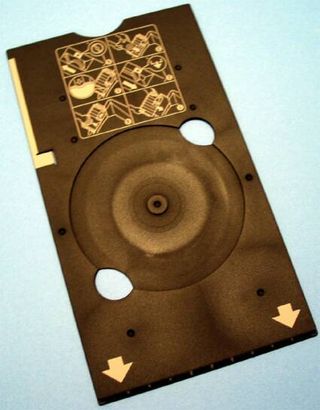
This is the tray that is used to hold the optical media for printing on the 960.
The Model 960 allows for the tray to be fed into the printer from the front, which can be an advantage if your print area around the printer is at a premium. Before the media is placed into the tray, it is necessary for the included front sheet feeder to be placed on the output tray and snapped into place. The printer roller release lever needs to be in the alignment mode, which keeps the rollers from gripping the tray while you are starting the alignment process. Once the front sheet feeder has been installed, you can then place the media to be printed on the tray. The tray guide needs to be slid all the way to the right side of the feeder. Now, it is just a matter of sliding the printable media tray all the way into the printer until you are able to align the curved notch in the tray and the printer. Once this has been accomplished, all that is left to do is to place the roller adjustment level into thick media printing position. You are now ready to print your optical media.
After comparing the printing preparation process between the Epson 900 and 960, it is obvious to us that the better position and guide of the front feeder of the 960 made it easier to get consistent alignment placement. The 900, on the other hand, was more 'loose' and difficult to align consistently. The alignment is the key to making sure that the entire surface of the media is covered or the images/text is centered on the media correctly during the printing process. While Epson does offer some alignment and print saturation support within the printer driver, it will still take some experimentation to make sure that the settings are at their proper values in order to achieve optimum, consistent results. The 960 wins the convenience competition, as it is easier to load and more easily achieves consistent results.
Stay on the Cutting Edge
Join the experts who read Tom's Hardware for the inside track on enthusiast PC tech news — and have for over 25 years. We'll send breaking news and in-depth reviews of CPUs, GPUs, AI, maker hardware and more straight to your inbox.
Current page: The Printing Process On The Models 900 & 960, Continued
Prev Page The Printing Process On The Models 900 & 960 Next Page The Bundled Epson Print CD SoftwareMost Popular

