Windows In Your Pocket
Set The System's Boot Device Sequence

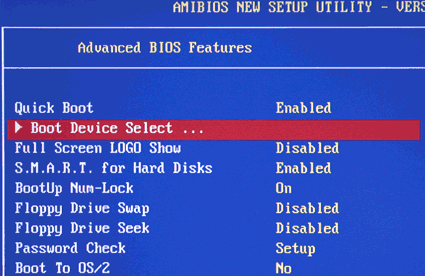
AMI-BIOS: For most versions, managing a PC's boot device sequence appears under the "Advanced BIOS Features" menu
If your PC has a relatively new motherboard, its BIOS will already include the functions necessary to support USB-attached boot media. If so, you need only make the right selections in that BIOS menu to boot from a USB flash drive. Older PCs, on the other hand, won't accept USB drives as valid boot devices. This means a BIOS update that supports USB boot options is necessary. You can find information about where to obtain such updates from your PC's (or motherboard's) user manual, on the driver CD included with the PC (or motherboard) or on the vendor's Website.
Normally, the hard disk precedes the USB flash drive (which falls under the heading of USB-HDD in most BIOS menus) in the boot order. If the hard disk contains a viable boot sector, the PC will start up automatically using the information it contains. Only when the hard disk suffers from a boot sector defect or an operating system can't be found will the PC boot from the USB flash drive instead.
Change this boot order. Plug the flash drive in, boot the computer and enter the BIOS setup utility. Normally, this means holding down the DEL or F2 key just as the computer powers up and begins the boot process. If you read the initial startup screen on your PC carefully, it will tell you exactly what you must do to access and alter your BIOS settings.
If your PC uses AMI-BIOS from American Megatrends, there are two possible ways to alter the boot device sequence. Each varies depending on the version of AMI-BIOS that's installed.
For the first variant, there is no menu entry named "Boot." Navigate to the sub-menu named "Advanced BIOS Features." Navigate to the item named "Boot Device Select... " and designate the USB flash drive as the first device in the "Boot Device Priority" list by selecting "1st" as its value. Then, hit the Esc key and set both the "Quick Boot" and "Full Screen LOGO Show" items to "Disabled" (this lets you see the BIOS messages during startup on the monitor). Exit the BIOS Setup utility using the "Save and Exit Setup" item in the main menu.
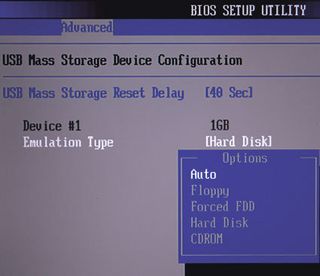
For the second variant, use the "Boot" menu to select the USB flash drive. It will show up under one of the following headings: "Hard Disk Drive", "Removable Device" or "Removable Storage Device. " Next, select the USB flash drive as "1st Drive" in the first position, then hit the Esc key. That device should appear in the menu named "Boot Device Priority" which might also show up as "Boot Sequence". Inside that menu, designate the USB flash drive as the "1st Boot Device", hit the Esc key and save all changes in the "Exit" menu by selecting "Exit and Save Changes".
Stay on the Cutting Edge
Join the experts who read Tom's Hardware for the inside track on enthusiast PC tech news — and have for over 25 years. We'll send breaking news and in-depth reviews of CPUs, GPUs, AI, maker hardware and more straight to your inbox.
The Phoenix BIOS that's so popular in notebook computers also lists the USB flash drive in its "Boot" menu (which might also appear as "Boot Device Priority"). In this case, the flash drive may show up as an entry in the "-HDD" or "-Removable Devices" sub-menu. Select the device class ("-Hard Drive" or "-HDD" for example) and use the F6 key to move the flash drive to the top of that list. Exit the BIOS Setup program by striking the F10 key, followed by the Enter key, to save all settings.

Current page: Set The System's Boot Device Sequence
Prev Page Expanding The Role Of USB Flash Drives Next Page Test Your Settings-
you should try puppy linux on a usb stick, its not windows, but its got its benefits, its free, secure and we,, you'll might enjoy one of the fastest linnux distros aboutReply
-
follow above link, it works!!! only comment, in Step 3 it refers you to step 1, instead it should be referring you to Step 2 command prompt window. Also, there is no need to download their software, i haven't used it to create a boot key, just start with step 2 right away! Best of luck and Thanks for the link post!!!Reply
-
looking for a"FREE" Mini Windows XP ISO for install on a Mini Netbook with only 3Gb HD .. PLease AdviseReply
-
dvijaydev46 Have you tried SARDU? You can create a multi OS USD drive with that tool. It's not only limited to Wondows, but also can you add Linus, antiviruses and other troubleshooting tools.Reply -
dvijaydev46 Have you tried SARDU? You can create a multi OS USD drive with that tool. It's not only limited to Wondows, but also can you add Linus, antiviruses and other troubleshooting tools. http://mytechencounters.wordpress.com/2012/02/27/create-a-multi-bootable-usb-drive-with-linux-and-windows/Reply
-
gosim05 Step "Install Windows" the sentence "Open Windows Explorer and erase all files on the USB flash drive."Reply
DO NOT erase all files, leave BOOT.INI, NTLDR, and NTDETECT. Otherwise peinst.bat won't start the installation.
Most Popular

