Use grep to search Linux files and directories smarter
Use grep to search smarter in the Linux terminal

Get Tom's Hardware's best news and in-depth reviews, straight to your inbox.
You are now subscribed
Your newsletter sign-up was successful
You’re looking for that one file, the one that contains the all important information for your next meeting. Do you manually search all of your files? That will take time. Instead we use a little Linux command line magic. Grep is a pattern matching command that we can use to search inside files and directories for specific text. Grep is commonly used with the output of one command, piped to be the input of the grep command. For example we can search inside a file for a specific string of text using the less command, and pipe the output to grep.
In this how-to we will use the grep command and commonly added arguments to search for specific strings of data within files. We’ll begin by setting up a small directory of test files as searching an entire filesystem can take some time and create a lot of results.
All the commands in this how-to will work on most Linux machines. We’ve used an Ubuntu LTS install but you could run this how-to on a Raspberry Pi. All of the how-to is performed via the Terminal. You can open a terminal window on most Linux machines by pressing ctrl, alt and t.
Set Up a Test Environment for grep
As grep can be used in lots of different ways we need to set up a directory and some content that allow us to explore its uses. In this section we will create this test environment.
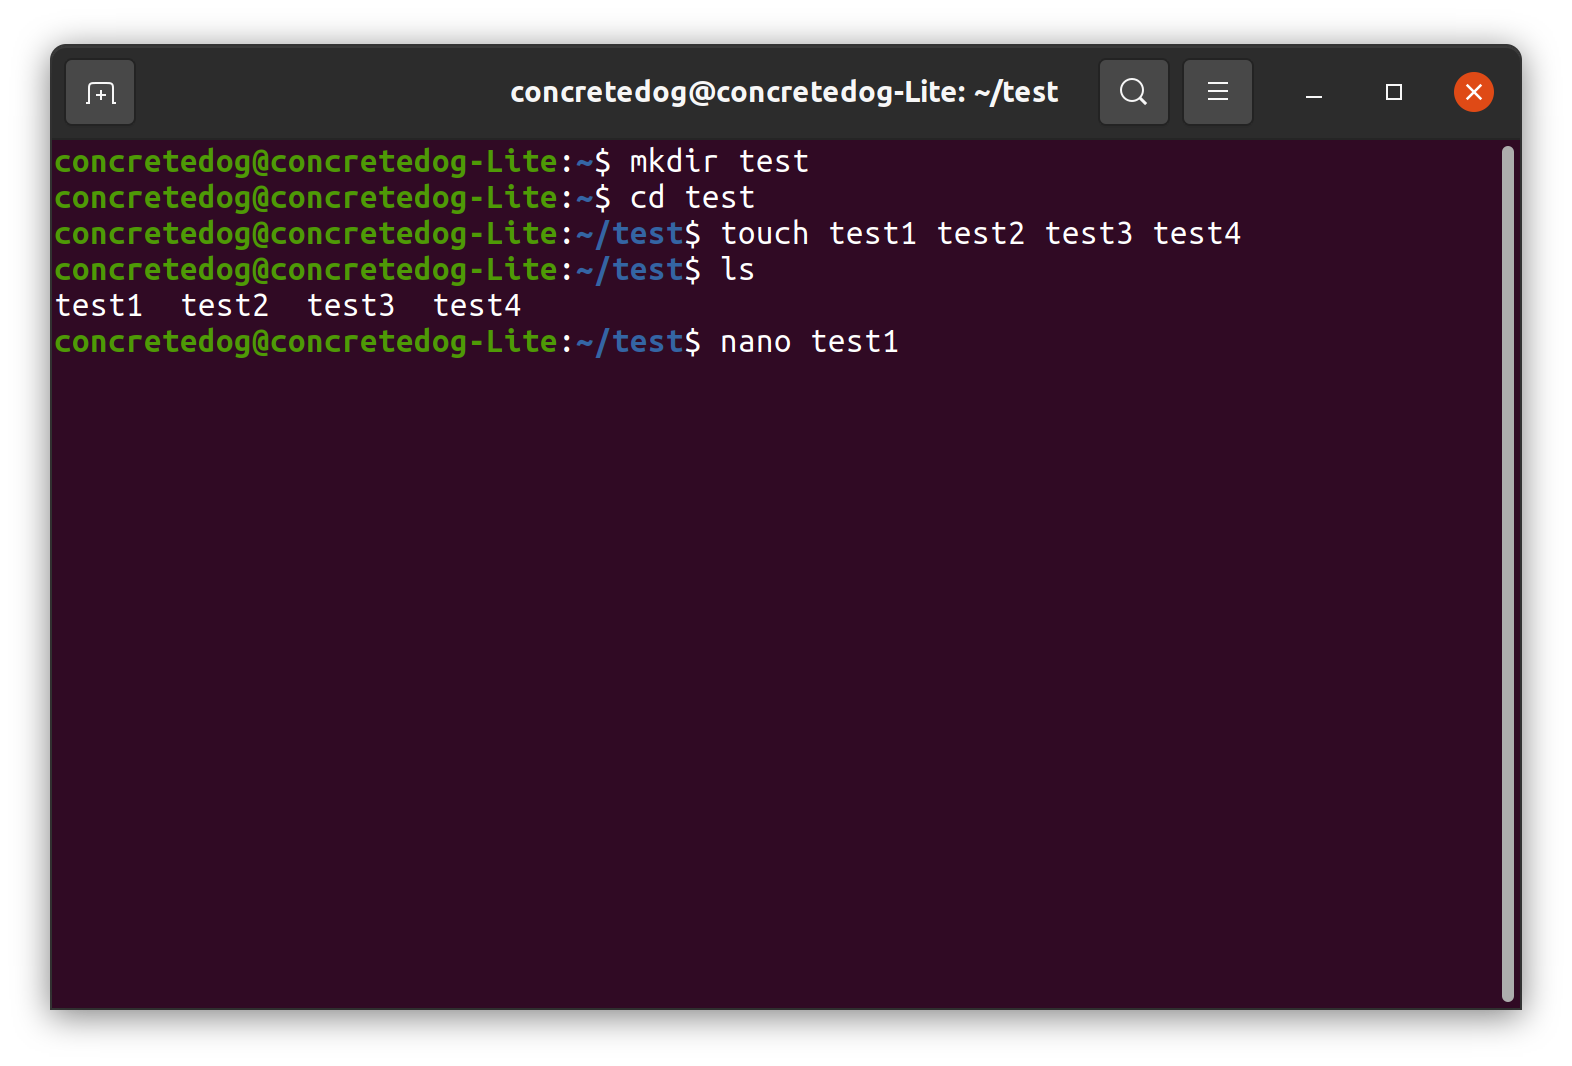
1. Set up a test directory and change directory so that you are inside it.
mkdir test
cd test2.Create 4 files, test1, test2, test3 and test4.
touch test1 test2 test3 test4
ls
3. Edit test1 using nano to contain the following names on separate lines. Note that in test1 none of the names contain capitals. After editing in nano press control x to exit, press y to confirm the save and then press enter.
Get Tom's Hardware's best news and in-depth reviews, straight to your inbox.
nano test14. Add the following text to the file. Then press CTRL + X, then Y and Enter to save and exit.
ali
mohamed
claire
aled
steve
5. Edit test2 using nano. In test2 we will add a single longer line of test containing the name steve.
nano test26. Add the following text to the file. Then press CTRL + X, then Y and Enter to save and exit.
this is a long line of test that contains the name steve7. Edit test3 in nano. Similar to test1 we will add a list of names on separate lines but this list will include the name steven.
nano test38. Add the following text to the file. Then press CTRL + X, then Y and Enter to save and exit.
alice
geoff
murbarak
mohamed
steven
9. Finally edit test4 to complete our test environment. Note that in this file we are using a capital letter at the start of Steve.
nano test410. Add the following text to the file. Then press CTRL + X, then Y and Enter to save and exit.
Steve ?Simple Searches with grep
Searching a file for a specific string is extremely useful. For example when debugging an error in a log file. Let’s start using grep in its most basic form.
The grep command syntax is simply grep followed by any arguments, then the string we wish to search for and then finally the location in which to search.
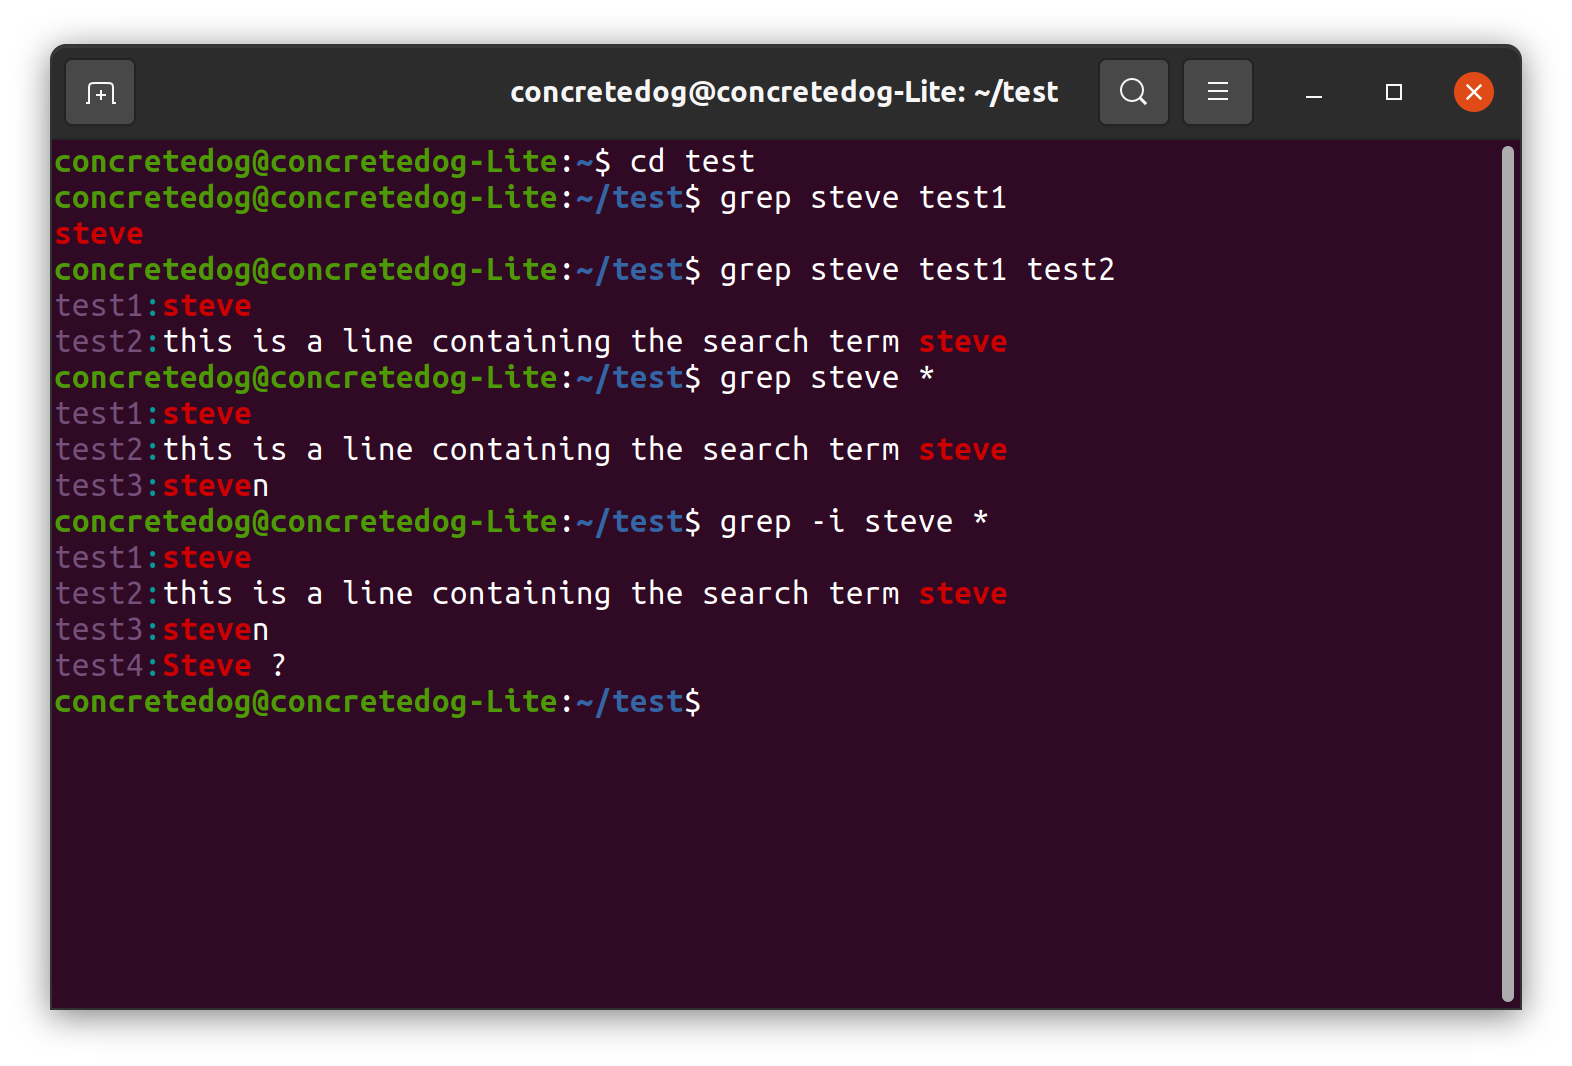
1. Search test1 for the string steve using grep. The search criteria is case sensitive so ensure that you're searching correctly. Notice that the word steve is simply returned in red to indicate it has been found in the file.
grep steve test12. Search for the same string in multiple files. We can simply add a list of files to the grep command for it to search. Notice that, with multiple search areas, the returned results are tagged with each filename from which the result is found. Also notice that grep returns the complete line of text that contains the searched string.
grep steve test1 test23. Search all files within the directory. Adding an asterisk forces grep to search all files within the current directory. Notice that the returned results include the result from test3 where the search string steve is contained within Steven. Note also that these results don’t contain the result from test4 as in its basic form the grep command is case sensitive.
grep steve *4. Add the argument -i to make grep case insensitive. This will return results from all four of the test files in the directory.
grep -i steve *Piping output to grep
The strongest use case for grep is when it is paired with another command. Using pipes we send the output of a command to grep and use it to search for patterns / keywords.
1. Open a new terminal window.
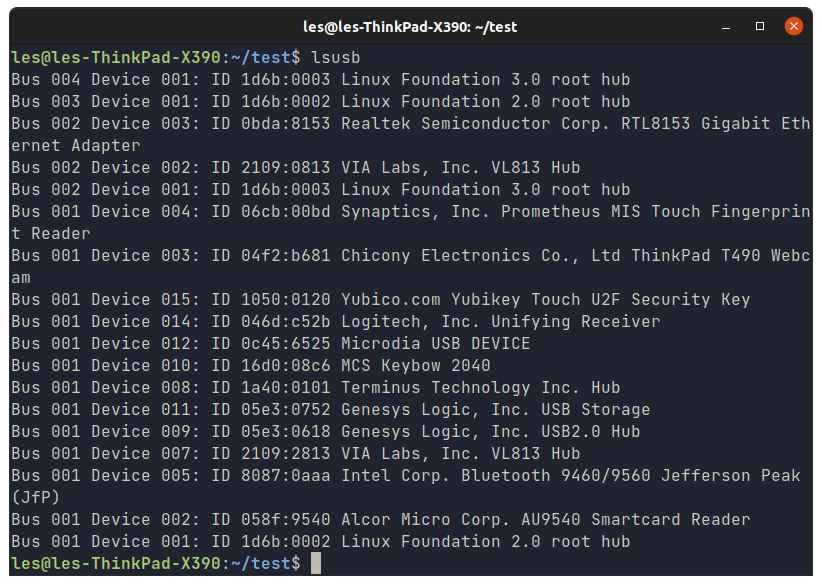
2. Use lsusb to list all of the USB devices attached to your machine. This will also list internal USB devices, such as laptop webcams. The output will differ depending on your machine, but you should be met with a wall of text.
lsusb3. Use the lsusb command again, but this time use grep to search for Linux. By adding a pipe between lsusb and grep the output of the first command is used as the input of the second.
lsusb | grep LinuxUsing dmesg and grep to Inspect the Kernel Ring Buffer
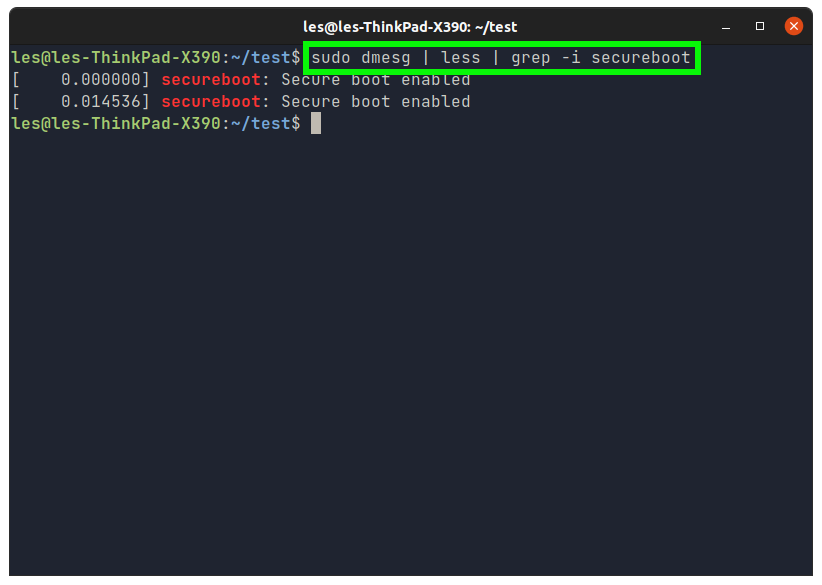
Let's try something a little more complex. This time we’ll use dmesg and grep to inspect the Kernel Ring Buffer (essentially the kernel’s log file). We are going to search for a keyword in dmesg, “secureboot”, and confirm that it is enabled.
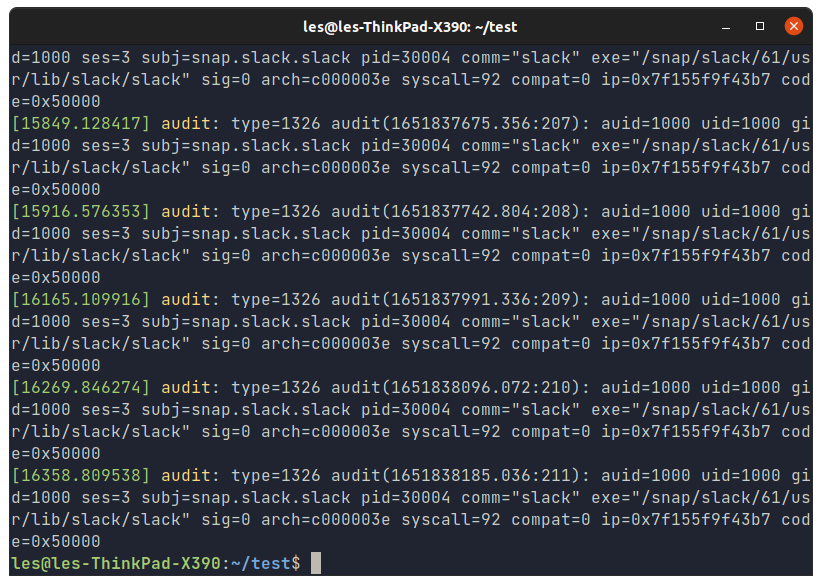
1. Open a terminal and run the dmesg command using sudo. This will print a wall of console output to the terminal, something that we can search using grep.
sudo dmesg2. Use the grep command to search for “secureboot” in the dmesg output. Use the -i argument to turn off case-sensitivity so that we catch every occurrence of secureboot. The output will show the lines at which secureboot appears in dmesg.
sudo dmesg | less | grep -i securebootOther Uses of grep
Like many Linux commands there are many useful additions and variants for the grep command. Let’s look at a couple of interesting examples.
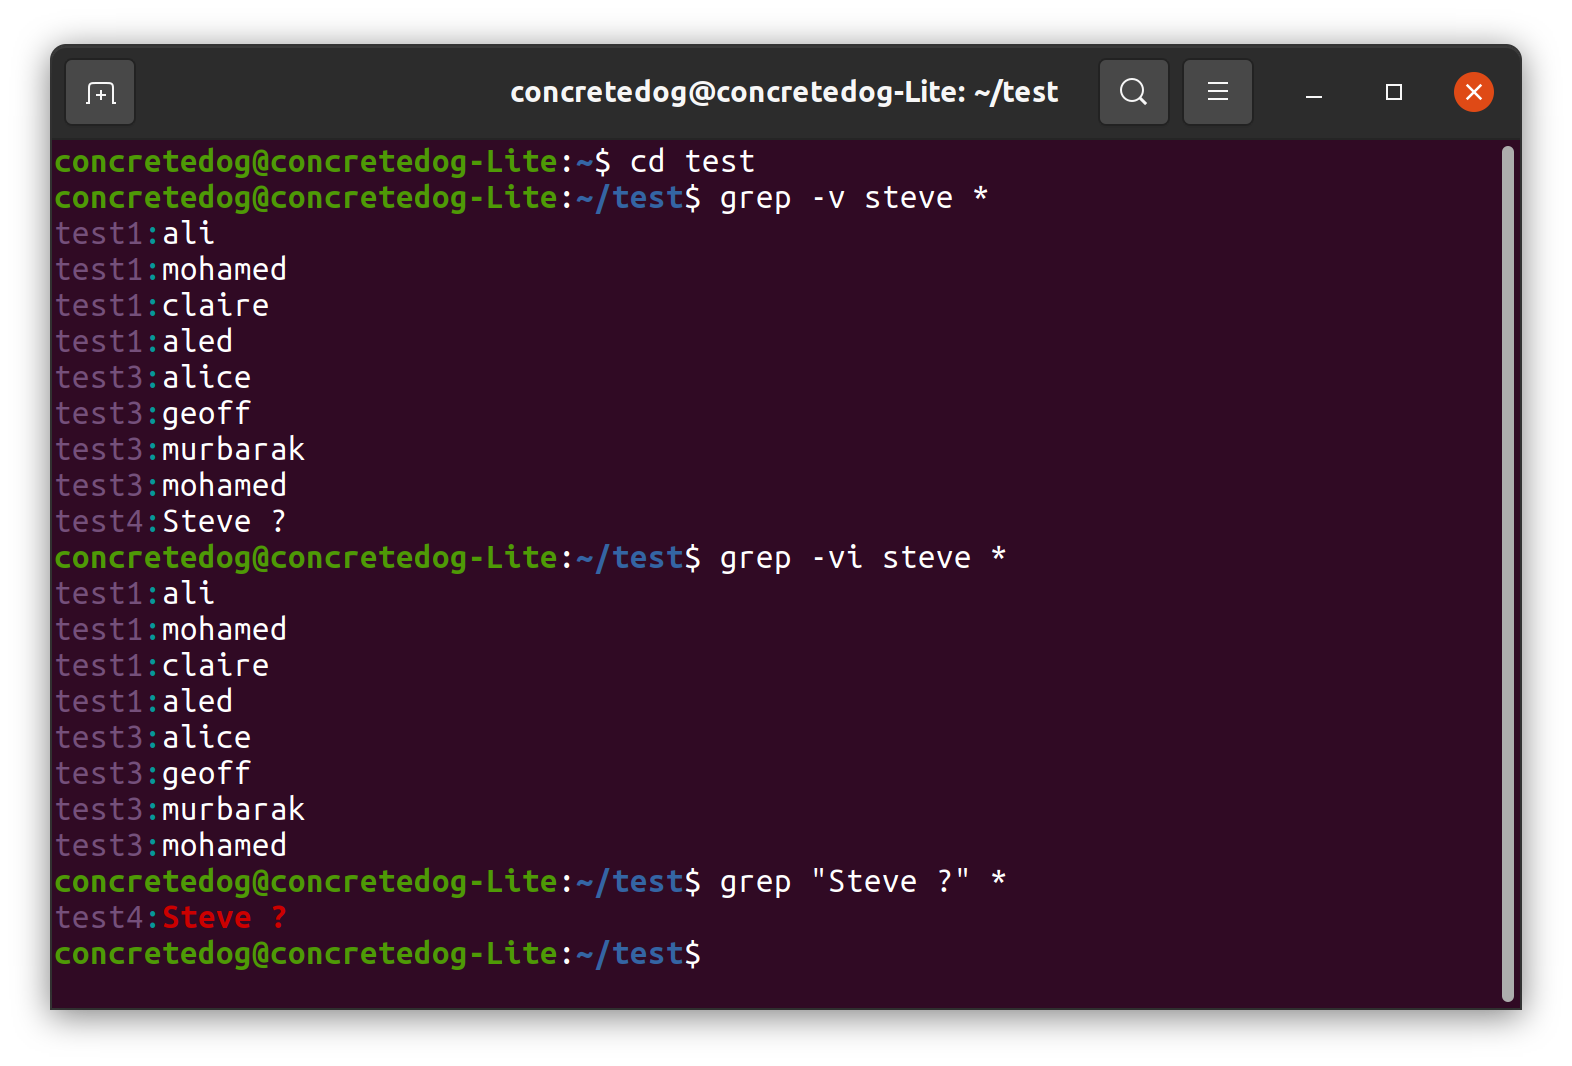
1. Perform an inverted search using the -v argument. This will return a list of every line from the test environment files that doesn’t contain the search string steve. This argument is useful to dismiss occurrences of strings in logs or files when debugging an issue. Note that again the results are case sensitive and therefore they include the line containing the capitalized Steve ? from test4.
grep -v steve *2. Combine the -v and -i arguments to exclude all matching strings regardless of case.
grep -vi steve *3. Search for a string that contains non alphanumeric text or spaces. If you include a search string with a space or other non alphanumeric text this can break the grep command syntax, to create a search string containing these you need to use quotes to contain the string. In this step we are searching for “Steve ?” which is contained in the test4 file.
grep “Steve ?” *Searching Subdirectories with grep
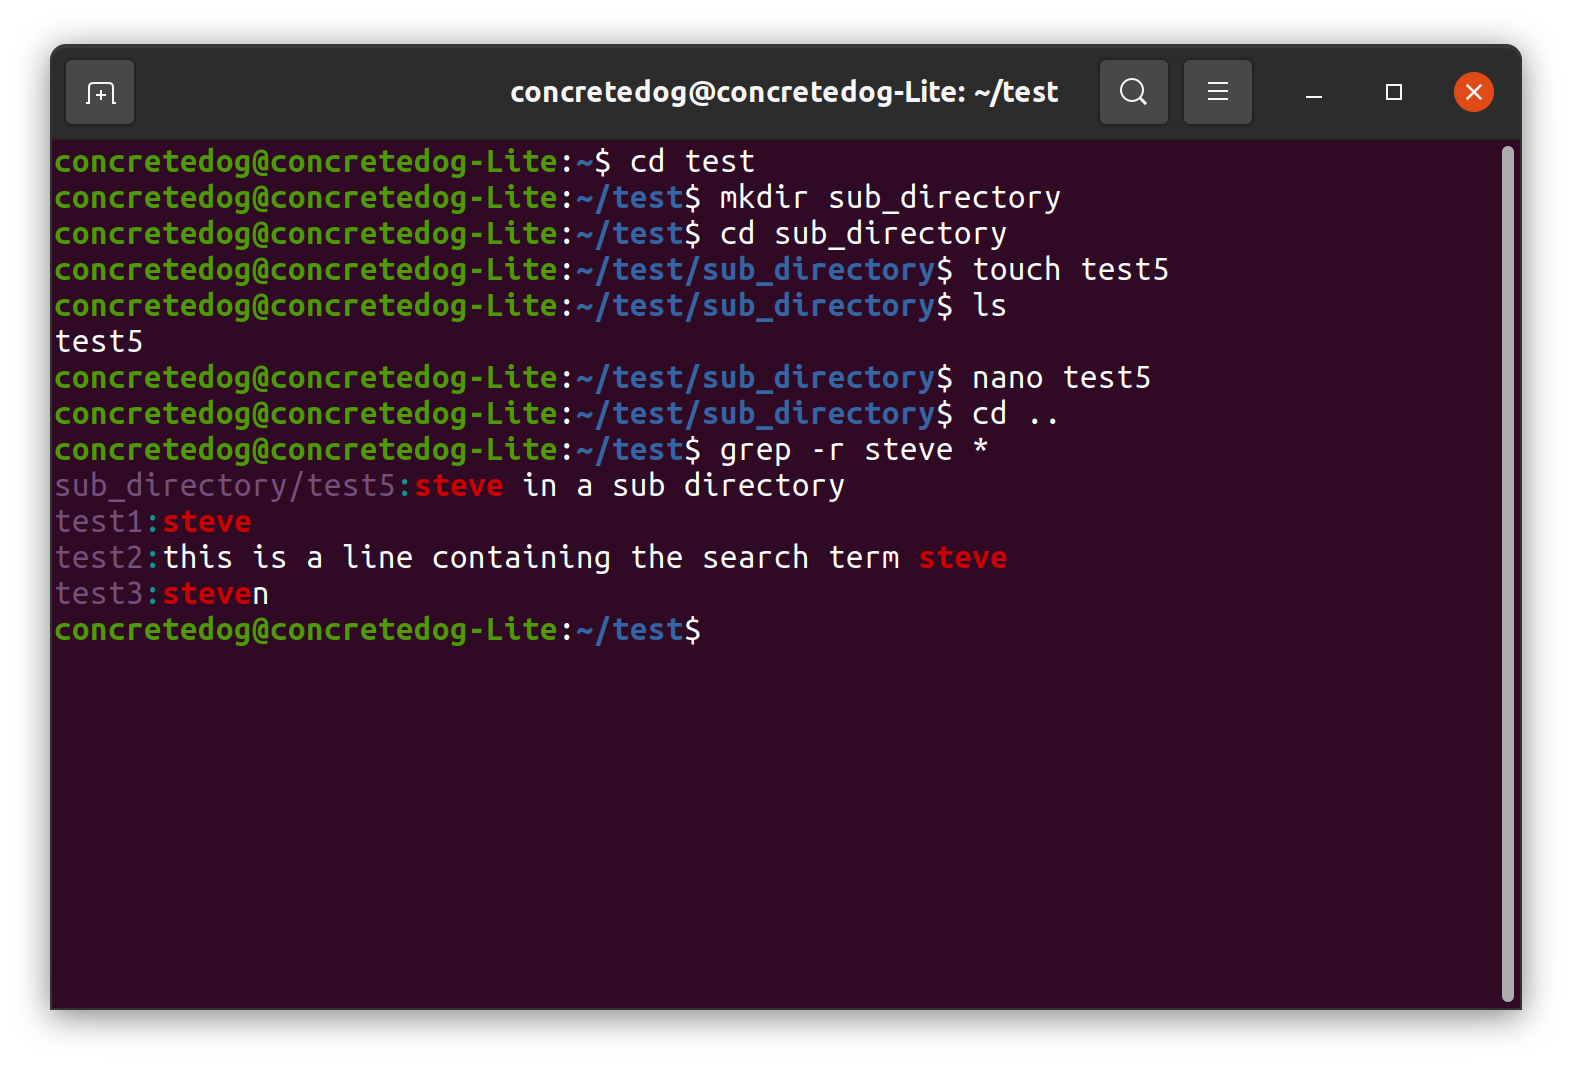
Often we will want to search for a string in the files contained in sub directories. We can do this simply by adding the -r recursive argument to the grep command.
1. Create a subdirectory containing a test file within the test directory.
mkdir sub_directory
cd sub_directory
touch test5
2. Open test5 using the nano text editor and add the text “steve in a sub directory” to the file. Then press CTRL + X, then Y and Enter to save and exit.
nano test5.3. Return to the test directory and perform a search adding the -r option. Notice that the result for test5 includes the location of the file listed in the output.
cd ..
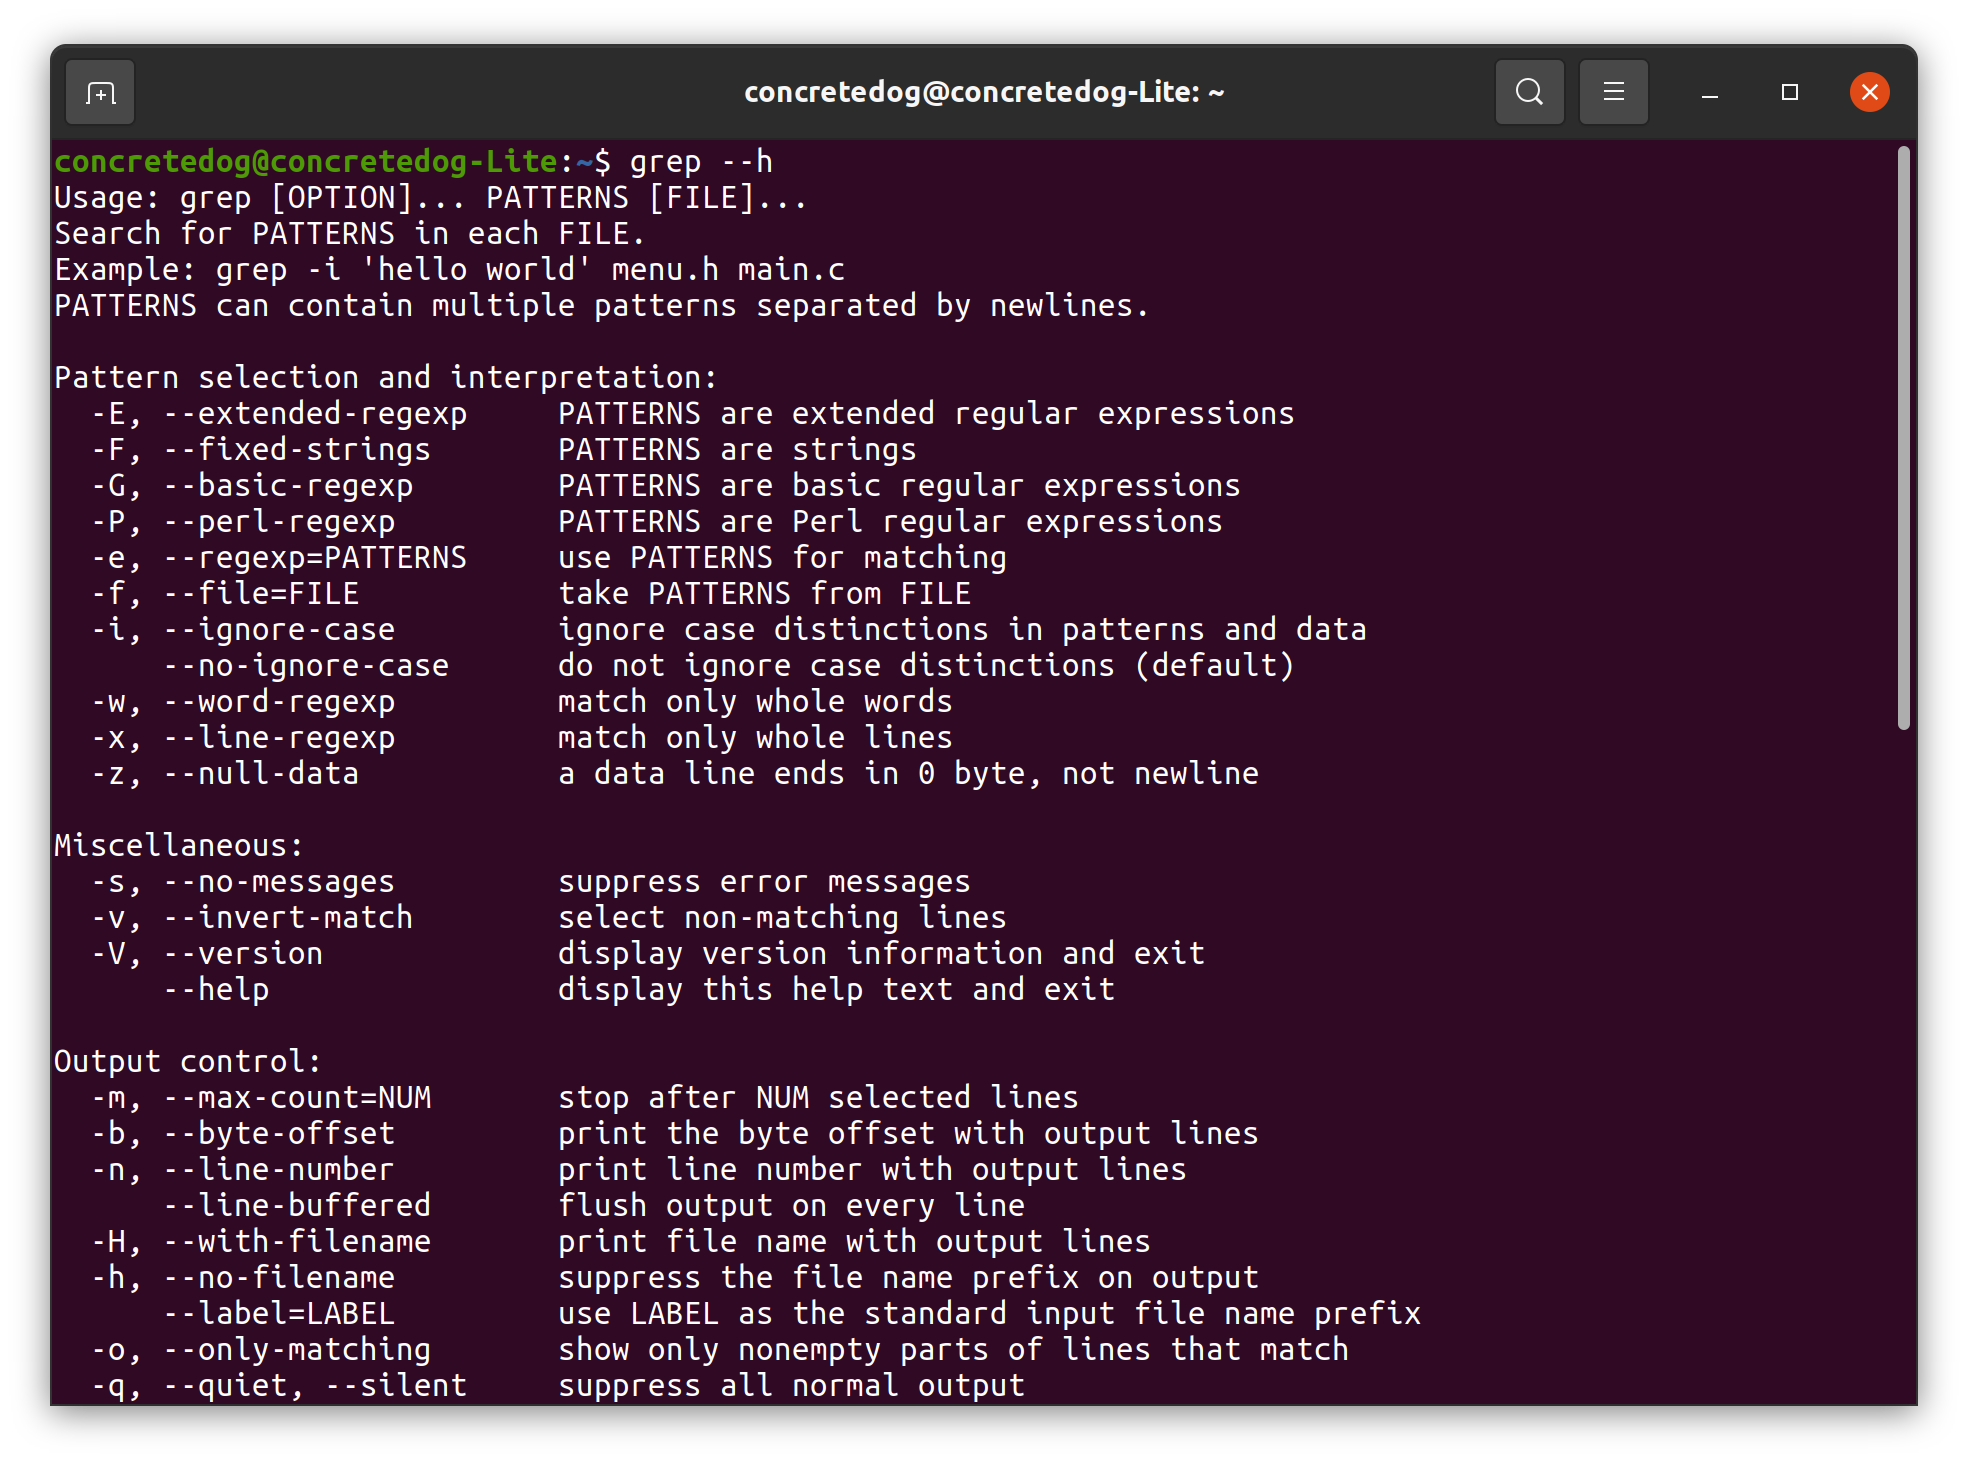
grep -r steve *With grep in Linux, you have a good collection of approaches for searching out file contents across your system. As with many Linux commands it can be worthwhile looking at the help menu to see all the varied arguments you can add to grep. Run grep --h in a terminal emulator to check out all the options.
MORE: How To Check Disk Usage in Linux
Jo Hinchliffe is a UK-based freelance writer for Tom's Hardware US. His writing is focused on tutorials for the Linux command line.
