
In this how-to, I’ll show you some quick, easy, and free ways to get more use from the memory already installed in your system. There is no escaping the rising costs of computing. Pandemics, chip shortages, and Artificial Intelligence have all played a part in raising the costs for the humble PC user. The price of your GPU has skyrocketed, and now it's memory's turn. If you don’t game, then sure, you can get by with a lower spec GPU, but every system needs RAM, and modern-day operating systems need lots of it. Or do they?
We’re not going to delve into “Linux has better memory management” territory of OS wars, but Microsoft Windows can use a sizable chunk of your RAM, so how do we reduce the hit? We need to be clever and, more importantly, frugal with how we compute. With today's incredibly inflated memory pricing, finding deals on memory is hard, so squeezing out every ounce of performance from your system is key. Let's get started!
Clean up your Startup Apps
When Windows starts up, there are a plethora of applications that automatically load. Anti-virus, Bluetooth, driver update tools, and then we have the user-installed applications that sit ready to be called (Steam, GoG Galaxy, Slack, etc.) Can we clean this up? Of course we can, and here’s how!
1. Click on the Windows logo / Start menu and search for Startup Apps, and click on Open.

2. Click on “Sort by” and select “Start-up impact”. This will sort the list (which can be huge) by the impact that the app has on your startup.

3. Turn off unnecessary applications that are causing the biggest impact. Before turning any off, check that they are not needed. If unsure, search online for the application, and if still unsure, leave the application.

4. Reboot, and your system should boot a little quicker.
Check for running processes/programs
Underneath the calm waters of the Windows desktop, there are many processes and applications vying for access to your system resources. Do we need them all? No, can we trim the fat and have a leaner setup? Yes, here’s how.
1. Click on the Windows logo / Start menu and search for Task Manager, and click on Open.

2. Click on the Memory column to sort the processes by RAM usage, from high to low.

3. Right-click on a process and select End Task to stop it. Only do this on processes that you know of. Don’t turn off random processes. Close Task Manager when done.

Stop Unnecessary Services
Services, those support applications that run in the background and fulfill specific tasks without bothering the user, are always running in Windows. There are services for Windows update, anti-virus, and even a time service that ensures your system clock is precise. There are also some services that hang around and provide nothing, so let's delve into Windows services and learn how to save precious resources.
1. Click on the Windows logo / Start menu and search for services.msc and click Open.

2. Scroll down the list for running services that you do not need! You can click on the Status column to sort the running services.
3. Right-click on the chosen service and select Stop to kill the service. Only do this for services that you know can be safely ended. Do not just end random services; you may break your OS.

Scan for Malware
Sometimes it can be a nasty virus or malware, lurking in the background of your Windows install, that is stealing all of your precious resources. Make sure that you have good antivirus software, and regularly scan your system.
1. Click on the Windows Logo (Start Menu) and search for Windows Security. Click on Open.

2. Select Virus & threat protection.

3. Click on Scan Options.

4. Select a Full scan and then click Scan now. The process can take a very long time; you can use the PC while the scan is running, but the best practice is to leave the PC to run the scan and go and do something else.

5. With the scan complete, take any recommended action to remove malware or viruses.
Disable Visual Effects
Yes, the bells and whistles of a UI make things look fun and interesting, but after a few days, do you really miss them? Thought not! So how do we turn them off and save some system resources?
1. Click on the Windows logo / Start menu and type sysdm.cpl into the search bar. Click on Open.

2. Click on Advanced and under Performance, click on Settings.

3. Tick “Adjust for best performance” and then click Apply and OK to make the changes. I tweaked my setup so that image thumbnails still appear; otherwise, I just had a sea of icons, hindering my search for images to use in my work.

Turn off Windows’ Memory-hungry Features
Behind the scenes, Windows has a lot going on. These “features” provide extra functionality for game recording, showing recent apps, etc. So let's tweak them and save some RAM!
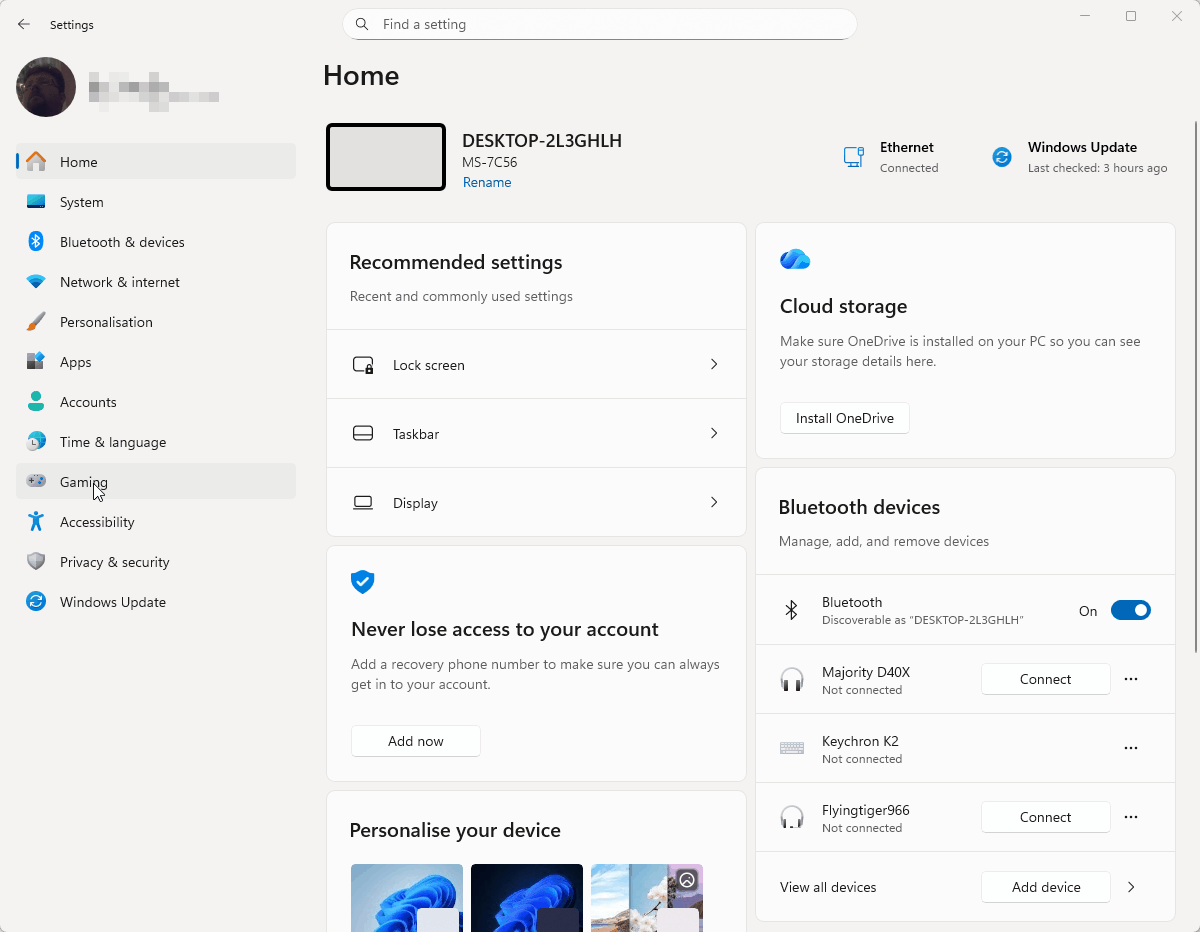
1. Click on the Windows logo / Start menu and click on Settings.

2. To disable Widgets, click on Personalization.

3. In the Personalization section, click on Start and then turn off “Show recently added apps”.
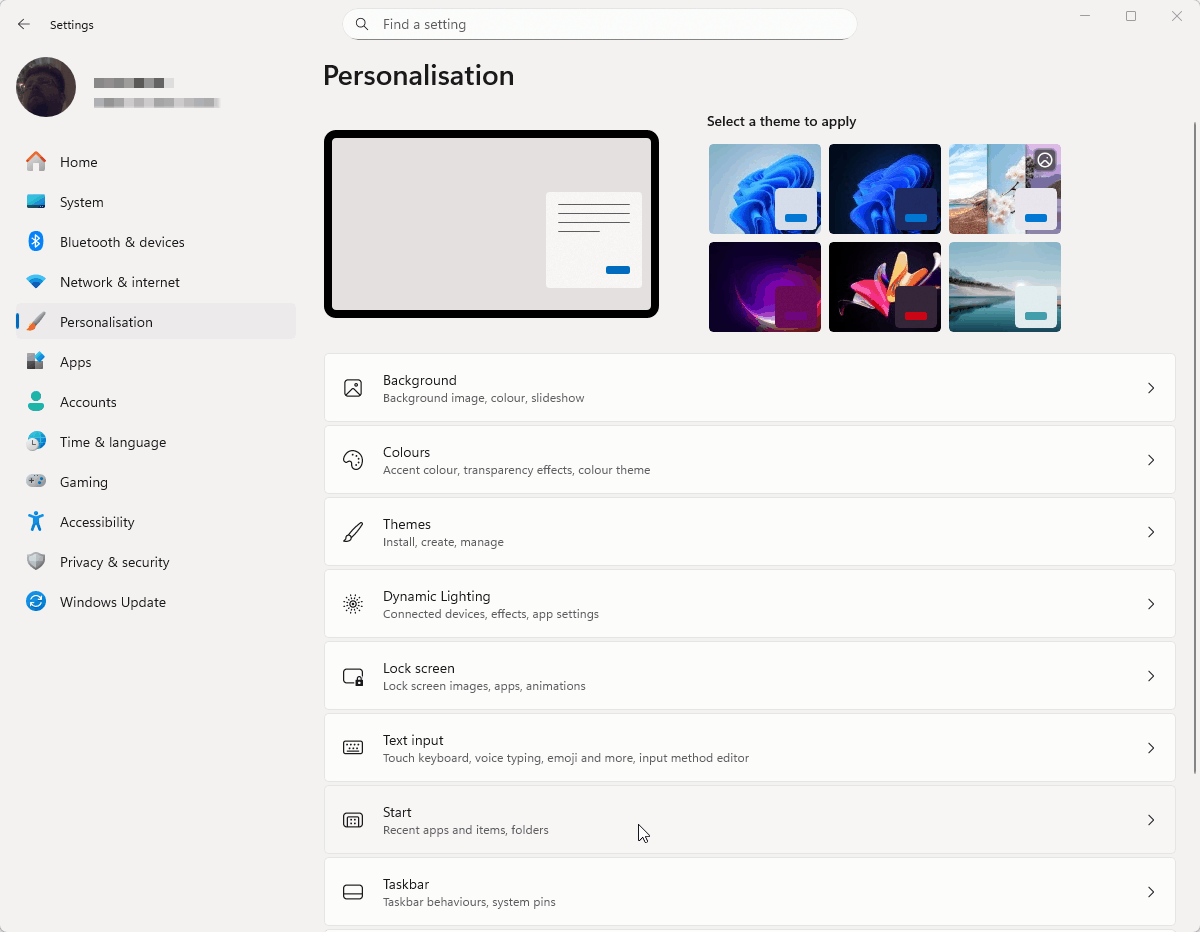
4. Click on the back arrow in the top left of the window to go back to the settings menu.
5. To tweak Gaming settings, click on the Gaming link in the main settings window.
6. Click on Captures and turn off “Record what happened.” Gamers should keep this setting on so that they can share their gaming sessions with friends.
7. Close the Settings window.

These quick and easy steps should save you a few more Megabytes of memory and help your system remain responsive, hopefully until the RAM-pocalypse subsides, or you can grab a great deal on the best RAM for gaming.
