PVR On A Budget
Installation
The installation process hasn't changed much since version 2, so please see my review of PVS2 for more details.
1. Hardware and driver installation
SnapStream PVS needs a TV tuner as its video source. It doesn't support hardware encoding, therefore any cheap TV tuner card will due. In my case, I already had a ATI All-in-Wonder Radeon AGP card installed in my test PC. As you will see, this is not the most compatible video card for SnapStream. To ensure compatibility with PVS3, I downloaded and installed the latest Radeon 3.4 drivers from ATI's website.
I then verified that the WDM drivers were installed in Device Manager. SnapStream recommends that you verify that the TV tuner is working with the manufacturer's software before installing PVS3. However, I skipped this step without any problems.
I then proceeded to install the drivers for the Streamzap Remote Control that I received in the review kit. The StreamZap remote control uses an IR receiver that plugs into a standard USB 1.1 port. The IR receiver should be put somewhere near the monitor, or wherever you are most likely to point it at.

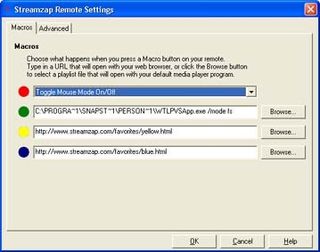
Despite their similar names, SnapStream and Streamzap are independent companies. However, SnapStream partners with Streamzap. In other words, Streamzap's software works with SnapStream PVS3 as well as with other programs. The Streamzap remote has 4 programmable buttons, one of which can be set to toggle "mouse mode". Mouse mode lets you control the mouse cursor by using the arrow buttons on the remote. However, within SnapStream, you use it as a regular remote.
The Streamzap driver installation automatically fires up a slideshow that allows you to test that your remote works right away. I had no problems controlling the remote from 10 ft away, a necessary part of the "couch experience" that SnapStream promotes.
2. Connect TV source
The TV source in my case was analog cable. Installation was as simple as connecting the coax cable to the TV tuner (in this case the integrated TV tuner on the Radeon). I also connected an audio cable from the Radeon to the line-in on the sound card, in this case a Creative Labs Audigy card. If you have a cable box or set-top box, you may need to buy a "cable pack" from SnapStream, which is either a serial cable or an "IR blaster". The purpose of a "cable pack" is to let SnapStream change the channel on the cable/set-top box.
Stay on the Cutting Edge
Join the experts who read Tom's Hardware for the inside track on enthusiast PC tech news — and have for over 25 years. We'll send breaking news and in-depth reviews of CPUs, GPUs, AI, maker hardware and more straight to your inbox.
3. Install Personal Video Station 3
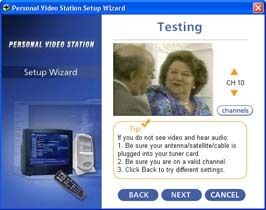
SnapStream PVS3 requires Microsoft DirectX 9.0. In my case, it was not installed, but the PVS3 installer automatically detected and installed it for me. Other than that, the installation was straightforward. The Setup Wizard took only a few minutes to go through, and it verified that both audio and video was connected.

The Fullscreen User Interface
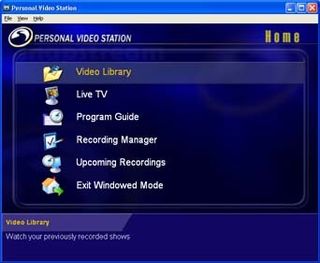
The Full Screen GUI takes a clue from competing products such as TiVo and ReplayTV. The GUI is also available as a regular window. You can scale this as you wish, but usually you want to keep the aspect ratio locked. One irritating thing is the inability to switch on-the-fly between the two modes. Instead, you need to exit the GUI and start it up again. This, of course, causes you to lose the live buffer.

The initial GUI screen, Home, shows the following options:
- Video Library
- Live TV
- Program Guide
- Recording Manager
- Upcoming Recordings
- Exit Windowed Mode
Most Popular

