Big Air: 14 LGA 2011-Compatible Coolers For Core i7-3000, Reviewed
Do Intel’s Core i7-3000-series CPUs really need closed-loop liquid cooling? Today we're testing fourteen different LGA 2011-compatible air coolers on an overclocked Core i7-3960X in order to determine whose is the most effective.
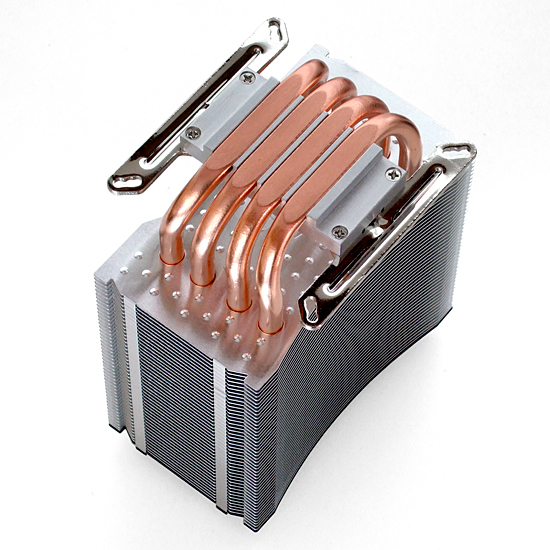
Installing Corsair's Air Series A70
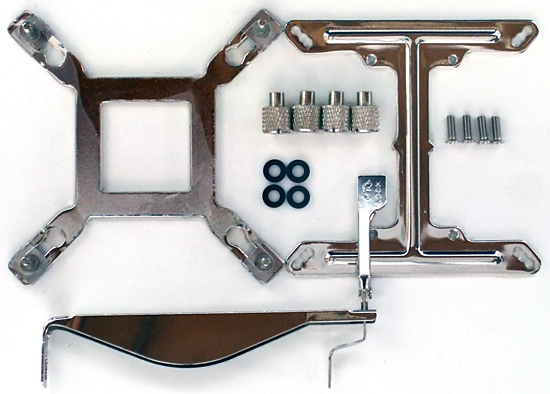
Corsair’s installation kit resembles Akasa’s, but with two key differences. First, a clip-style bracket is used for AMD interface compatibility.
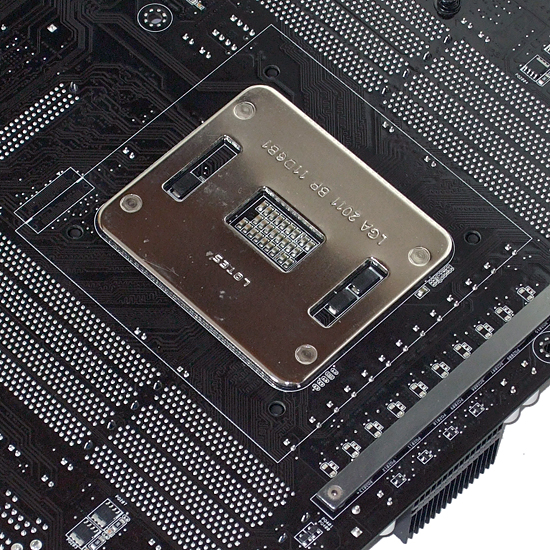
The second difference is far more pertinent to our installation: there are no special standoffs for use with Intel’s LGA 2011 integrated mounting plate. Instead, Corsair relies on a little-discussed feature of the LGA 2011 design to support this product:
LGA 2011 motherboards still have LGA 1366 mounting holes. These holes are covered by the factory-installed gasket, but we can see the gasket peeking through the holes in the photo above. These holes are likely intended to prevent damage from overly-long mounting screws when using the integrated support plate.
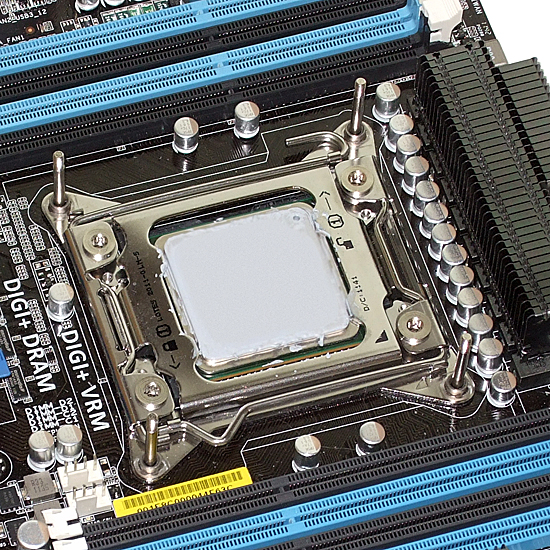
Corsair told us to simply pop the bracket’s hold-down screws through the gasket, but these screws weren’t sharp enough to go through easily. We instead poked slits in the LGA 2011 gasket using a pocket knife, and inserted the mounting screws through those slits.
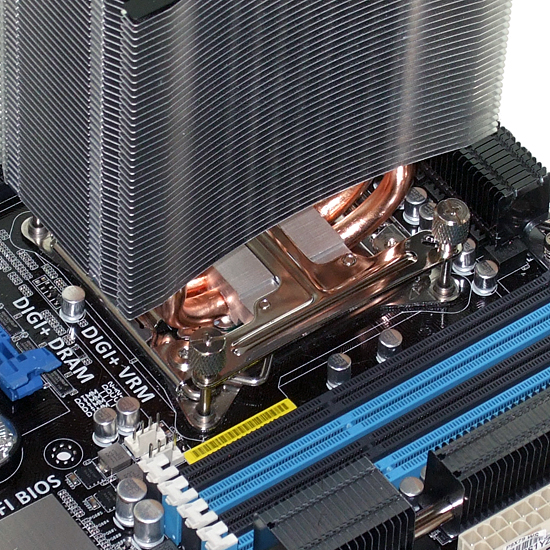
The screws now stand atop the LGA 2011 interface the same way they did on our LGA 1366 motherboards.
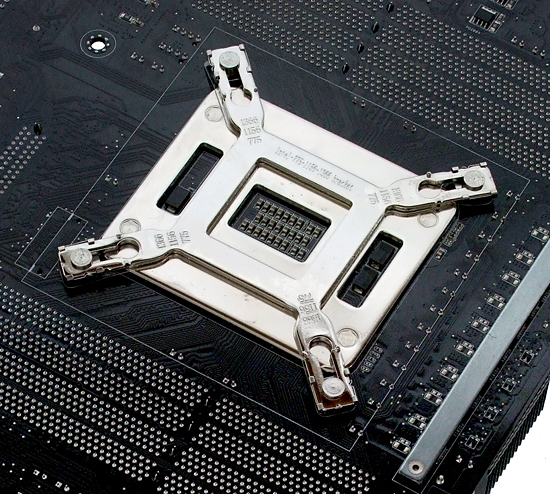
As with Akasa, Corsair’s mounting bracket bolts atop the A70’s base using screws from its underside.
Nuts apply tension between the cooler’s bracket and support plate using those protruding screws.
Get Tom's Hardware's best news and in-depth reviews, straight to your inbox.
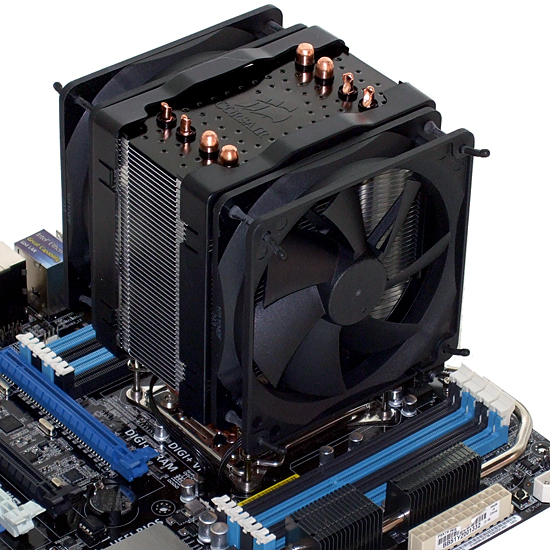
Plugging the fans into their motherboard headers and clipping them onto the heat sink completes the A70's installation.
Current page: Installing Corsair's Air Series A70
Prev Page Installing Coolink's Corator DS Next Page Installing Deepcool's (Gamerstorm) Assassin-
phamhlam I saw the Corsair A70 with rebate for $25. I am glad these coolers are proven to be the best value. I don't need to spend more than $50 for a cooler when a $30 cooler can give me almost the same performance.Reply -
CaedenV I was disappointed by the Evo's noise level in my own system, and found some very silent (rated at 8dB) Enermax fans, and threw 2 of them on and that did the trick very well. Even though they don't move a lot of air, the push-pull effect still gets me a lower overall temp on my CPU. So remember that with a lot of these coolers you are not stuck with the fans that they come with as they are very easy (stoopid easy) to replace.Reply -
giovanni86 Troublesome with the height especially concerning with the 8 DIMM slots so close by. I don't like the appearance of the NH-D14 but it does do the job and give you the clearance. Hopefully cooler manufactures will approach these new found boundaries and release ones that will clear all DIMM slots otherwise CPU water cooling looks to be in my near future.Reply
On a side note i wish the "ZALMAN CNPS9900MAX-R" was reviewed as well considering on newegg it is compatible with LGA 2011, and I've been eye balling that one since it came out for my next build. -
bison88 BigMack70Meh... I still see no reason to even consider the Noctua over the $35 Hyper 212 Evo.If I were to consider a cooler in the ~$90 range, I'd be going water cooling anyways.Reply
I've heard nothing but great things from CM's Hyper 212+ and Evo variants. Might I add the other powerhouse in affordable cooling, Thermalright's TRUE Spirit 120 for just about the same price. It seems the Hyper 212+ and TRUE Spirit have fallen off in Heatsink/Fan comparison charts despite kicking some serious ass against there competition price rise, and can even hang very well against high-end coolers costing 2-3 times as much.
I realize you have to compare modern products to modern products for the sake of it, but just a FYI for those not familiar with the cooling scene. Don't ever count out a product that first debut 2-3 years ago, they can still hang, the good ones at least. -
molo9000 BigMack70Meh... I still see no reason to even consider the Noctua over the $35 Hyper 212 Evo.If I were to consider a cooler in the ~$90 range, I'd be going water cooling anyways.Reply
Water cooling is a lot more expensive and a lot more complicated. Water cooling systems are not maintenance free and always add the risk of a leaking pipe.
$80-$90 is a small price to pay for getting a quieter PC without resorting to water cooling. -
I been using a Prolimatech Megahalems since its introduction back in 2009. I remembered that in a few months later Noctua took the crown as top performing air cooled heatsink. It is nice that new cpu heatsinks are becoming better in performance, but i don't like the fact that they are becoming bigger and heavier than previous cpu heatsink kings by only earning a degree or two above the rest. Could you guys do a heatsink Weight/cooling efficiency chart? This is to make readers see which manufacture did its engineering mission to make a much more effective unit than its competition. Not just slab more metal to defeat the other guy. To heatsink manufactures: Do something innovating if a wall seems to be in the way! Just look at PSU manufactures, they are reaching 92% Platinum rating, from 82% rating four years ago.Reply
Example:
Noctua NH-D14 weighs 900g without fans and it did 45c at full load.
900g/45c= 20.00 efficiency ratio.
Panteck PH-TC14PE weighs 970g without fans, performing at 46c.
970g/46c= 21.09 efficiency ratio.
CM Hyper 212 EVO Weighs 580g with fan, performing at 51c.
580g/51c= 11.37 efficiency ratio.
Ideally, the lower the ratio, the more efficient a cpu cooler is. Other charts count as well when making a final decision. -
razor512 anyone know where I can buy the Xigmatek Venus SD1266 in the US?Reply
I checked newegg and amazon
seems like a good replacement for my sunbeam core contact heatsing -
builder4 bunnywannyI been using a Prolimatech Megahalems since its introduction back in 2009. I remembered that in a few months later Noctua took the crown as top performing air cooled heatsink. It is nice that new cpu heatsinks are becoming better in performance, but i don't like the fact that they are becoming bigger and heavier than previous cpu heatsink kings by only earning a degree or two above the rest. Could you guys do a heatsink Weight/cooling efficiency chart? This is to make readers see which manufacture did its engineering mission to make a much more effective unit than its competition. Not just slab more metal to defeat the other guy. To heatsink manufactures: Do something innovating if a wall seems to be in the way! Just look at PSU manufactures, they are reaching 92% Platinum rating, from 82% rating four years ago.Example: Noctua NH-D14 weighs 900g without fans and it did 45c at full load. 900g/45c= 20.00 efficiency ratio. Panteck PH-TC14PE weighs 970g without fans, performing at 46c.970g/46c= 21.09 efficiency ratio.CM Hyper 212 EVO Weighs 580g with fan, performing at 51c.580g/51c= 11.37 efficiency ratio.Ideally, the lower the ratio, the more efficient a cpu cooler is. Other charts count as well when making a final decision.Reply
By that logic, having no cooler at all is the most efficient... 0g/200c= 0 efficiency ratio. And a dead CPU.
Also, the higher the temperature (Bad), the lower the ratio, which doesn't make sense.
You would also need to use the ambient temperature delta rather than the absolute temperature in any sort of ratio for the results to be meaningful.
I think that the majority of people don't care how heavy their cooler is, only about the price. -
lostmyclanwhy =) you need mass for your decision ? i think its about surface and not mass...Reply
I am not saying that i need mass to make my decision. And i agree that surface is important. All i am saying is that i want to see cpu heatsinks to be more efficient or equal at cooling with less metal.
