Is Solarism's Future Looking Bright?
Get Tom's Hardware's best news and in-depth reviews, straight to your inbox.
You are now subscribed
Your newsletter sign-up was successful
Test Results
The monitor comes with a sparse but clear 34-page manual (half in English half in Spanish). It also comes with a 15-pin D-sub cable, a sound cable, and the power supply. There is no software to install and Windows Plug-and-Play had no trouble recognizing the monitor immediately. Setting up the monitor was quite simple. We connected the monitor using a standard 15-pin D-Sub cable and the external 12v DC power supply box, and that was it. Fire up the computer and a brighter-than-usual picture appears right away.
The LM1503 has a multitude of connections on the back that include: a 15-pin Mini D-Sub connection; S-video; two composite video inputs; DC power input; mini plug audio input; and four RCA audio inputs (two each for left and right channels).
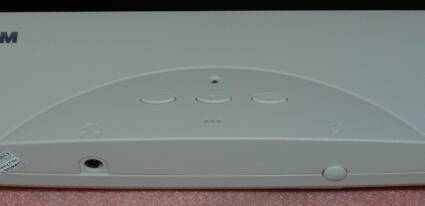
On the front of the panel are the controls for the on-screen display (OSD). Located just below these controls are the on/off button and a headphone jack. The OSD features four simple menus, and their navigation and selection is simple.
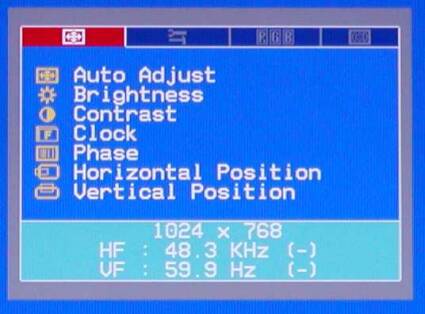
From the Monitor Function Selection Menu you can select the auto adjust feature, which sets or resets everything to provide optimum picture. You can also adjust the brightness and contrast, the clock frequency, phase, horizontal position and vertical position of the image. Clock frequency is used to fine-tune the display to match the graphic board frequency, if necessary. (Adjusting the phase seemed to have no effect on the display.)
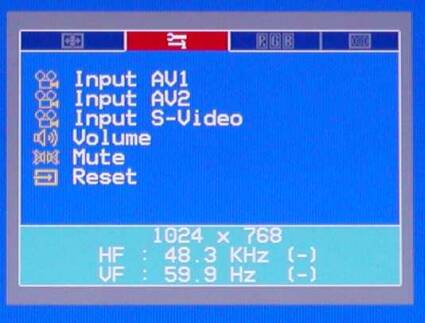
The Tools Menu is used to select the video input you wish, adjust the speaker volume, mute the audio, or reset everything to factory defaults.
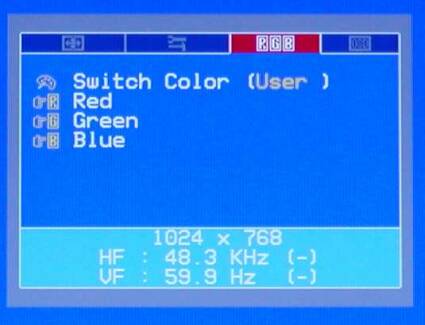
The RGB Adjusting Menu is used for selecting color temperature (9300K or 6500K are provided as defaults), or adjusting individual red, green, and blue colors.
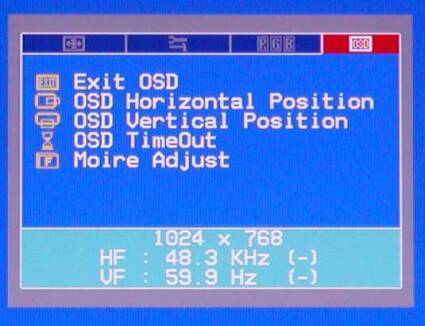
The OSD Function Selection Menu is used to exit the on-screen display or to adjust its horizontal position, vertical position, and time out (up to 30 seconds). You can also apply moiré reduction via the OSD Function Selection Menu (although it seemed to have little effect in our tests).
Get Tom's Hardware's best news and in-depth reviews, straight to your inbox.
Overall, the OSD was easy to use, if somewhat limited in the number of controls. Then again, there aren't that many things that you should need to adjust on an LCD display.

