Building Project A.R.E.S: My Award-Winning Sci-Fi Case Mod
In a galaxy far, far away… what? Wrong quote? Okay, let me start over.
Now, it was finally time to get the paint job started. I began from the external panels and went through a couple attempts before I got a color I liked, so I wasn’t starting off very optimistic. The biggest obstacles were in trying not to overdo it with the blue or make the paint clunky.
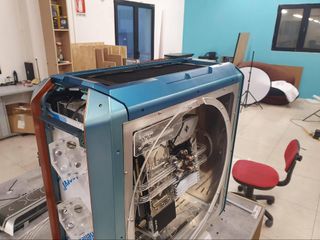
Thankfully, I was able to break up some of this blue with copper paint, starting from the C700M’s trims that normally have RGB lighting in the C700M. I decided to paint them in copper and remove the lighting to fit the overall design much better. The handles also got the copper treatment.


The more I painted, the more confident I got with my choice of colors. Project A.R.E.S. was starting to really come together as a beautiful piece.


The side frames got the same blue treatment, and I finally added the edge lighting strips behind them.


As I mentioned in my story at the beginning of this article, there are two color schemes Project A.R.E.S. represents. I wanted the inside of the mod to be painted and finished differently from the outside.
So I took the acrylic parts and painted them with a titanium color.


Pump Mounting
At this point, I took a break from the paint job to tackle a part that was long overdue: the pump mounting. I wanted the pump to look like the thruster of the starship, so I made simple brackets out of aluminum L-profiles and then modified the pump to make the cable come out of the side, instead of the bottom, of the pump for a much cleaner look.
Stay on the Cutting Edge
Join the experts who read Tom's Hardware for the inside track on enthusiast PC tech news — and have for over 25 years. We'll send breaking news and in-depth reviews of CPUs, GPUs, AI, maker hardware and more straight to your inbox.


Finishing off the Internals
The internal aluminum panels were finished by initially brushing them and then making random strokes using abrasive discs mounted onto the power drill.


Final assembly of the internals started by putting together the acrylic panel and all the parts of the rotating hardware panel.


Blue LED strips embedded into the acrylic panel help things pop.


With this done, it was time to finish the PSU side. I painted the acrylic covers with the same titanium color used before and added some details using a copper-colored acrylic marker.
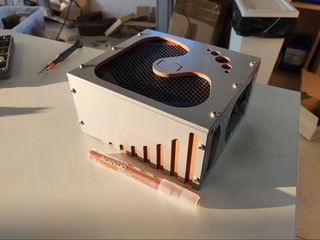
Finally, the PSU is mounted:
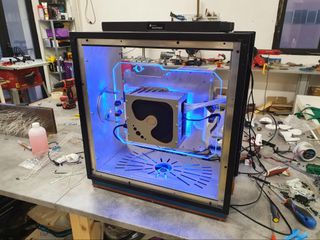
Cable Management
Now it’s time for the fun part: cable management! This was quite complicated because there just isn’t a lot of space here. I was definitely happy with how the corrugated pipes acted here though. They were both very useful and fit with my theme.


The pedestal was completed as well by painting the lower aluminum plate blue and adding a couple copper details with the aforementioned marker.
Next, I fixed everything together, including the acrylic blocks.


Coming Together
With cable management done, it was time to assemble the main hardware and ,with that, the internal tubing runs and last touches on the internal cables.


This is how the “dark side” looks with the cables through the rotating system. They will be fixed in place later on.
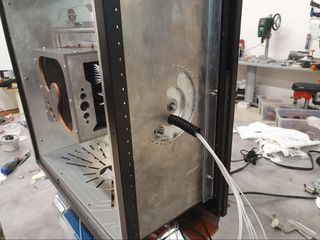
While I kept painting all the remaining parts, I kept on with cable management too, since at this point I was in a crunch time until the Case Mod World Series’ deadline (today, I’m definitely glad I worked my butt off to finish it in time).


Almost everything was now assembled except for the external panels, which still had to be painted. But in the meantime I went ahead and filled the watercooling loop. I intentionally left long soft tubing runs behind the reservoirs so that I was able to remove the panel holding them to access the internals when needed.


Here comes my favorite part of this project: the finished front. I painted all the parts, filled the engravings with the copper marker and installed the backlighting for the optic fibers.


Project A.R.E.S. Complete
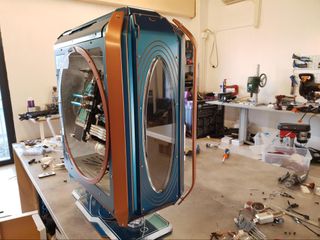
My mind was already pretty blown when I saw how good Project A.R.E.S. looked assembled. But then I turned the backlighting on, my brain officially melted. I created the vision I had in my mind, but the end result was even better than I pictured.
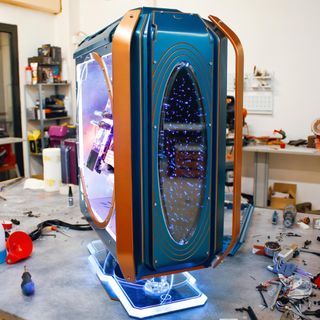
After recovering from a quick brain melting, I painted the top panel and added warm-white LED strips to the reservoirs area.


With this final touch, A.R.E.S. was finally complete and ready to take the win at this year’s Cooler Master World Series as Best Tower of the Year.
Final photos:


-
AnimeMania The floating case was a neat idea, I would have modified the top of the clear pillars to look like rocket thrusters and added red or blue LED lights inside the clear pillars to make them look like rocket flames.Reply -
PapaCrazy Beautiful paint, and reminiscent of the Fallout color theme (except more metallic and complex). The rotating mechanism looks like a steering wheel airbag wiring mount I once had to fix. Great job all around.Reply -
SonoraTechnical If there were ever a case worthy of the upcoming Milan Based (ryzen3) 64Core ThreadRipper paired with a RDNA2 (big navi) Radeon RX 6900XT, this is it.Reply
Most Popular


