The Disco Pixel PC: Building a Flashy, Formidable Mid-Tower in InWin’s 309 Case
It’s like a Lite-Brite that you can overclock
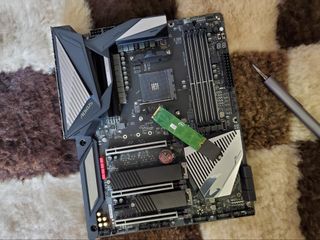
The Disco Pixel build started off simple enough, by popping the top M.2 heatsink off the Aorus motherboard and installing the Intel SSD 660p underneath.The heatsink’s thermal pad is pre-installed, so once you peel off the protective plastic, the SSD just sticks on; you then slide it into the drive slot and screw down the heatsink. That was simple.
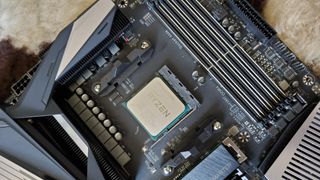
Installing the Ryzen CPU and ADATA RAM was similarly easy and as expected.
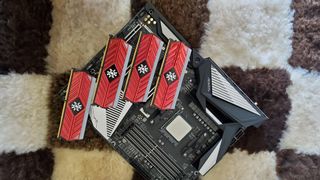
The memory is a bit bulky with its heatspreaders and RGB lights, but I’m using a stock AMD Wraith Prism cooler here, so installation isn’t going to be a problem.
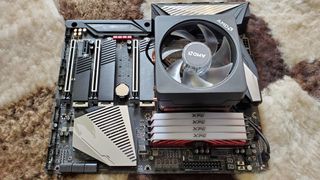
Also at this stage, I connected the RGB cable to the Wraith cooler and plugged both it and the fan header into the motherboard.
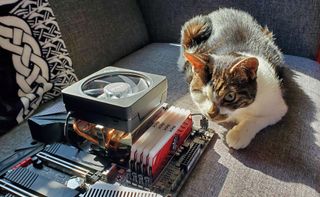
Having completed the first few steps without issue, I set the motherboard (and my sheepskin rug) aside to break out and strip down the case. My furry build buddy gave me a one-eyed nod of approval. Her depth perception isn’t the best, but she’s still a harsh critic of my cable routing skills.


After working in the Min-ITX RGBaby’s Jonsbo case, the InWin 309 feels positively massive, even though it’s just a mid-tower. It’s also worth pointing out that this is a hefty chassis, even when empty. With its steel shell, glass side and front, and the electronics housed up front, it weighs 30 pounds all on its own.
Thankfully for my back, once I removed the side panels and an unneeded steel plate for mounting 2.5-inch drives, the case was easier to manipulate--at least until I started putting parts in it. First to go in was the power supply up top, behind the honeycomb section, followed by dropping in the motherboard. The latter has a pre-installed IO plate, which means installing the board was as simple as putting it in place and screwing it down on the standoffs.
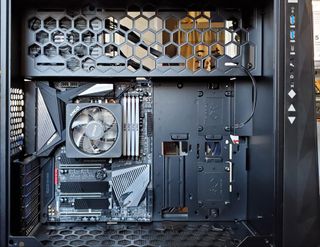
Also note in the image above the generous port panel on the front-left edge. Aside from USB 3 and USB-C ports, you get separate audio jacks, power and reset buttons, and controls for the front-panel lighting, which we’ll get to in detail later.
Stay on the Cutting Edge
Join the experts who read Tom's Hardware for the inside track on enthusiast PC tech news — and have for over 25 years. We'll send breaking news and in-depth reviews of CPUs, GPUs, AI, maker hardware and more straight to your inbox.
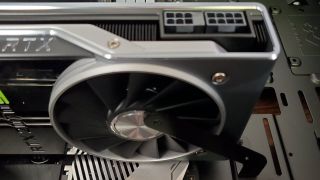
Next in was the graphics card. But first I installed a handy metal support bracket that InWin includes with the case to keep hefty GPUs from sagging in their slot. It wasn’t really necessary with the standard 2070 Super, but I figured I’d put it in anyway. It attaches to slots on the motherboard tray via two screws, and can be slid up and down to fit the placement and thickness of your graphics card.
Next, it was time to start plugging in all the requisite cables. That included the usual front-panel (aided by the motherboard’s inclusion of a G-connector that lets you plug in all the headers first, then plug the whole thing into the board), USB, and power supply connectors.
The case itself also requires connecting to a SATA power connector for the front pixel array. I also plugged in the optional 5V RGB header that lets you control the case lighting via RGB software from most of the major motherboard makers. As it turns out though, the physical control buttons on the side of the case as well as InWin’s surprisingly good Glow2 software do a much better job of letting you control the case’s versatile light show.
Speaking of lights, I also installed the Strimer Plus cables at this point. And I had to do this more than once because the main ATX Strimer cable had the lights on the wrong side for the purpose of this build. So I had to remove the light strip from the top of the cables and pop off the cable combs, which only have clips on one side to hold the light tubes. This is a tedious process, but fairly straightforward once you get a clear sense of what you’re doing.
Also note that the Strimer Plus lets you control its lights by plugging it into the motherboard. But just as with the case, I soon learned the lighting effects are much more dynamic if you use the buttons on Lian Li’s included control box, so I plugged that in, set the lights the way I wanted, and stuffed it behind the motherboard tray with dozens of other cables. After this install and testing and reviewing the original Strimer, I think I’m pretty far along in the Tom’s Hardware RGB doctorate program.
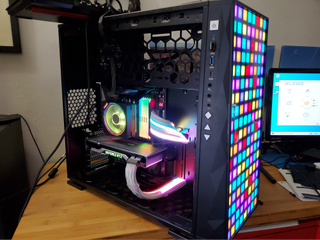
With the RGB cables and all the core components in place and connected, I plugged the system in to see if everything would light up and boot. The system lit up like neon Christmas and the system saw my boot drive, so I went ahead and installed Windows so I could also play with the Glow2 software a bit. But I still like the default random twinkling pixel pattern at least as much as any of the other options.
With the core components, OS, and lots of glowing things all working as expected, it was time to install the fans -- three in the bottom and three up top. The good news is that the fans have splitters for both the RGB headers and fan connections, so you can daisy chain them to each other. And the motherboard actually has fan and RGB headers placed conveniently along the top and the bottom of the board.
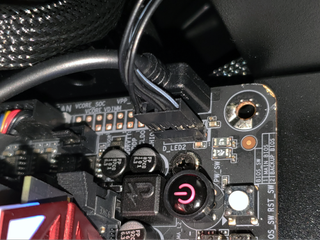
The bad news? While the above made the initial install of the fans easy -- I just screwed down three as intakes in the bottom and three in the top so their light rings would show clearly -- when I thought I’d plugged everything in and fired the system back up, only three of the six fans (one on the bottom and two up top) actually lit up.
RGB lighting headers are finicky enough when you’re just trying to get one to stay on your motherboard. But connecting six of them together (in two three-fan chains) meant that the pin connectors pulled themselves apart with almost no effort. In fact, just putting the right side panel on the case was what had pulled them apart the first time.
After a few frustrating attempts to push the RGB headers back together on their own, only to have them come apart when I adjusted something else in the case, I dug out some electrical tape and taped all the pin connectors together where one header met another. This is far from pretty, but at least there’s lots of room in the case to hide cables. For the fans up top, most of the unsightly taped-up cables get stowed behind the fans in the power supply chamber. Down at the bottom, there’s a decent amount of space behind the rear edge of the fans to just tuck the unsightly cable mess.


With the fans finally working, there was little left to do on the build front other than some final wire cleanup (much of which I had done during the process of messing with the fan cables), attaching the Wi-Fi antenna (important because there’s no Ethernet port near my work bench), and start taking photos of the finished system in between installing all the necessary drivers, OS updates, and software required for setting up and benchmarking a new build.
Thankfully, the trio of silver buttons on the front of the case let me cycle through the ample lighting presets so I could get a good sense of what that 144-pixel panel was capable of. There are some interestingly retro presets here, and even a clock.


MORE: Best Gaming Desktops
MORE: How To Build A PC
MORE: All PC Builds Content
Current page: Build Notes: Room to Breathe and Daisy Chain Pain
Prev Page The Parts to Build the Disco Pixel PC Next Page InWin 309 Case and Software ThoughtsAfter a rough start with the Mattel Aquarius as a child, Matt built his first PC in the late 1990s and ventured into mild PC modding in the early 2000s. He’s spent the last 15 years covering emerging technology for Smithsonian, Popular Science, and Consumer Reports, while testing components and PCs for Computer Shopper, PCMag and Digital Trends.
-
Unolocogringo You weren't one of those hippie type fellas were you?Reply
If so welcome to the club!!!
I sort of remember those days,most of them anyway.
As for the build????
I think garish would be putting it nicely.
But to each his/her own! -
deesider I don't get what the top fans are doing - isn't the exit from the top chamber blocked by the PSU?Reply -
Unolocogringo Reply
Th power supply inlet is behind the rear fan. the other two fans blow into an empty chamber that has vents on the right case panel.deesider said:I don't get what the top fans are doing - isn't the exit from the top chamber blocked by the PSU?
Most Popular


