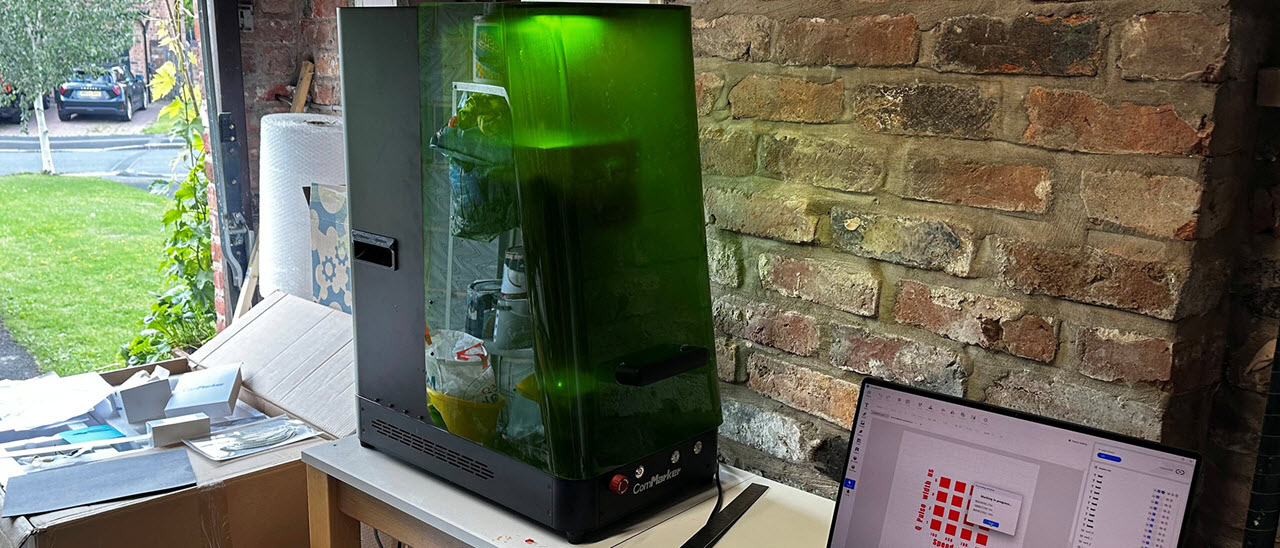
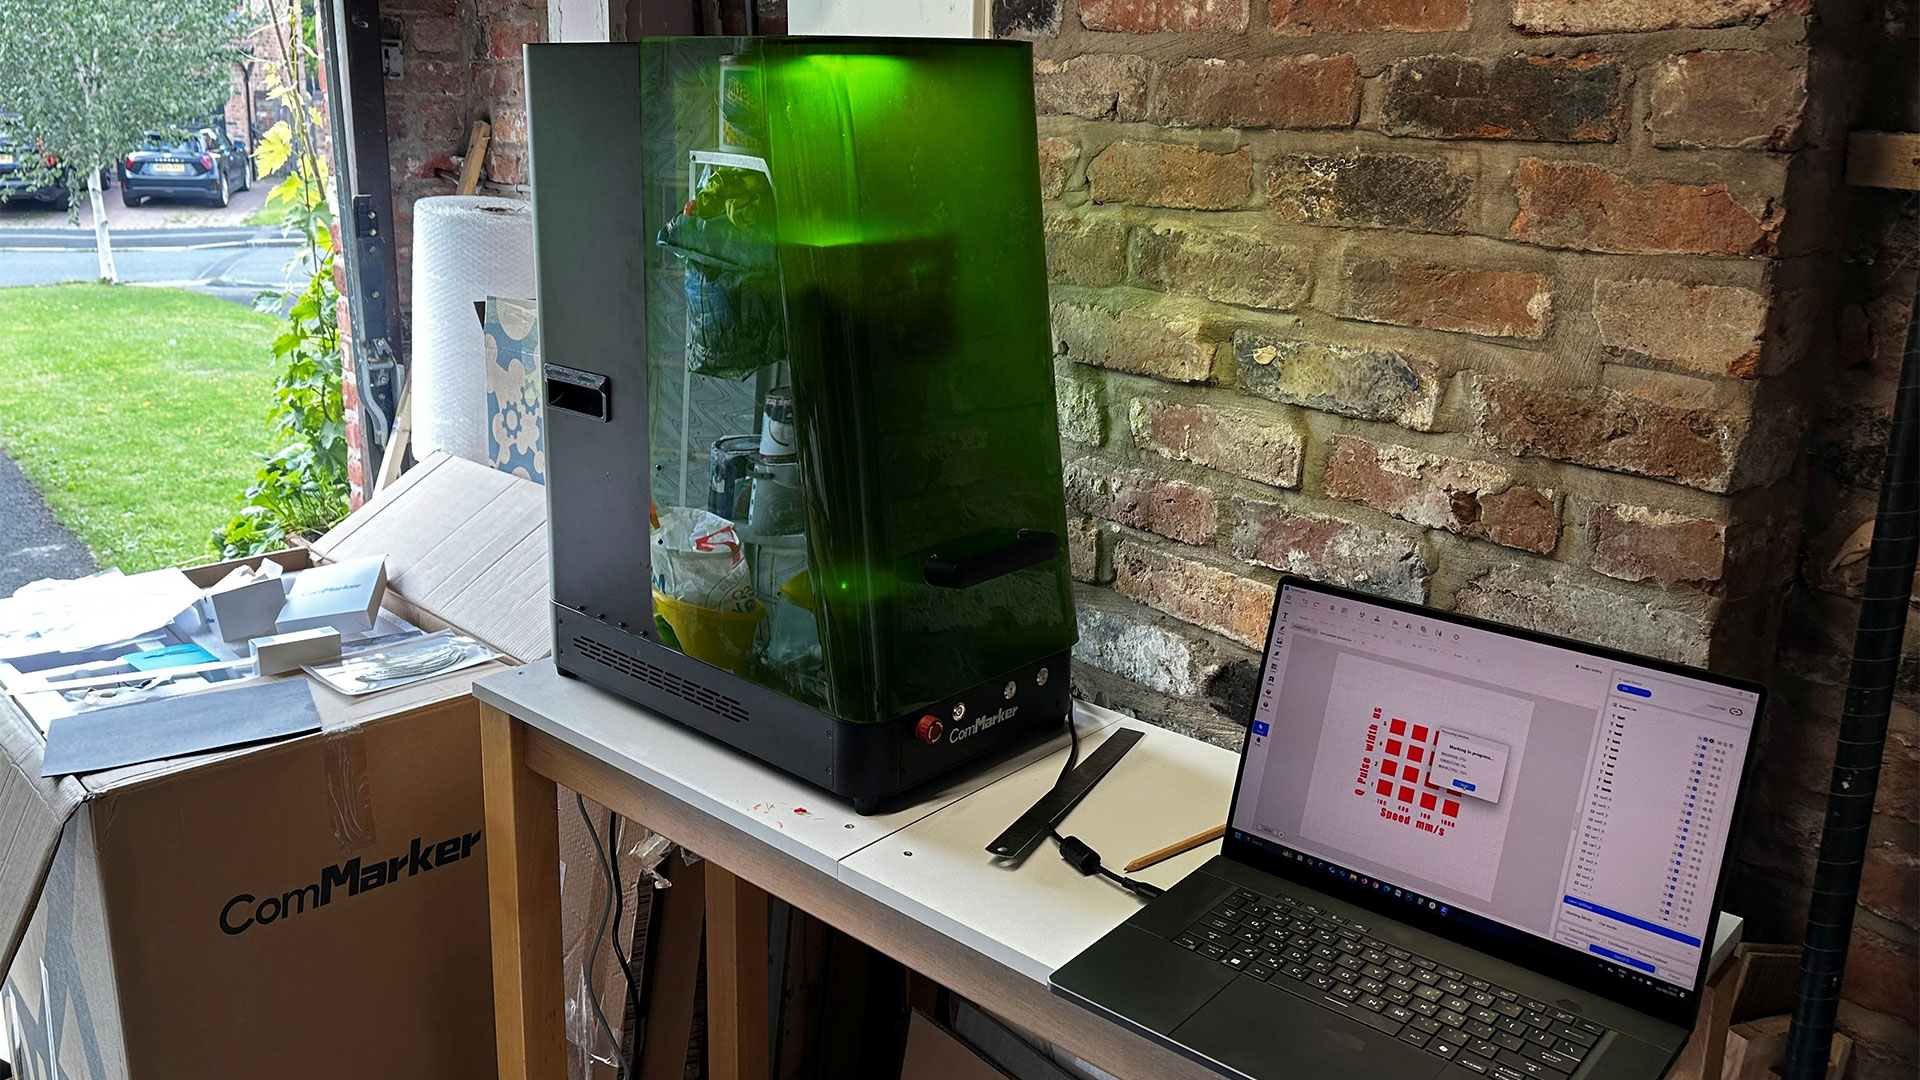
Tom's Hardware Verdict
The new ComMarker Omni X delivers several worthwhile improvements over its flexible UV-based “ZeroBurn Engraving” predecessor. However, with our early test hardware, we were sometimes derailed by in-development software glitches.
Pros
- +
UV’s ‘cold burning’ tech reduces fumes and delivers cleaner engravings and cuts
- +
Ultra-precise 0.0019 mm fine laser precision
- +
Up to 10,000mm/s speeds mean some jobs are finished in seconds
- +
Integrated safety filter hood
- +
Simple assembly of sturdy machine
Cons
- -
Considerable size and weight
- -
Laser cooling fan noise (addressed with latest hardware update)
- -
Software teething troubles
- -
‘Galvo’ lasers like this still have a smaller work area than gantry models
- -
Pricing starts at around $4,600 without the slider (thus limited to 150 x 150mm jobs)
Why you can trust Tom's Hardware
ComMarker has followed up its popular Omni 1 UV laser with the new Omni X, a similar 5W model but with some intriguing and perhaps compelling advances. We had the chance to have a thorough hands-on review period with the new machine pre-launch, over a period of several weeks, to assess how it ranks among the Best Laser Cutters and Engravers in the market today.
So, what’s new? Top of the list among the new stuff is, firstly, the fact that ComMarker has made this UV laser fully enclosed as standard. Building on this feature, there’s a sensor-backed auto-stop function to cease the powerful and potentially harmful laser light output if this cover is lifted – or if you try and start a job when the cover isn’t fully closed. This safety cover moves up and down manually, using a handle.
Secondly, ComMarker has added an optional slide extension, effectively expanding the piddling 150 x 150mm galvanometer UV laser work area to a more ample 450 x 150mm area. As per the feature’s name, this new ability comes courtesy of a motorized slider that integrates into the design.
Another update to the new device is the added convenience of LiDAR ranging. All you have to do is hit ‘Autofocus’ in the ComMarker application UI to ensure sharp and accurate results. The manual up/down buttons and steel ruler integrated into the galvanometer (galvo) head remain, so you can tweak settings manually should you wish/need. You might want to engrave glass under the focus point/surface, for example.
About UV lasers
While 5W might sound rather piddling in terms of power, due to the way UV laser technology works, we found it ample. Later in this review, you will see sample works, and we have shared information about timings, too.
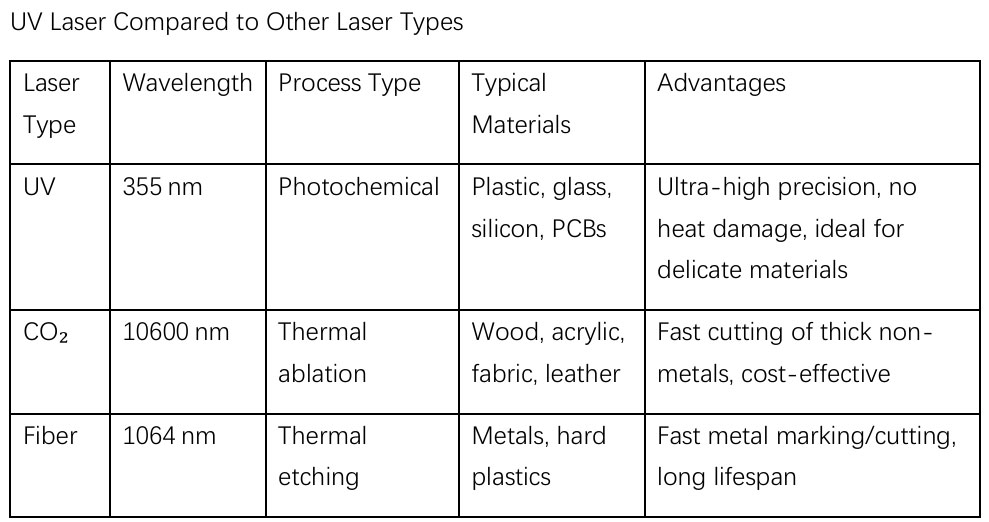
We aren’t here to do a diode vs fiber (IR) vs UV laser technology comparison, but some would argue UV lasers are the cleanest, fastest, and most flexible - and are thus worth their obvious premium. See the chart below for some laser tech comparisons from ComMarker. The premium is hard to ignore, with the Omni X starting at above $5,000 (retail) without the optional slider or rotary extension accessories bundled in.
Machine Footprint | 515 x 320 x 655mm, 20.3 x 12.6 x 25.8-inches, 32kg, 70.5 pounds |
Work area / w.slide | 150 x 150mm, 5.9 x 5.9-inches / 150 x 400mm, 5.9 x 15.7-inches |
Materials | “1,500 materials” inc glass, metal, wood, organic material |
Laser type | UV works between 50–82.4°F (10 - 28°C) |
Laser power | 5W 355nm wavelength laser, 110 and 220V mains power accepted |
Focus | 70 x 70mm and 150 x 150mm lenses with LiDAR auto focusing |
Accuracy | 0.0019mm |
Speed | Marking up to 15,000mm/s or 10,000mm/s |
Cutting platform | Flat grid integrated, adjustable elevation table provided |
Other | UV light safe safety hood, dust isolation, |
Connections | USB, ports for optional slider and roller add-ons |
Software | ComMarker Center (PC), ComMarker App (mobile), and LightBurn (PC, Mac) compatible |
Included in the box
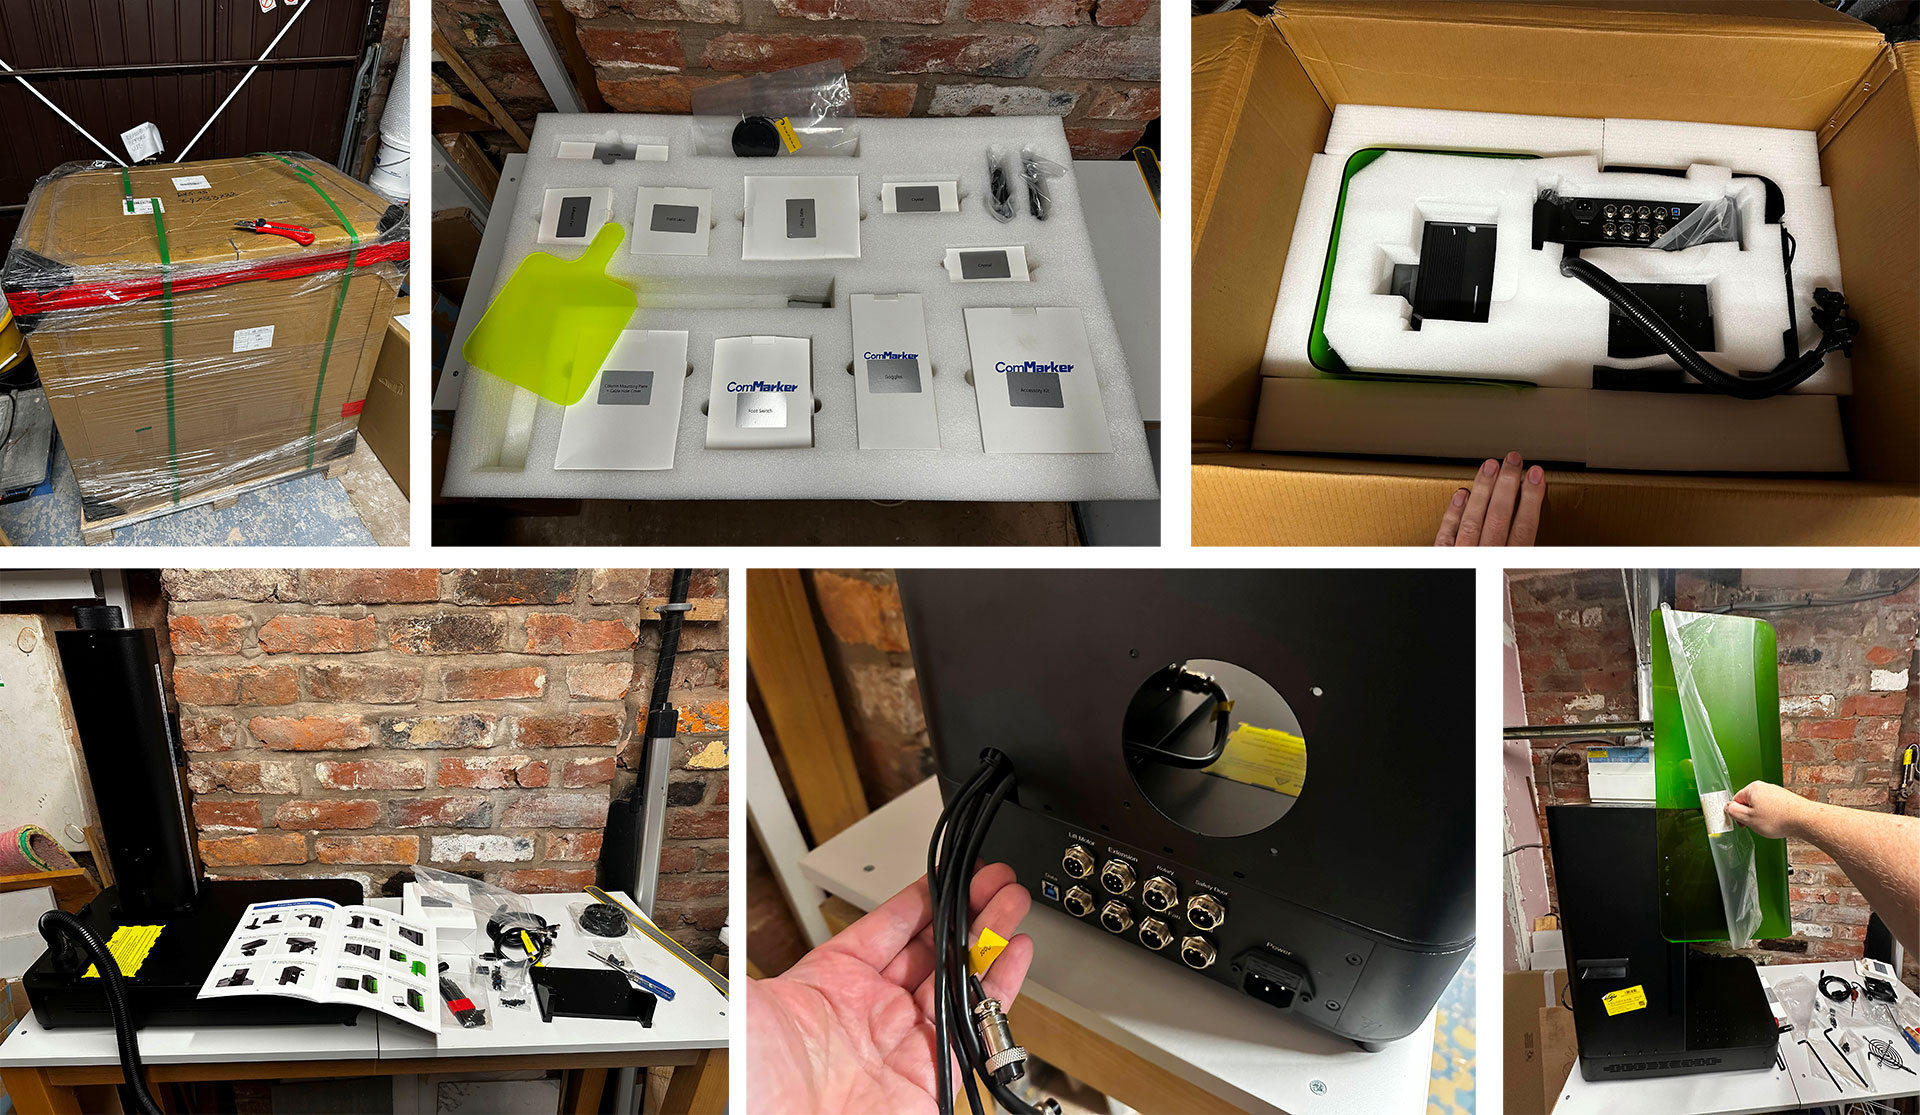
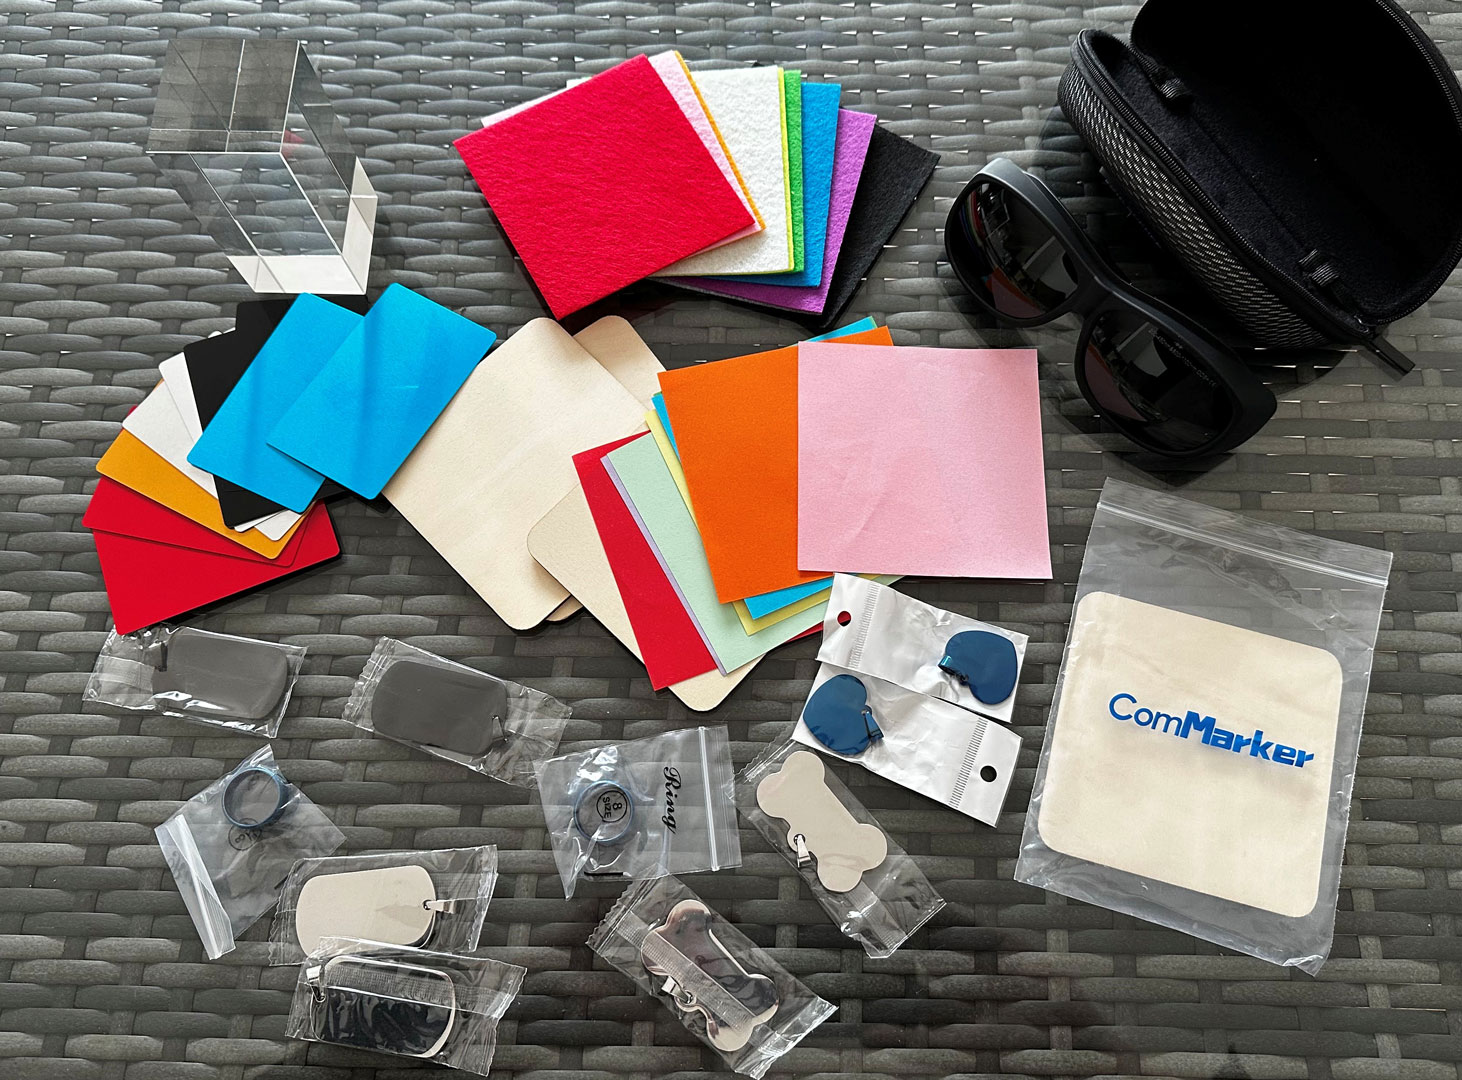
The ComMarker Omni X was provided in a part-assembled kit form. It had all the machine parts, fasteners, power and data cabling, and tools required for assembly (like Allen keys). Extra safety glasses were supplied, which was reassuring for double protection (the machine has a built-in safety visor), as was a 50cm steel ruler. Last but not least, ComMarker included quite a broad range of sample materials for makers to add their designs to.
Get Tom's Hardware's best news and in-depth reviews, straight to your inbox.
Design of the ComMarker Omni X
ComMarker’s Omni X is quite a tall, imposing beast measuring 515 x 320 x 655 mm (20.3 x 12.6 x 25.8-inches), and weighing 32kg (70.5 pounds). The shipment came in at around 70 kg (~150 pounds), too. Once assembled, it isn’t ungainly, though. Most of the time you will only touch the machine to interact with the protective hood handle, to get to the working bed (which is bristling with threaded holes).
Access to the bed, various fixings, a finely adjustable platform, and buttons for emergency stop, power, and manually moving the laser head up and down are all at a regular table height, more or less. That is, if you place the Omni X on a regular table.
Assembly and preparation
This is quite a heavy and sizable machine, as shown in the specs table. Nevertheless, building it wasn’t a difficult task, as I would describe the device, as it was delivered already partially assembled. I spent a much longer time assembling the budget aluminum extrusion framed SculpFun S9 diode laser (with its pulleys and belts), which will likely become redundant now.
ComMarker had everything very carefully packaged, with components either obvious what they were, or clearly labeled. The provided manual guides you through starting with the platform, bolting on the height-adjustable pedestal, and then the laser head unit on top of it.
Quite a lot of allen screws were needed to secure the back/top cover, which is metal, heavy, and packed with fans atop. However, the trickiest thing I found was fixing the green safety cover. There were just two slim screws attached to the slider mechanism on either side, and I had to get help to balance this quite heavy component while it was fixed in place. If not for balance, I worried about screw, shearing, or cracking the green plastic.
Turning on the finished assembled machine for the first time, it is surprisingly loud. But the noise* doesn’t change whether cutting (or engraving), it is just the ‘ColdFront 2.0 thermal system’ keeping the UV laser components happy. ComMarker’s description of this cooling system as “quiet” might be relative to other UV lasers, but in PC cooling terms, it isn’t quiet!
I completed a rough test in my garage with a background noise level of around 34dB (fridge, gas boiler running, etc). Turning on the Omni X saw the dB meter read a sustained 68dB from about 30cm (12 inches) away.
* ComMarker wrote to us to say that it was implementing a sensor to "add a temperature control switch to the machine." The purpose of this, based on early review feedback, is to reduce the fan noise when the machine isn't actually cutting or engraving. According to the firm, this change reduced machine noise "from about 71dB to 63dB," in its tests. Omni X machines that ship to paying customers will include this refinement.
Software
I was advised to test this Omni X, a pre-mass-production sample from ComMarker, with the firm’s own branded new software package. The PC application installed easy enough and has an interface similar to other similar tools.
Central to the UI you see the canvas, which for most of my testing of the Omni X would be 150mm square. The toolbar to the left allows the creation of text as well as a few primitive vector shapes. These can be outlines (great for cutting) or filled shapes. Beneath these are icons to import a bitmap or vector graphics file straight onto the canvas. Then there are some more specialized tools.
To the right of the canvas area, a context-sensitive panel shows the laser marking settings for each selected object or group. Thus, you can place a few graphics and have different engraving intensities applied (for different effects or shades), If you were also cutting, you’d adjust parameters for the shape you were cutting to match the material.
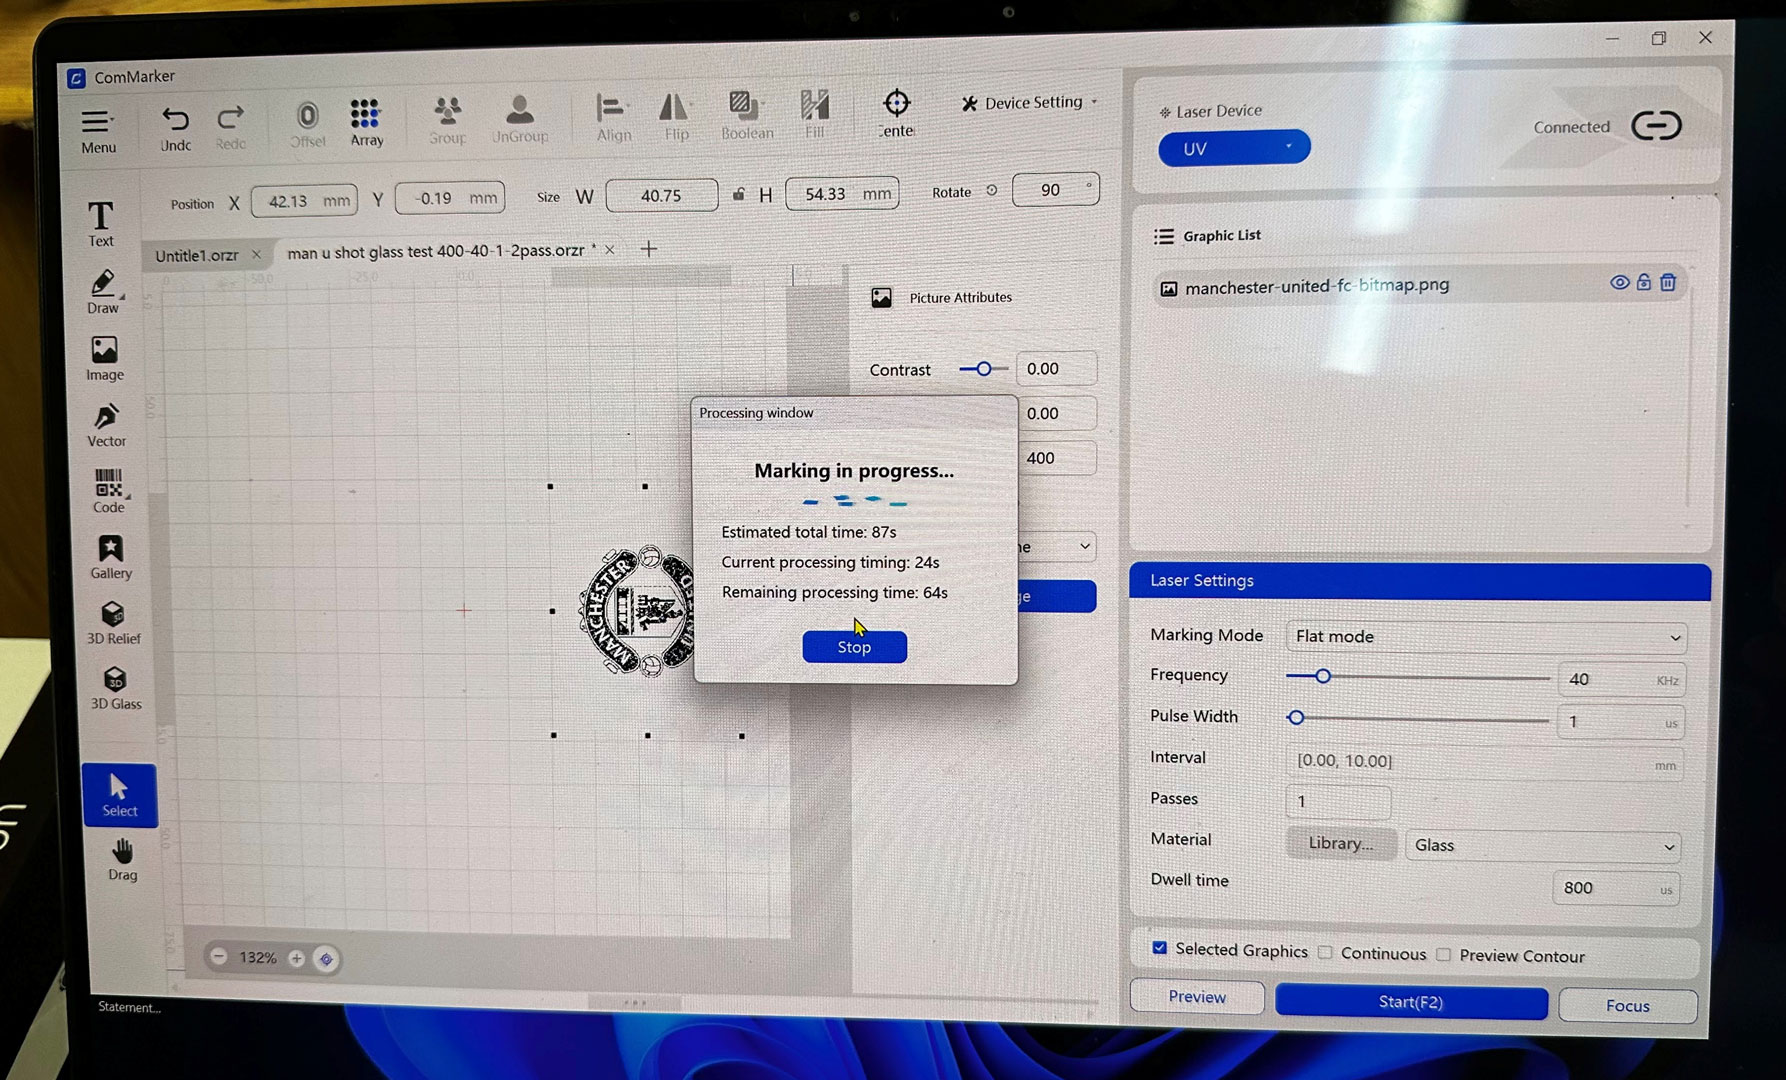
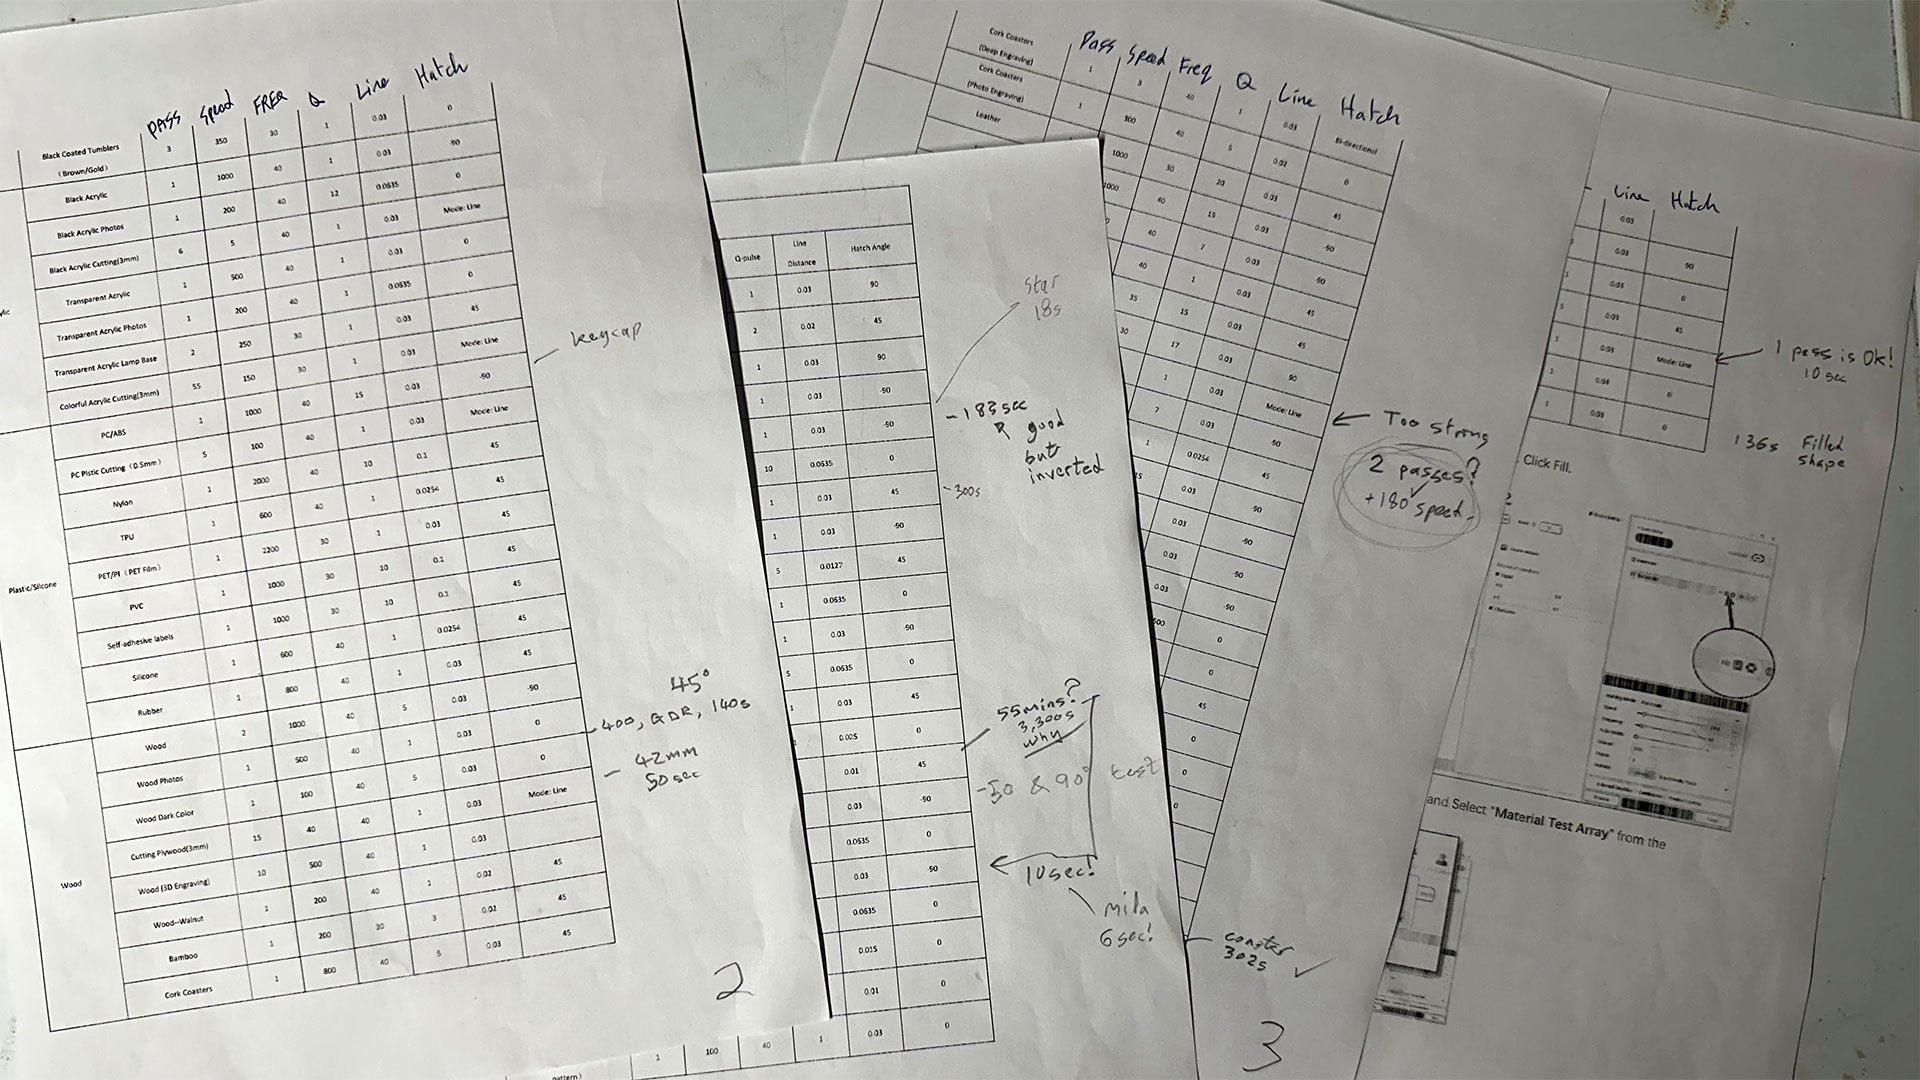
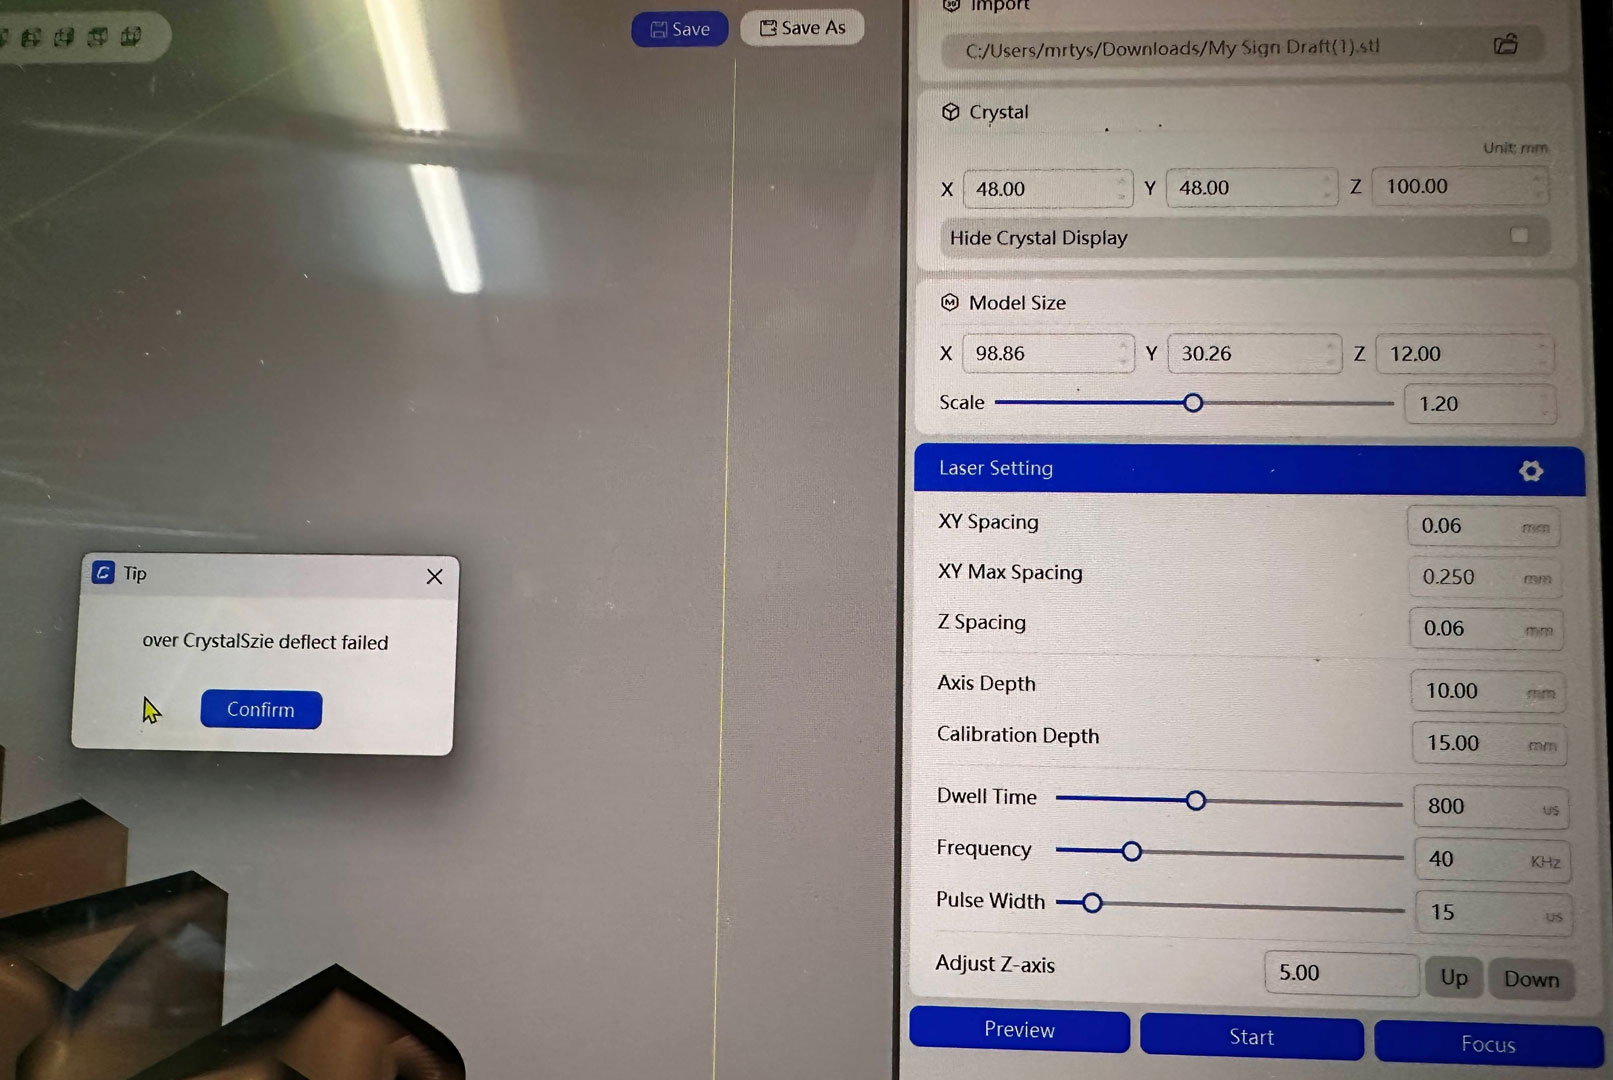
The software was pleasingly simple, but with enough depth for multi-stage UV laser etching and cutting processes.
I must tell readers that I did have teething troubles with the ComMarker app, though. This might be understandable, as this is new software, but I wasted quite a lot of time, moving through three revisions of the software. And this is software which isn’t yet properly documented and surprised me with some of its issues.
As of the time of writing, on the latest software, everything seems to be working as intended though, touch wood, fingers crossed, etc.
Engraving and cutting
So, we have lots of engraving and cutting possibilities here. Some of these materials are confidently engraved or cut by diode and fiber (IR) lasers. However, the UV laser in the Omni X has its own strengths and weaknesses – mostly strengths though, as you should expect given the price tag.
To get ready for any job, you place the material on the platform and hit the focus button to the lower right side of the software UI. If it grumbles that it isn’t in focus, it usually manages it on the second press!
Next, you will want to check if the artwork you wish to laser cut or etch fits in the physical size constraints of the material. Click preview to see. You can also choose whether to preview the selected object on the canvas or its contour.
ComMarker supplies a green translucent paddle so you can check the preview bounds, as on many materials you can’t see evidence of the UV light bounds being repeatedly traced out by the galvo. This makes things a little tricky as the paddle is quite cloudy and about 5mm thick. On small, irregular shaped objects you can’t just put the paddle down on top, as it will slide or tilt.
The above processes apply to all jobs, but at some point before pressing ‘Start’ you will also need to load, input and/or adjust the Laser Settings parameters.
👉 First test – Wood
I am very familiar with engraving (burning) and cutting plywood sheets with my diode laser, so thought it was the best place to start. This was my first UV test!
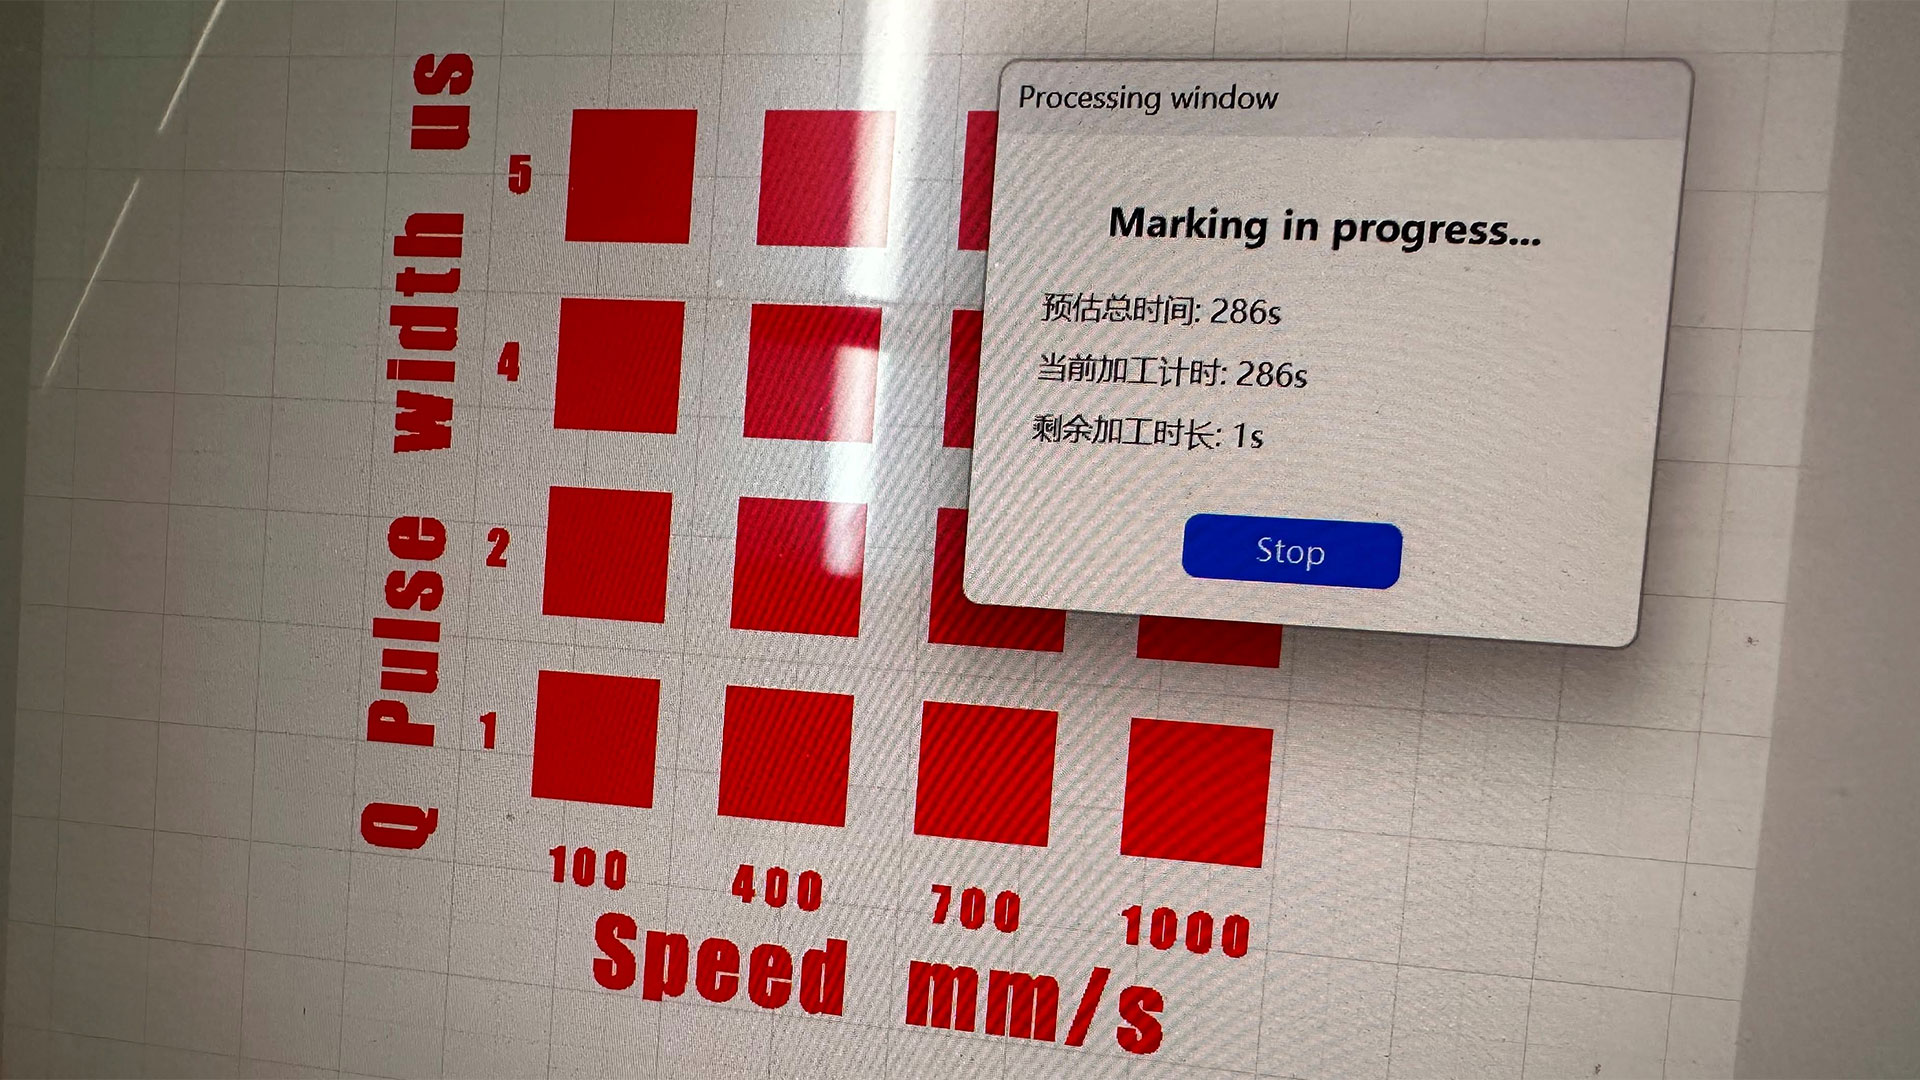
Sadly, somehow the ‘continuous’ button, located just above the Start button, had been ticked by accident. So my first test of a material cutting and engraving matrix ran far far beyond the timer that claimed the process would take under 300s. As this was my first experience of the machine, and there are so many warnings about UV lasers, I thought it was a software bug where the 1s remaining dialog box would just go away a little later. I got fed up about 3 hours later, decided to hit cancel, only to find out my job had been ruined…
I talked with ComMarker, and they said the continuous checkbox was “mainly designed for long-running tasks like cutting through 5mm glass, where the laser needs to keep running without interruption.” They agreed it shouldn’t be alongside frequently toggled preview controls and right next to the Start button. They haven’t moved it deeper into the UI yet, though.
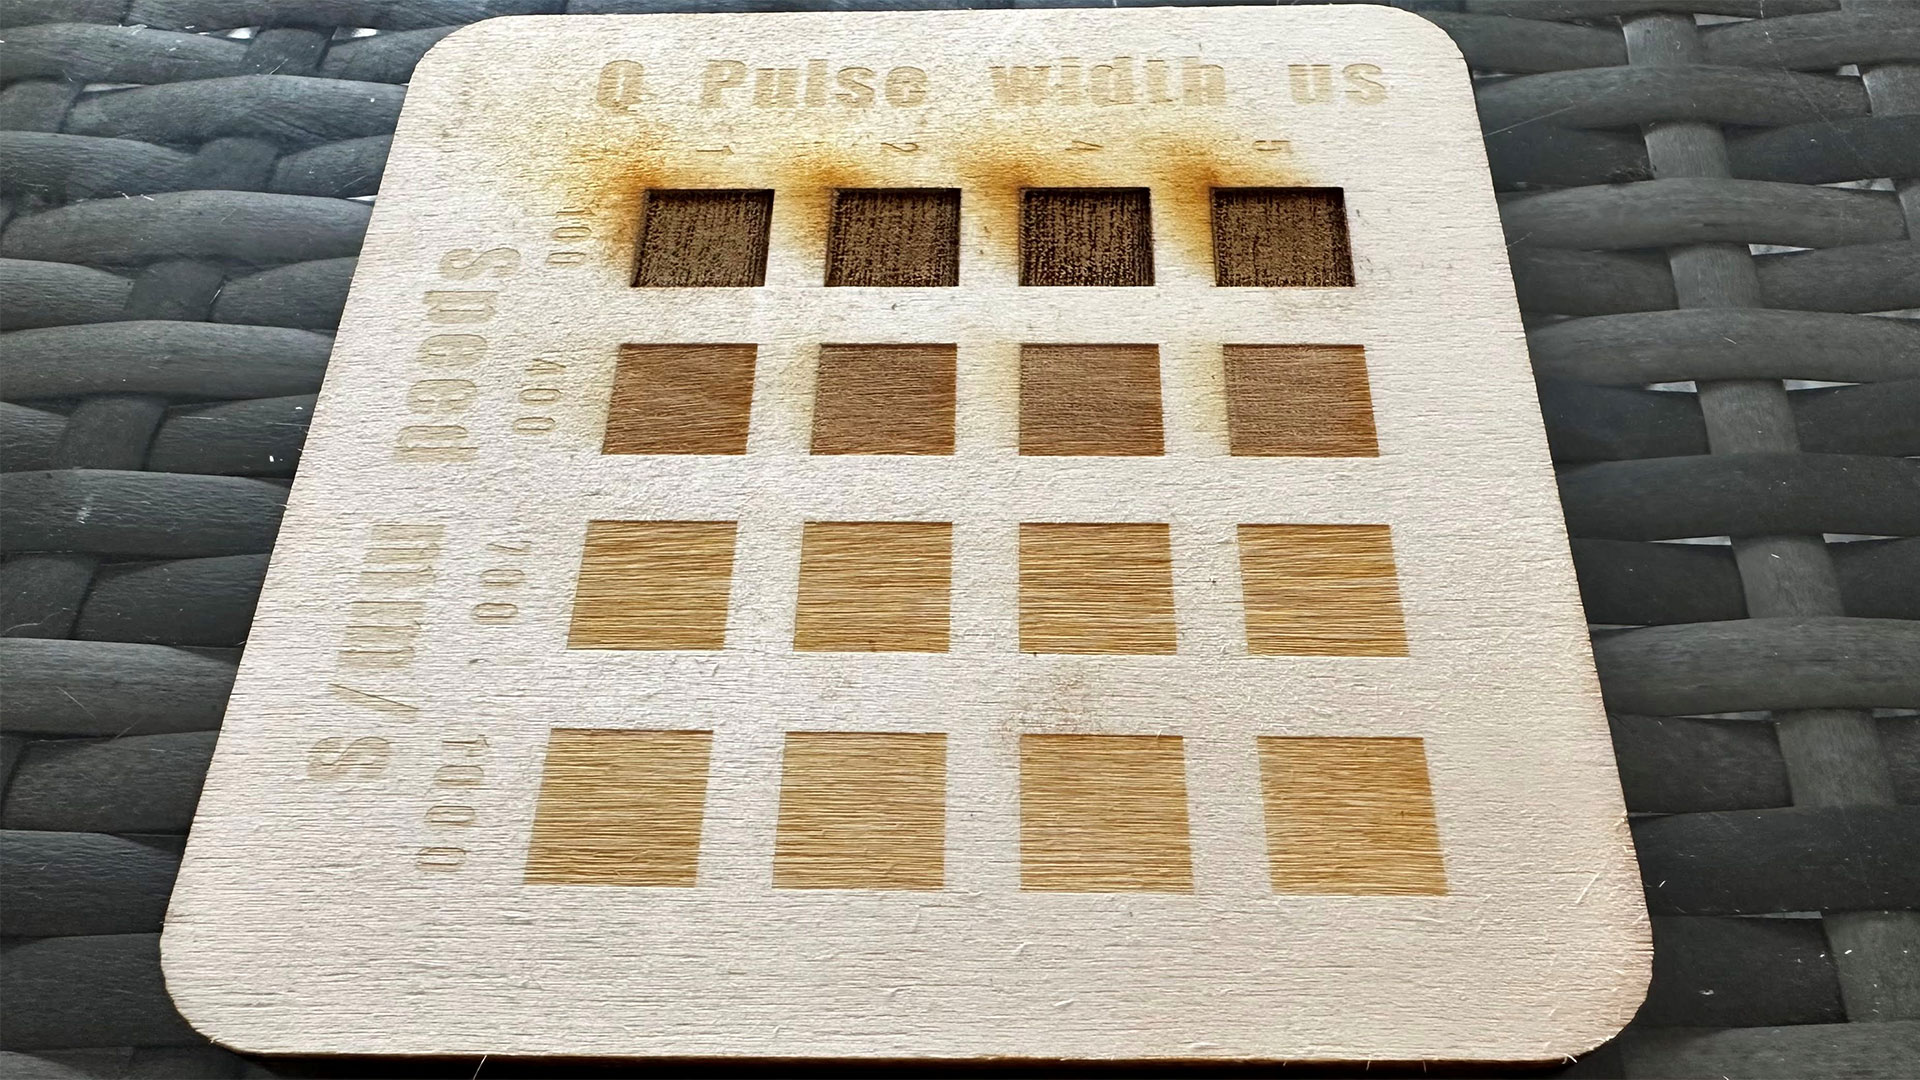
With that drama behind me, I found wood engraving and cutting quick and efficient on the UV laser. Indeed, the ‘cold burn’ technology here could cut the 3mm ply samples very cleanly and rather quickly.
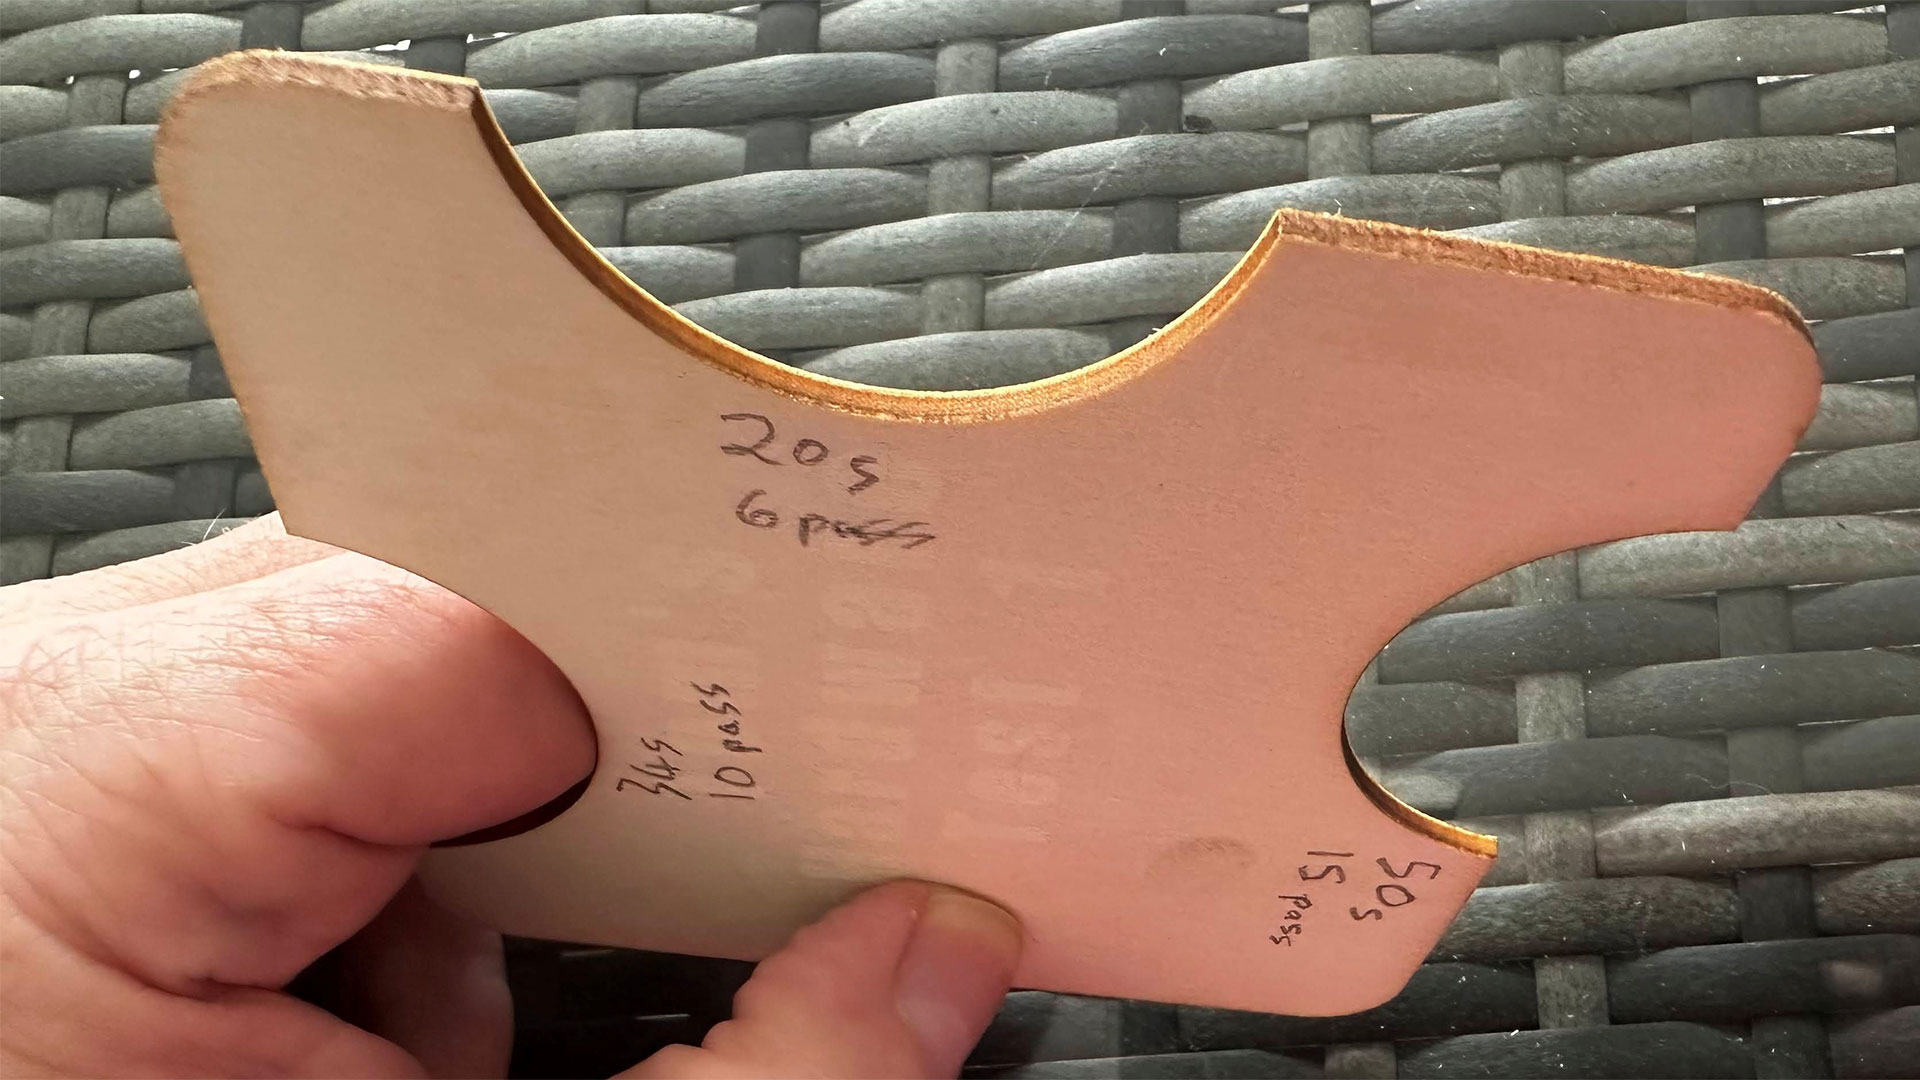
ComMarker’s guidance had suggested 15 passes to cut this material, but I tested 10 passes with success, and even six passes worked. Of course, using fewer passes (if you can) means there’s less chance of charring, and it saves considerable time. In my example, moving from 15 to six passes reduced the work time for cuts from 50 to 20 seconds.
Engraving on wood was equally swift, with adjustments to number of passes, laser beam speed, and others providing different effects. Perhaps this is a weak point of a UV laser system, though. ‘Zero burn’ tech means that the wide range of black levels produced by laser-induced charring are largely absent here. Check out my other sample pictures to see what I mean.
Update: You can see some more wood engraving work as part of my feature where I make an Apple ADB to USB converter dongle.
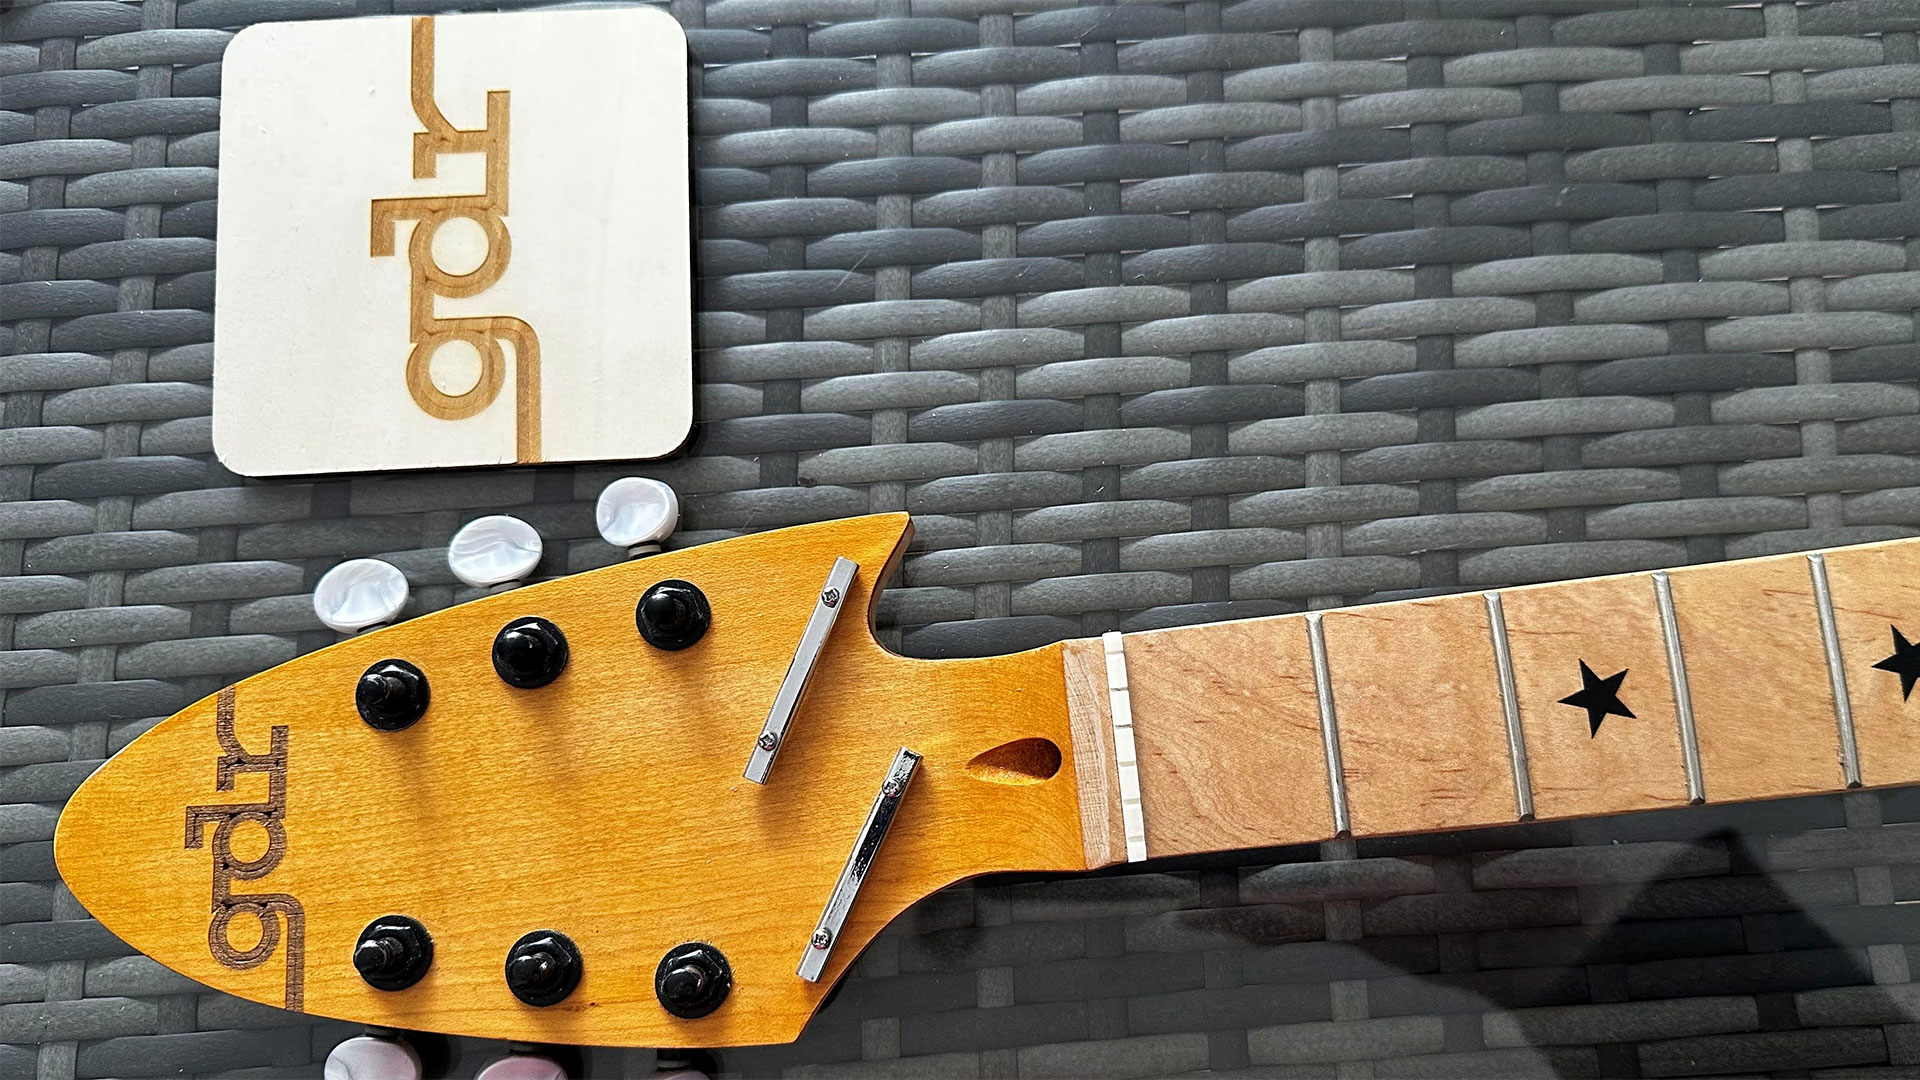
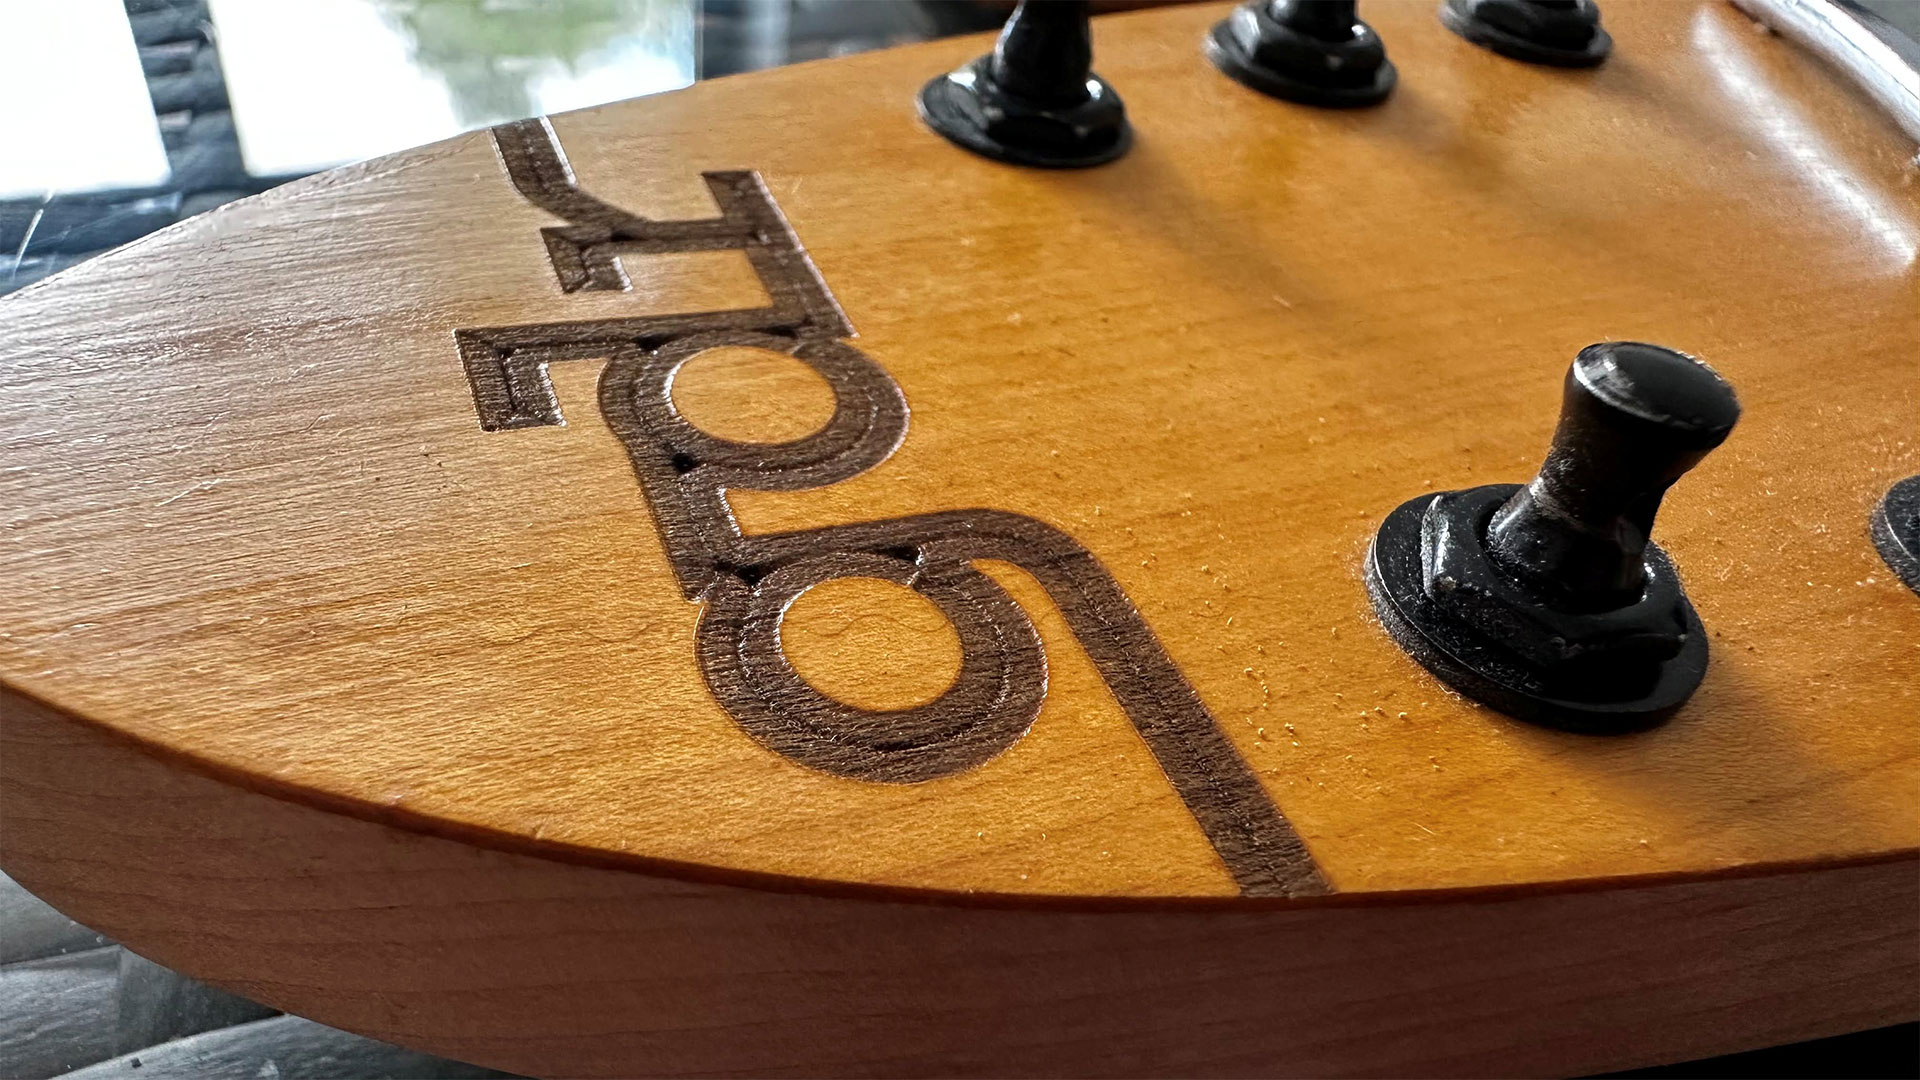
On the guitar headstock logo I might fill the engraved text (GDR = Guitar Design Reviews) with some colored ink, lacquer, or varnish.
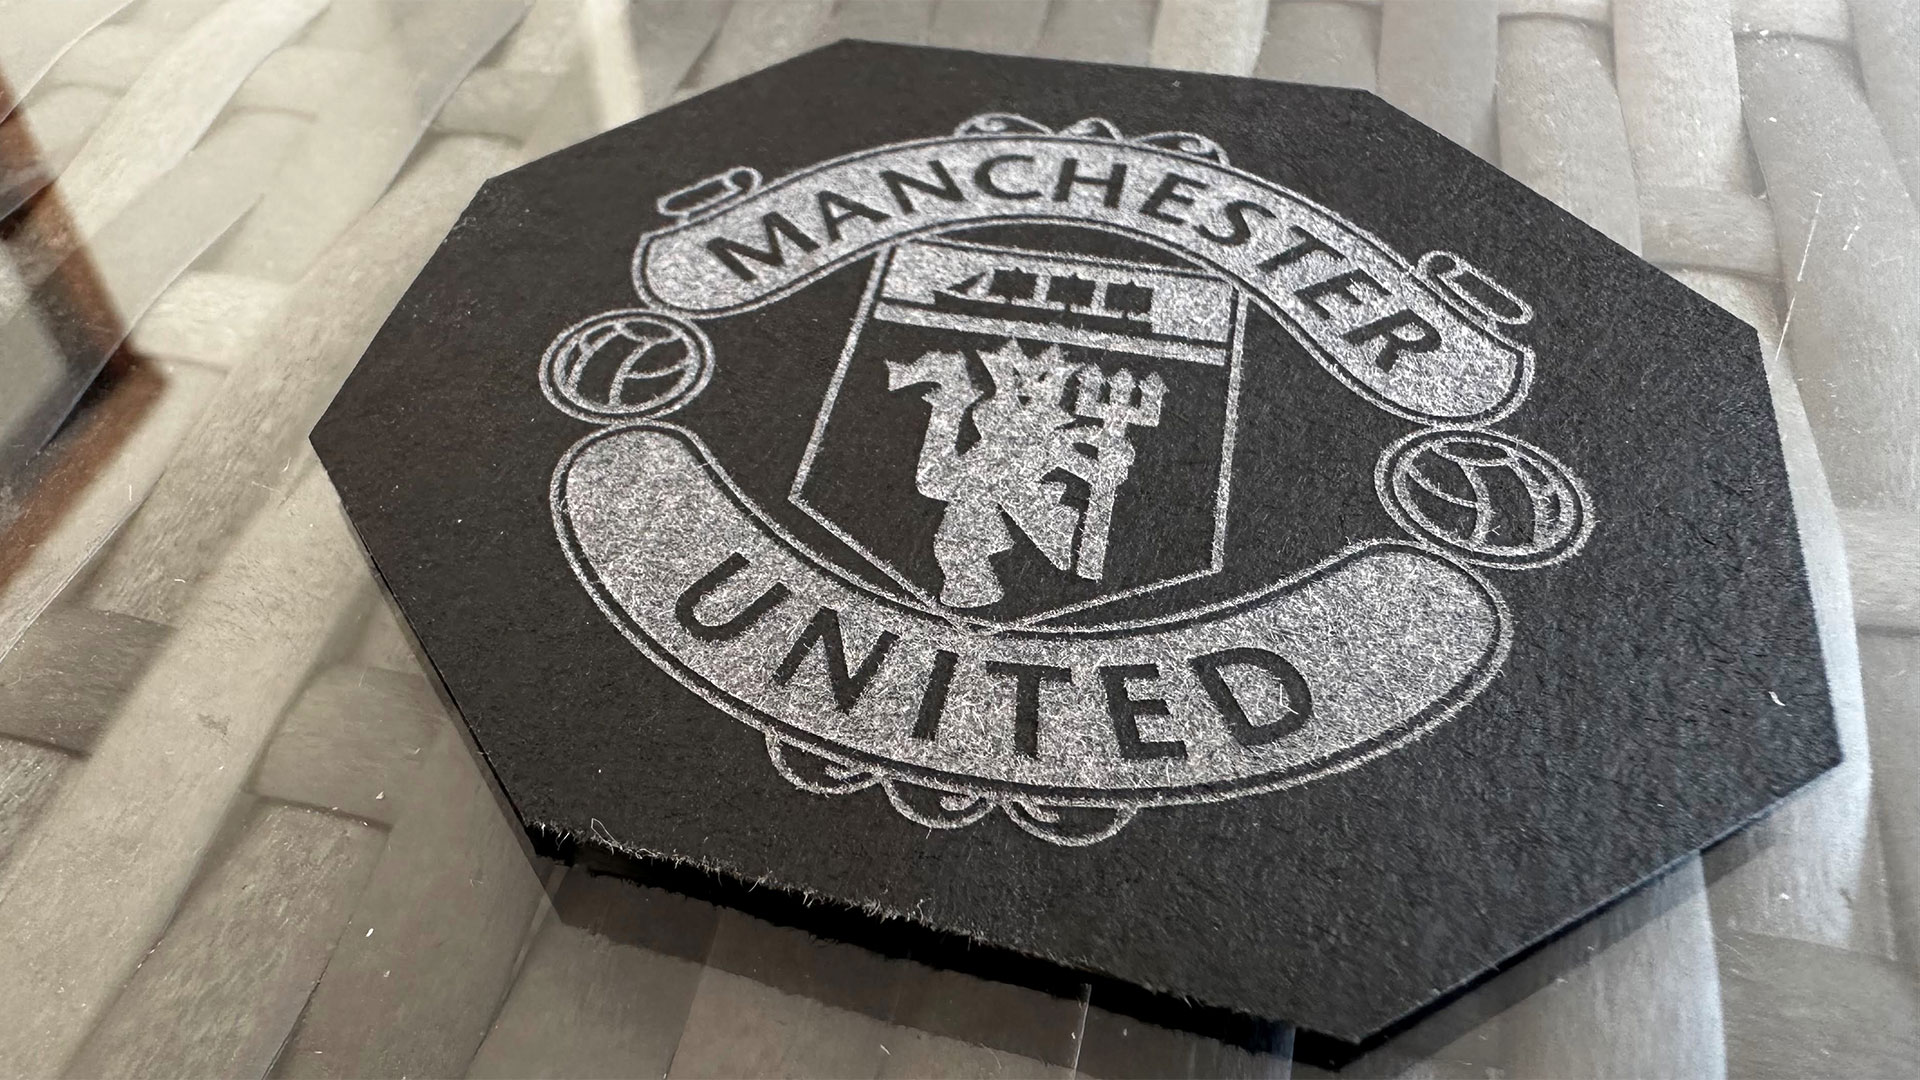
👉 Paper, fabric, leaves, slate
Using some of the paper samples in the ComMarker introductory pack, it was pleasing that the first tests, using the settings provided, worked without fiddly adjustments.
Etching a logo onto quite thin paper was quite impressive, delivering the translucency you can see in the images. On heavier card, a different, probably more impactful effect was possible.
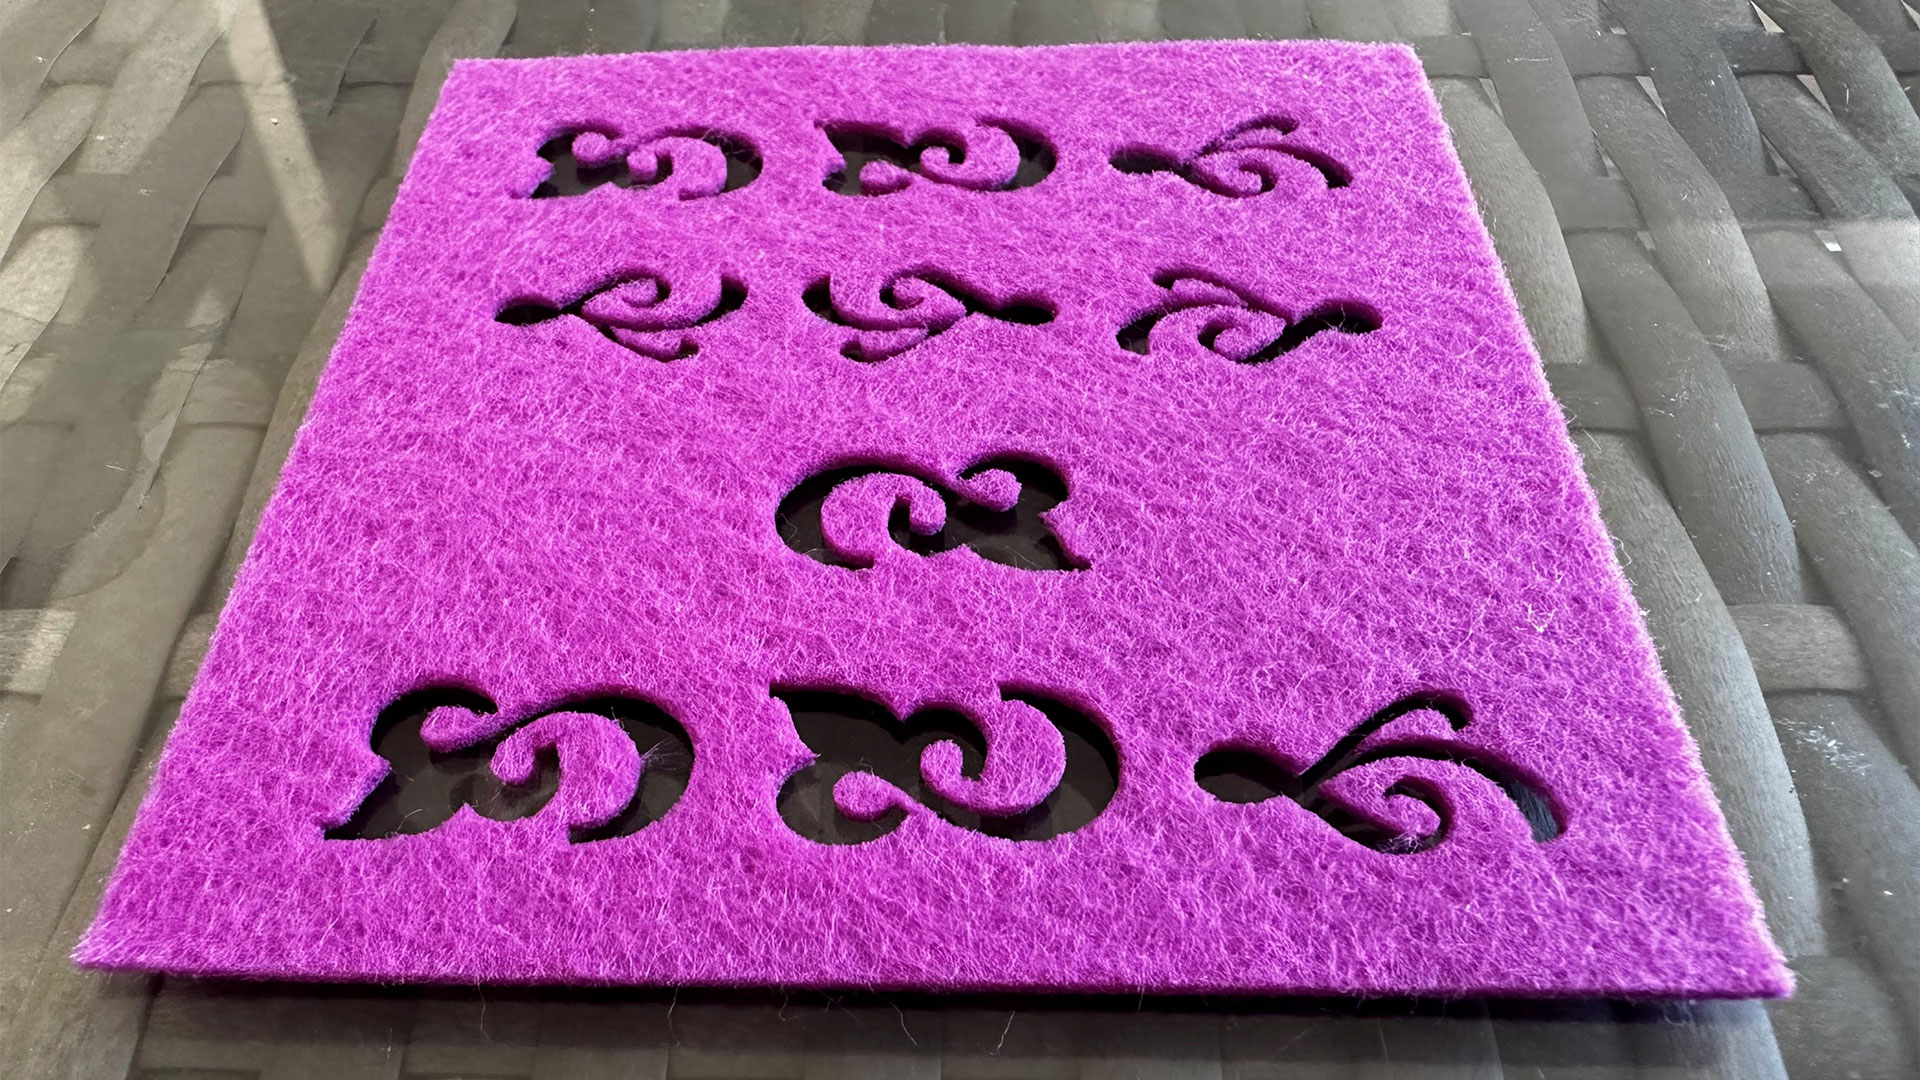
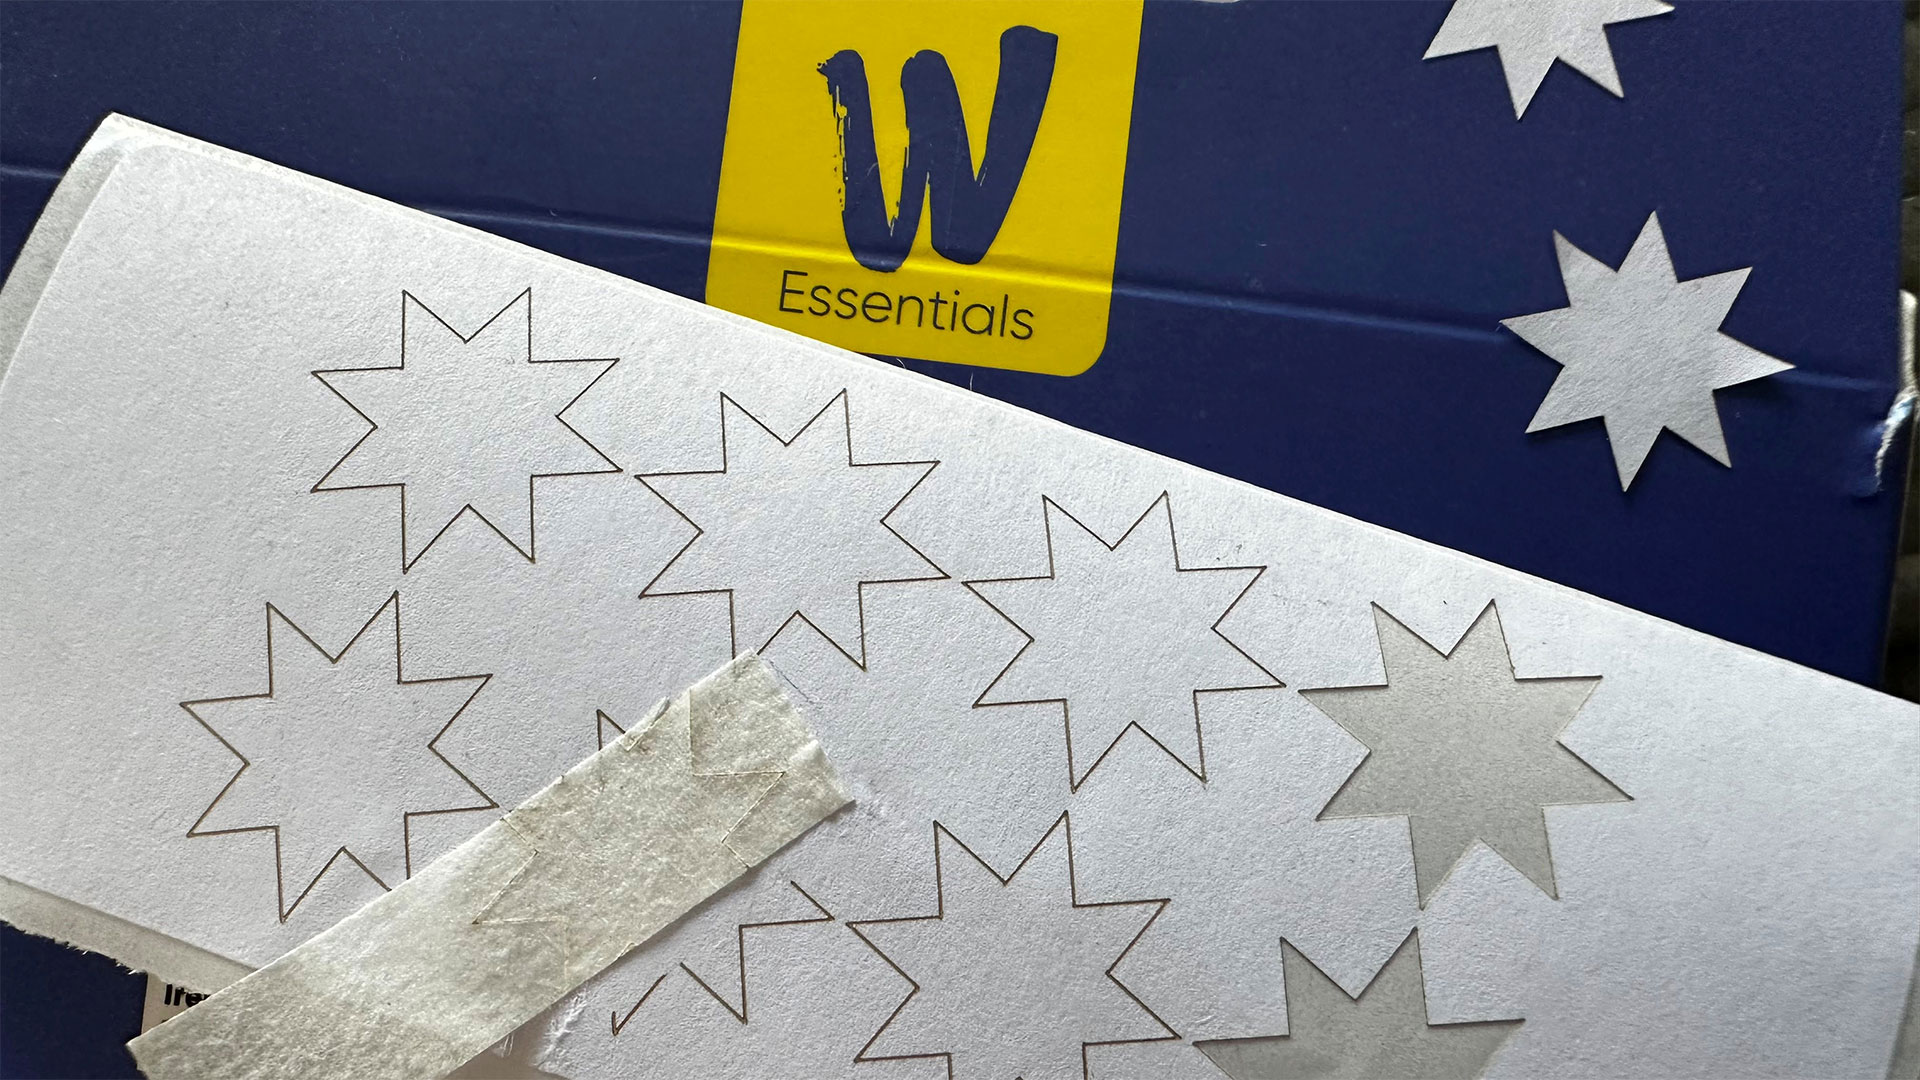
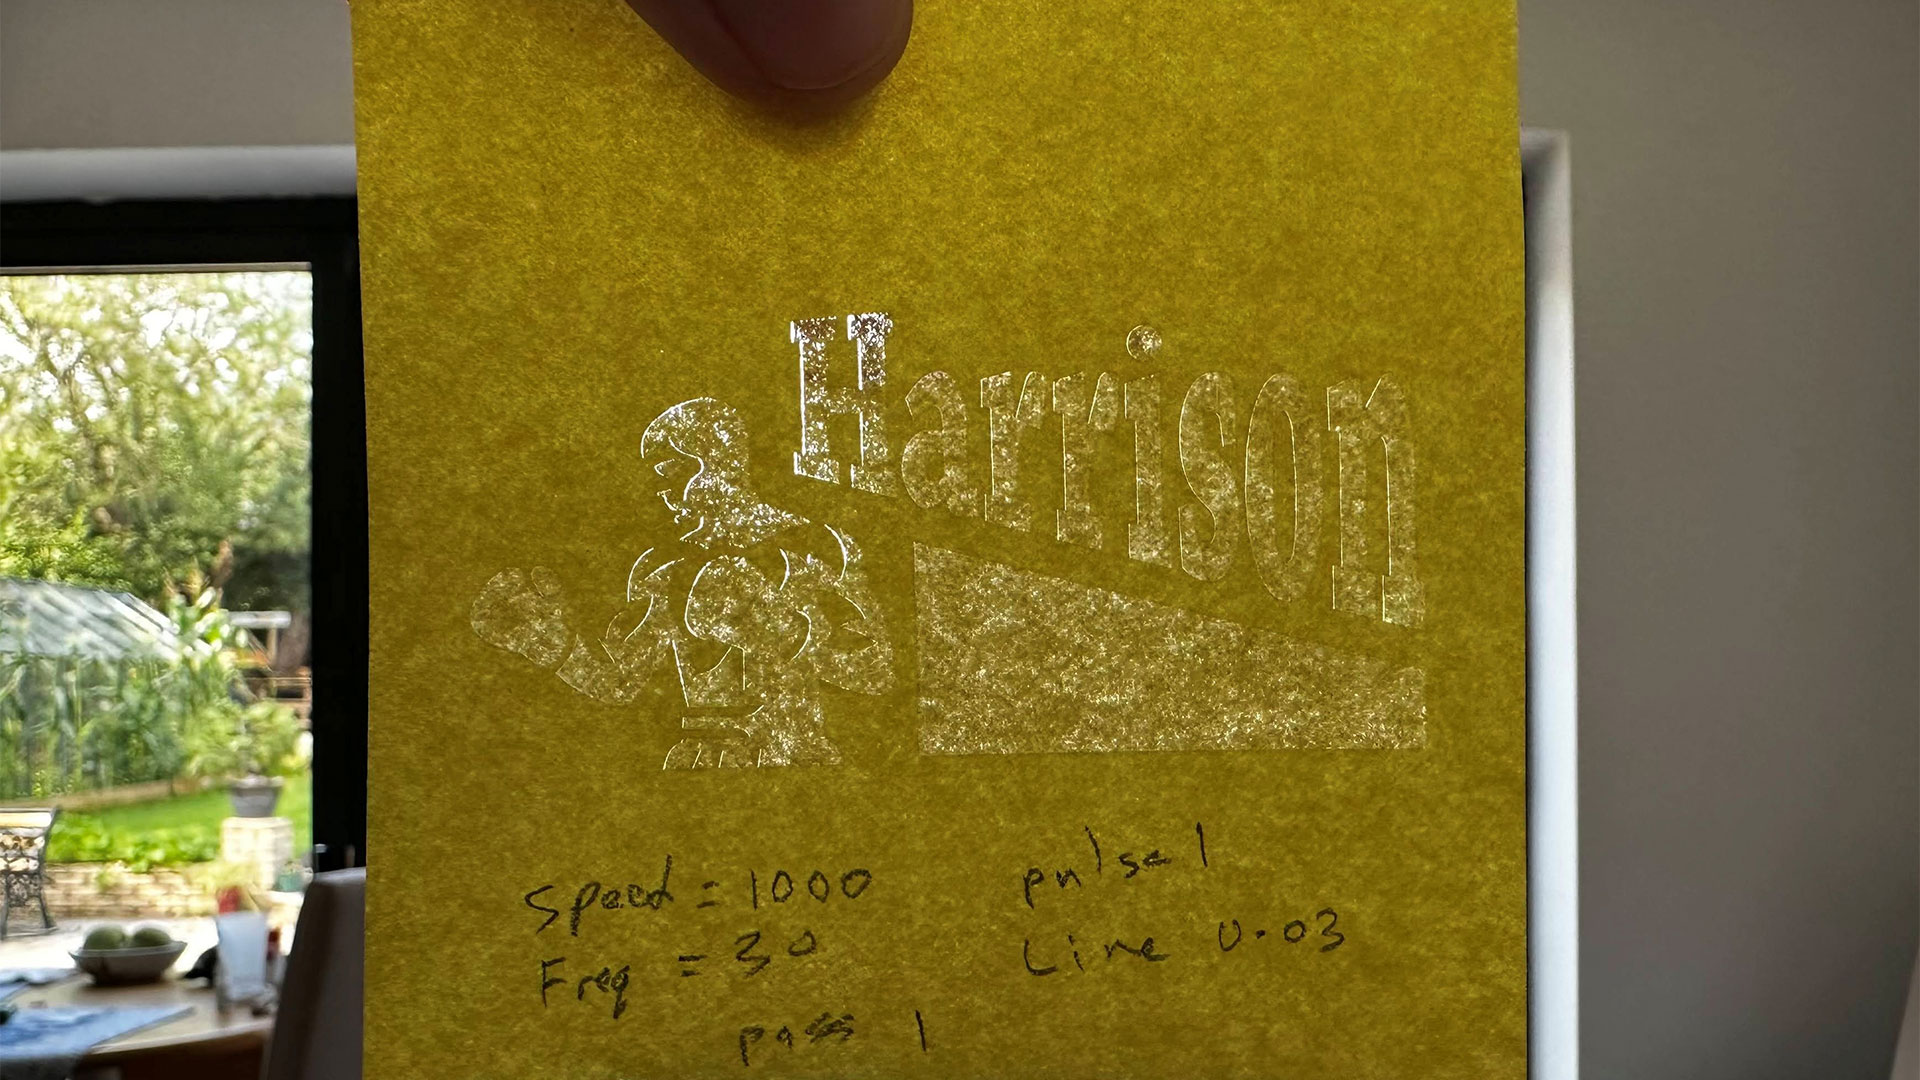
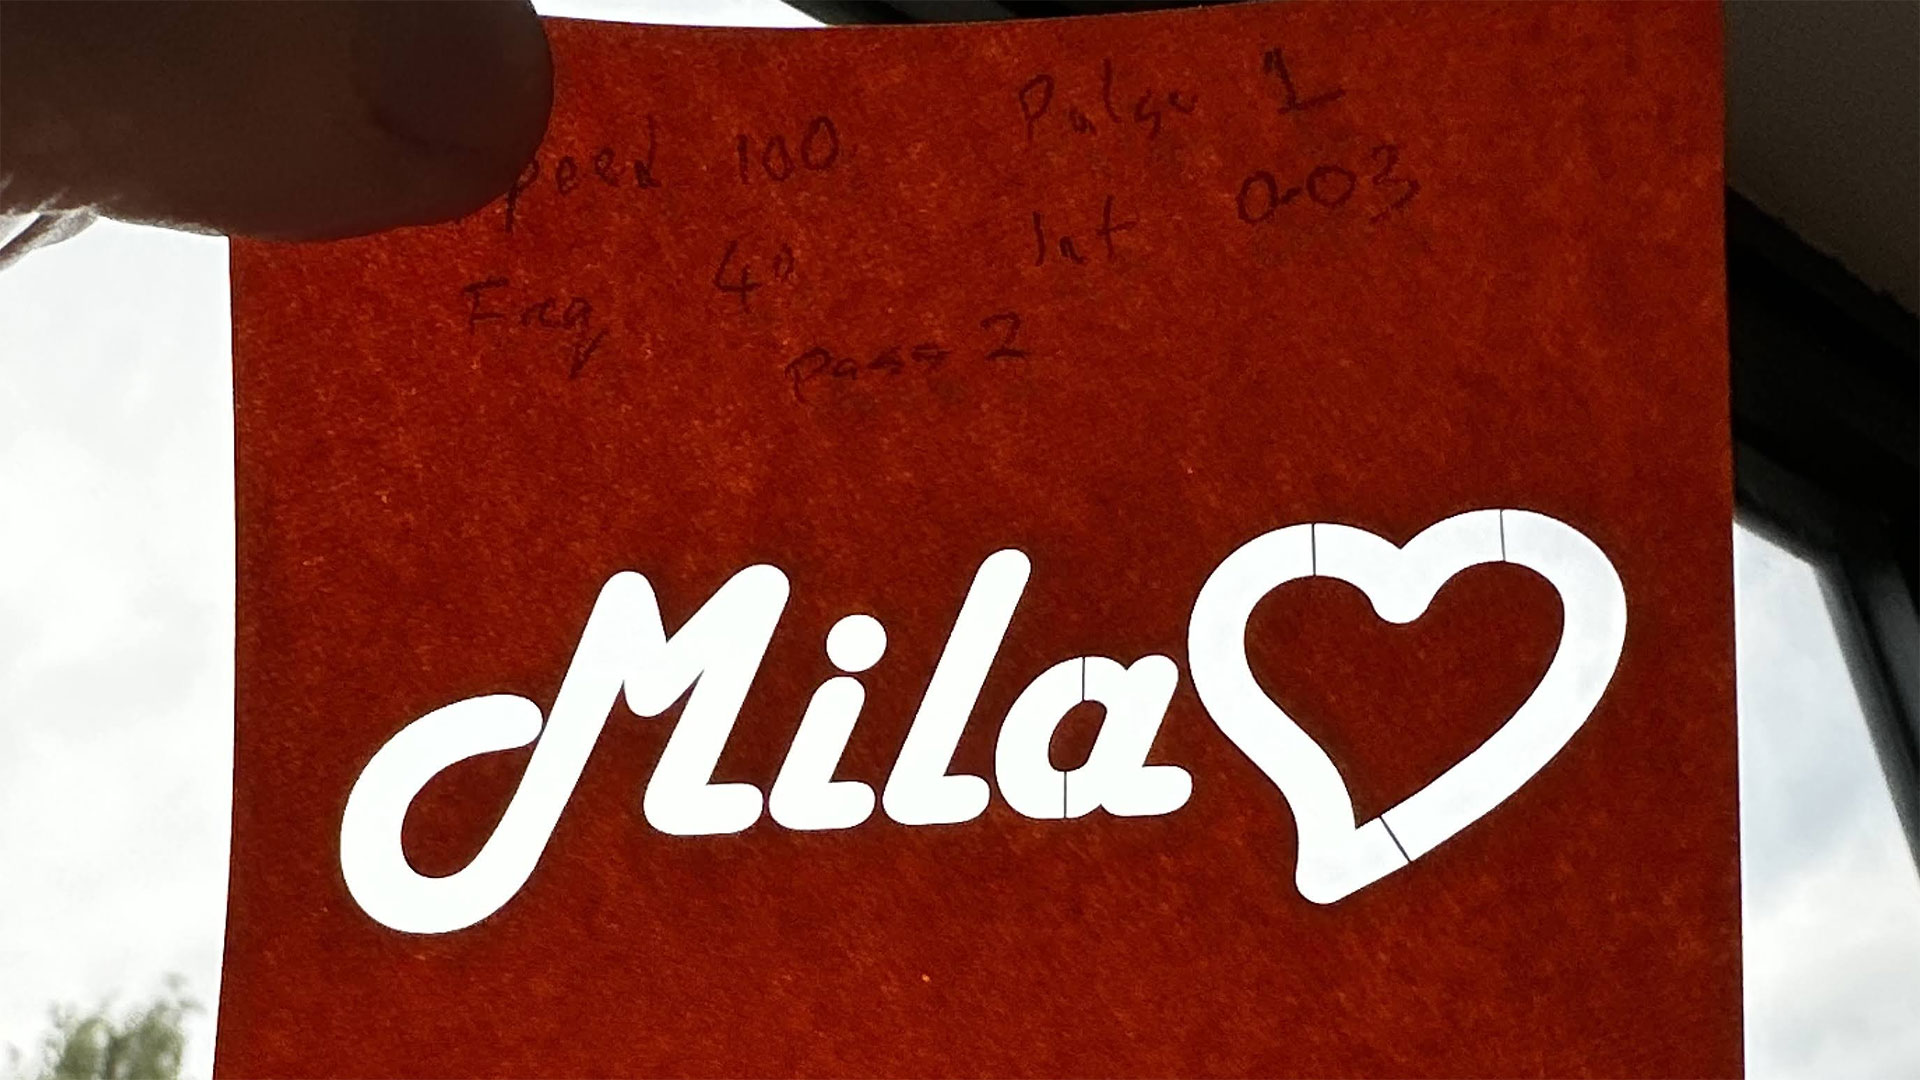
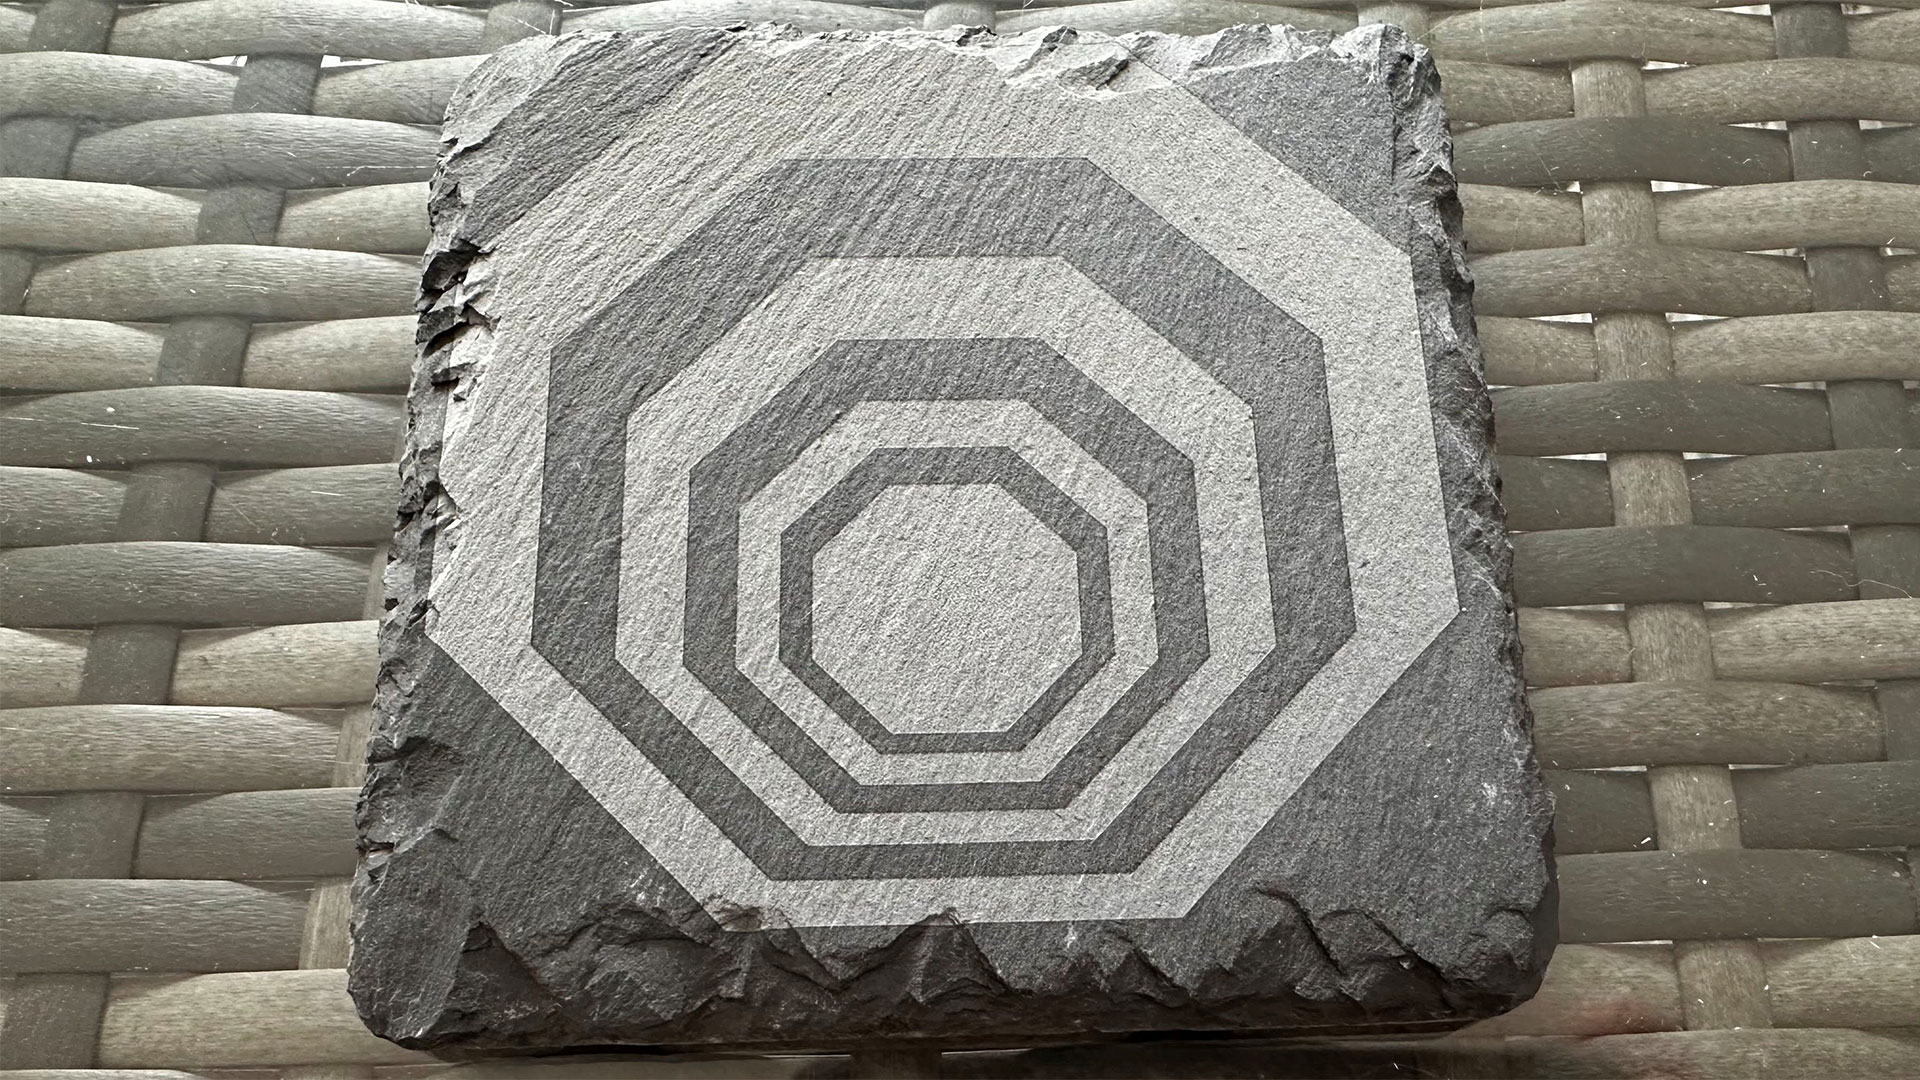
Cutting self-adhesive stickers was also an effortless and quick process with the Onmi X. I asked the grandkids to let me know what other shapes they would like various stickers cut out. The process takes just seconds, with extremely fine and clean cuts.
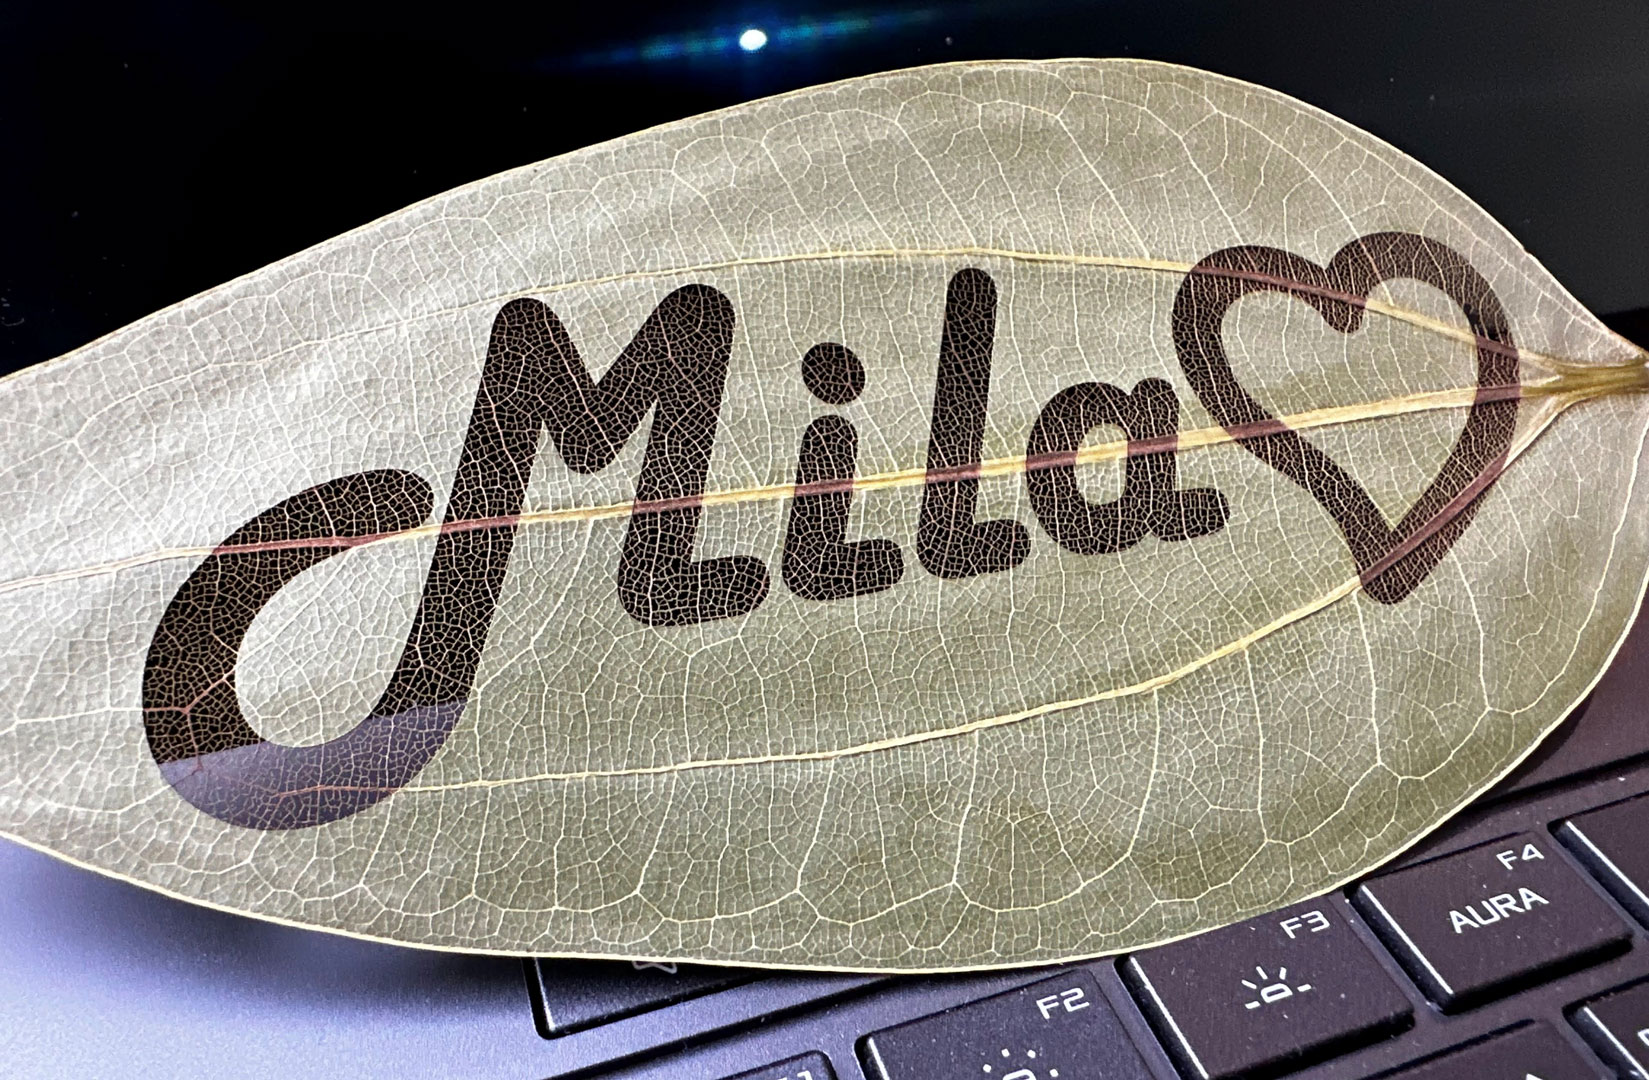
The measured effects of UV lasers on leaves is rather special. I etched this stylized name/logo on a leaf using the recommended settings. As you can see, it came out beautifully and evenly.
👉 Metal, painted metal
I’d not tried metal engraving or cutting on my previous diode laser. For this model, I got some painted aluminum business cards I had seen others work on, with great results. However, the finished engravings in person seemed even more impressive.
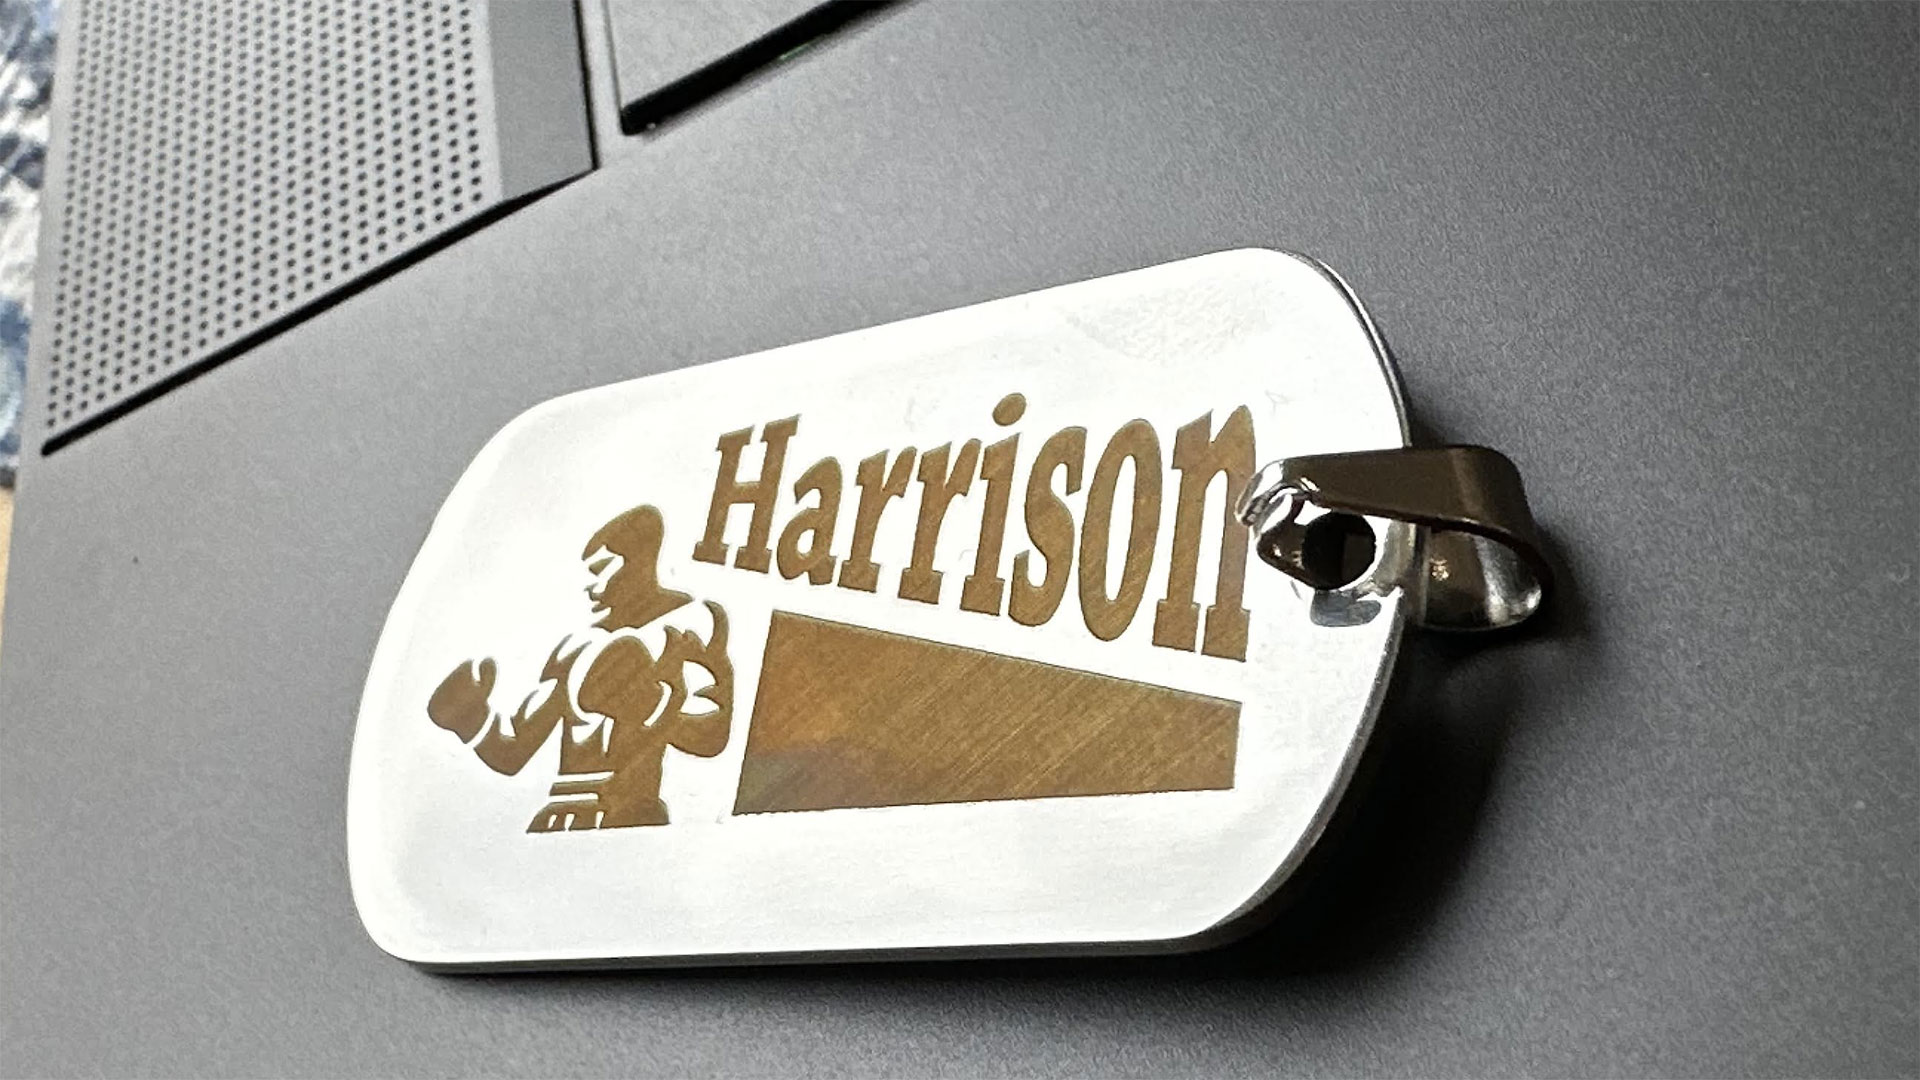
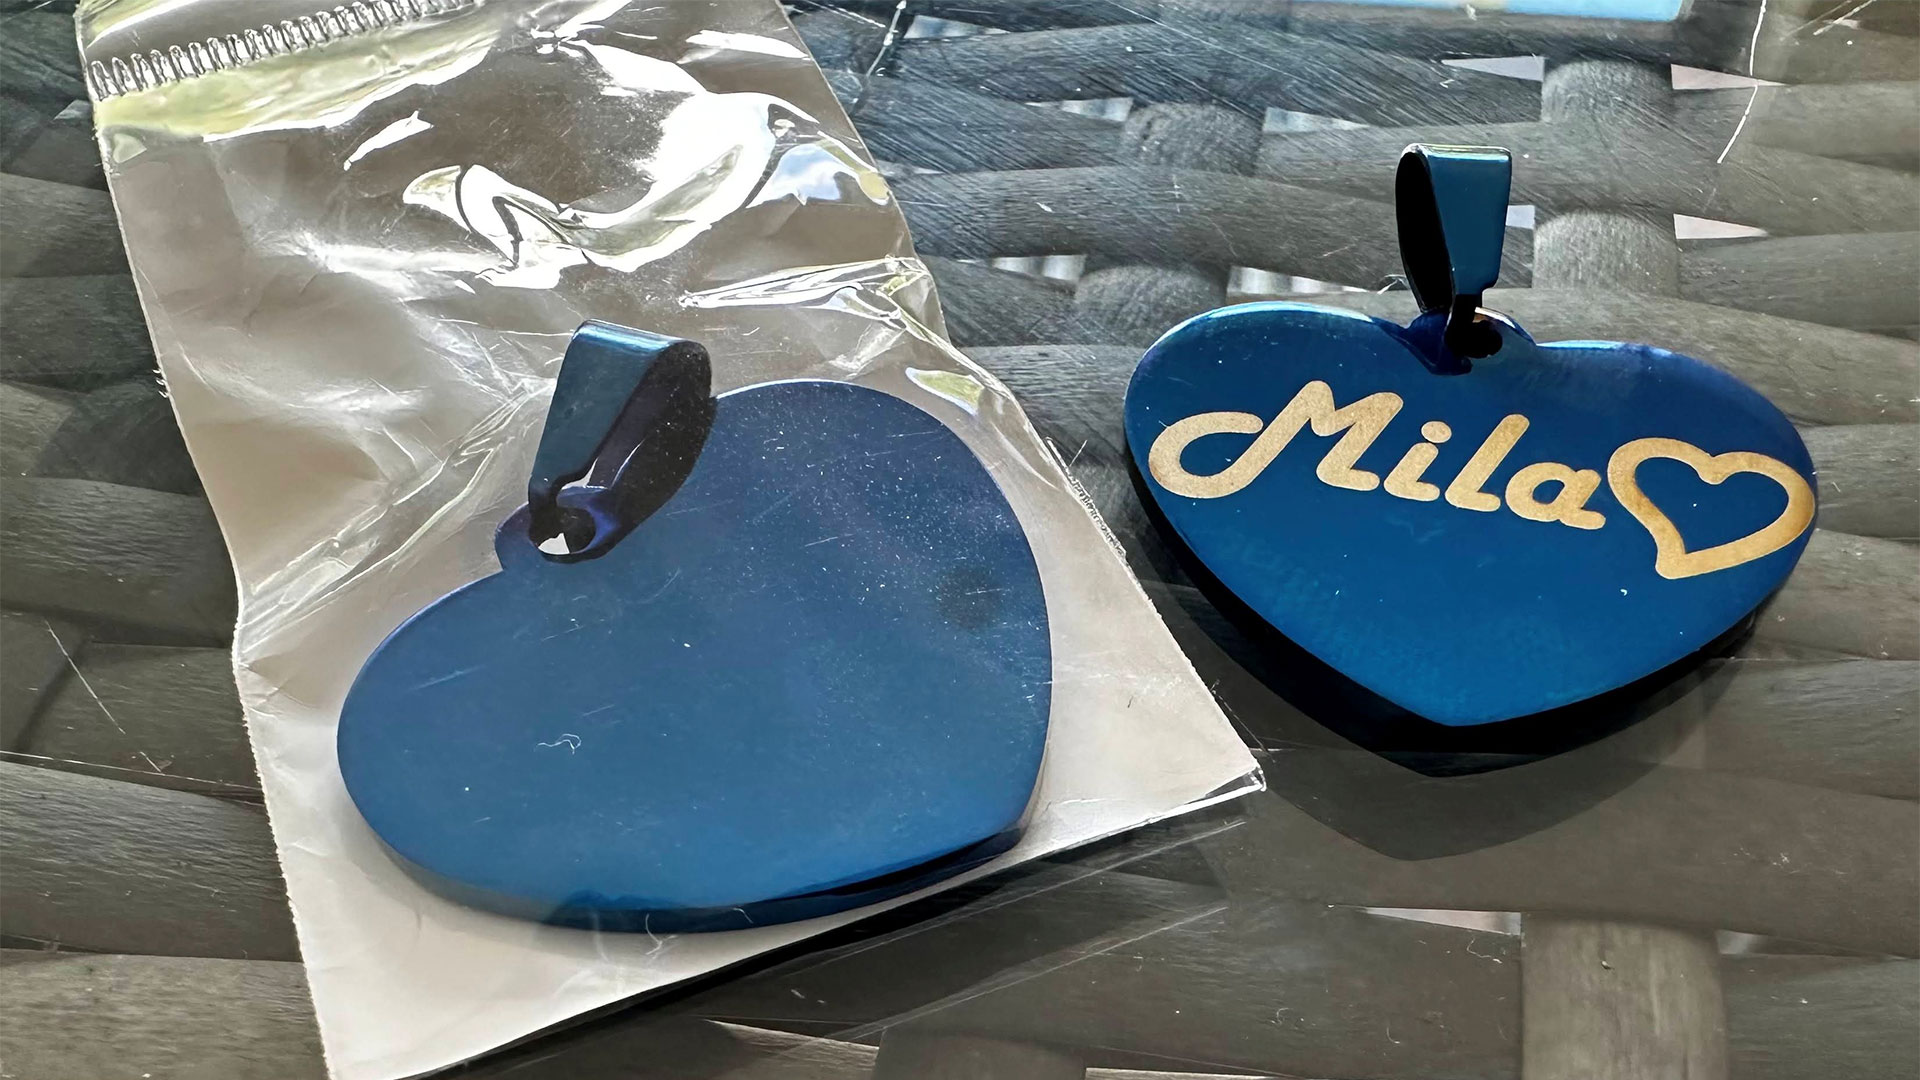
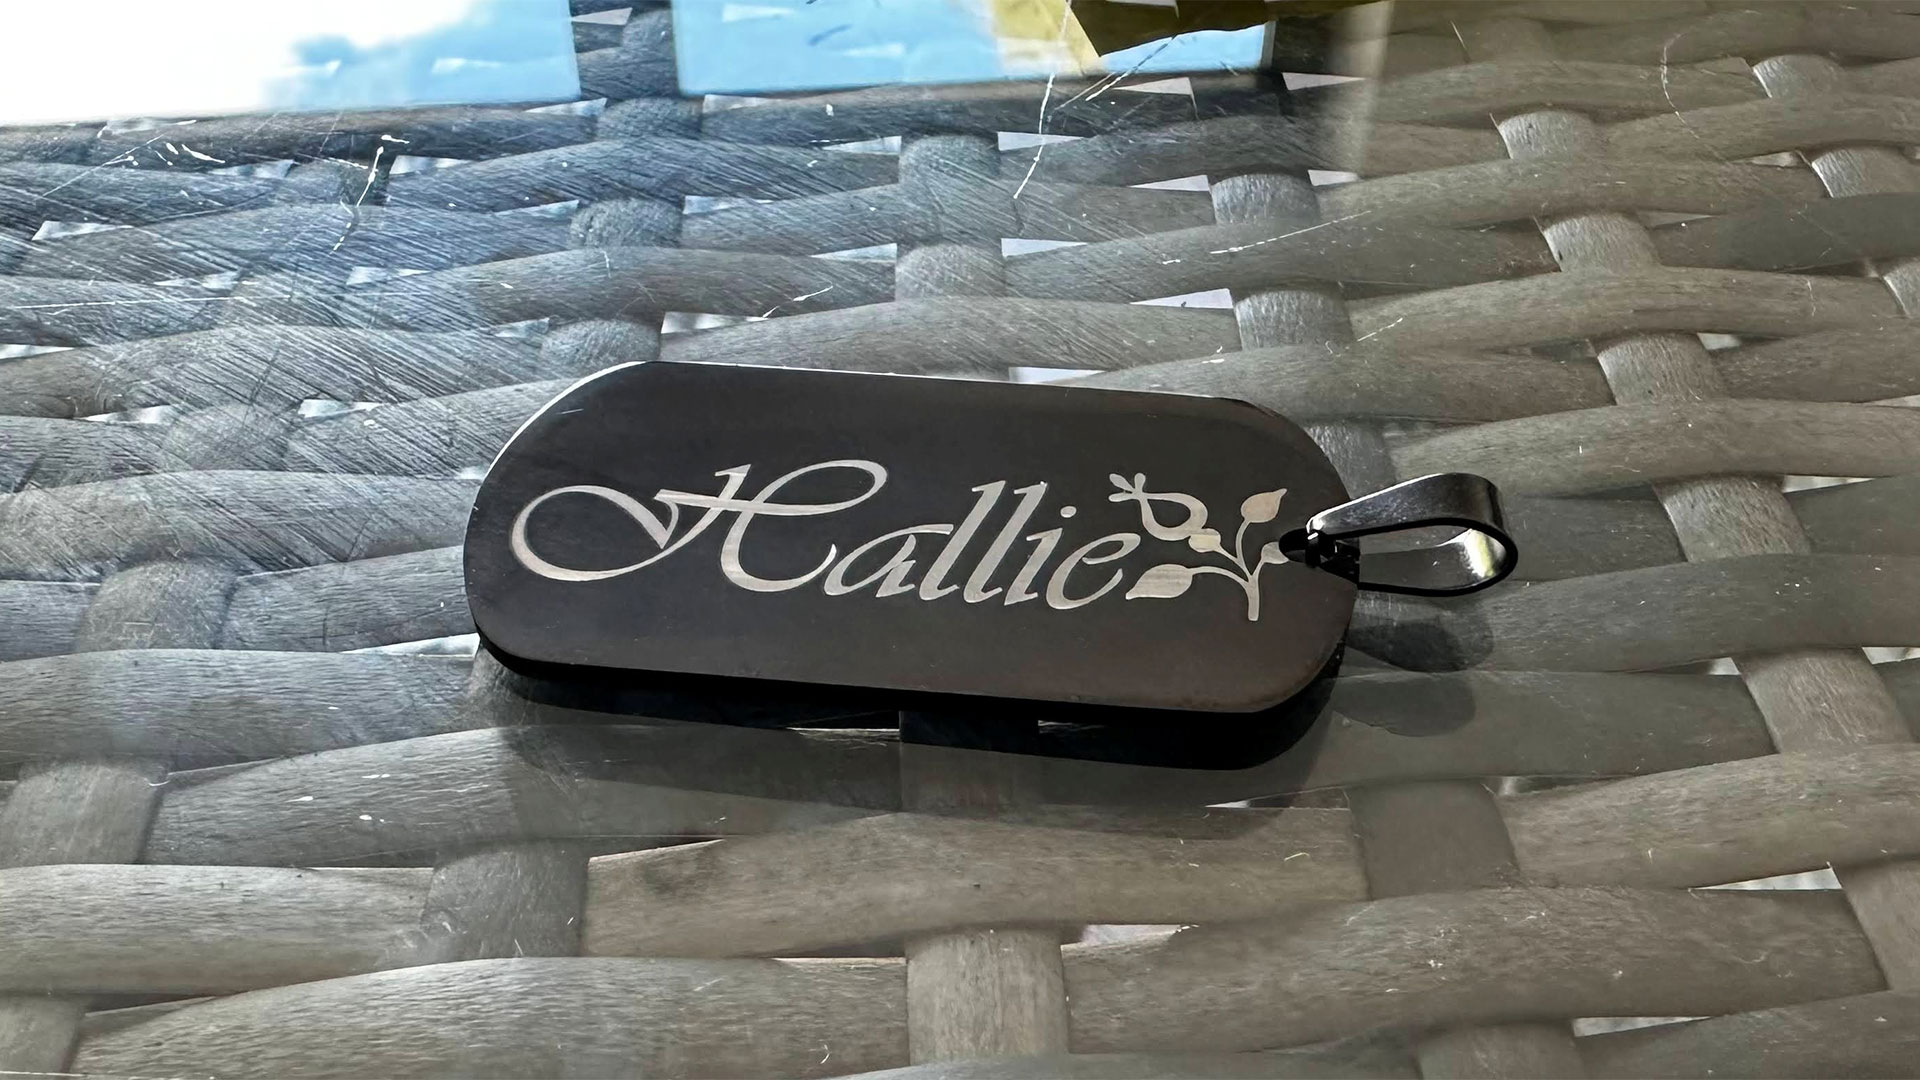
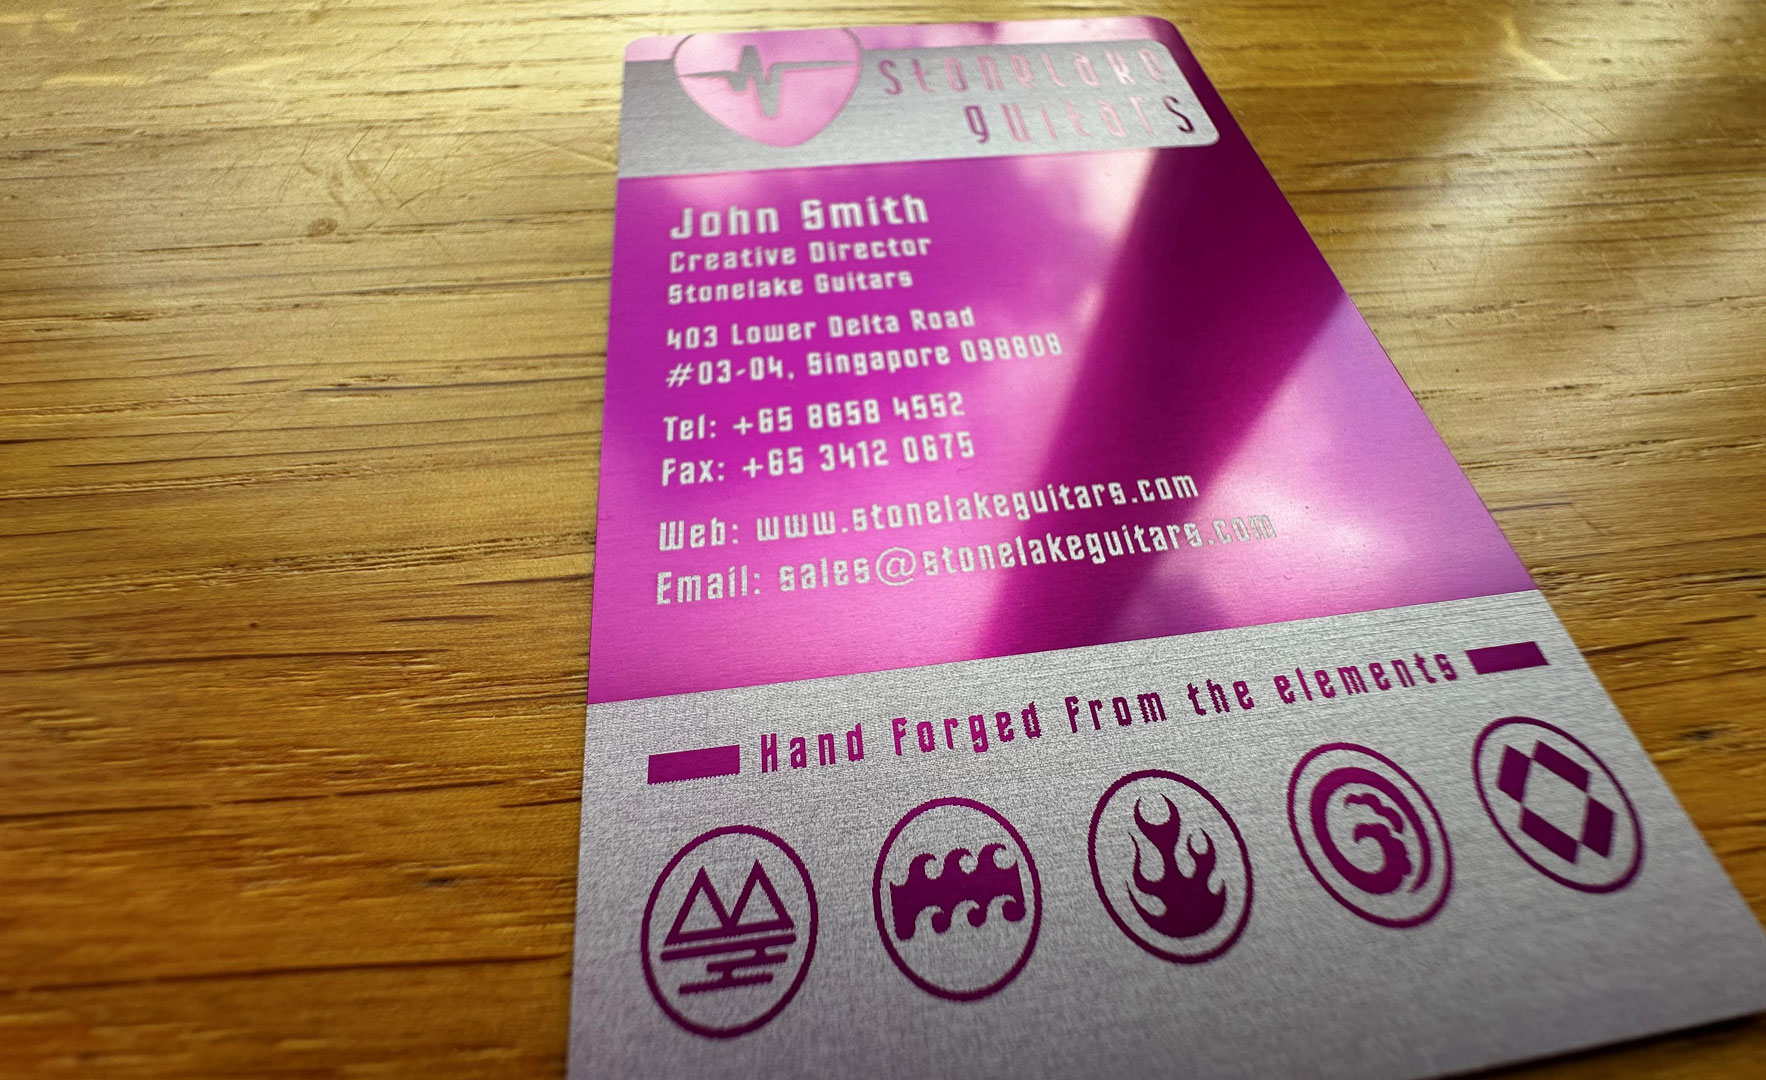
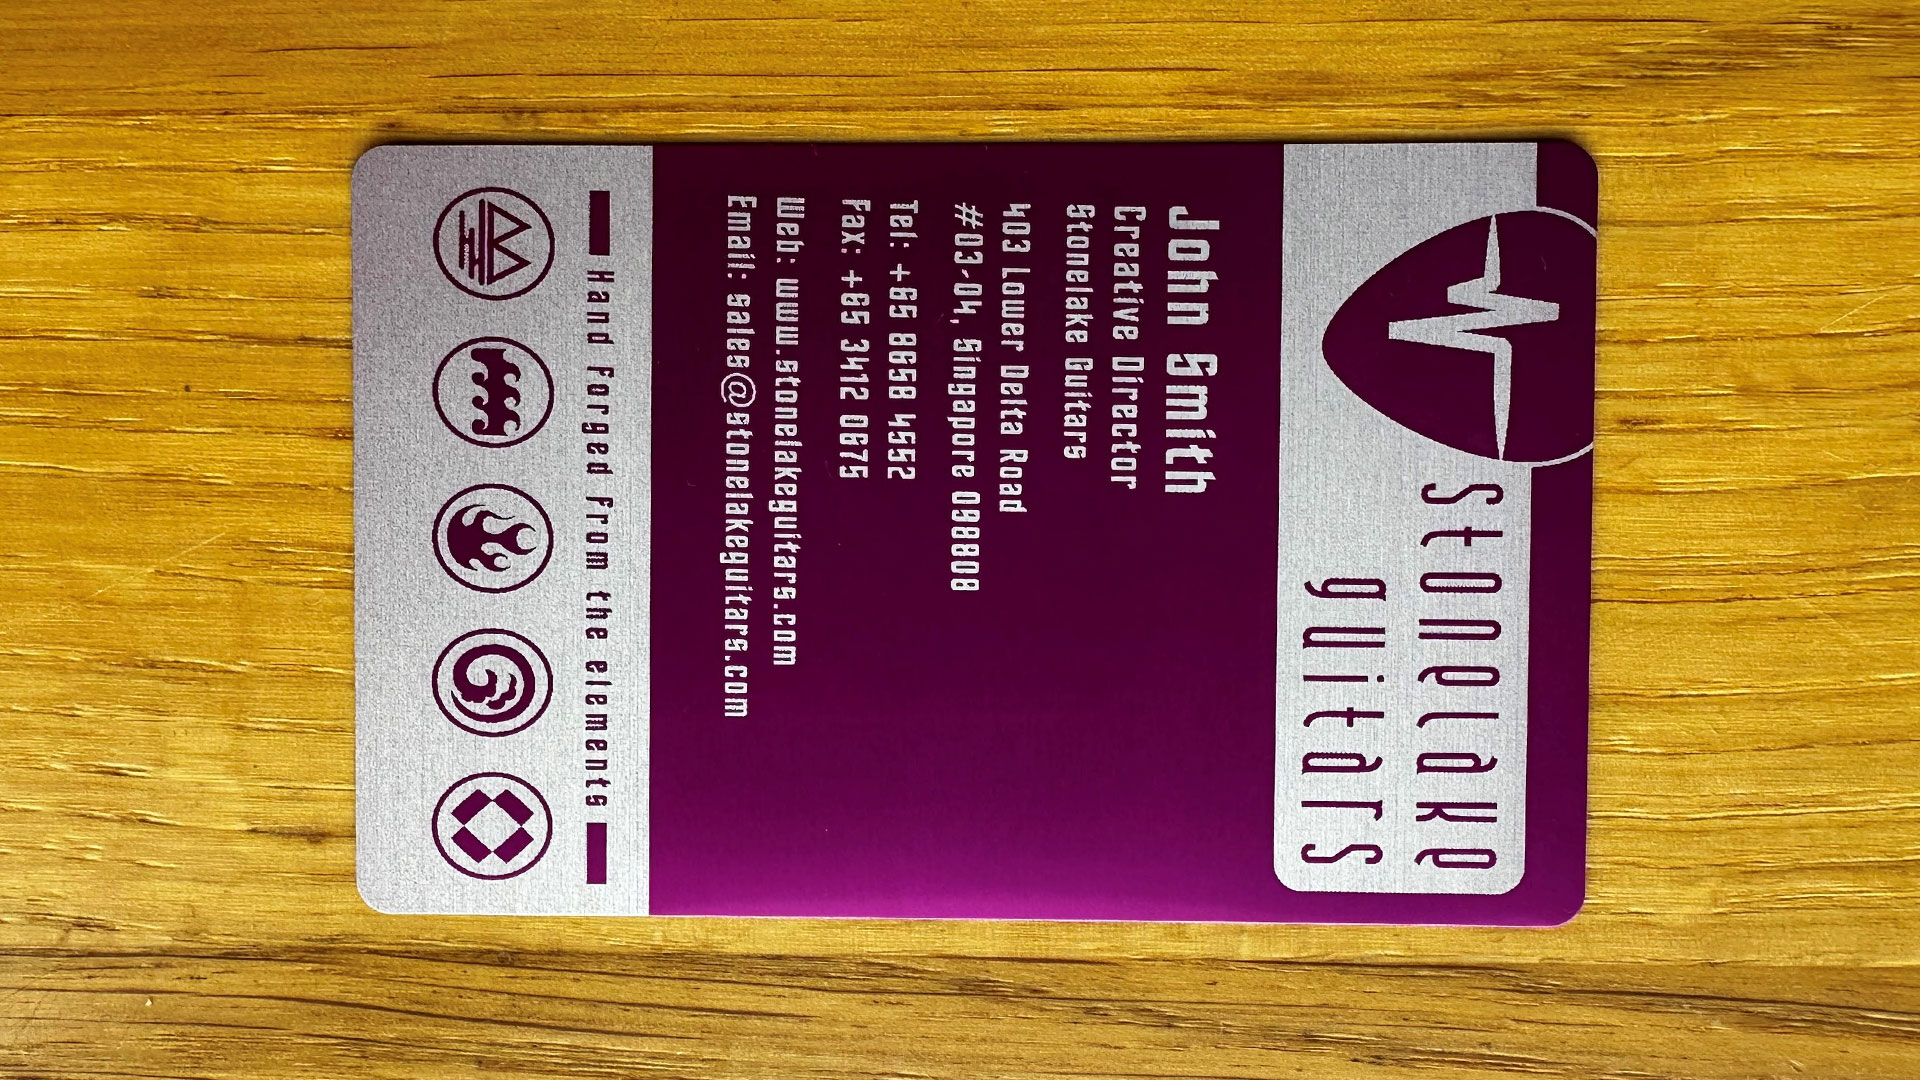
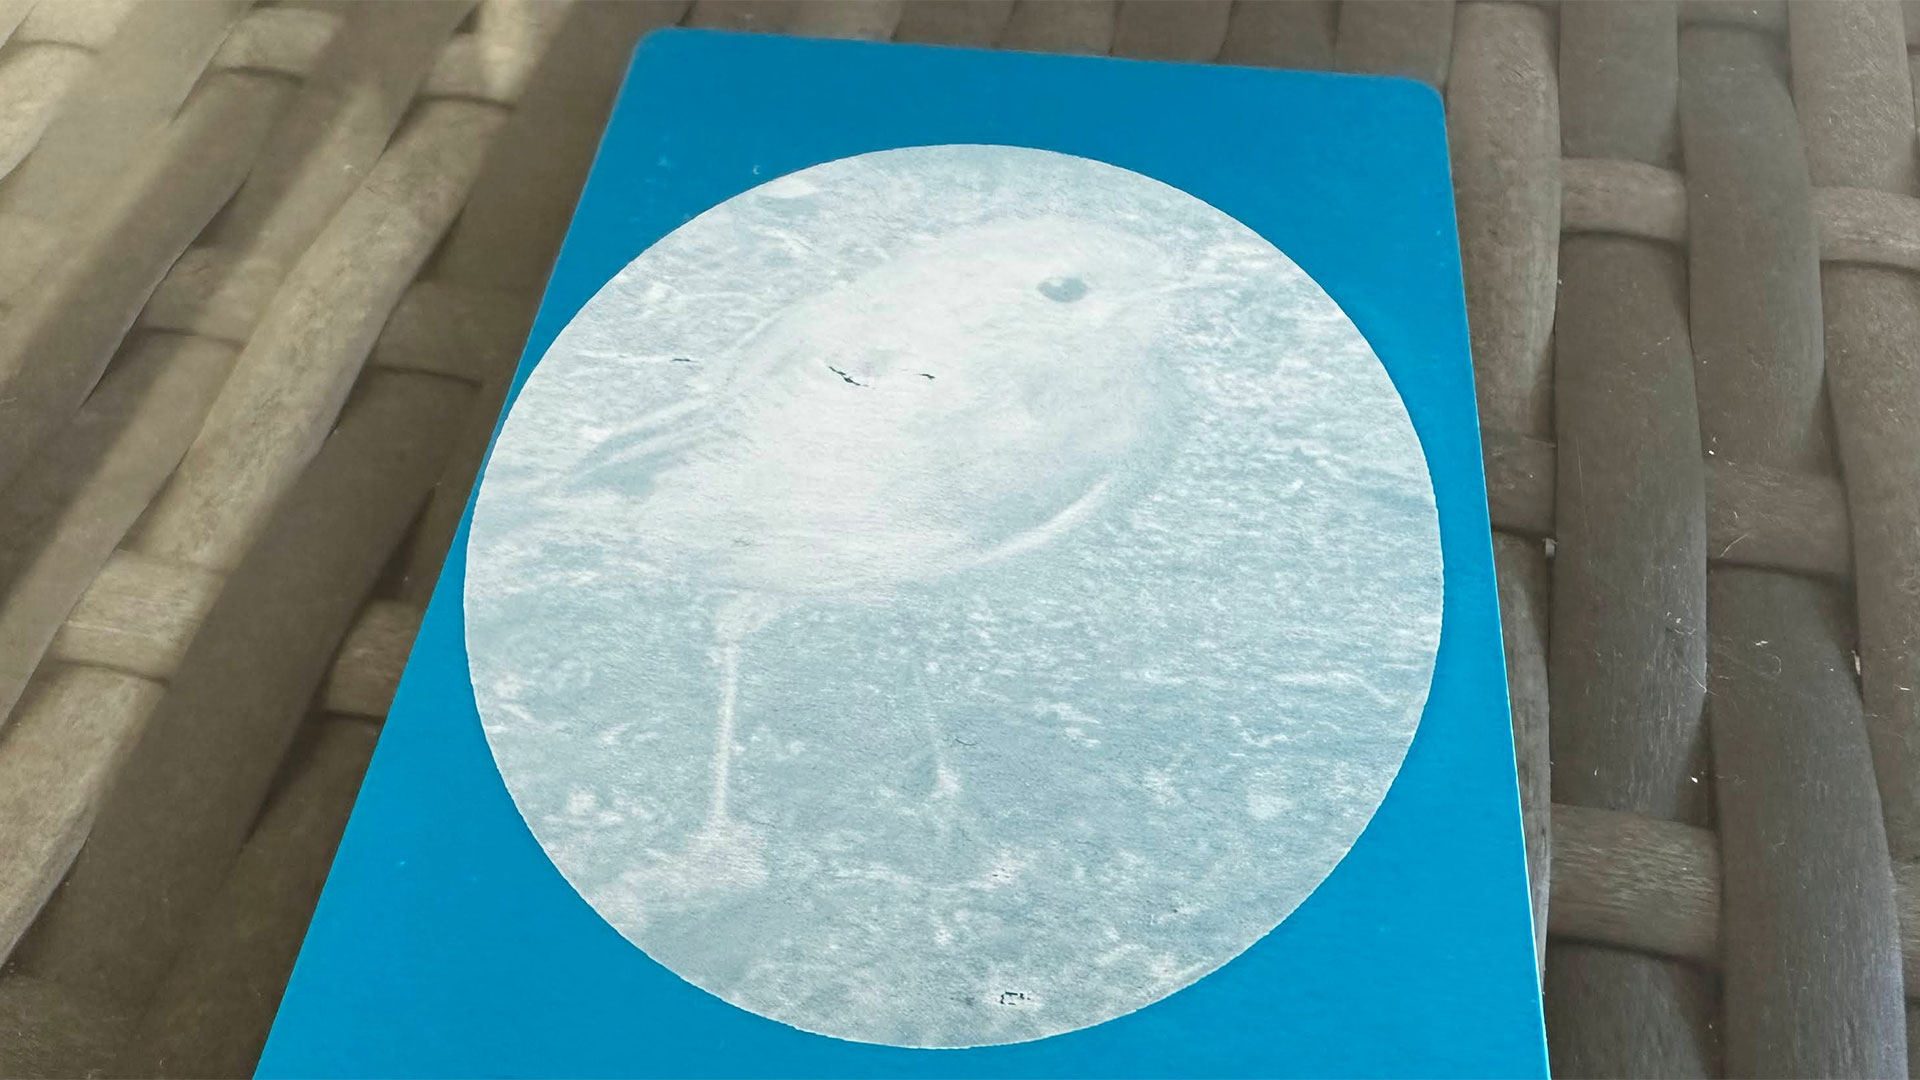
ComMarker’s Omni X also fared very well on the metal samples with various color or mirror coatings. These line art engravings came out pleasingly sharp, and the results could be had very quickly.
My tests of printing photographs on metal weren’t as good as expected. Perhaps I need to tweak settings more, or adjust the images used for better reproduction.
👉 PC keyboard keycaps
I have an old mechanical keyboard on which the (ABS) keycaps have started to wear out. This peripheral came with blank spare keycaps, and a UV laser is supposed to be good for engraving various plastics without charring, melting, or burning. It looked a good candidate for a UV-laser aided fix.
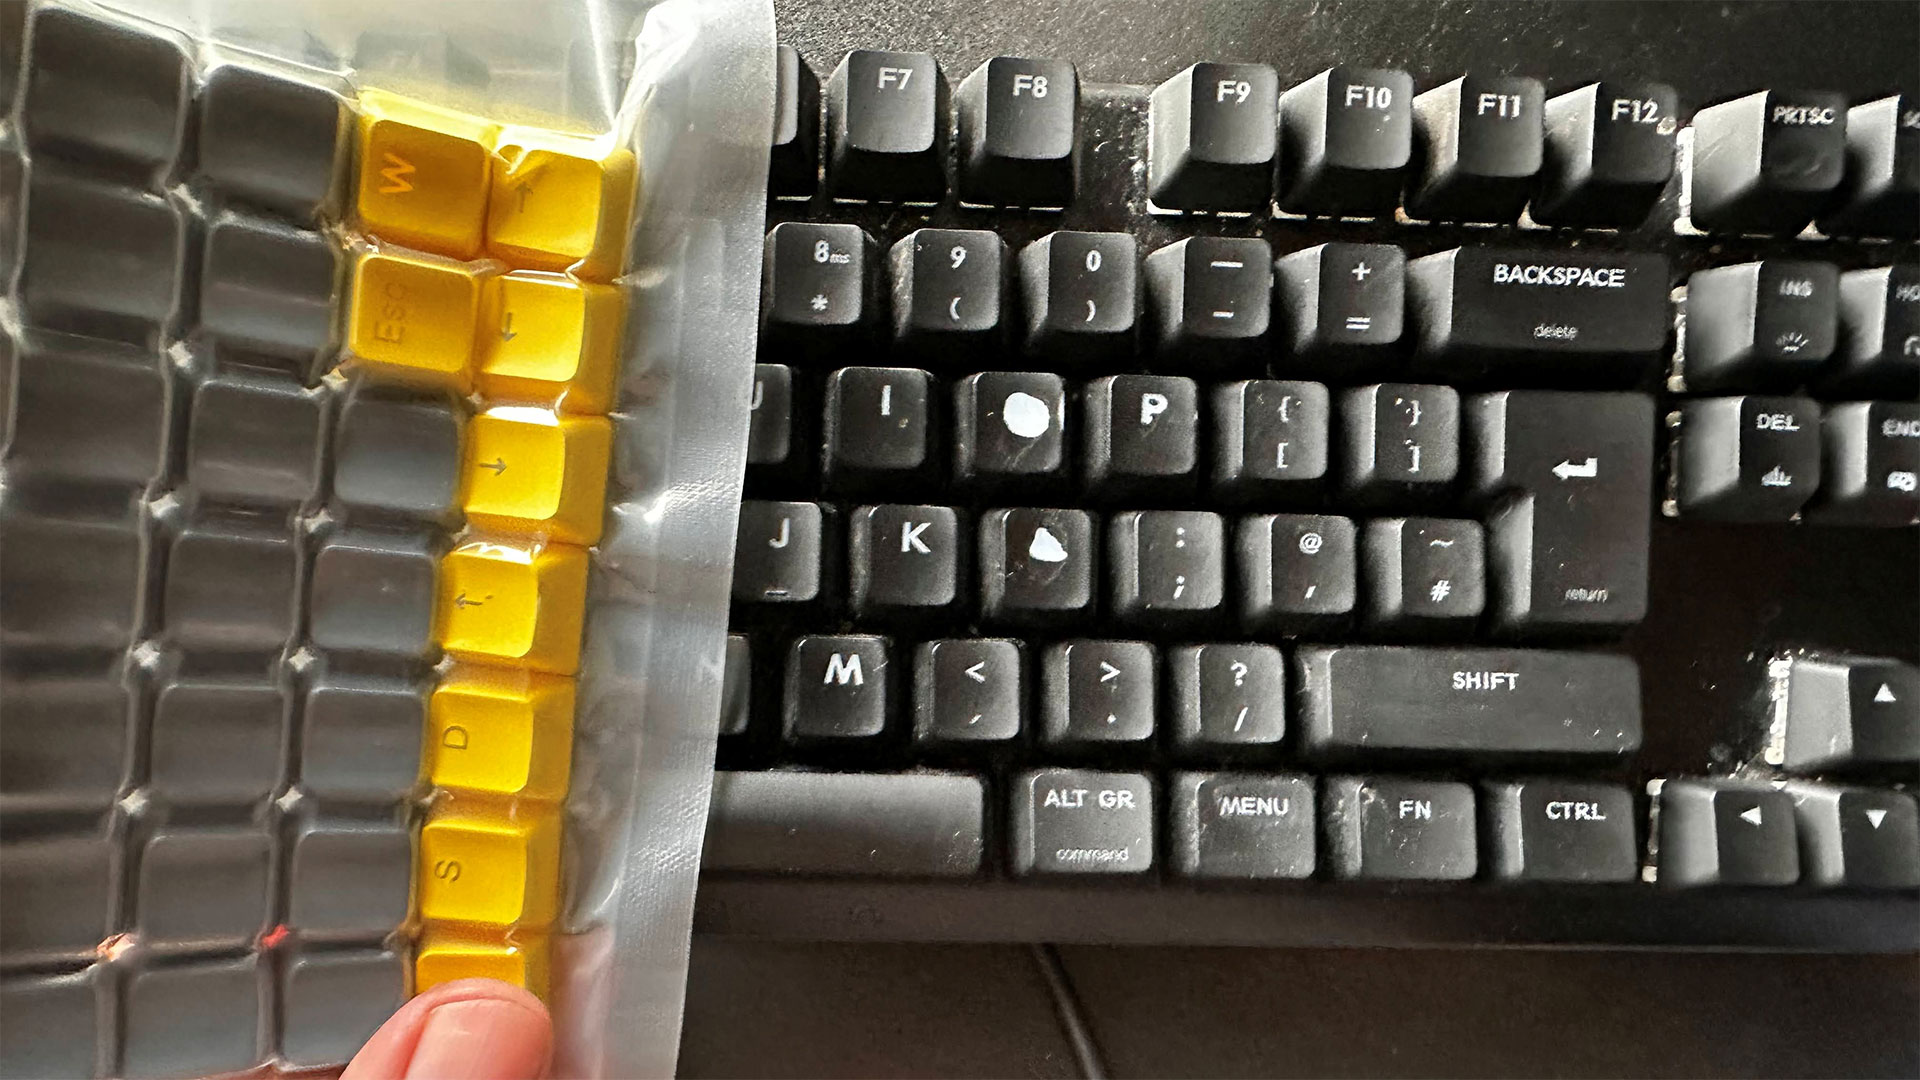
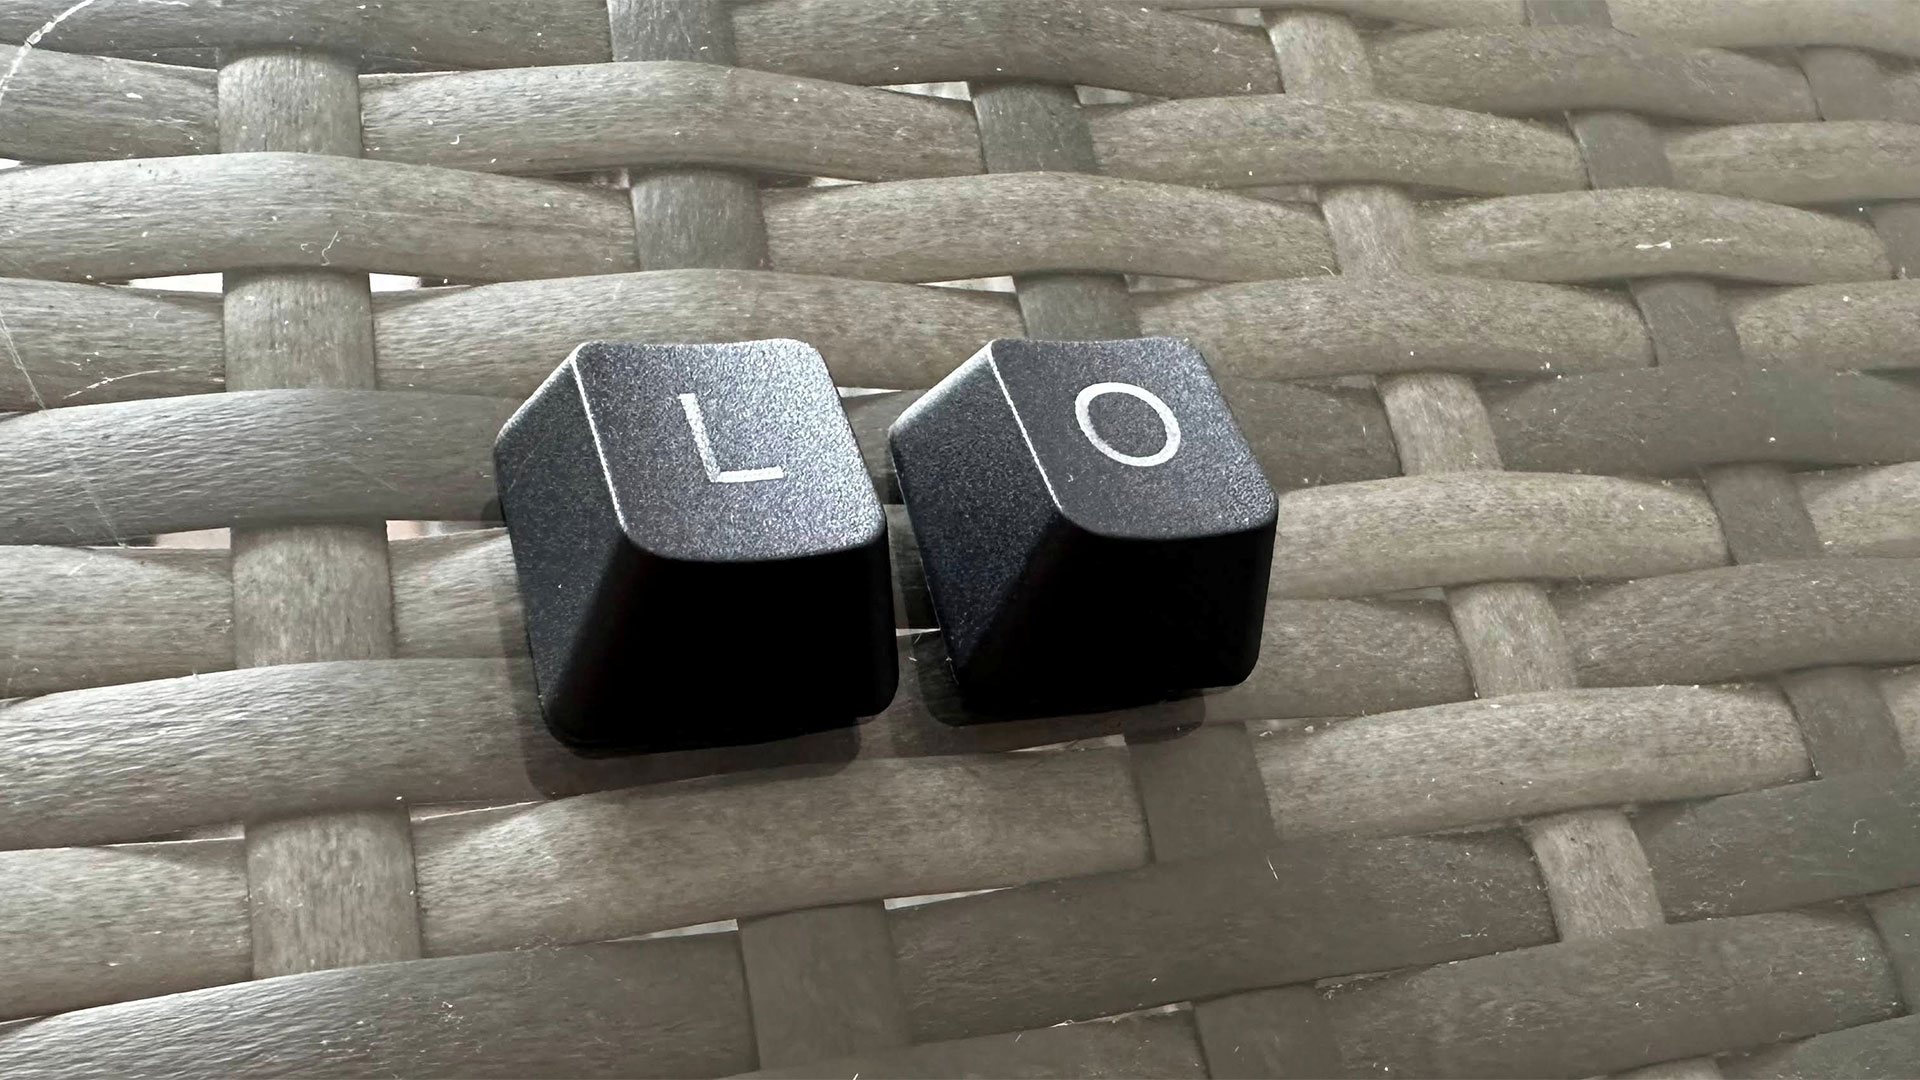
Positioning the keys correctly was quite a challenge, given the above explanation about UV previews and the paddle. However, I think these two 'L' and 'O' replacements look fine. The RGB LEDs should shine though easily. Hopefully the rest of the black finish will be durable enough for a few months.
👉 Glass gave me some trouble
ComMarker supplied me with some beautiful glass crystal blocks for test-engraving. Since they look so ‘expensive’ I thought I would try one of the 12 mini shot tumblers I got from eBay first.
After poor results over several attempts, I talked to ComMarker, and they asked me to manually raise the laser head 2 or 3mm up from its LiDAR determined focus point. Even though the shot glasses slightly curve away at the sides of the logo, it remains pretty sharp, legible and doesn't look bad at all.
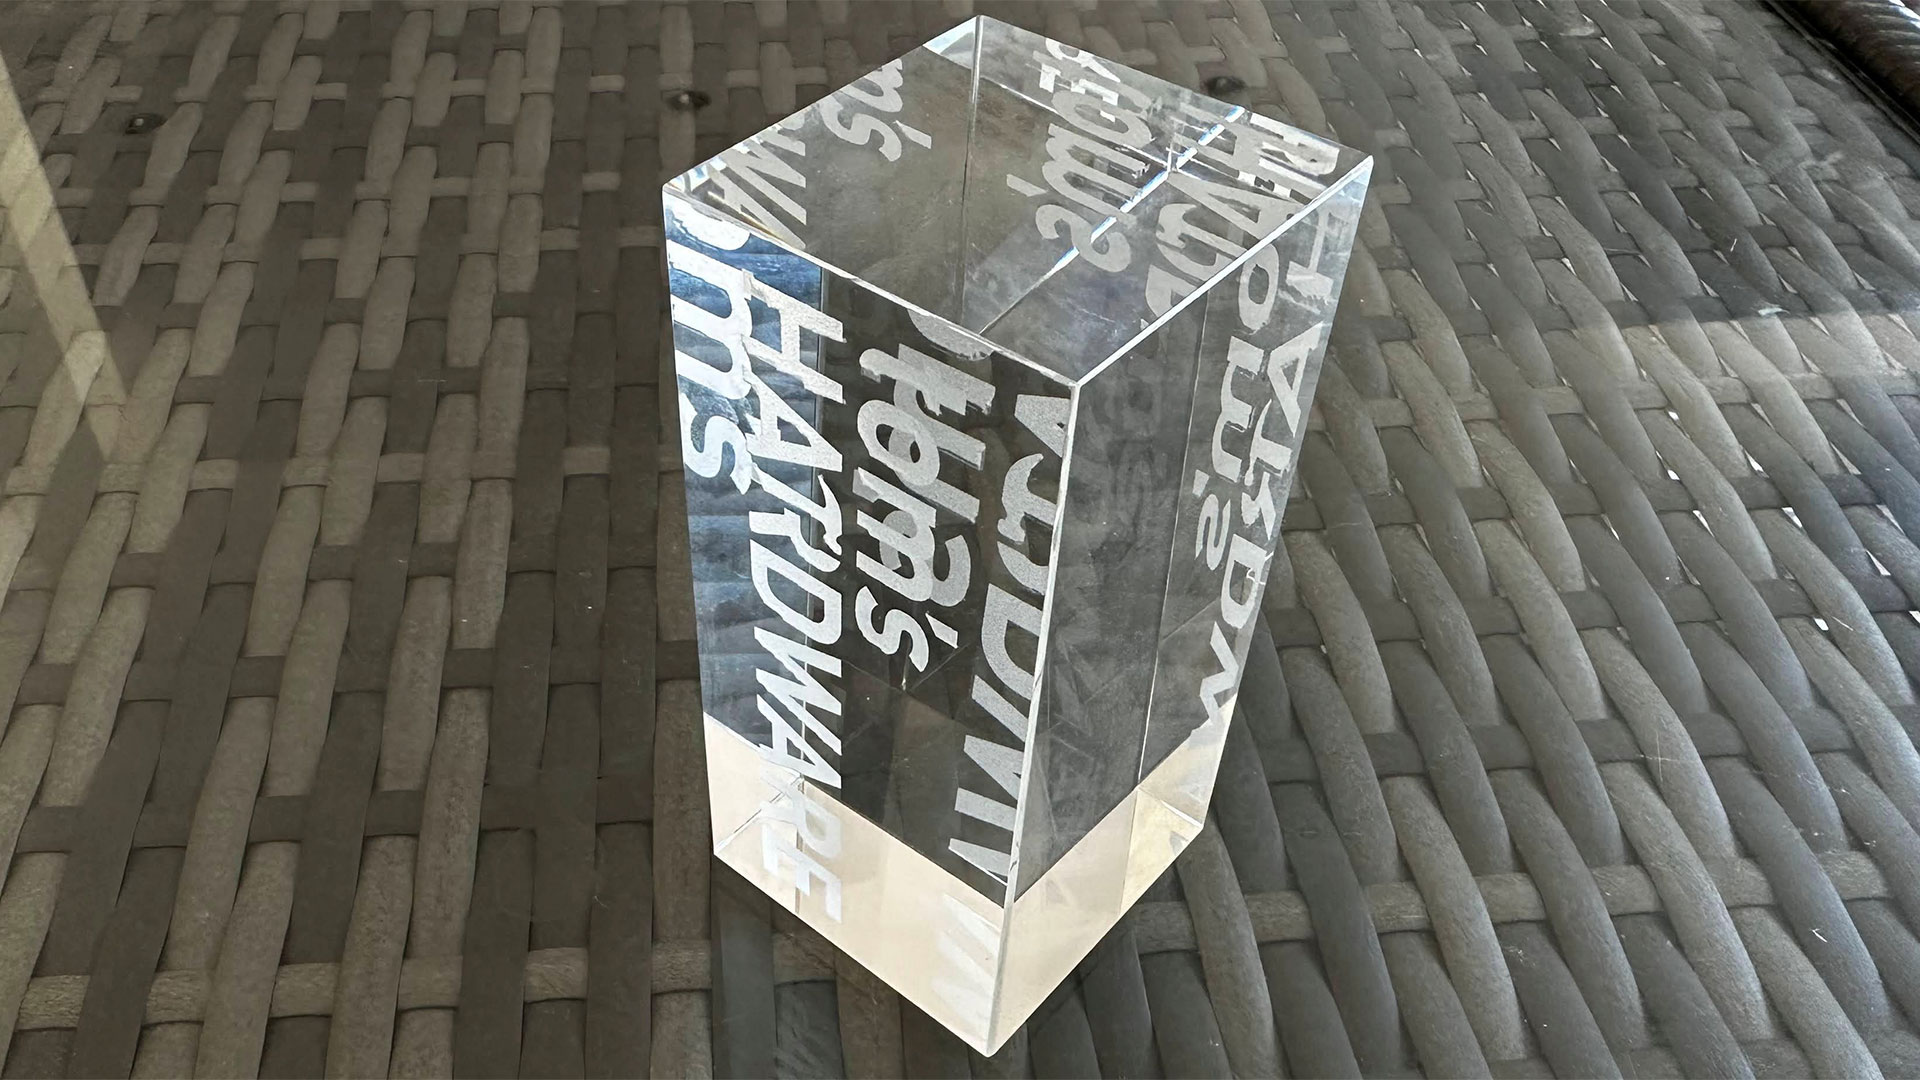

When I tried one of the glass crystal blocks, it engraved beautifully first attempt. Well, except for the output size being too big on the first shot - due to one of those software bugs I mentioned previously. The Tom’s Hardware logo looks great on this glass, even with one side ‘zoomed in’ like it was an intentional part of the design (it wasn’t). On closer inspection, though, it would probably be worthwhile tweaking the settings with the hope of getting sharper straight edges on some of the letters. There are various advanced line/hatching settings available.
I didn’t have any clear or colored acrylic samples for testing, but they should be easily within the capabilities of the Omni X, and I was given seven presets for different types of acrylic, and both engraving and cutting settings.
Bottom Line
The ComMarker Omni X delivers some worthwhile improvements to last year’s well regarded Omni 1. The safety visor is welcome, as is the 99.72% Dust Isolation feature delivered by the enclosure with suitable extractor hose attached. Another refinement here is the compatibility with the slider extension, as well as the existing roller/rotational add-on that fits the Omni 1 and X.
Standout positives included the UV technology at this laser's heart - with 'cold burn' and ultra precise 0.0019mm laser beam capability. Inherent to galvo type laser like this are fast movements, with the laser point capable of moving at a quoted 15,000 mm/s.
Pondering over negatives, we might complain about the size and weight of this device - which seems large given its 150mm square work area (without extender). I'd also repeat my grumbles about software teething trouble...
ComMarker’s software irked me during my few weeks of testing, and I went through versions of it which fixed one thing but then introduced a different brand-new wrinkle. However, getting the right settings and tuning to a sweet spot was the main battle – which can be the case with many a laser. I’ve talked with ComMarker about this, and they tell me consumer production machines will have all the correct calibrated parameters saved to the motherboard ahead of shipping. That way they will be out of the scope of accidental software tinkering. I’ve also found that the material library presets in the Laser Settings part of the UI have gotten better in the newer releases of the software. This provides a faster route to refining your settings for different materials.
It would be a shame if the software let down what seems to be excellently, sturdily built hardware. It is noted, though, that this UV laser is compatible with LightBurn software, which I’ve tried with good results before. Please note, you will need the $200 ‘galvo’ license of LightBurn to accompany this model, though. ComMarker told me the Omni X will launch with a USB stick for consumers, containing a LightBurn materials library and presets.
Personally, the UV laser is a big step-up in speed and cutting power, and opens up a lot of material flexibility. But machines like this come with a considerable price tag. We have been told that the Omni X will retail starting from $4,599, with bundles including accessories like the rotary and slider attachments rising to $5,099. And those are Early Bird prices.
However, if you have a workflow, or intended workflow that would benefit from the power, speed, and accuracy shown here, the outlay may be worth it. As is often the case, a wise decision is all about horses for courses.
- Omni X Basic Bundle: Early bird $4,599 / Regular $5,299
- Omni X Rotary Bundle (with R5 roller): Early bird $4,859 / Regular $5,683
- Omni X Slider Bundle: Early bird $5,099 / Regular $6,044
- Omni X Ultimate Bundle (Slider + R5 roller + 100W Fume Extractor): Early bird $5,689 / Regular $6,947
For alternative laser cutter and engraver choices, at all kinds of price points, please check out our frequently updated Best Laser Cutters and Engravers 2025 guide.

Mark Tyson is a news editor at Tom's Hardware. He enjoys covering the full breadth of PC tech; from business and semiconductor design to products approaching the edge of reason.
-
burnvictim99 I bought an Omni 1 and already spent $4K...now I'm upset this model came out two months after my purchase...it seems so much better for the same money.Reply
What settings did you use on the ABS plastic keys? Could you share the settings that you had success with? -
MarkRT Reply
Hi, sorry for the late reply - I've just seen it.burnvictim99 said:I bought an Omni 1 and already spent $4K...now I'm upset this model came out two months after my purchase...it seems so much better for the same money.
What settings did you use on the ABS plastic keys? Could you share the settings that you had success with?
I opened up my ComMarker project file and the ABS keycap engraving was done at the following settings on the 5W UV laser:
Speed: 800
Freq: 40
Pulse width: 15
Interval: 0.03
Deeper in the settings, I also note fill angle was 90 degrees.
Hope that helps!
