Tom's Hardware Verdict
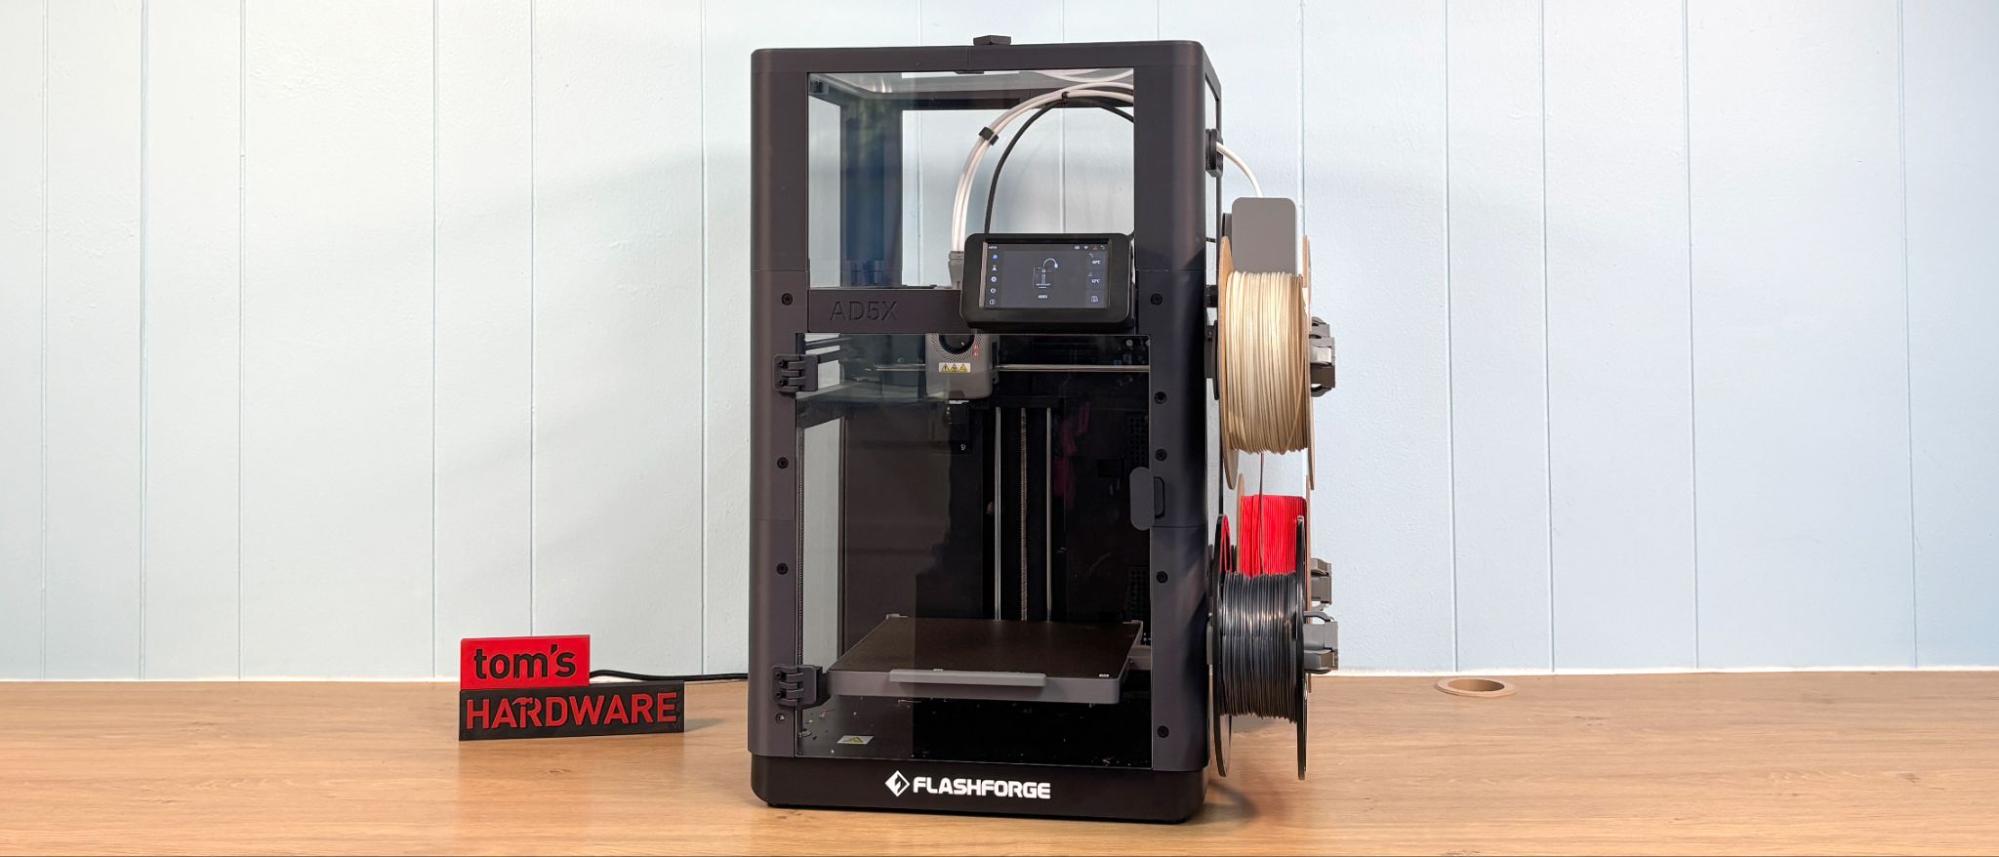
The Flashforge AD5X is a stripped-down Core XY that has excellent print quality but is hampered by a flawed version of OcraSlicer. The base unit lacks creature comforts like lighting, a camera, or an enclosure, which can be added to the printer as upgrades.
Pros
- +
Four color printing
- +
Smaller footprint with filament spools on the side
- +
Easy to load
- +
Quick change nozzle
Cons
- -
Flawed Slicer
- -
No camera
- -
No lighting
- -
Touch screen requires pressure rather than touching
- -
Slicer won’t sync filament to the prepare screen
- -
Enclosure is DIY
Why you can trust Tom's Hardware
The Flashforge AD5X is a good 3D printer with a bad slicer experience. I find it somewhat flummoxing, as the machine is using a version of OrcaSlicer, which is widely regarded as an excellent slicer. And yet, the AD5X is hampered with a buggy program that crashes frequently, does not transfer filament types and colors from the device tab to the prepare tab, and worse of all, does not inform the user how much filament is wasted in color swaps.
These slicer issues could be solved with a software/firmware upgrade, so take this review with a grain of salt. We saw a similar problem with the Anycubic Kobra 3, and after the slicer problems were fixed, the machine became quite enjoyable to use. I hope that Flashforge takes this to heart and fixes the problem.
The AD5X is an evolution of the budget model Adventurer 5M with an almost identical steel skeleton frame. The enclosure is sold as a DIY Kit that includes clear plastic panels and hardware, while you provide printed parts. This is also a chance for you to upgrade your machine to a fully enclosed one for a small $39 upcharge, which also allows you to give the printer a custom look.
The AD5X features a quick swap nozzle with a steel insert, which is good up to 300C, and a heated bed that reaches 110C making this an excellent machine for high-temperature filaments (once enclosed).
The AD5X comes equipped with an IFS, a Flashforge Intelligent Filament System. Unlike a machine with an AMS box, the AD5X has a small box attached to the side of the printer and four regular-sized spool holders. Filament is fed into the box and runs through four Bowden tubes to a color switcher mounted on top of the toolhead. This is rather like the system used by Bambu Lab’s A1 machines, and mechanically, it works very well.
Retail pricing for the Flashforge AD5X is set at $549, which is pretty decent for an open-frame core XY. The machine is currently on sale for $399, which is even better. The machine we reviewed, with the enclosure kit, is $636.96 and on sale for $438. You’ll need to add the price of filament – we got by with one spool, but if you get fancy, this could, of course, go up. However, with the current software issues, it’s not going on our list of the best 3D printers.
Flashforge AD5X Specifications
Build Volume | 220 x 220 x 220 mm (8.66 x 8.66 x 8.66 in) |
Material | PLA/PETG/TPU/ABS/ASA (up to 300c) |
Extruder Type | Direct Drive |
Nozzle | .4 mm |
Build Platform | PEI spring steel flex plate |
Bed Leveling | Automatic with Auto Z Offset |
Filament Runout Sensor | Yes |
Connectivity | USB, LAN, Wi-Fi, App |
Interface | 4.3-inch Color touch screen |
Machine Footprint | 363 x 402 x 448 mm (14.29 x 15.82 x 17.63 in) |
Machine Weight | 11.4kg (25.13 lbs) |
Included in the box: Flashforge AD5X
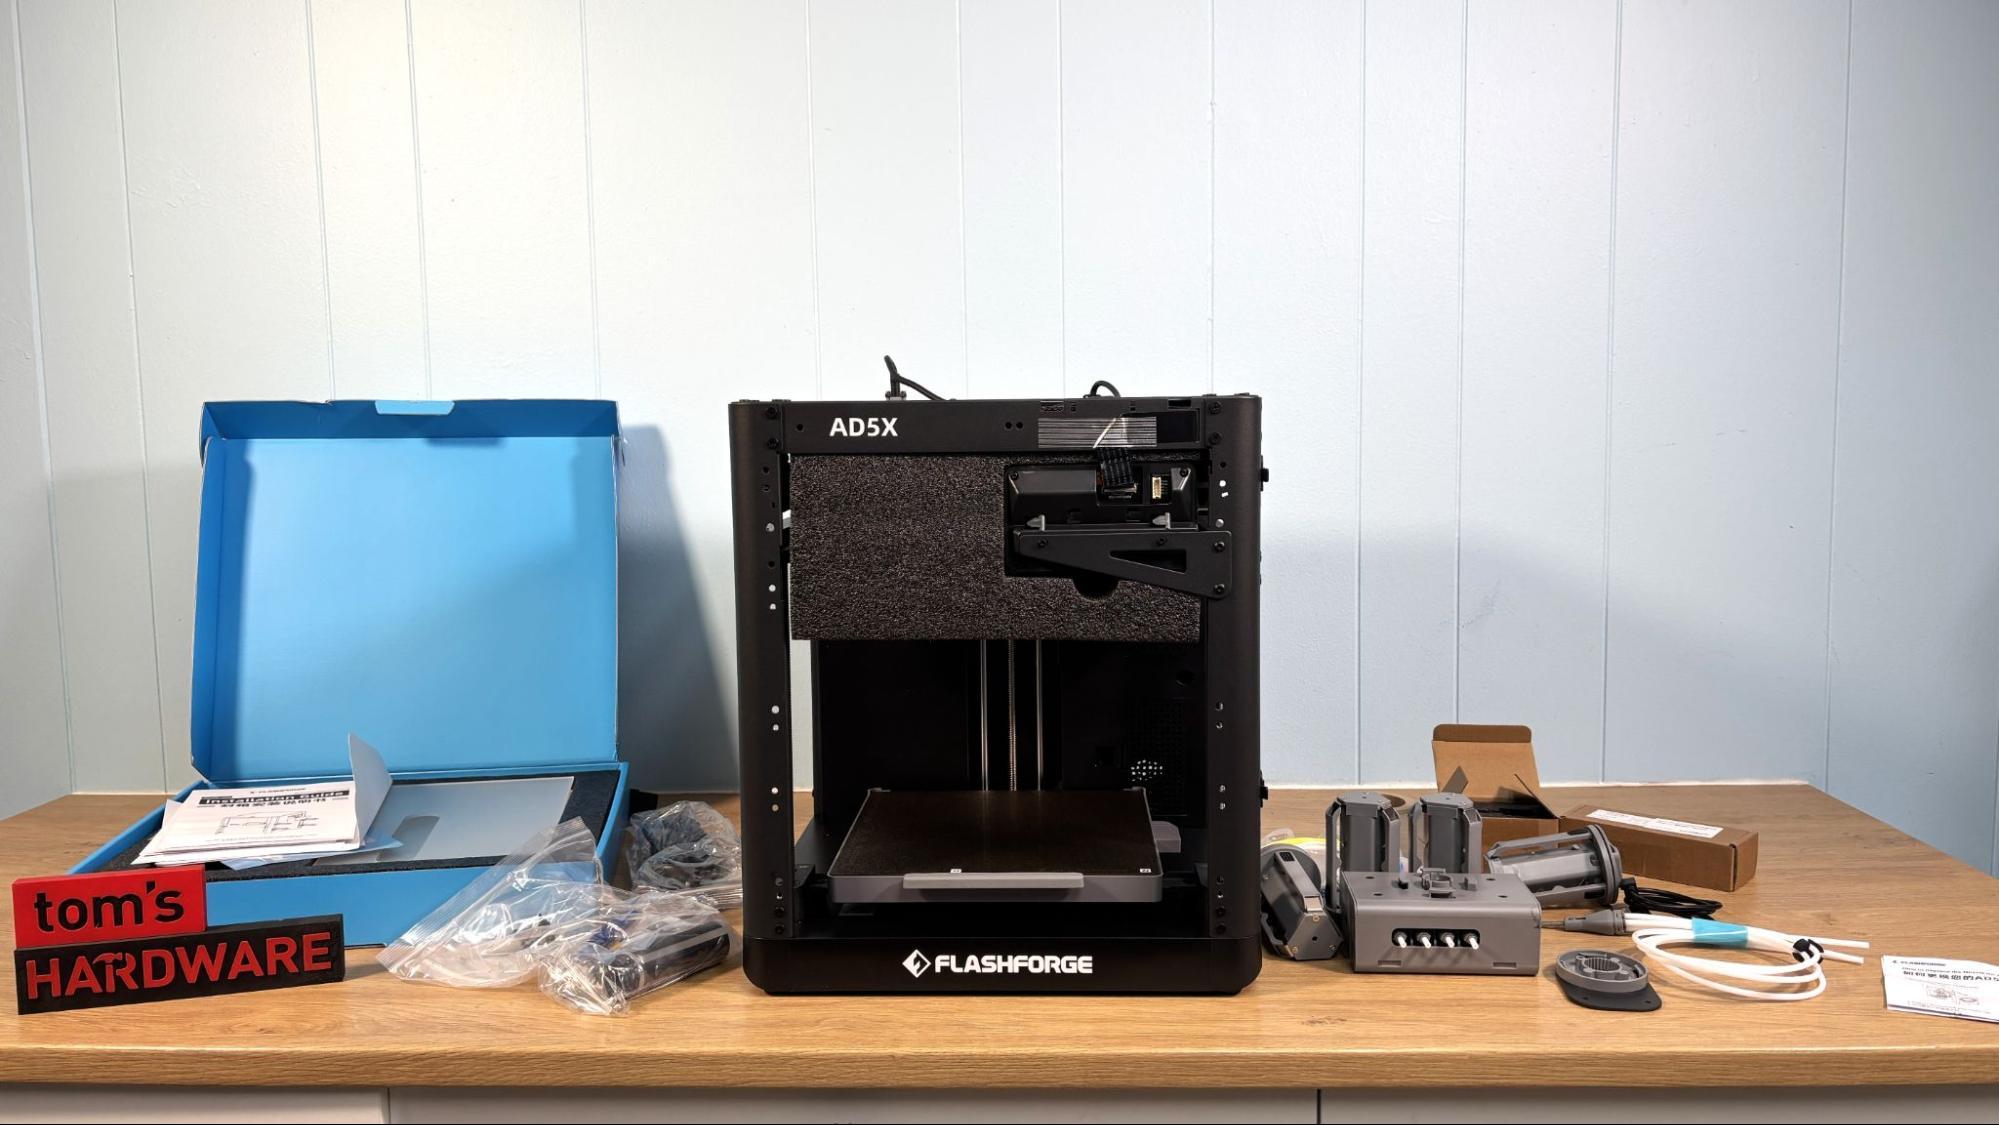
The Flashforge AD5X comes with everything you need to set up your 3D printer. The four-color IFS module, its mounting plate, connection cable, four spool holders, and bowden tubes are included as part of the printer. There is also a power cord, toolkit, and quick start guide.
Get Tom's Hardware's best news and in-depth reviews, straight to your inbox.
For the review, we also received an enclosure kit with the hardware and acrylic panels, a copy of the print files needed to make the enclosure, and the filament to print it.
The printer comes with a four-pack of filament coils to test out the color system, which is a nice touch, since even most multicolor machines come with a sample of white filament.
Assembling the Flashforge AD5X
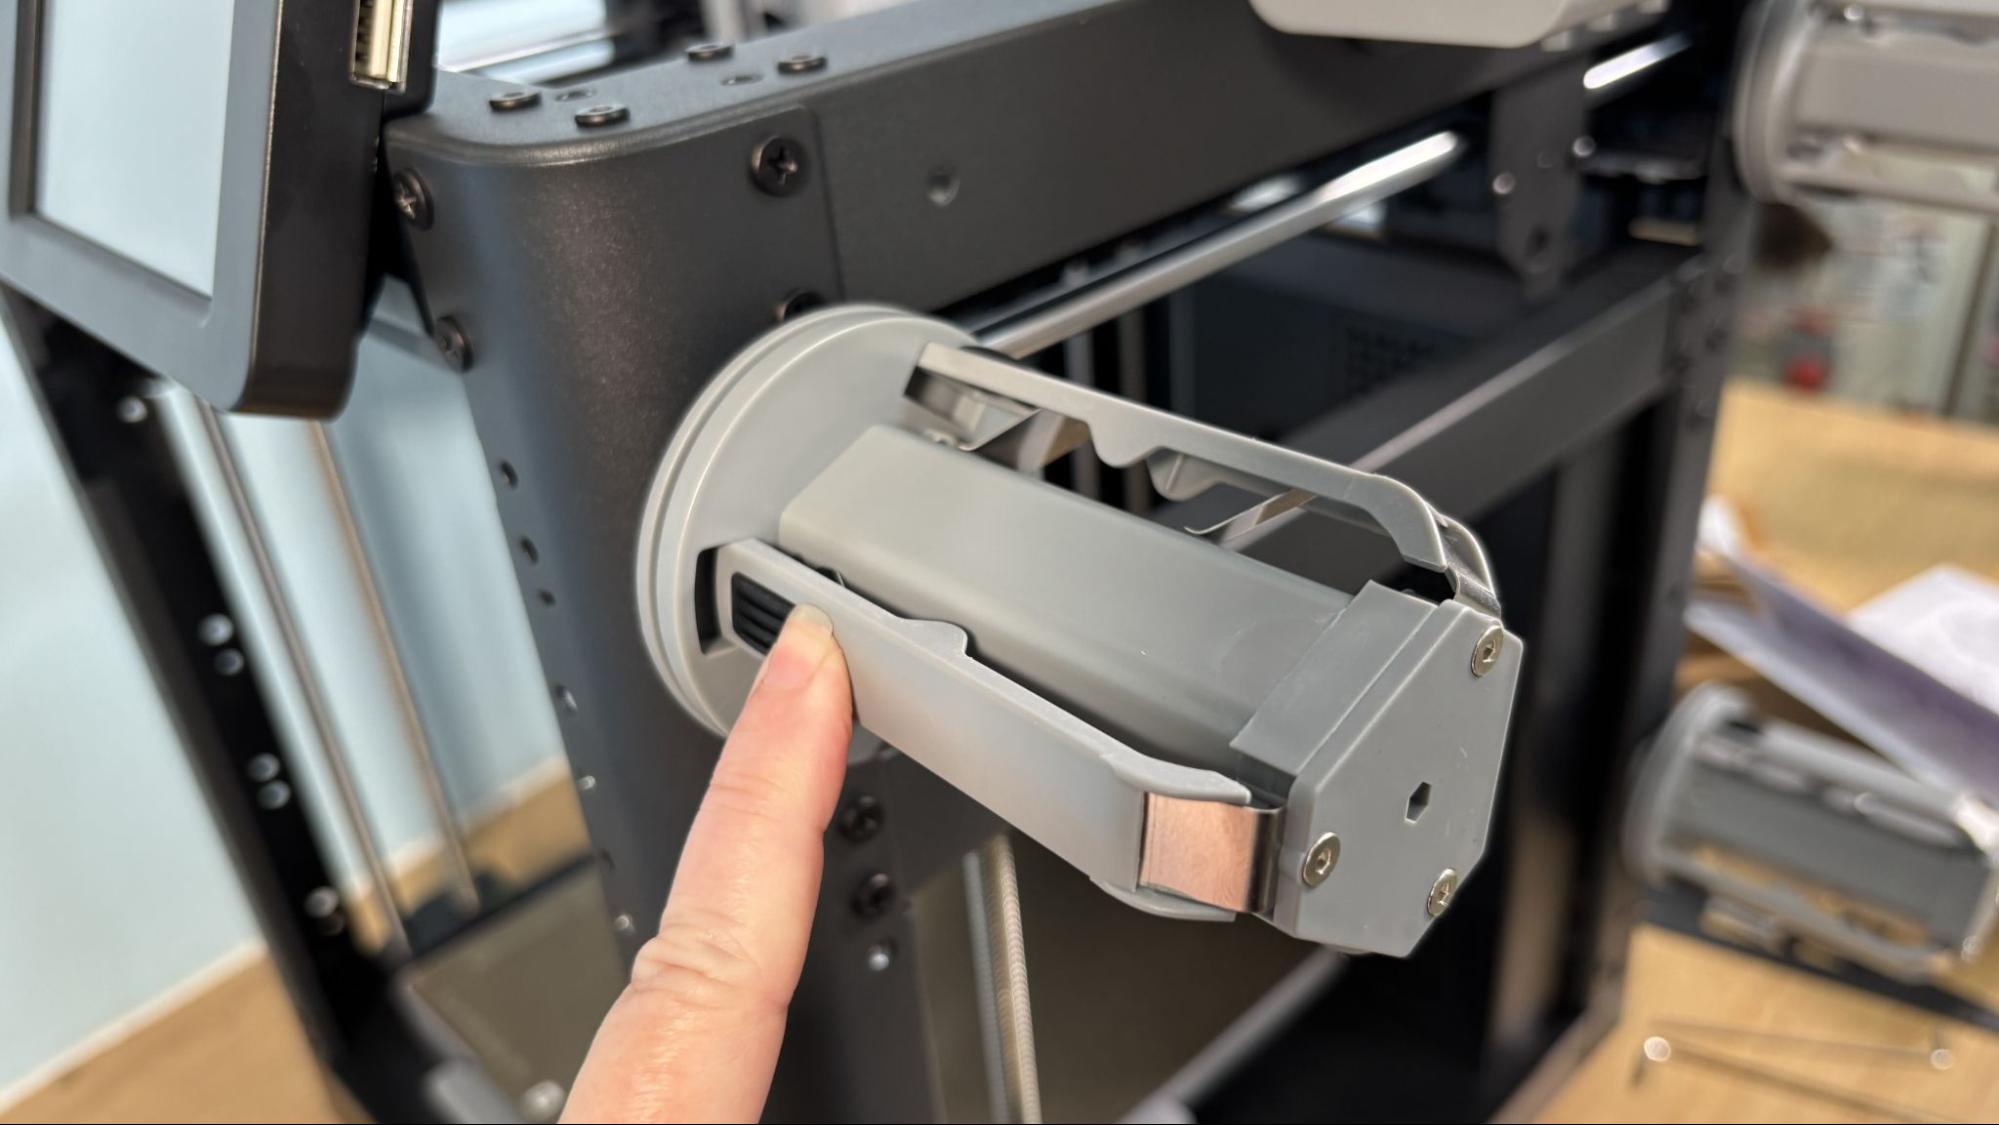
The base unit Flashforge AD5X is mostly assembled and can be unpacked and put together in minutes. A sturdy metal bracket holds the screen safely inside the printer for shipping. After removing the four M3 screws holding it in place, the bracket is discarded. The screen is then flipped up and slots into the frame without tools. The ribbon cable is pre-attached to the screen, and care should be taken to avoid pinching it.
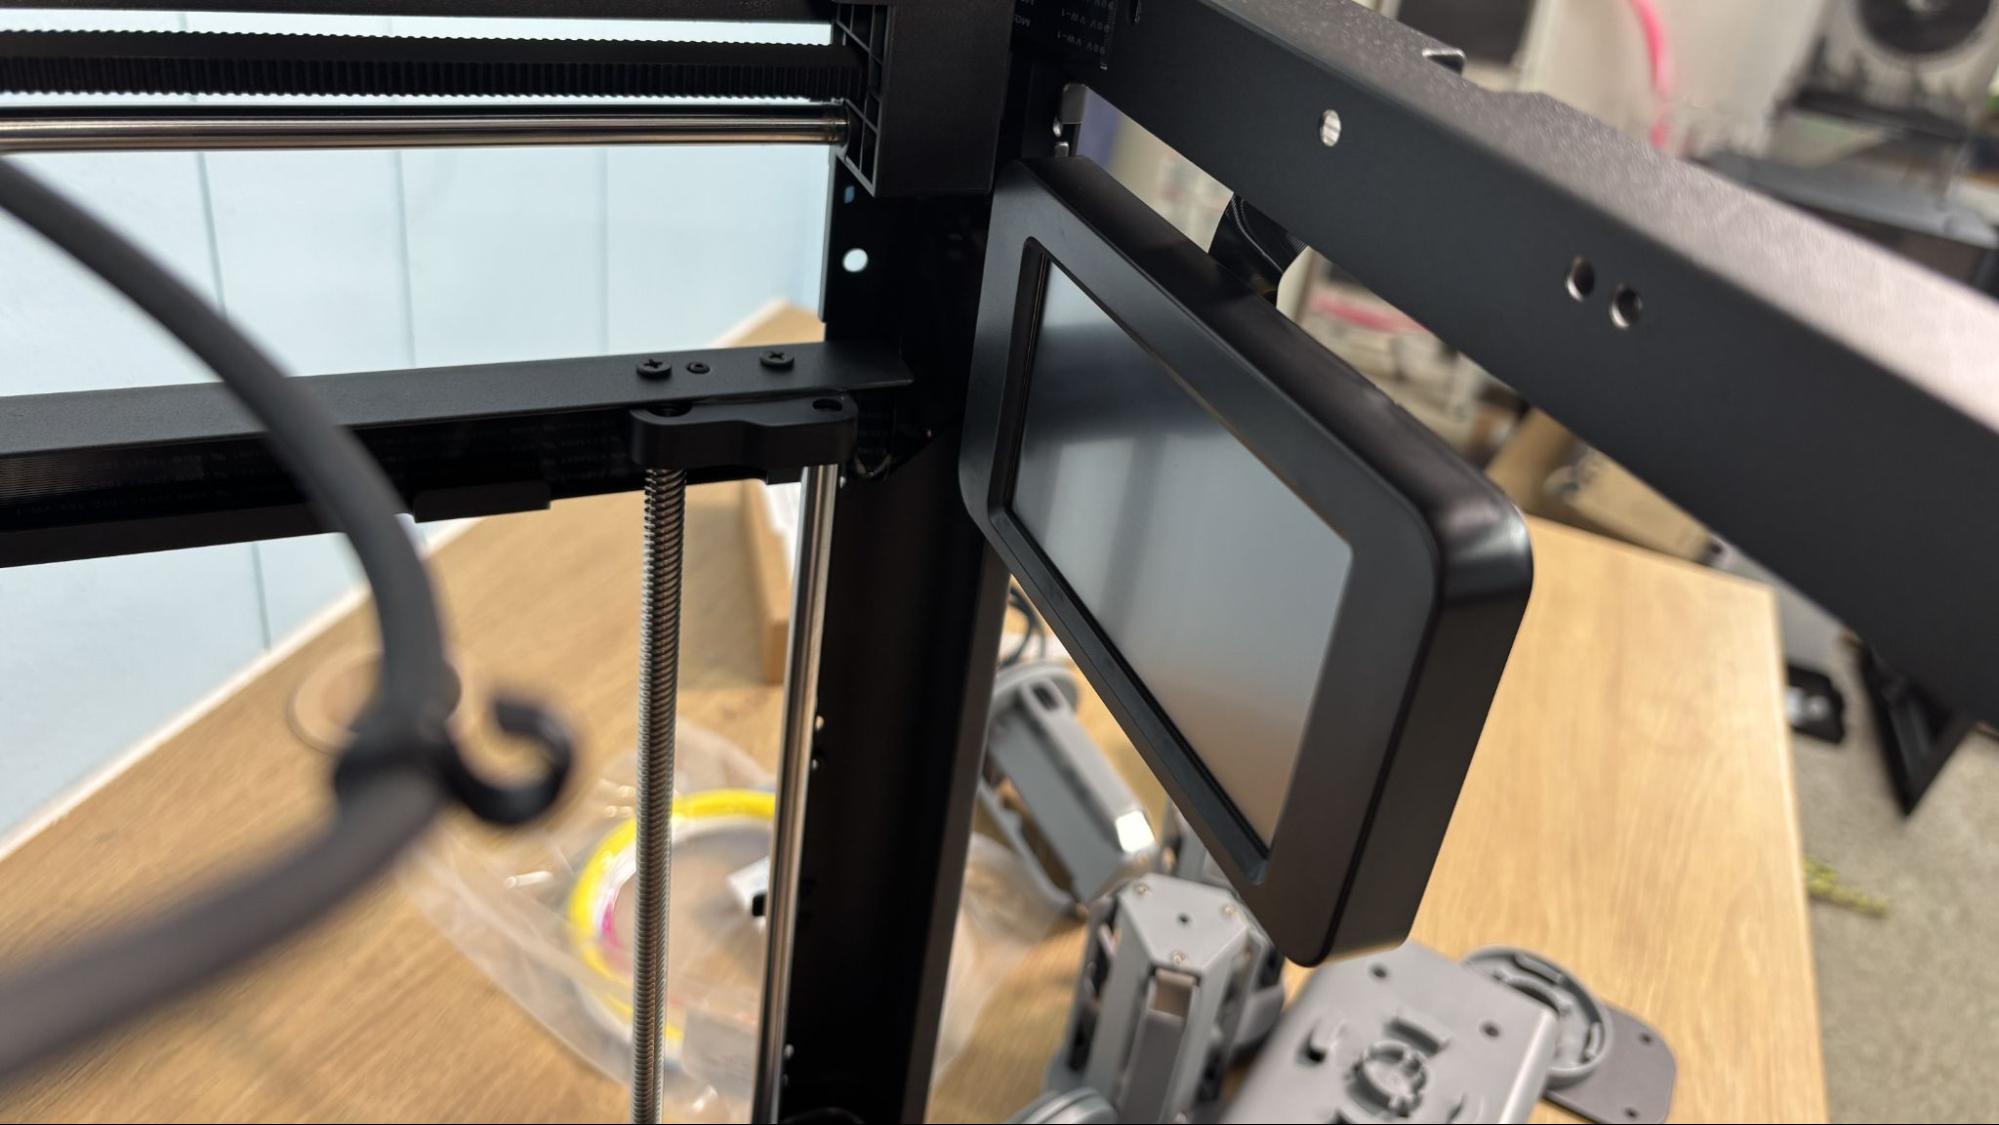
Next, remove three screws marked with green arrows, which secure the build plate to the case.
The bracket for the IFS color module attaches to the right side of the frame with 2 M3x6 screws. The IFS cable runs from the rear of the module to the rear of the printer, over spool holder number three and is kept in place by a cable clip held in place with 2 M3x6 screws. Four Bowden tubes mount, in any order, to the top ports of the color hub. The plastic 4 in 1 guide attaches to the tool head, the tool head cable is clipped to the Bowden tubes to run along with them. Spool holders are labeled, as are the brackets they attach to. The spool holders are pushed into place and assembly is complete.
Leveling the Flashforge AD5X
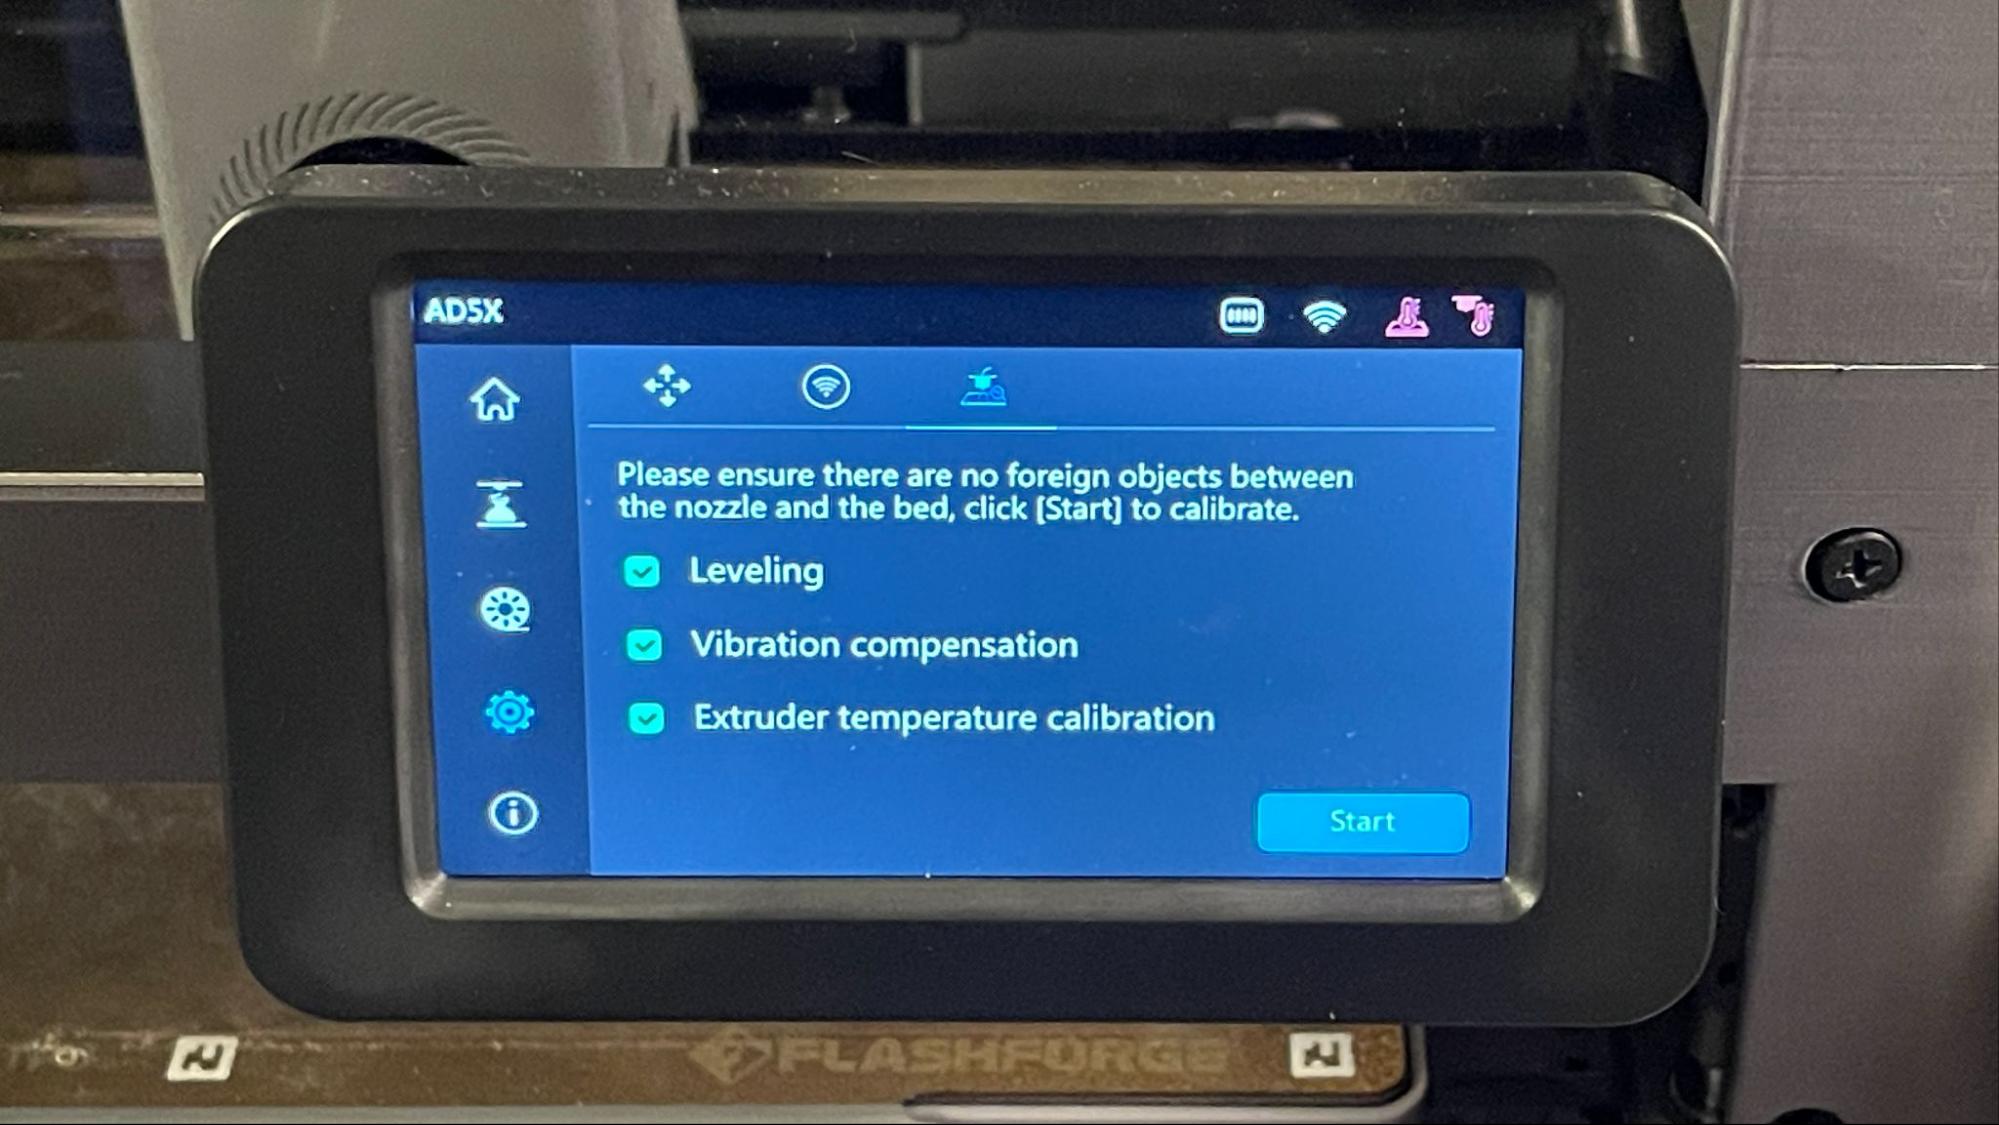
Leveling the Flashforge AD5X is done automatically with the initial calibration, including vibration compensation and extruder temperature calibration (PID tuning), at initial start up. At the start of each print, the software defaults to re-leveling at the start of each print. The leveling and automatic Z-offset works perfectly.
Loading Filament in the Flashforge AD5X
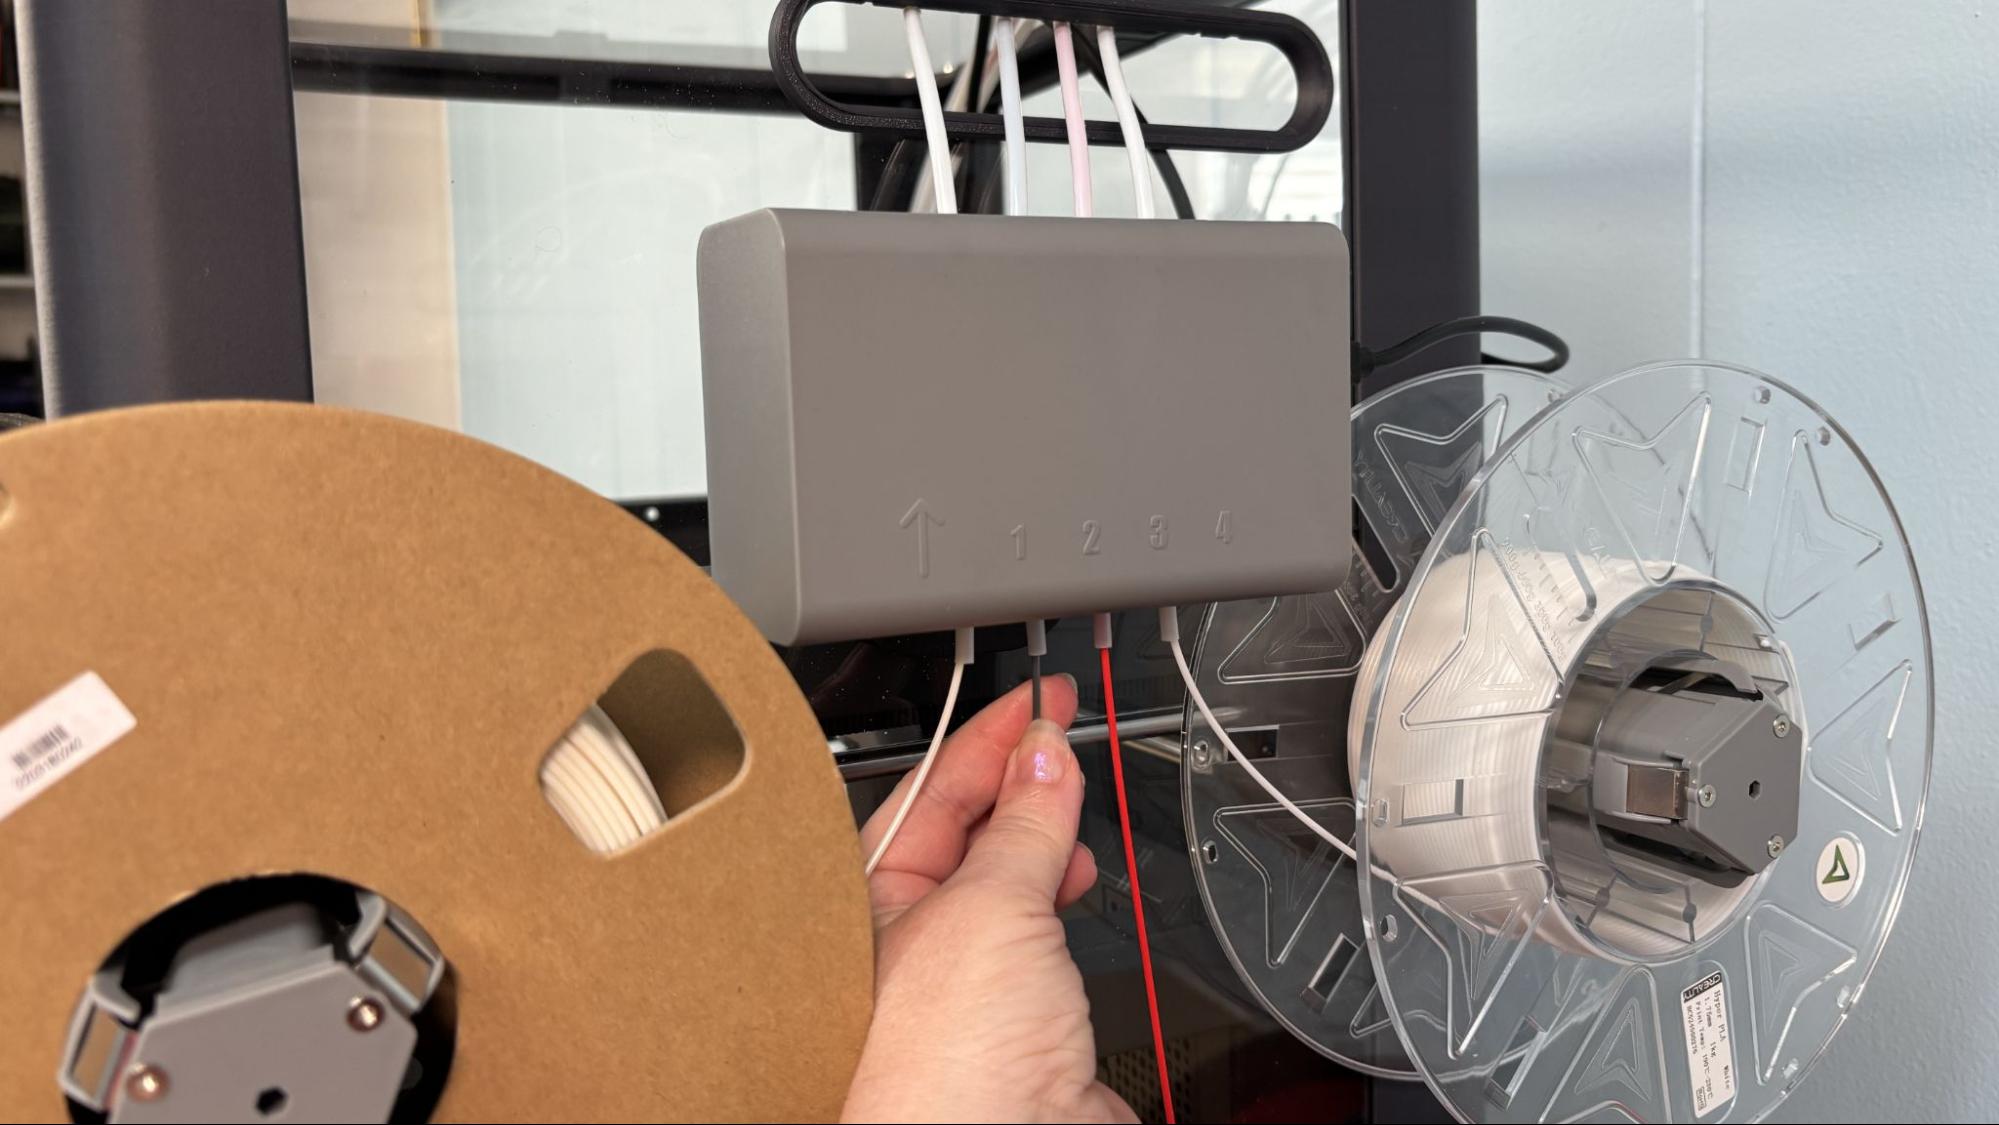
The Flashforge AD5X has mounts for four spools on one side, which feed into the IFS module. The spool holders are labeled, as are the feeding tubes for the module, but there is only one way to load them that makes sense. With a spool mounted, the filament is inserted into the bottom of the module and pushed in a few inches until the IFS grabs it. This can be a little awkward since the spool holder is spring-loaded to retract a bit.
Changing filament is simple, since the IFS cuts and retracts the filament when it is done with it.
Design of the Flashforge AD5X
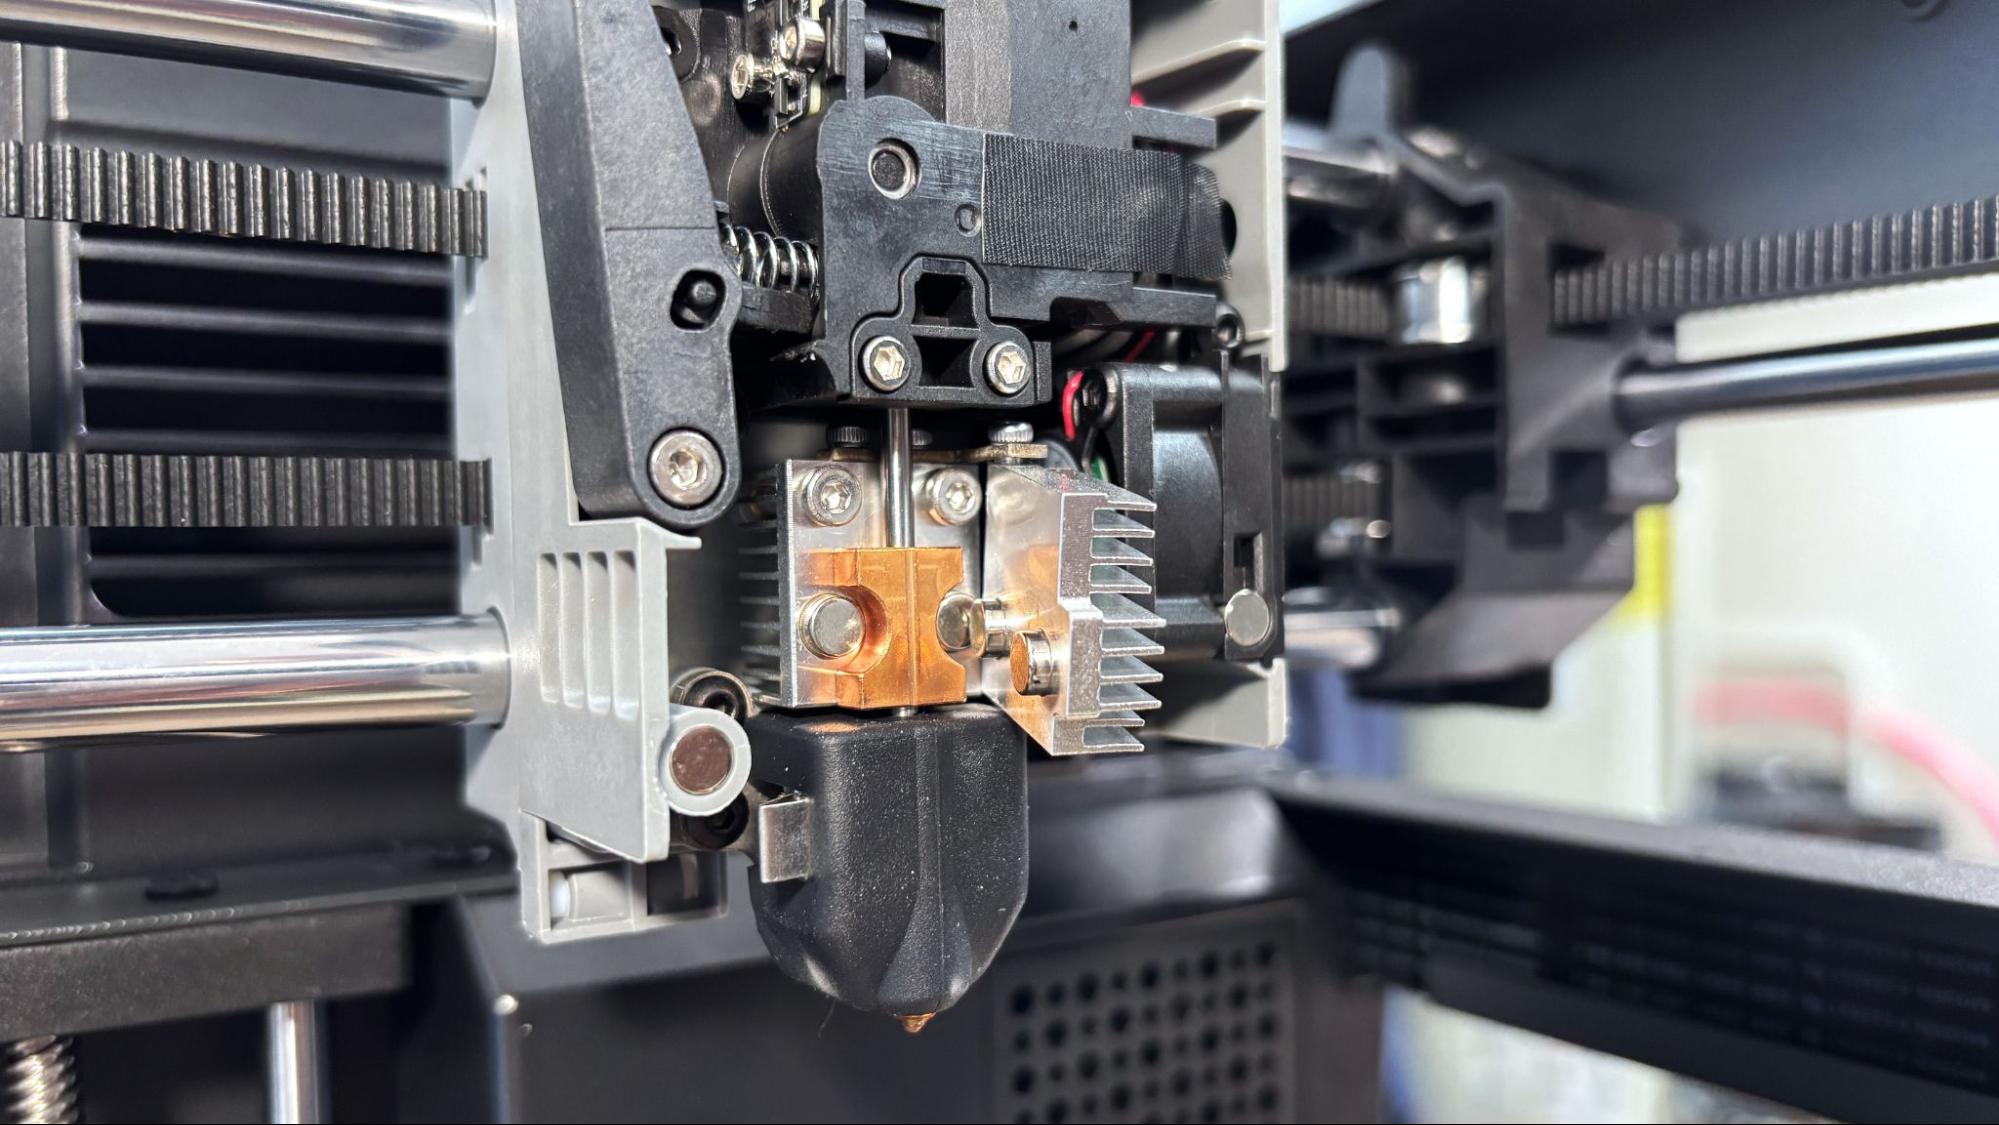
The Flashforge AD5X, with its stripped-down metal frame, lack of lighting, and no camera, is a bare-bones machine by today’s standards. But it does have a well thought-out design with some really nice touches.
One really nice feature is the large 5015 blower fan mounted in the front tool head cover, which doesn't have any wires to keep it connected to the tool head. When you need to clear a jam or replace a nozzle, you don’t need to deal with the cover dangling by delicate wires while you work. Instead, pins on the front cover connect it to slots on the tool head.
Replacing the nozzle is simple and requires no tools. The heat break is something I haven’t seen: it's in two pieces and is held together with magnets.
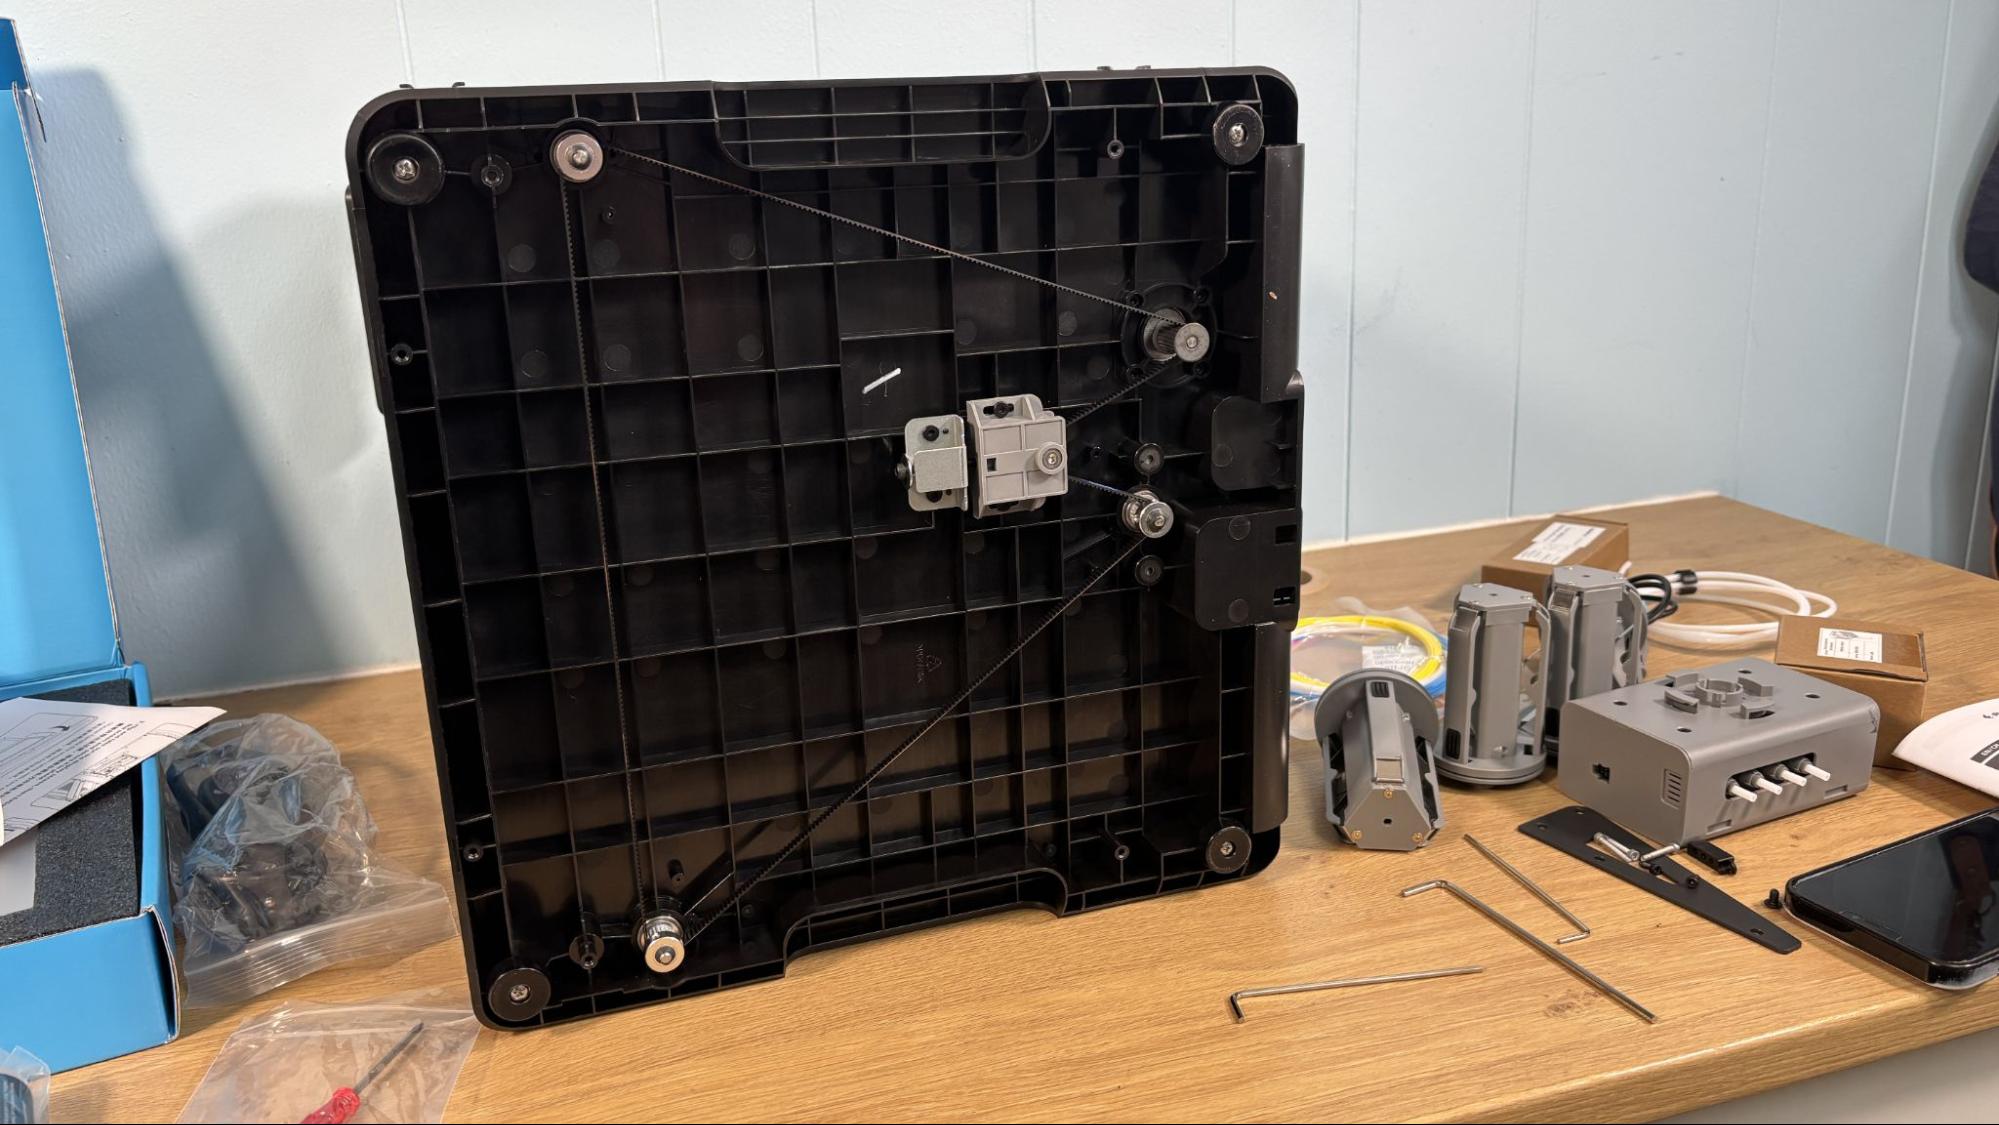
The motion system is a rock solid, fast, Core XY design driven by two stepper motor concealed behind the back panel. The bed runs on four linear rods and has three lead screws, which are belted together and driven by a single stepper motor. The belt has an automatic tensioner. The bottom of the machine is exposed, so use care when moving it onto a shelf or counter.
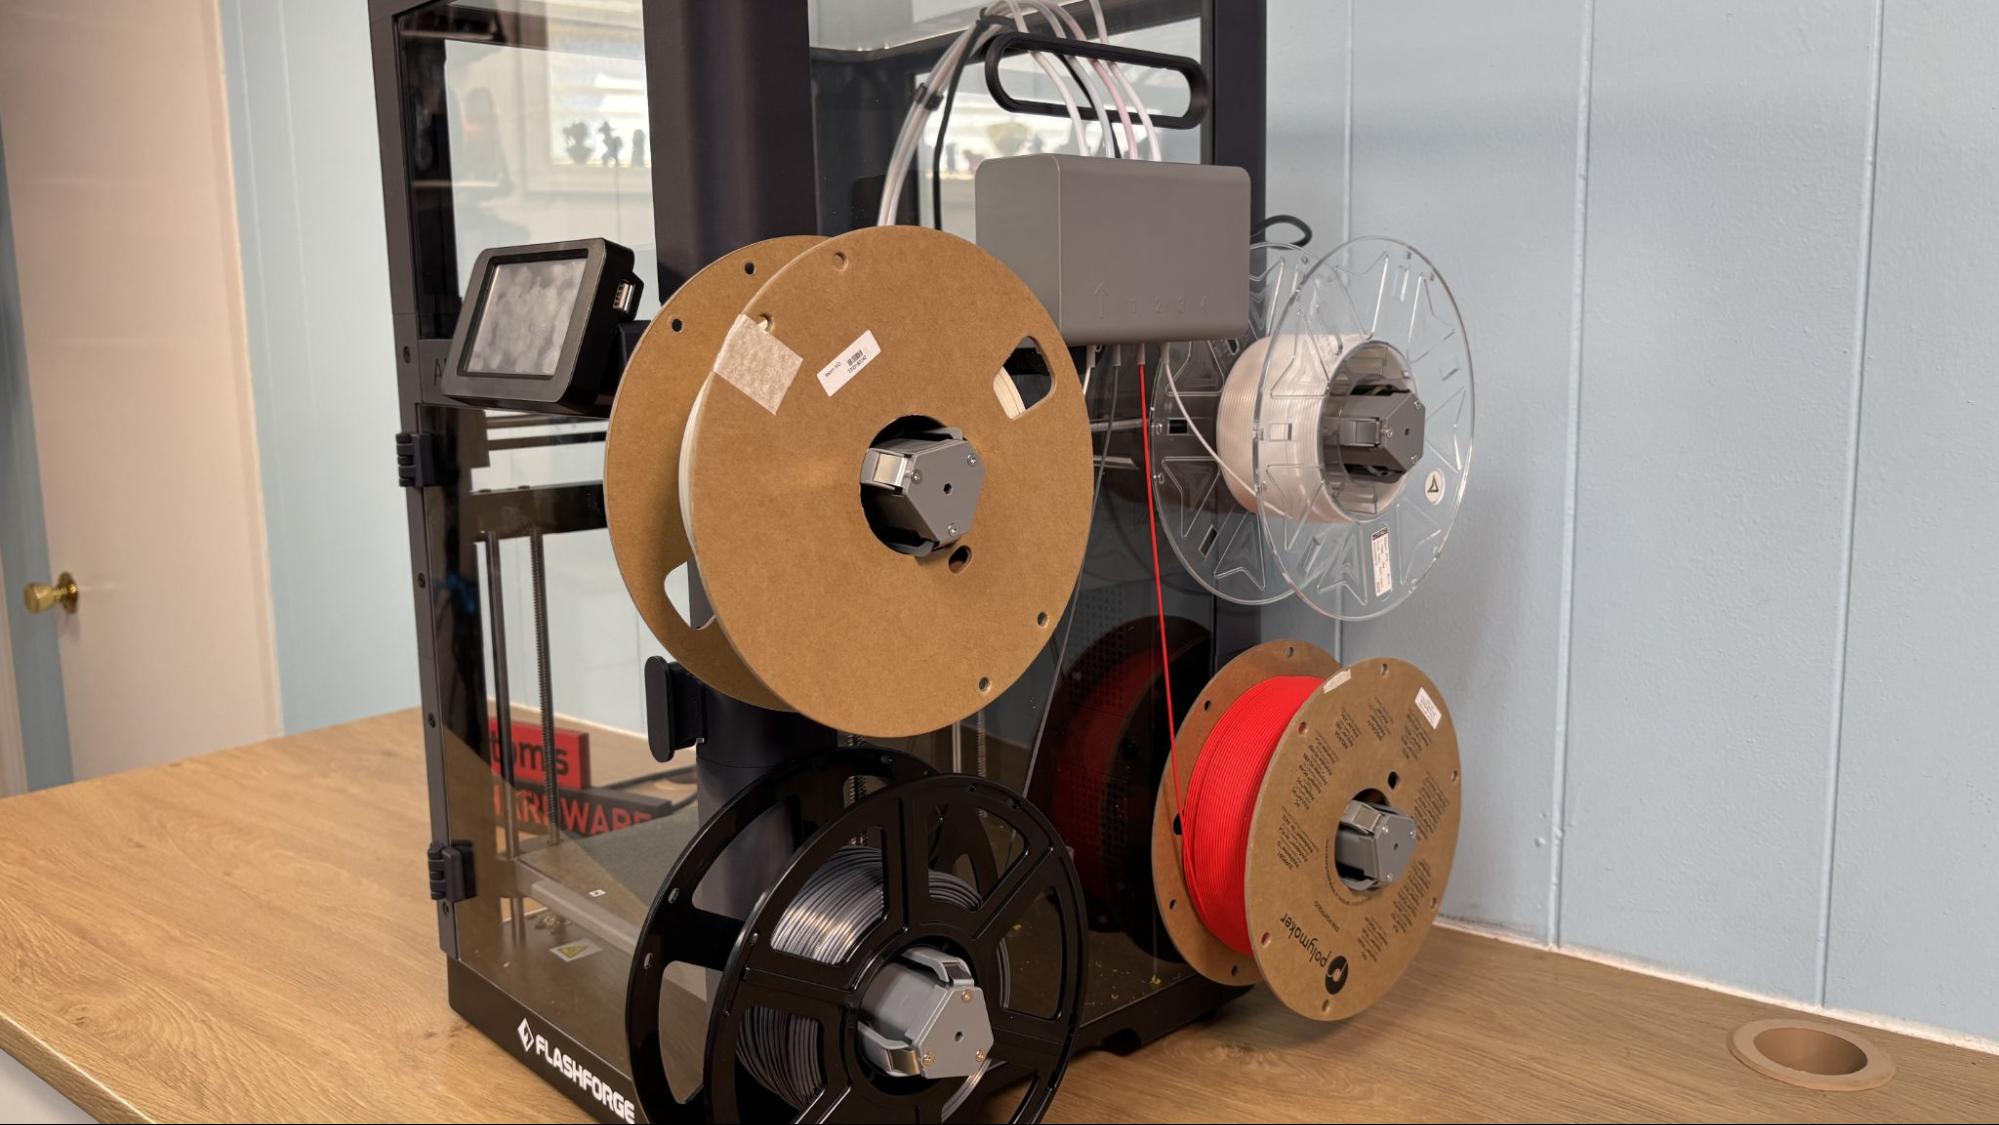
The Intelligent Filament System is a small box permanently mounted to the side of the machine, with four spool holders set underneath it. This makes for a nice compact package, and you never need to worry about taking it off to access the interior of the 3D printer like machines with separate AMS boxes.
The color touch screen is bright and easy to read, but is not adjustable for different viewing angles. It also takes some getting used to as it is more of a tap screen than a touch screen, leading you to peck repeatedly at the menus rather than just touching them.
The things I missed most while using this printer were lighting and a camera. In my well-lit basement, there have been several times I’ve needed to whip out my phone for additional light to see how the first layers are going down. Even on budget printers, I’ve become accustomed to monitoring them remotely with a built-in camera. I did try plugging a webcam into the USB port on the Flashforge’s screen, to no effect.
Preparing Files / Software
The Flashforge AD5X came with a copy of Orca Slicer dubbed “Orca-Flashforge”. If you are familiar with Orca or Bambu Studio, you should feel right at home. However, having used Orca Slicer and other manufacturers’ skinned versions of Orca Slicer, this is perhaps the least stable version I’ve run across. It crashes about every third print when left up and running. Usually, it will save the file you are working on and ask if you want to reopen it.
It also has several annoying deficiencies. First, the slicer doesn’t show you the amount of filament wasted in purge volume, only that used in the purge tower. This is unacceptable, as you have no idea how much total filament will be needed to make the print. For example, in these two color frogs, the default purge is 540mm³, which is about .67grams of filament. That’s certainly a small amount, but when multiplied by hundreds of color swaps (and several colors) it can certainly add up.
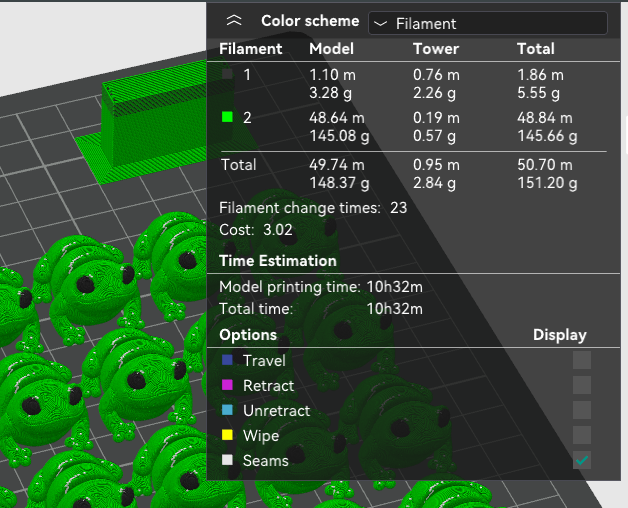
Another issue is the device tab, which shows the current filaments and their colors in the IFS. You tell the printer what colors you’ve loaded from the touch screen, but this information is not fully transferred to the slicer. It only goes as far as the device tab, then makes you manually enter that information into the slicer itself. This information is critical to flush volumes. If you just wing it, you could end up with black flushing at yellow levels and disastrous results.
One feature that hopefully Flashforge will remove in a future version of Orca-Flashforge is the nag to clear the build plate before printing a new file. This requires you to close the print dialog box you just completed and then go to the device tab to hit the clear button.
For full disclosure, I did try to use the normal OrcaSlicer for the Flashforge AD5X. The good news is that there is a profile for the machine, so you can enjoy a more stable environment. The bad news is that the printer is still not passing along critical information, like wasted filament.
Printing on the Flashforge AD5X
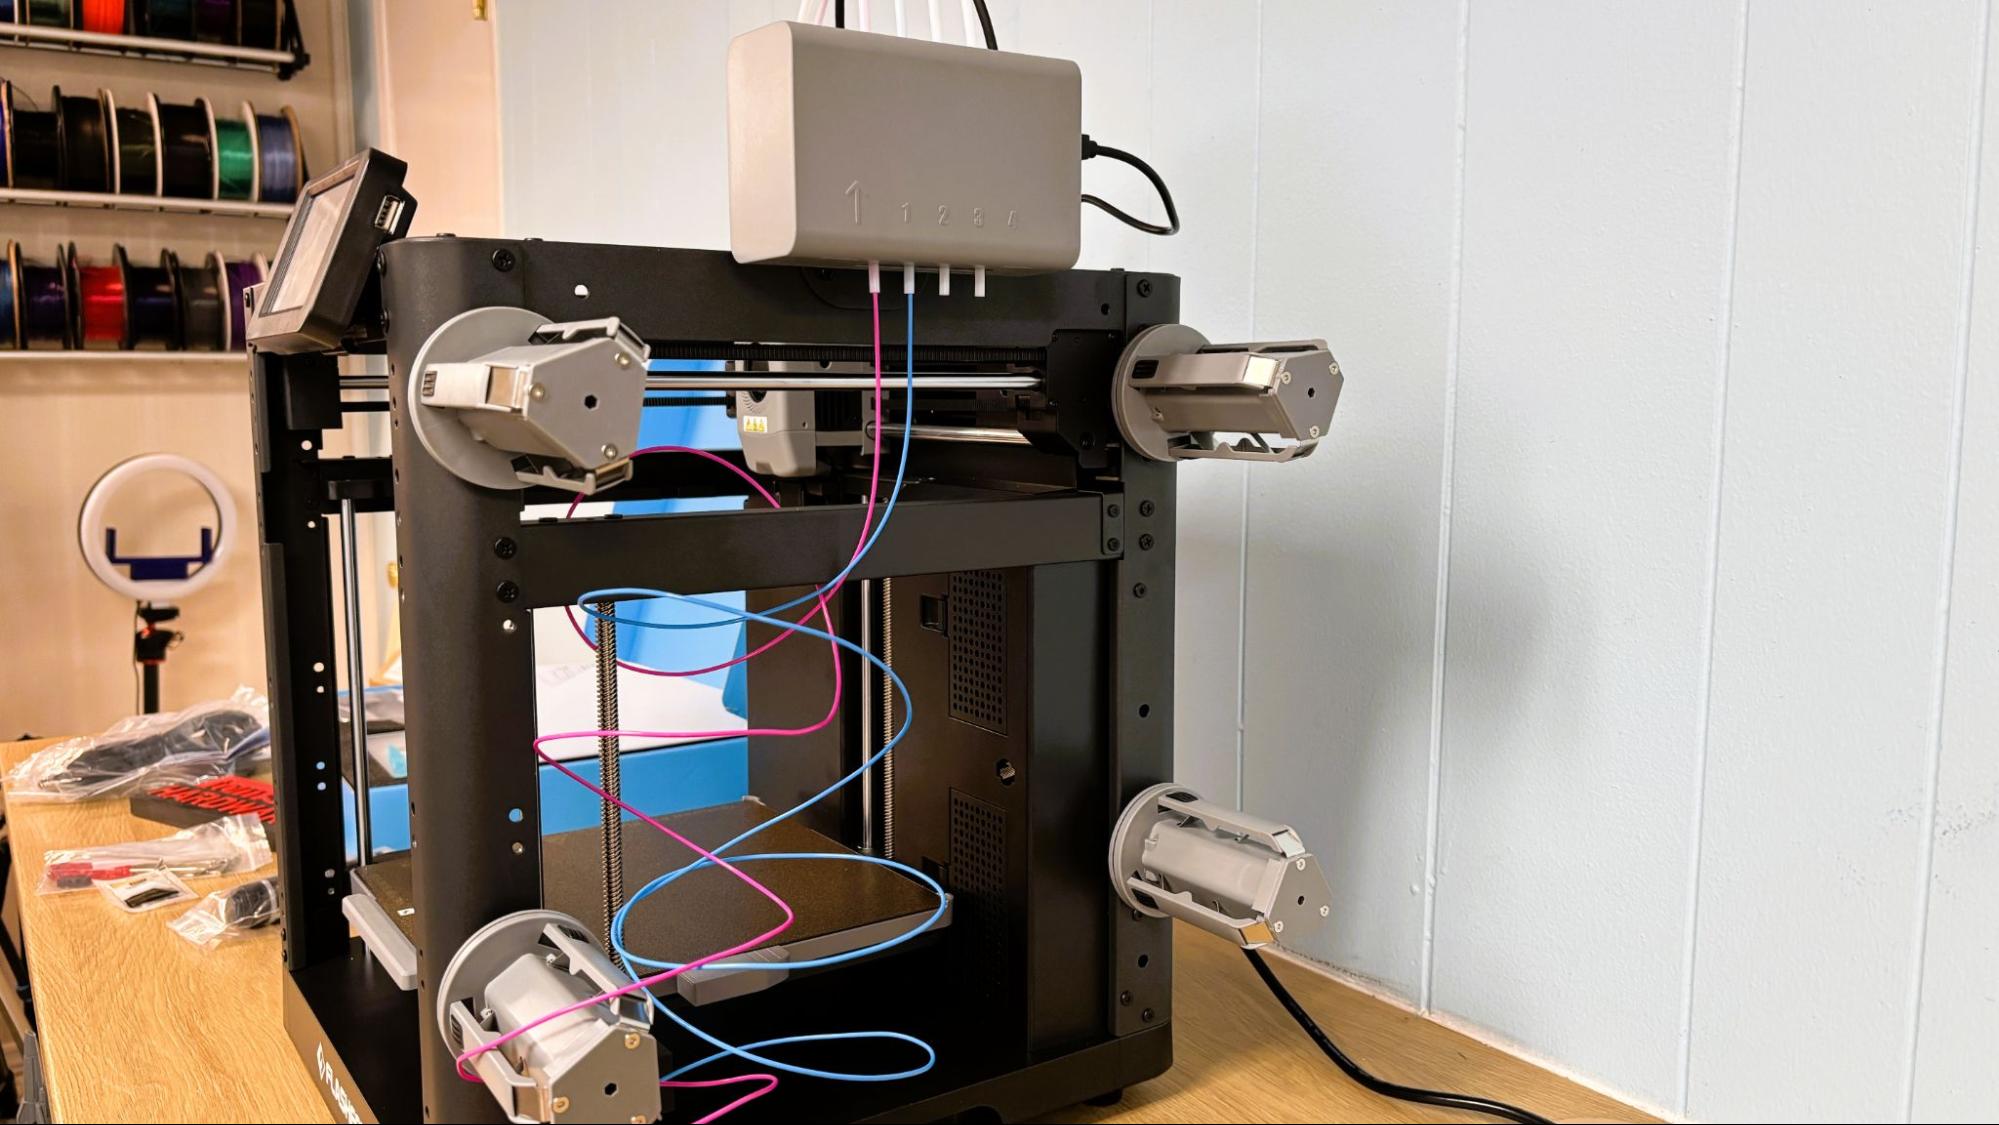
The review unit came with four sample coils of filament, which, as much as I appreciate the gesture, immediately tangled. To fill up that IFS, you’ll want to check out our guide to the best filaments for 3D printing for suggestions.
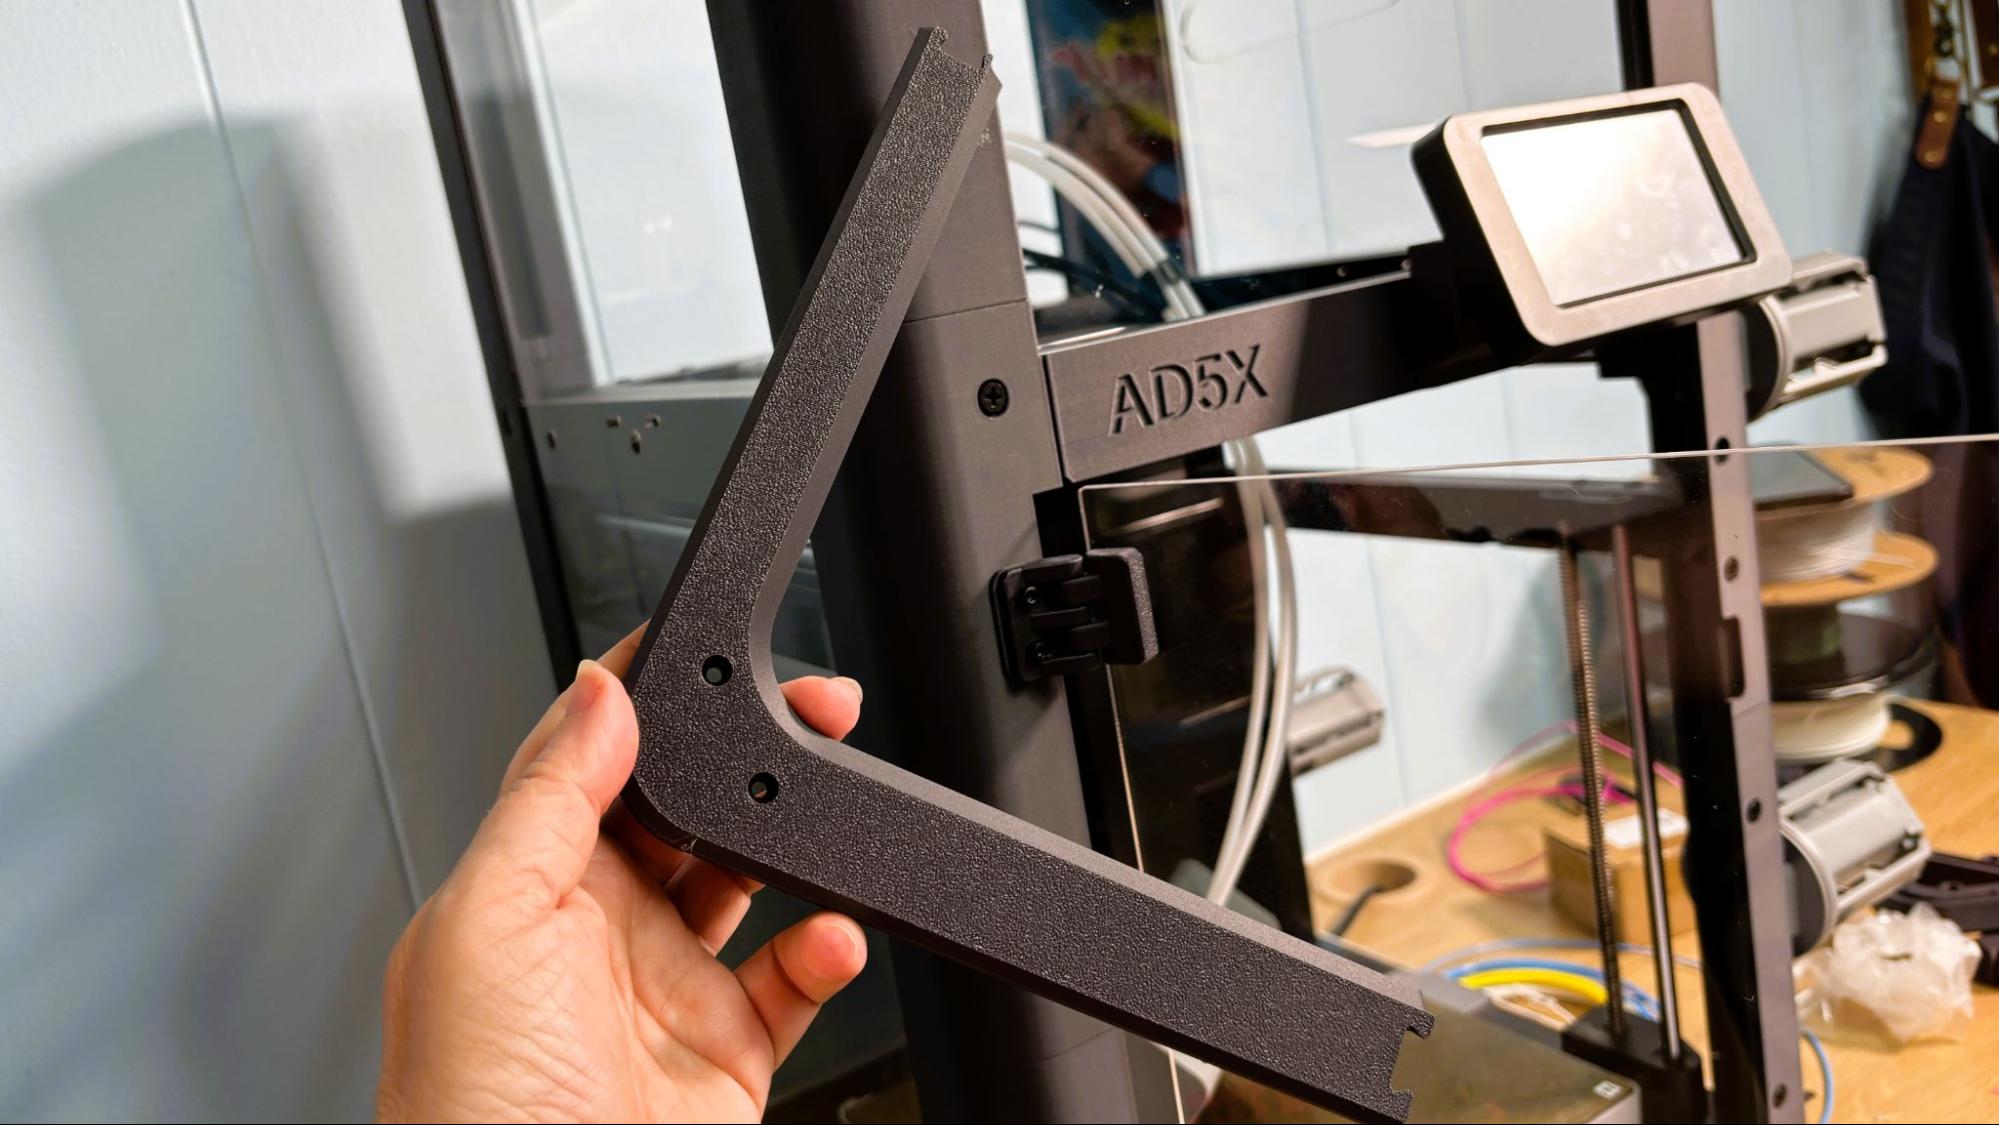
I threw caution to the wind and printed the Flashforge’s enclosure first. There were three plates, and all the models were available as pre-sliced G-code. The AD5X has some pretty crazy enclosure themes, but I decided to go with a basic frame. Since the AD5X does not have active chamber heating, I felt comfortable using the Volcanic Rock Grey PLA CF Flashforge sent for the review. Printed with a .2 layer height and an average speed of 180mm/s, the three plates took a little over 19 hours to print. I’m not sure that the carbon fiber makes the prints stronger, but it does give them a lovely brushed metallic finish.
Of course, you can’t test a multicolor system without doing a ton of multicolor prints. The AD5X does a very good job with color swaps, although it wastes a lot of filament in the process. Even though Flashforge is using Orca Slicer, and you have complete control over flush volume, flush to infill, and can print a purge object, the slicer does not tell you how much material is wasted in the final print. This is very important, as a large amount of wasted material can cause you to unexpectedly run out of filament if you’re not using fresh spools.
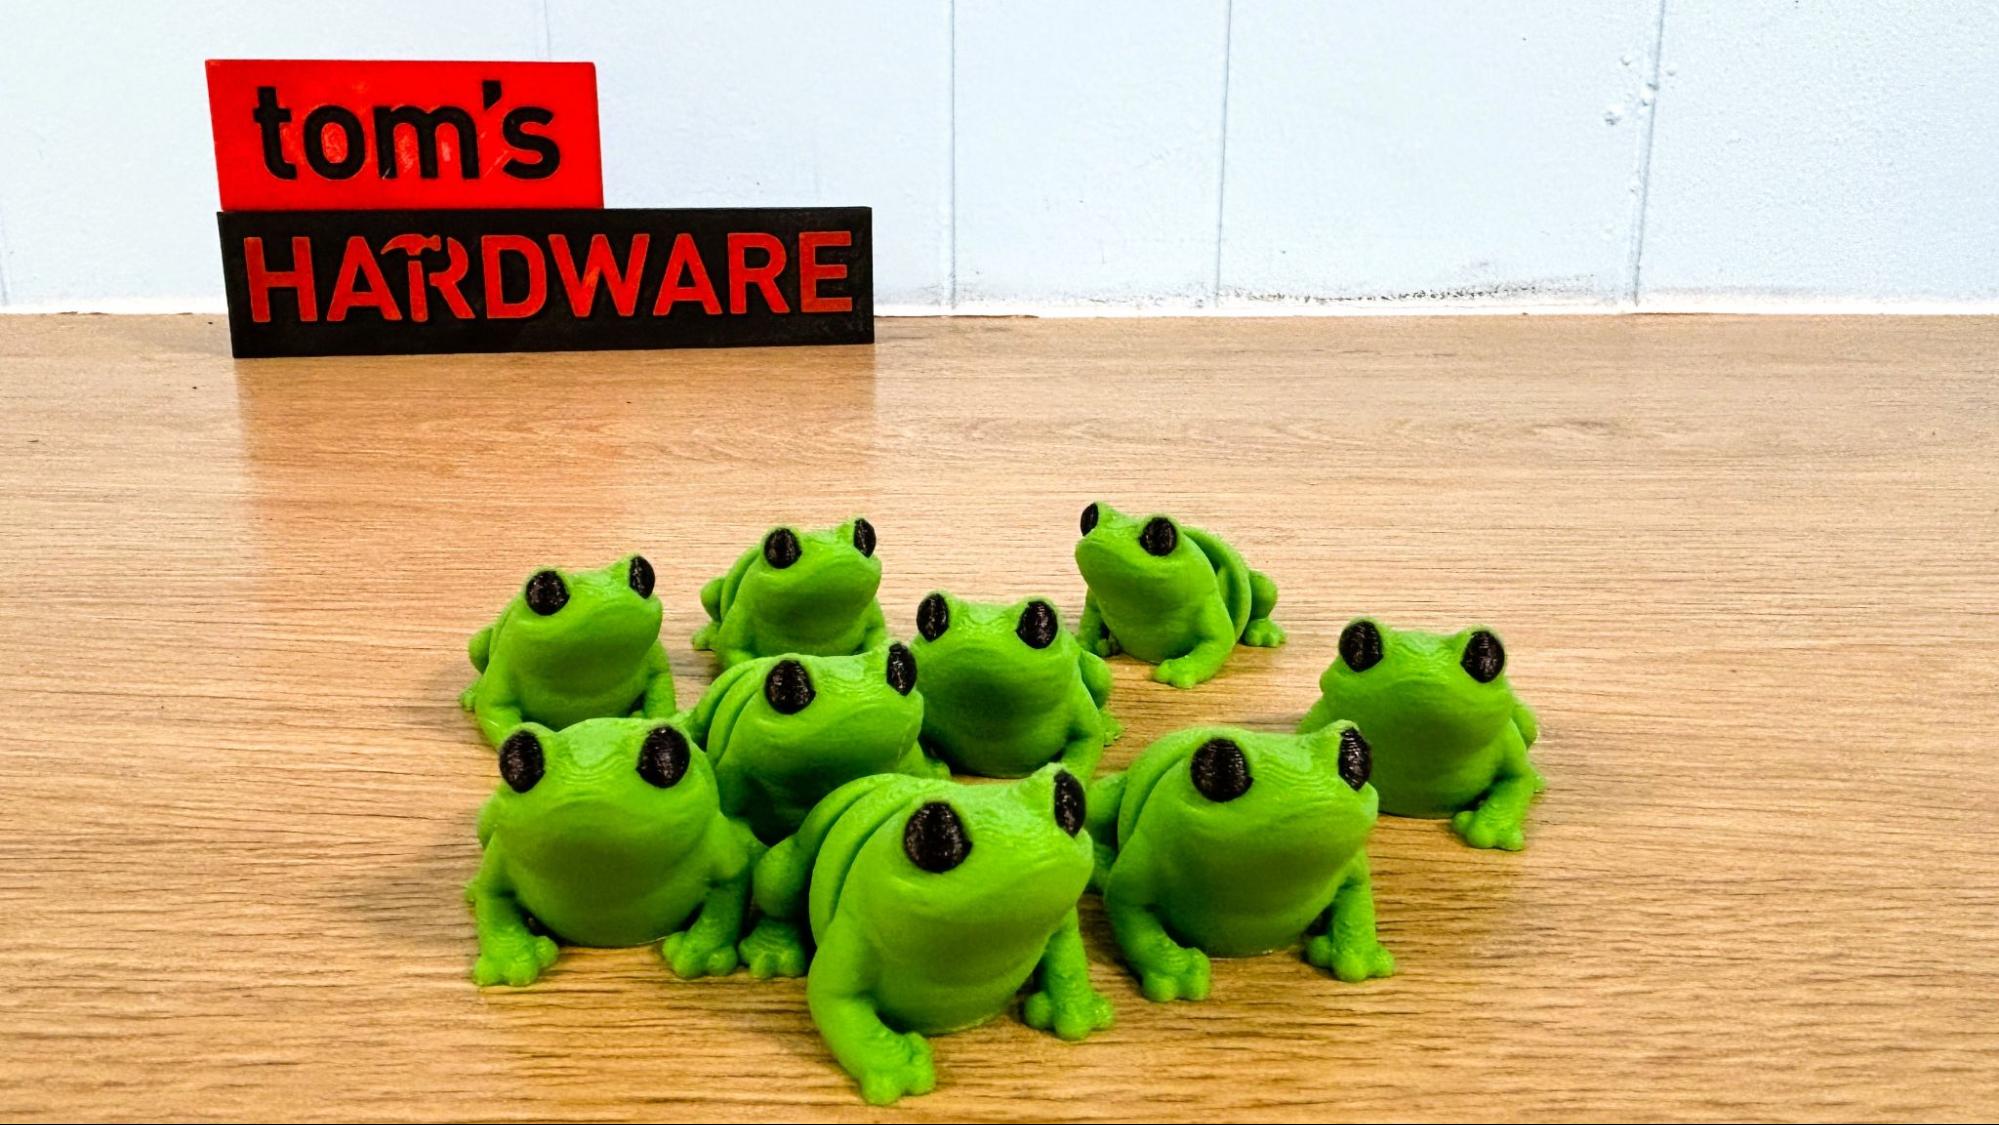
I did a full plate of 33 Articulated Tiny Butt Frogs from Zou3D. Using a .2mm layer height and an average print speed of 200 mm/s, they took 10 hours and 10 minutes to complete. They printed really well using Prusament Simply Green and Prusament Jet Black PLA. They also wasted 11 grams of filament in just 23 color swaps around the eyeball. For comparison, one frog only weighs 9 grams.
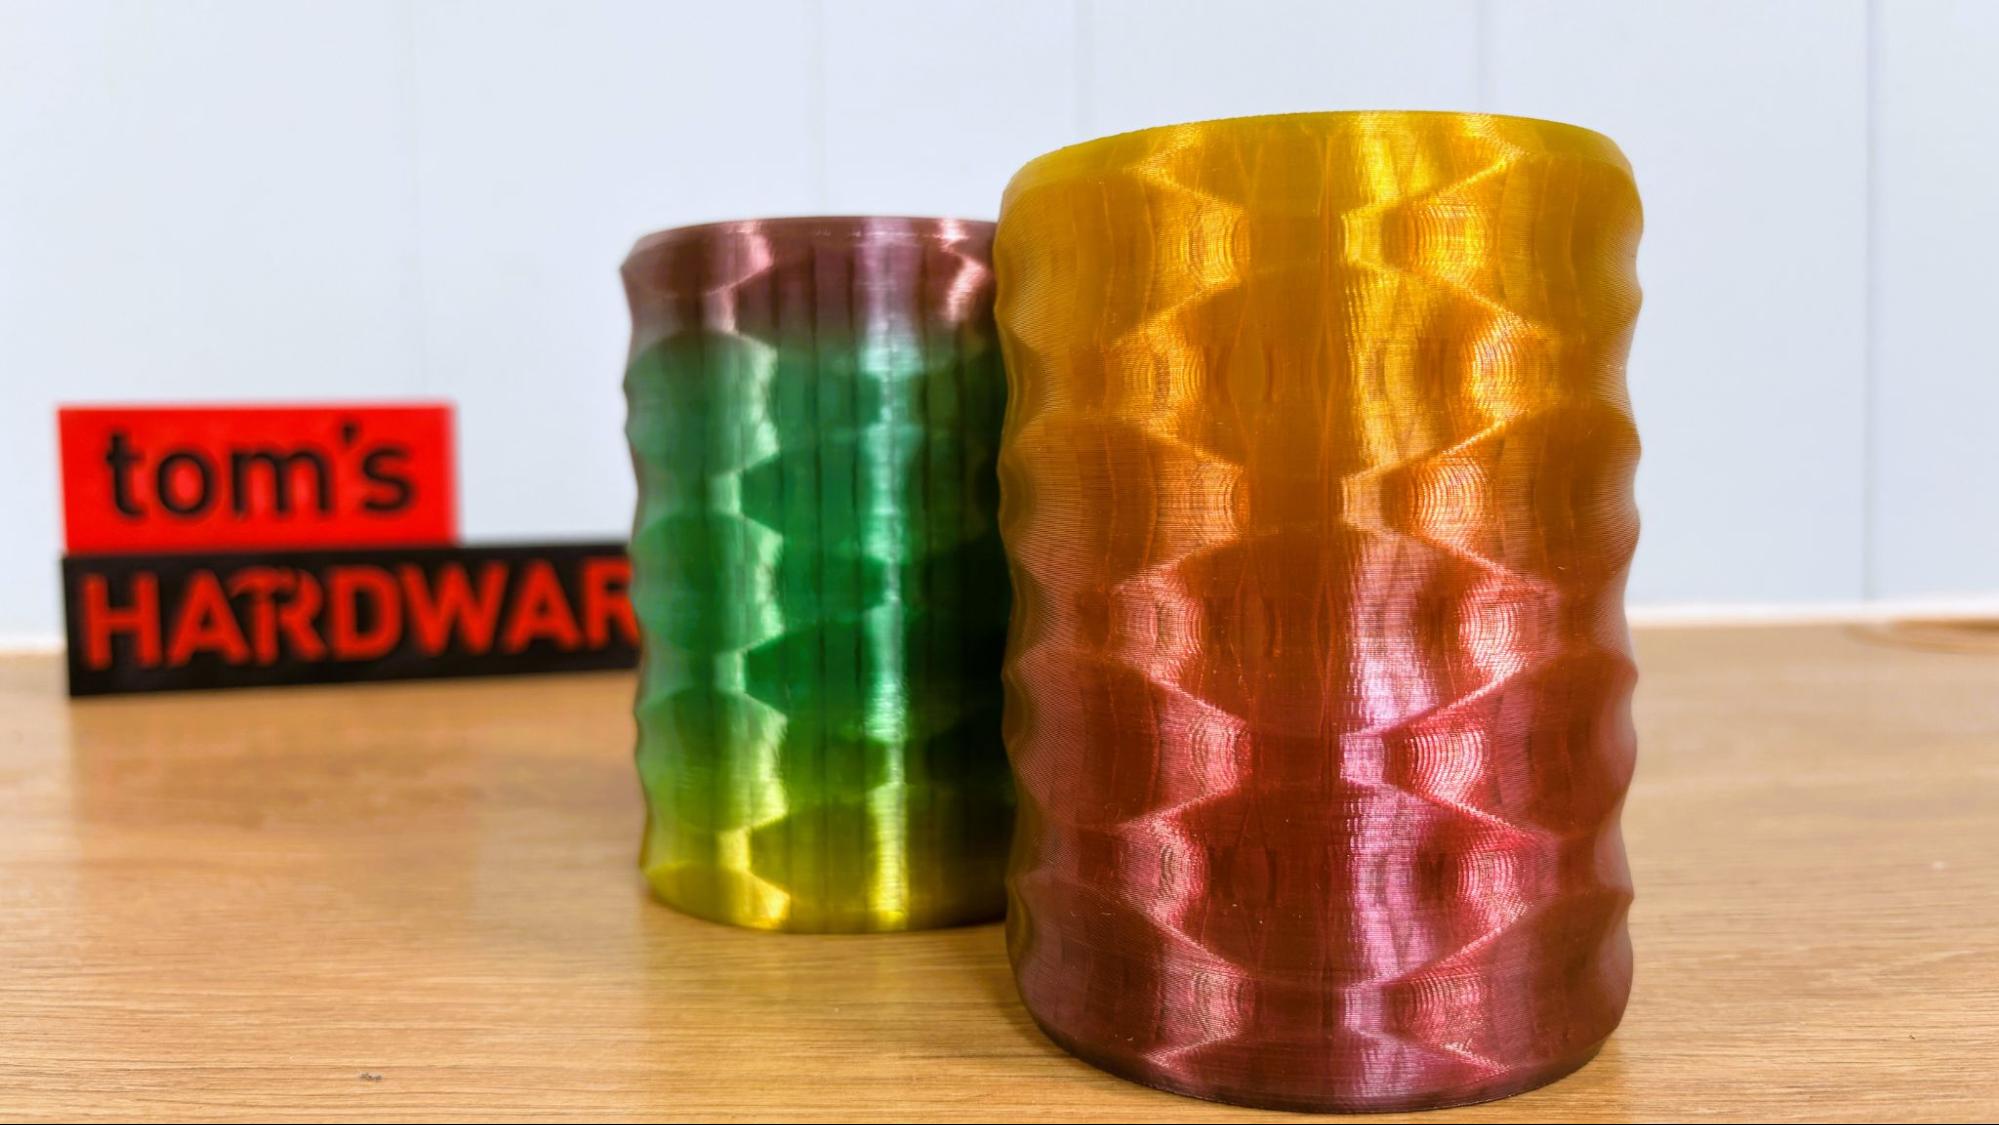
For PETG I printed a bunch of vase model Jack-o’-lanterns from Daniel Josvai on Printables. With a .2 layer height, a whopping .8 layer width, and an average speed of 60 mm/s, the main part of each pumpkin finished in 1 hour and 17 minutes. They printed perfectly in Matter Hackers Build Series translucent orange. The pumpkin tops needed infill and were printed separately in the same PETG translucent orange.
All the stems and all the faces printed in about an hour each, with a .2 layer height at an average of 100mm/s. The stems were printed in Jungle Green Prusament PETG, and the faces printed in Jet Black Prusament PETG. Unfortunately, since this wasn’t a true multicolor print, I had to use 3D Gloop to stick the pieces together, and got a little messy on one of the smallest smiles.
This print came out extremely smooth, without any stingingness you often get from PETG. The eyeballs do have a bit of layer line inconsistency, since they were printed flat, but this could be improved by reducing the layer height.

For TPU, I ran a pair of Summerwave Koosies by James The Printer on Makerworld. With a .2mm layer height and an average print speed of 45 mm/s, the print took 5 hours and 38 minutes each. Print quality was excellent, with no stringing, all in my favorite Rainbow TPU from Microcenter’s Inland. The TPU koozies work really well, keeping your drinks cool.
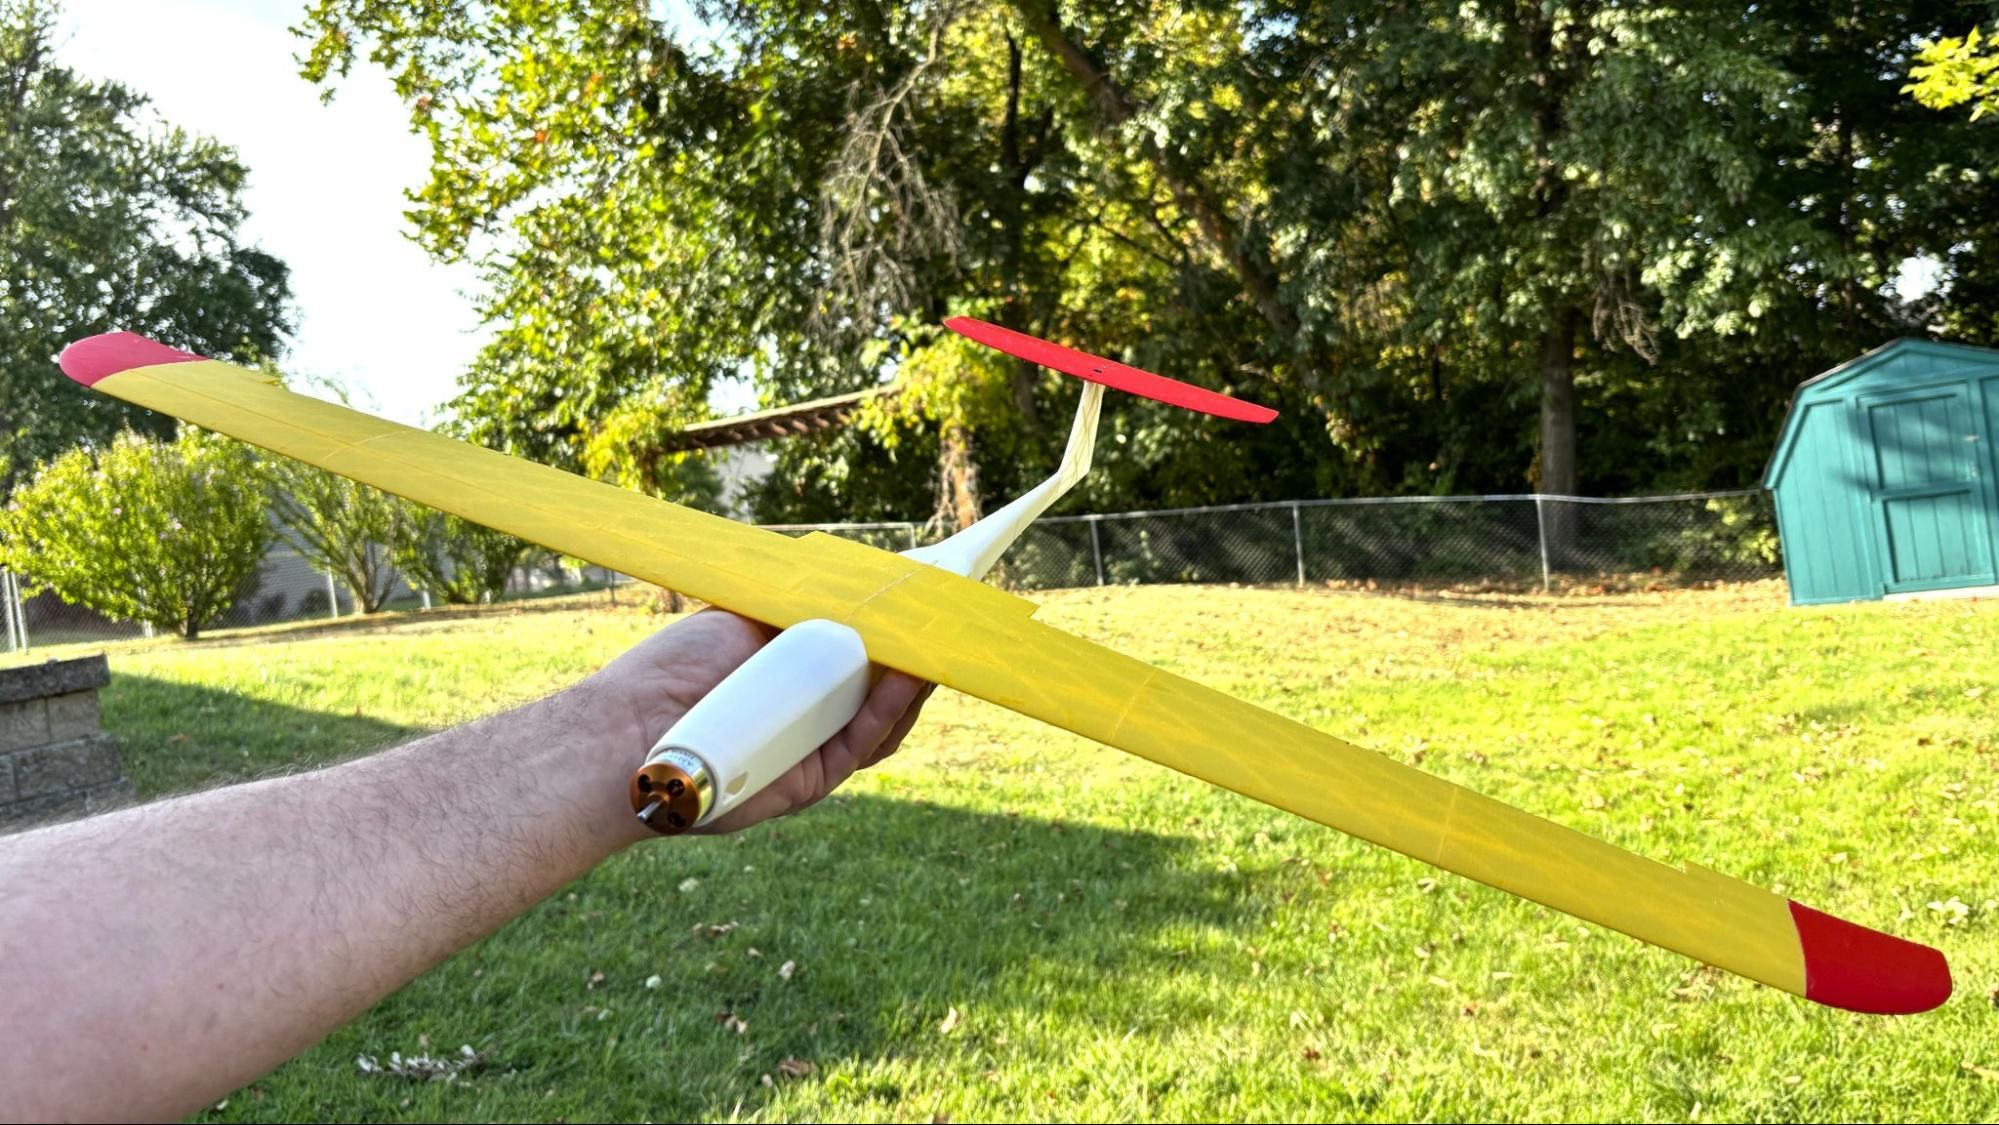
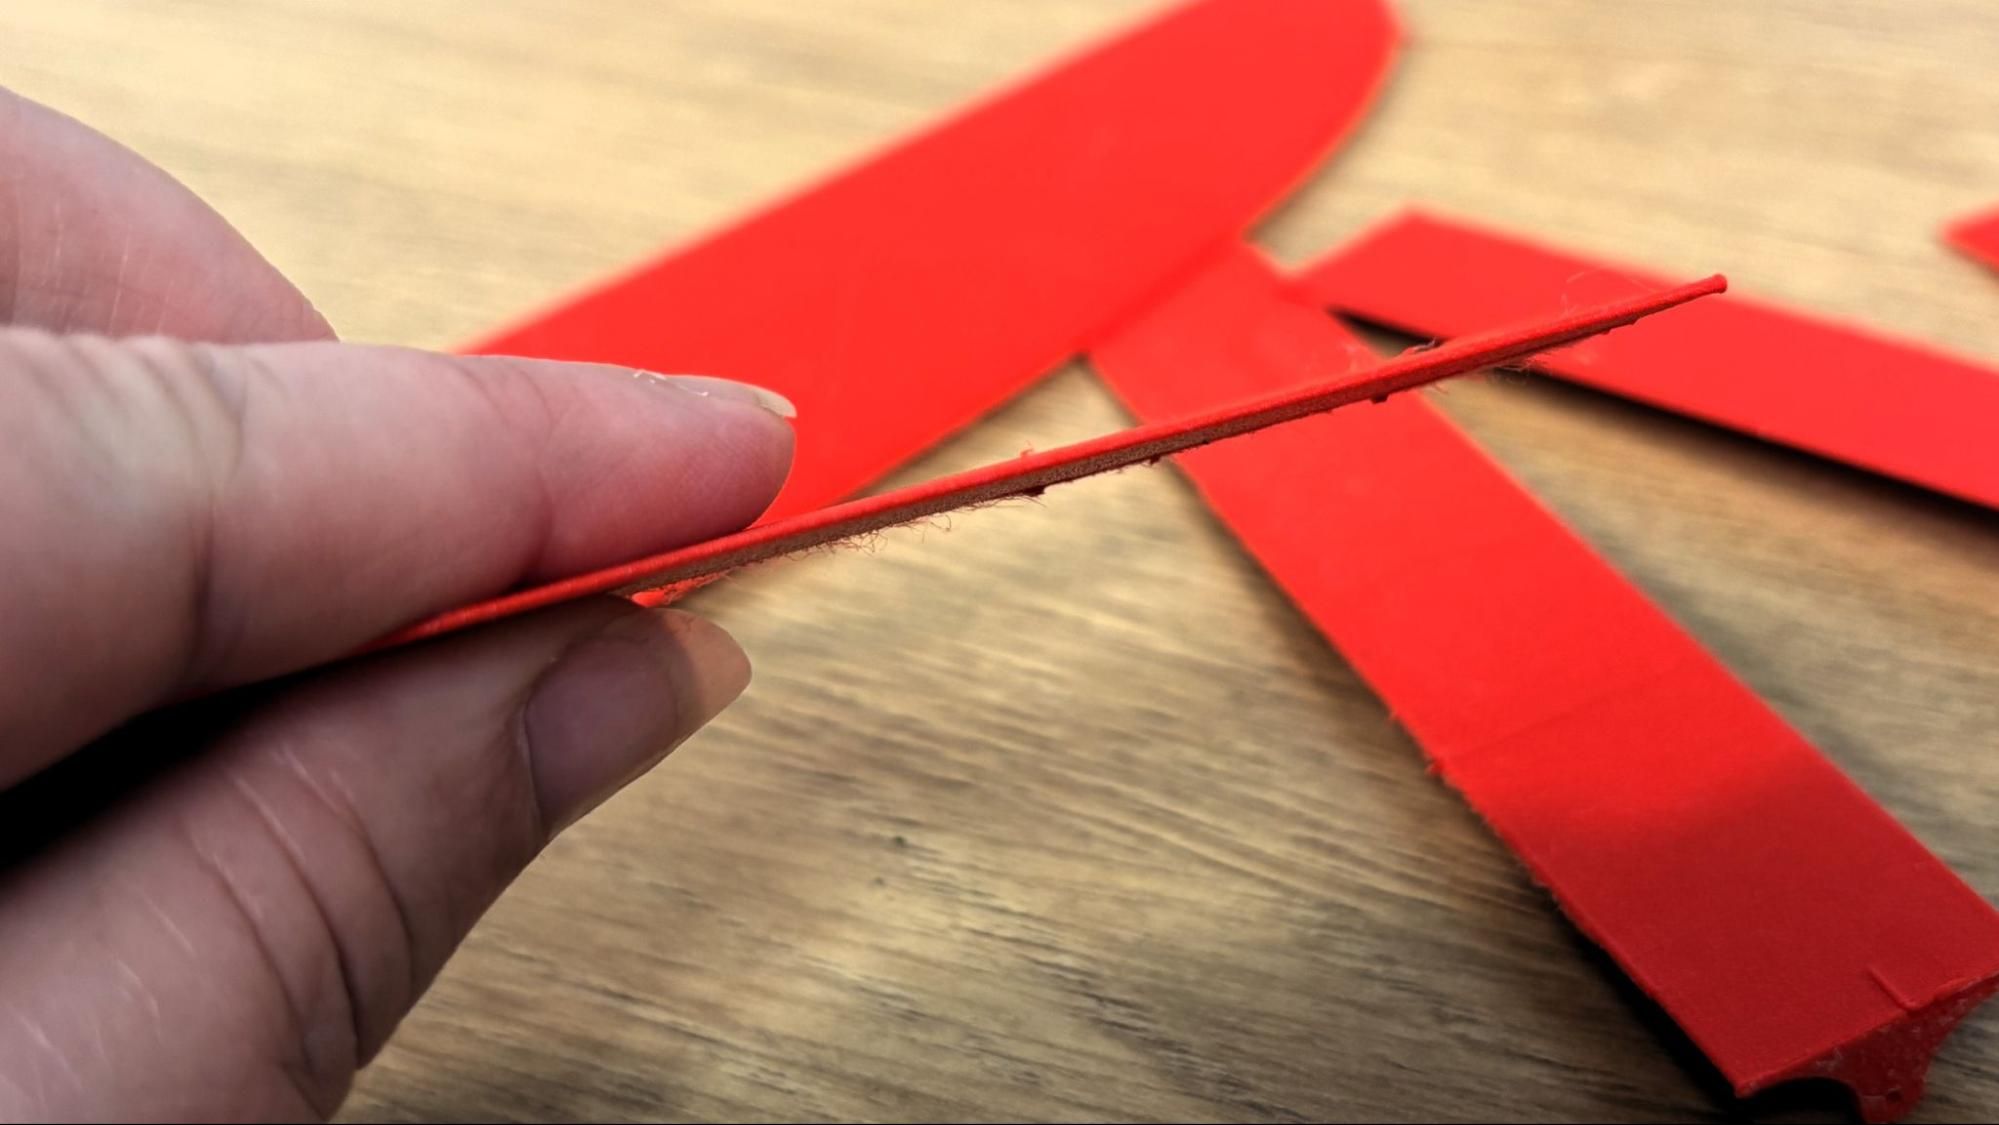
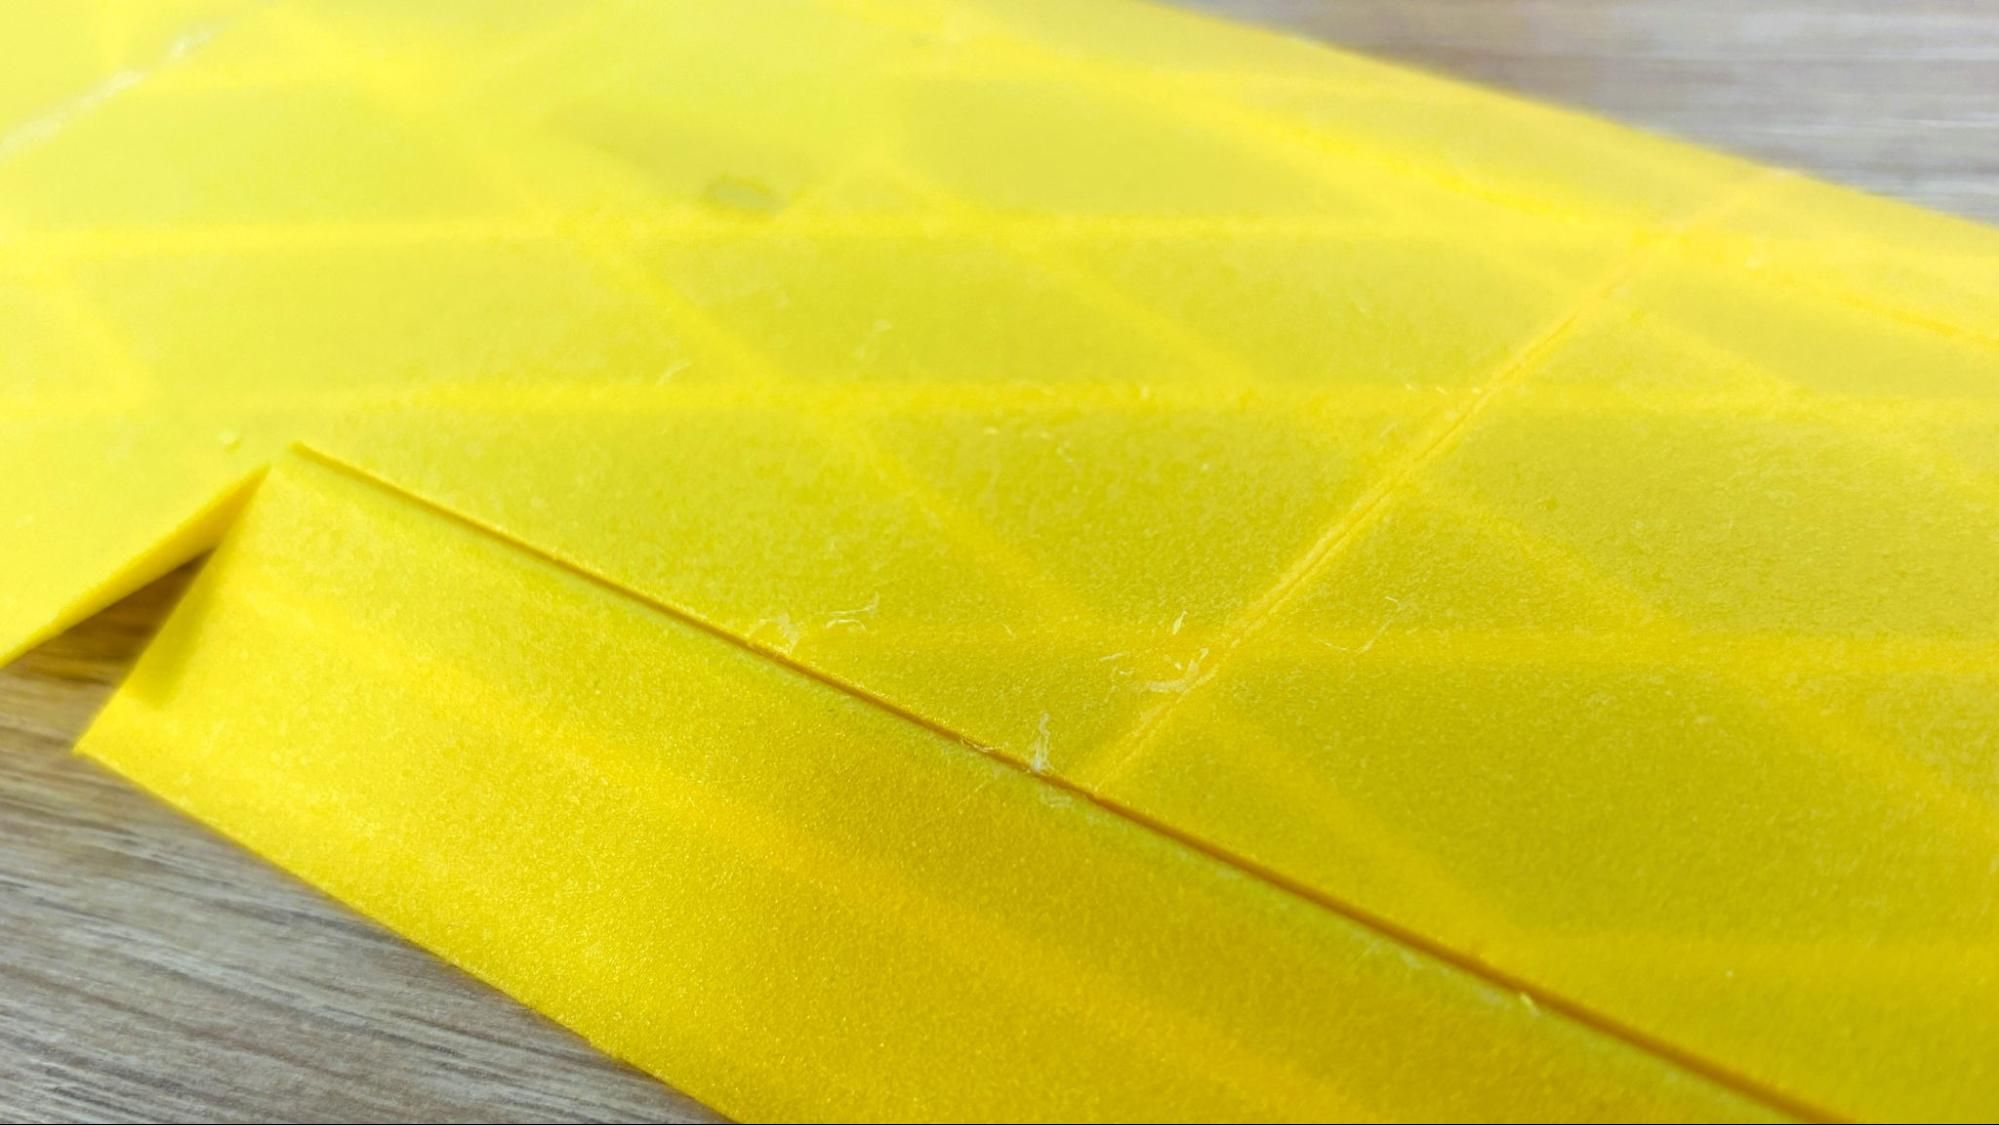
I’ve been wanting to 3D print an RC plane for my husband, but I’ve had a real problem trying to print Polymaker’s Light Weight PLA using other machines. This special low-density PLA is ‘Pre-foamed” when it is manufactured, making it perfect for printing RC plane parts. I’ve tried printing this one Thingiverse model, the Nucking Futs, several times. The Flashforge AD5X is the first printer I’ve used that can print Lightweight PLA without making a stringy mess or failing halfway through. Using the stock PLA profile and bumping the retraction up to 2mm, I got amazingly smooth prints with just the tiniest bit of fuzz.
The RC plane is a very delicate, tall, and slender model that requires excellent bed adhesion and a steady motion system. Using a .2 mm layer height with only one wall, no infil,l and a print speed slowed to a maximum of 75mm/s, the prints averaged 3 hours and 30 minutes each. Due to the size of this model, the plane is broken into a dozen pieces, then glued together. The wings have 8 pieces that print in pairs. After being Glooped together, the complete wing (without servos) is only 139 grams using Polymaker LW-PLA in yellow and red.
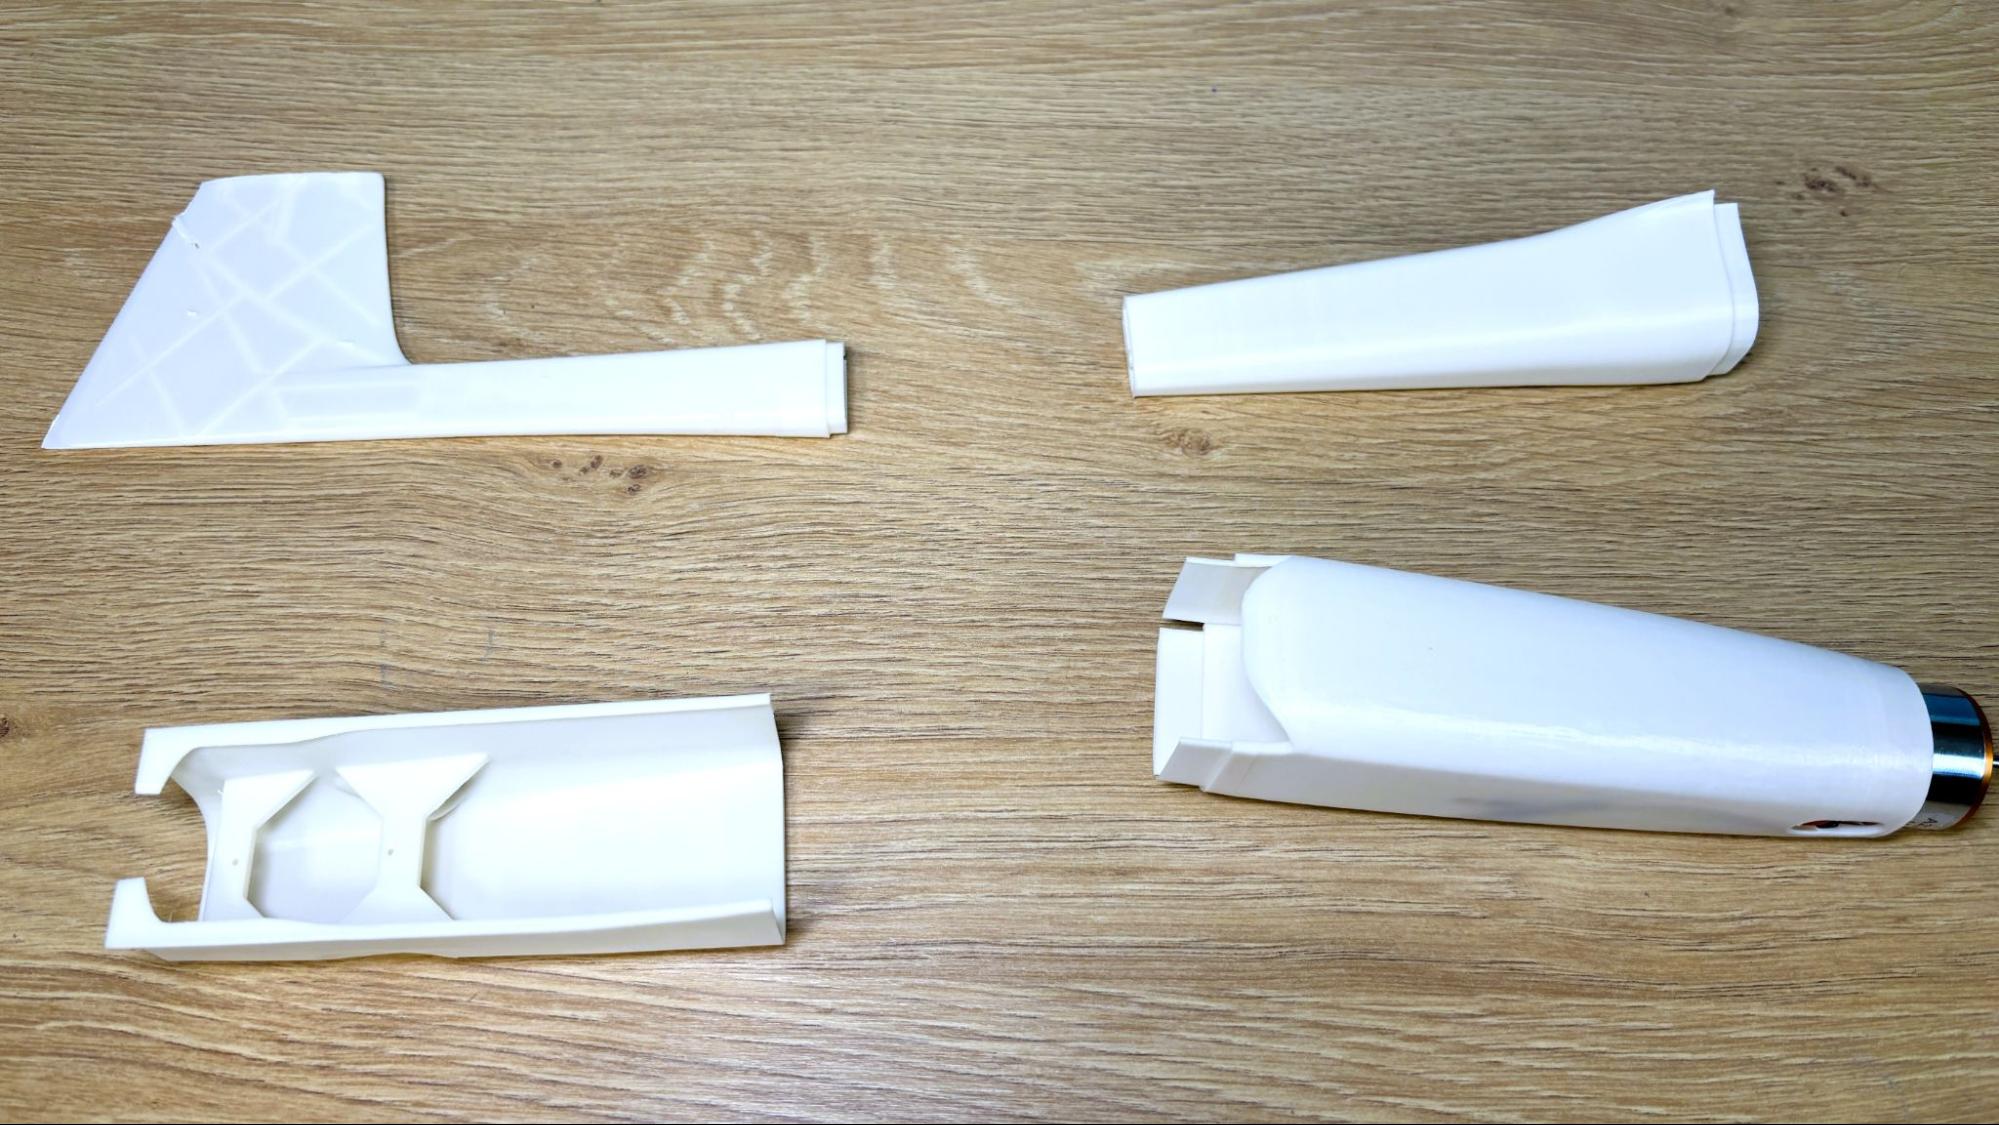
The fuselage needed a higher temp filament due to the motor heating up the firewall. Strangely, the AD5X does not list a preset for ASA, but I modified the ABS profile (close enough) and got excellent results. With a .2 layer height and again using a slow 75mm/s, one wall print, the fuselage took 5 hours 30 minutes to complete. Using Microcenter’s Inland natural ASA, the result is strong and light.
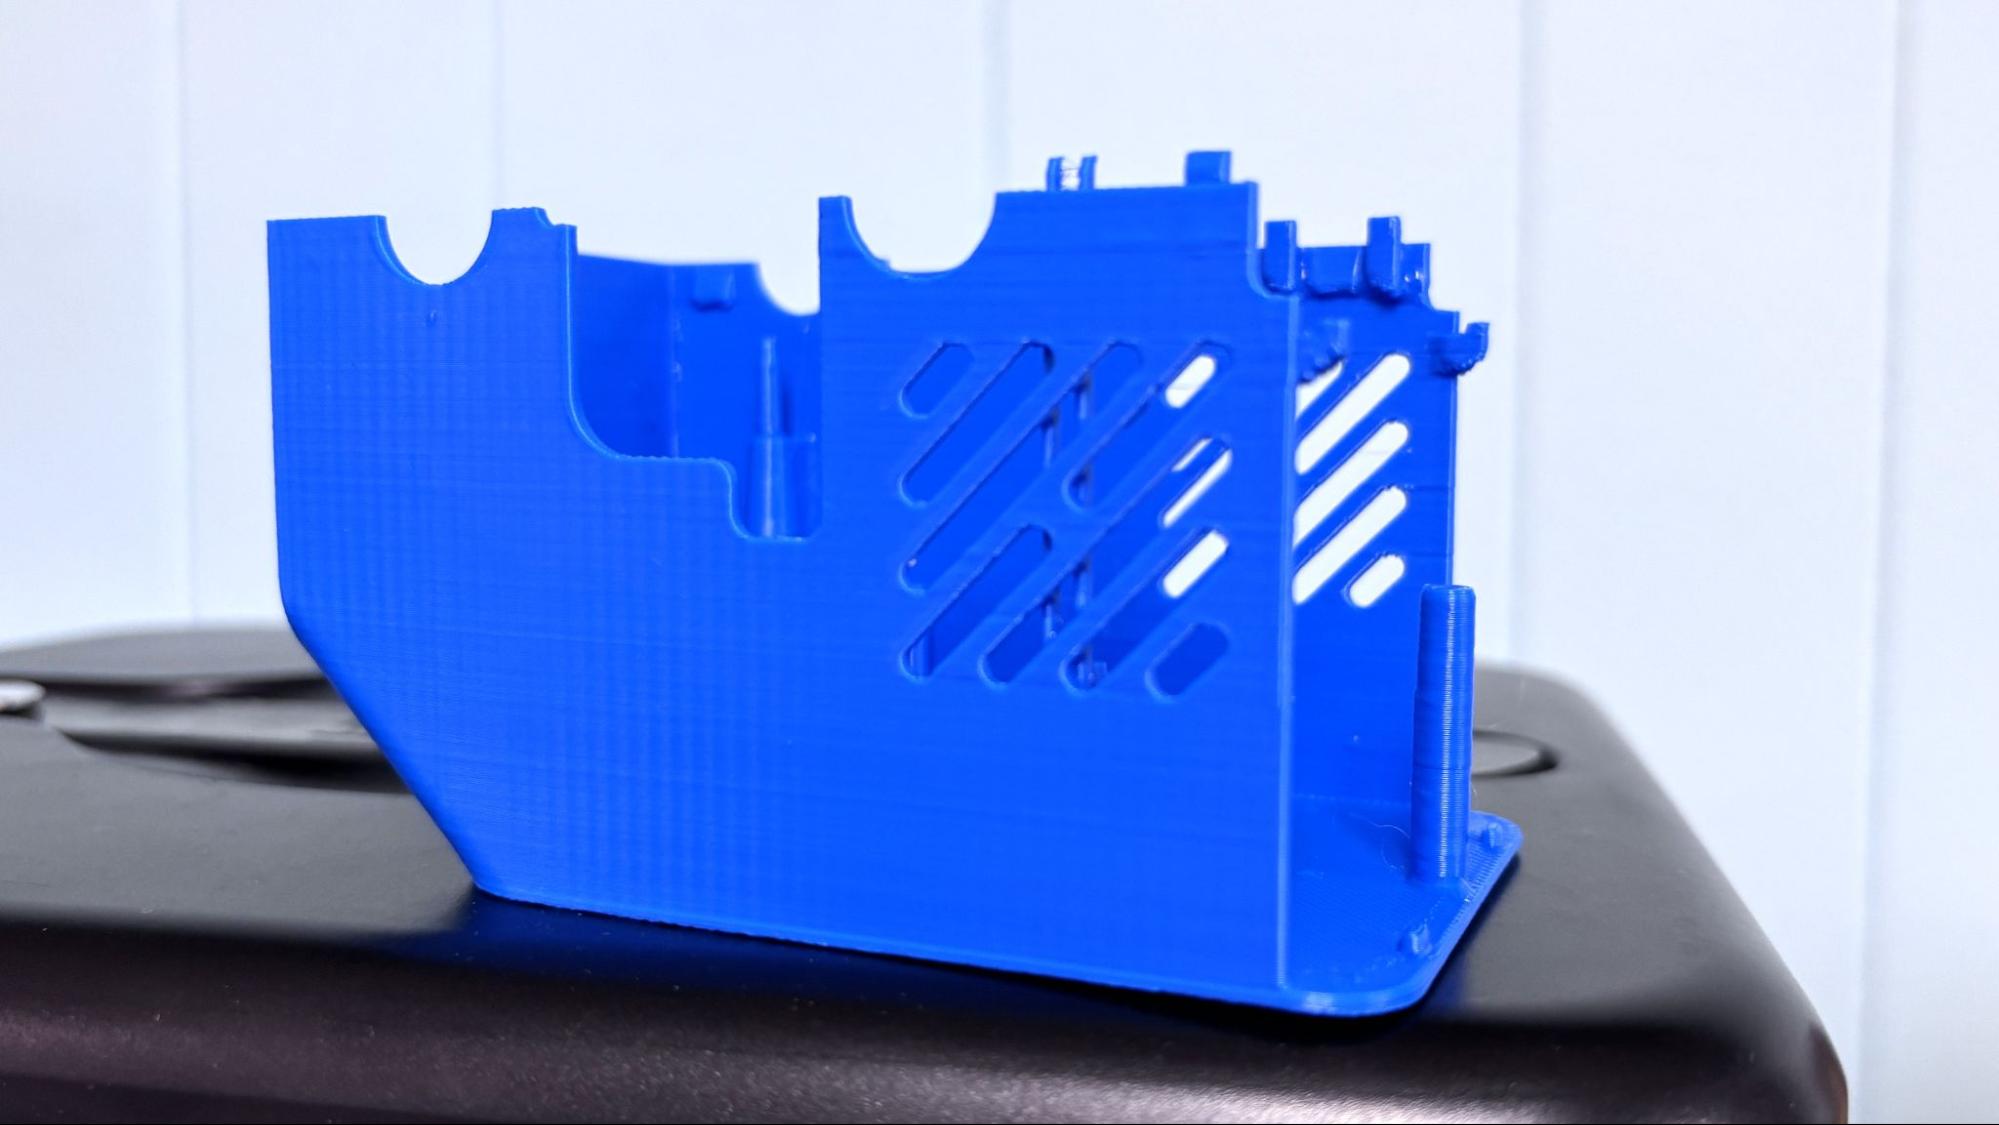
The Flashforge AD5X also does not have a profile for PC filament, but it certainly has the right heat settings. I wanted to try it, since it’s not always the easiest to print, and the toolhead cover on one of my other printers was needing replacement anyway. Using a .2mm layer height and limiting the print speed to 100 mm/s, this print completed in 1 hour and 55 minutes. This cover is functional if not perfect, and is printed in blue Polymax PC. There’s a bit more ringing in this print than some of the others.
Bottom Line
The Flashforge AD5X is an excellent printer, but its software is flawed. Once the slicer issues are fixed, I would have no issue with this machine, but as is, I’m a little wary. This problem is compounded by the price of the printer, which is currently in step with much of its competition.
The AD5X is a pretty good value at $399. If you want the enclosure kit for $49.99, a camera for $39.99, and LED lighting for $15.30, which you need to install, they are currently available from Flashforge’s website.
However, the Anycubic Kobra S1 Combo – which overcame its similar slicer issues – is currently on sale for $459. It also comes with a built-in enclosure, camera, lights, and the AMS has a dryer function. The Bambu Lab P1S, with excellent software with a great ecosystem, is on sale for $749. If you’re interested in a smaller format, super affordable color printer, check out the Bambu Lab A1 Mini Combo for $399, currently on sale for $349.

Denise Bertacchi is a Contributing Writer for Tom’s Hardware US, covering 3D printing. Denise has been crafting with PCs since she discovered Print Shop had clip art on her Apple IIe. She loves reviewing 3D printers because she can mix all her passions: printing, photography, and writing.
