Comparing Water Coolers: We Follow Your Lead
Installation, Continued
Of course, you should never put a cooling system in to a PC without first running it for a while, to ensure that the bubbles are out of the system before it's mounted on a CPU, and, more importantly, to make sure it doesn't leak. To do this we attached a power supply to the H20-120 and hot-wired the power supply into thinking the power switch was turned on so that it would supply voltage to our liquid cooling system. The manual recommends purchasing a power supply tester to turn the power on instead of hot-wiring your power supply, and we certainly don't disagree with them. Unless you're absolutely sure you know what you're doing, shorting out power supplies is not a good idea.
Once powered up, the pump ran coolant through the block and radiator and bubbles started to appear. We added coolant as needed, and after about a half an hour of leak-less operation we figured it was OK to install the H20-120 in our test rig.
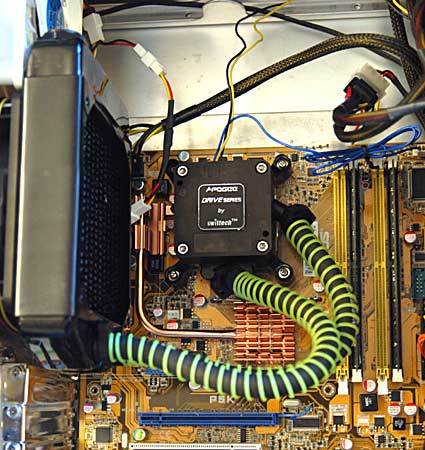
This is the one step where we had some significant trouble in our installation. While the radiator installed flawlessly, the CPU water block / pump unit was very difficult to install. As far as we can tell, the screws that hold the water block to the back plate behind the CPU socket are just barely long enough to reach. After messing with the screws and pushing harder than we were comfortable with, we finally managed to get three of the four screws attached. While 3 out of 4 isn't bad, it wasn't good enough for our testing.
We tried a number of strategies, including removing the motherboard from the case and pushing from both the screw and back plate at the same time with no luck. The only way we got it to work was by removing one of the washers on the screw so that it stuck out further, and even that only worked with more brute force than we were comfortable with. We're sure that if these screws were a sixteenth of an inch longer this wouldn't have been a problem, so that's something we'll suggest to the engineers at Swiftech.
After the mounting problem was solved, everything went very smoothly and before we knew it the system was up and running. Time for testing!
Get Tom's Hardware's best news and in-depth reviews, straight to your inbox.
Don Woligroski was a former senior hardware editor for Tom's Hardware. He has covered a wide range of PC hardware topics, including CPUs, GPUs, system building, and emerging technologies.
