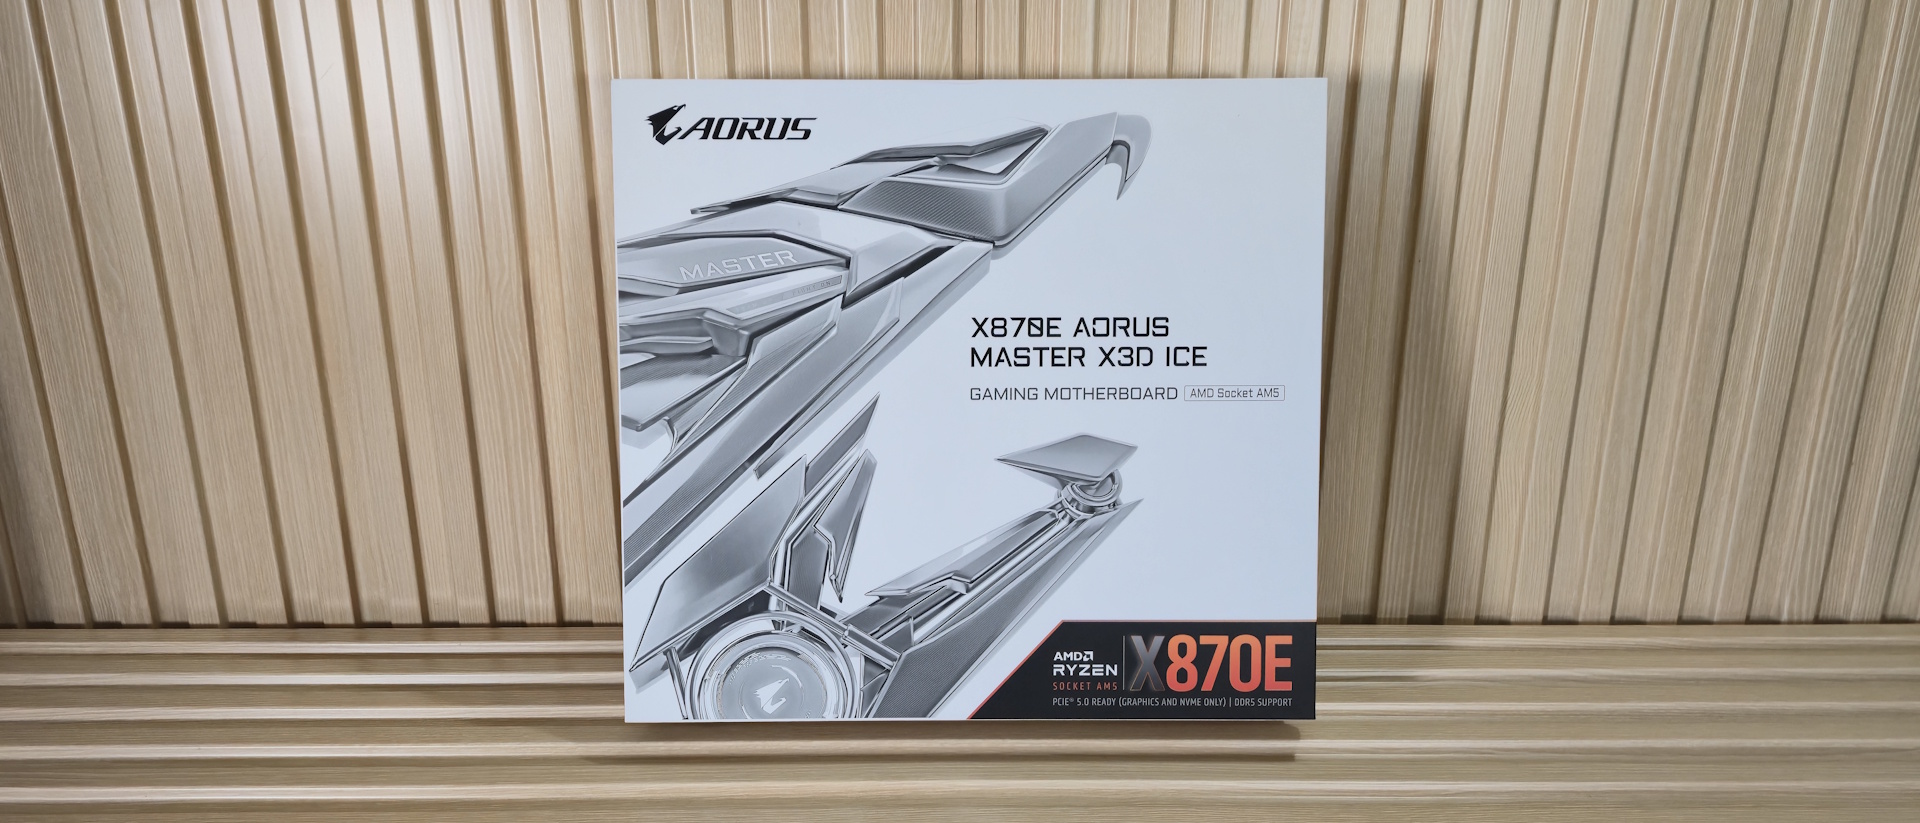
Tom's Hardware Verdict
The Gigabyte Aorus Master X3D Ice, an attractive white update to the non-X3D version, offers robust power delivery, other improved specifications, and DIY features in a premium package. By most accounts, it’s a useful update, but don't expect significant performance gains from the X3D Turbo 2.0 mode.
Pros
- +
64MB “DriverBIOS” pre-loads Wi-Fi driver directly into the BIOS
- +
Dual Ethernet (one 10 GbE)
- +
Four USB Type-C (2x 40 Gbps) on rear IO
- +
‘Front’ HDMI output
- +
Five M.2 sockets (2x PCIe 5.0)
Cons
- -
X3D Turbo 2.0 didn’t show significant gains in our testing
- -
Last-gen audio codec
- -
Only seven USB Type-A ports on rear IO
Why you can trust Tom's Hardware
Gigabyte, like the other board partners, is updating its AMD motherboard stack. On top of 64MB BIOS’ (for additional CPU support without lopping off older models), the company gets the chance to fix any issues and add any relevant features that may have come out since the platform was released in late September 2024. The X870E Aorus Master X3D Ice builds upon the non-X3D version, with more robust power delivery, a larger BIOS, connectivity enhancements, and, of course, the updated X3D Turbo 2.0 functionality for X3D chips, which Gigabyte says improves performance up to 25 percent (tested below).
On the hardware side, the X870E Aorus Master X3D Ice provides you with everything the platform has to offer. And at $649.99, it had better! There are four USB Type-C ports on the rear IO, five M.2 sockets (two PCIe 5.0), fast networking with dual LAN (one 10 GbE) and Wi-Fi 7, faster memory support to DDR5-9000 (up from 8600 MT/s), an increase in Vcore VRM phase count (16 to 18), and three full-length PCIe expansion slots. You also get a front HDMI port, which is useful for mounting a smaller display in the case for monitoring or extra display options. The Realtek ALC1220 audio codec remains unchanged, but a DAC has been added. The Icy white PCB and paint job are new, and there have been some minor tweaks to the premium design. In all, these are some nice upgrades from the original X870E Aorus Master.
Performance on our Aorus Master X3D was middle of the pack, and nothing out of the ordinary. It proved to be a solid gamer and was good in productivity, though our Procyon Office tests had it on the slower side of average using default settings. You wouldn’t notice a difference in the office apps, but by the numbers, it was a bit slower. All of that said, there’s really nothing to worry about on the performance side of things. The Turbo 2.0 feature for X3D chips did yield some positive results in some tests, but was unimpressive in our testing.
Below, we’ll examine the board's details and determine whether it deserves a spot on our list of the Best Motherboards. But before we share test results and discuss details, here are the specifications from Gigabyte’s website.
Specifications of the Gigabyte Z890 Aorus Master
Socket | AM5 (LGA 1718) |
Chipset | X870E |
Form Factor | ATX |
Voltage Regulator | 22 Phase (18x Vcore, 110A SPS MOSFETs for Vcore) |
Video Ports | (2) USB4 Type-C |
USB Ports | (2) USB 4 (40 Gbps) Type-C |
Network Jacks | (1) 5 GbE |
Audio Jacks | (2) Analog + SPDIF |
Legacy Ports/Jacks | ✗ |
Other Ports/Jack | ✗ |
PCIe x16 | (1) v5.0 (x16) |
PCIe x8 | ✗ |
PCIe x4 | ✗ |
PCIe x1 | ✗ |
CrossFire/SLI | ? |
DIMM Slots | (4) DDR5-9000+(OC), 256GB Capacity |
M.2 Sockets | (2) PCIe 5.0 x4 (128 Gbps) / PCIe (up to 80mm) |
SATA Ports | (2) SATA3 6 Gbps (Supports RAID 0/1) |
USB Headers | (1) USB v3.2 Gen 2x2 (20 Gbps) Type-C |
Fan/Pump Headers | (7) 4-Pin (CPU Fan/Water cooling/System) |
RGB Headers | (4) aRGB Gen 2 (3-pin) |
Diagnostics Panel | (1) 2-Character Debug Port |
Internal Button/Switch | ✗ |
SATA Controllers | ✗ |
Ethernet Controller(s) | (1) Realtek 8126 (5 GbE) |
Wi-Fi / Bluetooth | MediaTek Wi-Fi 7 MT7927 - 320 MHz, 6 GHz, BT 5.4 |
USB Controllers | ASMedia ASM4242, XXX |
HD Audio Codec | Realtek ALC1220 with ESS ES9118 DAC |
DDL/DTS | ✗ / DTS:X Ultra |
Warranty | 3 Years |
Inside the Box of the Gigabyte X870E Aorus Master X3D Ice
Inside the box of this upper-midrange motherboard are several accessories to help you get started. You get the typical fare: Wi-Fi antennas, SATA cables, and guides, among a few other goodies. We’ve listed everything that comes with our Aorus Master X3D Ice below.
- Installation guides
- Stickers
- G-Connector
- DDR Windblade fan
- (2) SATA cables
- Quick-connect Wi-Fi antenna
- (2) 2-pin thermistor cables
- Microphone
- System fan extension cable
- (2) Velcro straps
Design of the Aorus Master X3D Ice
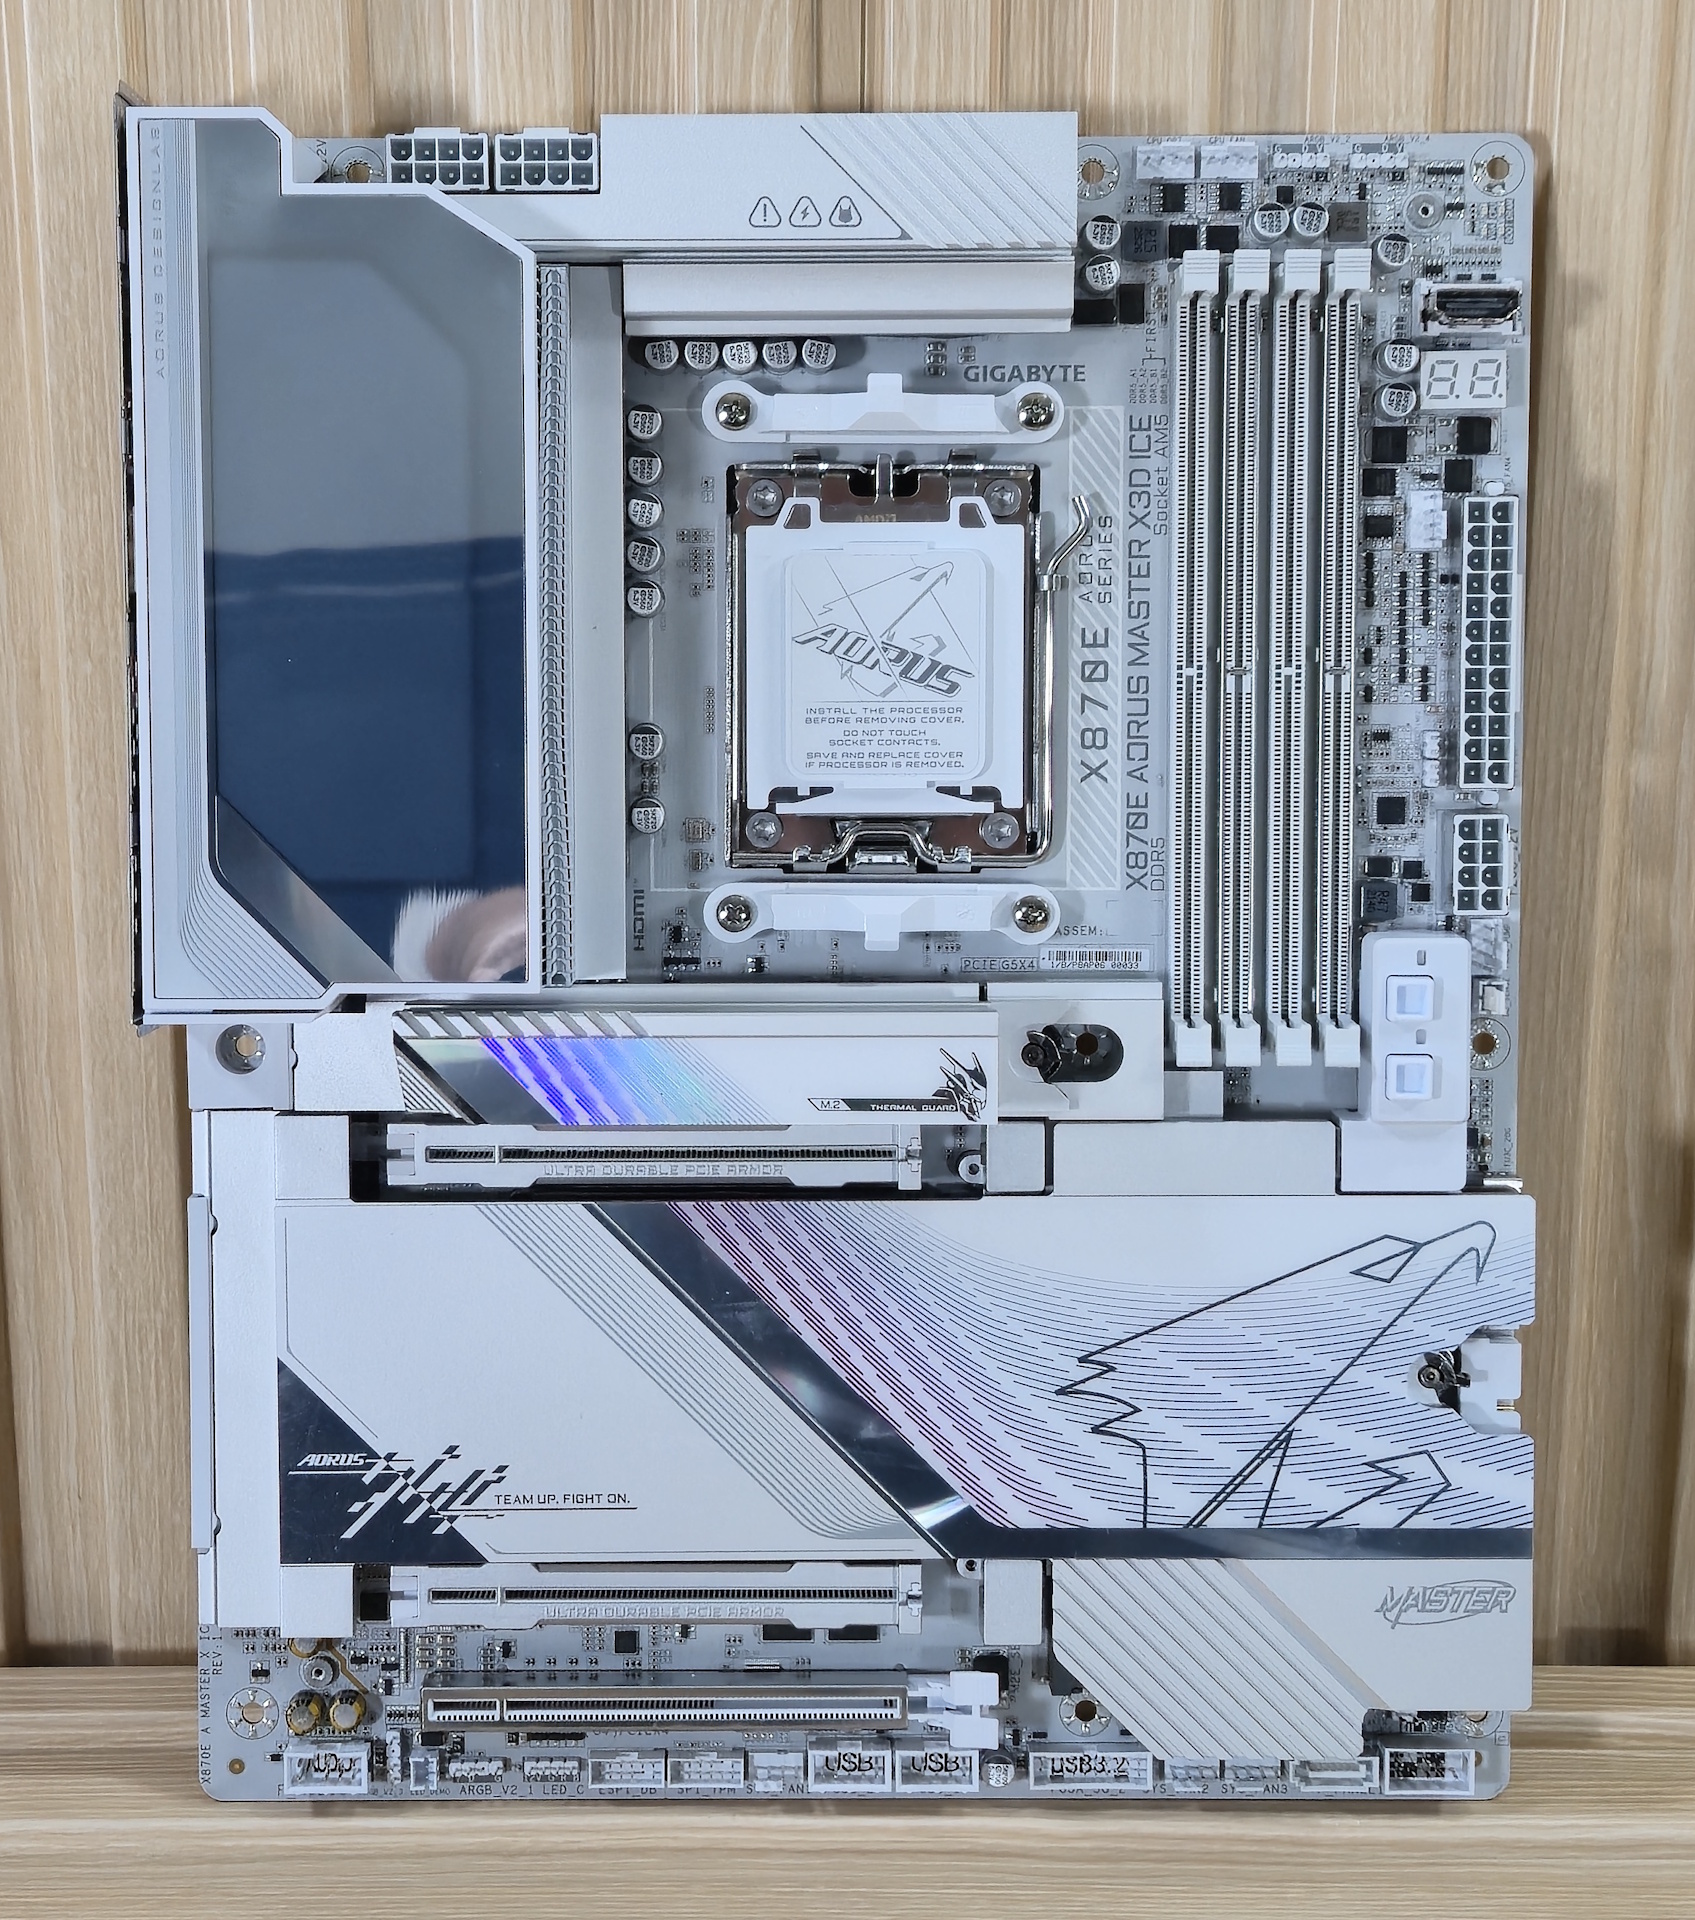
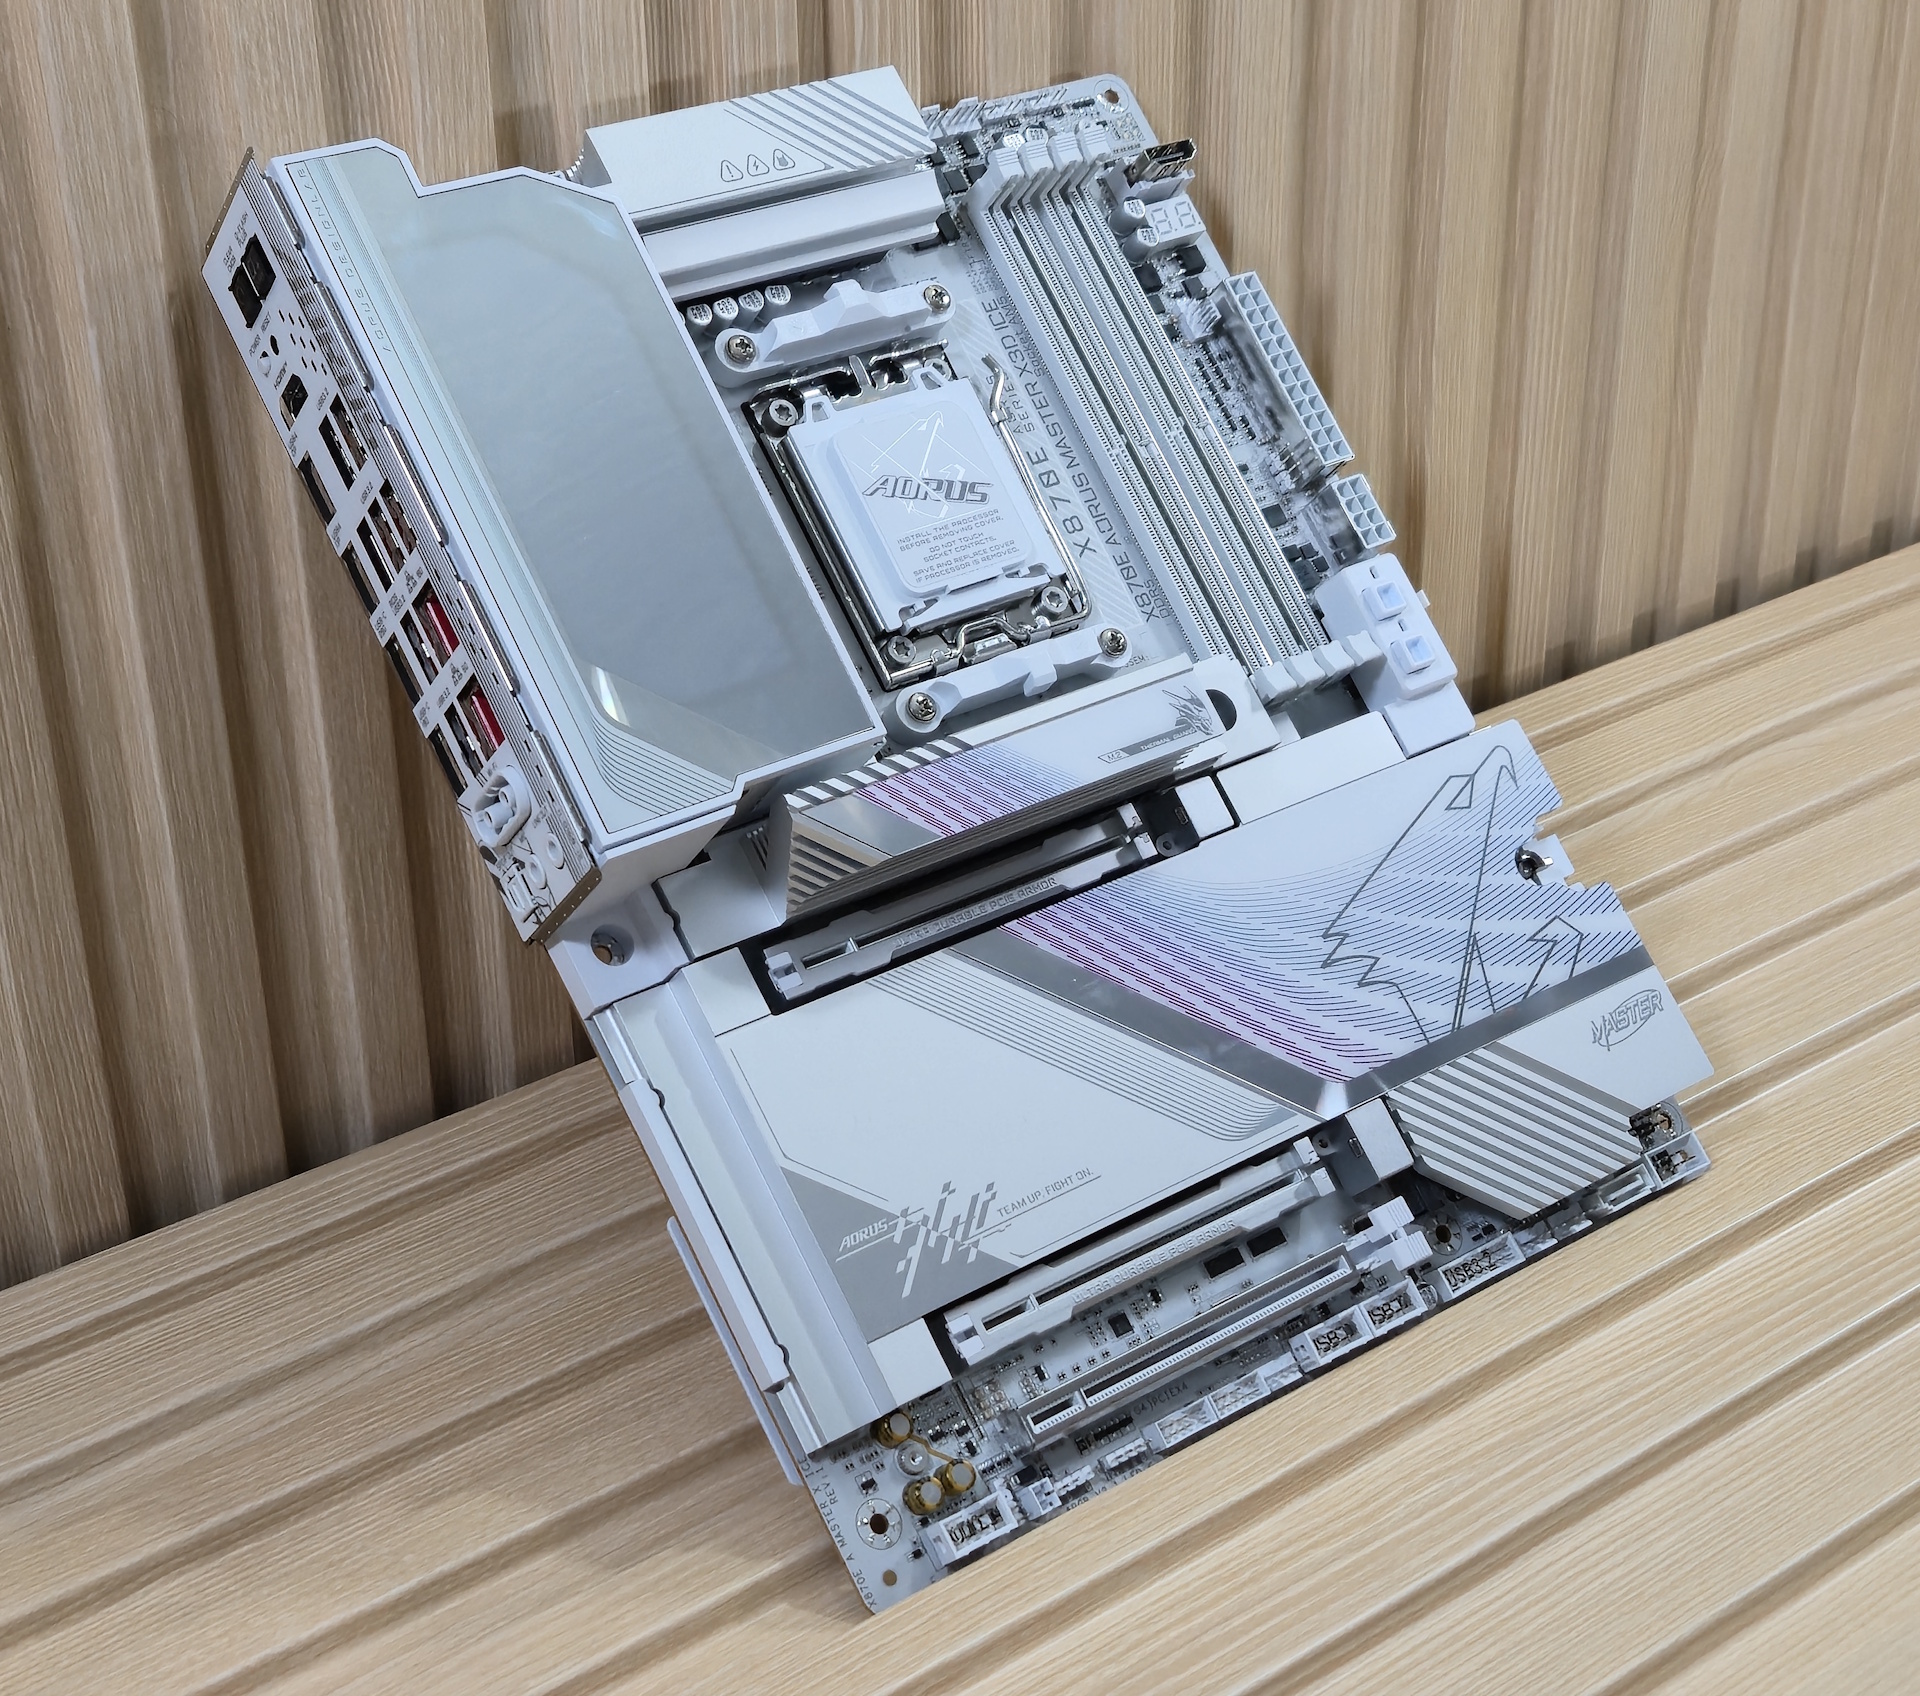
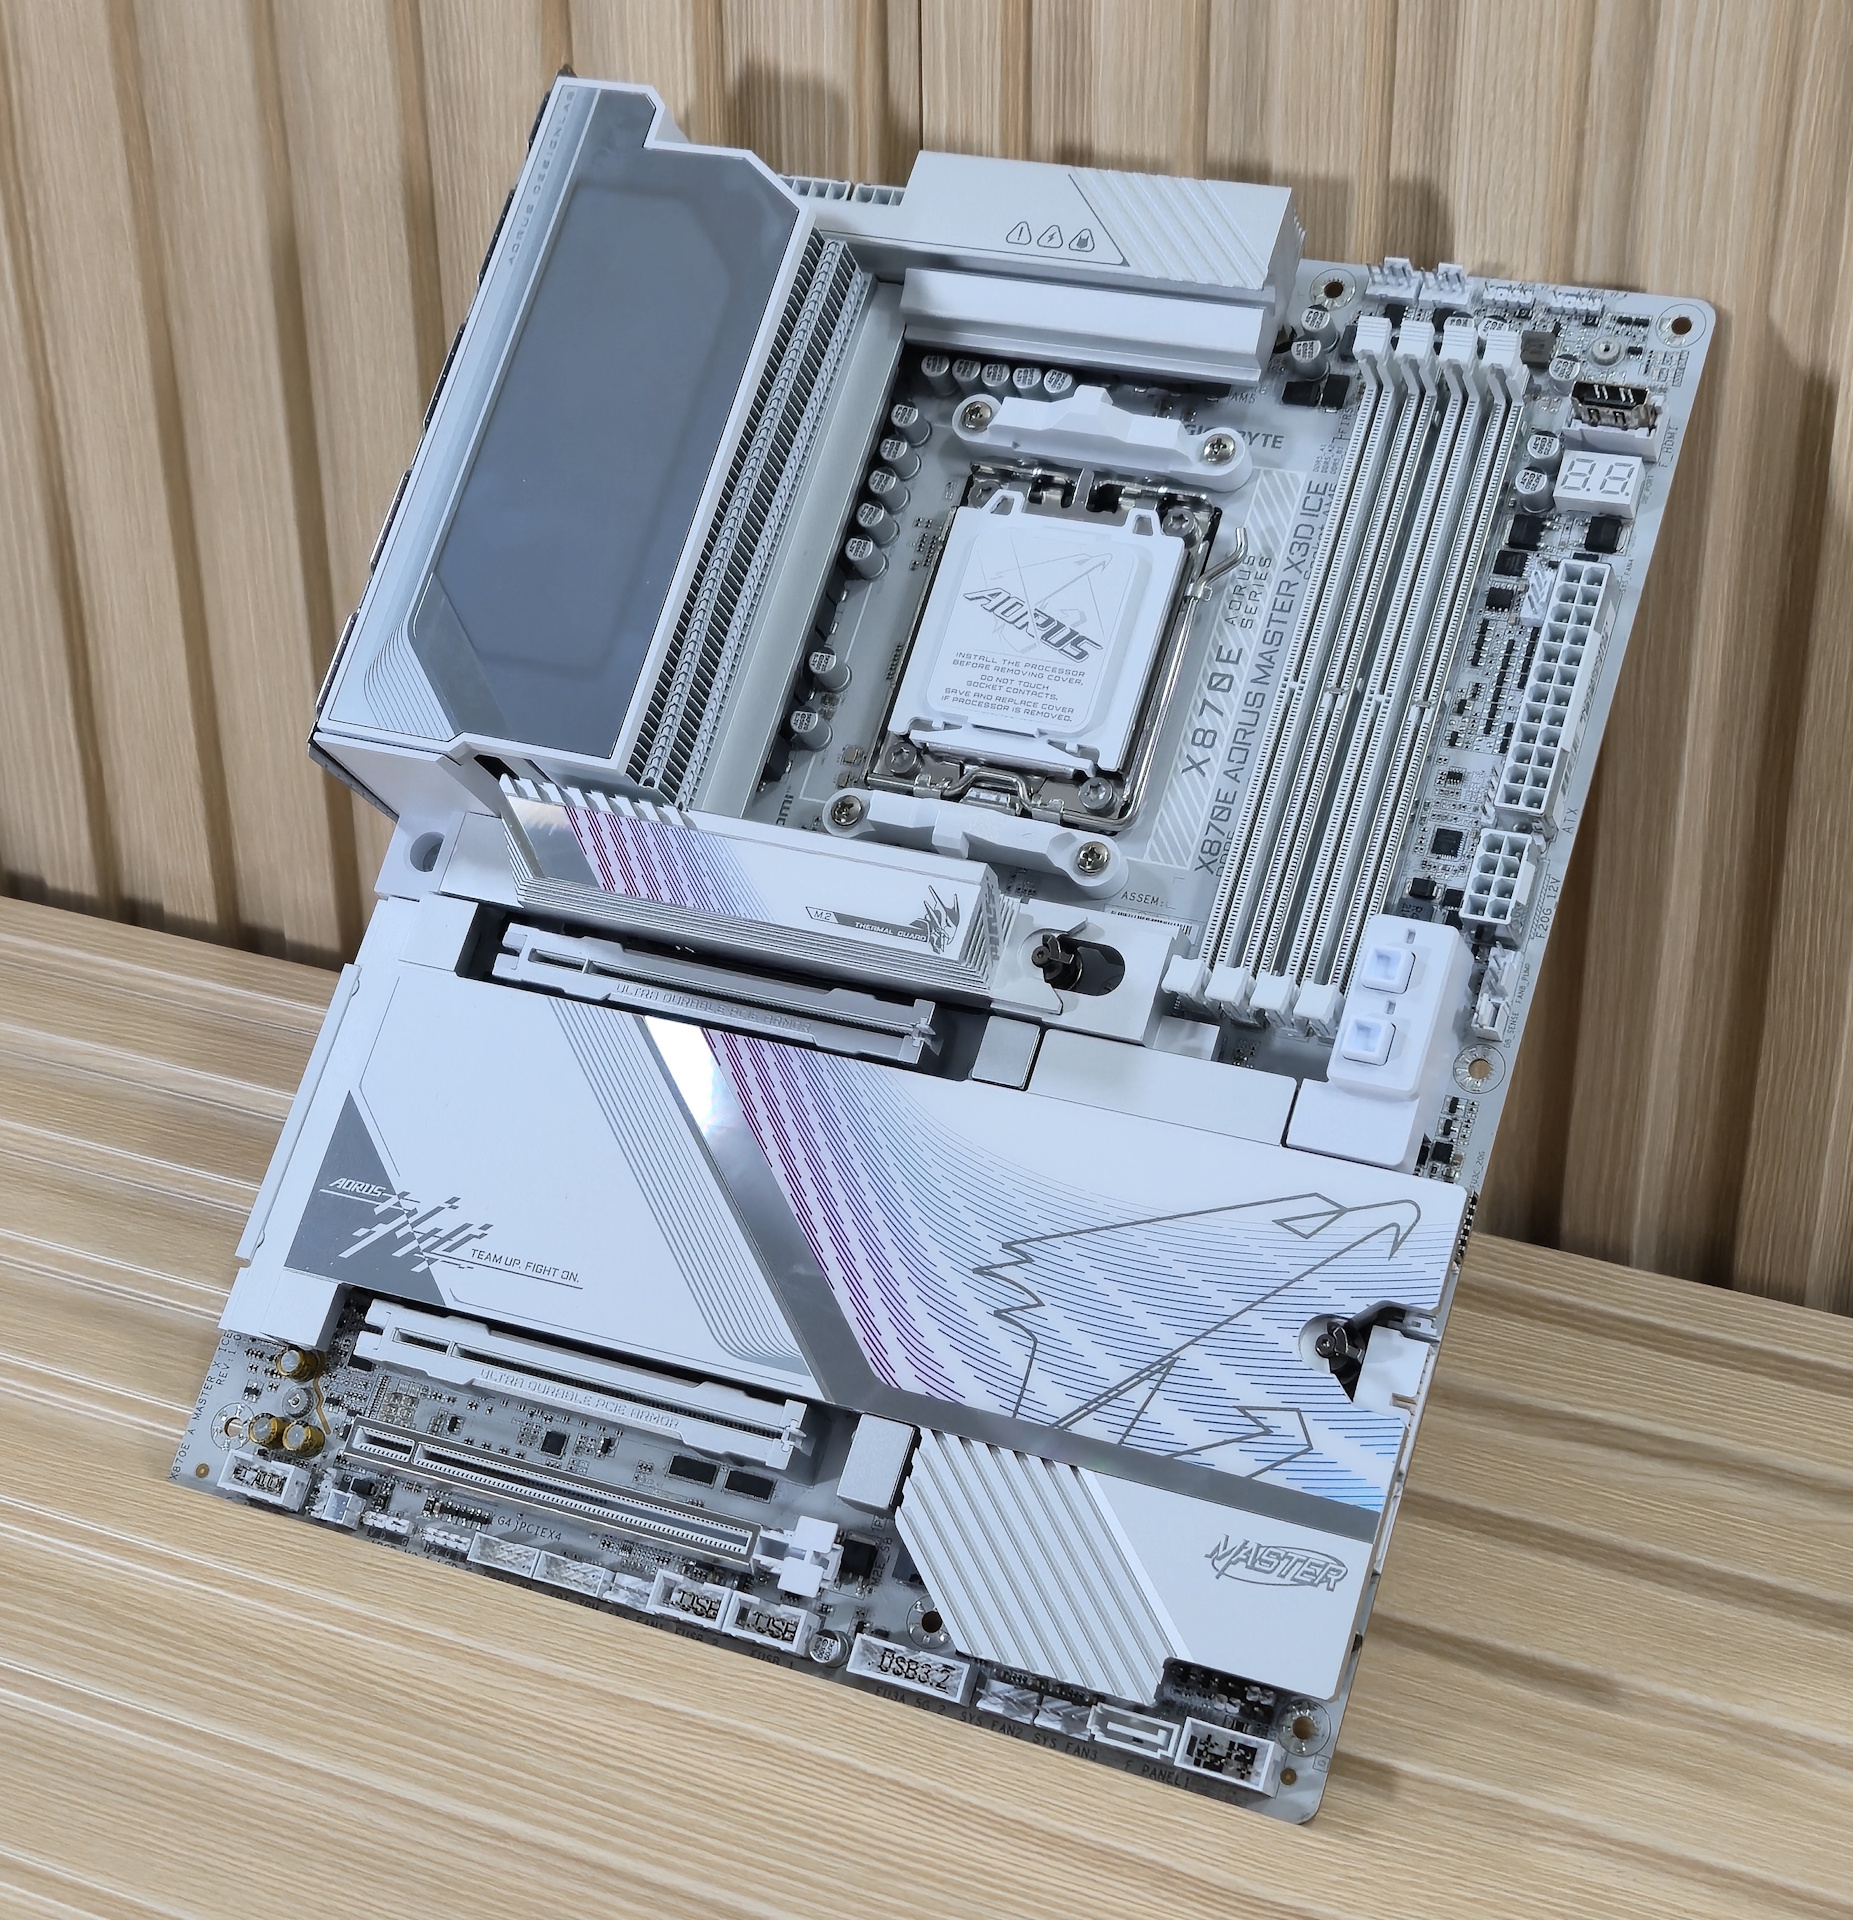
The X3D Ice features a white, 8-layer server-grade PCB with oversized heatsinks to cool the VRMs below. Thermal transfer is achieved through a direct-touch heatpipe connecting both heatsink arrays and high-efficiency thermal pads. On top of the left heatsink, an RGB feature displays Aorus branding against a reflective background. A large, independent heatsink for the top M.2 socket shares the same design as the VRM heatsink, which is also present on the large plate-style heatsink covering the other M.2 sockets and chipset (and hides a RGB lighting strip underneath). On the right side, more Aorus branding is visible, this time featuring the falcon. Overall, the appearance matches the price, and the icy white finish is sure to look good inside a white chassis.
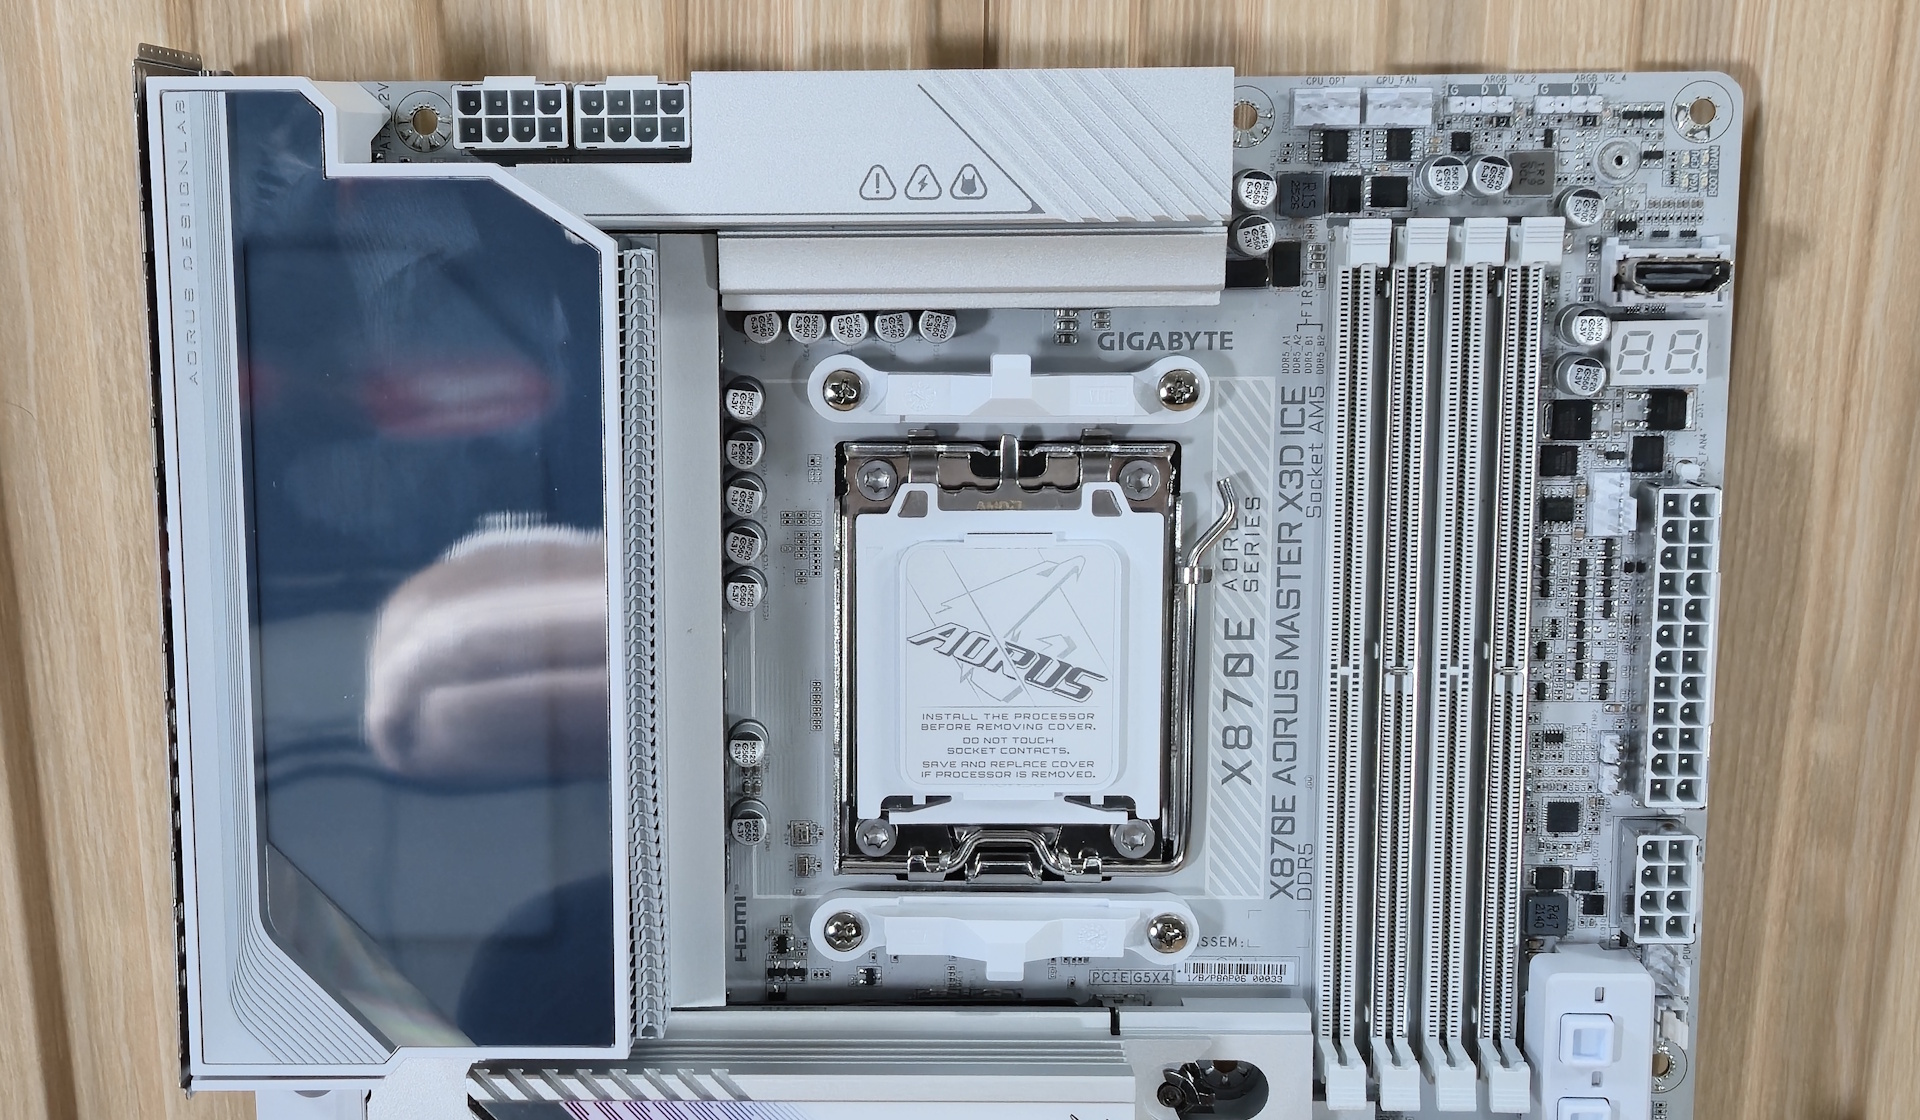
In the upper-left corner, we start with the two 8-pin EPS “UD” power connectors (Ultra Durable - solid pin design) to power the CPU. Around that is the direct contact, heatpipe-connected VRM heatsink, and we get a better look at the Aorus lighting effect on top. The finned design ensures robust power delivery remains within specification and offers ample headroom for overclocking and pushing the limits.
To the right of the socket, we find the four DRAM slots, two of which utilize Gigabyte’s UD reinforcement with locking mechanisms on both sides. The daisy-chained routing allows the board to reach speeds of DDR5-9000, which is 400 MT/s faster than the ‘old’ X870E Aorus Master. To that end, our Klevv DDR5-8000 kit booted, but didn’t pass the stress test (more on that later). I’m not sure many will want to go that fast, as it’s cost-prohibitive and you don’t get a lot out of it over slower speeds and tighter timings, but you do have the option. Capacity remains the same, at up to 256GB.
For anyone pushing the limits or who’d just prefer cooler-running DDR5, Gigabyte includes its DDR Wind Blade fan, which mounts to the motherboard and cools the RAM. It’s typically needed with high-voltage kits or when overclocking, but cooler is generally better.
Above that are the first two (of eight) 4-pin fan headers. Each header supports PWM- and DC-controlled devices through the Gigabyte Control Center (GCC). Output is balanced across all headers, capable of delivering 2A/24W to the attached device. This should provide sufficient power for several fans.
Get Tom's Hardware's best news and in-depth reviews, straight to your inbox.
Next to those are the first two (of four) 3-pin ARGB headers. If the integrated lighting isn’t enough, you can connect compatible RGB strips and jump into the GCC and RGB Fusion app to control the light show. There’s also a 4-pin ‘legacy’ RGB header as well.
Moving down the right edge of the board is the 4-LED POST Status Checker and the 2-character Debug LED. Both serve to identify problems during the POST process, while the latter provides a more unambiguous indication of the problem. An HDMI port sits between them and is designed for connecting sensor panel Displays or small internal LCD screens for system monitoring or just adding some flair to your build.
Continuing down the edge, we find another 4-pin fan header, the 24-pin ATX connector to power the board, a vertical 8-pin PCIe power connector to support power-hungry graphics cards, as well as the front panel USB Type-C ports, QC-USB 65W capability (otherwise it’s 15W). The Smart Fan 6 application in GCC controls all of these headers. Just behind them are two 2-pin temperature sensors (included), allowing you to monitor temperatures in addition to the integrated ones. Next is another 4-pin header (Fan/Pump), and finally, a truly unique feature, two PCIe EZ-Latch Plus Duo buttons to easily secure/eject any graphics cards in the top two PCIe slots.
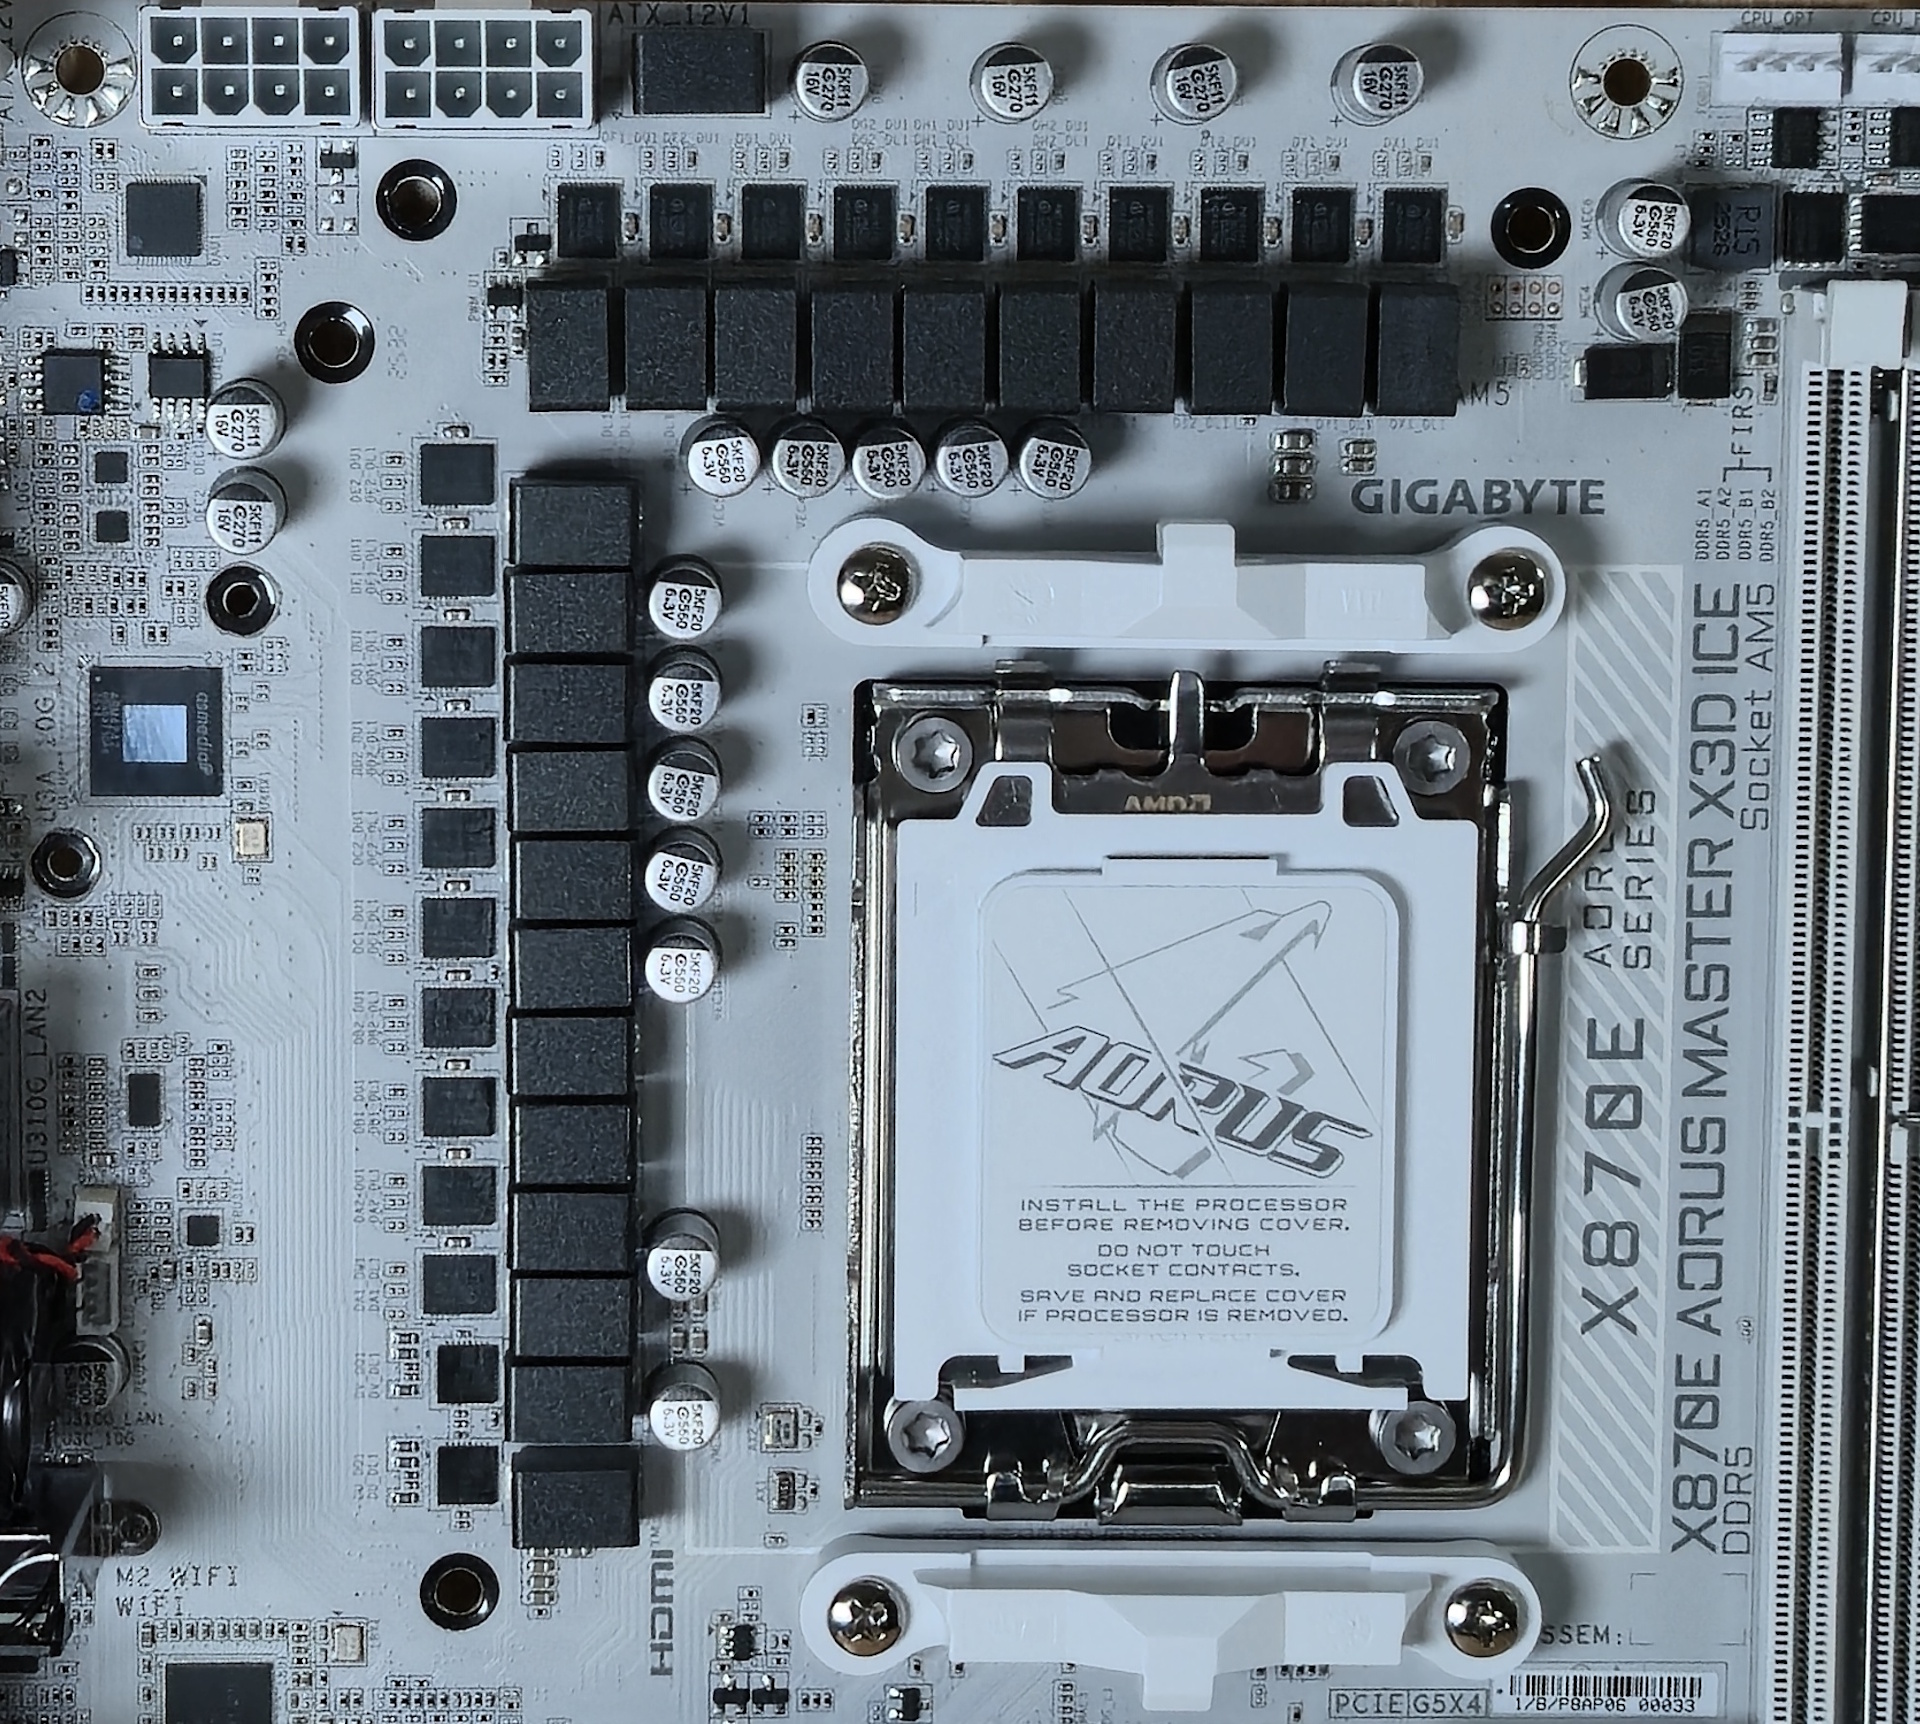
Power delivery on the Aorus Master X3D Ice consists of 22 phases, with 18 dedicated to Vcore. Power heads from the 8-pin EPS connectors to an Infineon XDPE192C30 dual loop 12-phase controller. The next stop is the 18 Infineon PMC41430 110A SPS MOSFETs in a ‘parallel’ configuration. The 1,980A available will handle anything you throw at it, even if you want to go extreme overclocking and use subambient cooling with a Ryzen 9 9950X3D.
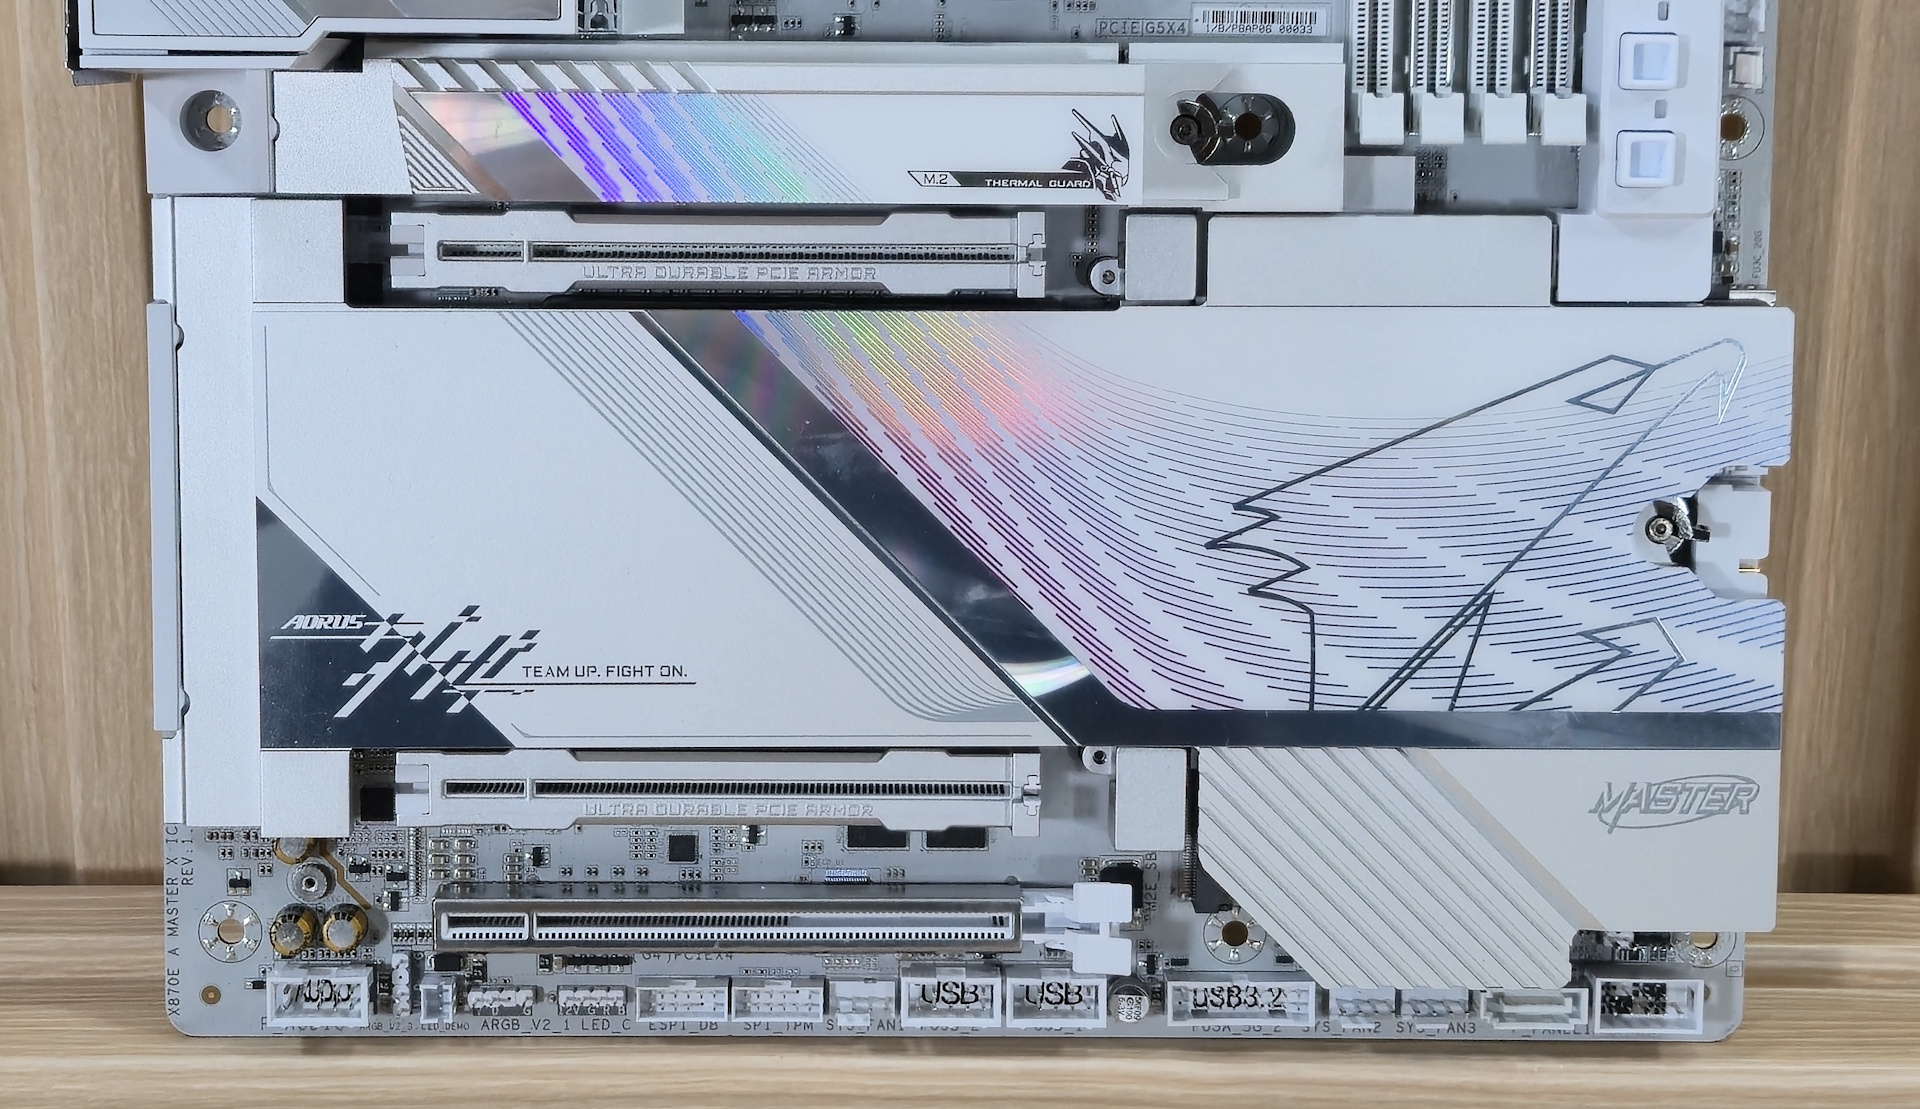
On the bottom of the board, starting on the left, is the audio section. Gigabyte kept the Realtek ALC1220 codec, a last-gen flagship. But for the X3D, the company spiced it up with an ESS ES9118 DAC chip, an improvement from the non-X3D X870E Aorus Master. This solution should be sufficient for most users.
In the middle of the board, we’ll start with the three full-length PCIe slots. The top two slots (reinforced) connect through the CPU and split 16 PCIe 5.0 lanes. The top slot supports PCIe 5.0 x16, and the second slot supports PCIe 5.0 x8. When both slots are used, it’s x8/x8. The bottom slot connects through the chipset and is PCIe 4.0 x4.
Mixed in and around the PCIe slots are five M.2 sockets. M2A_CPU (located at the top under the large individual heatsink) and M2B_CPU (left-most), as the names imply, connect through the CPU and are your PCIe 5.0 x4 (128 Gbps) sockets. M2C/D/E_SB, as their names suggest, connect through the chipset and run up to PCIe 4.0 x4 (64 Gbps). All sockets support devices up to 80mm in size, as well as RAID 0/1/5/10 for even faster speeds or redundancy. M.2 EZ-Latch Click and EZ-Latch Plus are a plus, simplifying installation or removal of the heatsink (Latch Click), and securing the M.2 module (Latch Plus) in place, making for a true tool-free drive design.
To the right, past the dual PROM21 chip chipset, several connectors are located along the right edge of the board. Top down are the front panel USB 3.2 Gen 2x2 Type-C port (PD 3.0/QC 4+ 65W fast charging when connecting supplemental power connector), the 3-in-1 fan header, 19-pin front panel USB 3.2 Gen 1 (5 Gbps), and finally, one of the two SATA ports (which support RAID0/1). The other sits vertically along the bottom edge.
Across the bottom of the board are several exposed headers. You’ll find the usual, including additional USB ports, RGB headers, and more. Below is a complete list from left to right.
- Front panel audio
- (2) 3-pin aRGB header
- 4-pin RGB header
- ESPI_DB header
- TPM header
- (1) System Fan headers
- (2) USB 2.0 headers
- 19-pin USB 3.2 Gen 1 (5 Gbps)
- (2) System fan headers
- SATA port
- Front Panel header
- 2-pin Clear CMOS/Spkr/CI/Reset headers
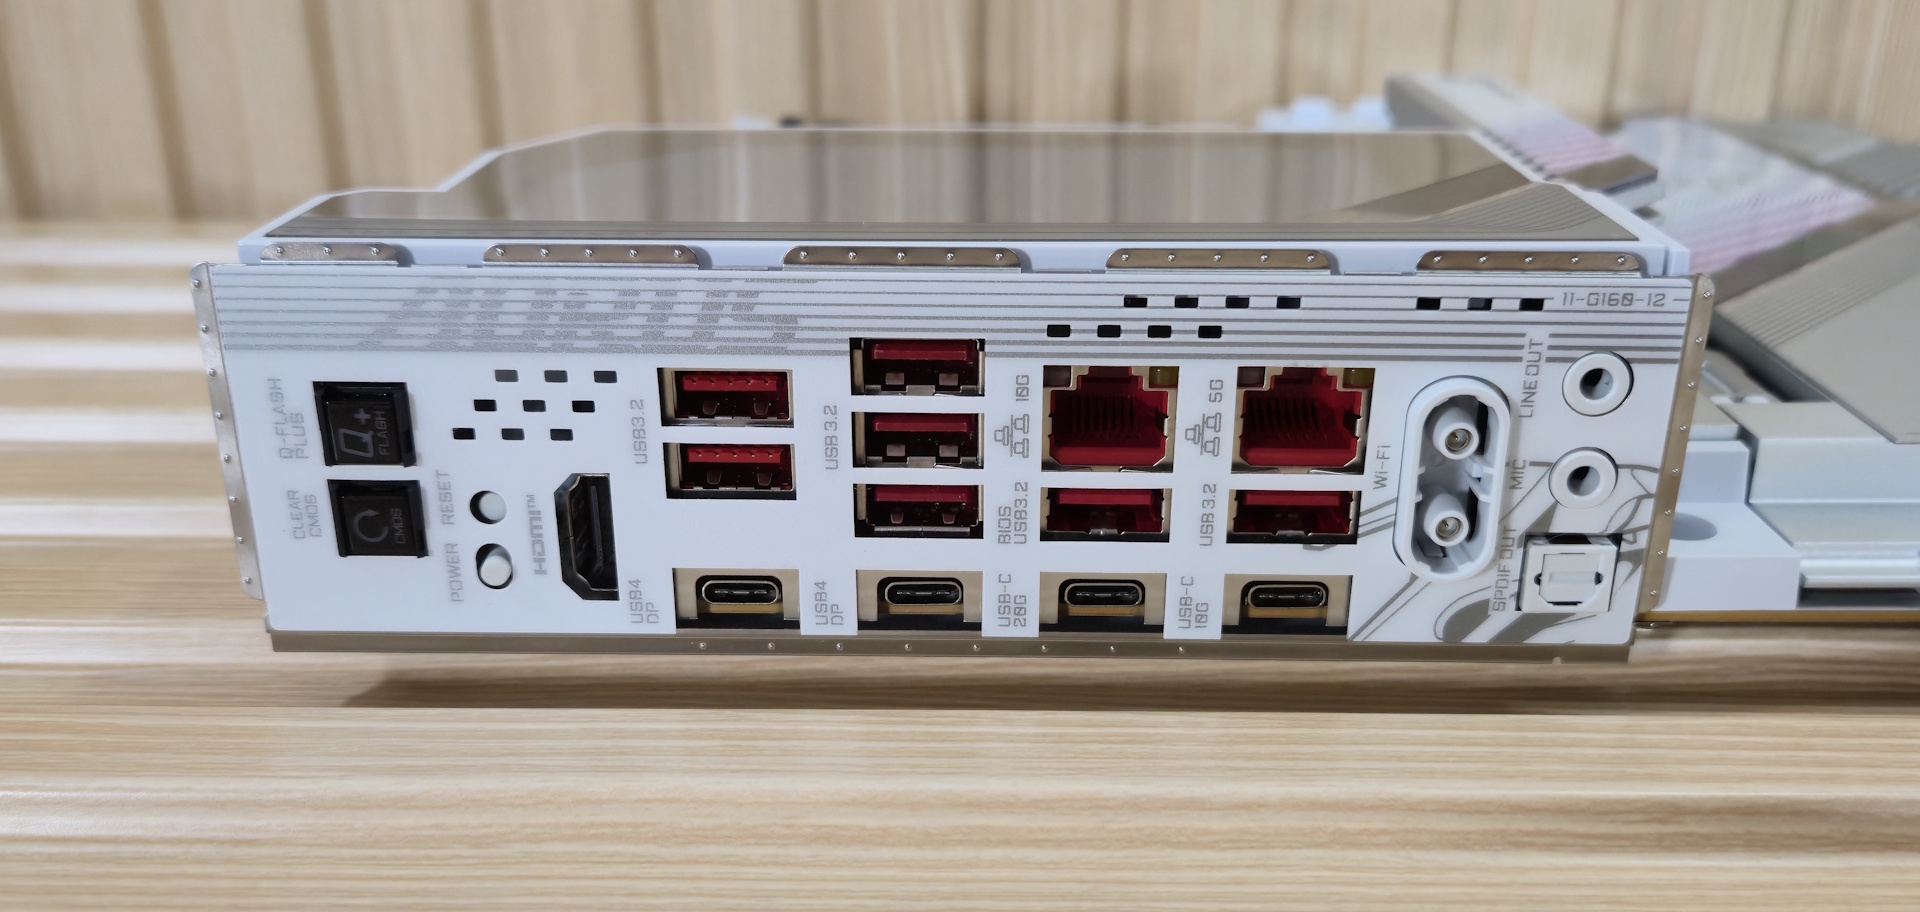
The backplate is equipped with numerous ports, connectors, and features, including ventilation slots to aid VRM cooling. Being an ‘Ice’ board, it has a white background and grey writing/labels on the ports. Starting from the left is the Q-Flash+, followed by the Clear CMOS button (a large, black button), and two small power and reset buttons (white). Next to that is the HDMI output for using integrated video.
There are seven USB 3.2 Gen 2 (10 Gbps) Type-A ports, which may be limiting for users who primarily use Type-A devices and do not have many Type-C devices. Gigabyte utilizes four in total here. Two are USB4 (40 Gbps) and support DisplayPort out as well. The others run USB 3.2 Gen 2x2 (20 Gbps) and Gen 2 (10 Gbps). Although there may not be many Type-A ports, at least they are all 10 Gbps. Finally, on the right is the quick-connect Wi-Fi 7 connector and the 3-plug audio stack (line/mic out, SPDIF).
MORE: Best Motherboards
MORE: How To Choose A Motherboard
MORE: All Motherboard Content

Joe Shields is a staff writer at Tom’s Hardware. He reviews motherboards and PC components.
-
eichwana You mention you don’t see an improvement with the turbo 2.0 feature designed for X3D chips, but then you don’t use an X3D chip? According to your specs you’ve used a 9900X non-X3D. Perhaps there’s only an improvement if you use the board with the chip it’s designed to improve performance for?Reply -
SonoraTechnical Con?Reply
Only '7' USB-A ports along with the '4' USB-C ports on the back plate... You are calling 11 USB ports on the back plate alone a Con? Good grief... -
Neilbob Reply
Uhm, there's a 9800X3D in the charts - or was that added after the fact? I only just skimmed through the review.eichwana said:You mention you don’t see an improvement with the turbo 2.0 feature designed for X3D chips, but then you don’t use an X3D chip? According to your specs you’ve used a 9900X non-X3D. Perhaps there’s only an improvement if you use the board with the chip it’s designed to improve performance for?
In any case, as stated, the Turbo 2.0 has basically zero effect. -
das_stig 2 SATA ports is what, PCIe x1 Gen 3.0 lanes, could have been used elsewhere, with all the M2 storage available and how hard to maybe sacrifice the M2/PCIe slot Gen 4 for a second full PCEI 5 x16 slot.Reply -
cdxpat "Gigabyte, like the other board partners, is updating its AMD motherboard stack."Reply
Just put my purchase of a crossgrade from Z790+14900K to ASUS X870E + 9950X3D on hold based on this statement! Also my local retail outlets do seem to be mysteriously out of stock of high end X870E boards.
When can we expect to see the other vendors updated/refreshed X870E motherboards? -
JayGau Reply
It's clearly mentioned in the review that they used a 9800x3d for their x3d boost tests:eichwana said:You mention you don’t see an improvement with the turbo 2.0 feature designed for X3D chips, but then you don’t use an X3D chip? According to your specs you’ve used a 9900X non-X3D. Perhaps there’s only an improvement if you use the board with the chip it’s designed to improve performance for?
"Please note that in these tests, we have three highlighted results. The first is this board, and the second is our X3D Turbo testing with a Ryzen 7 9800X3D."
