Early Verdict
An expensive board that compromises itself by trying to offer too much.
Pros
- +
Excellent memory bandwidth
- +
Lots of PCIe-based storage connections
- +
Thunderbolt 3 with PowerDelivery
- +
Dual LAN and fast AC Wi-Fi
- +
Three PWM fan headers
- +
RGB lighting
Cons
- -
GPUs and PCIe storage compete for bandwidth
- -
PCIe storage connections slower than competition
- -
No debug display
- -
No voltage checks
- -
No bench control or BIOS clear buttons
Why you can trust Tom's Hardware
Features & Specifications
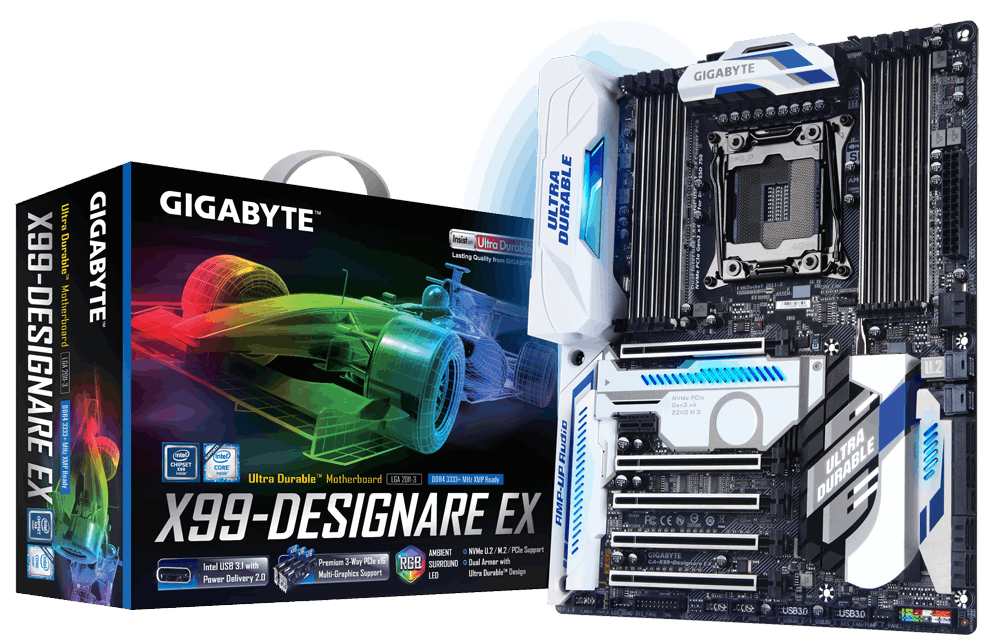
The Designare is a curious board. On the one hand, it’s loaded with many high-speed storage connections, multiple network controllers, lots of full-length PCIe slots, and generally things desirable in a server or professional workstation board. On the other hand, a meaty power regulator for CPU overclocking, RGB lighting effects, and 3-way 3.0 x16 GPU support suggests it would be a PC gamer’s dream board instead. Now it’s no secret that a high-end gaming rig can usually double as a good professional workstation, and vice versa, but we wonder if the Designare is stretching itself too thin by trying to speak to everyone.
Specifications
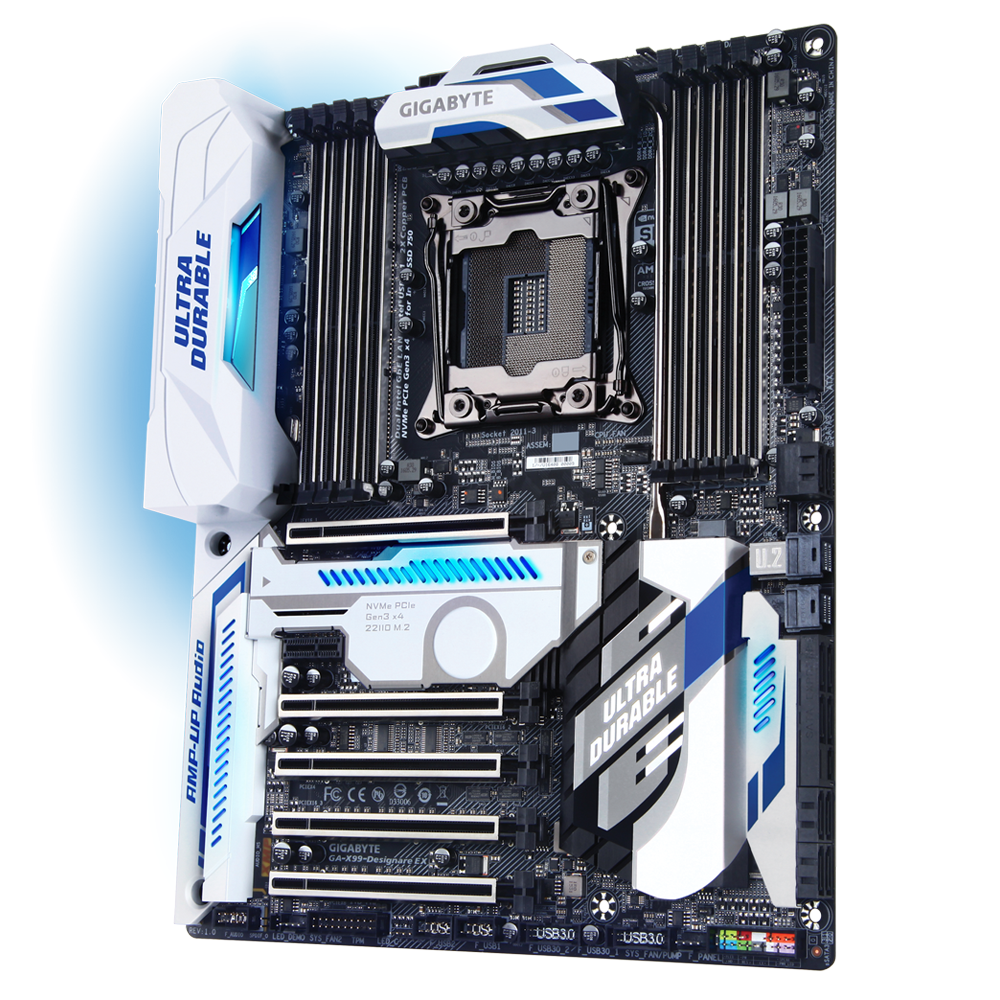
The Designare is a full ATX motherboard. Because it’s not under Gigabyte’s Ultra Durable banner, the PCB is a hair thinner than the company's X99P-SLI at 1.6mm thick. It’s still plenty strong to hold large CPU coolers, and the plastic bracket and I/O shield give it extra rigidity. The headline act for the Designare is a PLX PEX chip that allows advanced PCIe lane switching and is what fuels the x16/x16/x16 GPU support. We’ll cover this more in detail below.
Power Regulation
The Designare uses an improved power regulation design over the X99P-SLI by using eight phases instead of just six. It doesn’t have the extra power control pins, but it really doesn’t need them. Also, like the X99P-SLI, the Designare has a 5mm heat pipe that connects the voltage regulator heatsink to the one over the chipset, increasing heat dissipation even under heavy overclocking and power draw.
Fan and Environment Controls
The fan headers are nicely laid out for the most part. Four of the headers are close to the corners, convenient for just about any fan and radiator configuration. The prime CPU header is just below the CPU socket, like the X99P-SLI, making it somewhat troublesome to plug in the fan on large air coolers after mounting them. Fan controls are better on the Designare than on the X99P-SLI in that you now get three PWM headers (main CPU, CPU/pump optional, and system fan 3). Fan configuration still uses the same UEFI control as the X99P-SLI, which is a hassle.
Storage
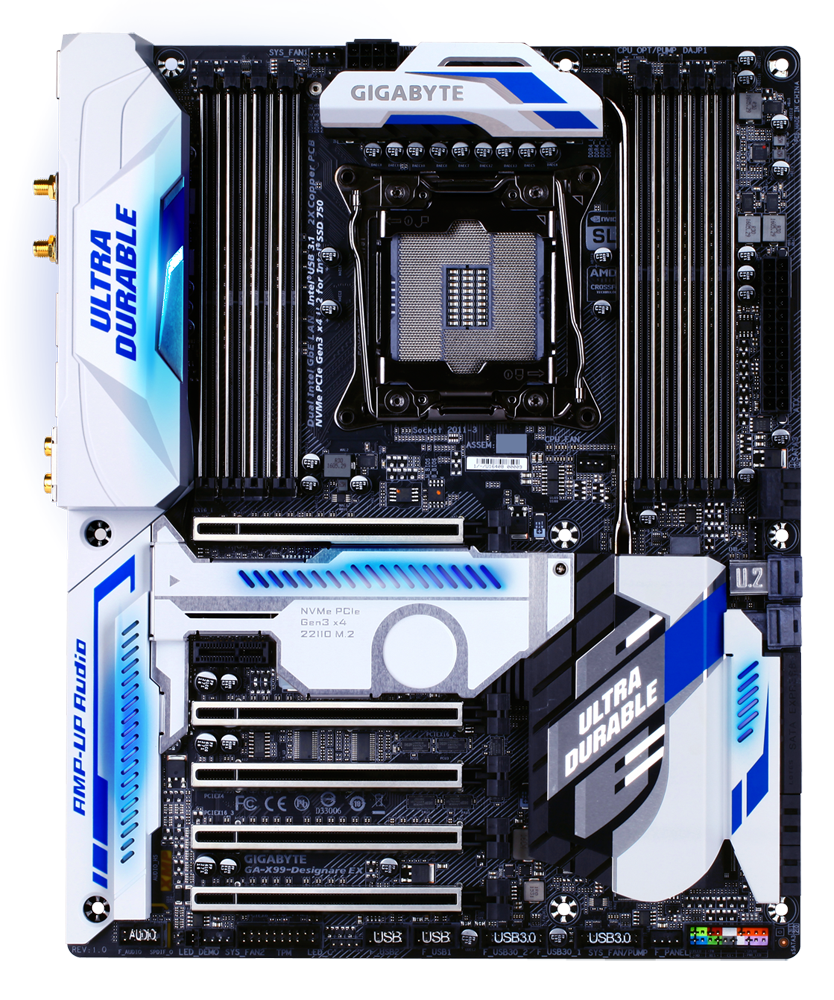
The Designare offers a bevy of storage options. The usual 10 SATA ports through the X99 chipset are present, all along the front edge, including two ports synced together for SATA Express. In between the SATA ports are two U.2 jacks offering PCIe storage for 2.5" drives. Finally, just below the top PCIe slot, and under the aluminum thermal shield is an M.2 slot that can accept up to 110mm modules. Storage enthusiasts will be happy to know both U.2 jacks and the M.2 slot can all operate at PCIe 3.0 x4 bandwidth with a 40-lane CPU. The lower U.2 jack is completely disabled when using a 28-lane CPU. However, storage and expansion card slots are in a fierce tug-of-war for PCIe lanes, as we explain below.
PCIe and Expansion Configuration
Because of the PEX 8747 chip used, the PCIe configuration on the Designare is complex and confusing at first glance. The manual doesn't give full details either. The PEX chip acts as a PCIe switch or repeater depending on how you want to look at it. It takes PCIe lanes directly from the CPU and outputs 32 lanes that can be redirected on the fly to other devices. This is great for multi-GPU setups where each card is sent the same information, because it means the switch can take 16 lanes off the CPU and "double" them for a x16/x16 split to two other GPU slots. The complication comes into play because most PCIe lanes used for storage come through the PEX chip. Bear with us.
The card slots are wired as follows: The first, second, and fourth full-length slots are all wired for 16 lanes. Let's call these GPU 1, 2, and 3 for easier reference. The very bottom slot is full-length, but only wired for x8; we'll call this GPU 4. The third full slot is only wired for 2.0 x4, because it comes off the chipset, not the CPU. The single x1 slot is, of course, on the chipset as well. Now for lane resource assignments.
Get Tom's Hardware's best news and in-depth reviews, straight to your inbox.
On a 40-lane CPU, 16 lanes go to the primary card slot, 16 lanes go to the PEX chip, four go to the Alpine Ridge Thunderbolt controller, and the remaining four go to the bottom U.2 port. A 28-lane CPU sends the same 16 lanes to the primary card slot, but sends only eight to the PEX and disables the U.2 port, saving the last four lanes for the Thunderbolt controller. That's not so bad yet. But now it's time to talk about lane splitting on, and after, the CPU.
When populated, GPU 4 takes its lanes from the primary slot up top, resulting in a x8/x8 split. The top U.2 port shares lanes with the GPU 2 slot, and the M.2 shares with the GPU 3 slot. So let's explain what all this means in real-world scenarios.
Without any PCIe storage in use, the Designare will happily support 3-way SLI and Crossfire in x16/x16/x16 for both 40- and 28-lane CPUs. Both cases leave the Thunderbolt fully intact. Both the M.2 and U.2 interfaces coming off the PEX will still see 3.0 x4 lanes regardless of CPU. They would each borrow eight lanes from their respective card slot to run at full speed while their paired card would run at x8. Even if both are in use simultaneously, that would still be an adequate x16/x8/x8 split, again regardless of CPU.
But just because a device sees 16 lanes doesn't mean it gets x16 bandwidth. The PEX chip is not an automagic device that can conjure bandwidth from nothing. Yes, it outputs 32 PCIe lanes, but the output can only be fueled by the CPU input. The PEX does its best to optimize lane traffic by switching data between active and non-active lanes, allowing it to perform as if it had a larger pipe than the CPU, but it can't mystically double effective bandwidth. With switching, you also get extra lag. Think of merging traffic lanes on the freeway, with eight lanes going down to four. If traffic is light, it's fairly easy for the cars to merge down without a problem. In rush hour, not so much.
The Designare sends 16 lanes to the PEX with a 40-lane CPU. Splitting 16 lanes between two x16 GPUs isn't problematic, since most of the data is identical between cards. However, you're not actually getting the x16/x16/x16 bandwidth the devices are reporting. Add storage on either the M.2 or U.2 that go through the PEX and now it's trying to squeeze an additional x4 into the pipe, and something's got to give. Using both means that you're now trying to jam x40 traffic through a x16 pipe.
A 28-lane CPU only sends x8 to the PEX, cutting it in half, but again all downstream devices still think they get full bandwidth. All PCIe storage runs through the PEX in this setup, so using multiple GPUs and storage will handicap bandwidth somewhere. Running both a GPU and a U.2 or M.2 drive with only x8 actual bandwidth is too much. Thunderbolt-attached storage would let the GPUs go through the PEX normally. Or you could use the GPU 4 slot for a x8/x8 split directly off the CPU and then use the PEX bandwidth only for storage. However putting a GPU in the last slot also blocks all the bottom headers, including the only USB 3.0 headers.
On paper, a lot of this looks bad. But how does it work in real-world use? It would only matter if you're pushing your graphics and storage systems to their limits simultaneously. Workstation render farms would likely see some bottlenecks, and because this board seems workstation focused, that's unfortunate. For regular consumers, it's less of an issue. Even when gaming, initialization and level loading work storage hard, but the GPUs don't do much. Once you get into actual gameplay, the storage isn't under much stress, except for occasional streaming. If the PEX is smart enough to allocate the lanes quickly on demand, noticeable bottlenecks should be minimal. However Broadcom, the maker of the PEX chip, is tight-mouthed on the exact details of its capabilities.
USB and Peripheral I/O
The Designare's rear I/O feels sparse compared to other X99 boards, even its own sibling, with only seven USB ports. Interestingly, none of them are 2.0 ports. The red type-A and type-C port are USB 3.1 Gen2 (with the Type-C also acting as the Thunderbolt connector). The Type-C port also supports PowerDelivery 2.0, meaning it can supply up to 36W of power for high draw devices. With the Thunderbolt controller is a DisplayPort-in jack that lets you route your GPU’s display through the Thunderbolt connection.
All other USB ports are 3.0 (aka USB 3.1 Gen1) signaling. The white-colored port is used for the Designare’s Q-Flash Plus feature that lets you flash the board's UEFI without needing CPU or RAM installed. Four USB headers, two 2.0 and two 3.0, are along the very bottom edge of the board as well.
Networking is handled by a pair of Intel Gigabit controllers that allow teaming. Like the ASRock X99 Taichi and Gaming i7 boards, the Designare also utilizes an Intel combo card for Wi-Fi and Bluetooth. Gigabyte uses the far superior 8260 card compared to the 3160 in the ASRock models. Whereas the 3160 has only a 1x1 antenna and Bluetooth 4.0, the 8260 supports Bluetooth 4.2 and uses a 2x2 antenna for better signal stability and twice the maximum bandwidth (867 Mb/s instead of 433 Mb/s).
Audio is provided by Realtek’s 1150 codec, but the Designare does not support DTS-Connect. Audio connectors on the back consist of the usual five 3.5mm multichannel jacks and one fiber optic S/PDIF connector.
Miscellaneous Headers and Connections
Nearly all the extra headers and connectors are along the bottom of the board. From left to right: HD audio, S/PDIF out, fan, TPM, RGB LED connector, two USB 2.0 headers, two USB 3.0 headers, another fan, and the front panel controls. Along the front edge, just above the U.2 jacks is a Thunderbolt connector for Gigabyte’s available add-in card. As usual for Gigabyte, most of the headers are clearly labeled and color-coded.
Package Contents
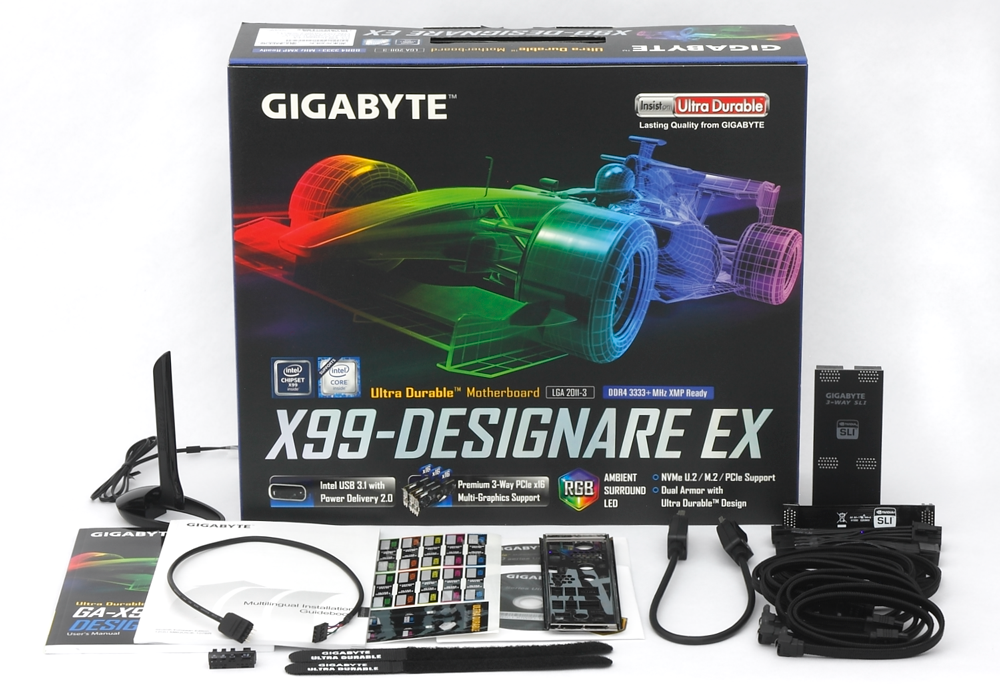
The Designare comes with an impressive collection of pack-in items. Along with the expected manual, installation quick guide, and driver discs, you get a padded and insulated rear I/O shield, six SATA cables with braided sleeves (three with angled connectors), two Velcro cable straps, a sheet of label stickers, and front panel connector bridge. The Wi-Fi uses Gigabyte’s excellent external antenna with magnetic base.
Gigabyte also includes a 3-to-1 power cable for the CPU. It takes three 8-pin or 4+4-pin EPS lead cables and coalesces them all into a single 8-pin connector for the CPU power jack at the top of the board. Gigabyte recommends using this when CPU overclocking to make sure the CPU gets sufficient power, but we had no such need with the 6950X.
For GPUs and displays, you get a flexible 2-way SLI bridge and rigid 3-way bridge. Like the X99P-SLI, there’s a short DisplayPort-to-DisplayPort patch cable for routing your GPU display to the Thunderbolt port. Unfortunately, while the cheaper X99P-SLI gets a second DP-to-mini-DP cable, the Designare does not.
MORE: Best Motherboards
MORE: How To Choose A Motherboard
MORE: All Motherboard Content


