How to Fix Your Motherboard for $15
Equip Your Motherboard With New Capacitors
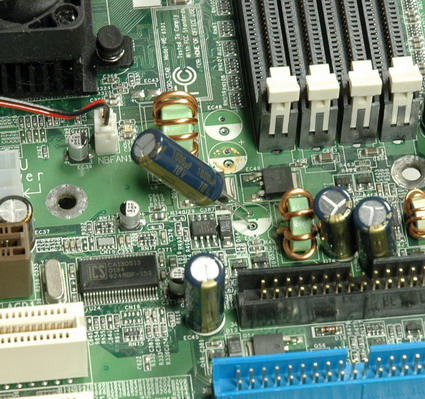
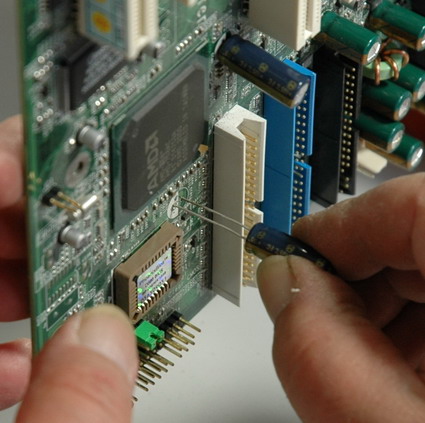
We have de-soldered all flawed capacitors from the motherboard and can now install our replacements. Watch the capacitors' polarity. If you confuse plus with minus, the capacitor will explode and you will have put in a lot of hard work for nothing. New capacitors come with a longer-legged plus pole. To make sure you get things right, take a close look at the capacitor. It is clearly labeled, e.g. with numerous "minus" symbols and an arrow pointing at the associated leg. Both poles are also clearly tagged on your motherboard.
Watch the polarity when replacing the capacitors on a motherboard.
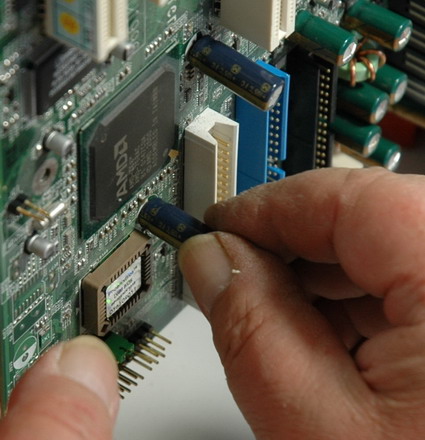
Moving the capacitor all the way down
Slightly bend anode and cathode (legs) to the side, so the capacitors won't fall out after placing them on the motherboard.
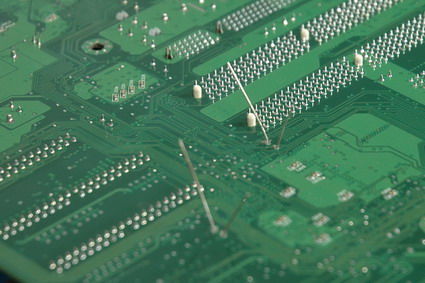
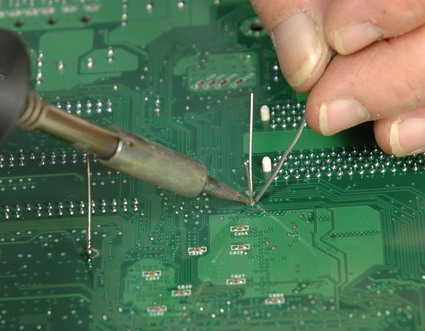
Soldering the capacitors...
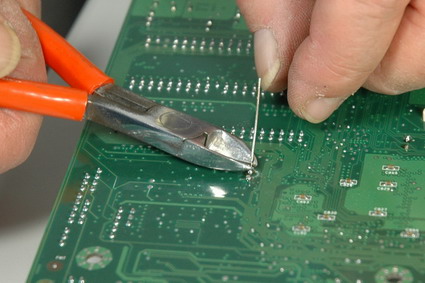
...and pruning left-over material.
Done! Ideally, at this point the motherboard should be ready for operation.
Get Tom's Hardware's best news and in-depth reviews, straight to your inbox.
Current page: Equip Your Motherboard With New Capacitors
Prev Page No Pain, No Gain...? Next Page Conclusion-
Darkness Master Recognizing of broken capacitors is not so simple in some cases.Reply
Sometimes (very often in my case) have capacitor its nominal capacity but it has high serial current. When you connect DC voltage of capacitor nominal value and capacitor have some serial current throught it, then it is broken. Only charging current is allowed (short current peak on connect).
Sorry for my english. -
4655434b20594f55 Good article. I have personally made this repair sucessfully many times using only a basic hand held solding iron and hand held desolder pump.Reply
Like you say the motherboard sinks away the heat fast. You need an iron with between 70 and 100 watts and a large flat tip. If it spans both solder points of the cap its really easy :)
Just heat and gently pull the cap out from the other side of the board. Then clear the holes with the heated pin method or use a desolder pump. If you heat the hole on one side and use the pump on the other side it should clear easily.
Only other thing to note is. Be QUICK, practice on some junk board first, you dont want to burn a big hole in your board or lift of the tracks.
Im sure most people don't have a professional solder/desolder station. These cost at least $160 usually more. -
4655434b20594f55 Another trick. Assuming the old caps are dead and of no further use. Pull them off thier leads.Reply
If you pull a electrolytic capacitor hard the leads will pull straight out of the body of the cap.
Leaving just the leads sticking up. Its now much easier to remove becuase you can desolder the leads and remove them one at a time. -
Just trim the leads sticking out of the bottom of the board then heat one at a time while applying slight pressure to the capacitor towards the other lead. They pop right out. I use thecapking for capacitors online, fast free shipping.Reply
-
I use the Weller WLC100. It's consumer DIY soldering station, but more than meets the needs for motherboard soldering. Runs about $50. I've done 50+ boards easily with this station, but I use a precision tip instead of the big tip it comes with (usually run about $10). I also recommend Mouser or Digikey for capacitors, though beginners may find these sites overwhelming. TheCapking is a good place to find capacitor kits for common motherboards with faulty capacitors, and the site has diagrams in case you get confused where the capacitors need to go.Reply
-
runf I Turned on a computer that had been working. A short "pop", a fairly intense burning odor, and later I found a capacitor (I presume) on the bottom of my computer case:Reply
Here is a pic of the Asus P5-K. The green arrow points to where the capacitor used to sit.
http://jazzdrummer.com/capacitor2.jpg
First of all I'd like to know if it is indeed a capacitor and if not, what it is. Whatever it is, can I get another, solder it in and have any hope of fixing this board? I'm really clueless, if you can't tell. Any help would be greatly appreciated. This could be an opportunity for me to learn something. -
gabs110 I have a MSI mobo which I repaired some months back...replaced 2 caps. Lately, the same symptoms re-occured..pc starts up, fans run, lights light up but nothing else..no sound, no bios, no display. I replaced the same caps again thinking it might be malfunctioning but still nothing and no signs of any other failure. Any advice? My pc is a Acer Veriton M464 duo core.Reply -
Greg Hopkins Once you pull a mother board for any bad caps, you should replace them all. The caps are cheap compared to the down time and frustration. Some caps can fail with no obvious signs from the outside. My advise would be to change all the old caps with new low ESR Caps.Reply
