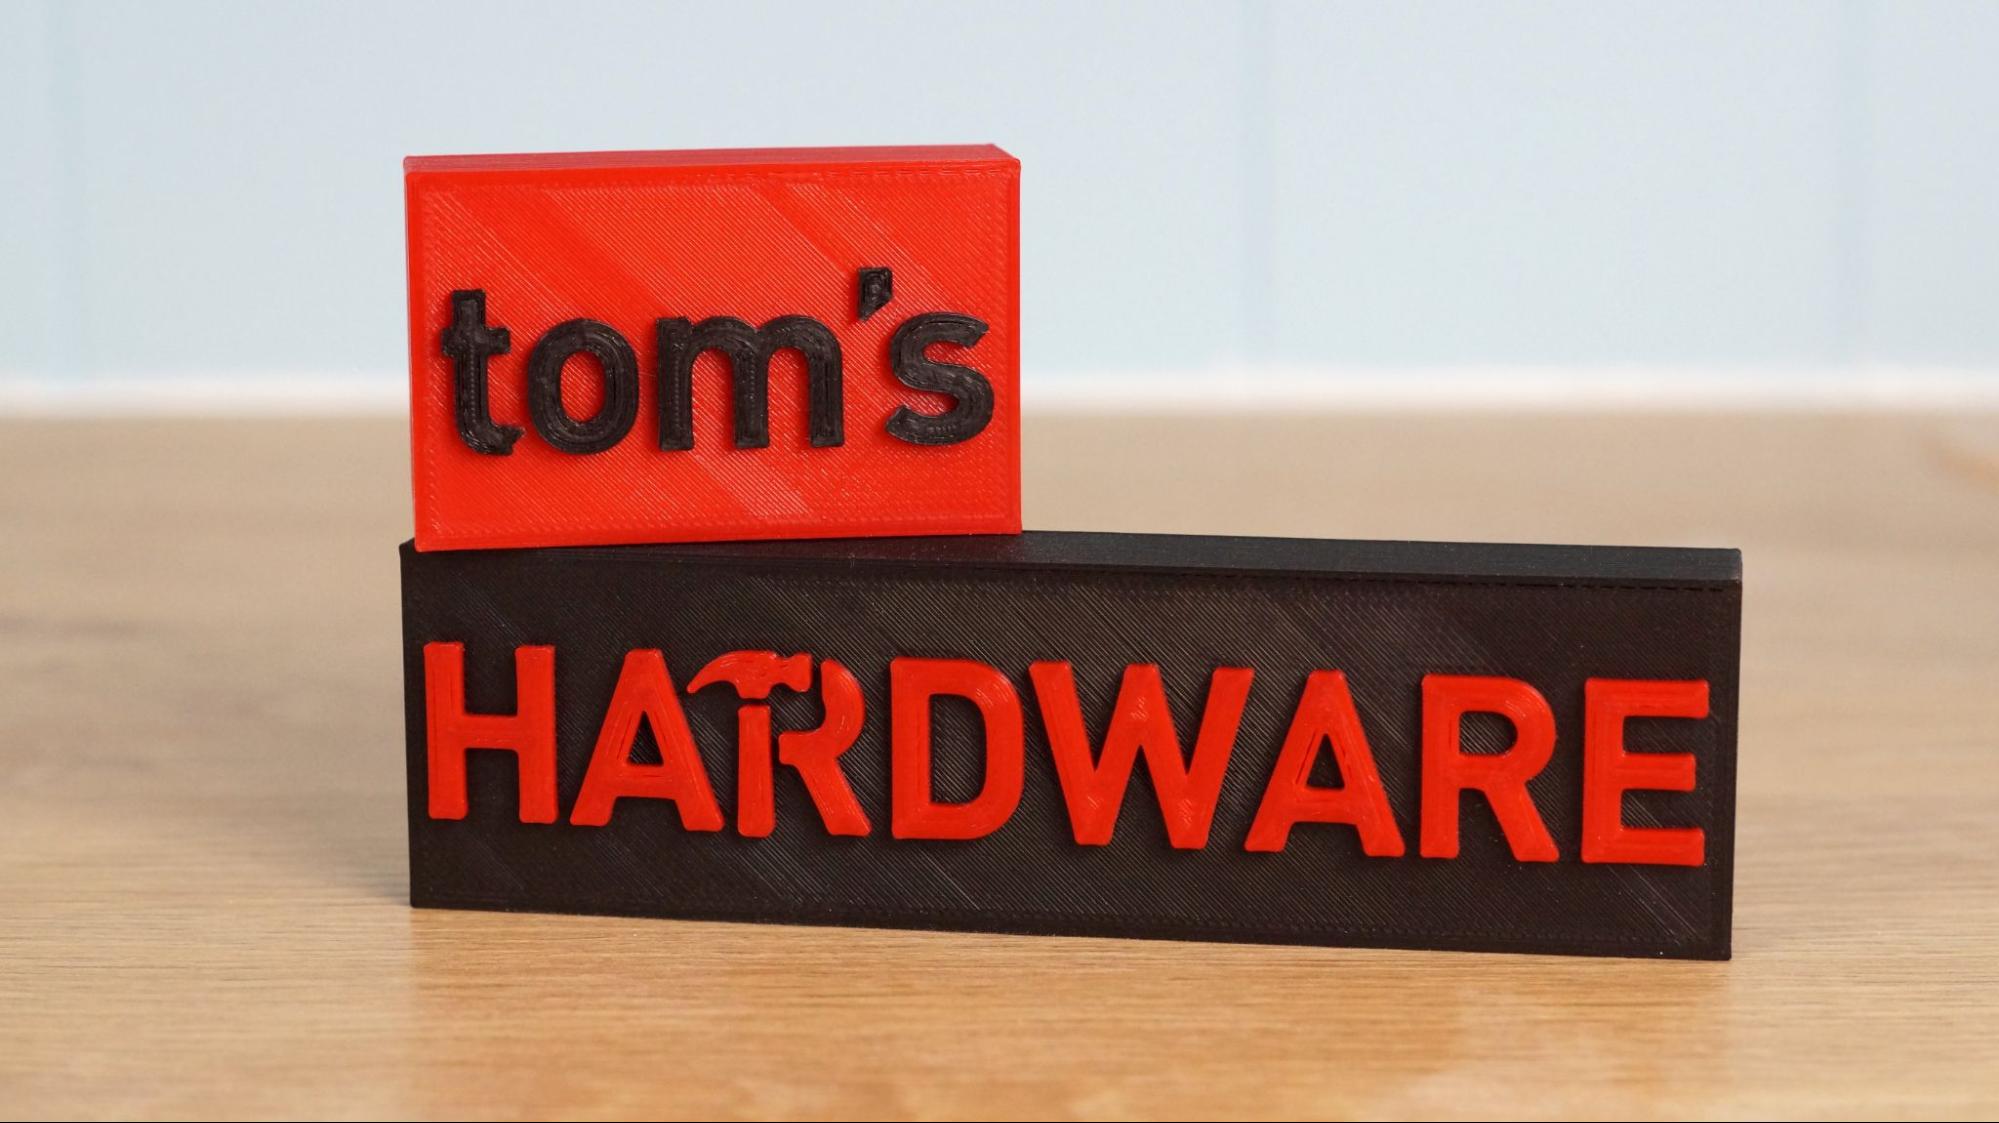
How to 3D Print Your 2D Logo
Make a logo file into a printable STL. You can even use multiple colors.
Get Tom's Hardware's best news and in-depth reviews, straight to your inbox.
You are now subscribed
Your newsletter sign-up was successful
Converting an image into a file your 3D printer understands is simple. Here’s how to do it using free software.
Would you like to display your logo on a desk or shelf? If you have a 3D printer, you’re no longer limited to flat paper – you can make it pop in 3D. A 3D printed logo makes a great photo prop for an Esty shop, a craft fair table display, or even a subtle bit of branding in the background of a video.
Simple line drawings are the easiest to use, but anything that can be converted into a bold black and white image will work.
Article continues belowPrusa Slicer can’t open image files while Cura will attempt to turn them into a lithophane style print. For the best results, you need to convert your logo from a PNG, GIF or JPG into an SVG file first, then run it through CAD software like Tinkercad. Then you’ll tweak it a little so it will hold together after printing and convert it to an STL file for slicing.
For this tutorial I’ll show you how I turned the two-color Tom’s Hardware logo into 3D printed boxes. However, you can use this technique for any logo you want.
What You’ll Need
- Image File of your logo (JPG or PNG)
- Tinkercad account (free)
- Internet access
Convert Your Files
1. Select an image file of your logo, preferably a JPG or PNG. I’m using the Tom’s Hardware logo as a primary example.

2. Navigate to Convertio.co’s image converter tool. Convertio.co is a popular file converting website. It can turn just about any file type into any other file type. You’re allowed to convert 10 files a day for free.
Get Tom's Hardware's best news and in-depth reviews, straight to your inbox.
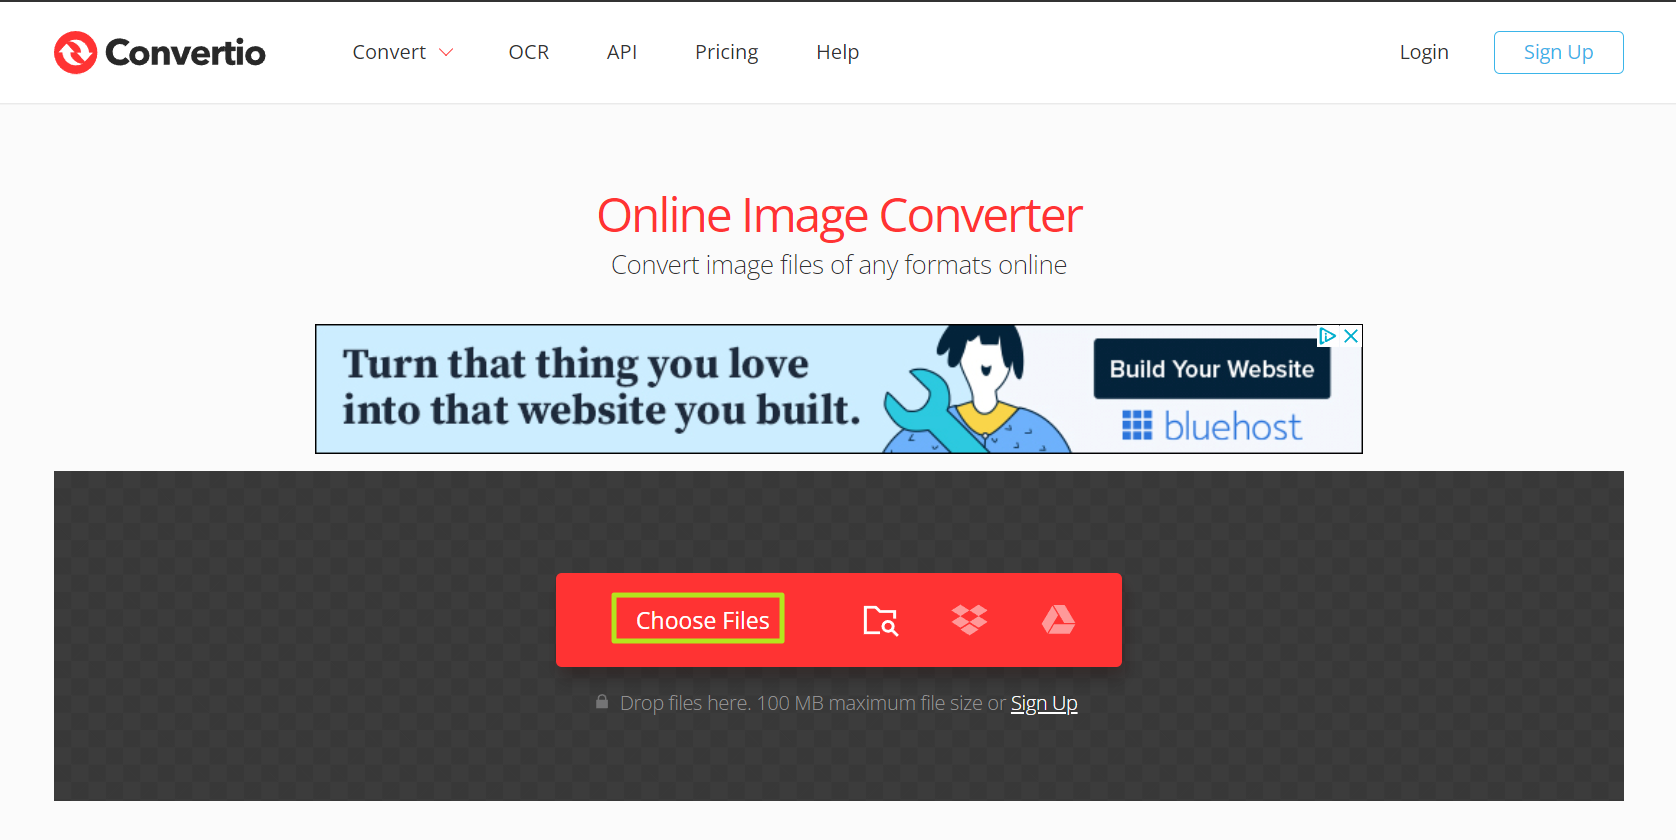
3. Click the red “Choose Files” button and select your file.
4. Select SVG as the output file format.

5. Click Convert.

6. Click the Download button.

Convert to an SVG in Tinkercad
Now that you have an SVG file you’ll need to convert it into an STL file. Tinkercad was developed to introduce students to modeling software, so this is not only a free option but an easy program for beginners.
Tinkercad is also cloud based so you won’t need to download anything. You only need to sign up for a free account.
You can get creative with this part of the tutorial, but for now let’s stick to placing our logo in a simple box.
For the next step we’re going to assume you know the basics of Tinkercad. If you’ve never used Tinkercad, Matterhackers has a great 10 minute introduction to this simple modeling software.
1. Open a new design in Tinkercad, then import your SVG file. If you’re told the image is too big, reduce the largest dimension to 100mm, which fits comfortably in the 200x200mm default workplane.
2. Examine your logo. It most likely converted into several loose parts that you’ll need to tie together with a box or baseplate Remember, if you don’t put your logo on a base you’ll end up with alphabet soup.

3. Drag a basic box from the Shape Menu on the right. Use the handles to make the box larger than your logo, but not as tall. Don’t worry about the size just yet.
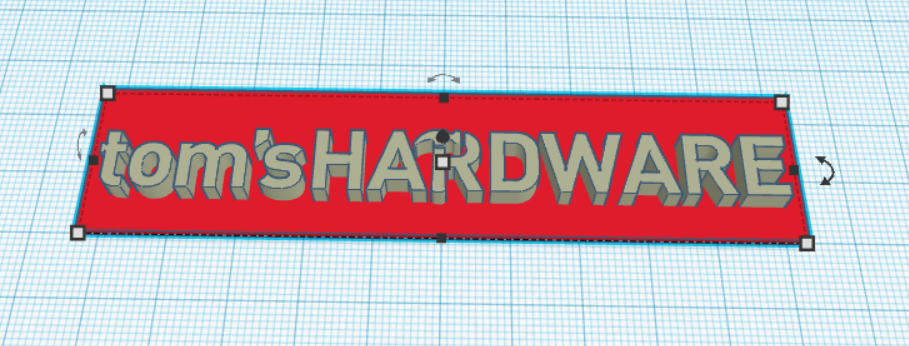
4. Select all the parts and click the align tool. Center the objects horizontally and vertically.

At this point, you have a working model that can be printed. Ungroup the objects if you want to adjust the size.
Make the Logo Two Color
You probably noticed our Tom’s Hardware logo is red and black. I’ll be printing this on an Ender 3 Pro without the help of an Multi Material attachment, so we will need to set up the files for easy two color printing using filament swaps in the slicer. We’ll explain this below, but for more details, see our article on how to make multicolor 3D prints on an FDM printer.

I could print the logo all at once with three color swaps, but that would create a messy three layer model. Instead I’ll break the logo into two blocks and print them separately.
1. Duplicate the logo and block by hitting CRTL +C and CTRL + V. You will edit one to be red and black, and the other to be black and red.
2. Cover part of the logo you don’t need with a “hole” block and press “group” to delete what it’s covering.
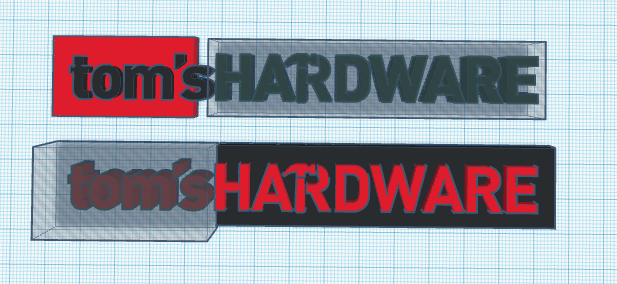
In this case, I need the words Tom’s and Hardware separated.
3. Resize the rectangles to suit your needs and center each of the words on its own block. Double check that both blocks match in height and width.

4. Export the logo as two files. In this case, I need Tom’s as one file, and Hardware as a second file. To do this, select the part of the model you want to export (like the word Tom’s and the red rectangle) and click Export. Repeat for the other half.
How to 3D Print a Two Color Model
Now we’ll bring the model into Cura for slicing. I’ll show you how to add a filament change to the gcode.
1. Open one of your logo files in Cura. It’s back to a single, one color model.
2. Slice the file as you like. I’ll use a standard .2 mm layer height.
3. Click preview and zoom in close to the text.
4. Grab the slider on the right and scroll through the layers until you get to the first layer where text appears. In this case, it’s layer 40.
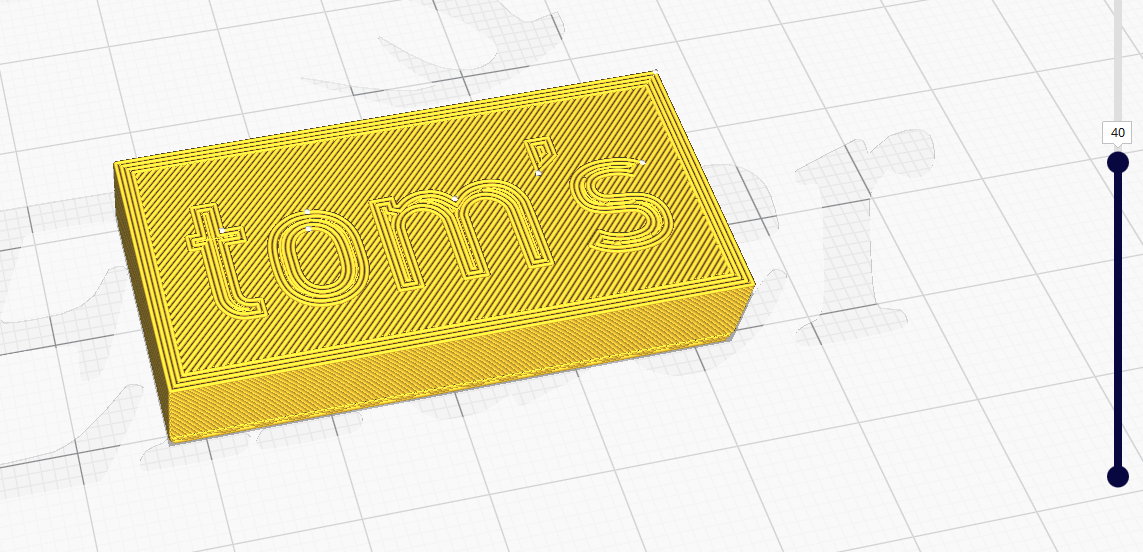
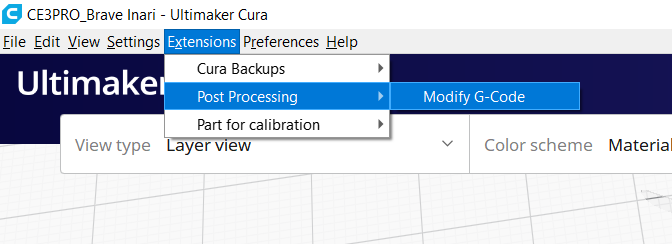
5. Select Modify G-Code from the Extensions->Post Processing menu.
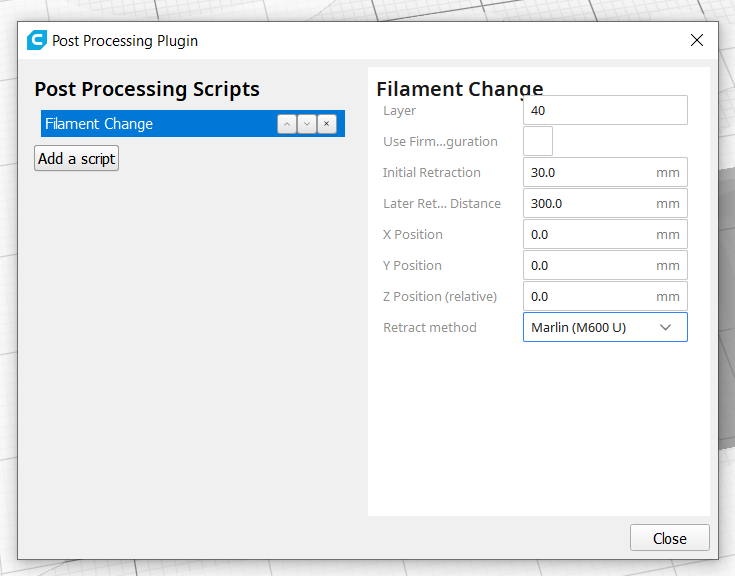
6. Select Add a Script and click Filament Change from the drop down menu. Enter 40 (or the correct layer number in your case) in the box for Layer.
7. Slice the model again and send it to your printer.
8. Load the printer with the color of the first layer. In this case, we’re using red. When the printer reaches Layer 40 (or whatever number you put in), it will pause and move the hotend aside so you can change the filament to your second color.
9. Repeat for the second part of the model.
What if My Logo has More Colors?
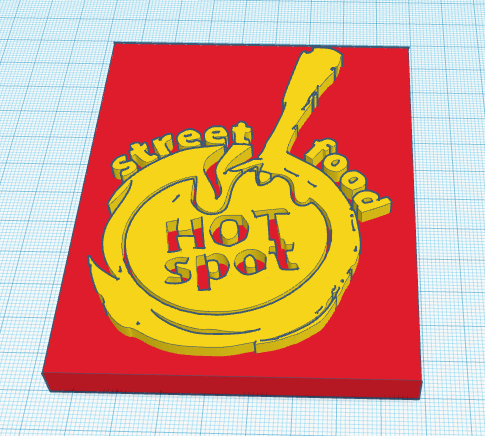
This is a very basic tutorial and, if your logo is more complex, you may need the help of a designer. However, I have one more trick up my sleeve to show you. I created a fake four color logo for a food truck we’ll call the Hot Spot. Now let’s convert it for 3D printing.

1. Open the image in any photo editing software. We’ll use the built in Photos app that comes with Windows.
2. Convert the image to black and white. The Photos app is very basic. To make something black and white, we’ll use the Mercury filter, and then adjust the light settings to their brightest. The result is muddy, but it will work.

3. Convert the JPG to an SVG in Convertio like before and import this new file to Tinkercad.
4. Place a square behind the logo and center it. Now you have a basic logo in a box that you can print. With a little creativity, you can break this logo into more colors or shapes.

Denise Bertacchi is a Contributing Writer for Tom’s Hardware US, covering 3D printing. Denise has been crafting with PCs since she discovered Print Shop had clip art on her Apple IIe. She loves reviewing 3D printers because she can mix all her passions: printing, photography, and writing.
