In 1989 Tim Burton’s Batman movie was in the cinema, and advertising campaigns were in full swing to promote the Caped Crusader. At Commodore, their marketing team had signed a deal with Warner Brothers Pictures and Batman was to be on the Amiga. The Amiga 500 “Batman Pack” became the iconic pack which saw this humble home computer dominate the market.
But the Amiga 500 was not the first machine in the Amiga range. That honour goes to the Amiga 1000 as used in 1985 by Andy Warhol to digitally alter a photograph of Blondie lead singer Debbie Harry. However, the Amiga 500 was the machine that made the biggest impact on the 16-bit home computing scene. Featuring 512KB of RAM and a 68000 7MHz CPU, the Amiga 500 was much more than a games machine. It was a competent office computer, a music creation tool, an artist’s studio and a television workhorse, capable of mixing live television with graphics created on the Amiga.
What You'll Need
- A computer running Linux
- Amiga Kickstart ROMs
- Amiga Workbench 3.1 disk images
- A copy of Cloanto’s Amiga Forever Plus Edition
Setting Up the Emulator
1. Download the recommended download from https://fs-uae.net/download and extract the files.
2. Open a Terminal, navigate to the folder containing the extracted files, this should be FS-UAE and run the launcher.
./Launcher3. Copy the Kickstart ROMs and Workbench Disk Files (ADF) from your copy of Cloanto Amiga Forever Plus Edition to relevant directories in the FS-UAE directory.
4. In the FS-UAE launcher click on the Amiga logo in the top left of the window. Select “Import Kickstarts” and navigate to where your Kickstart files are located. Import all of the Kickstart ROMs.
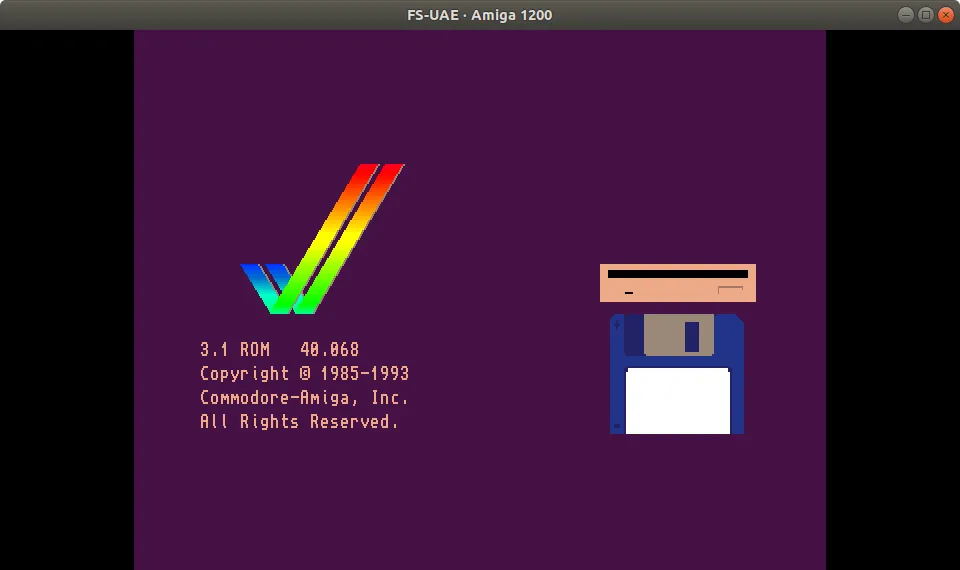
5. On the main Launcher screen, under Amiga Model select A1200 and 3.1 ROM 68020 CPU.
6. Insert the emulated Workbench 3.1 ADF disk image via Floppy Drives. Click Start to power on and boot the Amiga.
The Amiga operating system is called Workbench and it is a GUI similar to Apple’s operating systems of the era. It features all of the design stylings that we are familiar with. Windows, Icons, Menu and Pointer, and it has a shell interface that feels at home for Unix / Linux users. Workbench 2 onwards was where the Amiga Workbench saw the biggest shift from being just an operating system, into a powerful and efficient design. Don’t get us wrong, Workbench 1.3 was what we used with our Amiga 500, but it felt rather childish when compared to later releases.
Workbench 3.1 as used on the A1200 and A4000 was a big deal. Inside the Workbench 3.1 disk there are a number of folders. Prefs is where we can configure the Amiga. Change fonts, set the screen resolution, change input settings and set system sounds.
Install Workbench to a Virtual Hard Drive
A hard drive was a luxury for the earlier Amigas. With the release of the 600 and 1200 we saw built-in IDE interfaces and 600HD and 1200HD models were on the shelves, offering a whopping 40MB IDE hard drive. For our virtual Amiga 1200, we are going to install a 256MB hard drive using FS-UAE.
1. Click on the Amiga logo in the top left of the window and select HDF Creator.
2. Create a Single Partition Hard Disk File, called LXF.hdf and it will be 256MB in size.

3. Click on the Home icon and ensure that your Amiga Model is A1200, with 3.1 ROM and 68020 CPU.

4. Click on the Floppy disk menu and, in the top slot, insert Workbench 3.1 ADF disk and, in the second slot, insert the Workbench 3.1 Install disk.

5. Go to Media Swap List, and click on the + icon, select all of your Workbench 3.1 disks, of which “install” should be present.

6. Go to the Hard Drive menu and check that LXF.hdf is present.

7. In the RAM & ROM menu, ensure that the correct Kickstart ROM is present, and set your Chip RAM to 2MB, and Fast RAM to 8MB.

8. On the left of the launcher is a save configuration dialog, add the name A1200 LXF and click on the save button to save the configuration for future use.

9. Click on Start to run the emulator.
To format this drive, single left click on the icon, and then press and hold the right mouse button. Move the mouse to the top of the screen and select Icons, Format Disk. The format options should match these.
10. Workbench will boot as before, but now we see an additional icon on the desktop DH0 NODOS, which is our 256MB hard drive.
List of Options:
- Format - DH0
- Current Information: Device 'DH0' 256M capacity
- New Volume Name: WB3
- Put Trashcan: Y
- Fast File System: Y
- International Mode: N
- Directory Cache: N

11. Click on Format, and then in the next two pop ups click Ok and Format. The format process will take around five minutes. A new drive will appear DH0 (first hard drive) which is ready for use.
12. Double click on the Install disk icon and then double click on the Install folder. Double click on your chosen language to run the installer in that language.

13. Click on Proceed to install Workbench 3.1 to a hard drive.
14. Ensure the installation mode is Novice, click Proceed With Install to move on.
15. Skip the printer setup screen, the keymap should match your country / language selection.
The installer will now run and copy the files from the floppy drives to the virtual hard drive. At times there will be prompts for us to insert another disk.

16. Press F12 to swap disks when prompted. Use the cursor keys to move down to REMOVABLE MEDIA, press Enter to eject the previous disk and automatically insert the next. The Amiga will detect the disk change and carry on with the install.

17. Once the install is complete, you will be asked to eject the disk from the drive, again do this via F12 - REMOVABLE MEDIA. Then click on Proceed ro reboot.

Your Amiga 1200 will now reboot and will boot from the hard drive for the first time.

