Tom's Hardware Verdict
The Tokyo60 from Drop and Tokyo Keyboard is a solid, if stiff, keyboard kit that you can buy right now. It requires basic mods to sound its best, and the form factor takes some getting used to, but if you’re looking for an all-metal HHKB, this is a decent option at a reasonable price.
Pros
- +
+ HHKB layout with an aluminum case
- +
+ Reasonably priced for the uniqueness of
Cons
- -
No included instructions for assembly
- -
Case can sound pingy and hollow out of the box
- -
Diffuser is a separate purchase
- -
No per-key backlight
Why you can trust Tom's Hardware
Cheap keyboard kits are becoming more common, but Drop’s Tokyo60 keyboard kit still manages to feel like something special. At only $160, it features an all-aluminum case, which is usually the first thing to go as designers make sacrifices to keep costs down. On top of that, it features an HHKB layout, so-named after the Happy Hacking Keyboard, which has been a popular choice amongst programmers since the mid-90s.
The keyboard isn’t without its sacrifices, however. You won’t find extras like per-key RGB here (though there is wrap-around underglow) or a built-in USB hub found on Drop’s best-selling CTRL mechanical keyboard. Due to its symmetrical layout, it’s also not the best for gaming. But, if you’re looking for an easy-to-build, easy-to-mod, keyboard that doesn’t take up much space and can look great on your desk, it has a lot to offer.
Drop Tokyo60 Specs
| Switches | 5-pin compatible |
| Lighting | Optional wrap-around RGB with diffuser |
| Onboard Storage | 15 profiles |
| Media Keys | None (secondary layer optional) |
| Connectivity | USB Type-C to Type-A |
| Cable | 5 feet, braided |
| Additional Ports | None |
| Keycaps | Cherry MX-stem compatible (PBT dye-sub keycaps available) |
| Software | QMK Configurator (online) |
| Dimensions (LxWxH) | 11.8 x 4.4 x 1.4 inches (300 x 112 x 360 mm) |
| Weight | 1.54 pounds |
Design of the Drop Tokyo60
The Drop Tokyo60 is a compact keyboard designed by Tokyo Keyboard in collaboration with Drop. It’s been one of Drop’s most successful keyboard products, spawning multiple “seasons” of releases with new colors and keycap combinations. It's currently on its fourth iteration, though there’s no official word on if new seasons will be released.
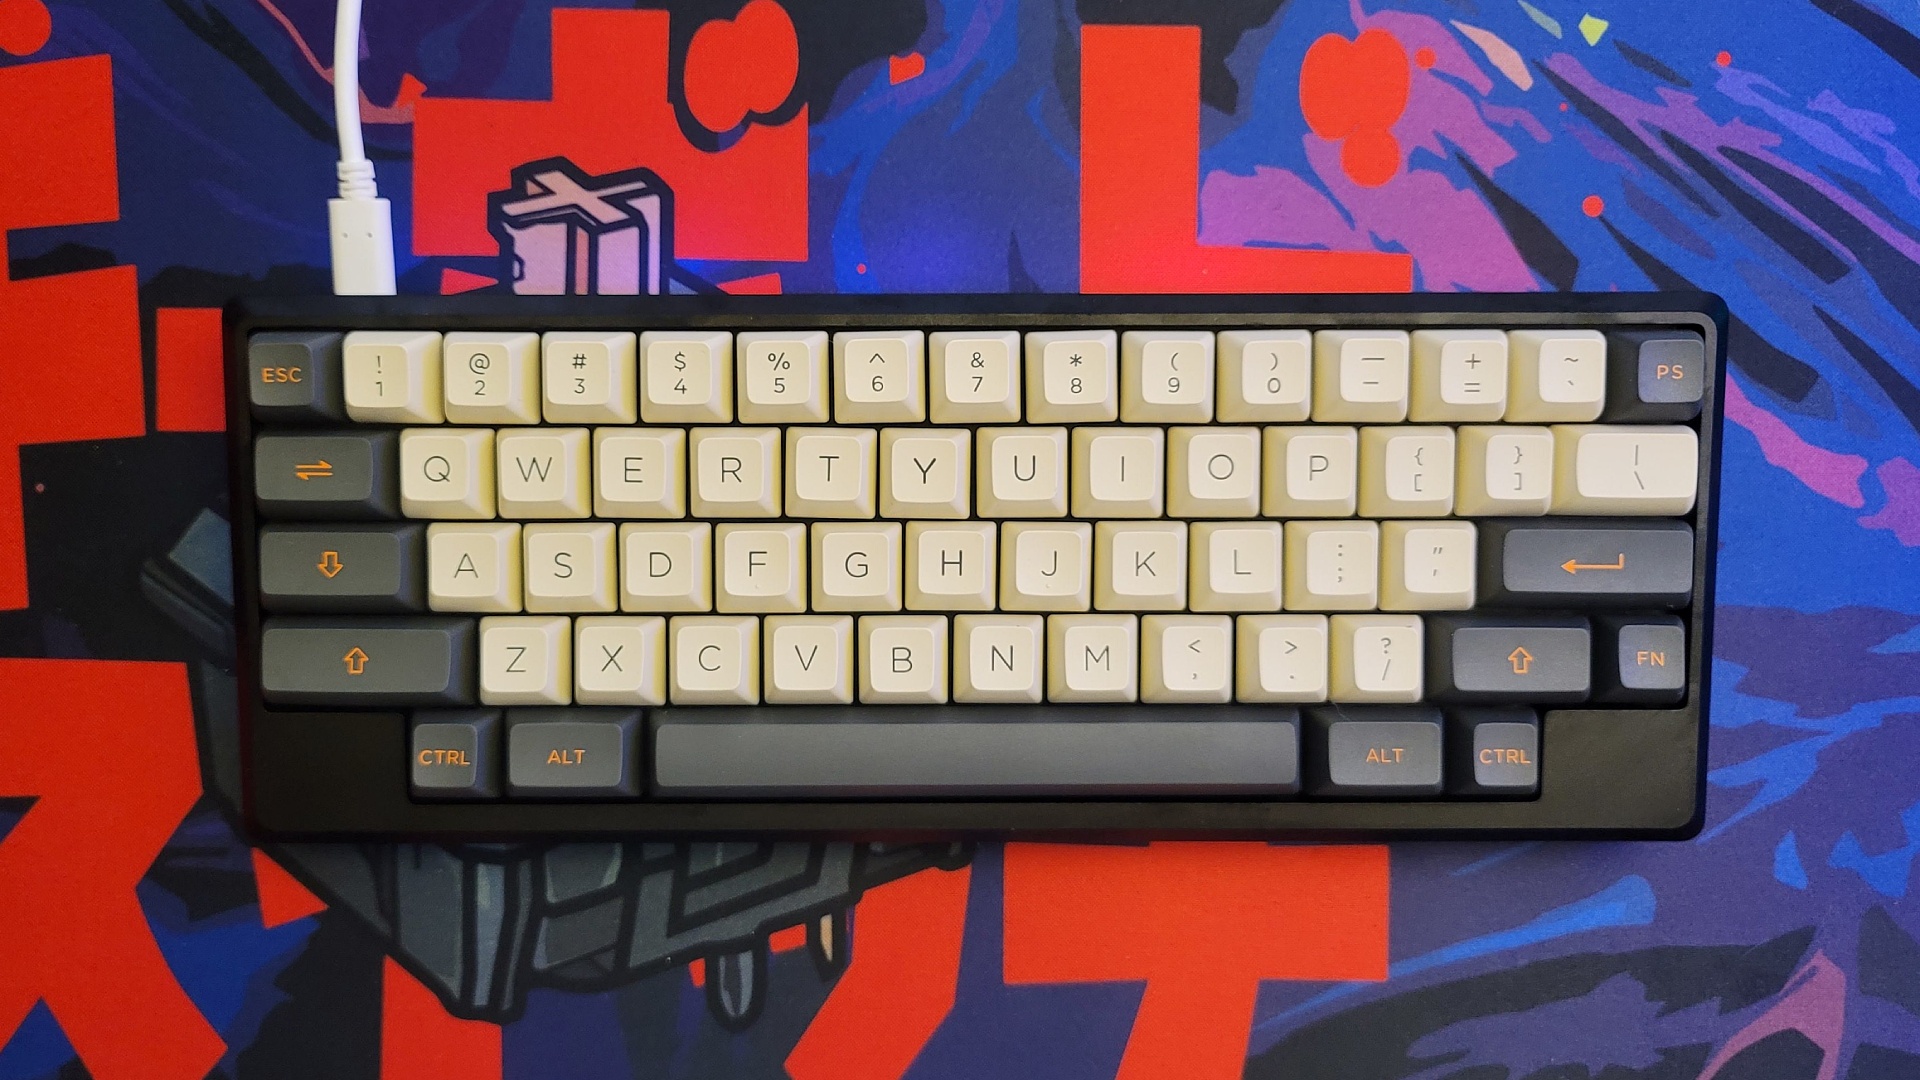
The keyboard uses the same layout as the popular Happy Hacking Keyboard designed by Eiiti Wada in the mid-1990s. The unique qualities of this layout are its symmetrical bottom row and the shifting of the Control key to the Caps Lock position. This has made it a popular choice amongst programmers who use Ctrl-based shortcuts, allowing them to hit this modifier with their pinky and keep their fingers on the home row.
The layout has become popular among keyboard enthusiasts. As is often the case with expensive hobbies, rarity drove interest as the original HHKB could only be imported to the United States for many years. Aesthetics are also a core part of the hobby, and the symmetrical design lends the HHKB layout a uniquely symmetrical look.
As a result, designers like Tokyo Keyboard have taken the HHKB mold and opened it up to custom keyboard builders. Other companies, like KBDFans and RAMA Works, have also created HHKB-based designs, but the Tokyo60 stands apart due to its price and availability. The KBDFans D60 HHKB retails for $319. The RAMA Works Kara costs the same, but is made of plastic and is rarely available to purchase.
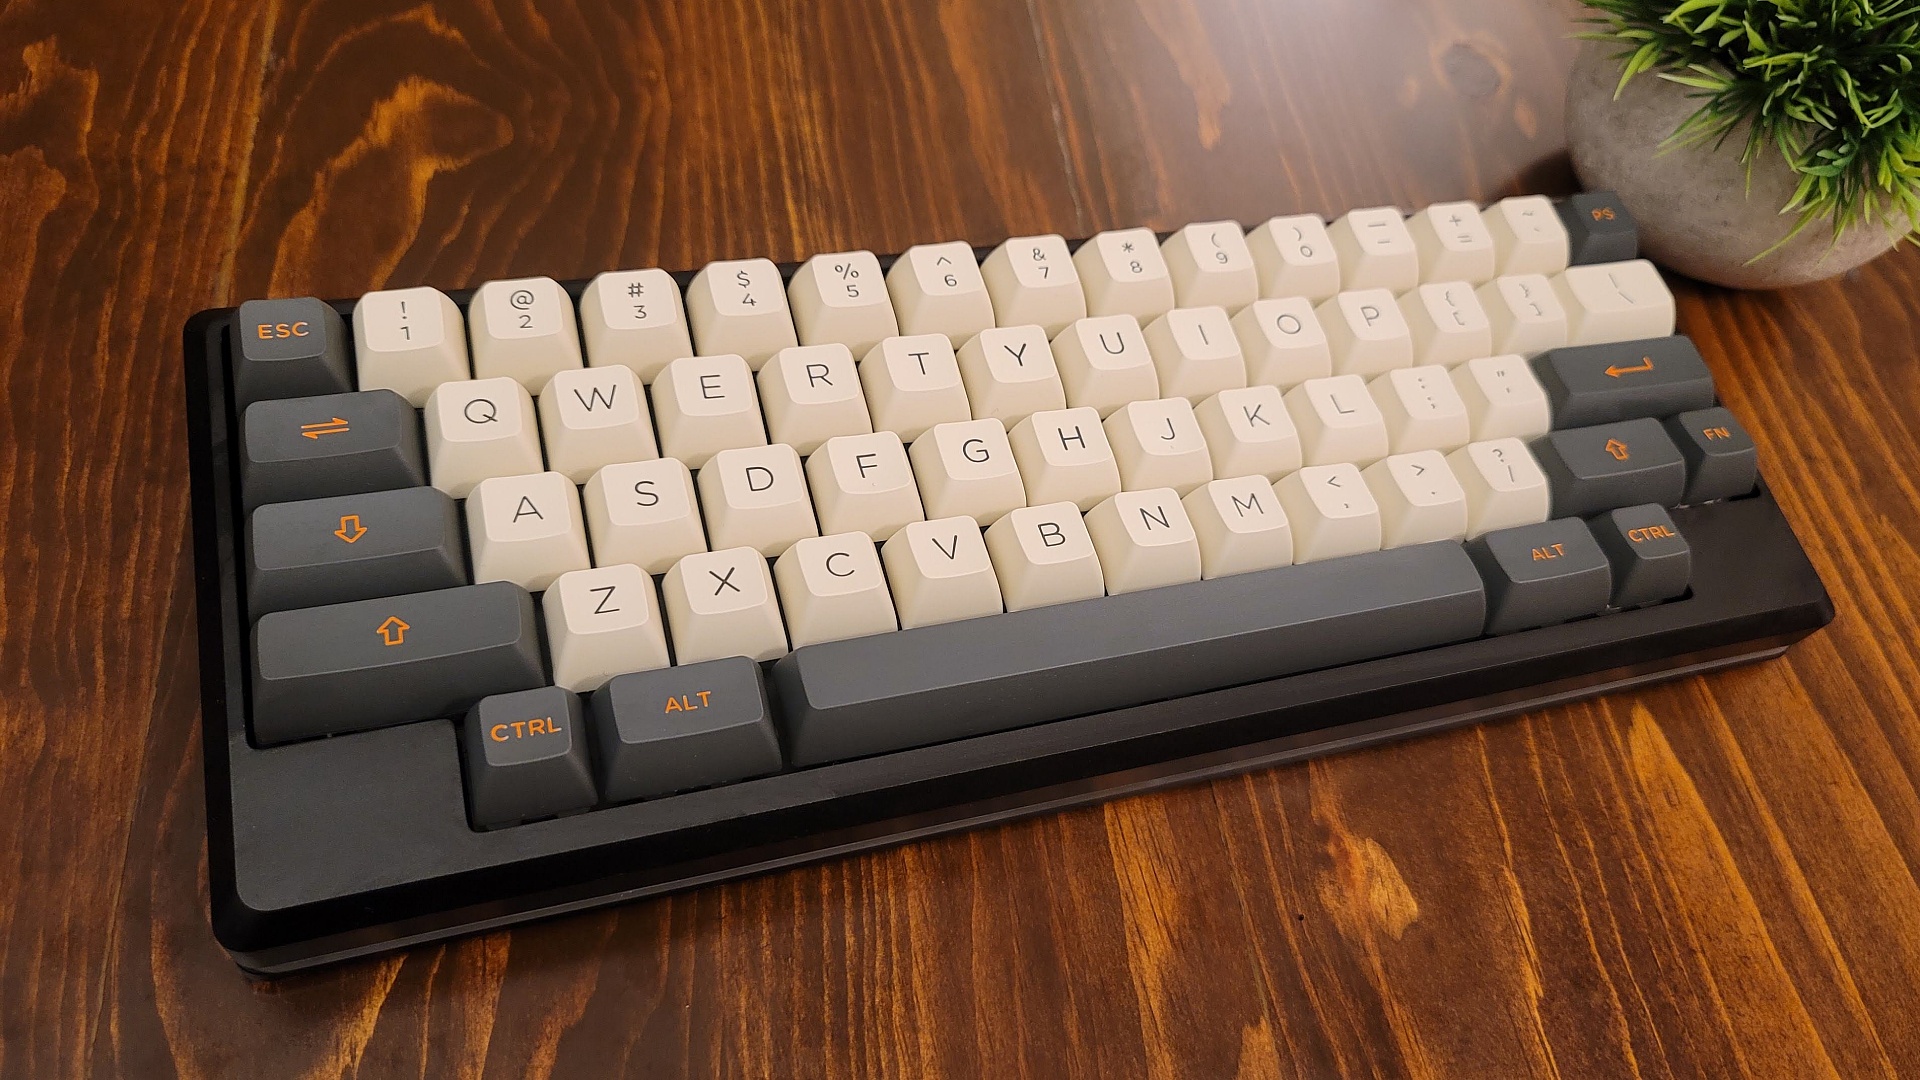
In contrast, the Tokyo60 features a CNC-milled aluminum case and a comparatively cheap $160 price tag. Drop currently lists seven different colors to choose from, though only Season 4 Slate is currently in stock. Like most keyboard kits, it does not come with switches or keycaps, though these are offered as separate purchases on the product page.
Get Tom's Hardware's best news and in-depth reviews, straight to your inbox.
It’s worth considering picking up everything at once, particularly for the keycaps. One of the quirks of the HHKB layout is that it uses a larger-than-average Spacebar (7u) that is not available in most low-cost kits. It also features a 1.5u Backspace in place of the Pipe key, which is even less common. Many users find themselves just using the Pipe key as backspace, accepting the mismatch simply to have more options for compatible keycaps.
The Tokyo60 is a hot-swappable keyboard, which means you can try different switches as often as you like without the hassle of soldering. Switches plug directly into the PCB and are held in place with plastic tabs on the mounting plate. When the time comes for a change, you simply pull out the old ones and press in the new. The keyboard also supports 3-pin and 5-pin switches, so is compatible with any MX-style switch currently on the market. With so many new switches releasing all the time, it’s a fun and (usually) low-cost way to completely change the feel of your keyboard.
The keyboard also one-ups Drop’s pre-built keyboards with its stabilizers. Unlike the CTRL or ALT, it uses screw-in PCB-mount stabilizers. Drop also includes a set in the box, so you won’t have to buy any separately. Screw-in stabilizers add additional stability to the larger keys and adds compatibility for popular choices like Durock V2s.
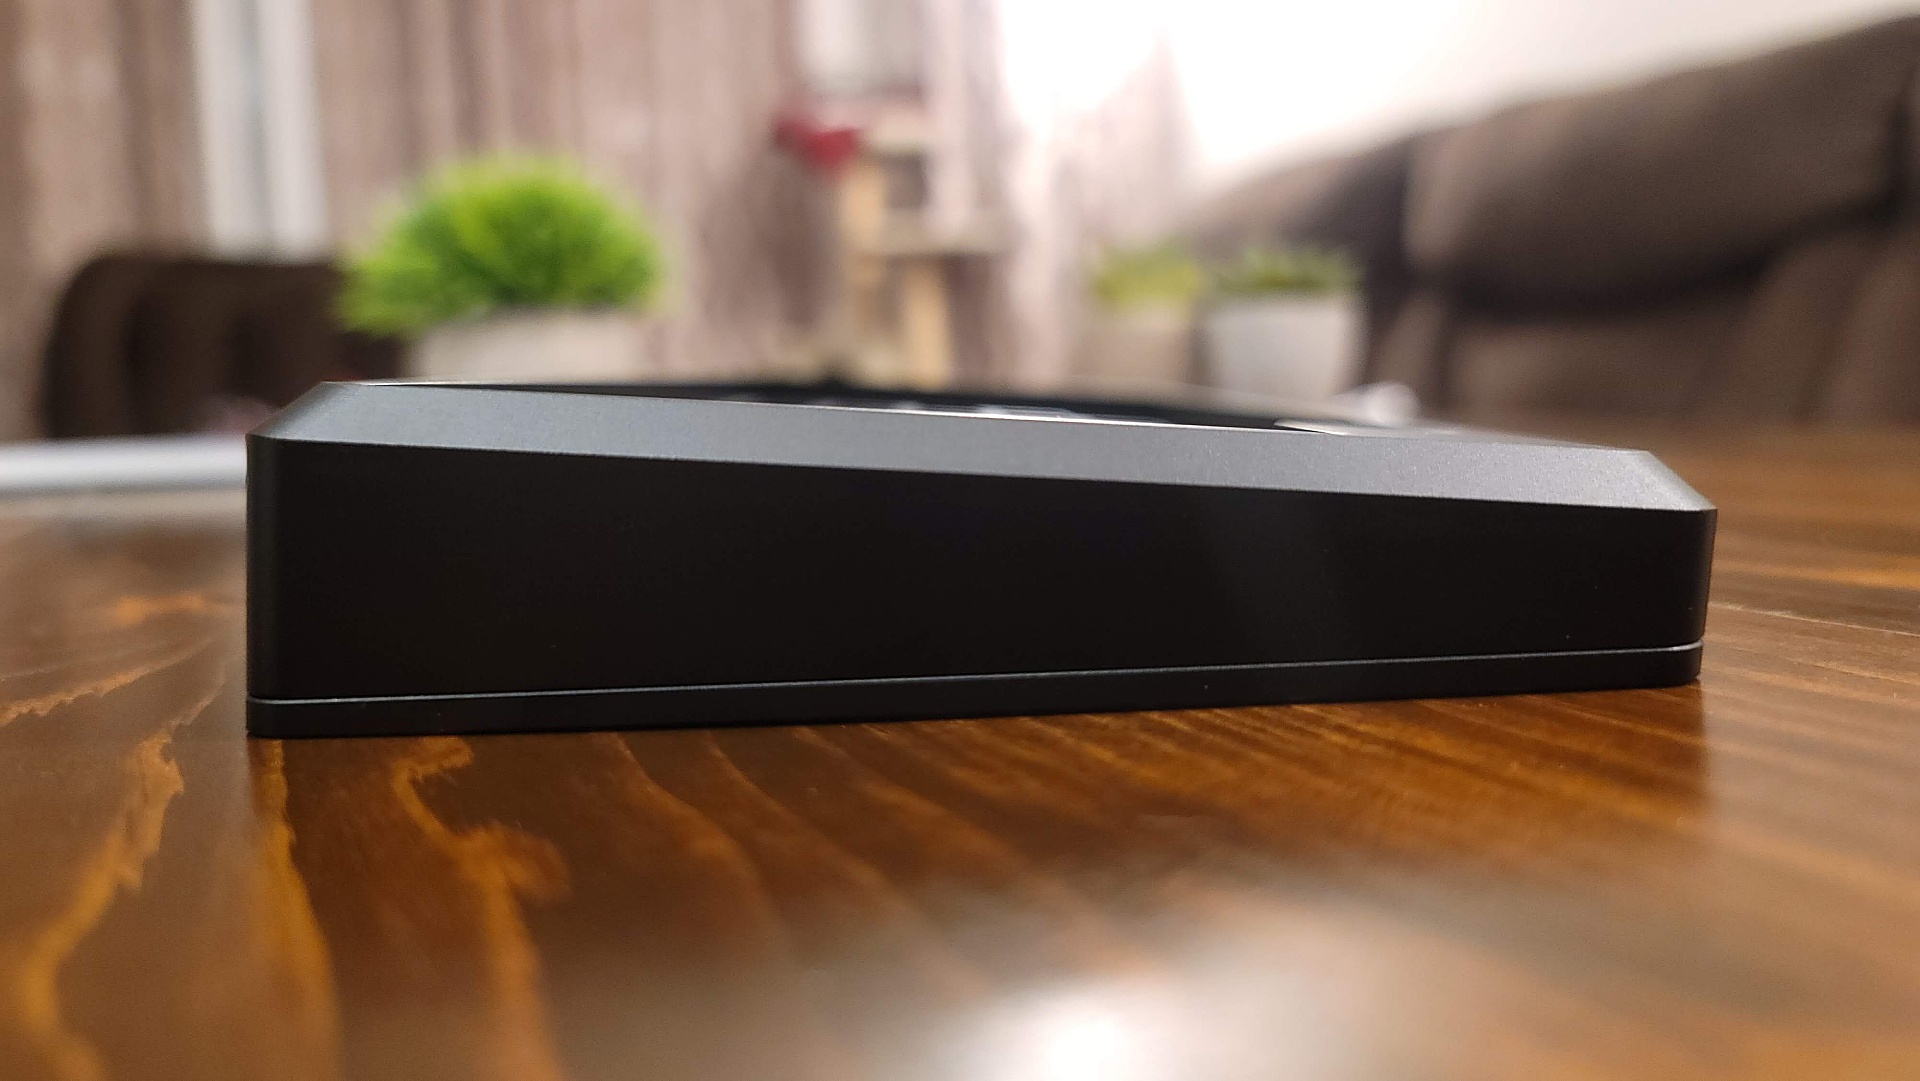
The Tokyo60 is a good value for the money, but it does have a couple of quirks potential builders should be aware of. Rather than use a separate switching mounting plate, it’s integrated directly into the top half of the keyboard. This makes assembly easier but leads to a stiff typing experience that’s louder as each bottom-out resonates through the case. The metal-on-metal design of the case also creates an audible ping and slightly hollowness with the added diffuser. The plate being integrated also makes it impossible to change if you prefer a softer typing experience down the line.
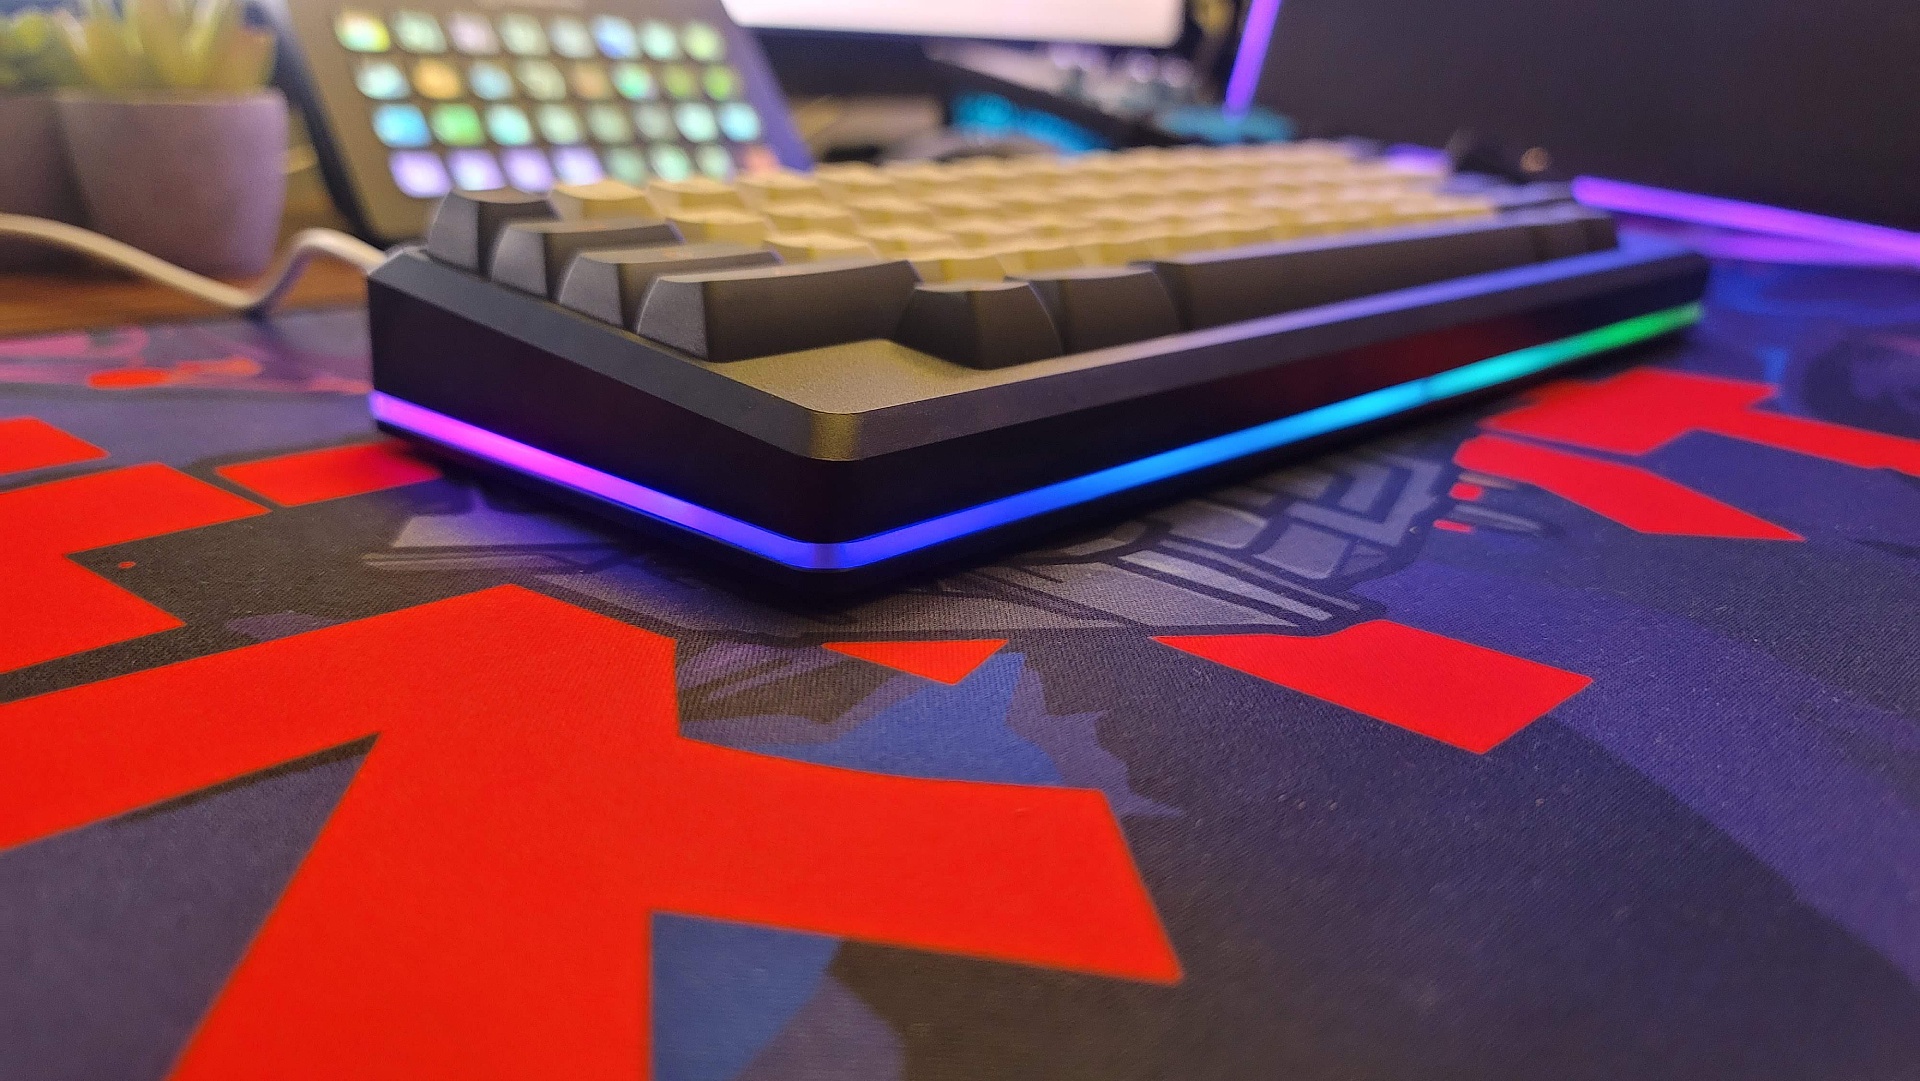
The second is that the keyboard does not feature per-key RGB backlighting. Instead, it features ten LEDs on the bottom of the PCB meant to provide underglow through an acrylic diffuser. This diffuser is a separate purchase and worth buying for the added visual flair alone. However, because of the resonant qualities of the case, it also impacts the typing experience.
The keyboard is devoid of supporting features. Unlike Drop’s other keyboards, there’s no built-in USB hub. Instead, there’s a single USB Type-C port around the back of the keyboard to provide connectivity. If you’re looking for amenities like Bluetooth connectivity, you’ll need to look elsewhere.
That said, the HHKB was never about flair and was always about being a great keyboard for typing. On that level, the Tokyo60 performs well when properly built.
Building the Drop Tokyo60
For more in-depth details on the steps described here, be sure to read out How to Build a Custom Mechanical Keyboard guide.
Building the keyboard is straightforward but made more difficult due to the lack of included instructions. Directions can be found on Drop’s Guides section but surprisingly aren’t even linked on the keyboard’s product page. Thankfully, this is genuinely a kit that’s hard to assemble incorrectly with a little attention to the location of its fasteners.
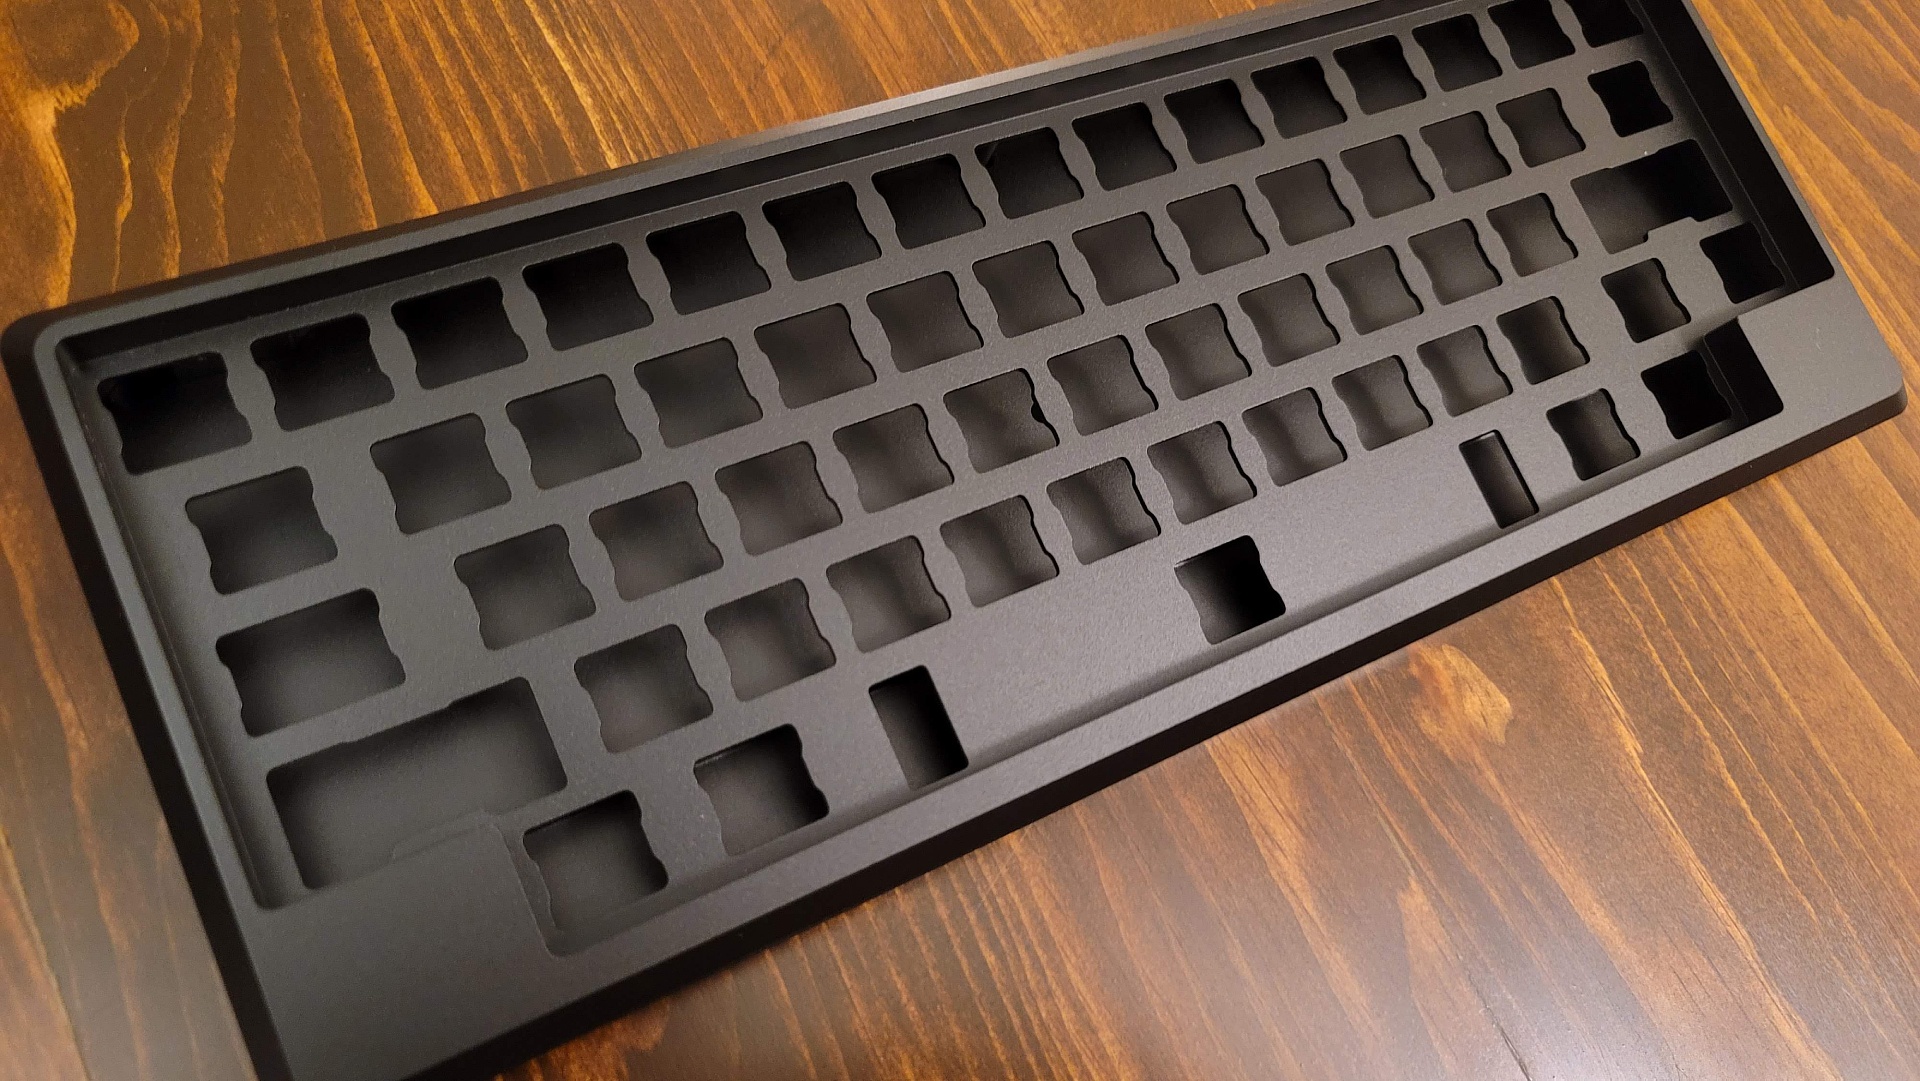
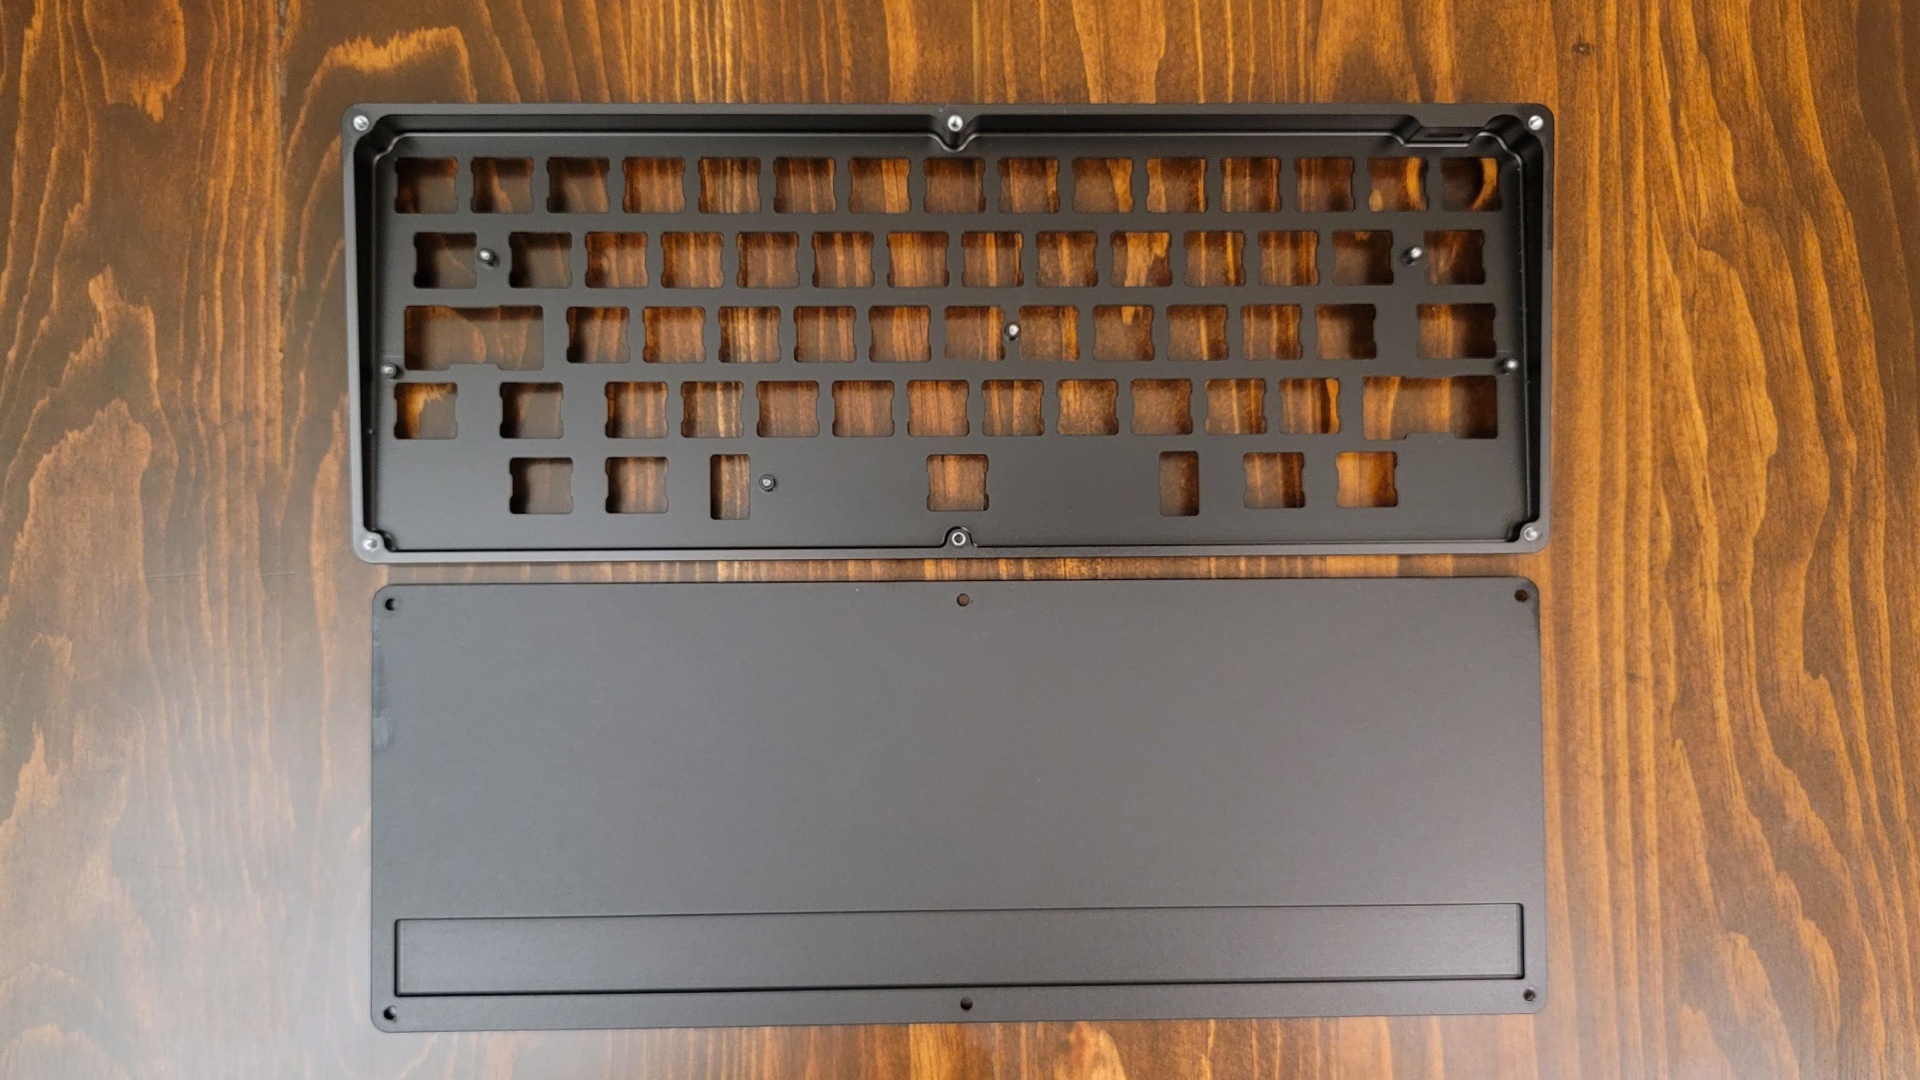
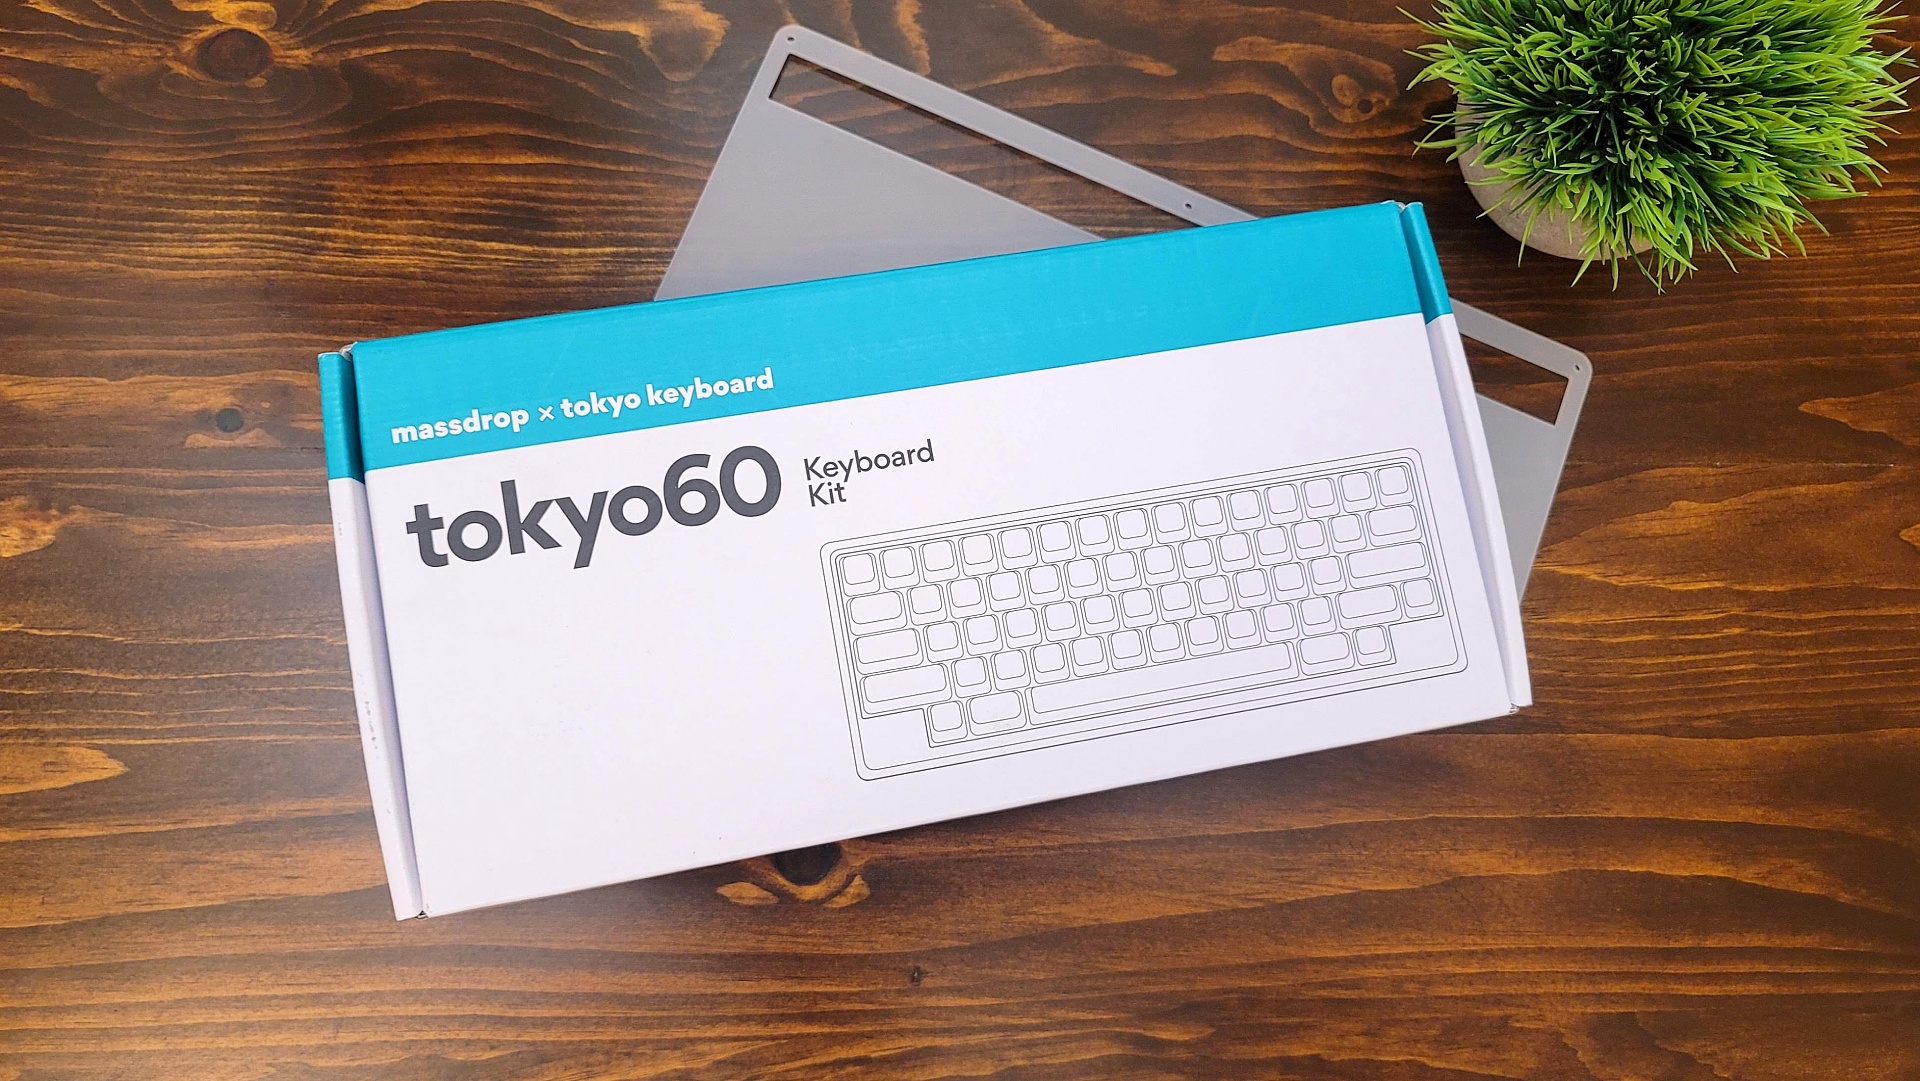
The Tokyo60 uses a two-part case that’s held together with six hex screws inserted through the bottom of the case. Since the top-half of the case also features the plate, there’s no need to install that separately, simplifying the build process. The PCB, stabilizers, fasteners, and rubber Bumpon feet are all packaged separately inside the box. The acrylic diffuser, if you ordered it with the keyboard, ships in a separate box and fits in between both halves of the case.
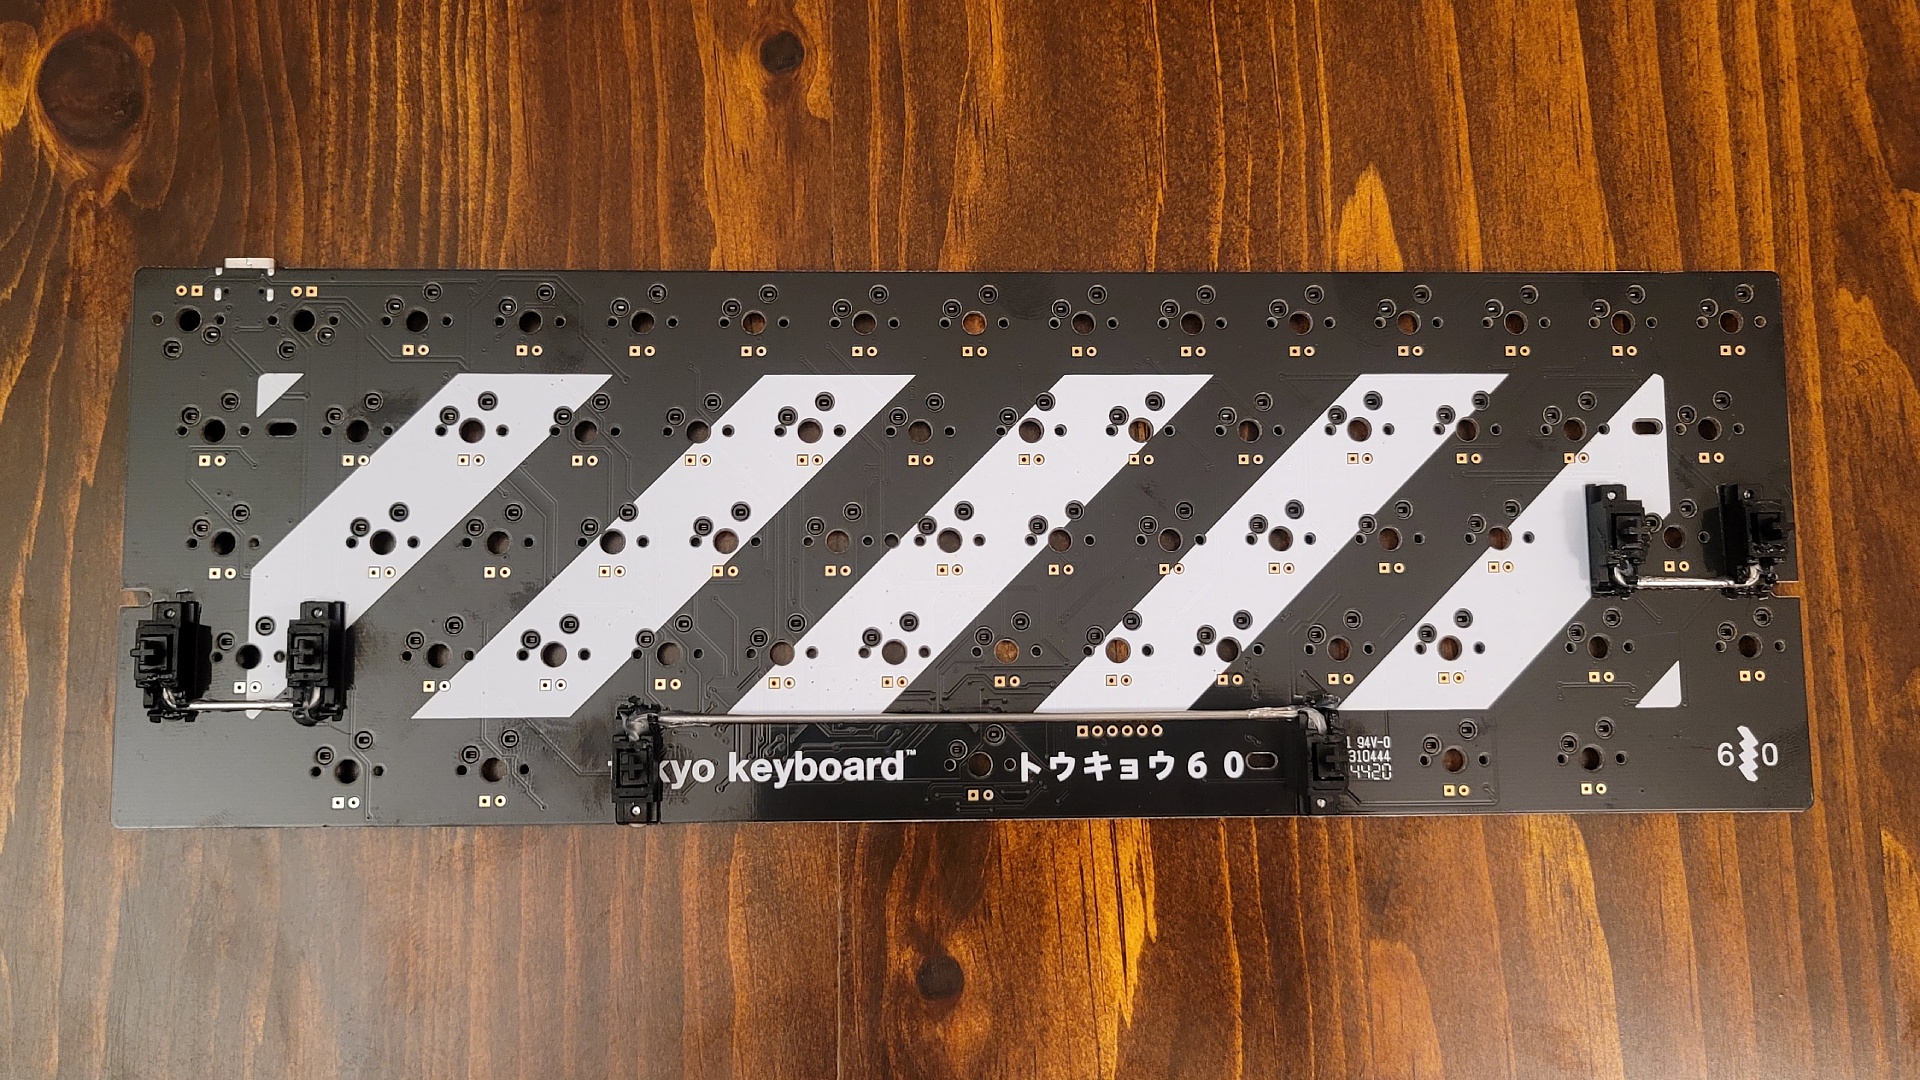
Assembling the keyboard kit is as easy as they come. My first step was to clip, lube and assemble the stabilizers. At a minimum, all users should apply dielectric grease to the wires. This step is a staple in all custom keyboard builds and allows the stabilizers to sound and feel smooth, without distracting rattle. With the stabilizers prepped, they easily fit into the cut-outs on the PCB and could be screwed into place.
After the stabilizers were mounted, I mounted the PCB to the top half of the case, which I had face down for this part of the build process. The USB Type-C port helped orient the circuit board. The integrated plate features six threaded stems that line up with holes on the PCB to screw it into place.
The diffuser (if you purchased it) is placed flush with the top case. The bottom half, which is really more of a plate, is placed on top of the diffuser and screwed into place with the original eight hex screws. There are no notches to keep these pieces in position, but after a couple of fasteners, it’s no longer an issue.
After the case is re-assembled, it’s time for switches and keycaps. Since this is a hot-swappable keyboard, installing switches is as simple as pressing them into place, a process made easier by the board’s support for 5-pin switches. Since the additional two mounting pins help guide the switch into place, the likelihood of bent bins is much less (though, you should still expect some, as always with hot-swappable keyboards). After that, your choice of keycaps can be pressed onto the top of the switches.
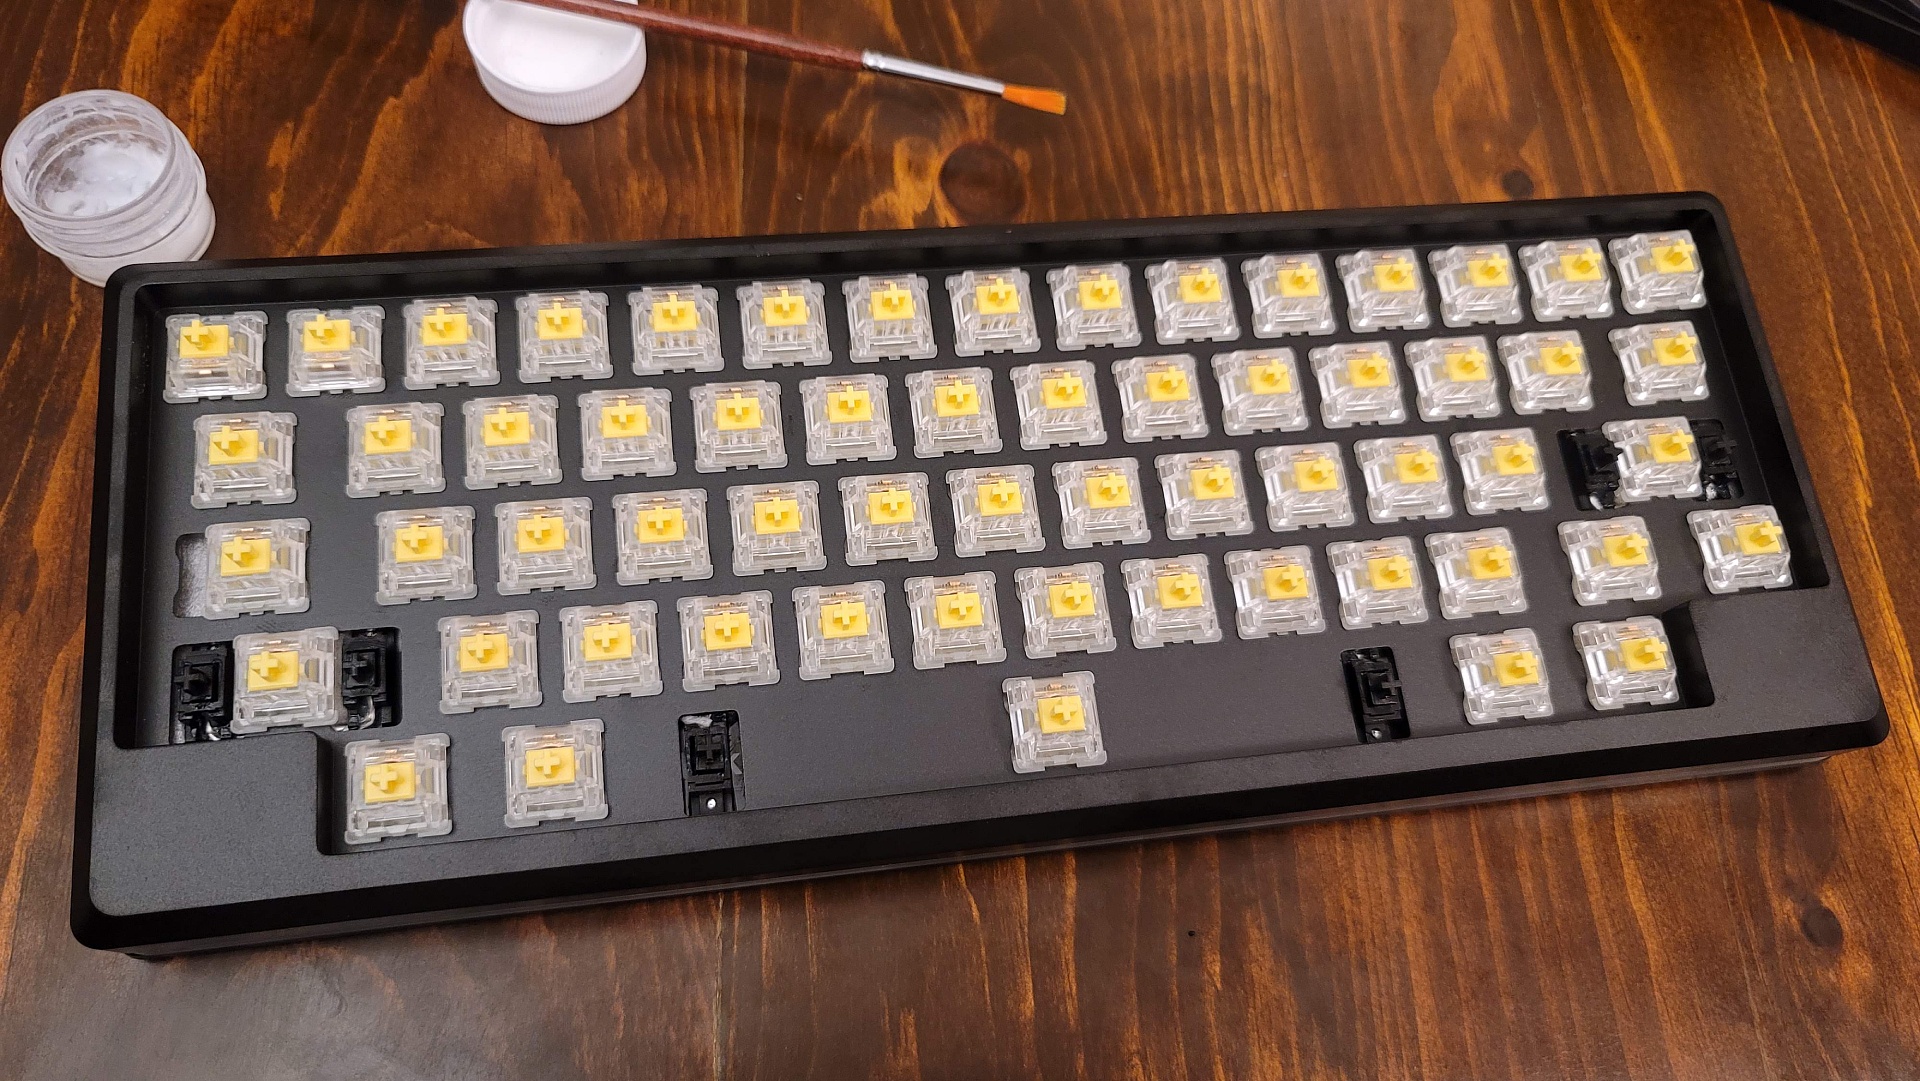
The last step, easiest of all, is to install the rubber Bumpon feet. Simply pull them off the adhesive strip and press them into the recessed circles on the bottom of the PCB and you’re ready to type.
For enterprising builders, the typing experience can be further enhanced with a series of simple mods. For my build, I added bandaids under the stabilizer feet to cushion the bottom out and added a bit of neoprene foam between the diffuser and bottom case to eliminate any remaining ping. The keyboard also responds well to the PE foam and Tempest Tape mods, which are more in-depth but still easy and worth the time to install.
Typing Experience on the Drop Tokyo60
The typing experience on the Tokyo60 will vary depending on how it’s built. Users who take the time to lube the stabilizers will have a much better experience than those who do not, so should be considered mandatory for any builder regardless of the keyboard being assembled. This is also true for the acrylic diffuser, as mentioned above.
Out of the box, without any modification to the stabilizers or using the acrylic diffuser, the typing experience is mediocre. Using stock Holy Panda tactile switches, the case sounded hollow and had a resonant ping that was distracting. Both of these qualities are common to aluminum-case keyboards without any special treatment. The screw-in stabilizers were solid and stable but terribly rattly when installed in stock condition.
Adding the acrylic diffuser and applying dielectric grease to the stabilizer wires makes a dramatic difference. The acrylic diffuser acts as a buffer between the top and bottom case, cutting spring noise and resonance to levels I was able to ignore. The stabilizers needed a good amount of lube to eliminate rattle and click, but once tuned both sounded and felt good.
How the keyboard feels to type on will depend on the switches and keycaps used. I settled on JWICK Yellow switches lubed with Krytox 250g0 and Akko Carbon Retro keycaps from Epomaker. Regardless of which switch you go with, you’ll find the typing experience to be very stiff thanks to the integrated and inflexible plate. This, like switch choice, is a matter of personal preference but does make the keyboard stand apart from more recent releases like the Keychron Q1 or Glorious GMMK Pro (which was itself somewhat stiff). This also makes the keyboard louder when bottoming out.
After coming to grips with the smaller, oddly positioned backspace, I found the keyboard very satisfying to type on. The density of the case lent the keyboard a crisp and clacky typing sound. It’s not a board that I would use working in side-by-side cubicles due to the noise, but for typing out articles at home, it was a very pleasant typing experience.
The quirky layout didn’t impact my typing speed as much as I expected it might. My average typing speed hovers between 110 and 120 words per minute. Across ten typing tests on MonkeyType, I averaged a speed of 109 WPM. The biggest hurdle I faced that caused the slight reduction in speed was unquestionably the location of the backspace key, but I’m confident that in time I could better accommodate its positioning.
Gaming Experience on Drop Tokyo60
The Drop Tokyo60 is not a gaming keyboard but, like most decent mechs, will allow you to play games without sacrificing much. The keyboard is responsive and up to the challenge for even high-intensity shooters like CS: GO. The form factor is the real stumbling point and may leave you wishing for a more traditional 60-percent keyboard.
The challenge with using the Tokyo60 as a gaming keyboard is directly tied to its layout. The symmetrical design may look nice, but I repeatedly found myself reaching for a Ctrl key that wasn’t there. Instead, that key has been shifted alternately to the Caps Lock position or one to the right where you would usually find the Windows key. In either case, it’s not ideal for quickly accessing those skills.
If you do choose to keep Ctrl along the bottom row, things get even more complex. I often use Ctrl-based hotkeys for MMORPGs like World of Warcraft. Shifting the Ctrl button one to the right is enough of a placement shift that I routinely hit the wrong combination key as well, completely throwing off my spell rotation. This was also true for Windows shortcuts such as Copy and Paste.
These aren’t issues specific to the Tokyo60, so shouldn’t be taken as an issue with this particular kit. Instead, they’re inherent to the HHKB layout and would be the same for any keyboard adopting its design. It’s perfectly capable when it comes to gaming in responsiveness, but be prepared to unlearn years of muscle memory when it comes to the Ctrl key.
On the plus side, because it uses QMK firmware, the Drop Tokyo60 supports multiple layers of customizable layouts. Every layer can be programmed as if it were a second, third, or even fifteenth additional keyboard, allowing you to have custom keymaps for more than a dozen games if you choose. These can be activated with customizable key combinations, making multiple layouts fast and easy to access. Because of the limited amount of keys, you will likely be sacrificing your ability to chat to make the most of this ability.
Programming and applying these layouts isn’t easy or fast, either. Because all of the keymaps are saved to the keyboard itself, making changes involves editing the keymap on the QMK Configurator website, compiling and saving the firmware, and then flashing it to the keyboard. The QMK Configurator also doesn’t support macros, so you’re left literally coding those yourself. It’s just not practical when compared to the ease of use of a dedicated gaming keyboard, or even one that supports VIA for flash-free remapping.
Software
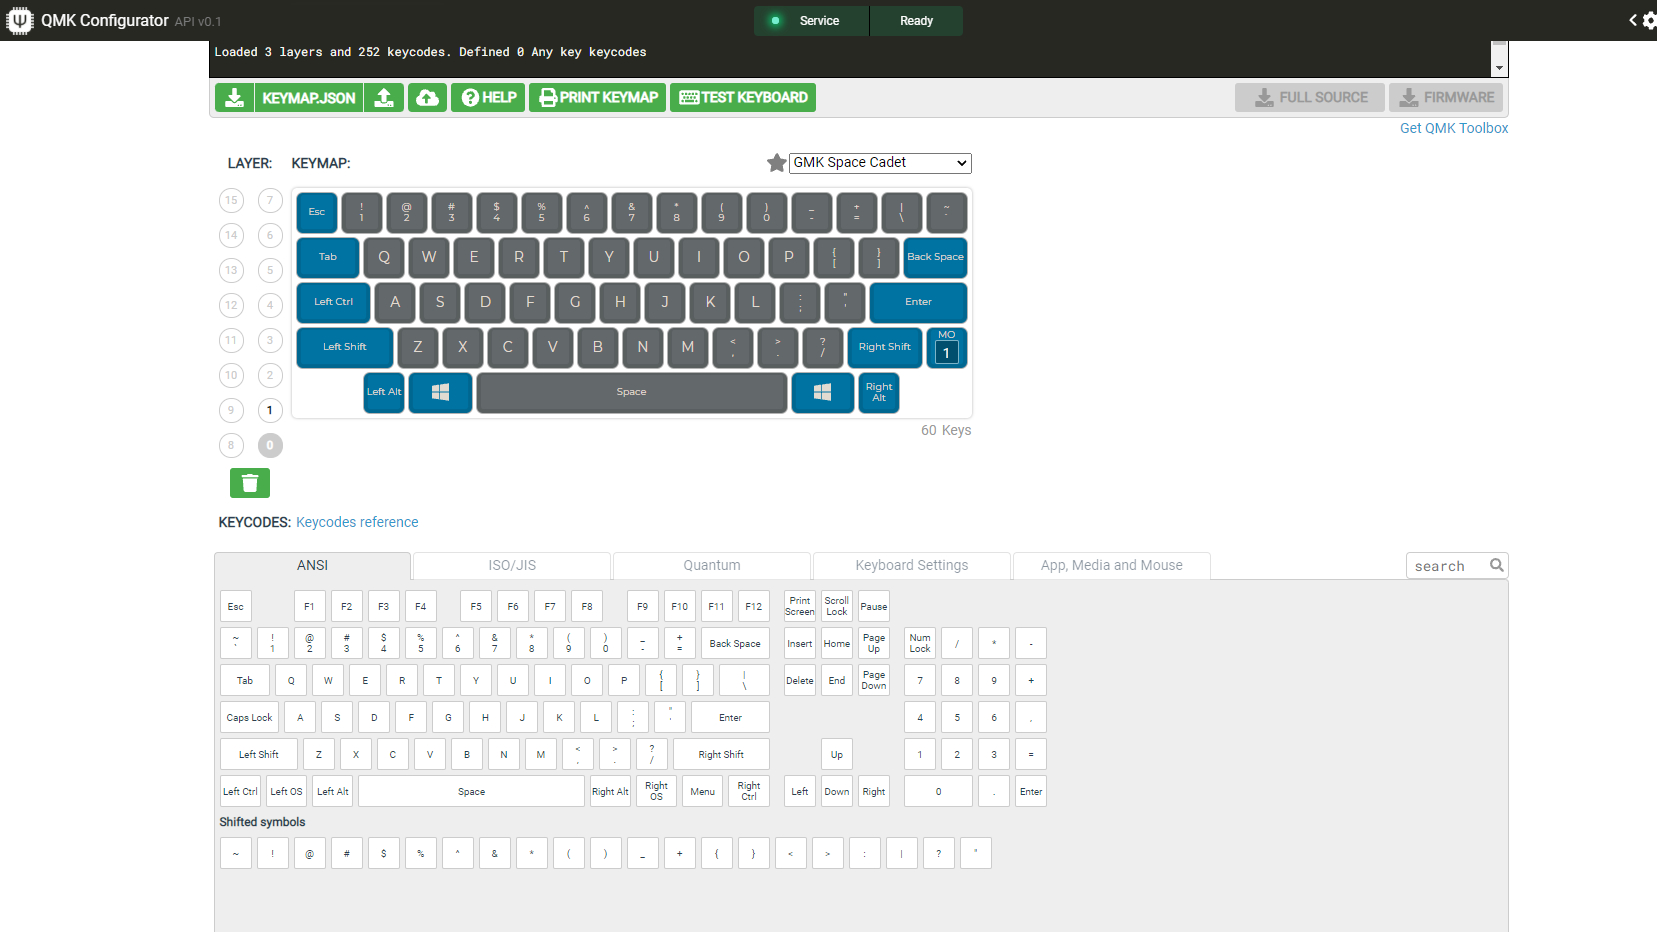
The Drop Tokyo60 doesn’t support any software of its own. Instead, all of its remapping is done through QMK, a customizable firmware that is programmable through the QMK Configurator. This web-based tool allows you to remap keys across fifteen layers using a simple graphical user interface. It also allows you to map more advanced functions, like Layer Taps where a key will send one function when held and another when tapped, with ease.
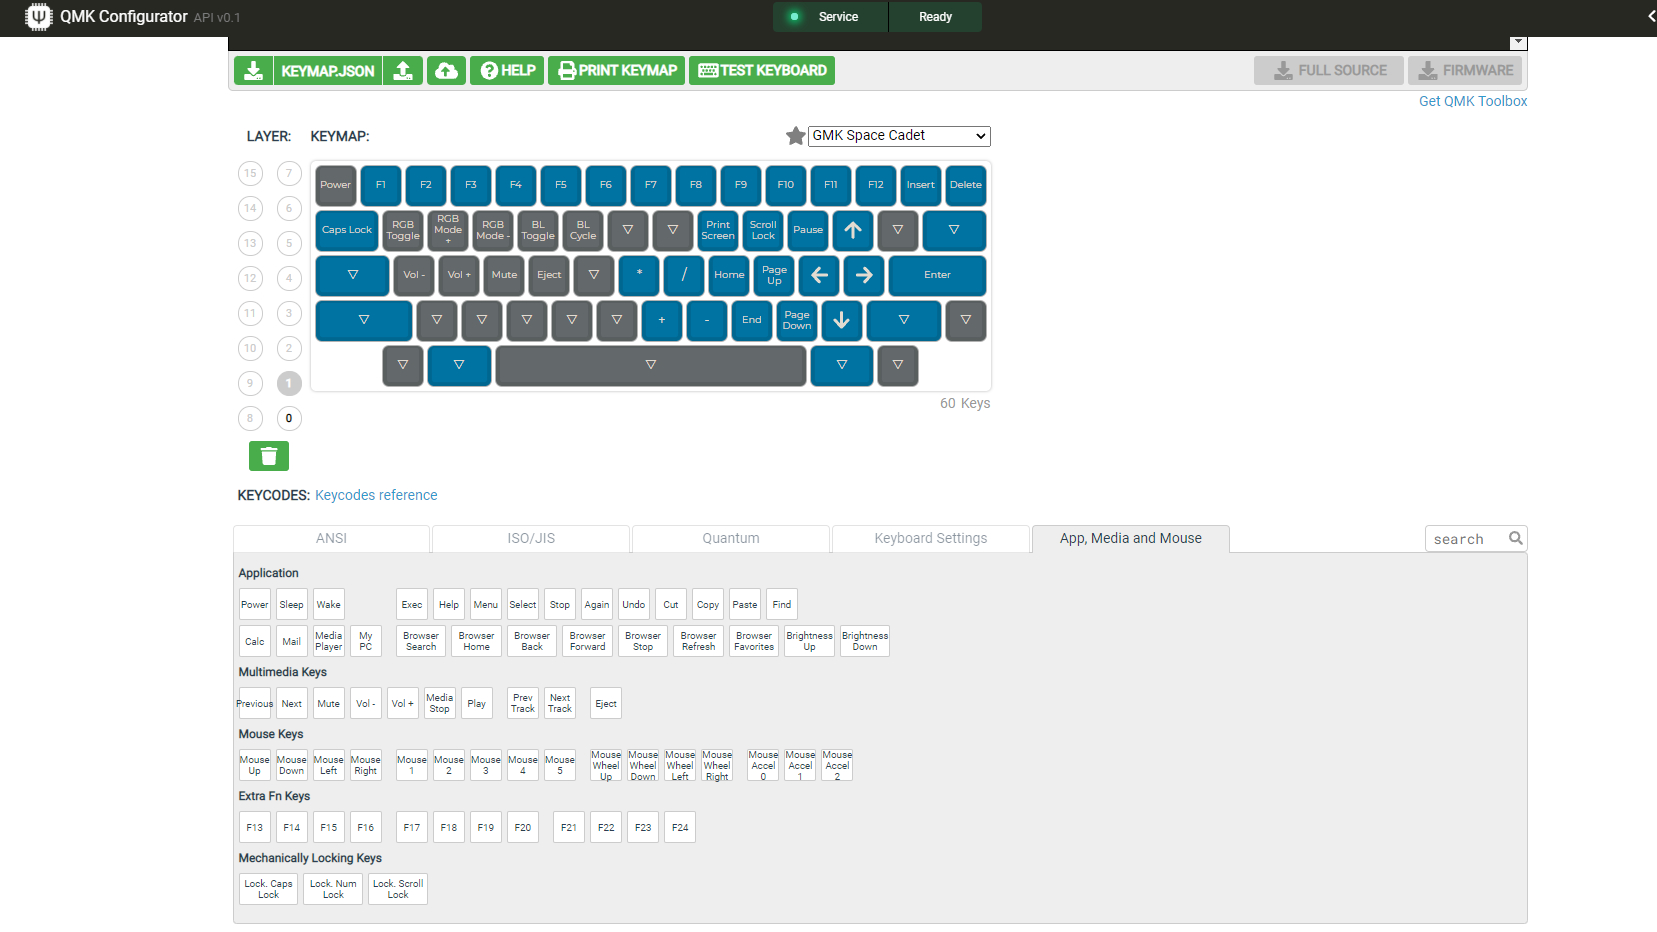
The QMK Configurator uses a repository of keyboard files, so when you navigate to the site all you have to do is choose the Tokyo60 from a dropdown menu. The keyboard layout changes to match the new keyboard and displays all of the default keymaps. Below this graphic is a section of potential keymaps, broken into tabs for ANSI and ISO layouts, controlling layer shifting, toggleable keyboard options that can be mapped to individual keys (swapping Ctrl and Caps Lock, for example) and App, Media, and Mouse controls. To remap a key, all you do is click on it once and then click on the option you would like to be positioned there.
There are no options for customizing lighting directly in the QMK Configurator. Instead, you’re able to map lighting controls to individual keys, including cycling preset lighting modes and even controlling the specific hue, saturation and brightness. Unfortunately, there are no options for individual LED customization without writing your own code.
Once your keymaps are set, you’ll need to click the Compile button to create a downloadable firmware file. With that downloaded, you’ll need to download QMK Toolbox, a lightweight app capable of loading firmware onto your keyboard. The process isn’t straightforward for newcomers, so it’s worth reading QMK’s Newb’s Guide to flashing. In essence, you’ll select the firmware file you just downloaded, put the keyboard into Bootloader mode, and click the Flash button. The Toolbox does the rest, transferring the firmware into the Tokyo60 and resetting it to apply your new settings.
Unfortunately, the lack of documentation with the keyboard makes the process more complicated than it needs to be. Many keyboards come with a default “Reset” keymap to enter into Bootloader mode, but the Tokyo60 does not. Instead, it features a physical Reset button on the back of the PCB. Thankfully, I was able to use a generic key combo (Right Shift+Left Shift+B) to force it into Bootloader mode, but I very nearly had to disassemble the keyboard I had just finished building.
Bottom Line
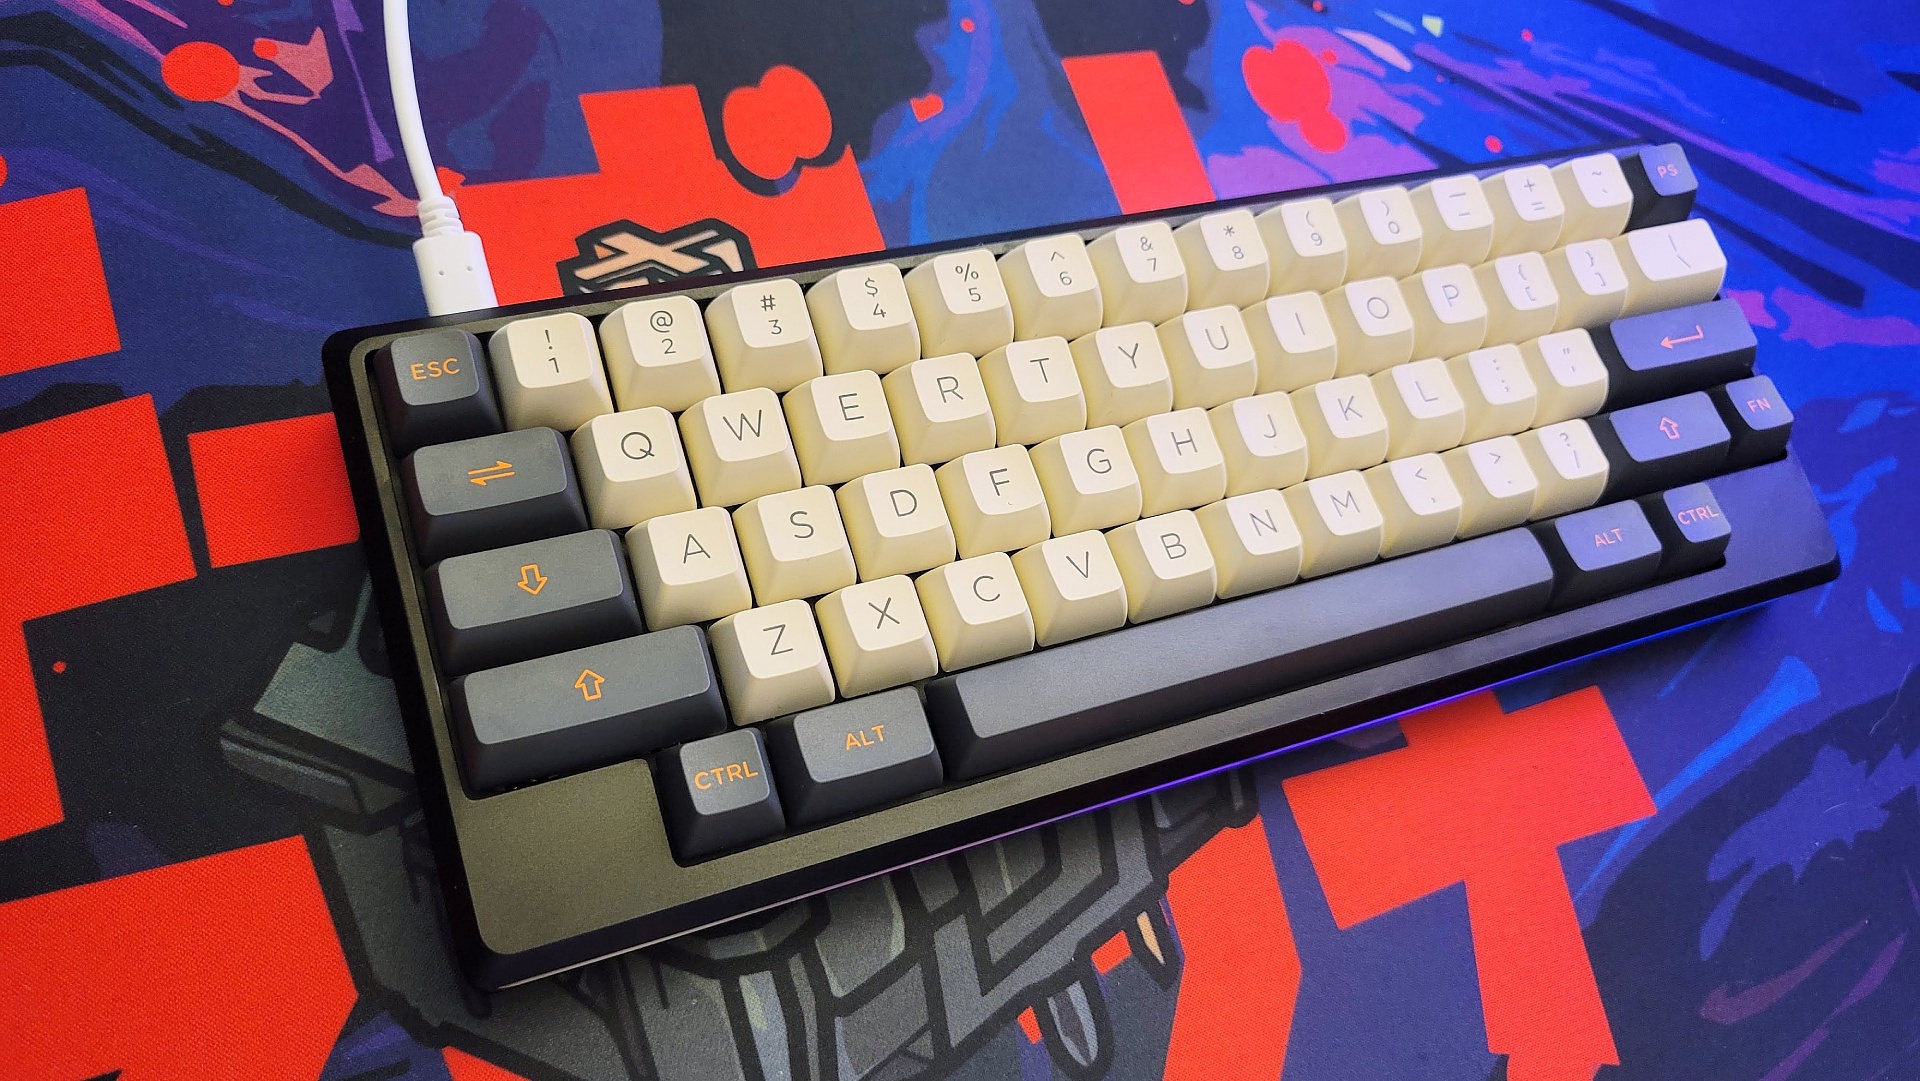
For fans of the HHKB layout that want an aluminum case, the Tokyo60 is one of the best options out there. With some basic modifications, like lubing the stabilizers and adding a bit of case foam, it delivers a good typing experience that’s loud, clacky, and satisfying. The layout wasn’t great for gaming but the final build looked and sounded great, which made it fun to use throughout the review process.
The big thing that stands out with this kit is that it needs those mods to be more than mediocre. I would argue that anyone building a keyboard should be taking the time to properly lube their stabilizers, but if you don’t want to take the time and don’t mind stepping up in size, the Keychron Q1 barebones version sells for only $150 and includes great stabilizers out of the box (though is awaiting restock as of this writing), as well as a softer, gasket-mounted typing experience. If you’re a gamer, the Glorious GMMK Pro is another good option that allows you to choose your own switches and keycaps.
Neither of those keyboards are HHKBs, though, and that’s the differentiator. At $160, this is a great choice for users looking to build their own custom keyboard. If you’re looking for a keyboard that doesn’t go over the top with RGB but still looks great, this is an option well worth considering.

Chris is a regular contributor for Tom’s Hardware, covering mechanical keyboards, peripherals, and content creation gear.
-
mrv_co And it's out of stock. I wouldn't get too hung up on case material, especially with inexpensive hollow aluminum cases. The PFU HHKB Pro Classic is $211 and ready to go out of the box. If you want to go the custom route, with the right switches, the Rama Kara is outstanding and readily available on Reddit because so many people can't adapt to the HHKB layout so they come up for sale often with little or no use. Or if you don't think you're up for adapting to the HHKB layout, just go with one of the numerous excellent entry-level hot-swap 65% options in this price range.Reply -
Drhovno I bought a Tokyo60 to fit my small office desk. It's really nice to own a keyboard with replaceable / customizable parts. I ended up loving the HHKB layout and bought another for home.Reply
If you can wait, the kits come up for around $100 on Ebay.
