Raspberry Pi UPS PCB Keeps Your Pi Project Juiced
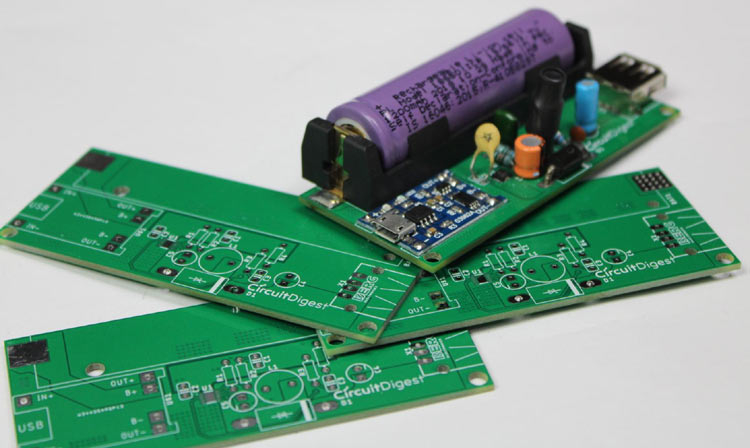
Finding the best way to power your Raspberry Pi project is always a challenge in itself, but ensuring redundancy is an entirely different challenge. Thankfully, this Raspberry Pi UPS project from Sourav Gupta at Circuit Digest is ready to tackle the issue.
There's nothing more frustrating than corrupting an SD card or worse, causing damage to hardware on your Pi because of power failure. Some of the best Raspberry Pi projects we've seen rely on continuous power and this PCB is designed to protect your hard work.


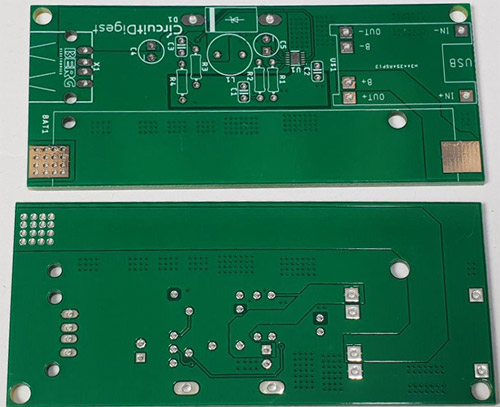
Gupta was kind enough to make the design open source and share all of the juicy details on how everything works. The UPS relies on an 18650 Lithium-Ion battery which can output up to 1.5A of continuous power with a peak of 2.5A. It can be recharged using a TP4056 Lithium battery charging module which uses a Micro USB port for charging the battery, on the other side of the PCB is a USB-A interface for output to the Raspberry Pi.
The board is installed between the Pi and power source to ensure power is supplied when drops occur. It plugs directly into the Pi's power port rather than the GPIO pins.
The PCB was designed from scratch, with samples fabricated by PCBWay. If you want to check out the design up close or maybe even recreate it, you can download the Gerber files on the project page at Circuit Digest. There you'll also find detailed instructions on what components are needed to assemble the final HAT. Be sure to follow Gupta for more cool Raspberry Pi projects and updates on this one.
Get Tom's Hardware's best news and in-depth reviews, straight to your inbox.

Ash Hill is a contributing writer for Tom's Hardware with a wealth of experience in the hobby electronics, 3D printing and PCs. She manages the Pi projects of the month and much of our daily Raspberry Pi reporting while also finding the best coupons and deals on all tech.
-
BriComp Reply
Unfortunately the design uses a surface mount component which is virtually impossible to solder by hand. Also not all the design files are available so it is impossible to get the PCB made and the SMT components assembled b y the PCB manufacturer. A great pity as I wanted to make one/some of these boards.Admin said:Stop disrupting your Raspberry Pi projects with unexpected power drops using this UPS project from Sourav Gupta at Circuit Digest.
Raspberry Pi UPS PCB Keeps Your Pi Project Juiced : Read more -
CooliPi ReplyBriComp said:Unfortunately the design uses a surface mount component which is virtually impossible to solder by hand. Also not all the design files are available so it is impossible to get the PCB made and the SMT components assembled b y the PCB manufacturer. A great pity as I wanted to make one/some of these boards.
I see 1 component, some sort of QFN package with a big thermal pad. You can solder it by hand if you have hot air.
My usual workflow:
I wet all the tiny pads on the PCB with PbSnCu tin. It has lower melting point than non-Pb tins and wets better. A good flux in it is a must. I use Stannol Sn63Pb36Cu1 with HS10 flux or similar tin.
I make a small drop on the QFN's thermal pad on a PCB. Not too big, or it would otherwise float on it.
I wet all the tiny pads on a QFN chip with tin.
I wet the middle thermal pad on a QFN chip. Again, not too big, just a tiny drop.
I use flux on both mating surfaces. Mine is an old rosin based one, but you may choose a newer, safer one.
I heat up the board to about 100˚C with hot air.
I heat the underside of that QFN chip pads (PCB).8 I put the QFN chip in the place
9. same as 7. - until is melts, at least partially. Continue until the chip floats around, then use tweezers to push it against the board. If it goes well, it floats to the right place. Excess tin is left outside the chip on the pads (shorting them, mostly), the rest is under the board, taken away by capillary forces in the vias in the pad.
10 I wait until the tin solidifies, then wait some 10 seconds, and then use a Ag coated woven copper wire (wetted in the flux) to put over the shots. Heat it with a soldering iron, effectively melting excess tin and absorbin it into the wire.
11 I inspect it with a magnifying glass.
I have soldered some hundreds of soldered packages like this.
Hot air, good tin (0.5mm dia) with good flux and a standalone flux plus woven wire does all the tricks. I solder 0.5mm pitch chips. -
Plepoutre59 Great if Tom's hardware could review the different ups boards for raspberry. There are a bunch : x708, x750, rpi ups v3, pi juice,... With different ampsReply