MSI GX60 Review: Radeon HD 7970M In A $1,200 Notebook!
MSI's GX60-series notebook is in our lab today. Armed with Radeon HD 7970M graphics, a 15.6" display, and triple-screen output, this is truly a desktop replacement. But can its AMD A10-4600M APU keep pace with gaming platforms armed with Intel CPUs?
Interior: Teardown Images And Components

Note the hole punched right through the "Warranty Sticker Void if tampered” label. This is from us. We void warranties so that you don’t have to.
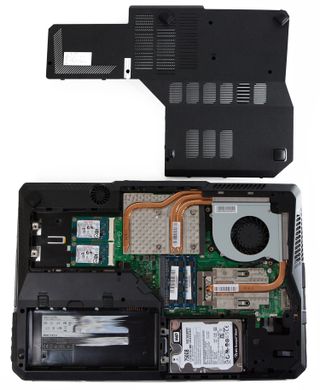
Six Phillips-head screws and numerous plastic snaps attach the bottom cover to the MSI GX60. Once removed, you have easy access to the mSATA SSD RAID array, GPU, RAM, CPU, and 2.5” hard drive. Note that in removing the six cover screws, you also removed three of the four fan screws and one of two hard drive screws.
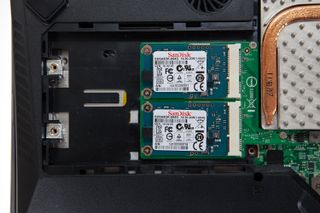
Starting in the upper-left corner, we have two SanDisk mSATA SSD drives on what appears to be a proprietary daughterboard. It looks like a second 2.5” drive could also occupy this space, but alas, there is no connector. With the speeds of larger mSATA drives catching up to 2.5” SSDs, but lower-capacity models still quite a bit slower, this is a really smart configuration. You get the performance of two 64 GB SSDs in RAID 0, while still leaving enough space for a large-capacity, inexpensive hard drive in its own bay.
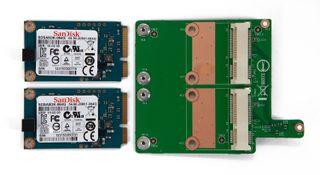
Removing the daughterboard and mSATA drives is no problem. There are two screws on the board and another two for each drive.
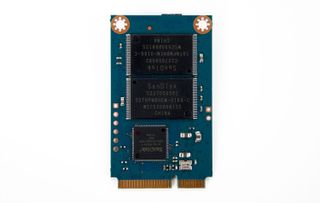
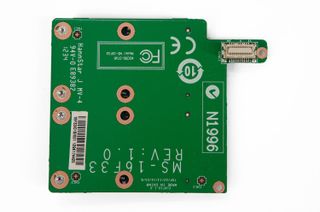
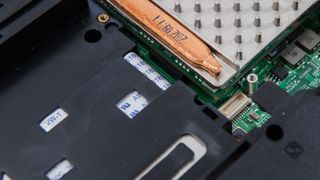
Another proprietary connector connects the daughterboard to the motherboard. While you may be able to order a proprietary daughtercard for a 2.5” drive, we’d definitely stick with the existing dual-mSATA and single-hard drive setup.
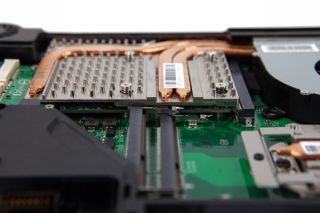
Moving on, we encounter the GPU. The connection appears to be a standard 100 W MXM-B slot. There are two heat pipes for the GPU and a third for the on-board memory. The system RAM slots in front of the GPU sit empty to give you a better view.
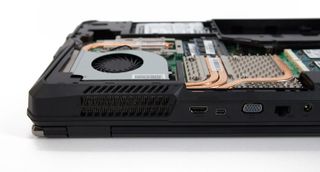
The heat pipes feed into a large heat sink that vents to the back of the machine.
Stay on the Cutting Edge
Join the experts who read Tom's Hardware for the inside track on enthusiast PC tech news — and have for over 25 years. We'll send breaking news and in-depth reviews of CPUs, GPUs, AI, maker hardware and more straight to your inbox.
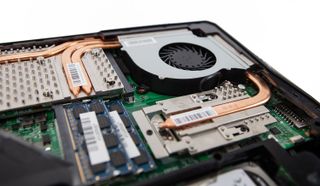
The GPU and CPU are both cooled by a single large fan. The upside to this is that a larger fan can move more air at lower RPMs. It also means one less part to fail.
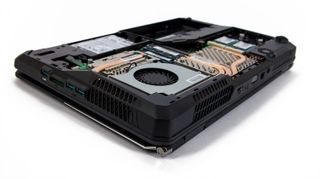
Even though they share the same fan, the CPU and GPU heat sinks do not touch. The thermal solutions for the each remain physically separate. Stressing one subsystem or the other will simply cause the fan to blow more air through both sinks. So, a CPU under full load results in the GPU idling a few degrees cooler.
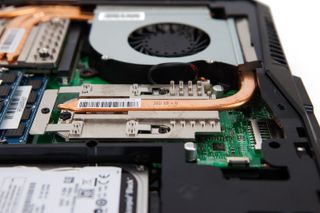
Here is a closer look at the CPU heatsink. It has one heat pipe to the GPU’s three, which makes sense since the GX60 sports a 35 W CPU and a 100 W GPU.
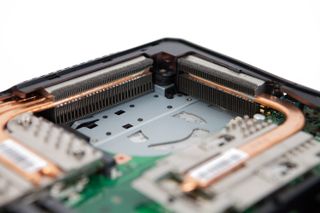
Since three of the four fan screws were already removed with the bottom cover, why not remove the last one? The fan is very easy to pop off, which can be a big plus when cleaning time comes around. Also note the little foam strips. These ensure that every last wisp of air is passed through the heat sinks.
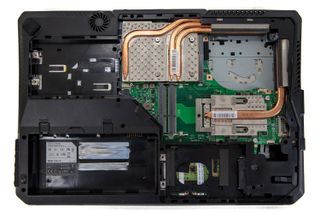
Here is an overhead shot of the machine with all of its user-serviceable parts removed.
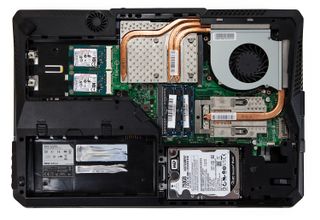
Less than five minutes later, everything is already back in place.
The only issue we had accessing the GX60's internals was replacing the bottom cover. Around the edges are small plastic clips that help keep it in place. Snapping these in can be quite the white-knuckle experience. If you are careful, and figure out which to snap in first, you should be fine. During the course of our review, we removed the cover four or five times without issue. With all clips in place and secured by the six Phillips-head screws, the bottom of the system is very solid.
Current page: Interior: Teardown Images And Components
Prev Page Exterior: Design And Features Next Page Keyboard And Trackpad-
yobobjm I own an MSI (with some weird number classification that I can't remember) but it has proved to be a dedicated and powerful gaming laptop. It also has had really no problems other than the glossy finish getting scratched (which doesn't even exist on this laptop) so I would recommend MSI products :DReply -
flowingbass I also own an MSI, a GX660r with a 5870M and a Core i5 480m. The 5870M desktop equivalent is a HD5770. The GPU is quite struggling to play on high in current games, mid-high or sometimes medium (all low on crysis 3 except resolution and textures) is required to maintain playable frame rates.Reply
I might just upgrade to this and just swap GPU between the two. i5 480m > A10-4600M -
acktionhank Hey Tom's run a few gaming tests again with PScheck forcing the CPU to run at a 2.5-2.7ghz so that it won't throttle itself so much.Reply
I'd like to see exactly what speeds we'd need to get an A10-4600 running at to reduce these severe bottlenecks. -
silverblue Very nice machine. It's a shame that AMD stopped with the A10-4600M and didn't look to produce a higher model as that'd help, however until the HSA initiative really kicks in, the Bulldozer architecture's FPU implementation is always going to be found wanting, and that's without even talking about the sharing issues which Steamroller looks to fix.Reply
Most Popular

