Console Killer: Building a Liquid-Cooled Living Room PC
1. Stripping the GPU
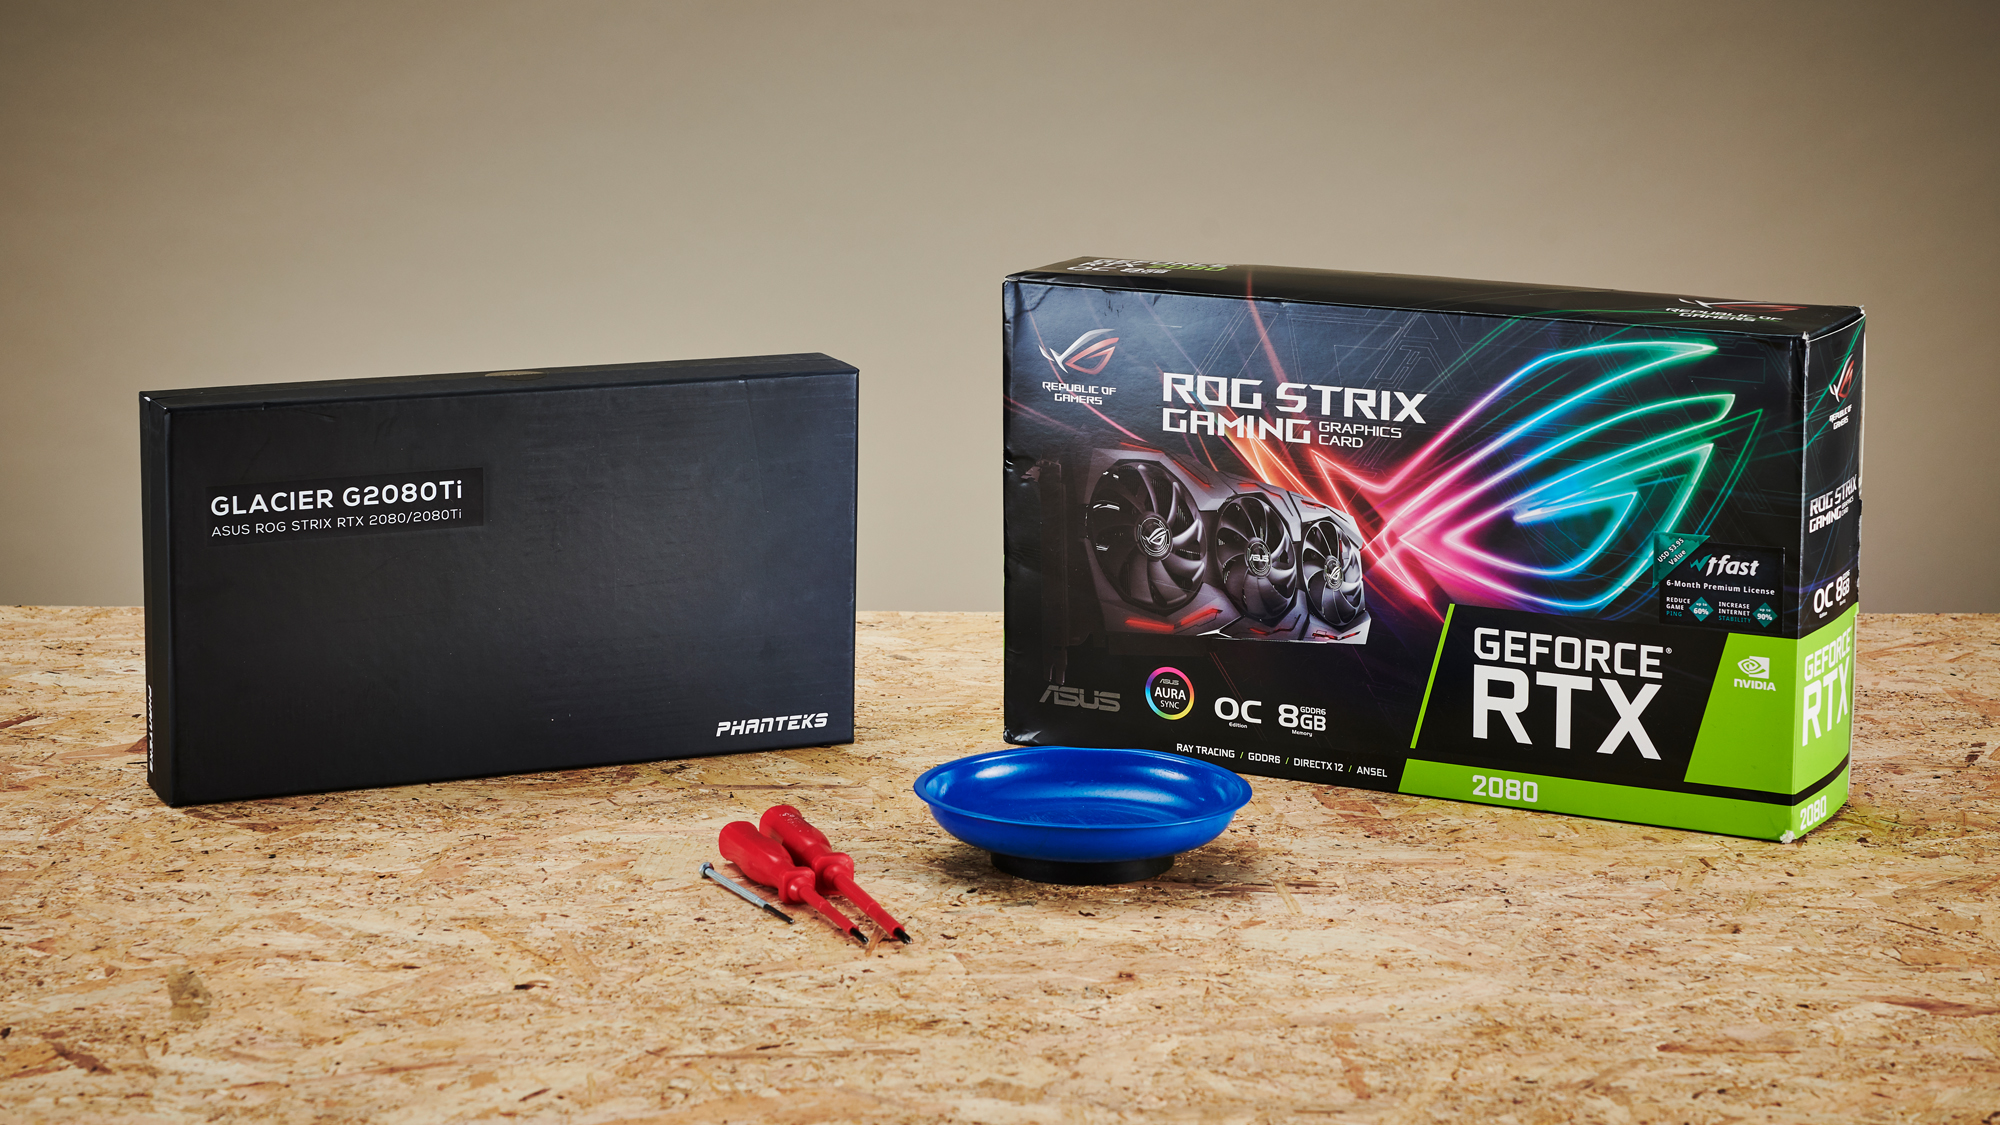
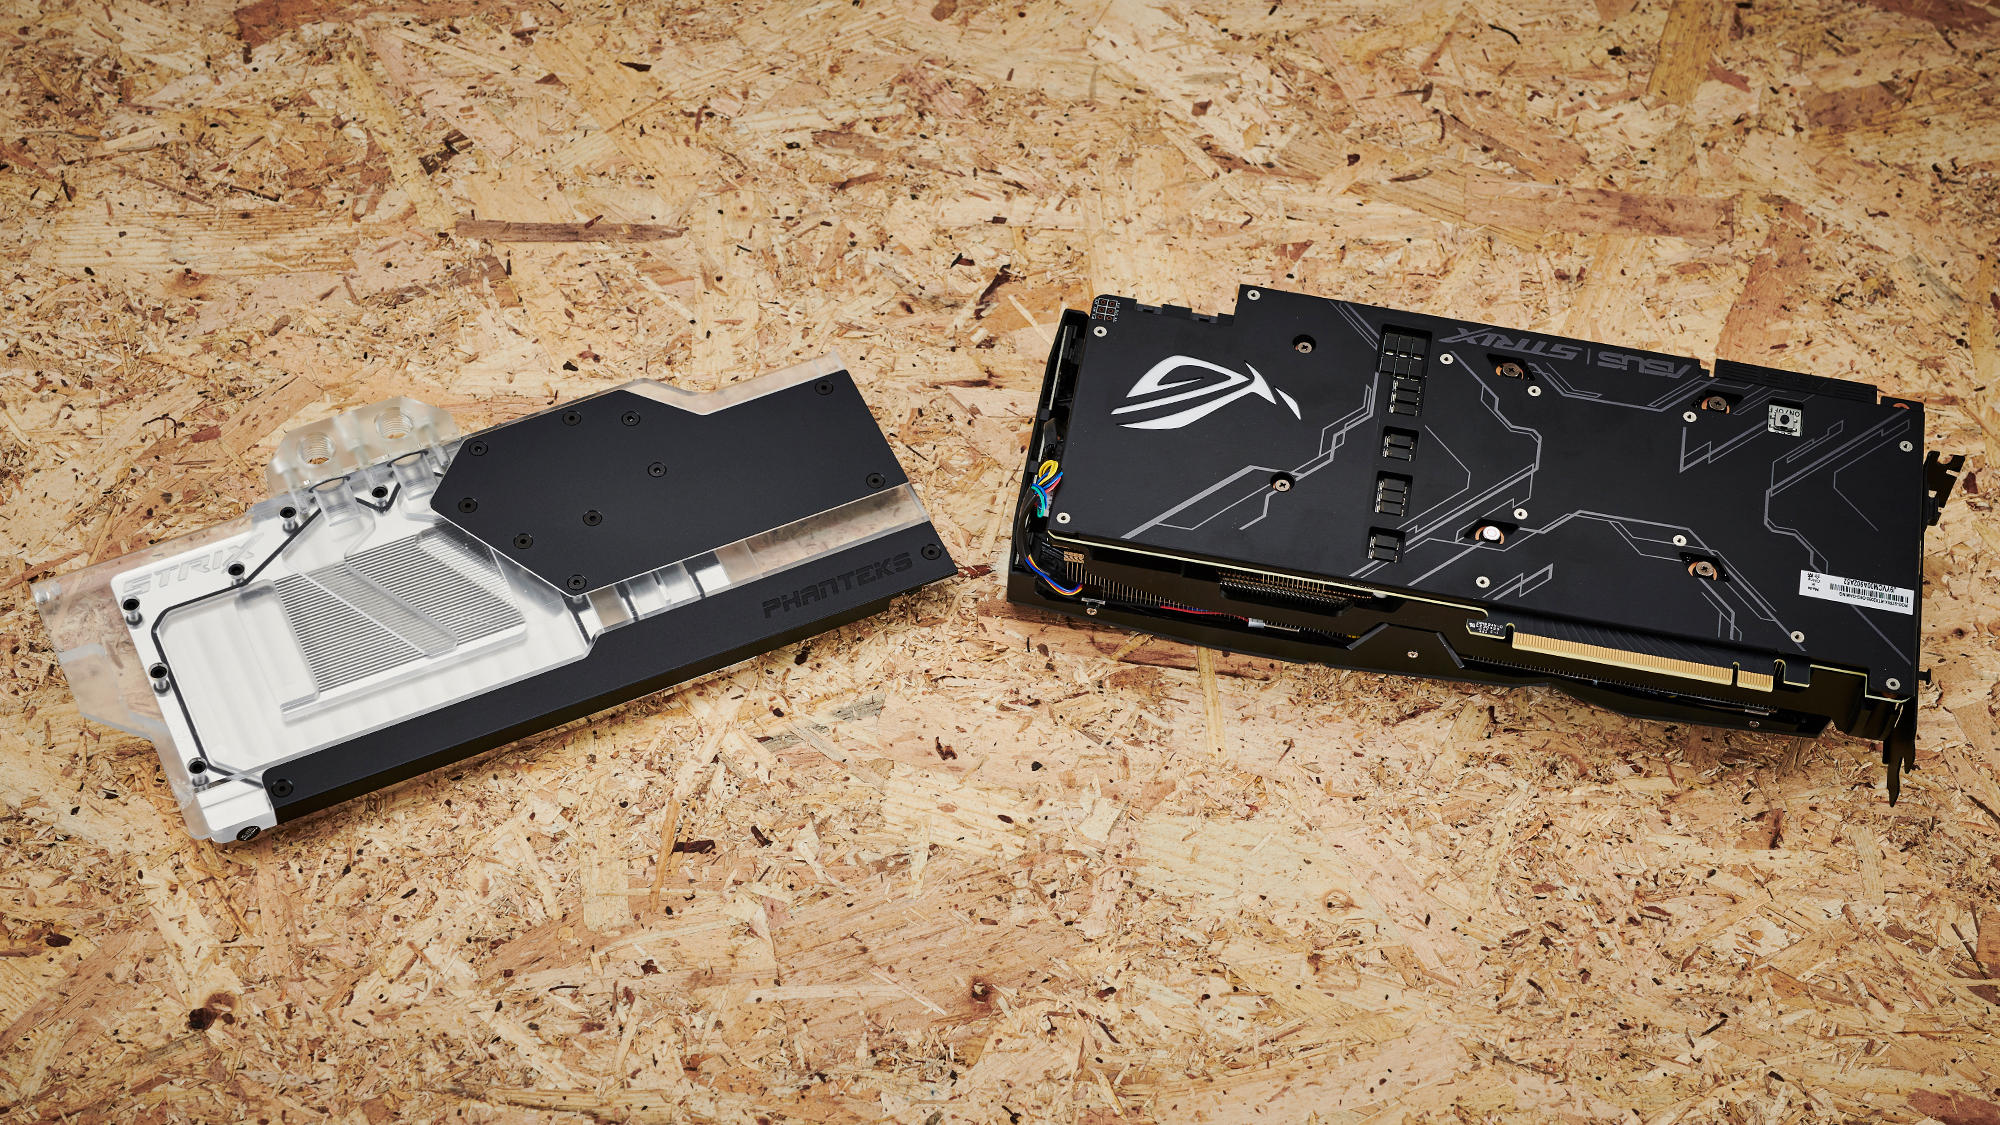
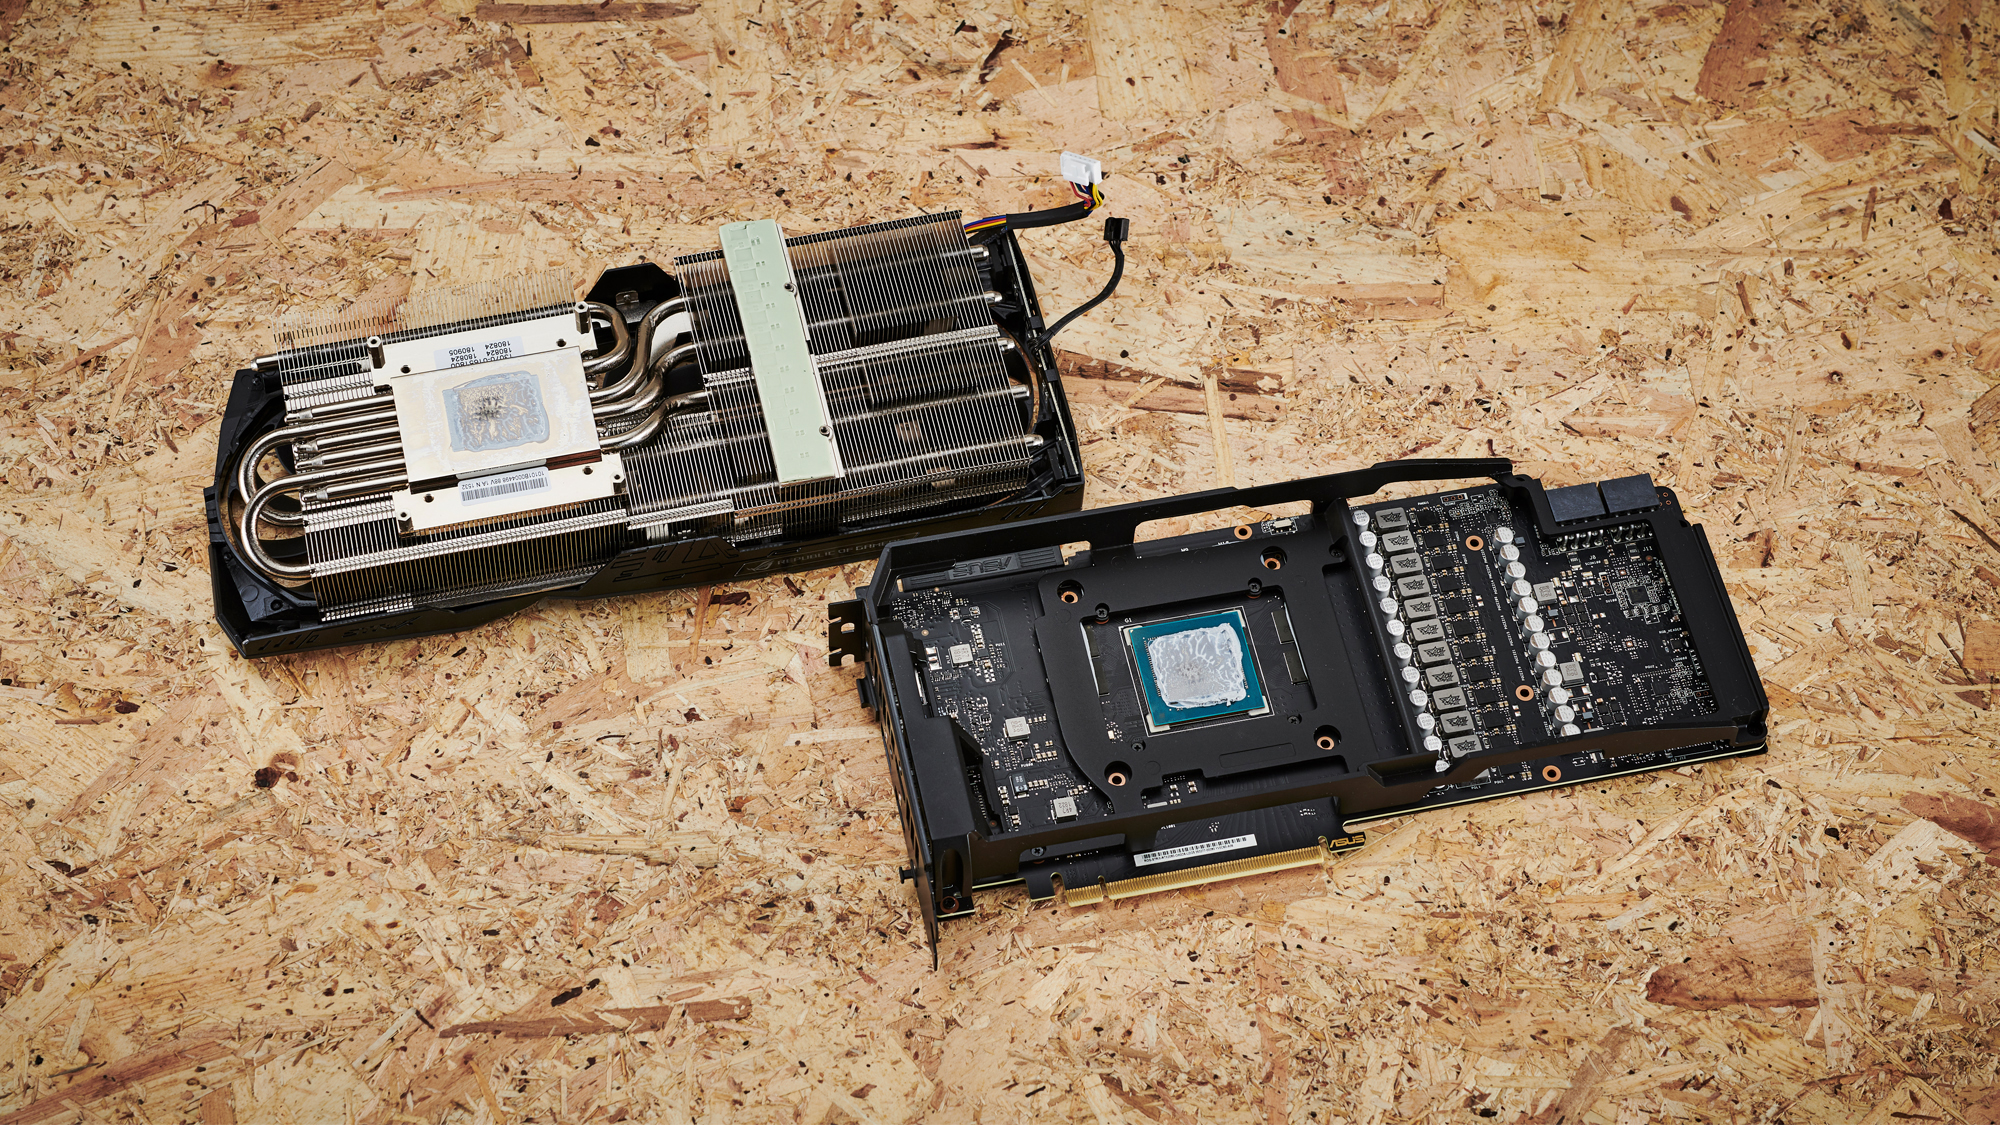
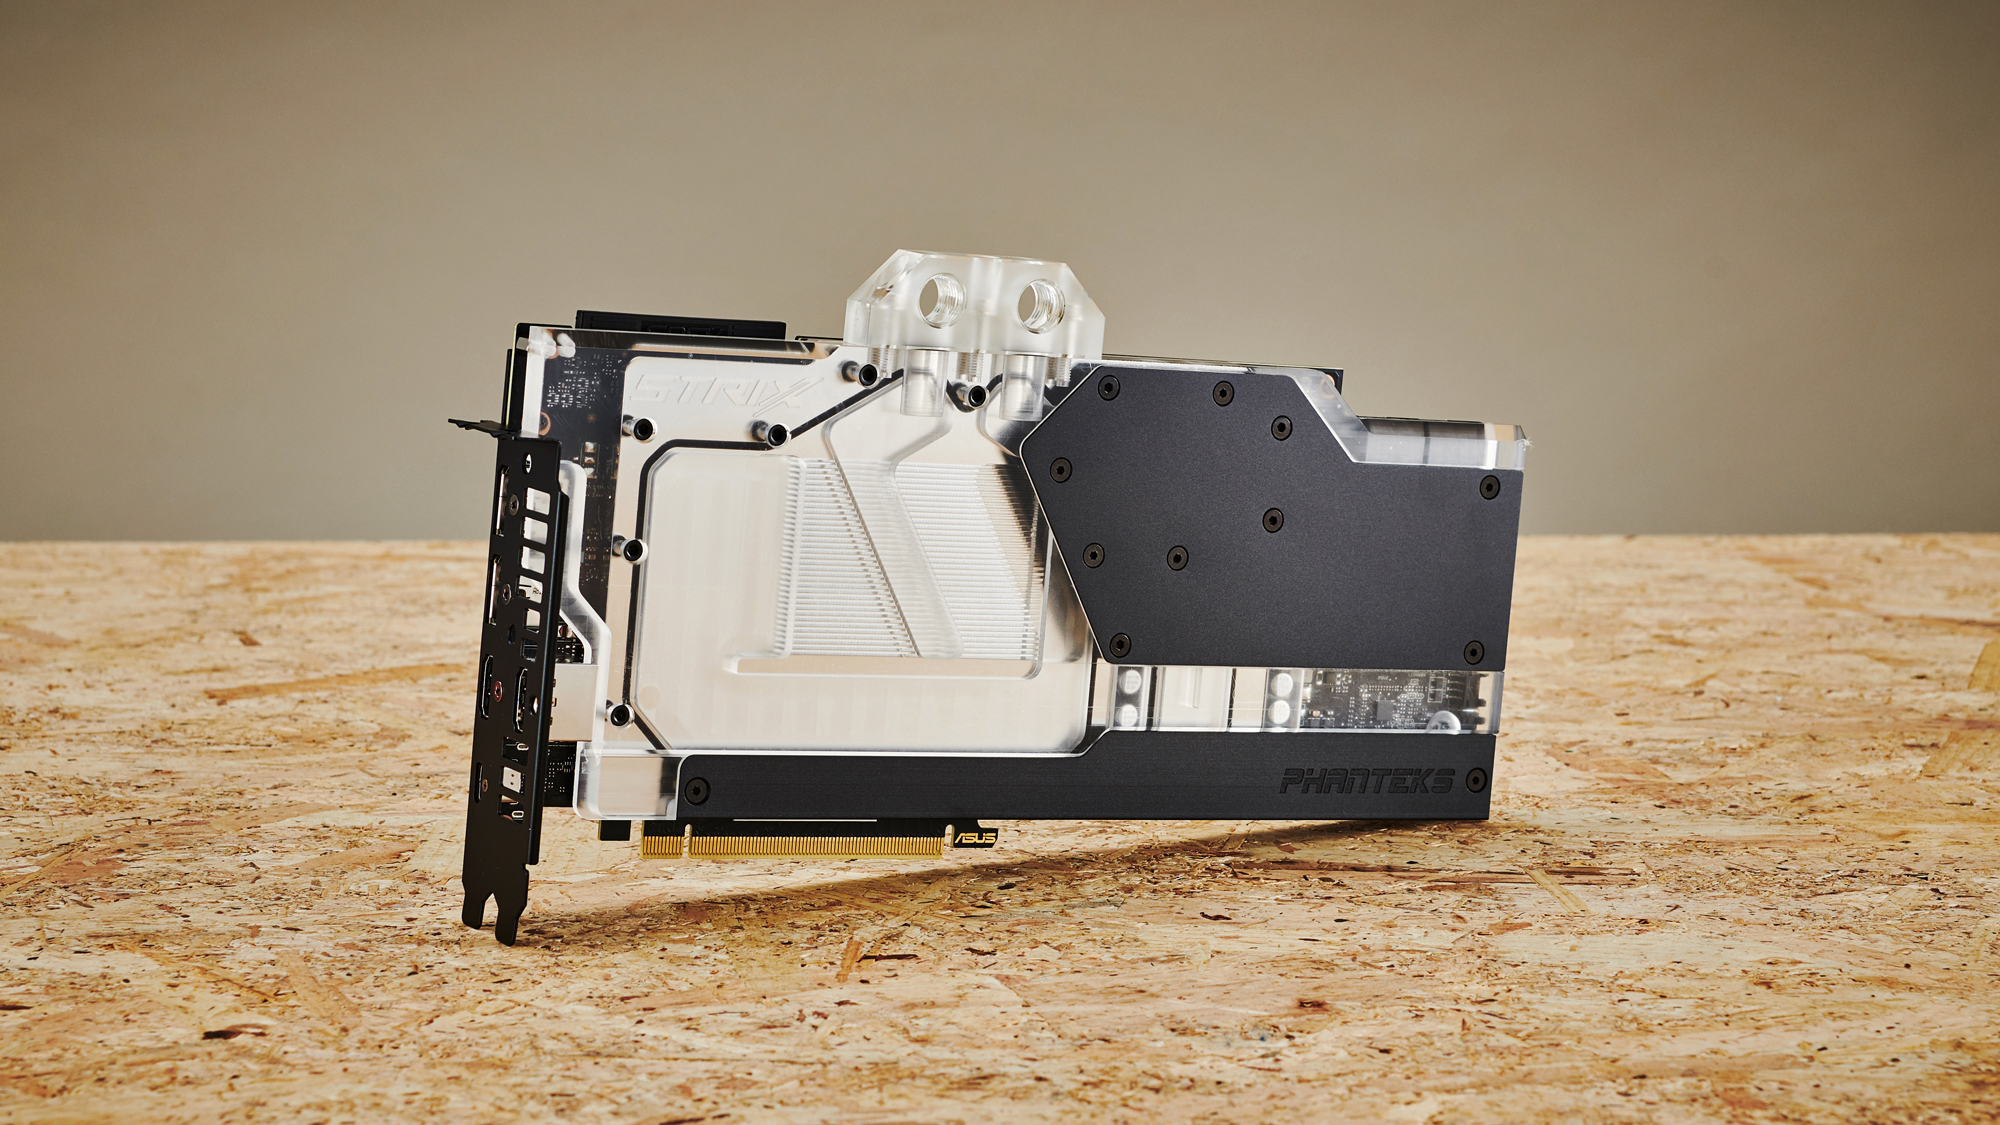
In order to liquid cool a graphics card, you have to first remove the fans and heatsinks that come attached. Stripping down a graphics card can be quite intense. If you knock off a capacitor or otherwise damage the card, you’ve destroyed a very expensive component.
Fortunately in my case, things went rather smoothly. The Asus card is held together with simple Phillips-head screws, unlike most Founder Editions (requiring torx, or a 4mm socket screwdriver), and once you’ve unhooked the RGB and fan cables, stripped the card, and added fresh paste and thermal pads to the memory, the Phanteks block goes on like a dream. I’m reusing the backplate here as well, so I can keep the RGB LEDs. That does add an extra layer of complexity to it. However, for the time being Phanteks doesn’t offer a backplate for the Strix variants.
2. Case Strip Down
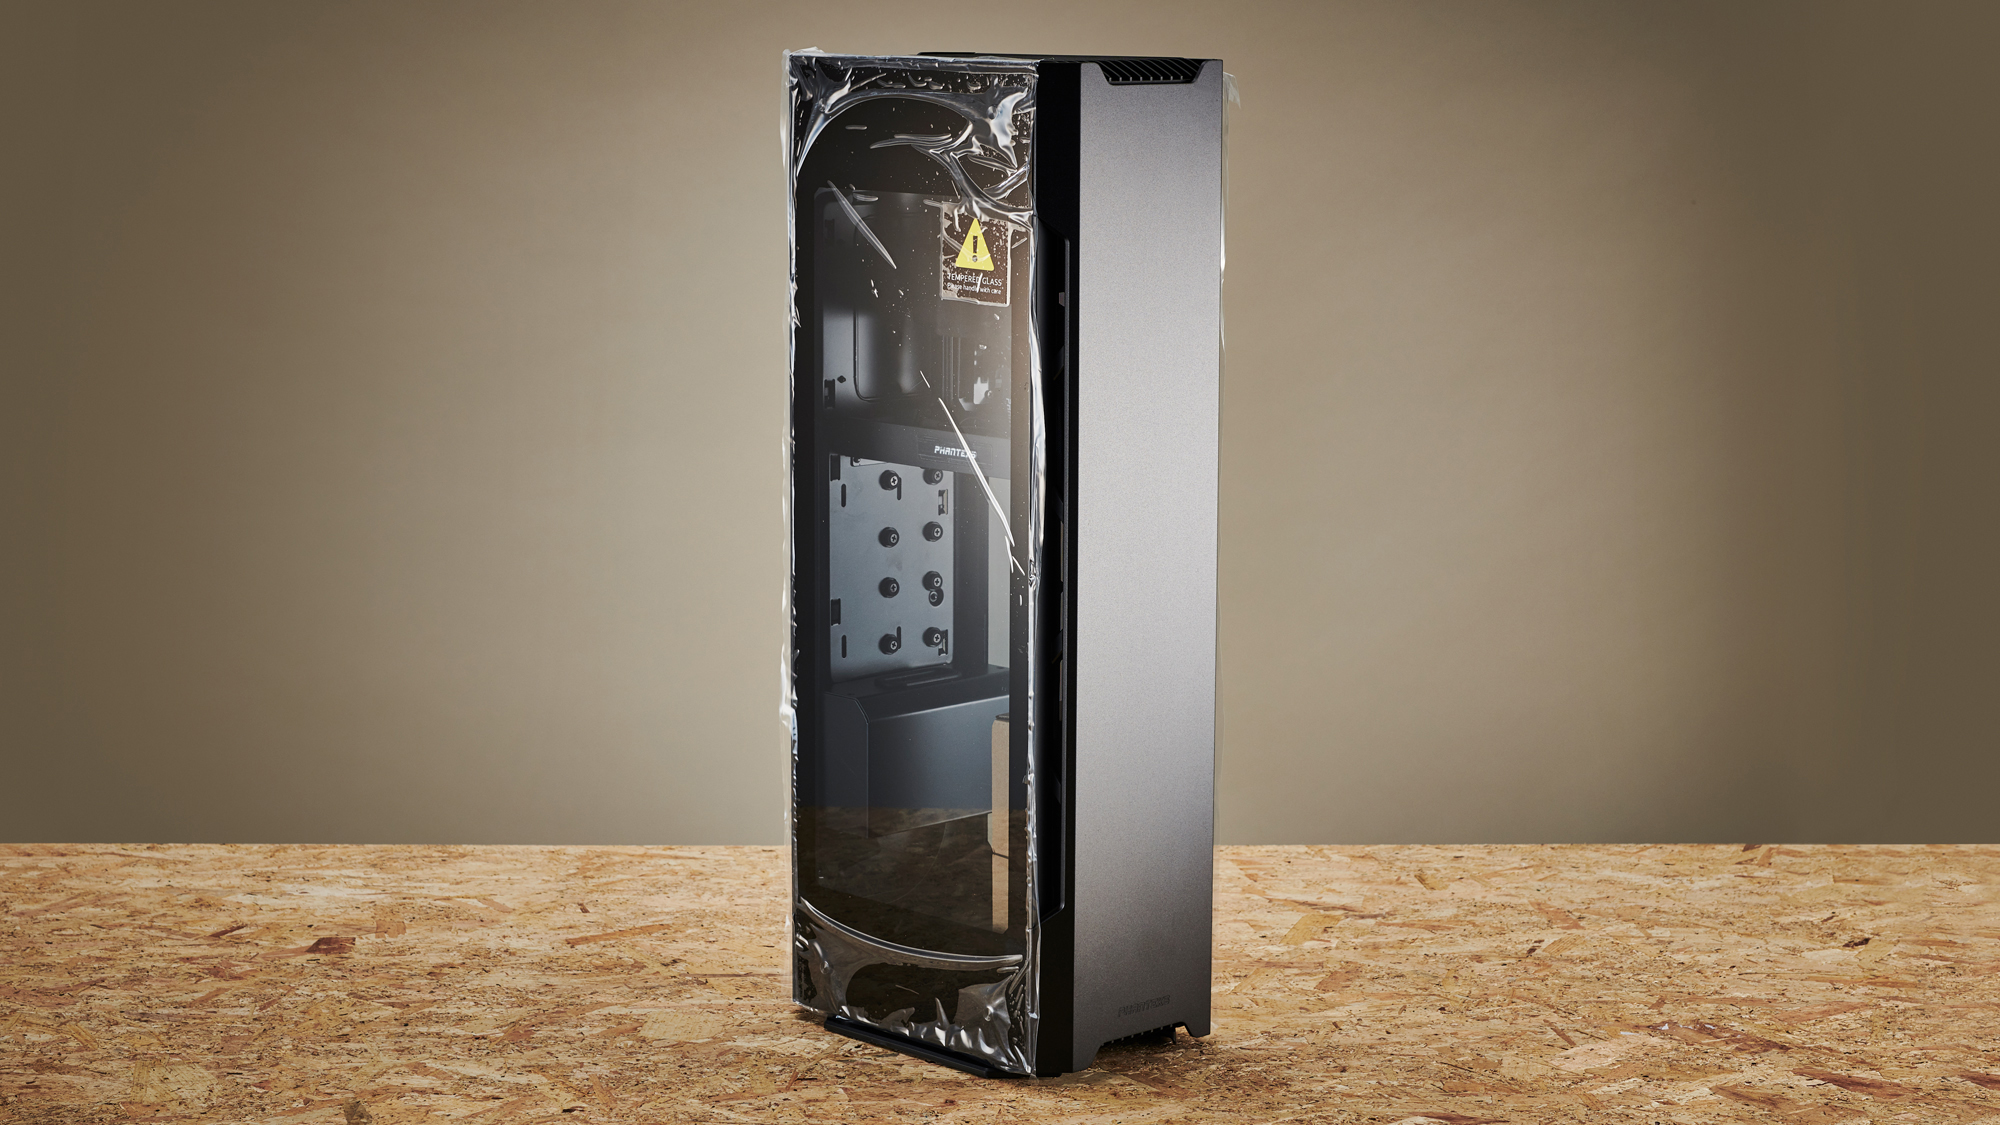
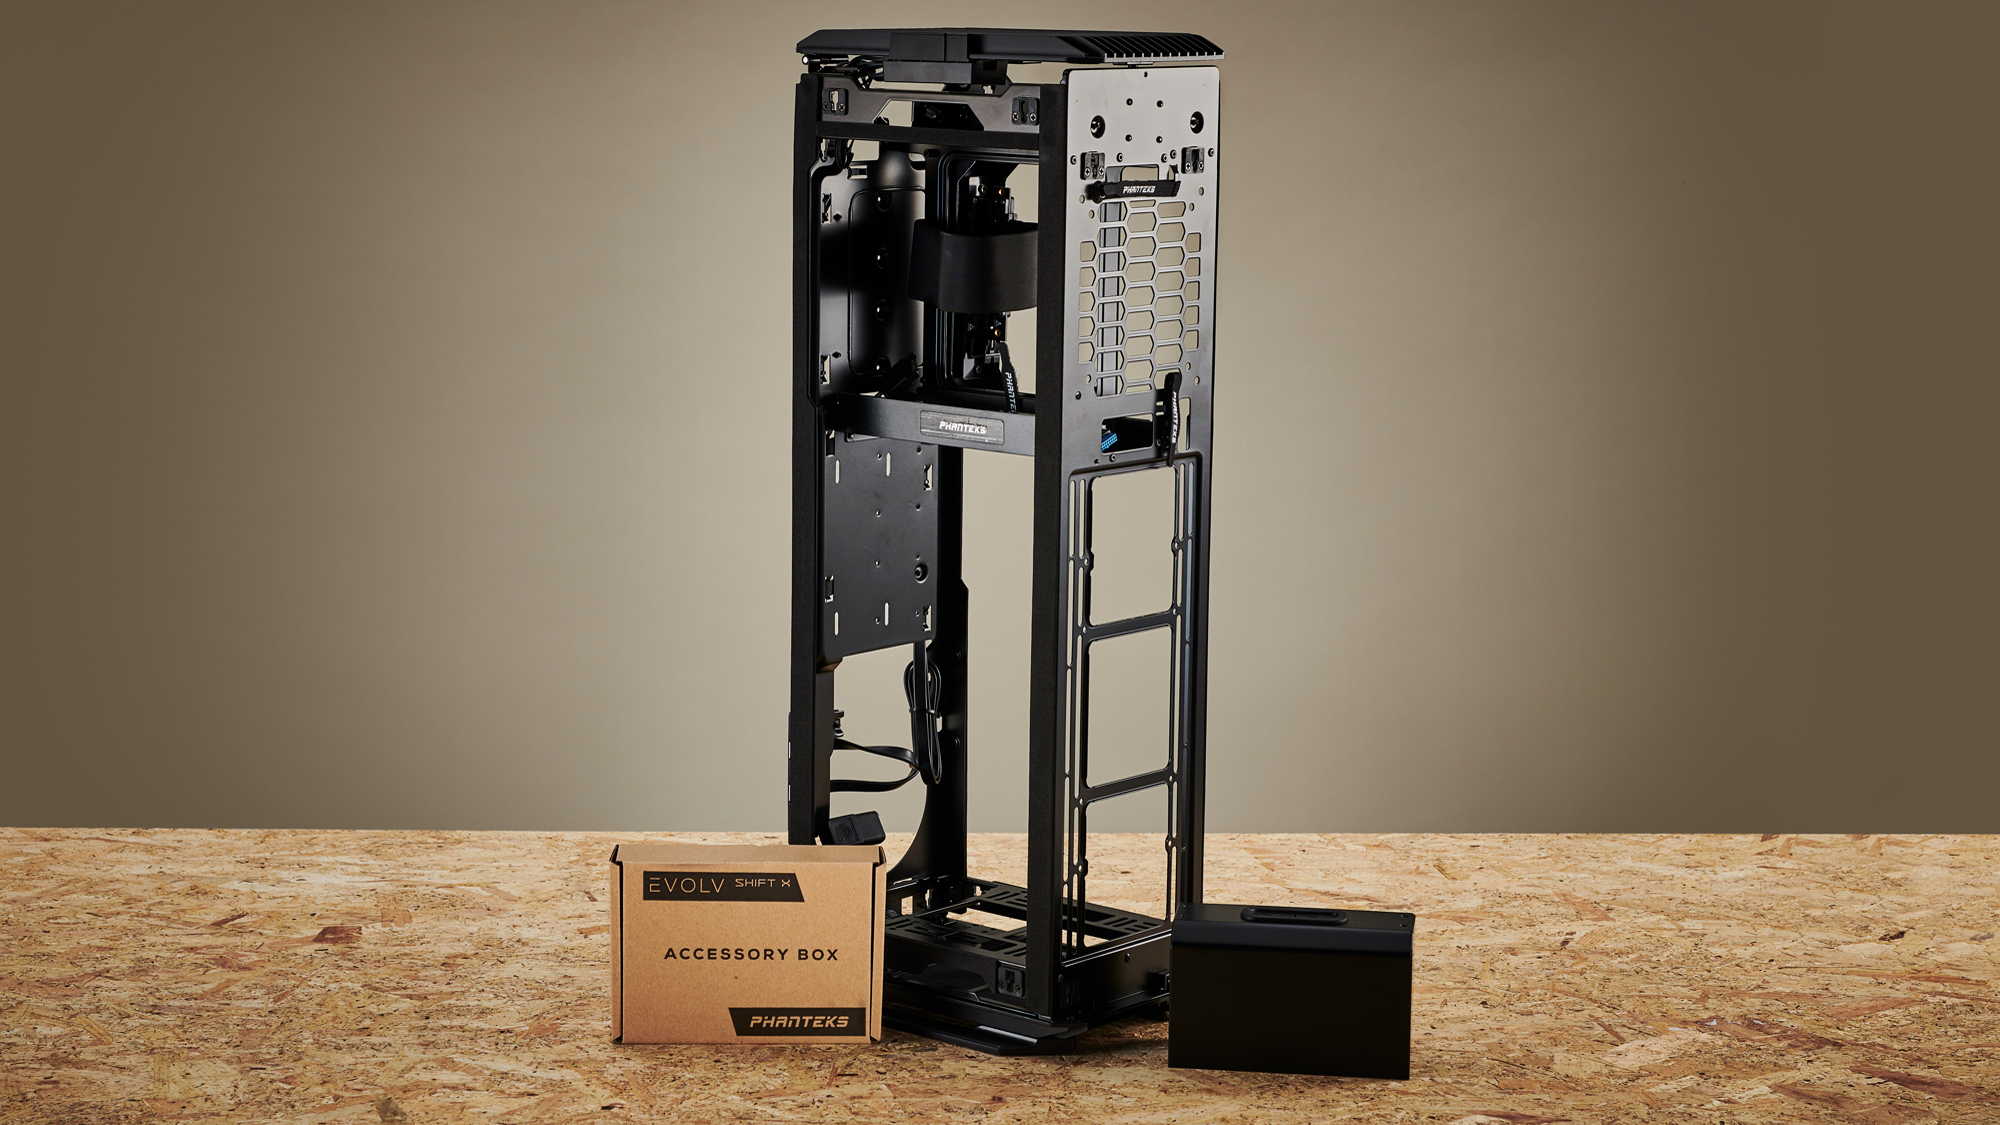
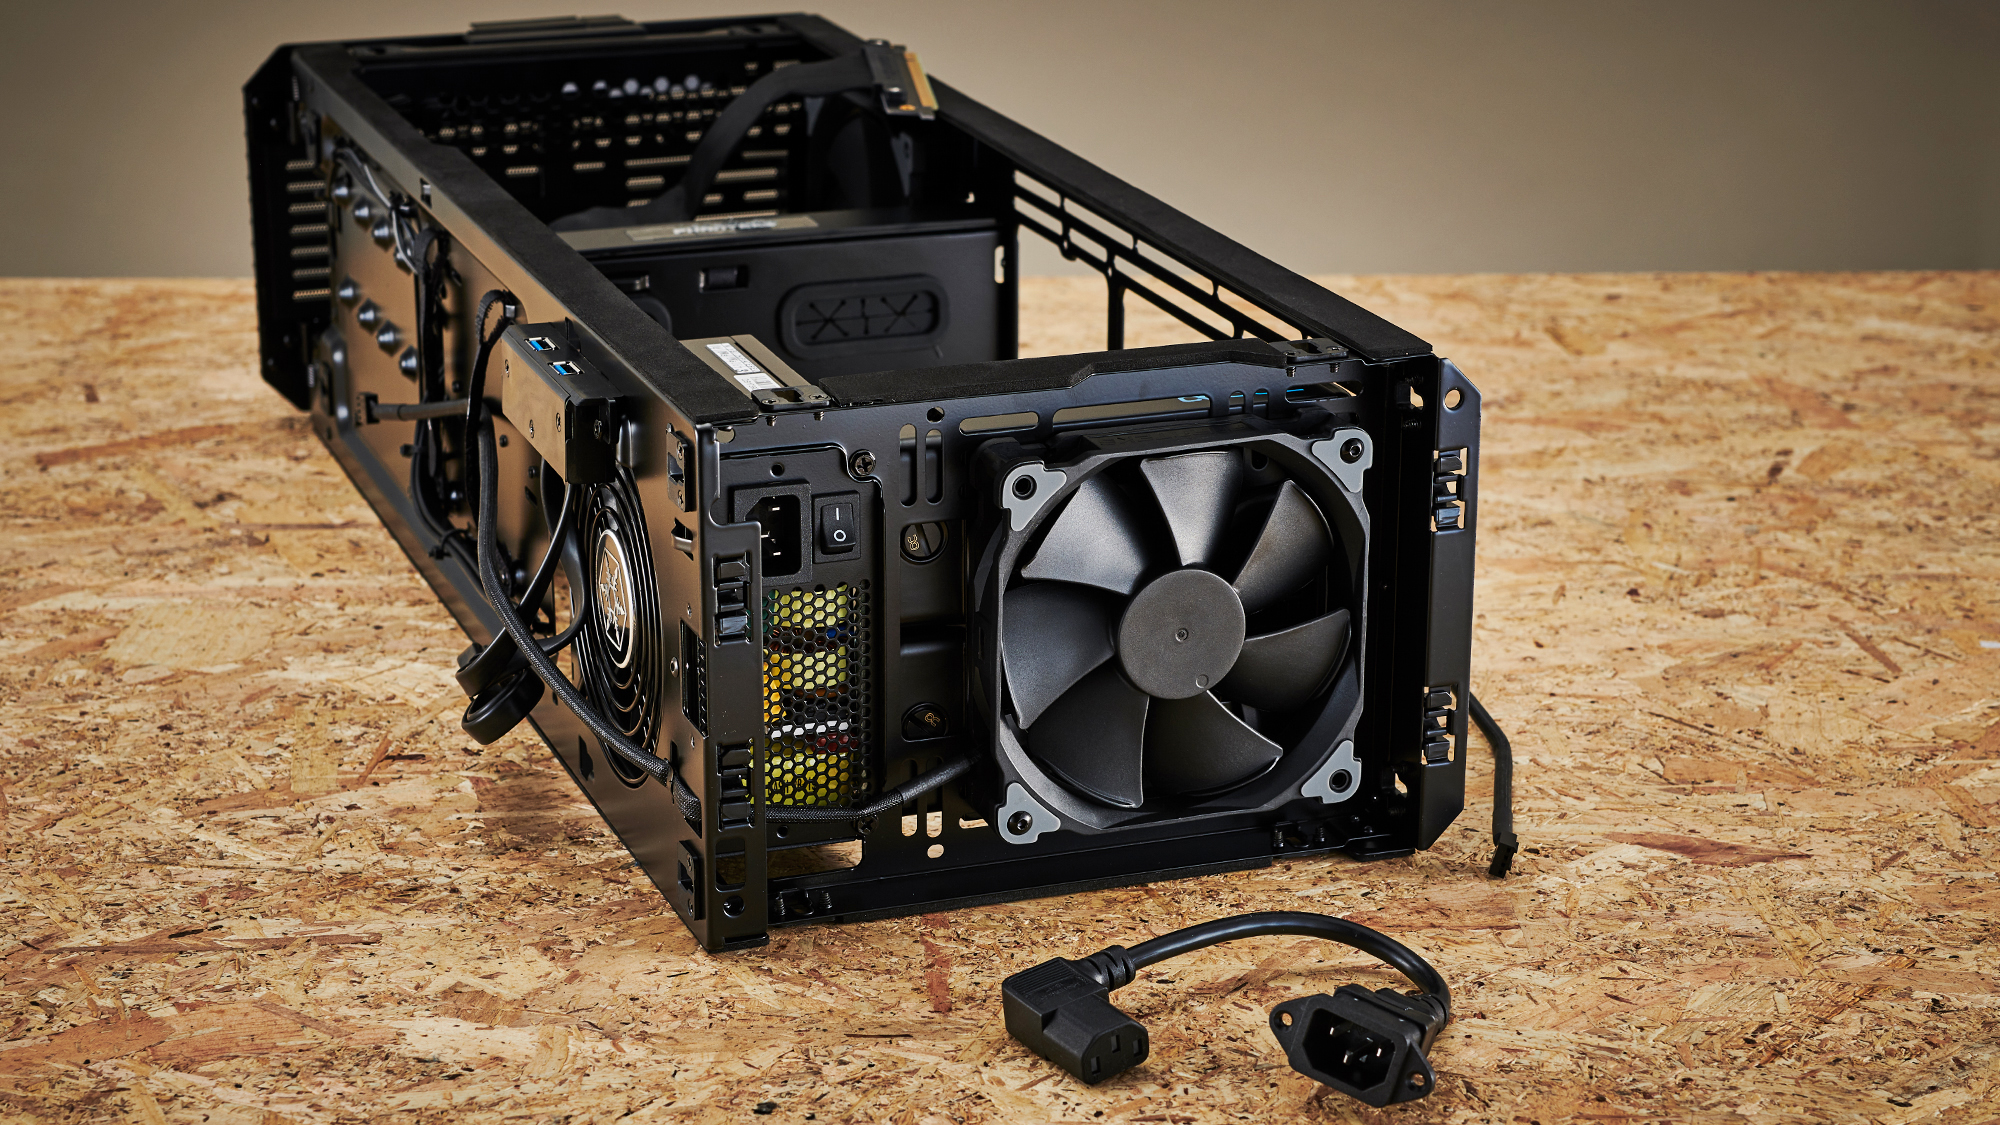
Stripping the Evolv Shift X is a fairly straightforward procedure. You simply pop the top I/O panel up, (it’s on a push-in hinge mechanism), then remove the two thumb screws located on both of the tempered glass side panels and lift them up and out. Once they’re out, the front and rear aluminum panels can be removed in a similar manner. There are two internal thumb screws for each located on the inside of the rear I/O area. Once they’re undone, the two panels simply pop off. Then it was a case of removing the stock fans, the SSD brackets, and the Phanteks cable cover and we were good to go.
3. Motherboard Prep
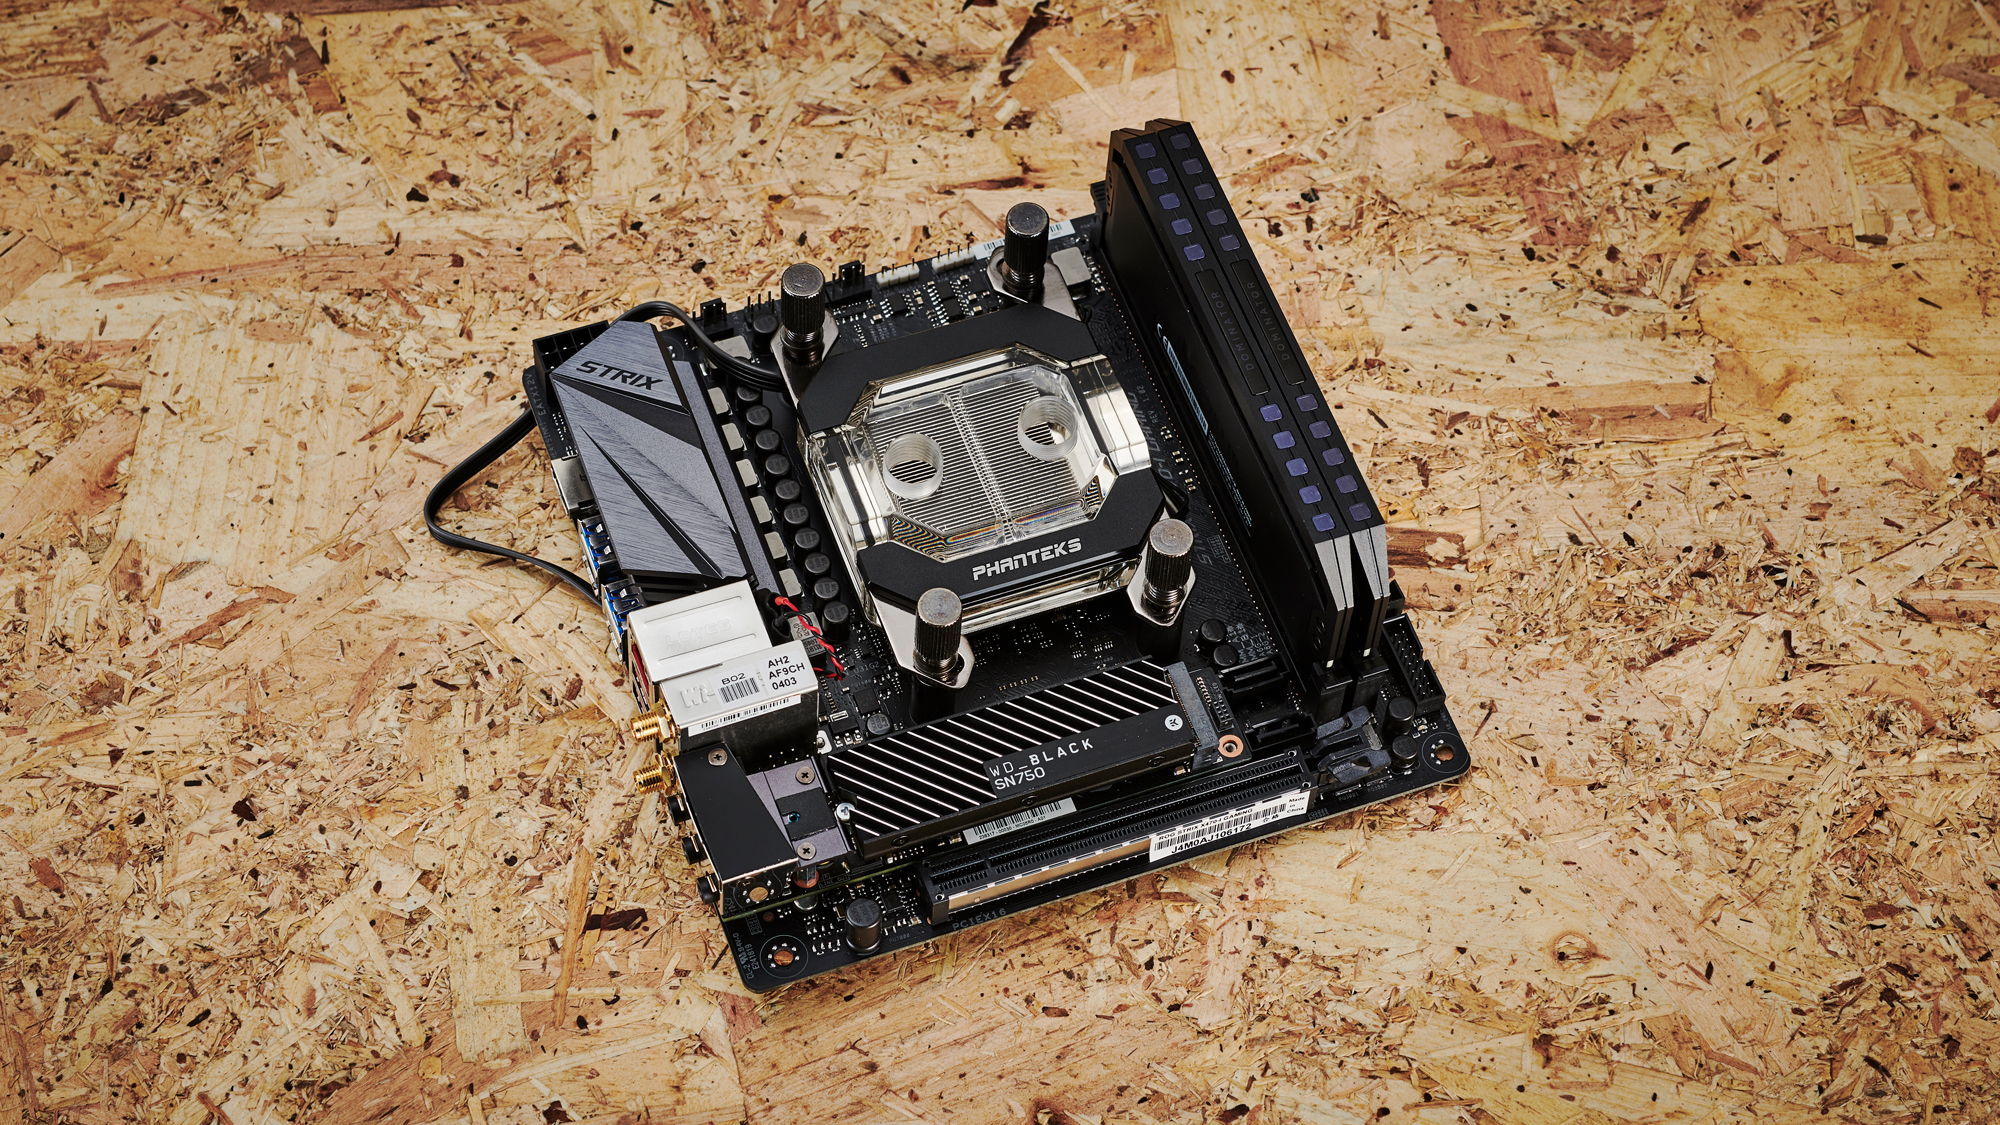
This is where I ran into my first snag. We recommend whenever you’re doing a water-cooled build like this that you setup your motherboard and the majority of its hardware outside of the case. It just makes it easier to get the CPU block in place securely if everything else is sorted beforehand. One thing we will comment on is that the Phanteks’ CPU blocks feature two RGB cables that need plugging in: one where the upper most black bar is located and one on the bottom. That can be quite fiddly, and does require some extra thinking r.e. cable management later on.
Our issue however was less with that and more with the WD Black SN750. It’s a fine PCIe SSD, but we intended to remove the heatsink and use the integrated one on the Strix mobo. Unfortunately you need a ridiculously small Torx screwdriver to take the heatsink off, and despite the fact our photography studio is located next to two DIY stores, we just couldn’t find a torx small enough. In the end we opted to just run with the motherboard’s PCIe cover off entirely, and if we’re honest, it kinda looks cooler anyway. Who needs RGB after all?
4. Radiators and Power Supplies
Next in the long list of snags I had to work through was the power supply and radiator situation. I decided to have a crack at using Silverstone’s 800W Strider SFX PSU, as I had some cables already sleeved for it from another build. You may notice in later shots this thing takes a tumble and I go for the Corsair option instead.
This is due to cable reach, and because of the length of the Evolv Shift X, you need to take advantage of a kit of Corsair Pro sleeved cables we had in the office when using that power supply. It’s not a perfect solution, as they’re perhaps just a touch too long for the chassis overall, but until I get some custom ones in they’ll do their job well. We also had to remove the kettle lead passthrough cable to install the PSU, as the cable’s a real piece of work to plug in. The trick is to remove it entirely, unscrewing it from the outside, then plugging the male end into the power supply, before securing the female end back to the case itself.
Get Tom's Hardware's best news and in-depth reviews, straight to your inbox.
This is also my first attempt at mounting that bottom radiator. It’s one of Alphacool’s new V2 NexXxos 120mm rads, complete with flush plug fittings. It works a treat and there’s no need to cut out any of the chassis to accommodate the bulkier plug fittings you used to have to use before. I actually ended up rotating the radiator internally after this shot. More on that later.
5. Mounting Reservoirs
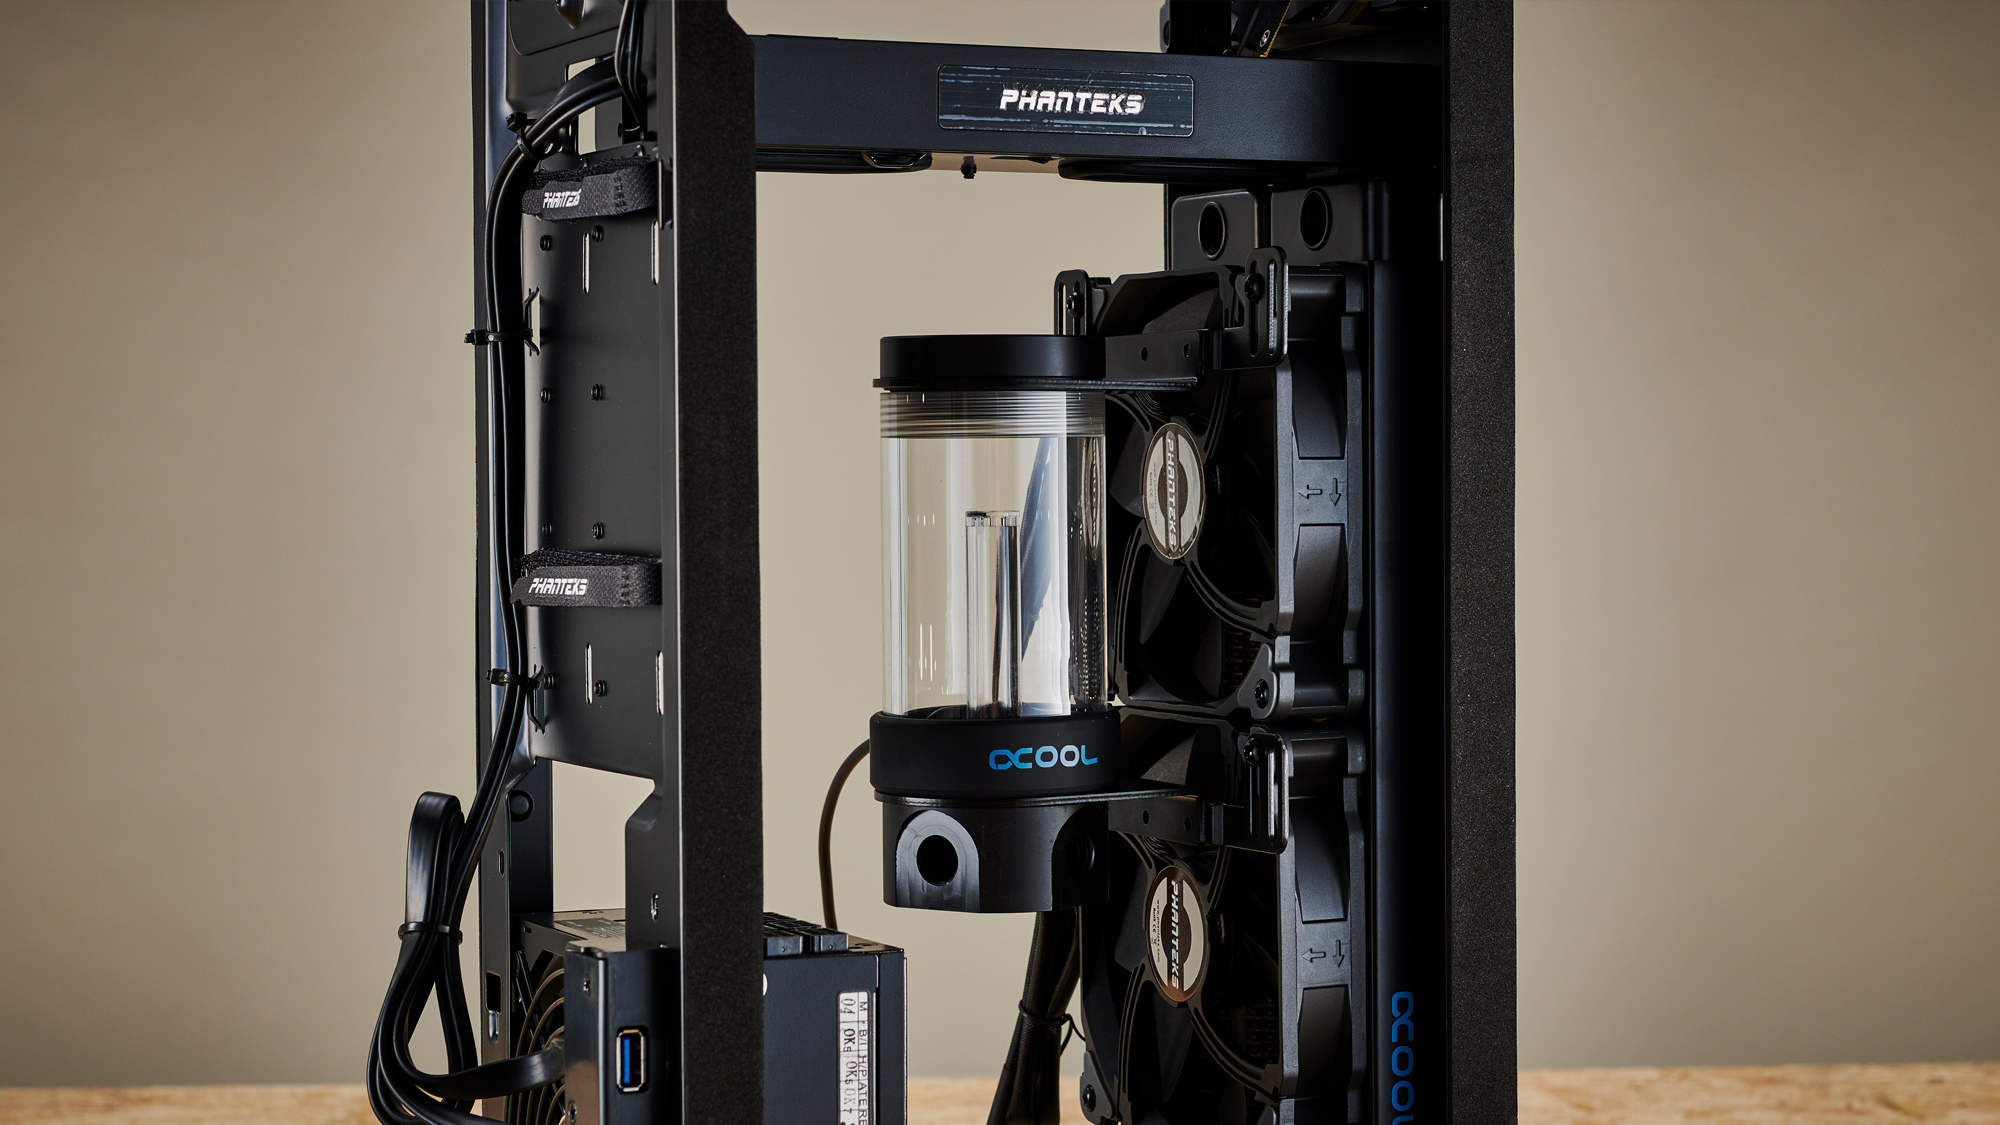
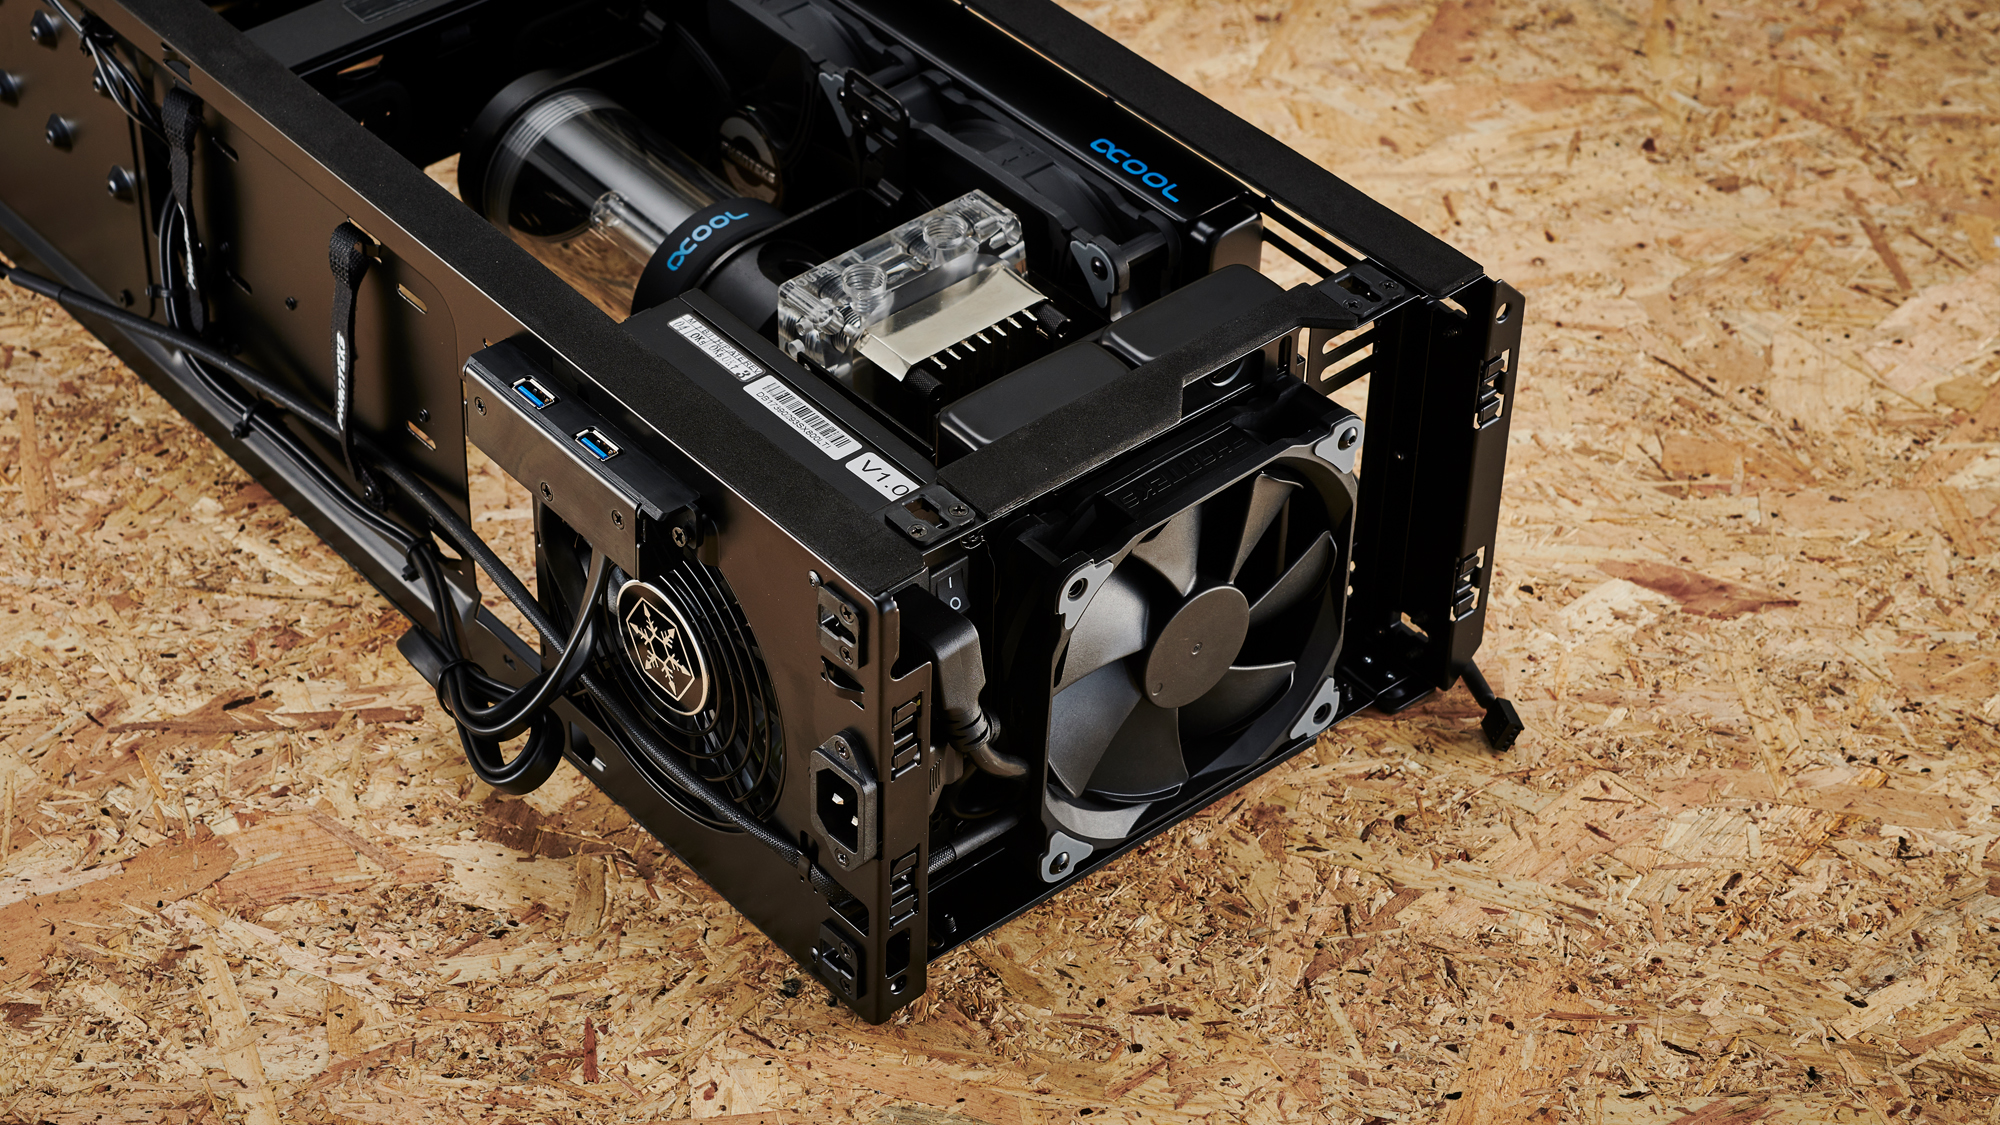
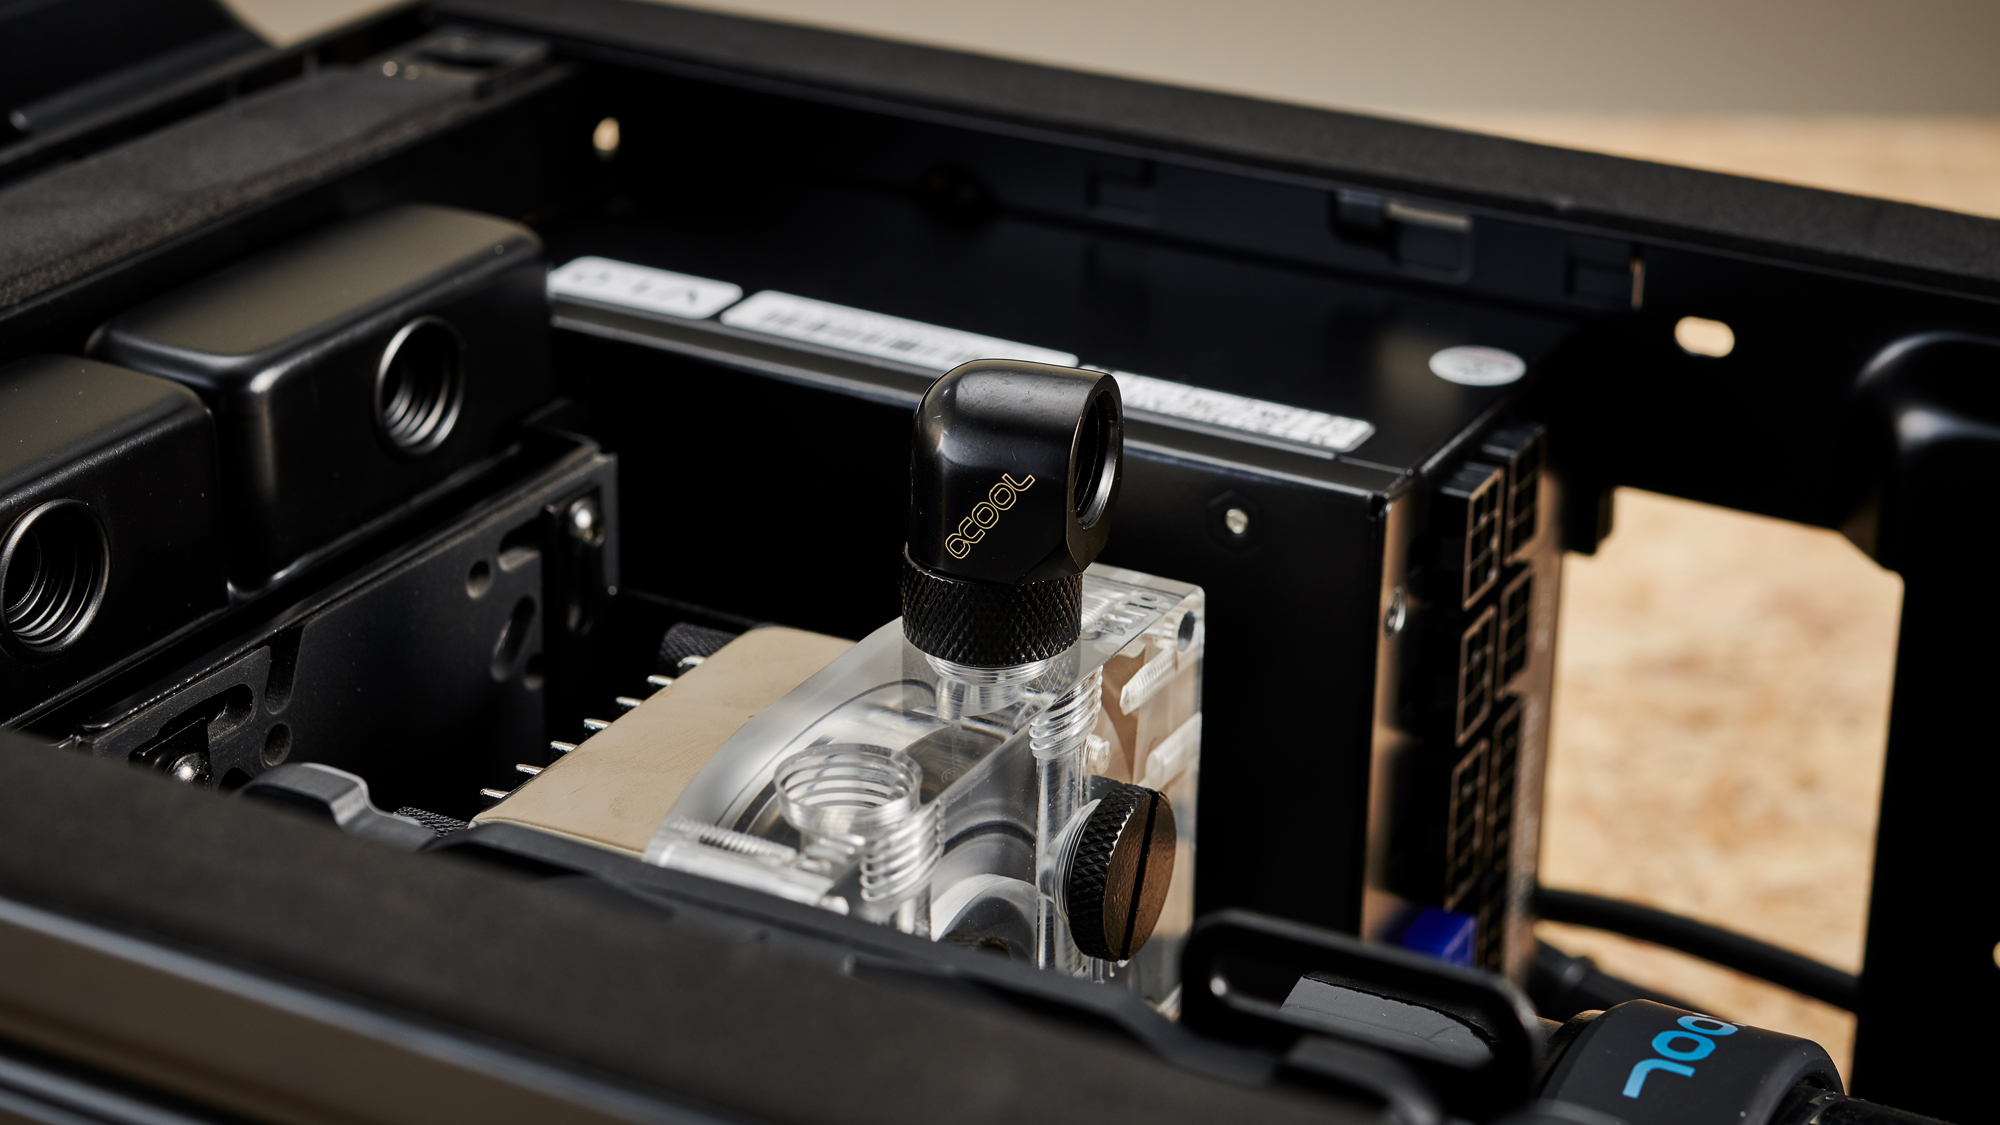
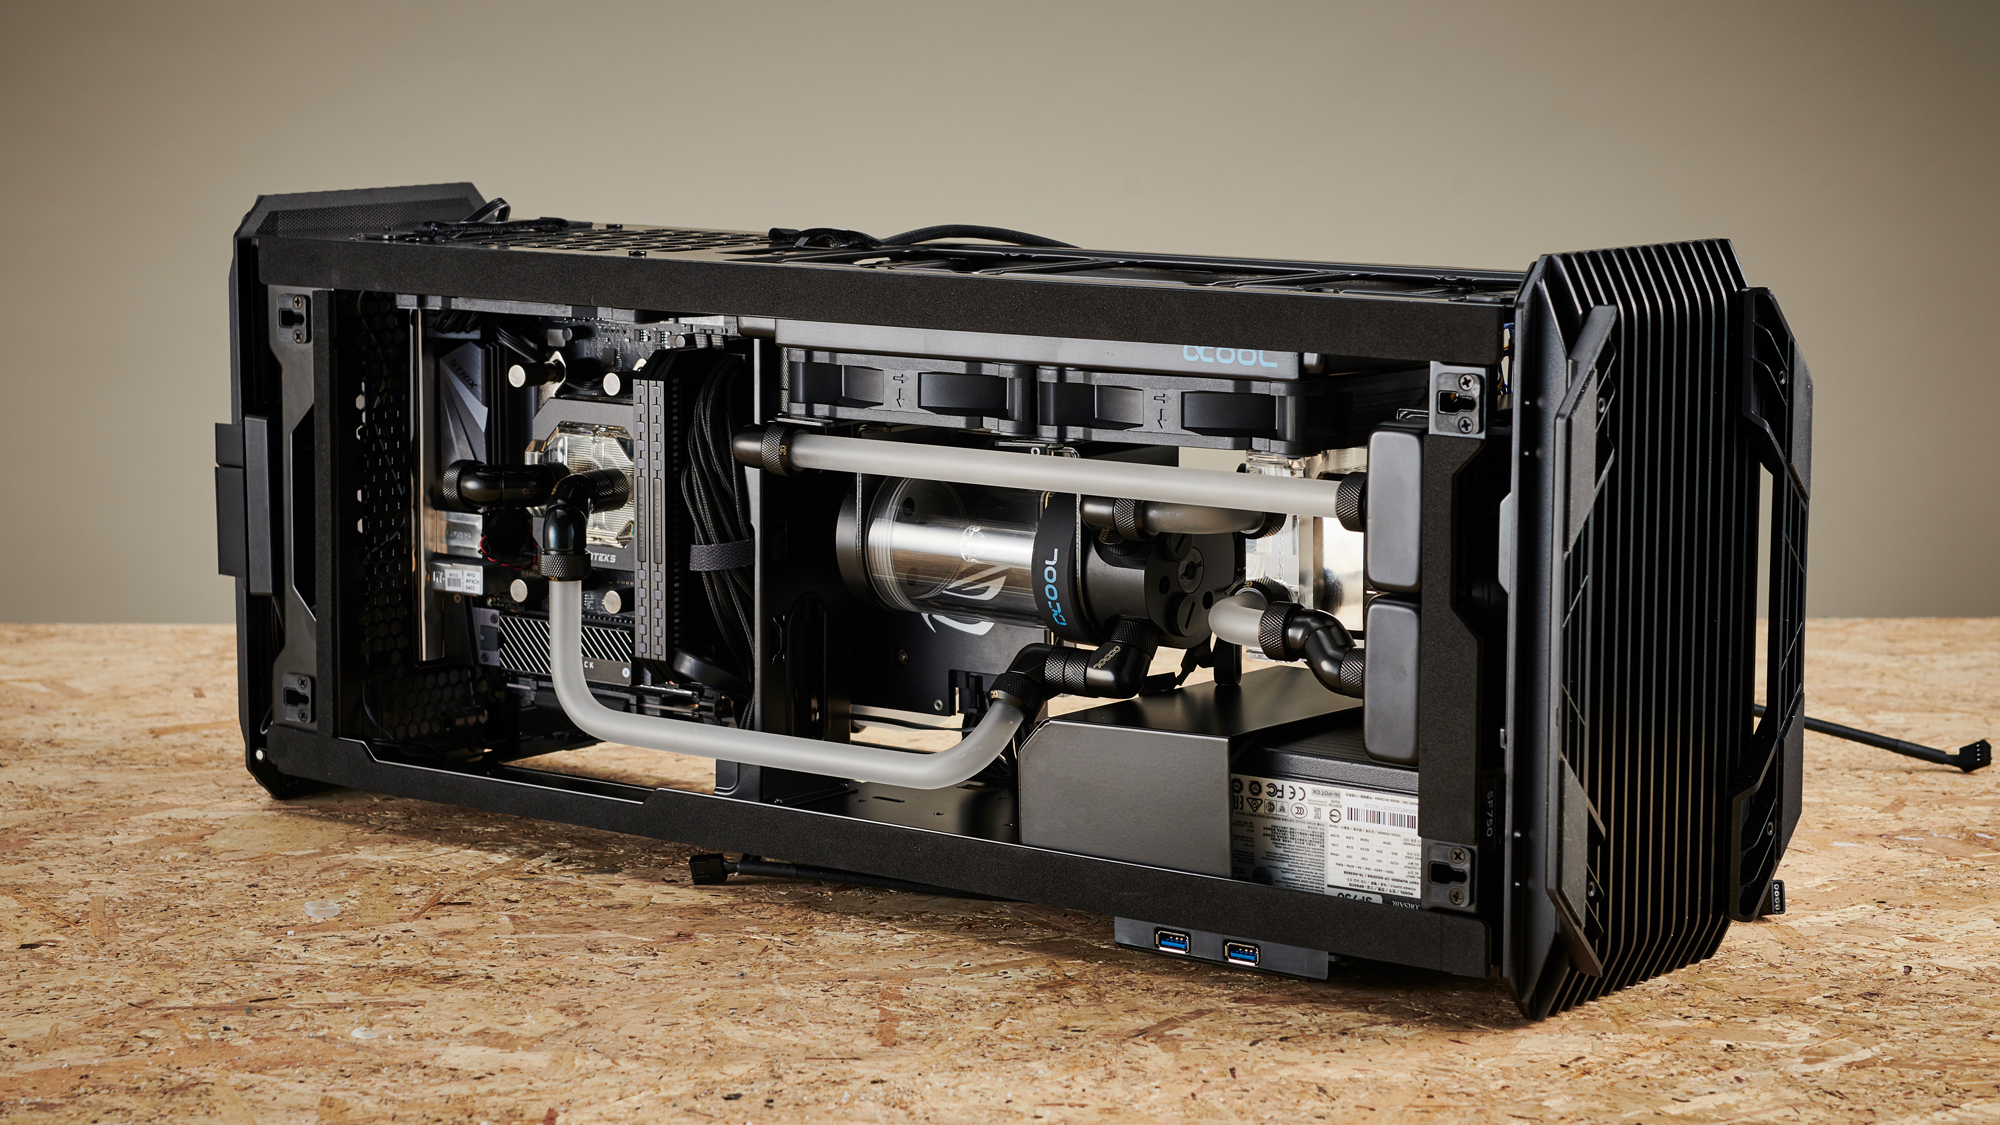
After I put the bottom radiator in, I took the opportunity to fit the front rad, complete with fans, and cables dangling off out to the side like some weird tentacle monster. I’m securing the reservoir both at the top and the bottom of its structure to help support it. Once this rig is complete, primed and free of bubbles, it’s going to be laid down on its side so it’s important to have the support for that res at both ends, as it’ll reduce the stress on the fittings attached to it, preventing any leaks from over-stressed o-rings or the rotary parts of some angled fittings. I’m also using a bracket here that you can adjust the height of the res with when it’s mounted to the fans. This helps when it comes to fine tuning the clearances you need for both the top and the bottom of the reservoir, and their connecting parts.
You can also spot that I’ve rotated the bottom radiator 90 degrees here, so the fittings are now closer in line with the two on the pump. The pump is mounted onto the included Phanteks pump mount bracket which comes with the case, and then that in turn is attached to the top of the of the radiator itself. I tried a few different orientations with this one, and the one pictured here didn’t quite cut it as the angled fitting made contact with the glass side panel. So I ended up having to move the pump back on the mountings just a touch.
At this point in time I was still visualizing tubing runs, trying to figure out how it all connects together, and more importantly, checking what the clearances are.
6. Motherboard and GPU in
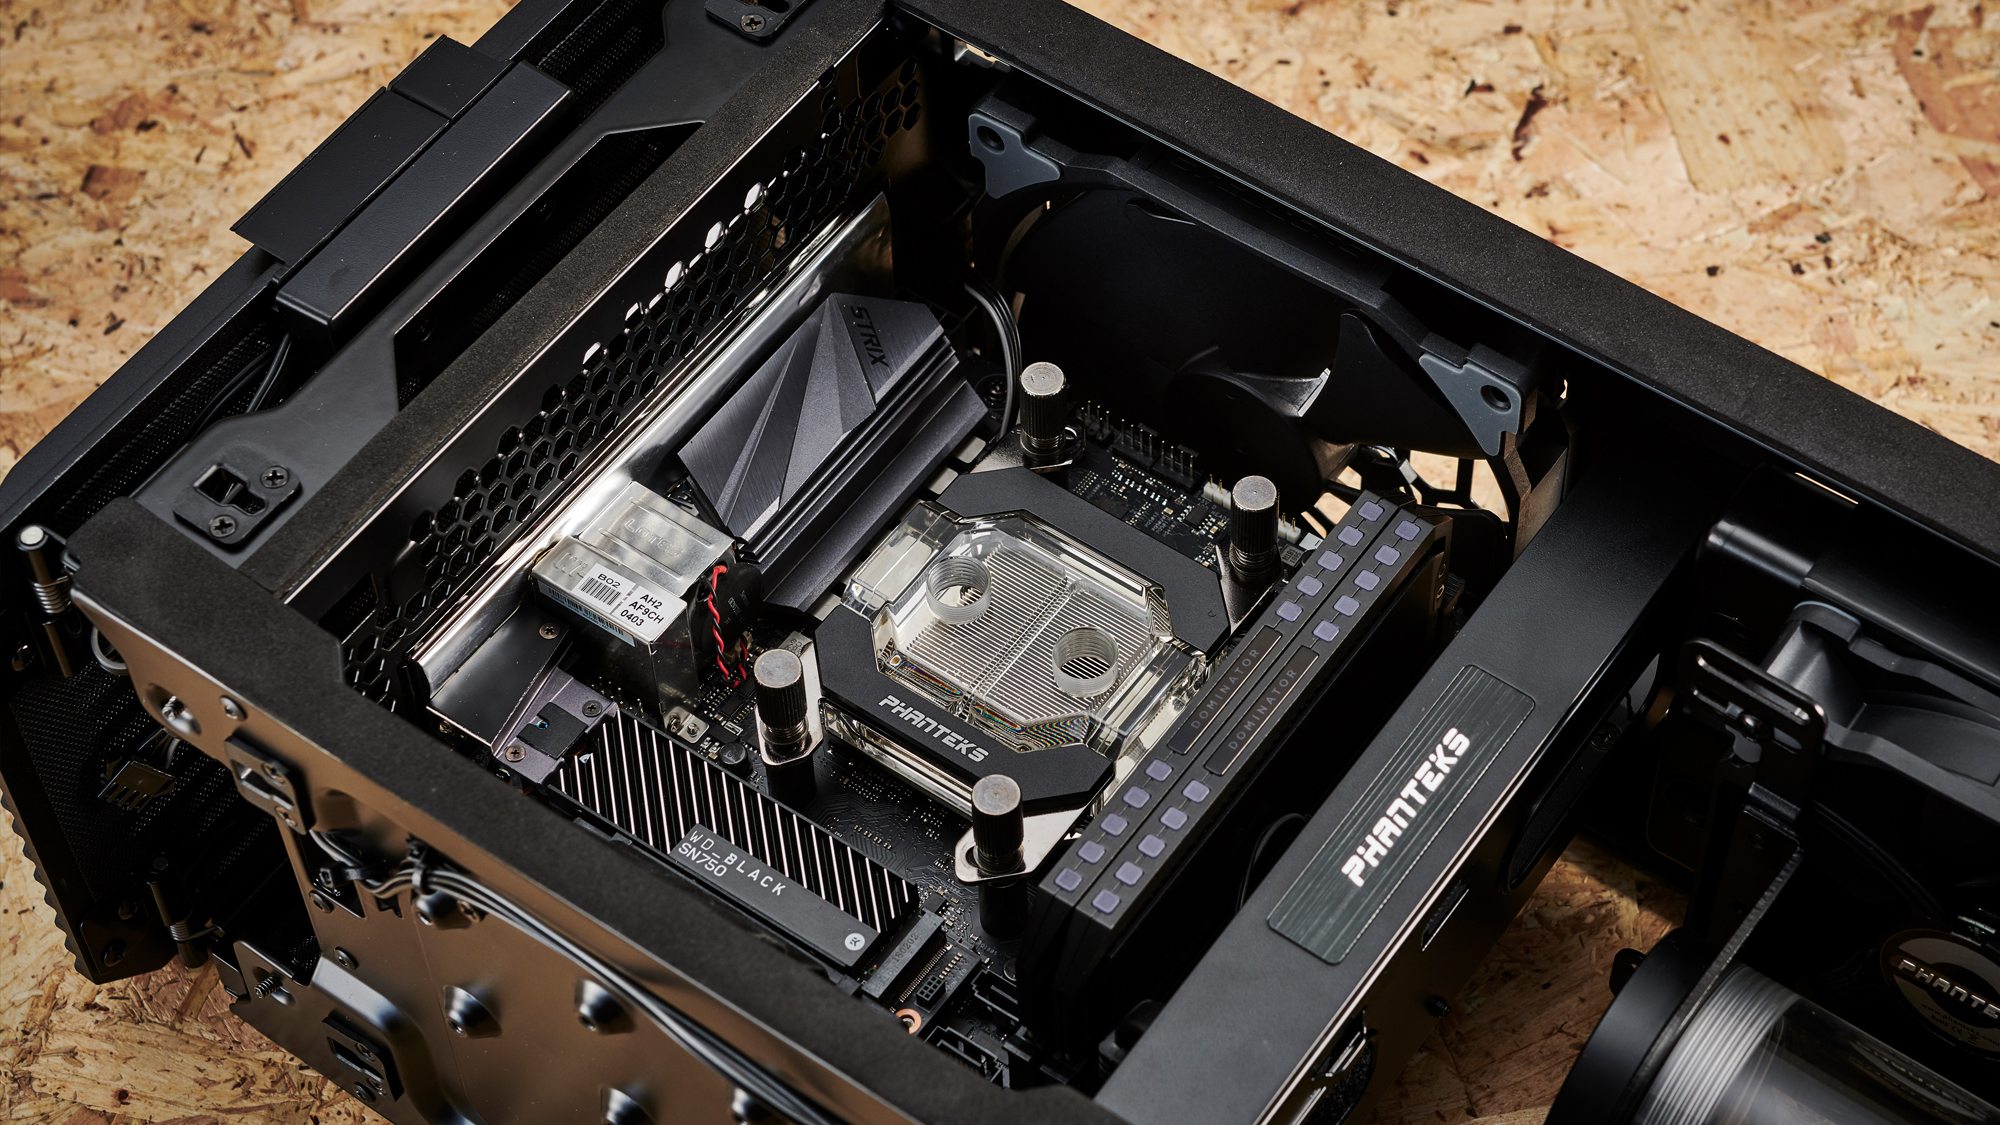
Here’s the first glimpse of our installed motherboard. It does look rather tight in there and it is. But the Evolv Shift X only has one front-panel header, no reset switch, hard drive light, LED light, or audio passthrough, meaning there are far fewer cables to manage and route around. Annoyingly there is a USB 3.0 cable, which is sorta useful, but more on that later.
I’ve also installed a 140mm Phanteks fan in the rear next to the motherboard. This is absolutely essential for keeping airflow moving through the case. However, thanks to all those fan, RGB and power headers being there on the mobo as well, you’re going to want to be careful plugging anything in here.
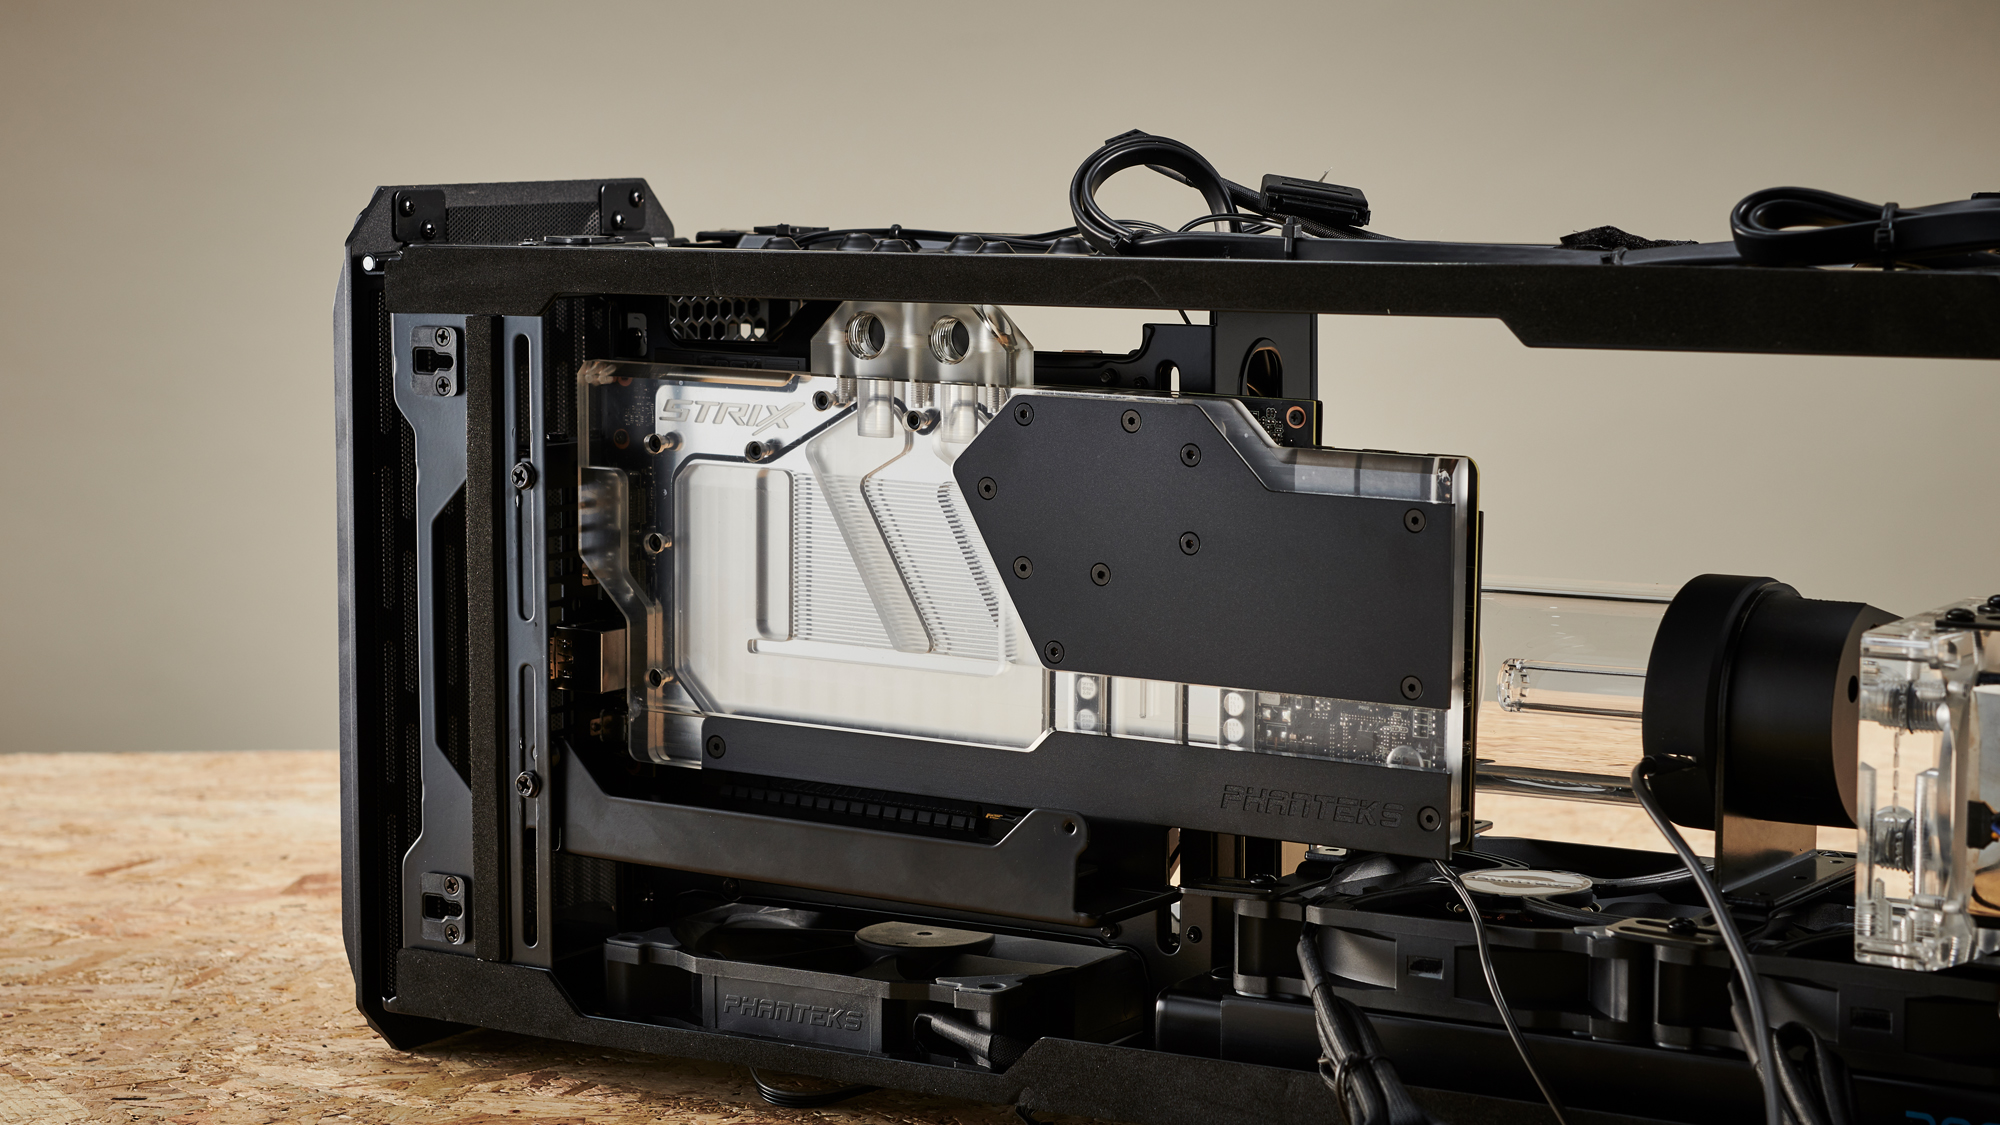
I also took the time to seat the graphics card on the other side of the chassis. This is actually a fairly lengthy process that requires you to remove those two Phillips screws, take the bracket out and flip the entire thing over on its axis. Don’t ask us why, but Phanteks ships these cases with the GPU backplate facing towards the glass panel, and the fans facing towards the back of the motherboard. I’m assuming this is for better internal airflow for the GPU. But as we’re liquid-cooling, that doesn’t make a whole lot of sense. So we rotated the bracket and the card around to get a better look at the waterblock and that pink coolant.
7. Cabling and Fittings
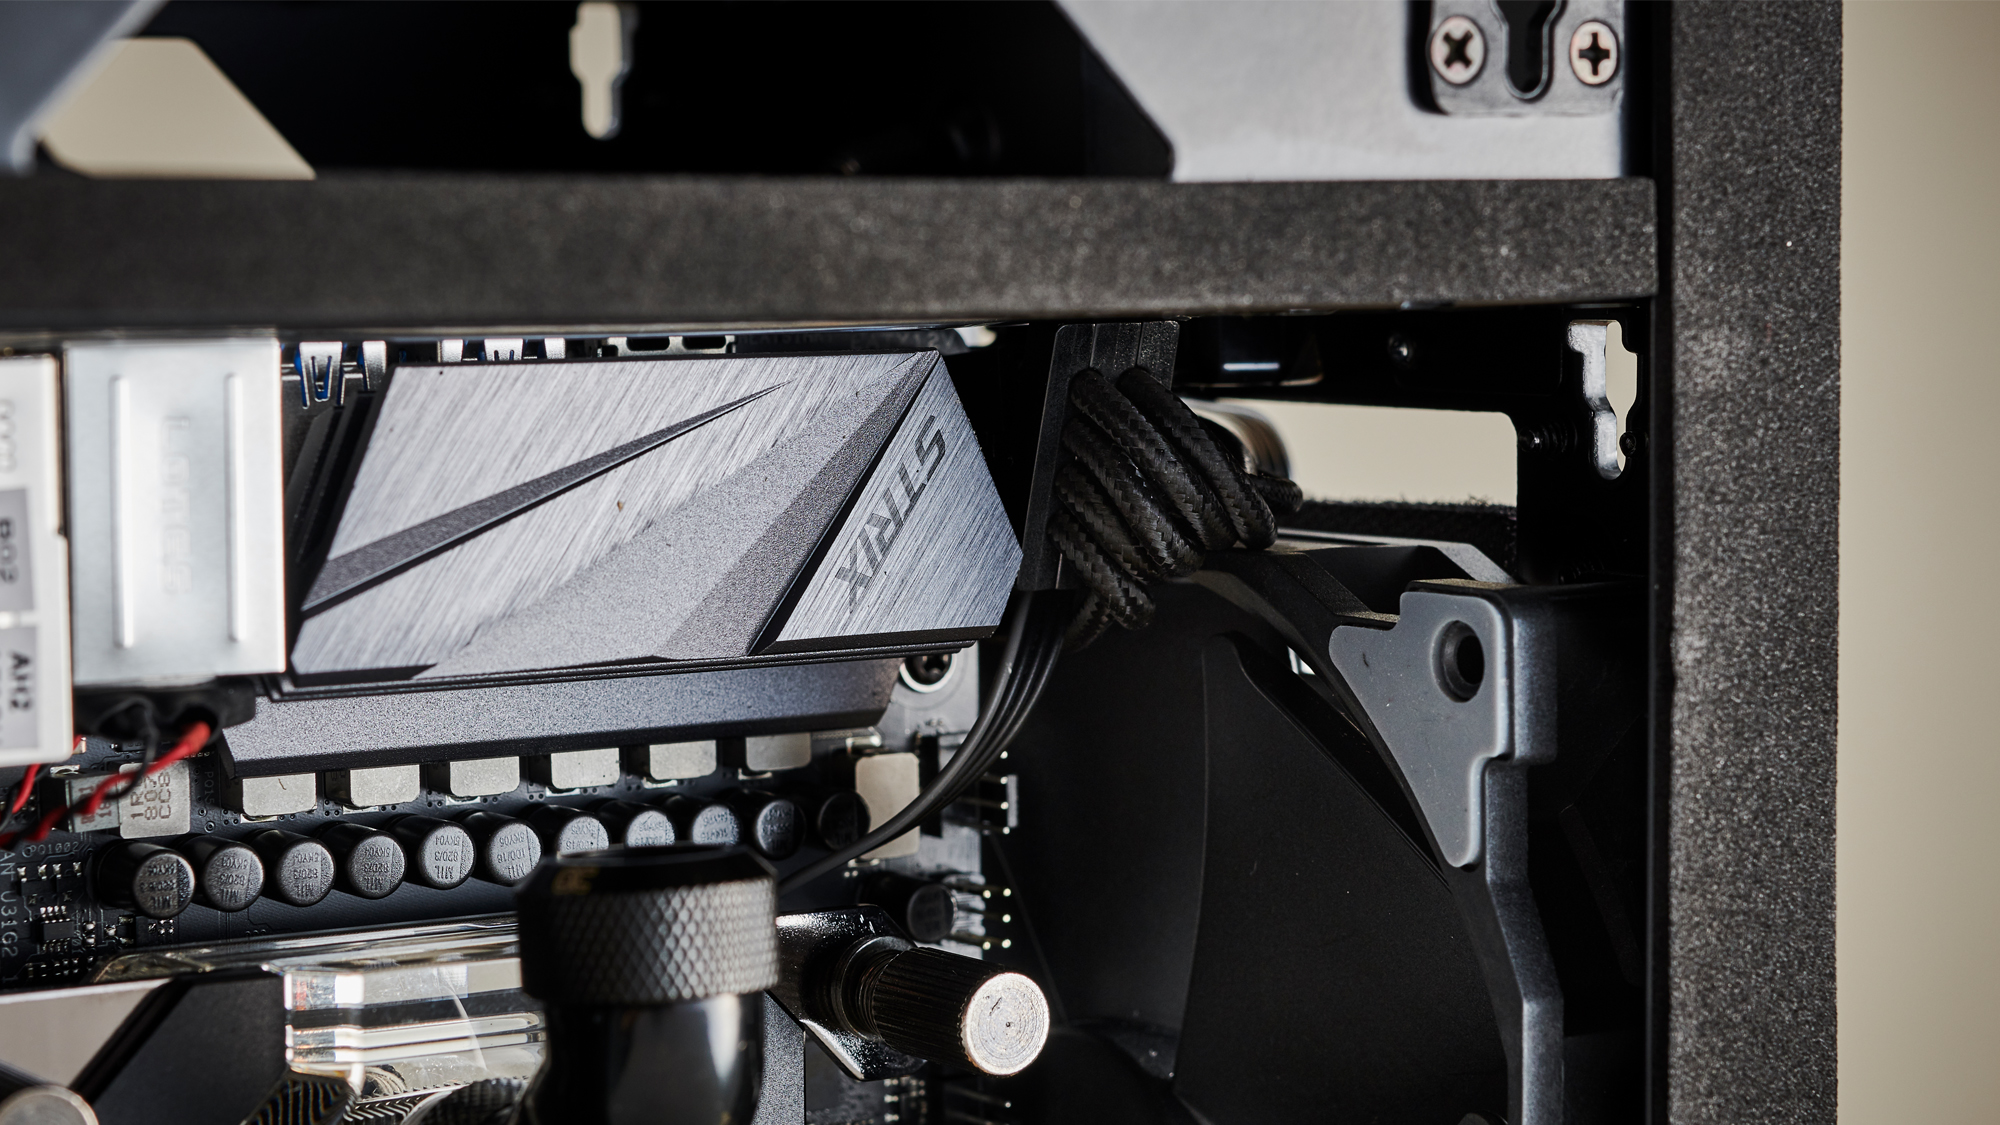
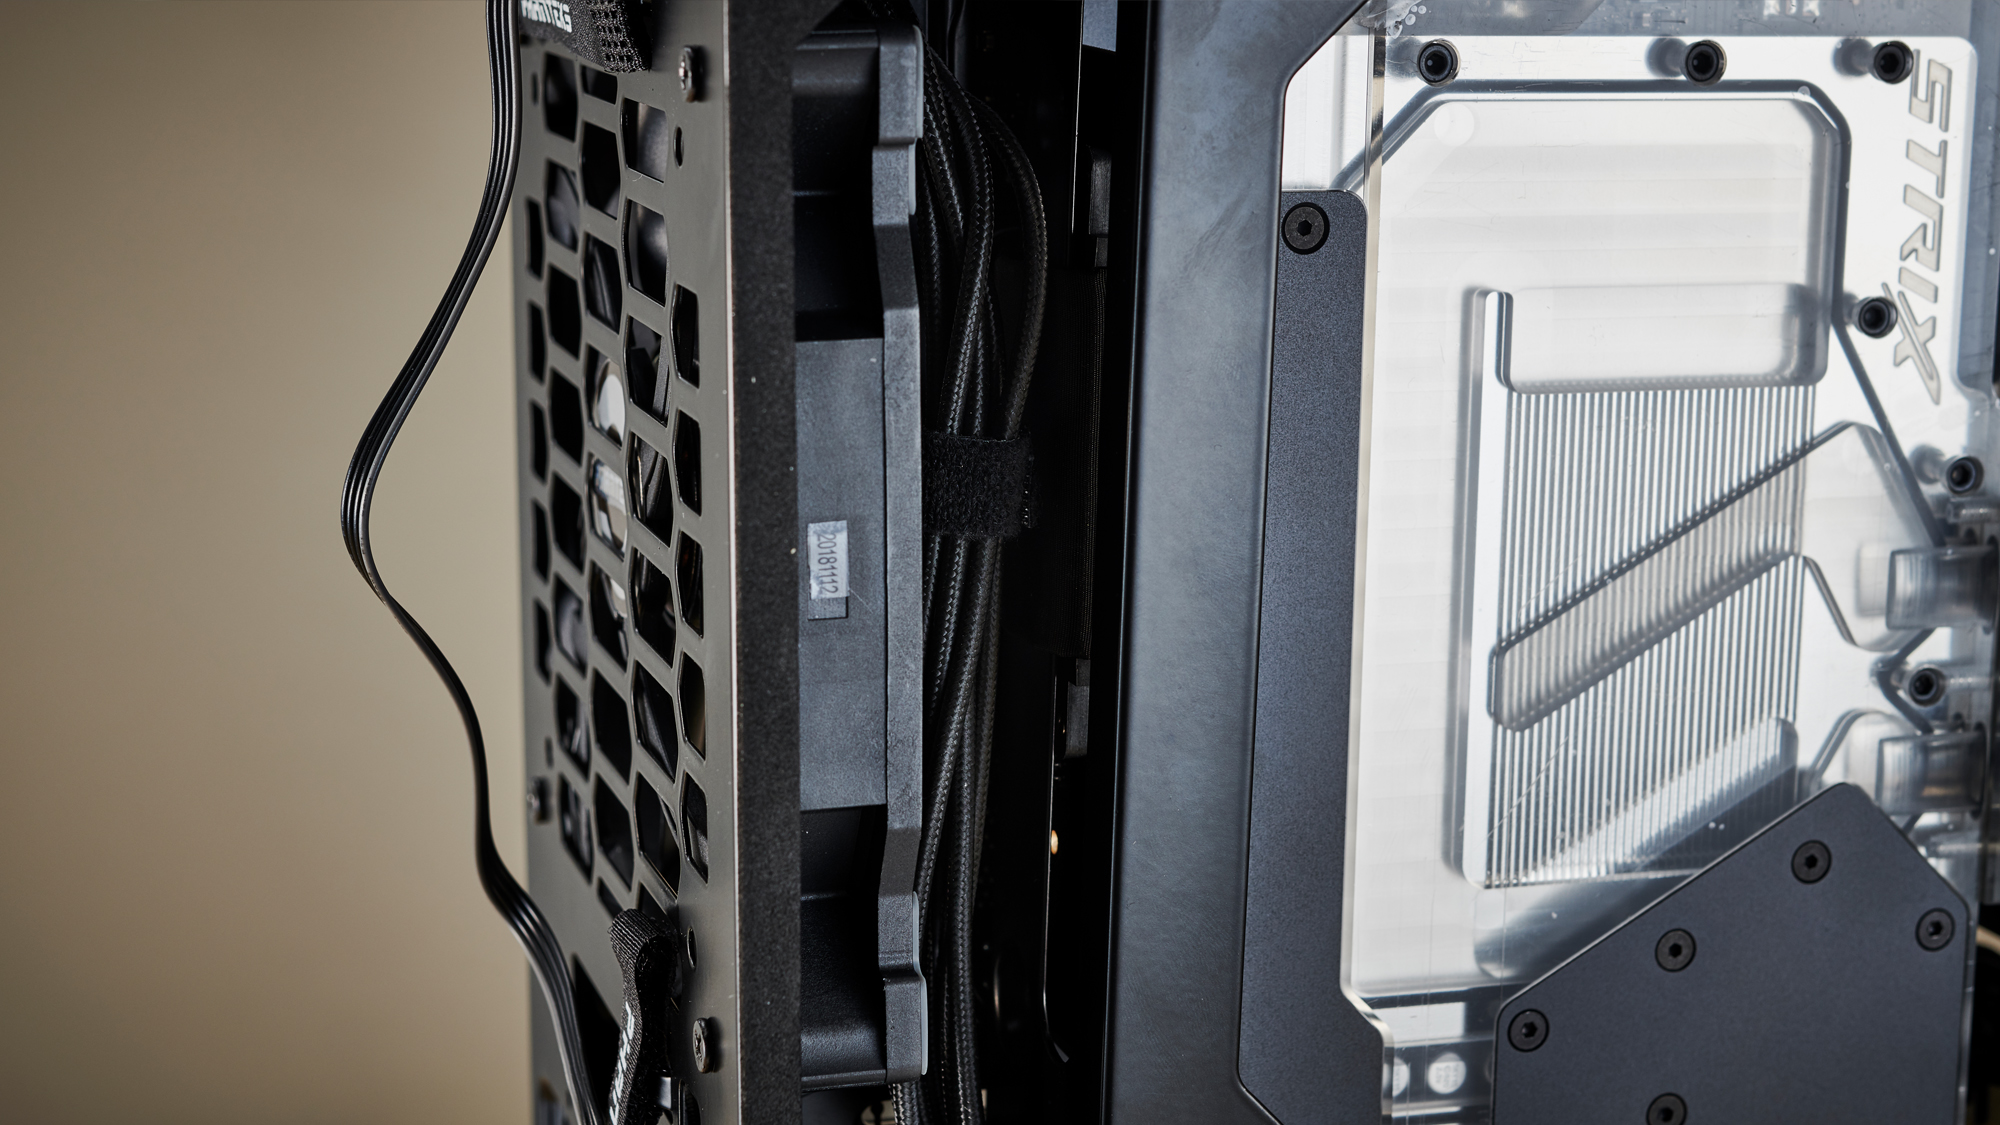
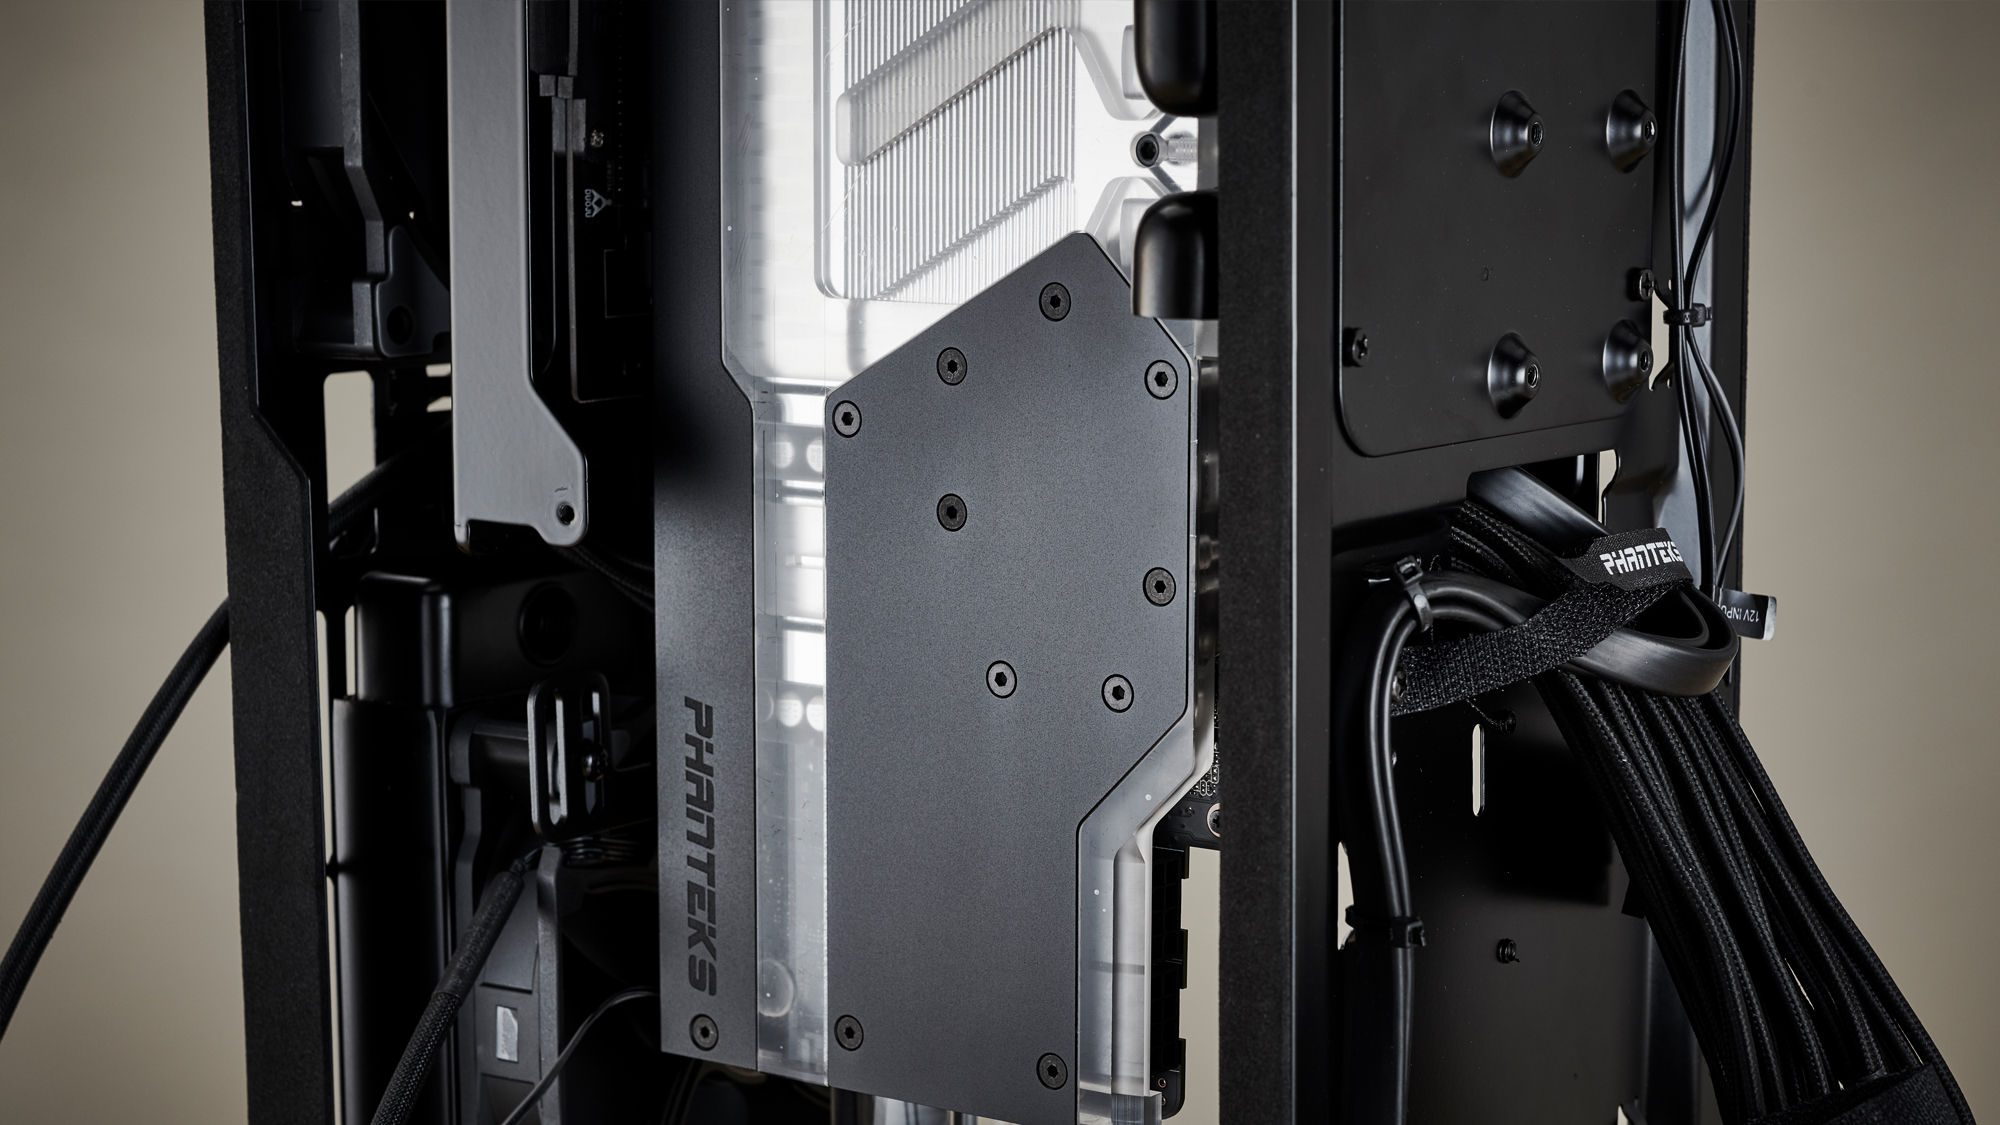
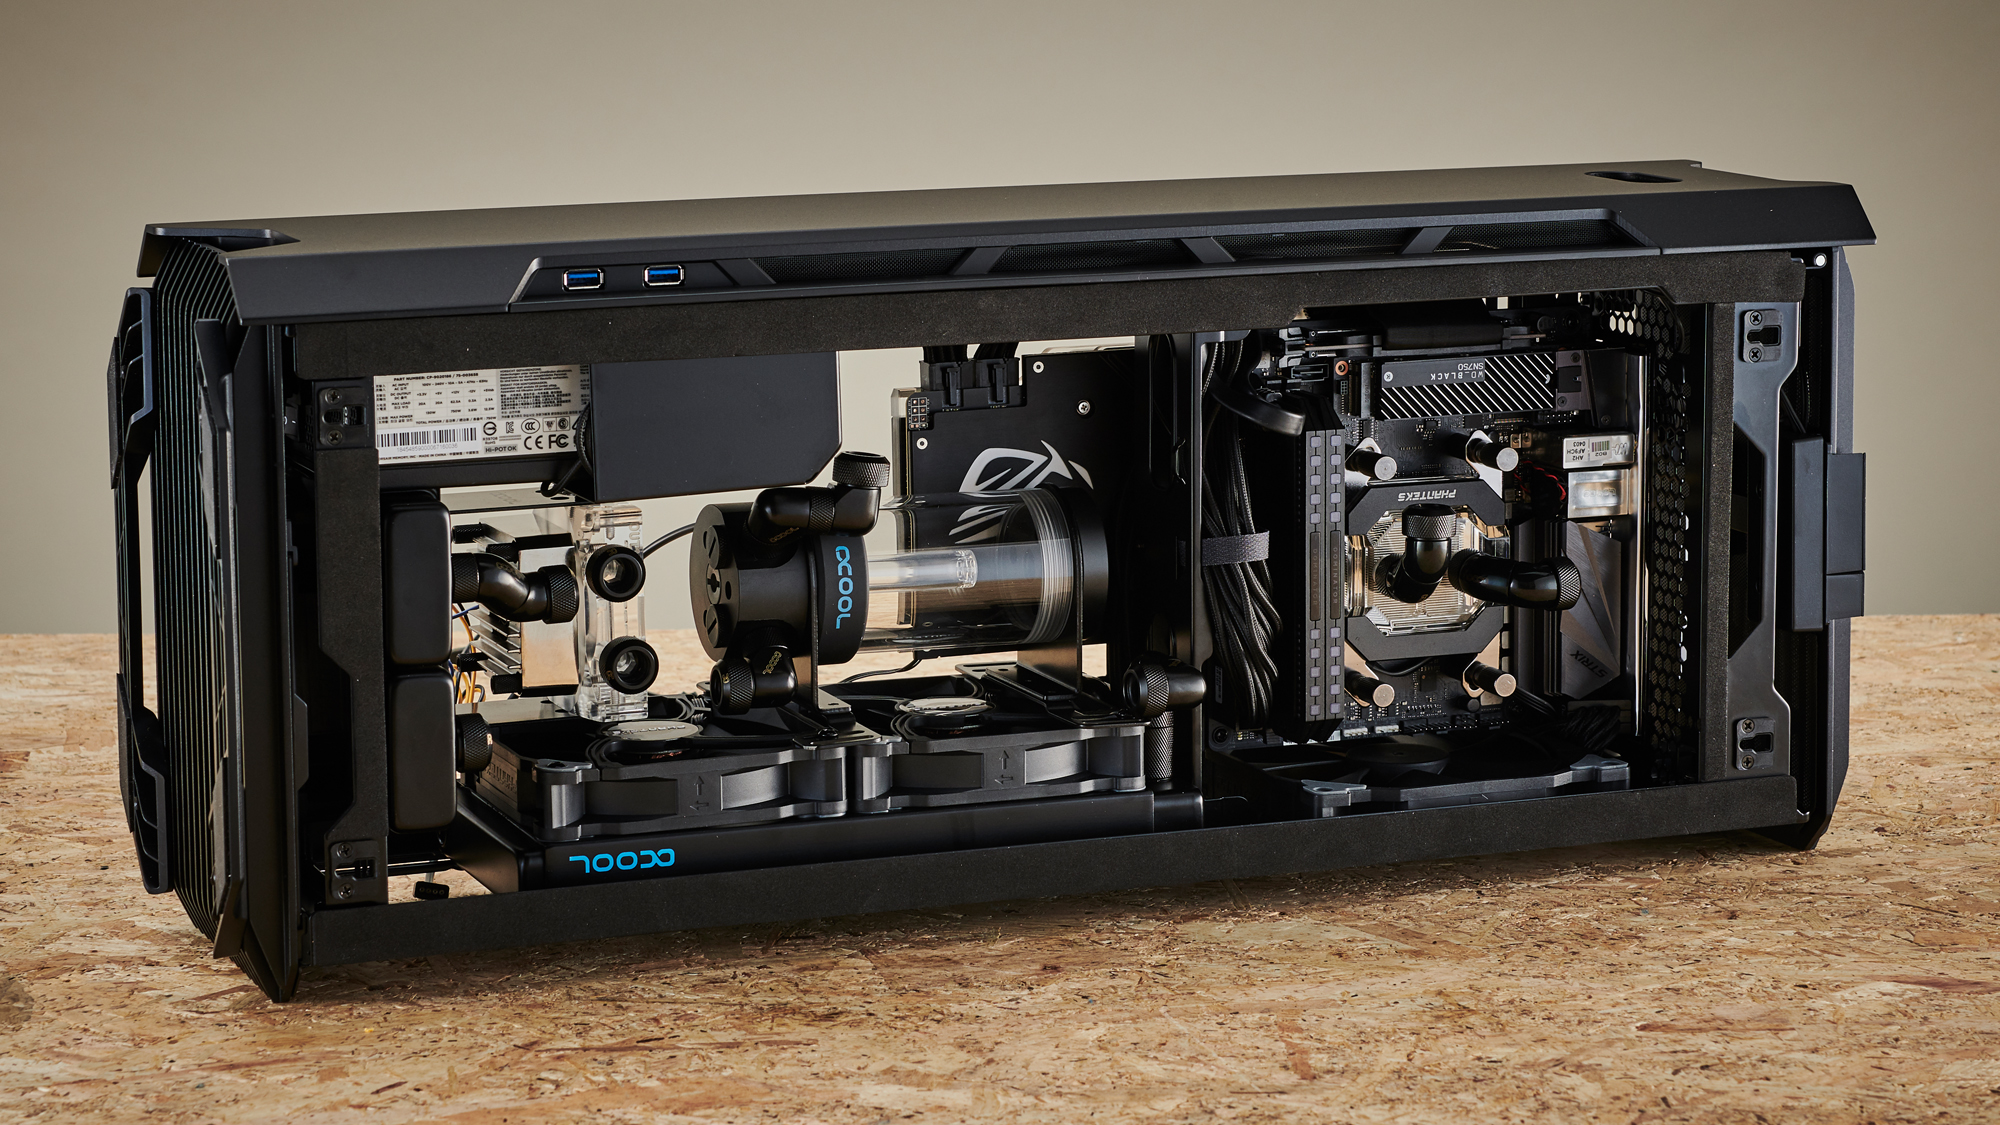
So at this point I’ve swapped out the PSU twice, and have decided to go for the 750W Corsair SFX instead. It’s smaller than the other two, and has longer cables making it a shoe-in for our build here today. That said, It’s a tough one to cable route. I’ve managed to sneak the CPU EPS cable behind the back of the graphics card’s backplate, and up and round into the 8-pin slot on the motherboard. But as you can see, keeping those cables away from that fan is, well, challenging to say the least.
This is also the first time I’ve managed to take a complete look at what the tubing runs might look like. When it comes to hard tubing, the easiest way to configure a loop is to take advantage of simple single 90 degree bends. It’s the easiest bend to replicate, and will keep a consistent look to the overall feel of the rig.
I played around with fittings a lot here to get the setup just right. Our loop’s effectively running from the res, down into the pump, into the bottom radiator, then up into the 240mm radiator, out the back of that into the GPU, up, round, through the top of the chassis near the I/O ports, through a bulkhead in that honeycomb mesh, down into the CPU, and then round and back into the reservoir once more.
I had to move that reservoir up and down about 15 times before I got it into the correct height that would both accommodate our tubing bends, and not be too difficult to fill from the roof. I’m not doing anything fancy when it comes to fill and drain ports this time around. I’m filling directly from the flush fittings in the roof of the res, and then there’s a drain port on the bottom of that 120mm rad that we can unplug as well. Ironically this has been, by far, the easiest build I’ve ever had to fill and drain, even compared to cases with dedicated drain and fill ports.
8. Tubing Runs Are a Go
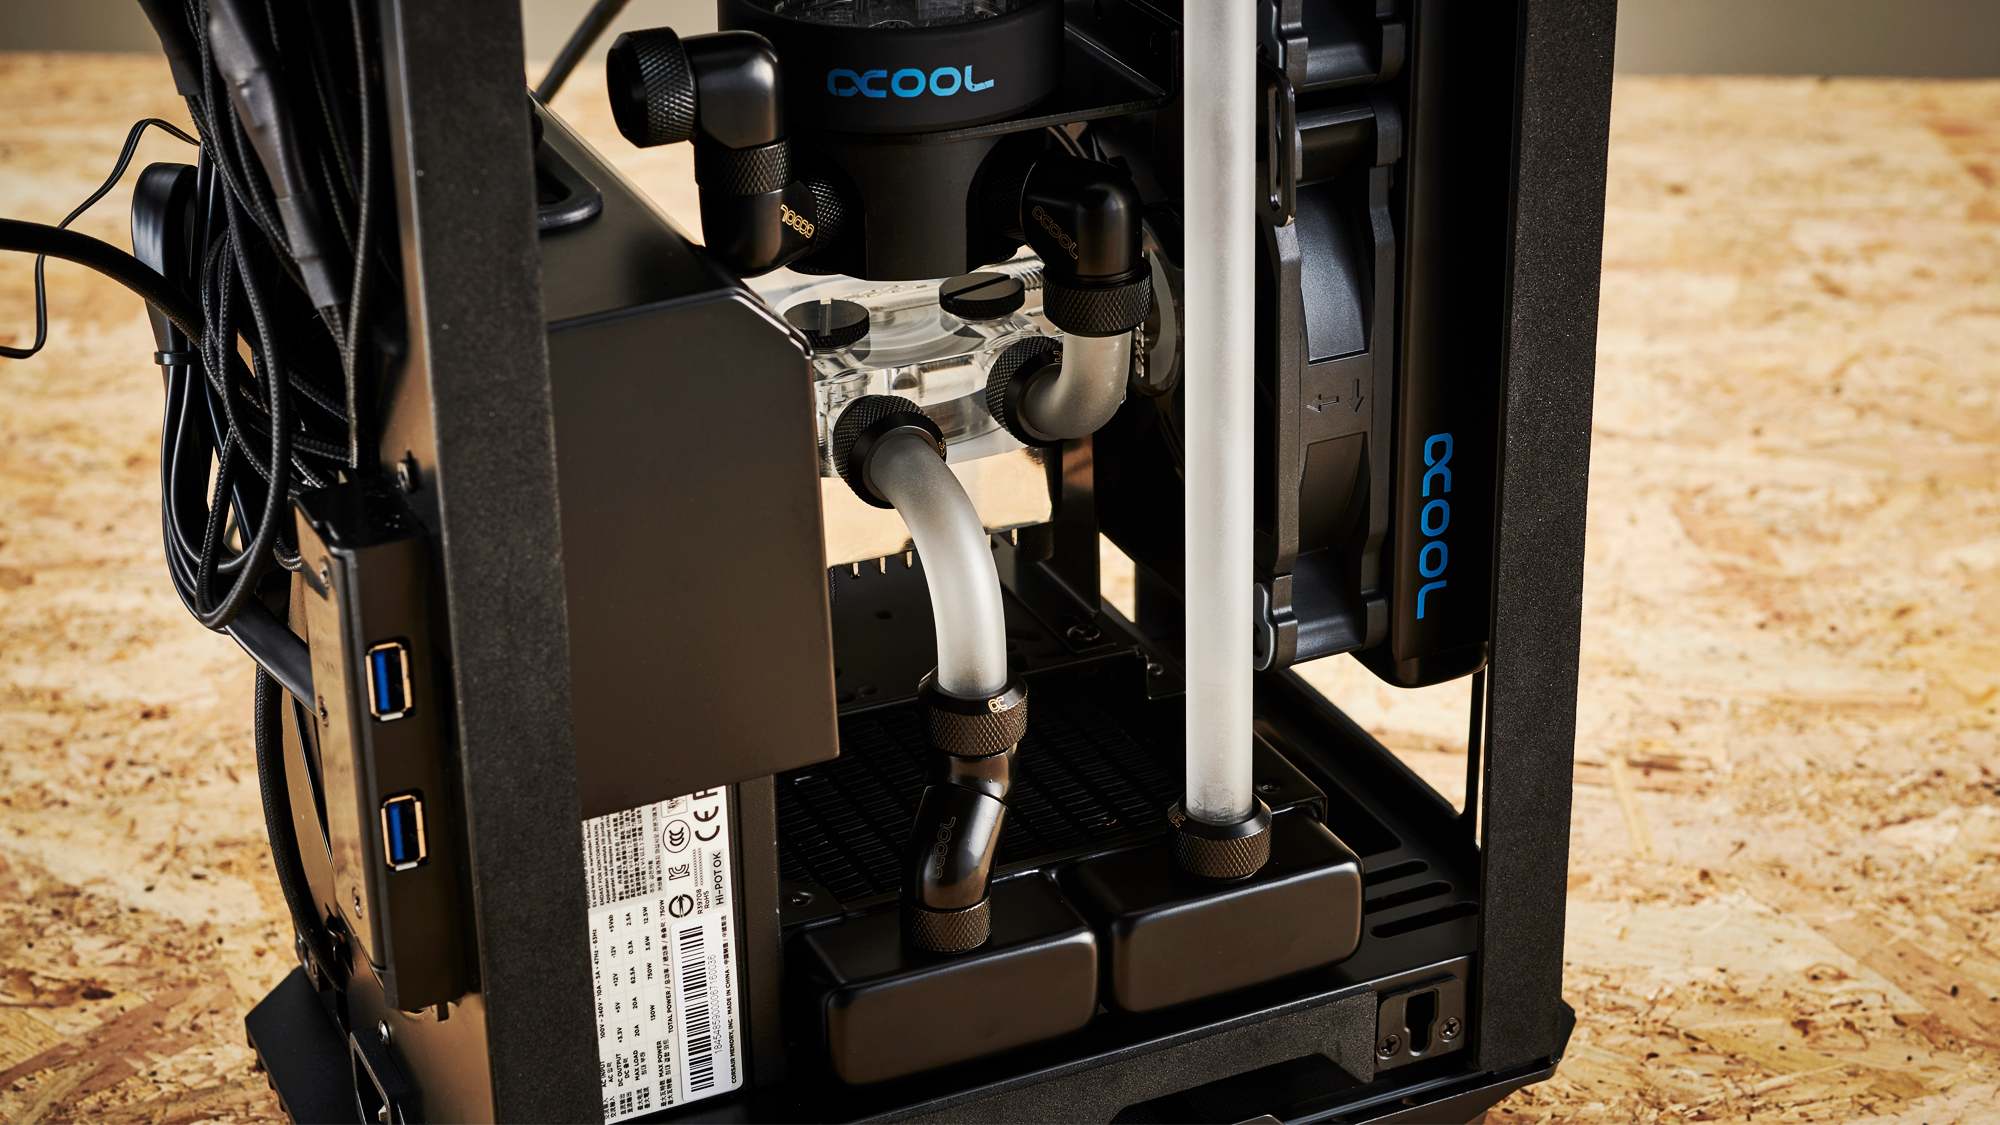
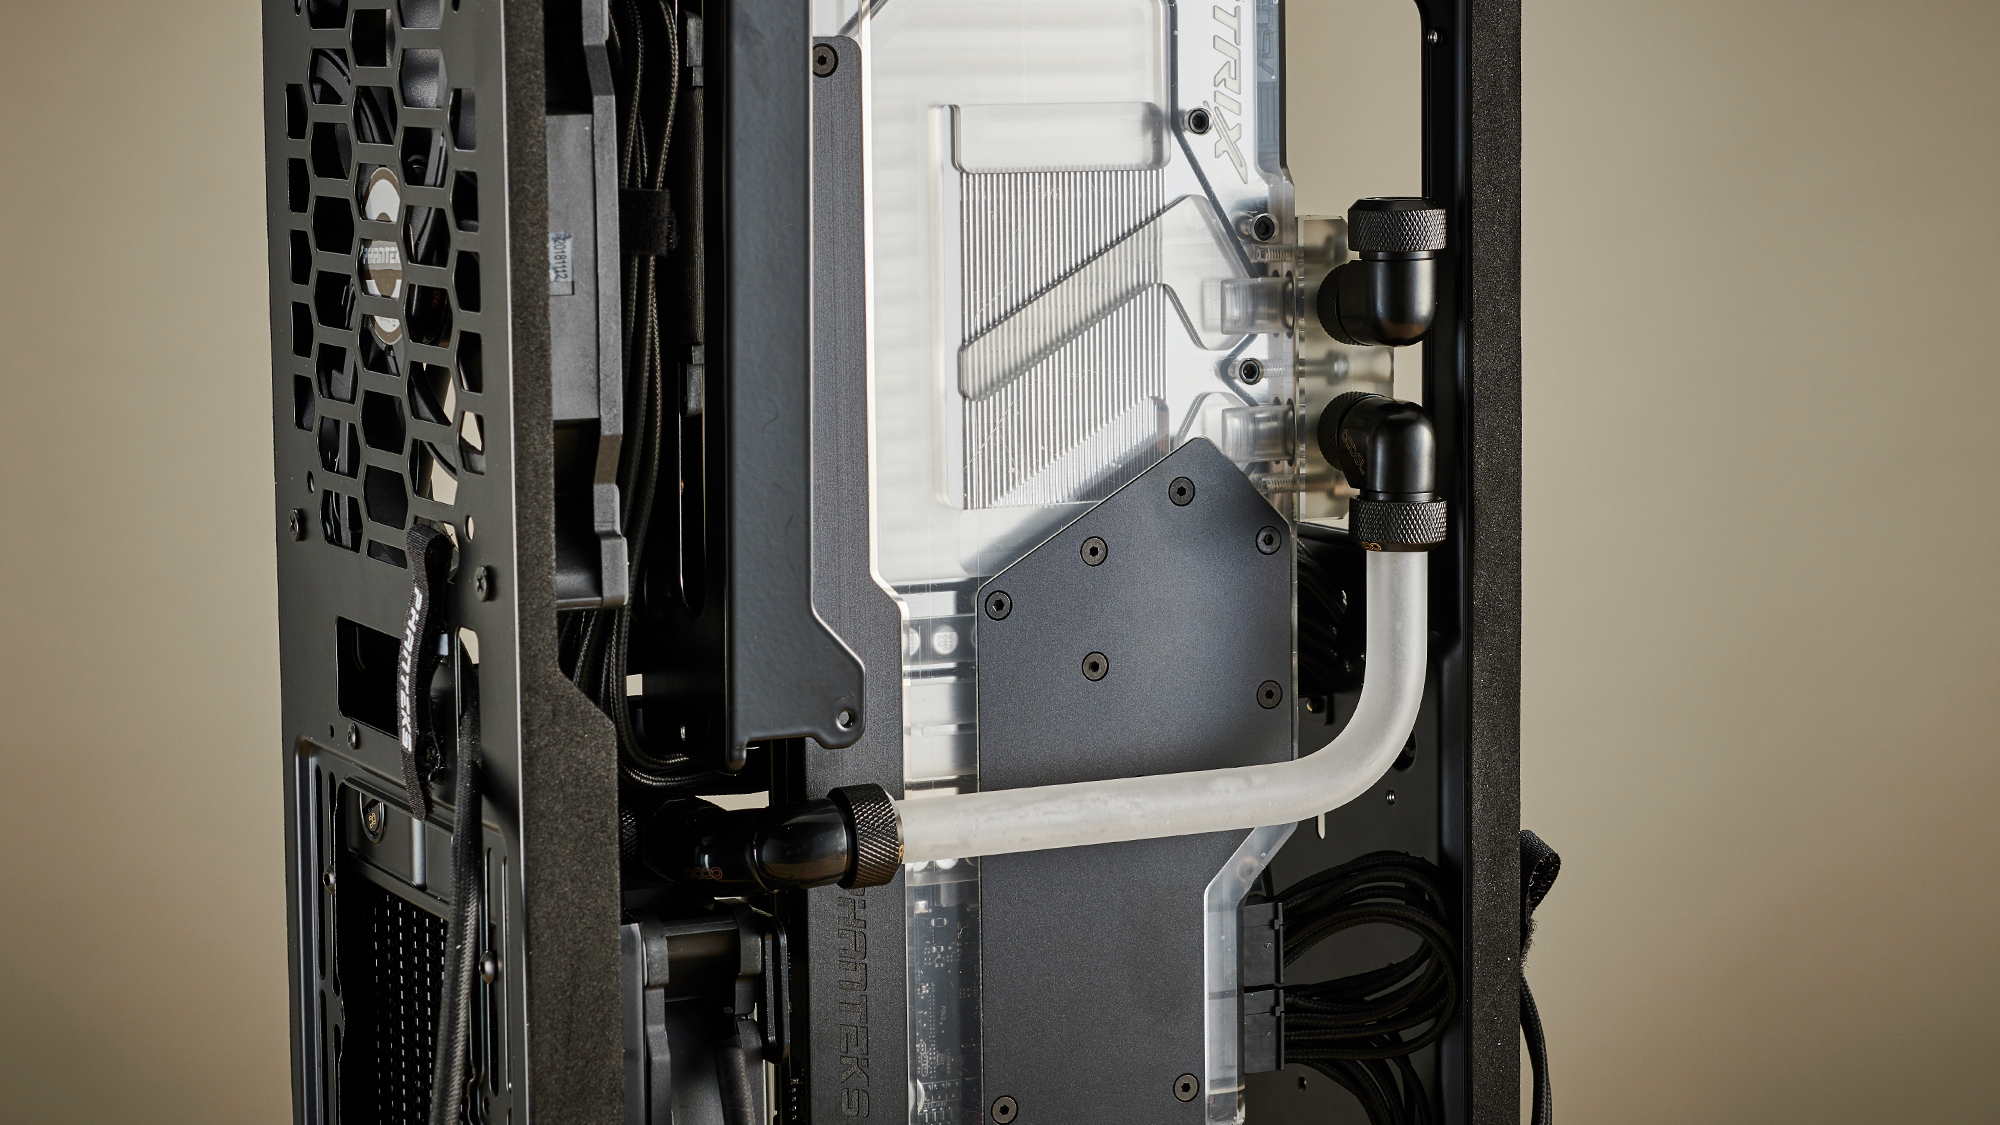
And here we have our first few tubing runs going in. I’ve used a snakehead (or twin 45 degree rotary extension) fitting to make sure our first 90 from the pump to the bottom radiator lines up nicely, followed by a fairly small 90 degree connecting the pump to the reservoir. That pump res tubing run was a bit frustrating as it was one of those where, at the time, the ol brain went “huh you should probably redo this one before you fill it, it’s a bit short, it might leak.” I then completely forgot about it until, you guessed it, I filled it, primed half the loop and it leaked. Cue mid-fill leak maintenance. Not fun. We then ran a very satisfying straight tubing run from the bottom rad all the way up to the top of the front radiator, which is attached using a 20mm extension, into two 90 degree rotary fittings. Snazzy huh?
As for the GPU in the back, connecting that to the front radiator was tricky mostly because I foolishly forgot to install any fittings until after I’d installed the GPU and cable runs into place. Yup, it meant removing the lot and refitting everything. These kind of things don’t sound that important here admittedly, but if you’re on the clock, every little mess up like this can set you back an hour if not more, and I was definitely on the clock. As for connecting the GPU to the front rad, I’ve gone for another 90 degree into a 20mm extension into a 90 degree fitting on the radiator side, to give us that clean line. This shot is actually a preliminary tubing run before we’ve got the correct length in place to keep the fitting straight with the GPU.
9. From Reservoir to CPU
This was arguably the trickiest tubing run to get right. It’s effectively two 90 degree bends still. However, one’s pitched at a 45 degree angle to make it into that myriad of reservoir fittings. As for the reservoir fittings, that’s another 90 degree fitting, into a 10mm extension into another 90 to make the distance to the tubing, as it needs to just crest the top of that PSU cable cover. Whenever you decide to add two bends into a length of tubing, judging the distance that you need to place that second bend into the tube is by far the most difficult part, if you’re out by even 2mm you’re inevitably going to have to start again with a fresh length of tubing, which can be excessively frustrating.
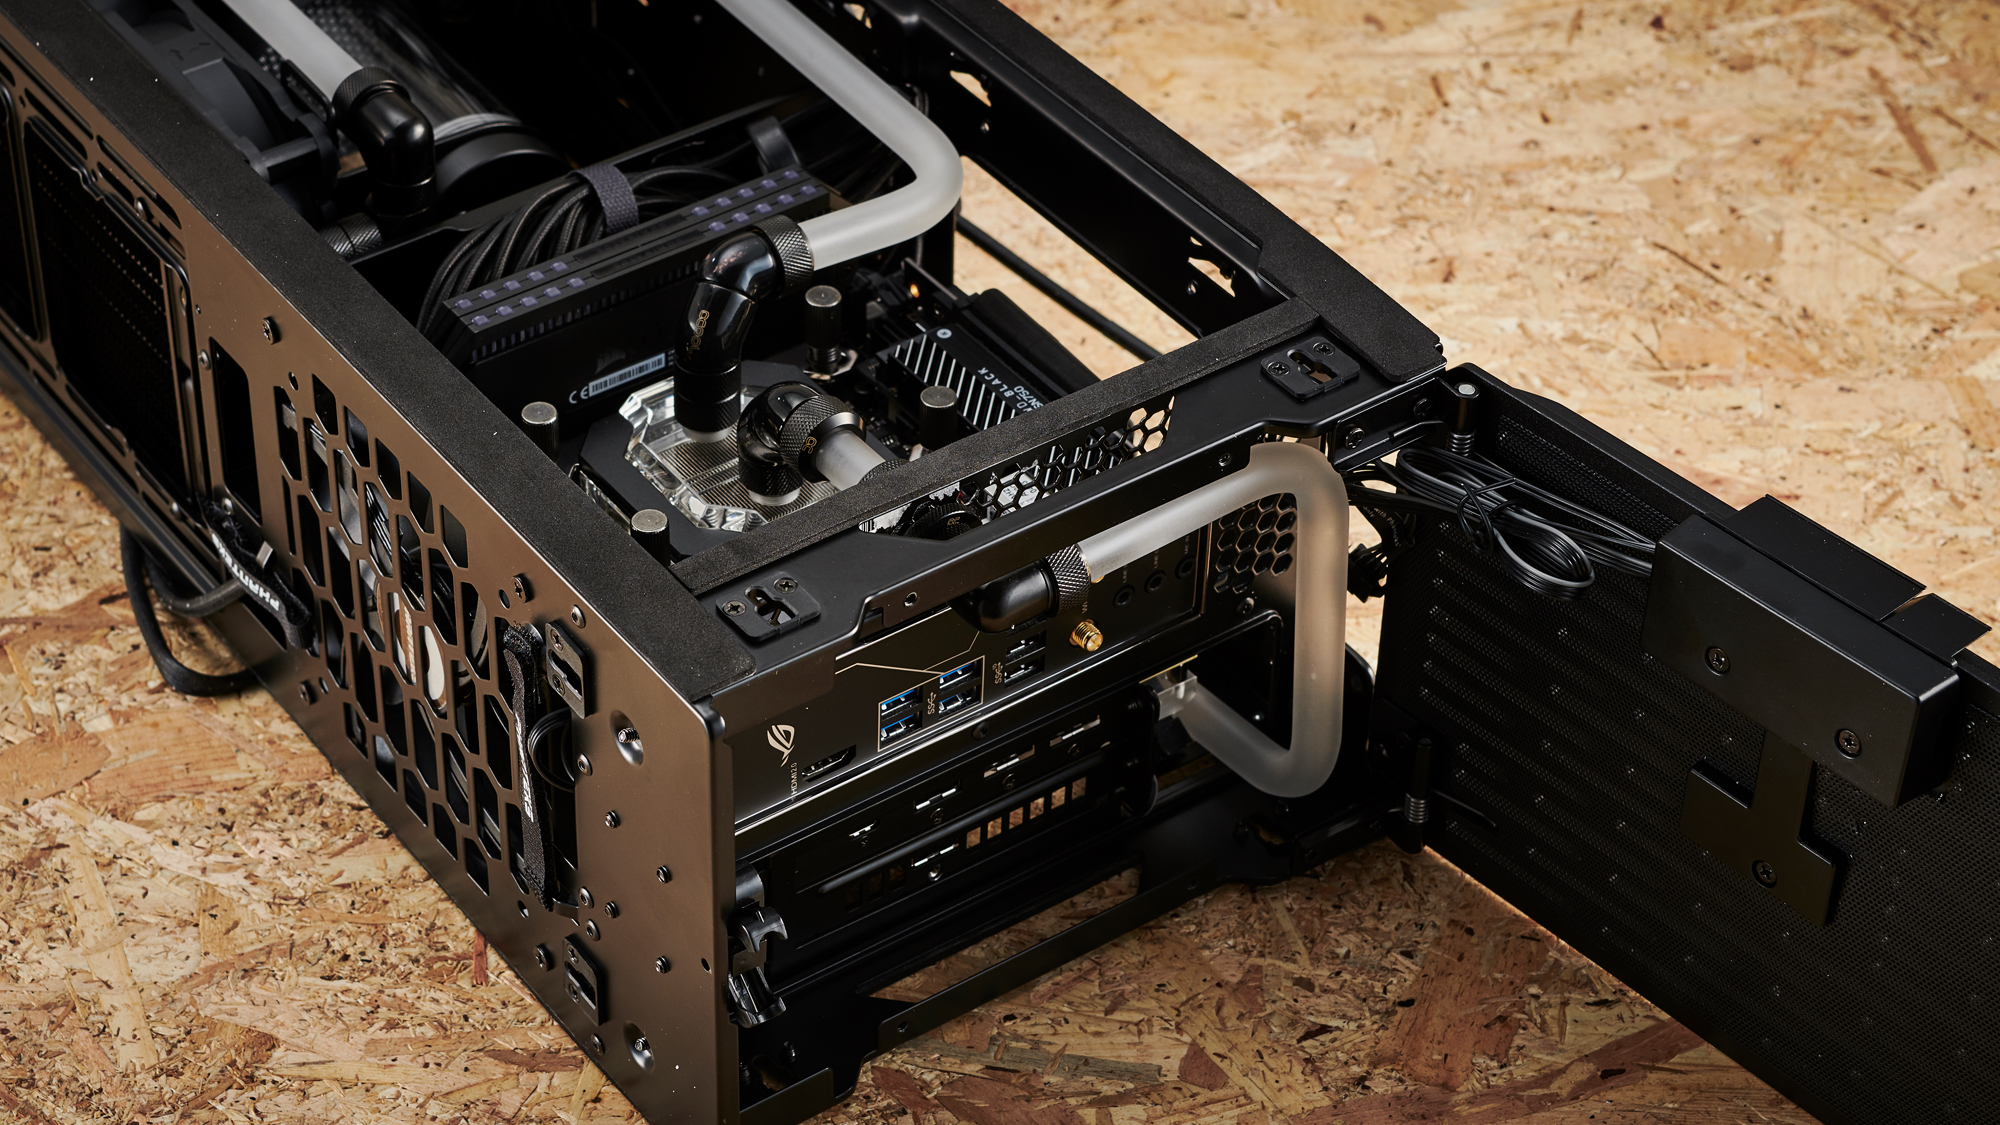
The CPU’s packing a 10mm extension into a snakehead, for both the run going into the reservoir and the one leading upwards. At this point, I knew that I was going to have to cut away some of the mesh and place a bulkhead passthrough fitting there.
Using the fitting as a guide, I marked a point in the honeycomb pressed steel. I covered the motherboard and rear I/O ports up as best I could with masking tape and paper towels and Dremeled out enough material for the bulkhead passthrough fitting to fit.
10. From CPU to GPU
With a 90-degree fitting located up top near the rear I/O, I had to run a 90-degree bend here, along the edges of the chassis as to not block the ports, and then down through a hole in the chassis and into the GPU block below. This took a myriad of attempts to get right, and I’m still not entirely happy with it. It also means having to thread your I/O cables underneath that acrylic tube and into the I/O ports, which is a bit nerve-wracking at times.
Perhaps later on, I’ll send it packing the other way around, although that would mean adding another 90 degree bend into an already complex tubing run. I also had to very specifically run the bulkhead passthrough fitting this way round, as it’s longer on one side than the other. Our original setup, with the uglier segment jutting out near the rear I/O meant that once we installed the 90 degree rotary, the lid wouldn’t close due to the power switch housing conflicting with it.
11. Cable Hell?
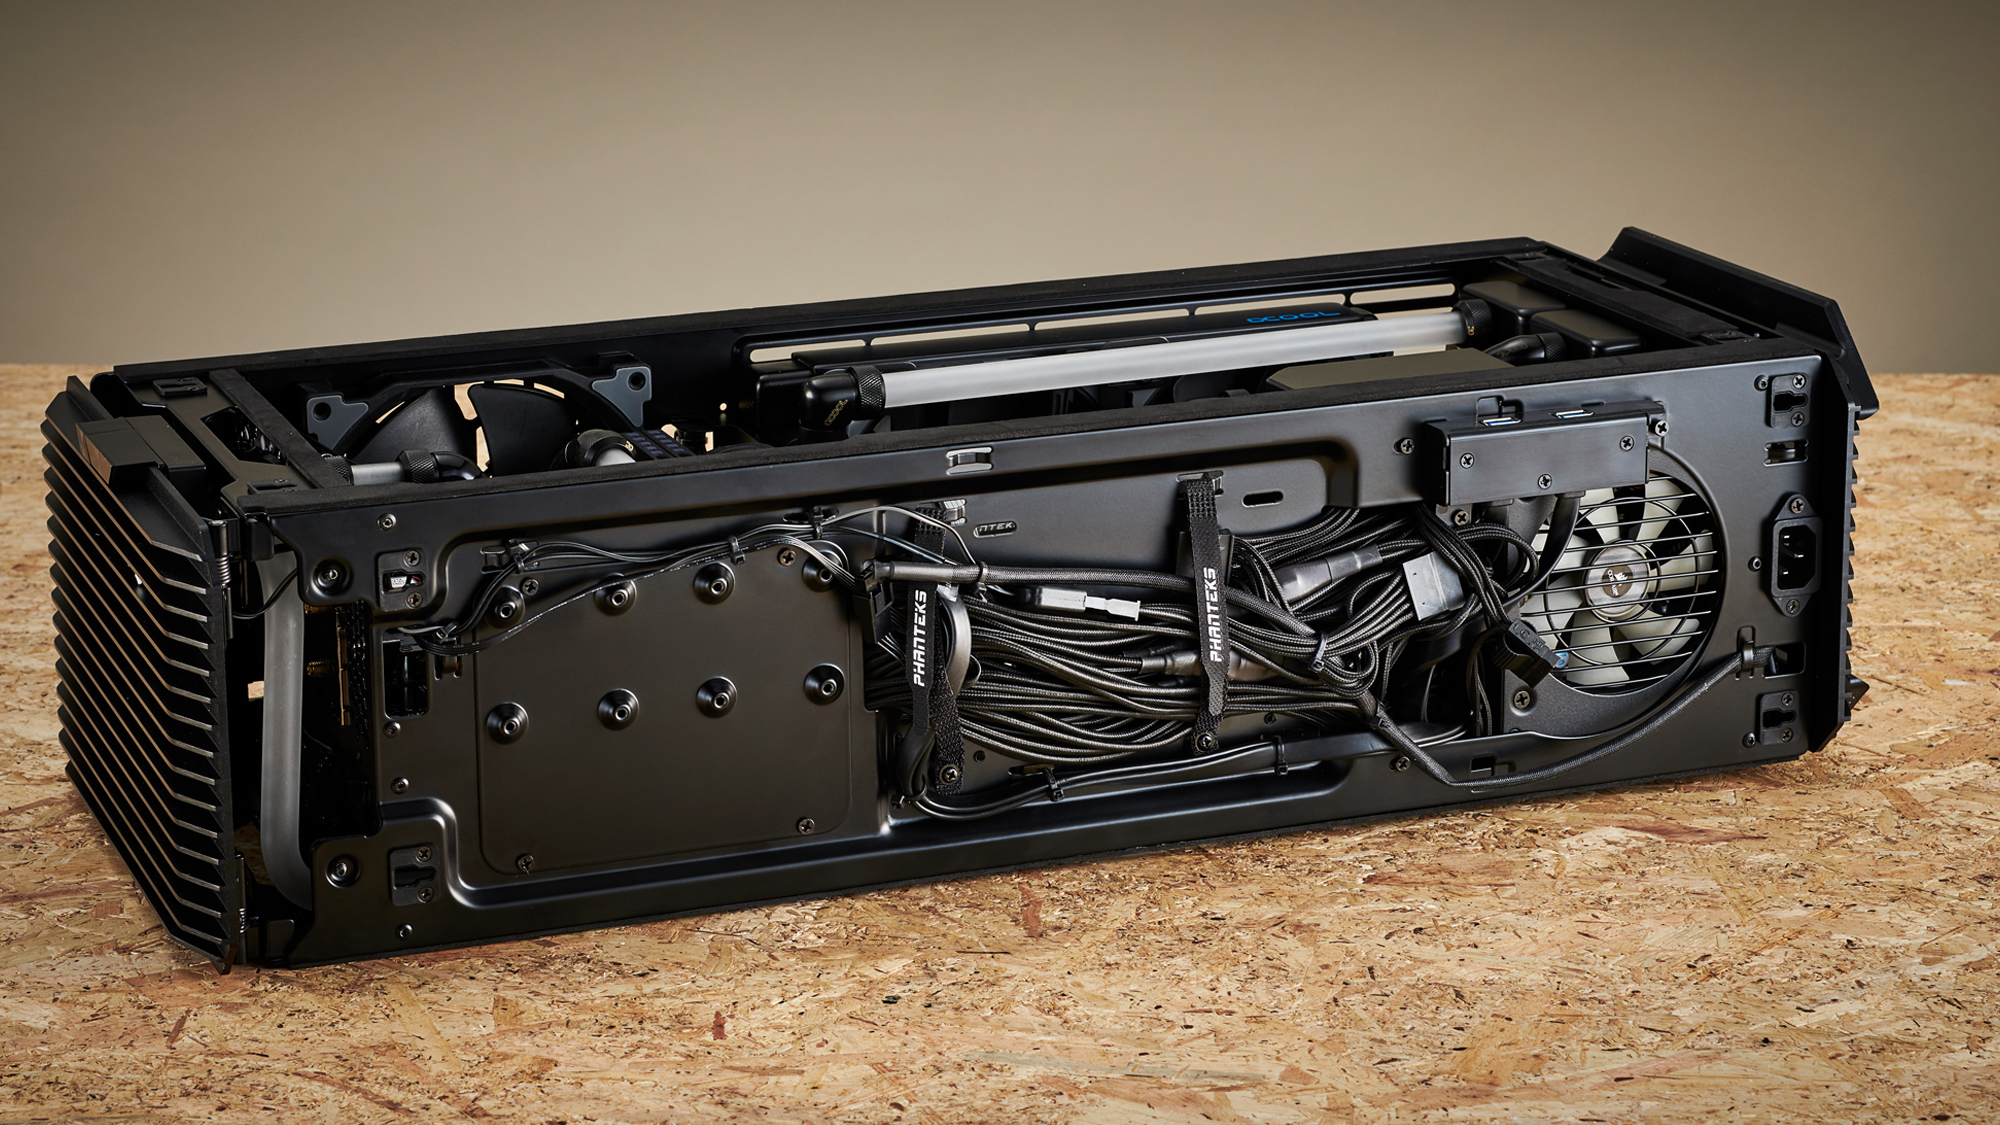
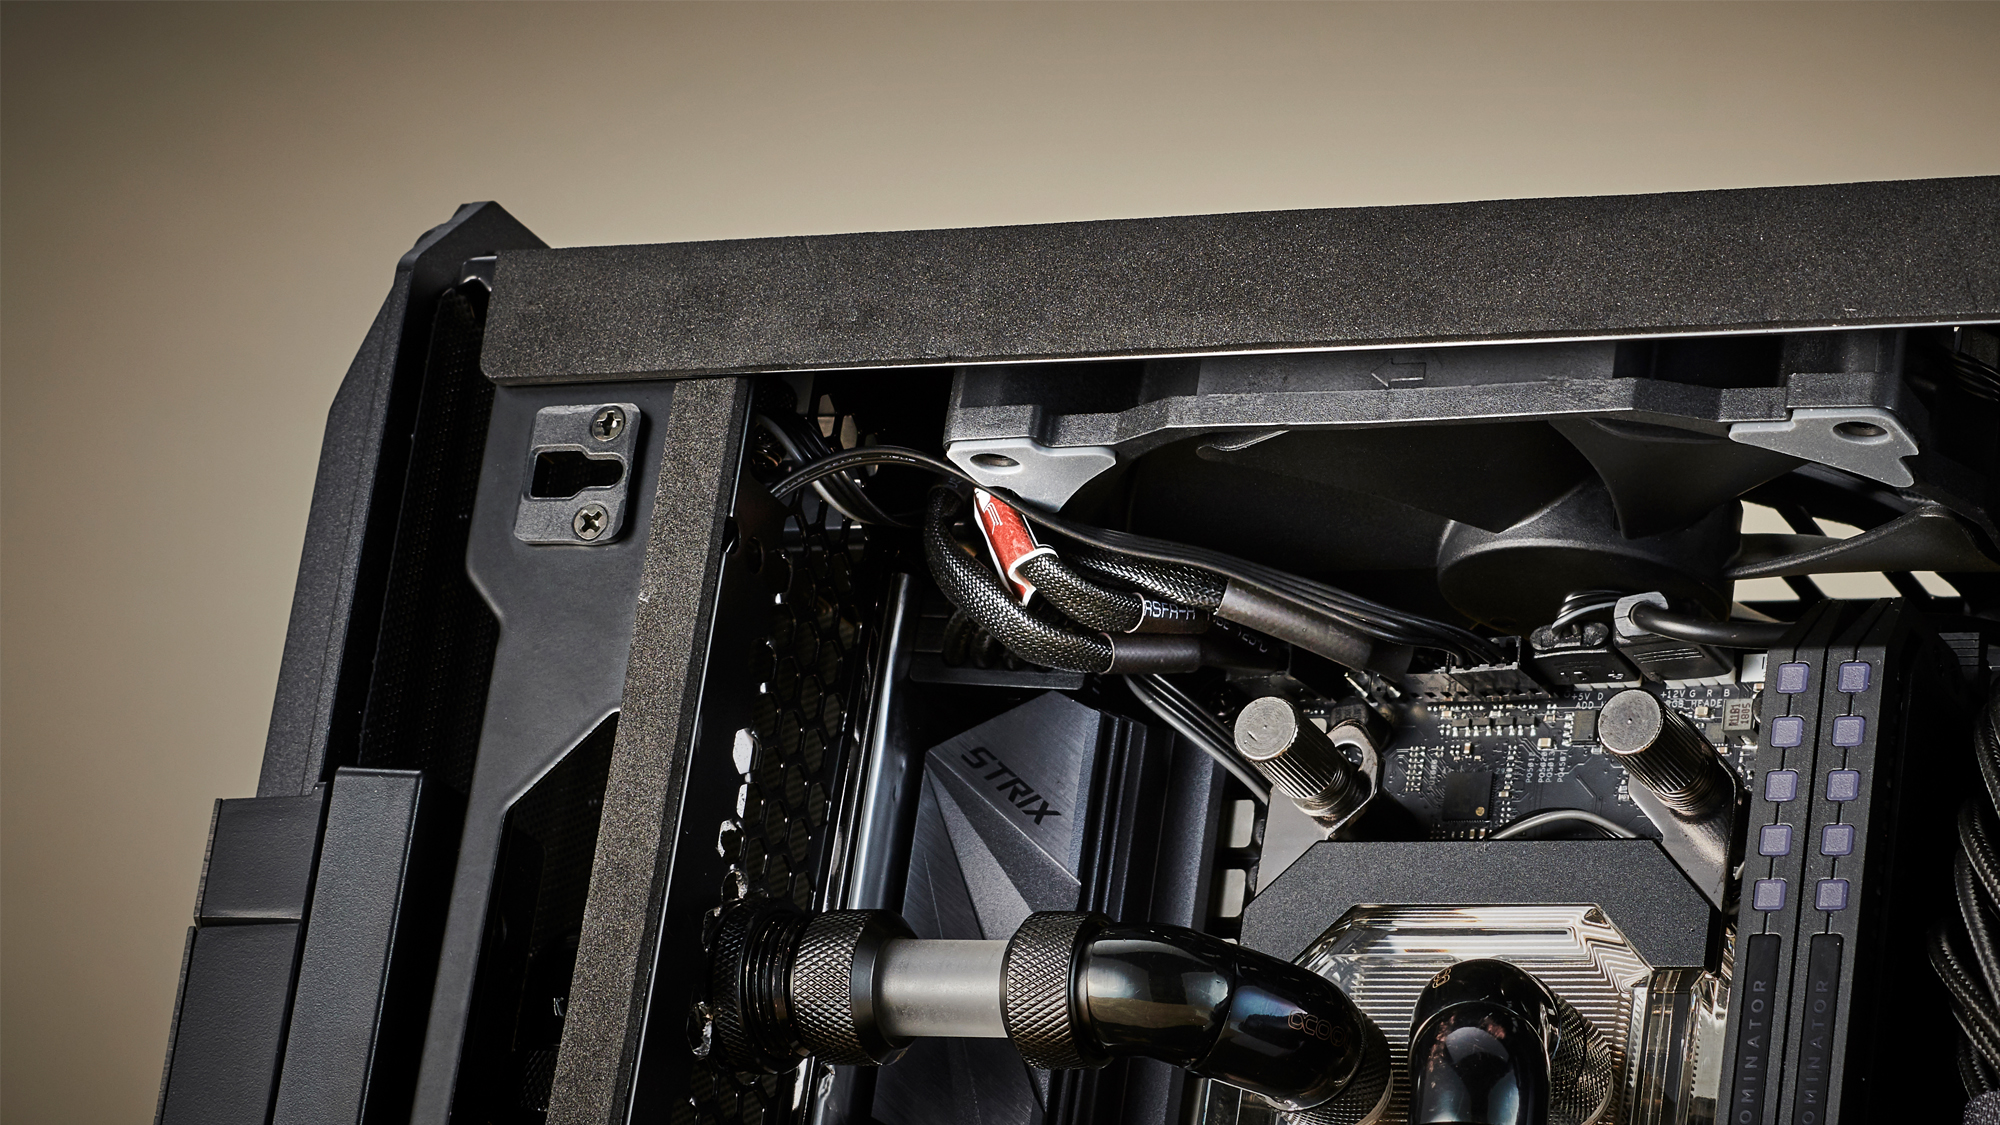
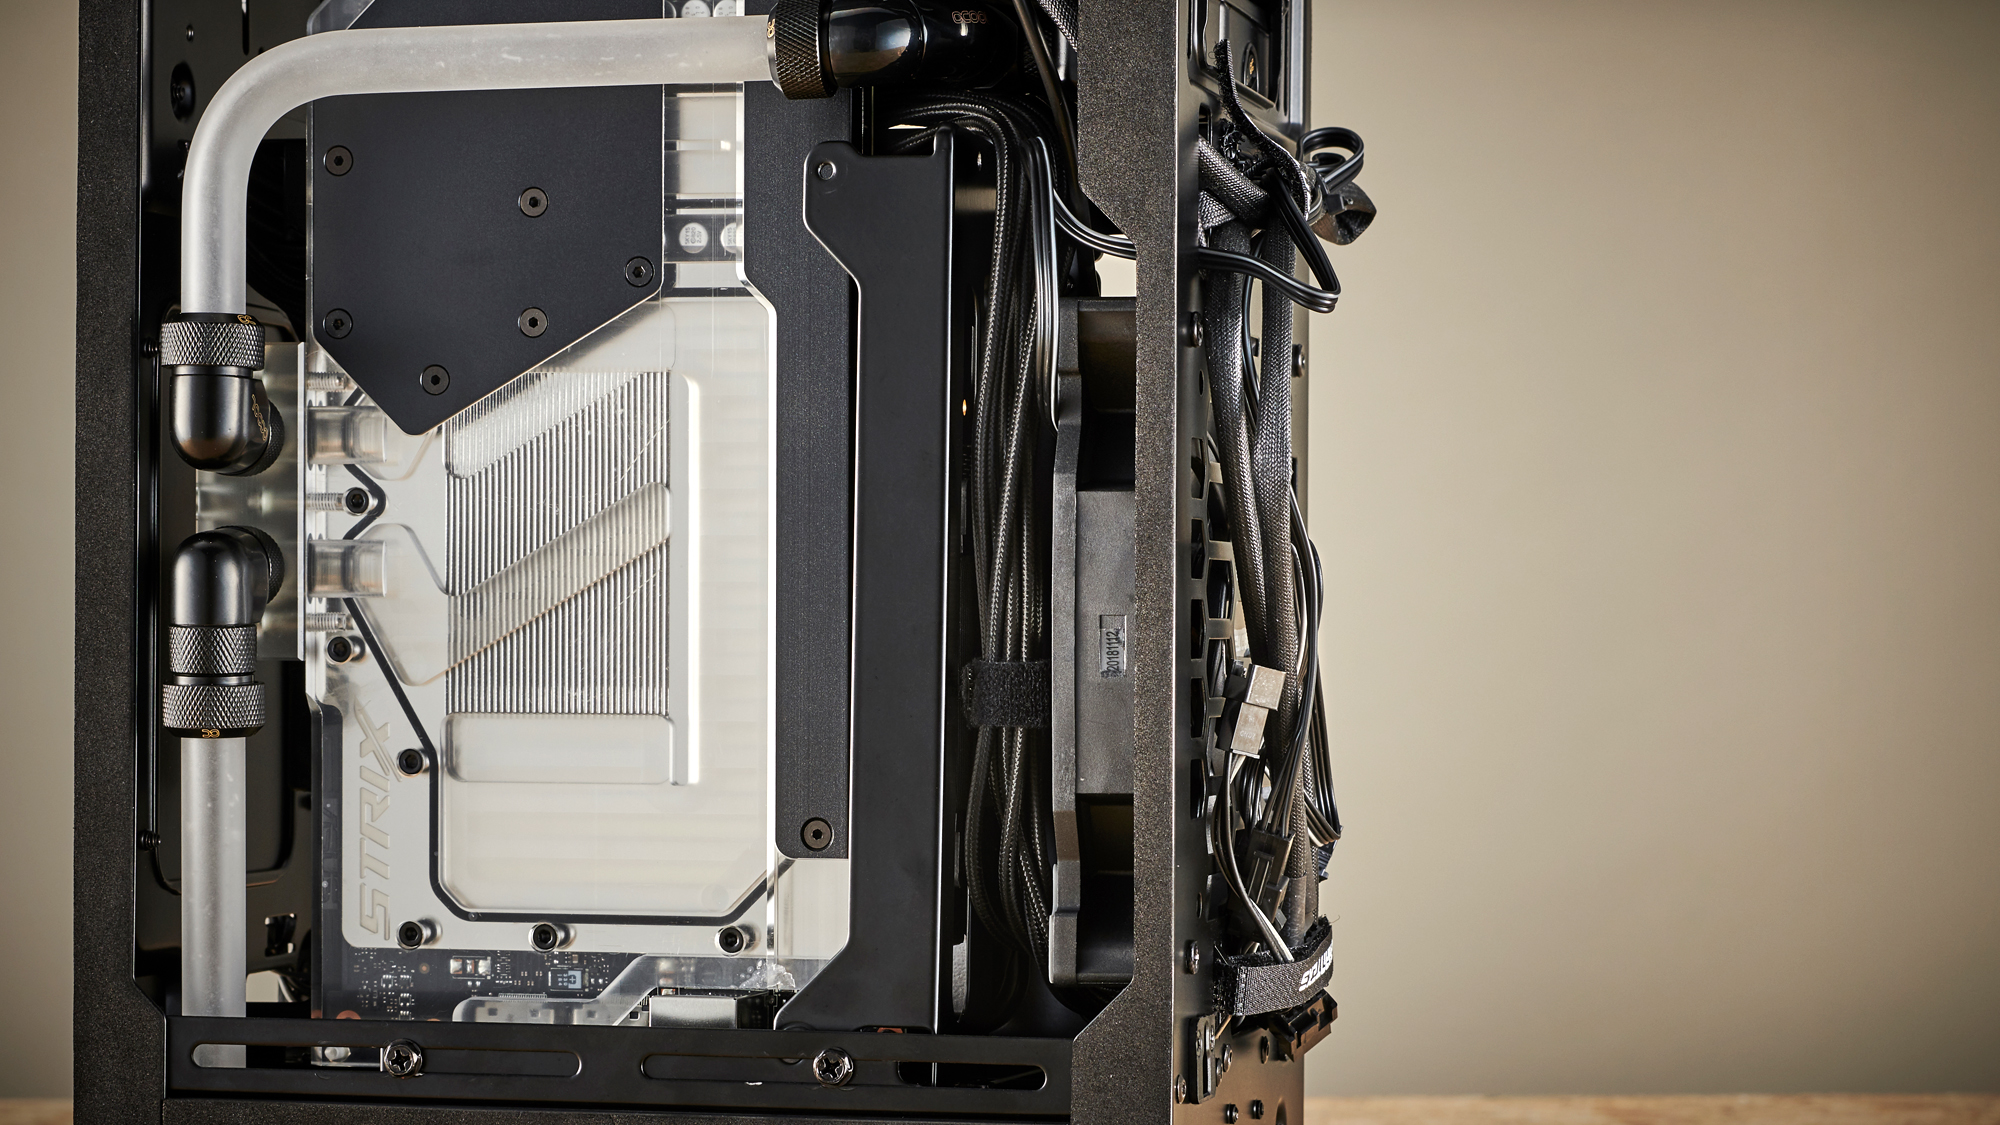
You can finally see just how crazy the cabling is in this build. It’s a chassis that really does require custom-length cables. SFX PSUs just don’t have the length to be able to cope with some of the distances here, at least not if you want clean runs. And yet with the Corsair custom cable kits, especially the ones with the in-line capacitors, you often just have too much cabling, and too much bulk to contend with. I’ve done my best with the Velcro straps, and thankfully the rear panel does shut, but it’s just one of those things you need to watch out for.
There’s also another neat shot of just how tight those cable runs are around our “rear” chassis fan. I had issues here too, as I’ve got an LED-light ring situated around the res that I believed could be powered off the RGB header (spoiler it can’t), and I’ve managed to plug that top 140mm fan into the AIO pump fan header too. We returned to this later with another Noctua Y splitter, and plugged the LED light ring back into its molex power and inline remote control, which unfortunately means no software control.
On the whole, the Evolv Shift X is beautiful, yet flawed. It’s easy to work in, yet you know airflow’s going to be an issue.
12. Fill Time
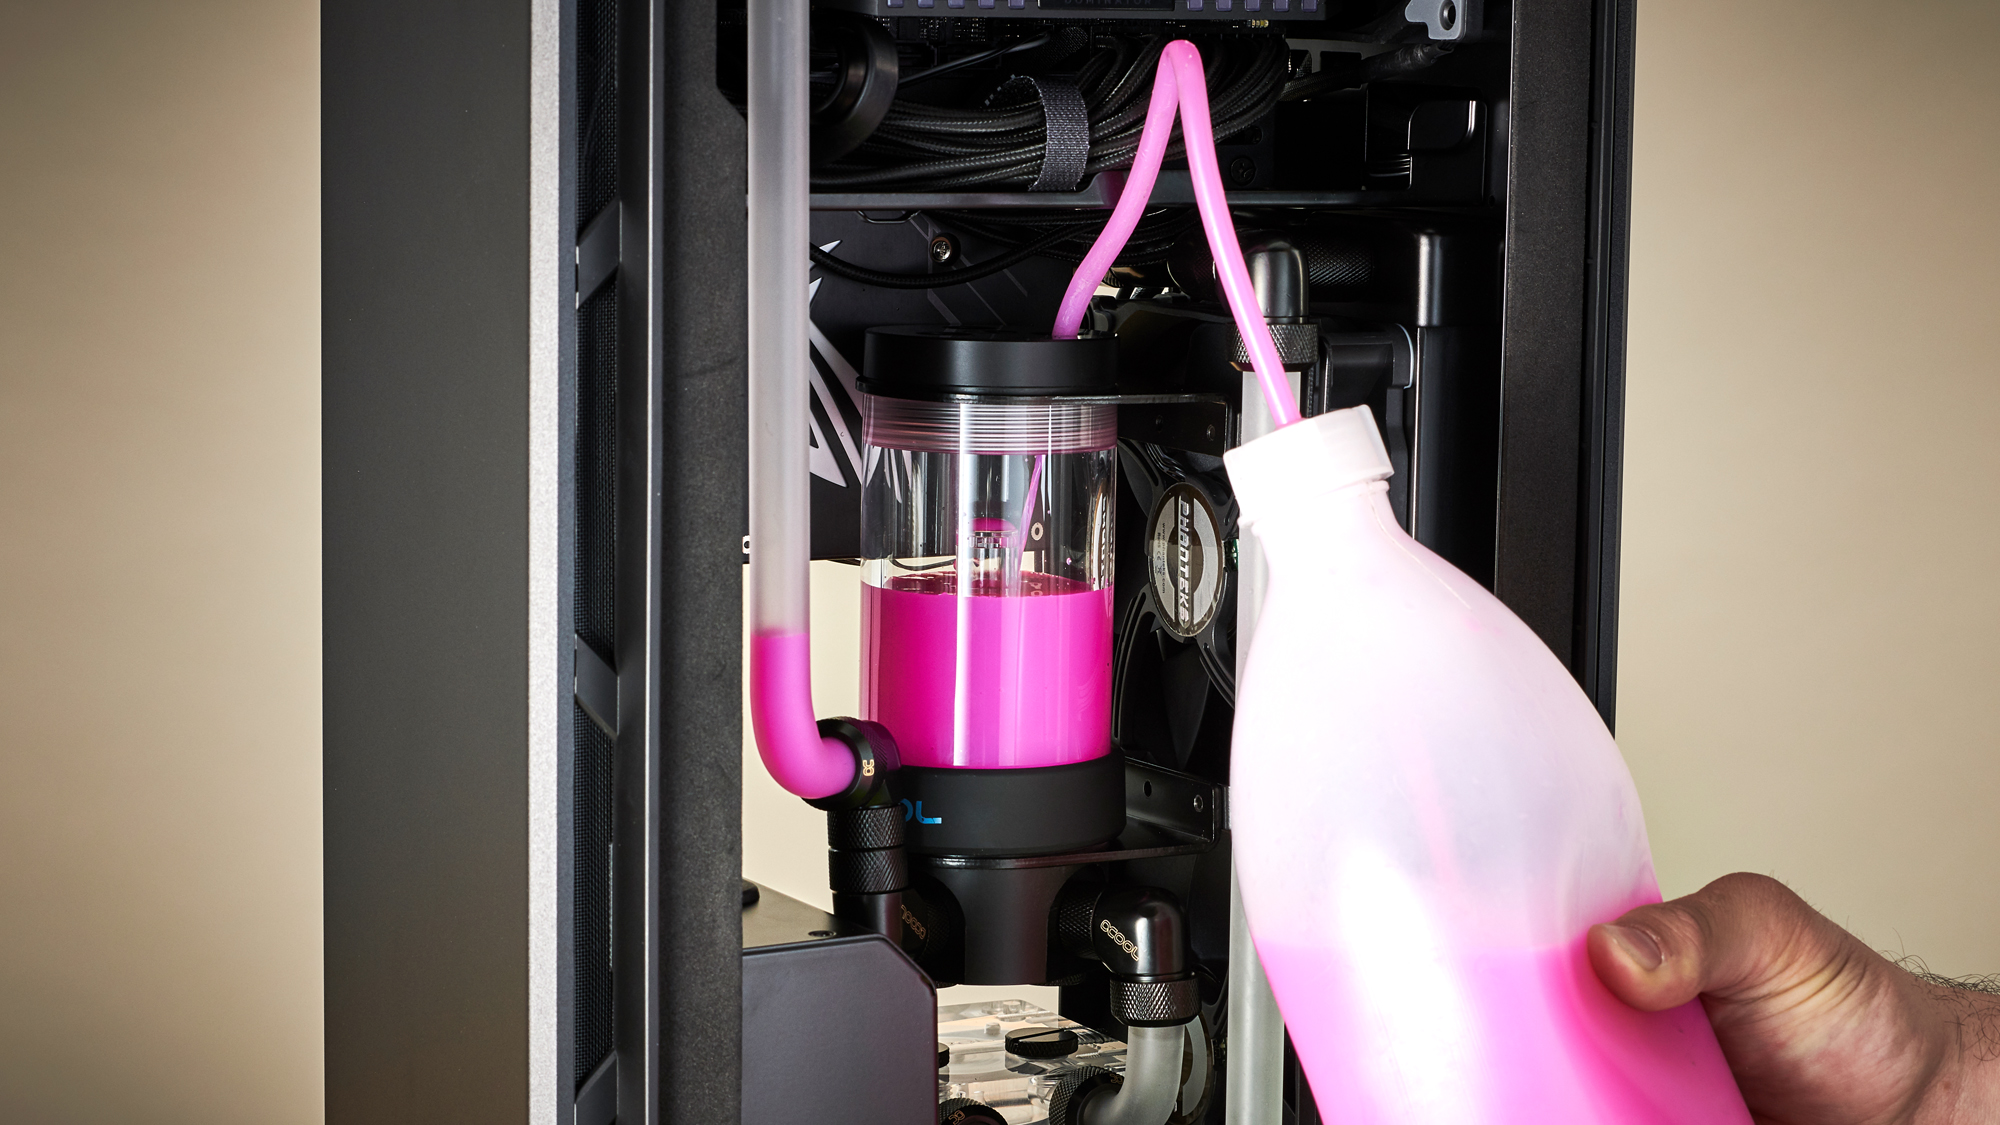
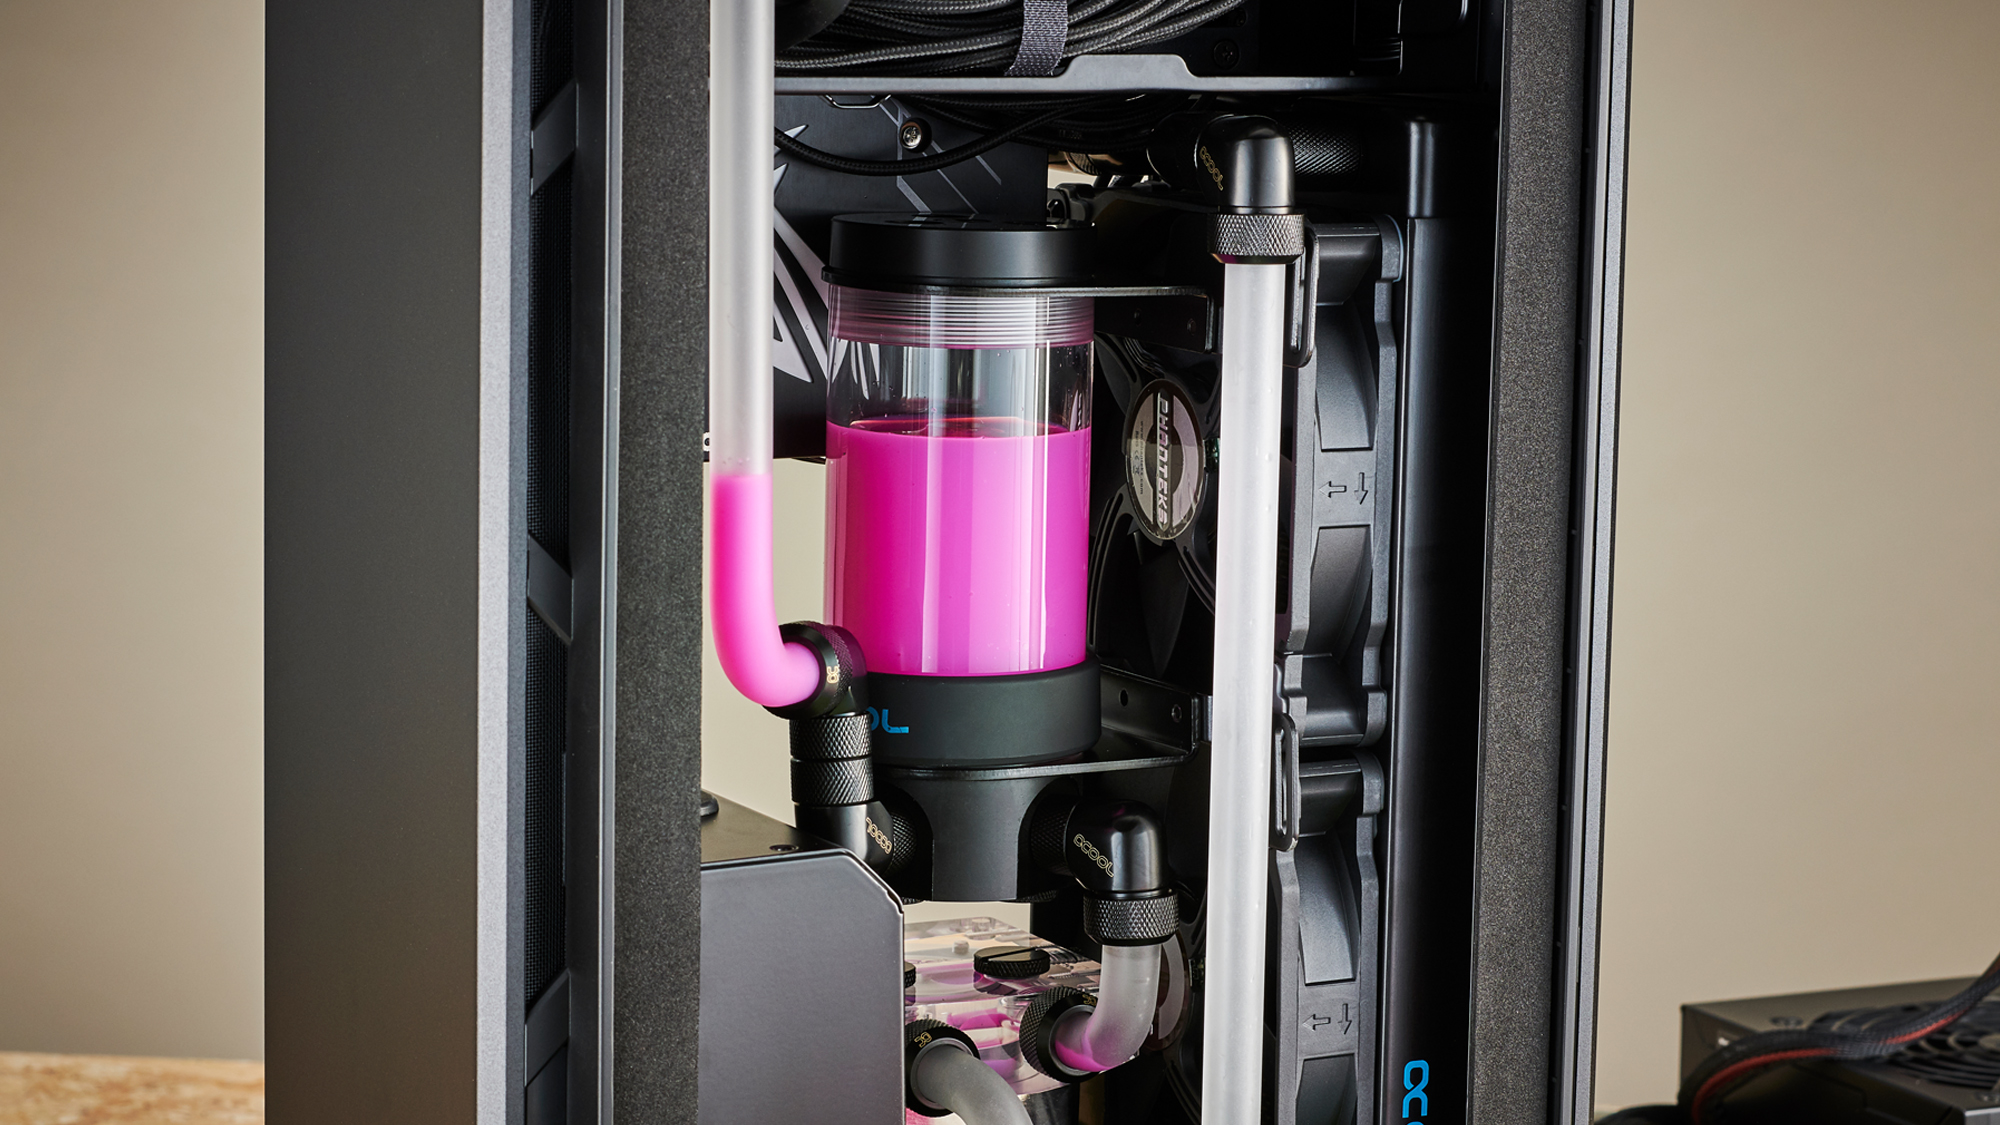
Once all of the cables were in, it was time to fill the loop. Wedging the fill bottle’s hose through the top of the reservoir was a touch tricky, as I had the res mounted so high up that using Alphacool’s included tool to loosen off one of the plugs just wouldn’t work. In short, the key wouldn’t fit so I had to cut it in half to get it to fit underneath that cable management bar, so we could loosen off the plug.
There’s a few things to note about this res combo. It has a solid water spout in the middle of it with perforations at the top, that pushes coolant up and out through like a sprinkler. If you’re filling the loop however, and coolant is going down into the pump via that spout, you need to fill the res so the coolant level is higher than the spout. Otherwise, all you’re going to be sucking down into that pump is air.
Another neat trick to fill it here is to attach a 90-degree fitting up top, then a length of soft tubing, and blow into the system. This will push coolant down into the pump without you necessarily having to power it on, reducing the chances of damaging the bearing inside the pump. Just try not to spit in it.
Of course our first fill run had a few issues. That 90-degree bend running down from the res to the bottom pump wasn’t quite long enough, and just missed the o-ring and began to leak. So mid-way through, we turned the rig on its side, isolated that length from the coolant. Carefully removed it, mopping up any excess coolant, and bent and cut another length to replace it.
MORE: Best Gaming Desktops
MORE: How To Build A PC
MORE: All PC Builds Content
Current page: Build Notes: A Lesson on Compromise
Prev Page A Mixing Pot of Cooling Solutions Next Page What We Learned
As Associate Editor of Tom's Hardware's prestigous British division, Zak specializes in system building, case reviews and peripherals, and has a particular penchant for liquid-cooling. He's also a lover of all things Viking/Scandinavian (thus the poor attempt at a beard).
-
pelegbn A $1,800 console killer?? can it run God Of War, Horizon Zero, Uncharted 4 or any of Sony's many great exclusives? I rest my case.Reply -
JackFlakk Enjoyed the article. You put together a fantastic looking rig. Nevertheless, I wonder if perhaps you lost your way when attempting to call an $1,800 build a "console killer".Reply
To borrow from (and somewhat misuse) Shakespeare, "the play's the thing." With your budget, after spending $300 on the console I can then go on to purchase 25 games at the full $60 price tag. Sure, they may all run at a miserly 30 FPS, but at what cost does one place a buttery-smooth frame rate? Me, I'd rather have a lot of games to play. -
AnimeMania I think building a computer for roughly the same price as a console or finding out how much it costs to build a PC that has the roughly the same graphic quality as a console would have been a better article. For the price of the video card, you could have purchased all of the popular gaming consoles. There needs to be some apples to apples in the article. Custom water cooling is never cheap or plug and play.Reply -
blacknemesist Replypelegbn said:Console killer? can it run God Of War, Horizon Zero, Uncharted 4 or any of Sony's many great exclusives?? I rest my case.
A better title would have been "Xbox Killer" but Sony already did that as well...
Can a PS4 run PC exclusive titles? Point is moot. -
blacknemesist ReplyJackFlakk said:Enjoyed the article. You put together a fantastic looking rig. Nevertheless, I wonder if perhaps you lost your way when attempting to call an $1,800 build a "console killer".
Its almost a console killer since it is compact, perform away above anything the PS4 can offer and only lacks the ease of mobility and maintenance. Given any title that exists on both PC and PS4 versions( not just a PS4->PC port) this machine completely wipes the PS4 out. It is overkill but it replaces the PS4 place in the living room. -
JackFlakk Replyblacknemesist said:It is overkill but it replaces the PS4 place in the living room.
As you wish. For the money, I'd still rather have the PS4 and the 25 games. I suppose one could have an entertaining evening playing with the Ambient Occlusion slider, instead. To each their own. -
rakadedo ReplyThe problem with the PS4 Pro (the more powerful of the two 4K consoles right now)
Mistake there. You either meant to say Xbox One X, or weaker instead of more powerful. -
fry178 lol, "console killer".Reply
stay within power and cooling envelope of a console and then see how much of a killer it is.
