RAID on Rye
Run The Disassembled Toaster Parts Through The Dish Washer
Dave Goeke: The first thing to do with a newly acquired toaster is to completely disassemble it. The parts to keep are the base, cover, and all the screws. There will probably be some odd, unusually-shaped pieces of sheet metal that may be used as brackets for mounting components. Then, run everything through the dish washer.
THG: Why would you want to run all the parts through a dish washer?
Dave Goeke: Old toasters are gooey and gummy on the inside. A dish washer is much more effective than hand washing. Wash on a mild cycle with little or no heat and mild soap. (Plastic from old toasters will fade and loose luster with heat and abrasive soaps.) Do this when your wife is away from the house, out shopping somewhere...
Install The OS First, Then Assemble
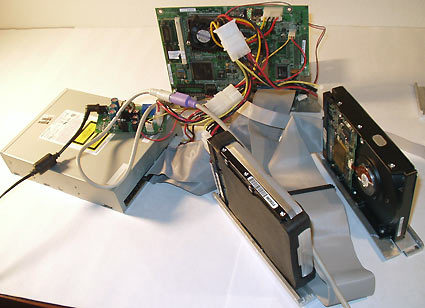
It is best to install the OS before the system is put together. The system must be completely wired up to install the OS.
THG: Okay, we've got the toaster, we've gutted and washed it, and prepared it for installing the components. Are we ready to put everything together now?
Dave Goeke: Install the operating system before assembly - ports and ATA cables are hard to reach once the system is built. This means connecting power, disks, video, keyboard, and a CDROM. Record which drives are master, slave, primary channel, and secondary channel, especially if your OS is not Linux. Some unnamed operating systems get apoplectic at boot time if drives are not cabled and positioned consistent with the internal labeling.
THG: What operating systems did you use?
Get Tom's Hardware's best news and in-depth reviews, straight to your inbox.
Dave Goeke: Any Linux distribution will work. Toaster RAID is a headless file server, so a window manager and all the space it uses is not needed. During installation, select networking, HTTP, NFS, SMB (AFP for MAC support is no longer needed, OS-X supports NFS and SMB clients), DHCP, and the RAID tools. Telnet or SSH will help. All this should fit in a small (100 MB) partition.
Current page: Run The Disassembled Toaster Parts Through The Dish Washer
Prev Page Getting Started Next Page Fit The Drives And Motherboard