Bye Bye Tape, Hello 5.3 TB eSATA
Installation
After staring at the pretty blue lights for a while, I then proceeded with the installation of the eSATA PCI-express card and its drivers, physically attaching the eSATA drive chassis to the server and installing the HRDM v2.0 service.
For me, documentation is the key aspect of any product. It should be organized, up to date and easily understandable. The documentation that came with the seven bay eSATA chassis could have been better. The manual was a combination of different documents that were stapled together and then organized so that a table of contents could be made. There were no step-by-step installation instructions and I ran into a couple issues that I didn't see mentioned in the system install docs that should have been. I'll talk about these as I go along.
The installation of the eSATA PCI-express card was pretty straight forward. Installing the card into the PC and pointing the "Found New Hardware Wizard" to the provided CD-ROM with the Silicone Image Sil 3132 drivers worked with no problem. I could have installed a fresh copy of Windows 2003 Enterprise and installed the SI drivers during the Windows setup, but I already had a new installation of the OS all ready to go. Also, as mentioned before, Silicon Image's website has the drivers for the Sil 3132 controller available for download, so if you run into any problems with the drivers on the provided CDROM, you can always download a fresh copy.
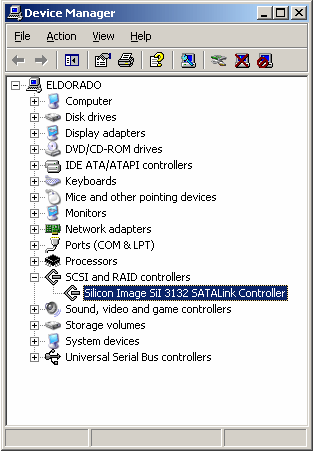
Once I finished the driver installation, I confirmed that the OS was happy with the new hardware by going to the Window's Control Panel and verifying that the new card was listed correctly in the Device Manager.
After installing the eSATA cards drivers, I verified the installation by going to the Device Manager and verifying that there were no errors.
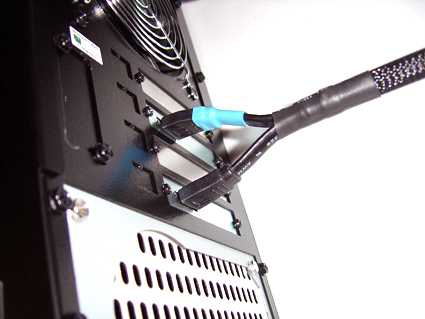
The next step in the installation involves attaching the eSATA chassis to the computer using the provided two meter long dual eSATA cable. The cable length limit of eSATA can be a problem depending on how you layout your rack mounted system, but 3Gb/s of data throughput should make it worth the effort. The dual cable itself is a pair of eSATA lines bound together by a mesh material intended to keep the cables parallel to each other from end to end. I felt a little uncomfortable connecting the cables to the back of the chassis since the mesh material was too close to the ends of the cable. This arrangement forced me to spread the cable ends apart in order to place the eSATA connectors into their ports on the back of the chassis. This resulted in a significant amount of tension on the connected ends. Fortunately, two weeks into the evaluation, the chassis was still running without any connectivity problems.
I was a little concerned with the amount of tension placed on the cable connectors when I plugged them into the eSATA chassis.
Get Tom's Hardware's best news and in-depth reviews, straight to your inbox.
One of the first documentation related issues I ran into also involves the cabling of the eSATA chassis to the eSATA controller card. A simple question such as "Which of the two cable connectors goes to which of the two cable ports on the back of the server?" should be easy to answer. Unfortunately, for the IT newbie, this easy answer won't be found in the documentation. Instead, they're destined to guess the answer or make a phone call to tech support to find out it doesn't matter. A diagram showing the simple connection would have been helpful here.
Once all the cable connections are done, it's time to start inserting the pre-formatted drives into the chassis. I expected to see new drives popping up in the Windows Disk Management window, none showed up.
The simple fix for this problem is running the Windows "mountvol /e" command to re-enable automatic mounting of volumes. A quick call to Highly Reliable Systems' tech support resolved that issue. As it turns out, automatic mounting of new volumes is turned off by default in Windows 2003 Enterprise. I don't know if there are too many small businesses that would run Windows 2003 Enterprise, but still, to prevent unnecessary headaches, it should be documented in the instruction manual.
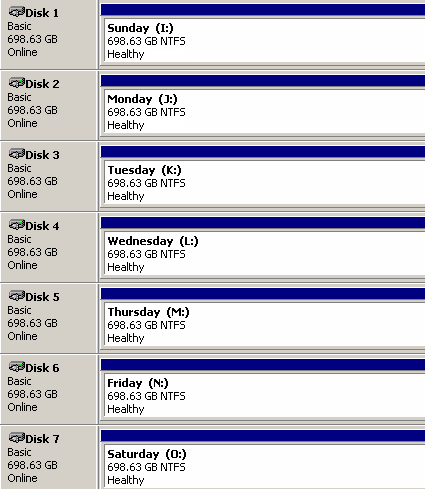
What your Disk Management window should look like after you have installed and configured all the drives.
Now that all the new drives have come up in the Disk Management snap-in, we're ready to make a couple of post-installation changes.


