We all love to check out the latest and greatest best laser cutting and engraving hardware. However, it is important not to overlook the vitally important software side of the equation. In this article, we will examine the perhaps bewildering array of laser control software options available to new hardware users. Then our attention will turn to more familiar ground for many: using traditional 2D bitmap and vector imaging software to create artwork that will be brought into the 3D maker world. Along the way, we will share insights and tips to help you make the most of your shiny new hardware.
Topics discussed below include:
- With lasers the 2D mindset still 'works' but they can make 3D stuff
- 'Generic' laser software: LightBurn, Laser GRBL, and EZCAD2
- Bundled software from laser hardware brands is getting better
- Preparing artwork and graphics - vector and bitmap choices
Lasers bring 2D designs into a 3D world
We live in a 3D world, but 3D creation software isn’t the easiest to grasp or become proficient in. Thankfully, many of the old-school tried-and-true 2D bitmap editing and 2D vector drawing packages that have been around for decades can be used to create useful and decorative 3D objects, in tandem with a laser cutter and engraver.
Article continues belowFor evidence of this, see our recent laser reviews or browse the extensive online libraries of laser projects at sites like Atomm, 3axis, and VectorsFile.

These portals are stuffed with source files for 3D creations that are slotted and/or glued together from cut 2D sheet materials. Common projects include elaborate decorative storage, holders, stands, toys, lamps, and more. If an object can be made from assembling custom-cut and engraved sheet materials, you are basically good to go. If you think about it, that’s a lot of things. Admittedly, 3D printers are more flexible in the complex and seamless forms that they can create, but that’s another story.
Lasers can also be used simply for decorative purposes - that's usually engraving rather than cutting. In this area of the laser-verse, common projects might be engraving pre-shaped name tags, coasters, chopping boards, and the list goes on... Even cylindrical objects like flasks, tumblers, and cups of various materials can be professionally engraved - if your laser has a rotational attachment.
‘Generic’ laser software
There’s a software ecosystem of commercial and free tools for controlling laser-cutting and engraving machinery. Depending on what controller is embedded into your machine, and the machine’s type and price bracket, you will often be instructed by a manufacturer to download a free control software application.
Applications like LaserGRBL are usually suggested for those who have just acquired a hobby-entry-level diode laser with GRBL / GCode controller hardware. Another option you may see suggested with a CO2 laser is RDWorks. And UV/Fiber galvo-head lasers from numerous brands can take advantage of a free software ride with the EZCAD2 application.
These freebies will, of course, do the job, and many enjoy success and satisfaction from using them. However, if you feel you are going to outgrow this functional free software with limited support, plan to be a power-user, or want to learn one laser software suite that will work across most of the hardware that is out there, it might be worth taking a look at LightBurn.
LightBurn
This is a flexible, multi-platform powerhouse laser cutter and engraver suite, but it requires payment after a generous free trial period. A LightBurn Software license can be had for as little as $99 (works only with typically budget GCode lasers) to $199 (works with DSP and Galvo lasers, too).
Whether paid vs free software makes sense to you is your decision. However, the best tool is often the one you know, and since LightBurn Software has been working in this niche for years, earning a good reputation, it can be a good choice for an established multi-laser workshop-equipped person, or a new entrant who thinks they will be working with these machines across multiple devices or generations.
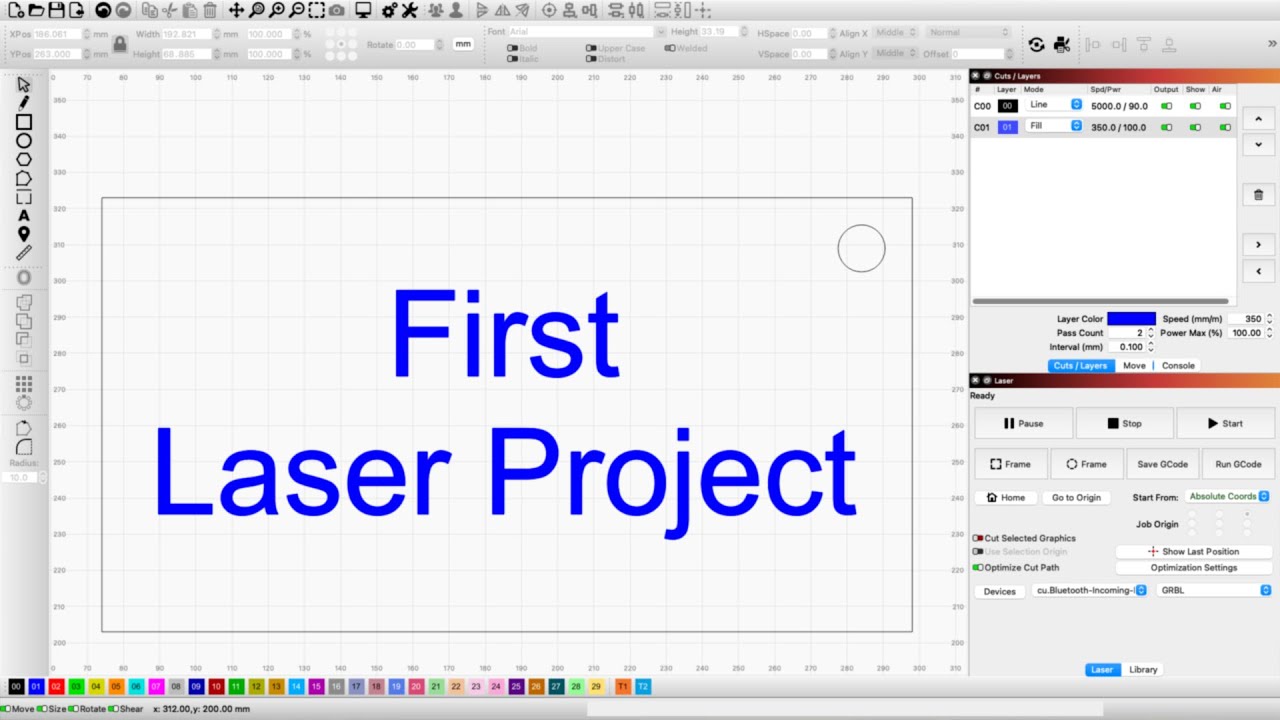
The way LightBurn is laid out and works seems to have set the standard of what to expect from laser control software. We’ll talk about custom brand bundled software later, but upon firing up the software and connecting a laser machine, you will be presented with the following:
- To the left and top:
- Shape presets and drawing tools, Import, Nesting, Step and repeat, Image adjustment, Offsets/kerf, Dimensions and alignment controls
- To the right:
- Layers controls, Laser settings adjustments per layer, Laser hardware controls
To the upper left side of the LightBurn UI there will be many familiar looking tools, such as shape drawing primitives, and ways to adjust shapes, group and combine shapes, and so on. Particularly useful laser-related tools include those to create arrays from selected shapes.

In essence, you have a basic vector illustration package here, with excellent alignment, arrangement, and Boolean combination tools. This will be particularly useful for drawing the cut lines for your projects, if you feel you don't need to harness the power of a full-blown illustration software package.
The vector tool set is a natural fit for clean, accurate cuts, but laser users will often want to mix their material cutting with some engraving. This is often where importing bitmap/raster graphics (such as.JPG, .PNG, .TIF, etc.) comes in.

LightBurn has you covered for the easy import, manipulation, and engraving output of bitmaps, too. In the example above, you can see I've imported a picture of a guitar to the canvas. Then I masked it with a star shape I drew using the built-in vector tools. At the time of the screenshot, I am viewing the Adjust Image options dialog. This is an important step toward achieving a pleasing level of contrast and detail in your material.
With all the variations between materials and lasers available, there's no perfect preset formula for great output. You will have to go through some trial-and-error adjustments to optimize things for your particular setup. Factory suggested settings are likely to provide 'OK' results, but time spent calibrating and testing both engraving and cutting samples of your favorite materials is always worthwhile.

One of the last things we want to highlight about LightBurn and similar laser software packages is the usefulness of the 'kerf' settings in preparing 2D sheets for 3D construction. This is where the software can adjust output to allow for the burned-away material waste when a laser cuts. Say you draw a precise 100mm square vector cut in the software, and then laser-cut a pine plank. Take out your steel rule, and you might find the finished cut object is actually 98mm square, or even smaller. This is because the laser cut might burn away up to a millimeter of material all the way around a shape, depending on laser/settings/materials.

Kerf settings might safely be ignored for many projects. However, if you are outputting several sheets for what will be assembled into a 3D project, tweaks to kerf can mean the pieces slot/interlock much more precisely. That will give your boxes, or other assembled sheet material work, a better fit and finish.
We have mentioned these aspects of LightBurn, as they are laser-specific features that differentiate packages like this from illustration software. However, these are typical features in most laser control packages.
Bundled software from laser brands is improving
Differentiating hardware with custom software suites is a growing trend among laser machine producers. For the last two lasers I tested, both brands suggested the best way to use their shiny new hardware was with their own-branded bundled software, though they also offered some initial LightBurn support.
As someone who prefers to use tried-and-tested 2D tools like Photoshop and Illustrator for preparing bitmaps and vectors, respectively, I am quite flexible with laser-specific software. It doesn't have to do much beyond allowing me to import, arrange, and output my files, with plenty of settings to dial in great output.
So, beyond a few software bugs, these laser-maker-branded suites were excellent at their tasks. Moreover, they worked with the full gamut of hardware-specific features like LiDAR autofocus, rotational attachments, positioning, and preview cameras — straight from the box — no need to wait for a third-party software vendor to get around to adding support for new-fangled software.


That means my advice is to at least give the own-brand bundled software a shot. You might find it does the jobs you need with minimum fuss, with full, easy-to-access support for the hardware you are using. Moreover, though there may be some unfamiliar new features such as 'AI' tools and project library integrations in these apps, they invariably still cover the basics - with a canvas, simple shape creation and arranging tools, import tools, and output layers and laser settings tools.
As hinted at above, though, some LightBurn pros working across multiple machines will probably like to keep their workflow under a single roof.
Preparing artwork and graphics - vector and bitmap wrangling
Choosing to originate your laser artwork in either vector or bitmap tools is one of those horses for courses decisions, where you should choose according to each image format's strengths. However, there are overlaps in the qualities of either format. Moreover, for simple cuts like rectangles, ellipses, and compound shapes easily made in laser cutter software, you can do without a dedicated vector drawing package and use the built-in shape tools most laser software provides.
Vector software - ideal for type, logos and complex cut shapes
If you want to create a laser output design that goes beyond including simple type or cutting shapes, it is worth investing some time and effort to prepare vector artwork to be imported onto the laser software canvas. In my recent work, I relied on 2D illustration software to create some complex cut Halloween and Xmas decorations to be cut from wood and perspex. These included various types of outlines and shapes.
When I traced and duplicated a guitar scratchplate, high-precision and easy adjustment of elements for iterative tweaking was also essential. This could only practically be done with vector illustration software. In my case, I rely on an old copy of Adobe Illustrator that only just remains compatible with the latest version of Windows. I've been using it for decades, so it is a favored, trusty, and non-subscription software tool. However, there are good modern and free alternatives like Affinity Studio and Inkscape - which can also be used to craft complex .SVG files, which laser software import filters seem to favor.


Vector files aren't just for cut lines, though. They can also be the best for engraved type, logos, and other design elements where are clearly defined edge will work well. Engraving a logo of your favorite sports team on a glass tankard will probably work best from a vector source file, for example.
Most vector software (and some laser software) allows for tracing bitmaps into vector, but in my experience, the results are hit-and-miss. But it is good to see that laser software can now often edit vector graphics nodes and undertake other basic edits, so you don't have to keep flipping back to the dedicated illustration software, exporting, and importing, to make small changes.
Bitmap - ideal for photo engraving, pictorial scenes.
The strength of bitmap graphics is as a source for photo-like engraving. If you want a photo of your dog on a painted steel pendant (for example), you will probably want to import one of your favorite doggy pics for the purpose.
You can do this straight into most laser software and make adjustments / apply preset adjustments to match optimized output settings for various materials. However, if you are more familiar with Photoshop, or the free GIMP or Affinity Studio software, you might like to fine-tune the shape, brightness, contrast, and levels of the bitmap artwork there. It is mostly a matter of preference and practice, which you will end up preferring over time.

During my testing and comparisons, it was notable that laser software like LightBurn is specifically tailored for mono photo processing, with its wide variety of monochrome dithering, threshold, and other adjustments.
Modern general photo editing software, however advanced, tends to neglect halftoning and dithering algorithms that were so important during the mono monitor/newsprint era, and that translate well to laser engraving. GIMP is one welcome exception to this trend.
Conclusion
I hope this laser software-focused article has provided some interesting and worthwhile insight into the topic. And it is a big topic, where if something already works for you, it might be worth sticking with your favorite apps and methodology.
There are so many other important aspects to getting the most from your laser, like hardware choice, materials choice, and preparation, to become familiar with. Nevertheless, we hope the cut and engraved results you can get will soften the learning curve and make the quest to get the most from your laser enjoyable.