Silent But Deadly PC: How We Built a Quiet, RGB-Free Desktop
Color Killing Hardware
From the outset, it’s worth noting that picking RGB-free hardware in today’s age of luminescent dominance is, well, not really possible. If you’re after premium components, RGB is inevitably going to come bundled with them; there’s just no way around that.
Outside of the obvious choices, such as processors, memory and solid state storage (the latter of which also features those pesky LEDs now), everything else deemed a premium flagship product is readily saturated with the stuff. It’s a real chicken and egg situation too. RGB sells well, so more RGB products are created and the cycle repeats.
That aside, the challenge here is less about the choice of components, and more about how you manipulate color schemes in an intelligent manner. Focusing on aesthetics, and unlit design language is key. Ultimately that translates into single or dual tone color accents for your builds, schemes that ideally complement one another.
From the outset, on the Silent But Deadly PC, we knew we were going to be going for a very subdued scheme. The choice to go with soft rubber zero-maintenance tubing, meant black would be our dominant color (or shade if you want to be real pedantic). So the fittings, the memory, the GPU and CPU blocks, the majority of the motherboard and the fans have all been chosen based around that fact. Our second color is white, albeit somewhat more subdued in its intensity than the first, and it’s only shown through the lighting that’s incorporated into the RGB products that we’ve had no choice but to include. Oh and there's one single 30cm white LED strip lining the front.
The reason we’re using white light, particularly with that LED strip is because it acts as a highlighting tool. Humans see best in white bright light, and so that’s what we’re using here. We’re not submerging those sharp angles and clean designs in a bathe of rainbows; we’re using our light to bring attention to the thousands of hours that those engineers have put into the development and design of this kit.
If, for instance, this was a hard-line build, featuring acrylic, PETG or glass tubing, we would’ve perhaps gone with a white coolant instead of the clear one we’ve chosen here, and entirely transparent blocks for the CPU and GPU, because we'd be relying more on the contrast between black and white to draw attention to each piece.
Color picking aside, let’s break down the true hardware behind this build, and explain why we picked what we did.
Stay on the Cutting Edge
Join the experts who read Tom's Hardware for the inside track on enthusiast PC tech news — and have for over 25 years. We'll send breaking news and in-depth reviews of CPUs, GPUs, AI, maker hardware and more straight to your inbox.
CPU: Intel Core i7-8086K
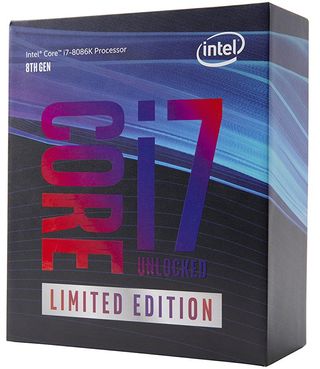

Now this one may seem like a bit of a wild choice, especially given it has two less cores than the latest 9900K, and also isn’t soldered like it’s newer kin. It’s a hot part. For us, it was a personal decision; this is a processor that we know, very specifically, packs a punch in the overclocking department. Think of it as a pre-binned chip, and if you can delid it, and add some of that glorious liquid metal to the affair, it turns into a cool, overclocking powerhouse that’s a ton of fun.
We know that ours can clock up to a crazy 5.4 GHz with a stable enough voltage, on a 360mm AIO alone. What that gets you is 233 points in CineBench’s R15 Single Core test, and a staggering 1,753 points in the multi core test, which is as much multi-threaded performance, as a stock 8 core, 16 thread Ryzen 7 2700X.
Graphics Card: Asus GeForce RTX 2080 Ti Turbo
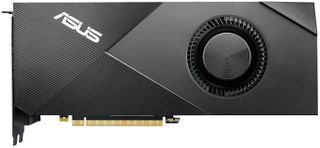

The big question was, why did we not pick a more premium aftermarket solution? The reason came down to the fact that the reference PCB layout found on it made it a cheaper, compatible choice for our Alphacool GPU block.
In the past, most of the time the only thing limiting GPUs when it came to overclocking was temperature. After all the GPU found at the heart of an Asus ROG Strix GTX 1080 Ti OC Edition, is exactly the same as that found in a Gigabyte Windforce GTX 1080 Ti. They’re still both made by Nvidia, still packing the same level of performance, all dependent on cooling, and the majority of the time, power-draw wasn’t as much of an issue as it is today.
And herein lies the problem. If we’d have gone with a Founder’s Edition card, we’d have likely achieved far better performance, as Nvidia allows you to up the voltage limit on its cards substantially compared to the stock cards from other manufacturers regardless of the fact that they both feature an identical PCB layout.
Motherboard: Asus Maximus XI Formula
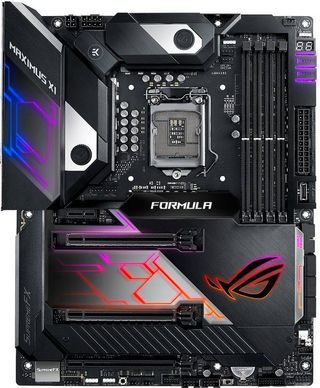

Similar to our RGBeast build, we decided to go with Asus’s Maximus XI Formula motherboard here. It looks incredibly clean, and comes pack with some serious connectivity for those with peripheral dense pockets.
Combine that with the incredible VRM cooling potential entertained by those EKWB designed VRM waterblocks, helping us to maintain higher overclocks, and it’s an absolute winner for this build.
Yes it may be loaded with those pesky RGB lights we’re trying to avoid. However, in our case, we plan on flipping those software switches all the way up to the white setting to counteract that predicament of ours.
RAM: 32GB (4x8GB) Kingston HyperX Predator @ 3200 MT/s
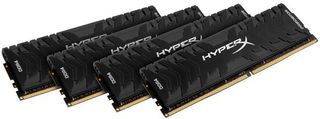

Admittedly memory was tricky for us to choose. The industry is awash with light emitting insanity, something we absolutely weren't interested in, so we’ve forsaken everything in favor of these clean sticks of HyperX Predator DDR4. Admittedly, we would’ve liked to have doubled the capacity on this one, but 32GB is no small sum, and for the time being it should give us some future-proofing for what we’re going to be doing with it.
Outside of this, we also had the option of running either Crucial’s Ballistix Elite sticks, or G.Skill’s black on black Trident Z’s, both of which would’ve been good substitutes.
Why no RGB when everything else has it? Because memory typically doesn’t set it’s color scheme until you log in to your OS and its RGB software initiates, and that’s just not our jam.
Power Supply: Asus ROG Thor 1200W 80+ Platinum
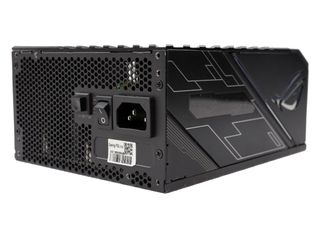

This is absolutely overkill for the rig. In fact, at stock, the setup should only draw about 33 percent of that total outlay from the wall. At overclock, that might rise to 50-percent under load, but it’s still not enough to justify the size of this thing.
So why pick it? Noise mostly, as the ROG Thor features 0dB fan tech. If it’s not utilizing more than 50-percent of its total power draw, the fans won’t spin. Meaning even when this rig is under intense load, it’ll be as silent as the comments section at Tech Radar.
On top of that, the Thor comes with some serious pedigree, as it was actually developed by Seasonic, who we’re immensely fond of when it comes to power supplies.
Boot Drive: 512GB Samsung 970 Pro M.2 PCIe SSD


We’ve gone with a fairly standard OS drive here. Originally we intended to go with a 1.5 TB Intel 905P SSD, but as it’d conflict with our vertical GPU ambitions we ditched it in favor of Samsung’s far more affordable, and more compact 970 Pro instead.
With its far greater TBW warranty/failure rate, and seriously impressive random 4K performance, it’s a no brainer using this for the OS. And as this is going to be the drive doing the majority of the heavy lifting, it makes sense to have the pro here instead of our secondary drive, which is….
Additional Drive: 1TB Samsung 970 Evo Plus M.2 PCIe SSD


This bad boy. 1TB of glorious PCIe storage for everything else. The Evo Plus provides some impressive sequential reads and writes, alongside cheap and effective storage, especially for all of our games and media. It’s not the “best-of-the-best” solution that’s for sure, but for price to performance it’s hard to beat this.
Chassis: Phanteks Evolv X - Anthracite Black
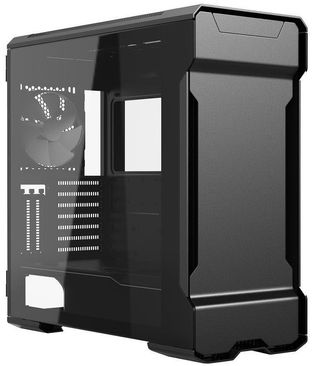

There really was only one case we wanted to use for this build, and that’s Phanteks’ Evolv X. In black of course. It’s a stunning piece of engineering, and with expansive support for liquid-cooling, and far better airflow than the original Evolv, it’s an ideal chassis for our build.
From the expansive fan and radiator support, to the rear cable tidy solutions, the exceptional design language, and the exquisite powder coated aluminum finish littering its well manicured bodice, it really is a perfect partner for this challenge.
Custom Cables: CableMod Custom Pro Cables - Black
We’re a sucker for custom sleeved cables. That said, we just don’t have the time, or the patience to learn how to do it (mad respect to those who do). For those who are like us, CableMod is the next best thing, if not better in some cases.
The first thing we did was go straight to the website’s configurator, select our power supply, choose the cables we needed in the build, of course all black, select the lengths we needed, and then add the pro cable comb options as well. CableMod then cuts and sleeves these to your order, add the combs directly on to them so there’s no faffing about, and ships them out to you. Yeah it’s a bit pricey, but for the convenience and the quality, it’s hard to beat.
Lighting: CableMod WideBeam Magnetic LED Strip - White
We’re also going with CableMod for our lighting solution, and we’re keeping it simply here too. Our goal is to use lighting to highlight and accentuate our hardware, no more no less. We’re not throwing unicorn rainbows here, or bathing it all in a sickly red, blue or green glow, no, this is simply a plug and play system designed to draw the viewer’s attention inside the case. Will it work? Well we certainly reckon so.
It’s worth pointing out here, that although we’ve gone with the magnetic variant (which should be fine on the interior of the chassis), if you have a more premium, all aluminum case (say the Enthoo Elite), you’ll need to use the included adhesive strip on the LED, err… strip, to keep it in place.
MORE: Best Gaming Desktops
MORE: How To Build A PC
MORE: All PC Builds Content
Current page: Color Killing Hardware
Prev Page The Quiet, RGB-Free Desktop Next Page Liquid Cooling ComponentsAs Associate Editor of Tom's Hardware's prestigous British division, Zak specializes in system building, case reviews and peripherals, and has a particular penchant for liquid-cooling. He's also a lover of all things Viking/Scandinavian (thus the poor attempt at a beard).
Most Popular


