Tom's Hardware Verdict
A budget machine perfect for beginners or makers with limited space.
Pros
- +
+ Affordable
- +
Quality Prints
- +
Easy to assemble
- +
Small footprint
- +
Silent stepper motors
Cons
- -
No assisted leveling
- -
Tiny build volume
Why you can trust Tom's Hardware
The Creality Ender 2 Pro fills a lot of niches. It's a great starter printer for families who want to expand their STEM knowledge without breaking the bank. It's light weight and topped with a handle allowing it to be easily moved from table to closet by weekend hobbyists. And its tiny footprint is excellent for makers who need a decent second printer, but lack tons of space.
Retailing at $169 but often on sale for less, the Creality Ender 2 Pro is less than half the price of a Prusa MINI+, which is on our list of best 3D printers due to its high quality and compact size. It also has about half the features, but still delivers when it comes to quality prints.
The Ender 2 Pro is from the same ecosystem as its big brother the Ender 3 Pro, which opens the door to many upgrades and modifications for future improvements. Better hotends, extruders, bowden tubes, nozzles and even auto leveling modules are ready to purchase from 3rd party vendors.
The small print volume – 165 x 165 x 180 mm – might be a hindrance for some users. It can print a lot of toys and practical prints, but you won’t get far if your goal is making costume pieces and props. For only $70 more you can pick up an Ender 3 Pro which has a larger build volume with similar basic features.
Specifications: Ender 2 Pro
| Machine Footprint | 421 x 383 x 465 mm (16.6 x 15 x 18.3 inches) |
| Build Volume | 165 x 165 x 180 mm (6.5 x 6.5 x 7 inches) |
| Material | PLA/PETG/Wood |
| Extruder Type | Bowden |
| Nozzle | 0.4mm (Interchangeable) |
| Build Platform | Textured Magnet on a heated bed |
| Filament Runout Sensor | No |
| Bed Leveling | Manual |
| Connectivity | Micro SD, Micro USB |
| Interface | LED screen with Control Knob |
Creality Ender 2 Pro: Included in the box
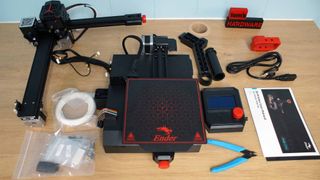
The Ender 2 Pro comes with everything you need to get your printer set up. You get tools to build and maintain the printer, side cutters, a nozzle cleaner, a spare nozzle, Bowden couplers, and a microSD card with a USB adapter. There’s also a small sample of white PLA to print your first model. No scraper is provided as the soft bed surface could be damaged by one.
A short video on assembling the printer and completing your first print is on the microSD card. There’s also a PDF copy of the manual, a copy of Creality Slicer 4.8.0 and models in both .gcode and .stl format. One model is a rabbit (tuzi) while the others are alternate handles (bashou) and a spaceship to mount on the top of the Ender 2 Pro.
Design of the Creality Ender 2 Pro
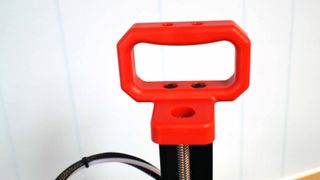
The Ender 2 Pro has a compact cantilever design which balances the X gantry off a single Z axis. The entire printer can be picked up by the top mounted handle and is a truly portable 10 pounds.
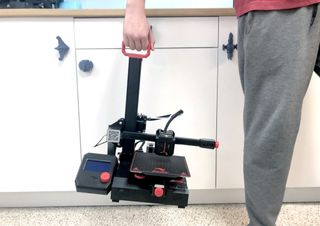
The printer has a plastic base but the frame is made from aluminum extrusions similar to those used on larger Creality machines. The Z axis is held in place by four bolts and reinforced with a sturdy bracket to prevent wobble. The back of the handle loops around the top of the Z rod to protect it from bumps. The power supply, motherboard and a handy tool drawer all fit underneath the base.
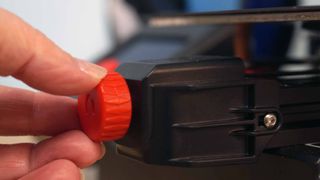
The Ender 2 Pro comes with belt tensioners for easy adjustments and a soft magnetic bed surface that makes removing prints a snap. It has upgraded silent stepper drivers which makes the machine quieter than other budget machines – all you’ll hear is the whirl of the fans.
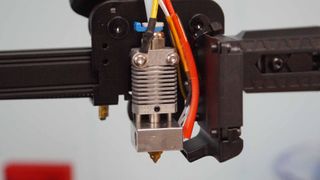
The spool holder is side-mounted for better balance and less vibration than the older top mounted Ender 2. It has the standard Creality hotend, extruder and Bowden tube design as seen on the Ender 3 Pro.
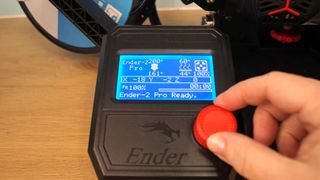
Its LED display is monochromatic with a selection knob – no fancy touch screens here. The screen snaps onto the base without screws, so it can be removed for travel or storage.
Assembling the Creality Ender 2 Pro
The Ender 2 Pro is 90% pre-assembled and only needs 7 screws and bolts to complete. I put this printer together in about 15 minutes while following the PDF directions. If this is your first printer, I highly recommend watching the Operation Video provided on the Micro SD card.
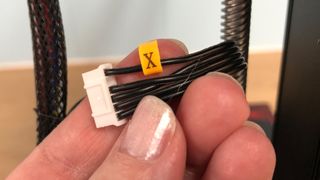
All the screws and bolts are in labeled bags so you can quickly grab the right part. The wiring is also clearly labeled for easy assembly.
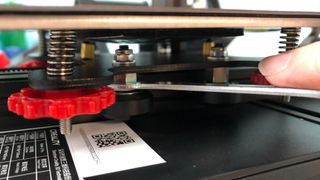
After assembling the printer, check that the printer’s three eccentric nuts are perfectly tightened to allow the X and Y carriages to move smoothly without wiggling back and forth. Eccentric nuts adjust the tension on the wheels and the Ender 2 Pro has two on the Y axis (on the right side of the printer) and one on the X axis (on the bottom of the carriage the holds the hotend). If there’s any snags in the movement, give the nuts another quarter turn.
For more on Eccentric nuts, check out this quick video from TH3D Studios.
Next double check that the belts are tight – not too tight, just tight enough to bounce back when you press them. Use the belt tensioner knobs to make any needed adjustments.
Leveling the Creality Ender 2 Pro
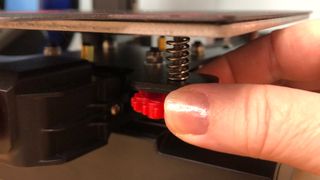
The Creality Ender 2 Pro requires manual leveling. Here, the smaller print size works in your favor – a smaller bed is often easier to get properly aligned.
The knobs are much smaller than those on other Creality printers, and require minute movements when making adjustments. The back right knob is in a tight spot that even my small hands had trouble getting too. This is definitely not a printer you level on the fly.
To level (or tram) the print surface, first home the printer, then select “disable steppers” from the Motion Menu. Slide a piece of ordinary paper between the nozzle and the bed. Push the hotend to each corner and adjust the knobs until the paper just catches on the nozzle.
The Creality Ender 2 Pro has an option to adjust the Z height while printing, called Babystep Z. This is located under Tune in the main menu and is only visible while the printer is printing. Negative numbers lower the nozzle, while positive numbers move it up.
For more on manual leveling, please read our handy guide.
Preparing Files / Software for Creality Ender 2 Pro
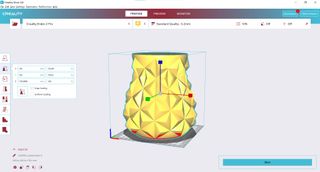
The Creality Ender 2 Pro comes with a copy of Creality Slicer 4.8.0. You can also use Cura and PrusaSlicer, which are both popular programs available for free download.
The latest version of Cura (4.13.1) doesn’t have a profile for the Ender 2 Pro yet, so you’ll need to load the older Ender 2 profile and increase the bed size to 165 x165 x180.
PrusaSlicer has a profile for the Ender 2 Pro and it honestly works better than Creality’s or Cura’s programs for this machine.
Printing on the Creality Ender 2 Pro
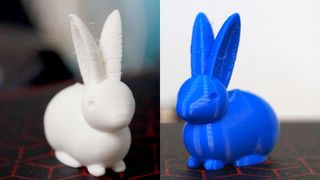
For my first print, I loaded the provided sample PLA and selected the pre-sliced rabbit from the microSD card. It printed fast with .2 layer height and was a bit stringy and rough on the ears – odd since Creality usually provides a high quality print to wow new users. The filament seemed a bit suspect, so I threw it away and loaded a fresh spool of Matterhackers Build Series Blue PLA. The rabbit was still a little rough on the ears, but otherwise looked ok.
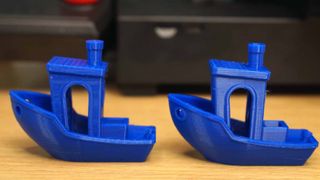
For the second print, I ran the popular 3D Benchy through Creality Slicer using the default settings with a .2 layer height and a speed of 50mms. This produced a really great Benchy, with the only flaw being a highly visible Z seam on the port side of the hull.
Next, I ran the Benchy through PrusaSlicer, again using the default settings. This Benchy was even better, as PrusaSlicer hid the Z seam for me.
Below we see a model sliced with Creality Slicer on the left and PrusaSlicer on the right, both printed in Matterhacker’s Build Series Blue PLA.
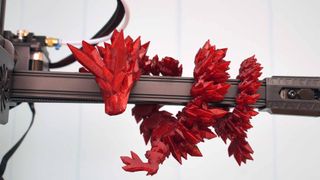
To see if the Ender 2 Pro can print more than tiny tug boats, I sliced the popular Crystal Dragon by Cinderwing3D in ProtoPasta Blood of My Enemies using PrusaSlicer. This is a complex, flexible print with dozens of contact points – good adhesion is an absolute must. The dragon didn’t fit and needed to be scaled down to 80%, but still printed perfectly at a smaller size. Even better, the flexible bed surface made releasing the dragon a breeze and it turned out perfect.
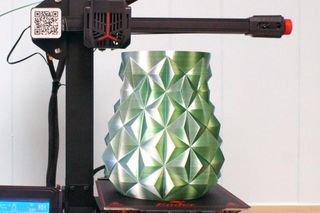
I was curious just how big this printer could go and stretched Bugman140’s Crystal Vase to fill the Ender 2 Pro’s bed, then printed it in MatterHacker’s White Green Quantum using vase mode. The resulting print was nearly 6.5 inches wide and 7 inches tall. Not bad!
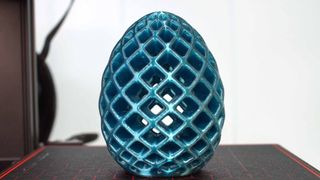
The Ender 2 Pro handled IC3D’s Raspberry Recycled PETG like a champ with this Easter Egg #3 by Dave Makes Stuff.
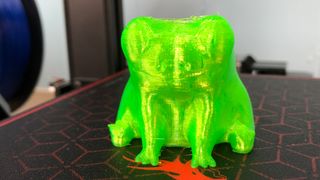
It also did a fair job of printing a Fred the Frog in MatterHacker’s Translucent Green TPU by Xx_SushiCat_xX. There was some stringing around the eyes and feet, but this is to be expected with a Bowden printer and flexible filament.
Bottom Line
Creality’s Ender 2 Pro is a great first printer for makers who want to try out 3D printing without a huge financial – or workspace – commitment. It prints great right out of the box, and its portability makes this machine a good choice for classrooms or a mobile STEM lab.
Its similarity to the Ender 3 line means you’ll find plenty of community support – and spare parts. If anything fails on your Ender 2 Pro, you can easily grab a part made for an Ender 3 Pro.
If you like the compact size of the Creality Ender 2 Pro, but long for a higher quality machine with auto bed leveling, a powerful extruder, hotter hotend and a color screen, then the Prusa Mini+ is worth your consideration. If you want a larger print bed, the Ender 3 Pro is up your alley. And, if you just want a sub-$200 3D printer with a larger build volume, consider the Elegoo Neptune 2.

Denise Bertacchi is a Contributing Writer for Tom’s Hardware US, covering 3D printing. Denise has been crafting with PCs since she discovered Print Shop had clip art on her Apple IIe. She’s been a freelance newspaper reporter, online columnist and craft blogger with an eye for kid’s STEM activities. She got hooked on 3D printing after her son made a tiny Tinkercad Jeep for a school science project. Excited to learn more, she got a Creality CR10s and hasn’t looked back. She loves reviewing 3D printers because she can mix all her passions: printing, photography and writing. When she’s not modding her Ender 3 Pro or stirring glitter into a batch of resin, you’ll find her at the latest superhero movie with her husband and two sons.

